
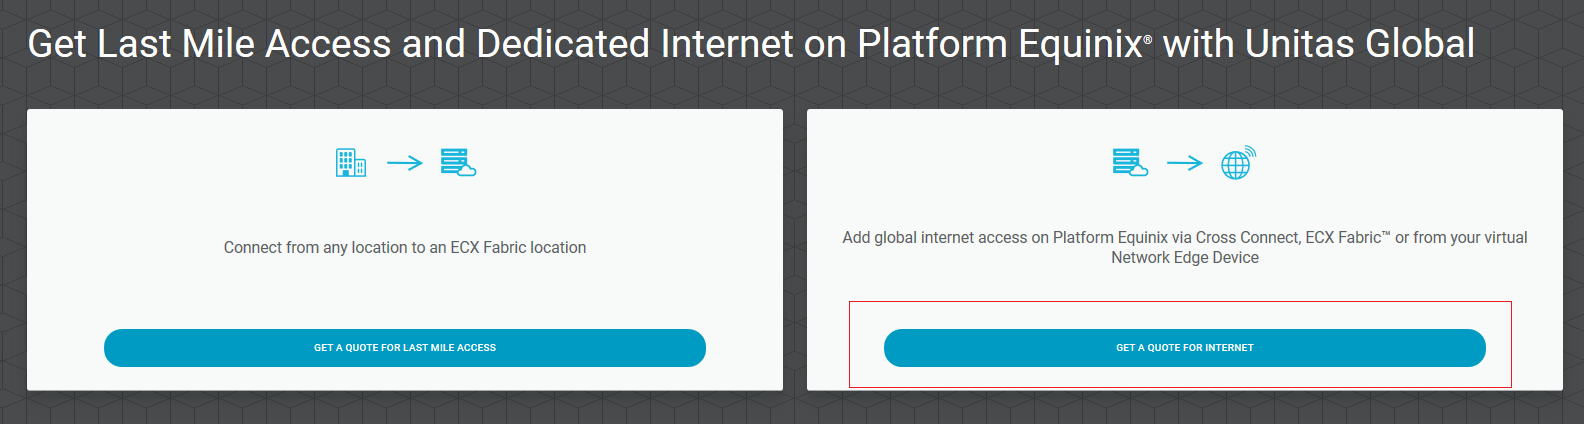
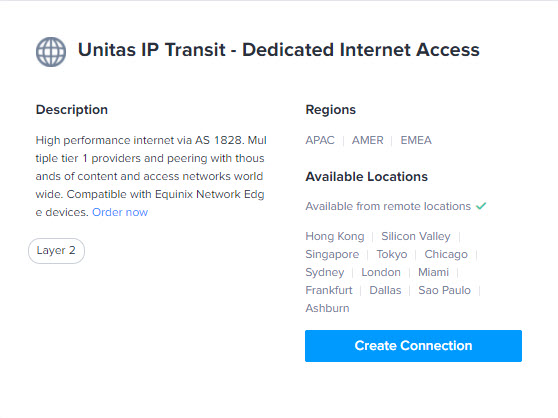
Internet Access is available as a destination on Equinix Fabric to which Network Edge customers can connect. Using a virtual device, Network Edge customers can connect to Unitas Global internet over Equinix Fabric.
Order Internet Access and Create Connection
Note: For help with bandwidth, terms, and price options, contact Unitas Global at ecxconnectivity@unitasglobal.com.
Get a Quote
- Sign in to the Unitas portal.
- Click Get a Quote for Internet.
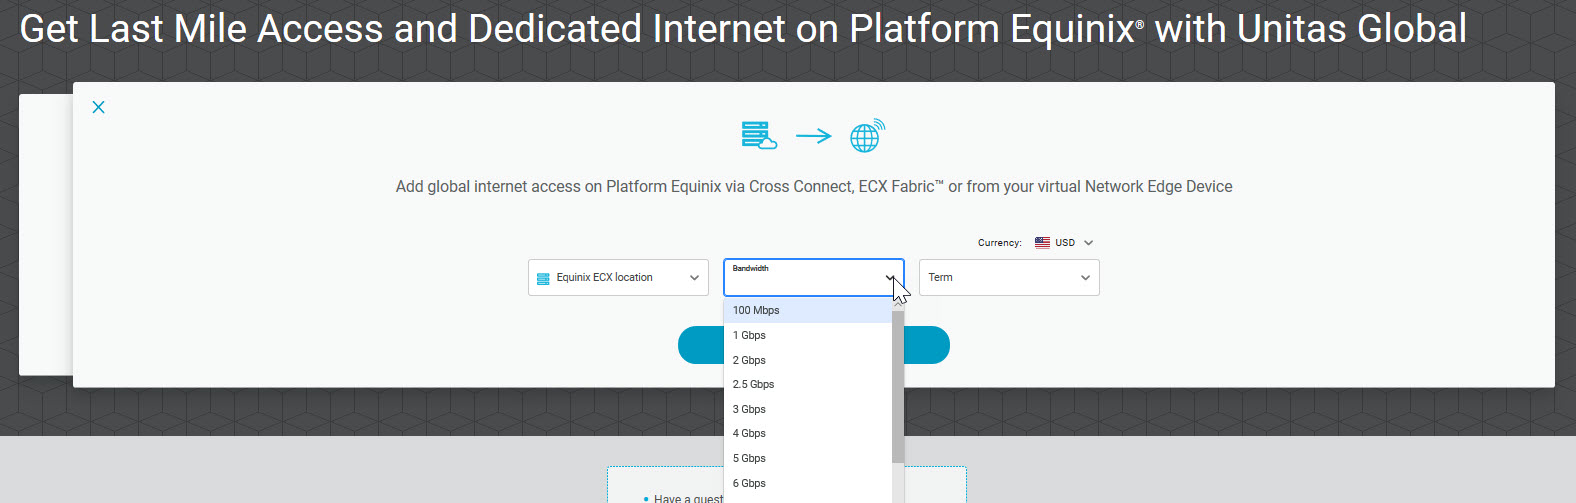
- In the Equinix Fabric location drop-down menu, choose a location.
- In the Bandwidth drop-down menu, choose the required bandwidth.
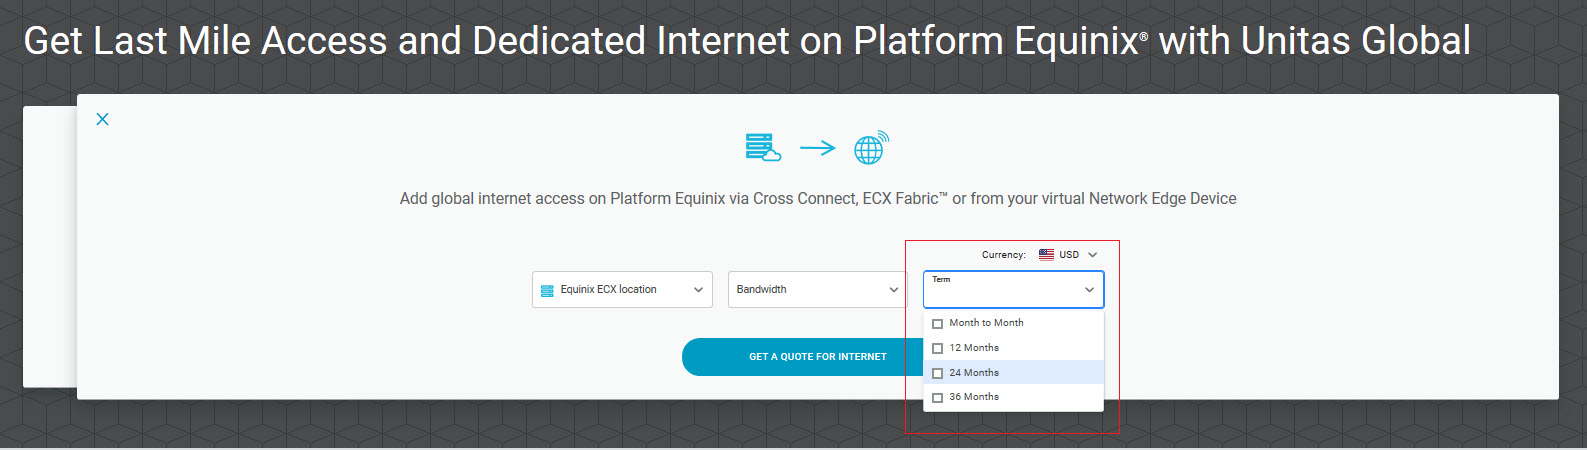
- In the Term drop-down menu, choose the required service term.
- Click GET A QUOTE FOR INTERNET to receive an instant quote.
Place an Order
When you are ready to place an order from the quote you received:
- Sign in to the Unitas Global portal, then click your quote.
- Click Order.

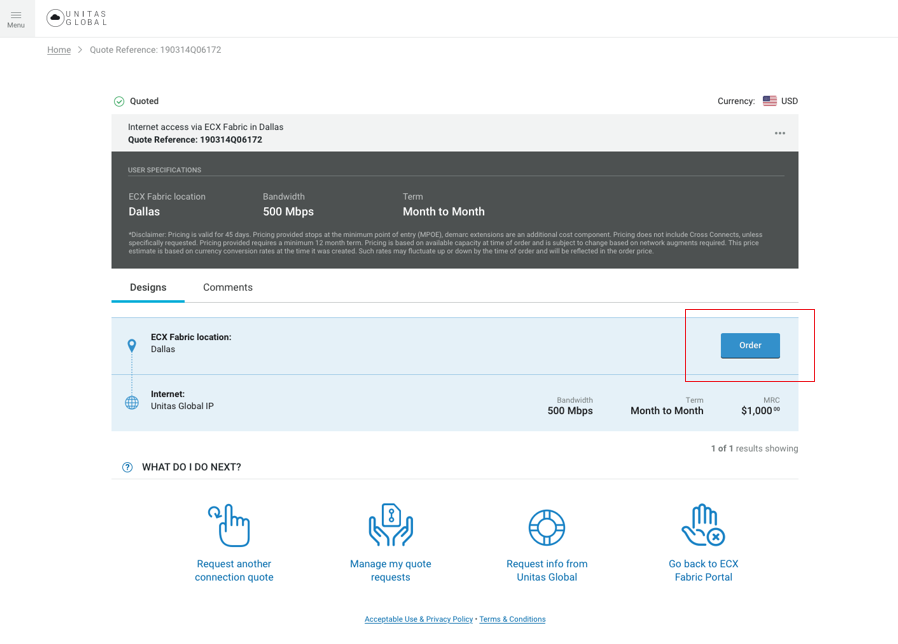
After your order is submitted, an email is sent to you containing your requested IP address and BGP configuration details. Use this information to set up your connection in the Network Edge.
Create the Connection
- Sign in to the Equinix Customer Portal and navigate to Network Edge.
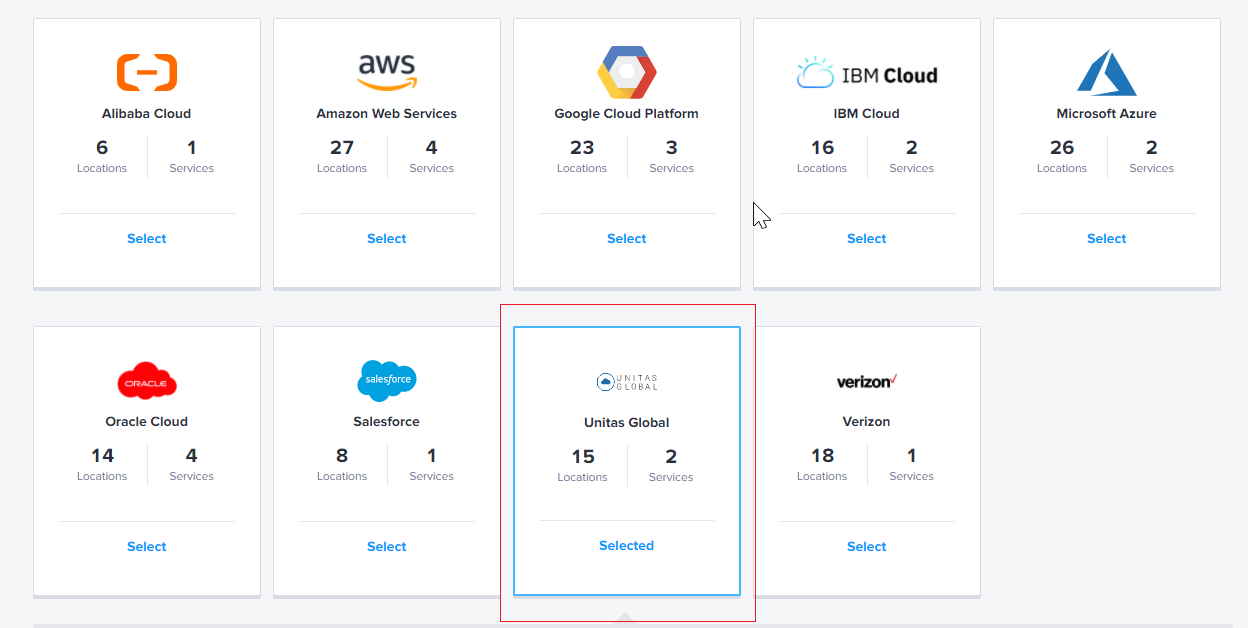
- Click Create Connection.
- Scroll to Unitas Global and click Select.

- In the Unitas IP Transit – Dedicated Internet Access card, click Create Connection.

- Click Create Connection.
- Click Create a Connection to Unitas IP Transit - Dedicated Internet Access.
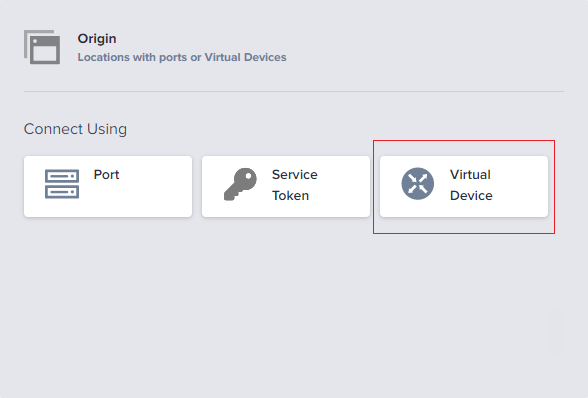
- In the Origin section, click Virtual Device.

- Select a location.
- Select a Virtual Device Type.
- Select a Connection Type.
- Select a device.
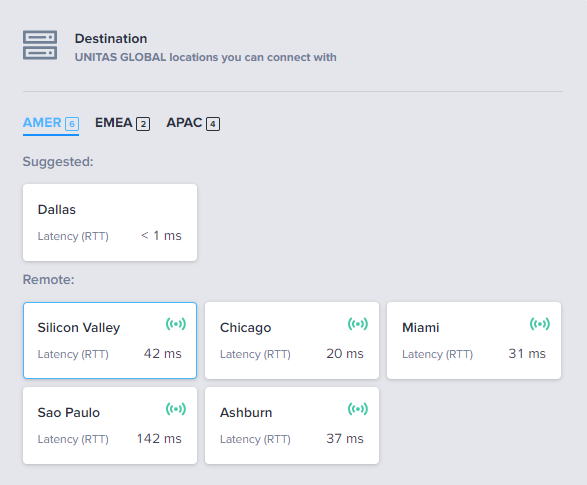
- In the Destination section, select a Unitas Global location to connect.

- Click Next.
- In the Connection Information section, enter a name for the connection.
- In the Interface Selection section, select Automatically select the next available interface on my device(s) or I will select the interface on my device.
- Finish the connection request and click Enter.
- Click Submit.
Note: Be sure ICMP is allowed on your Equinix Fabric-connected device or virtual Network Edge device as this enables Unitas Global to ping your connection for testing and monitoring your service.
When the process is completed successfully, the connection status is Not Provisioned until it’s accepted by Unitas Global. Once the connection is accepted, the connection is automatically provisioned within Equinix Fabric and the connection status changes to Provisioned.
The new connection can now be viewed or modified at any time by selecting the connection in Inventory.
If you need help during this process, or would like to schedule a turn-up call with a Unitas Global engineer, contact ecxconnectivity@unitasglobal.com.
