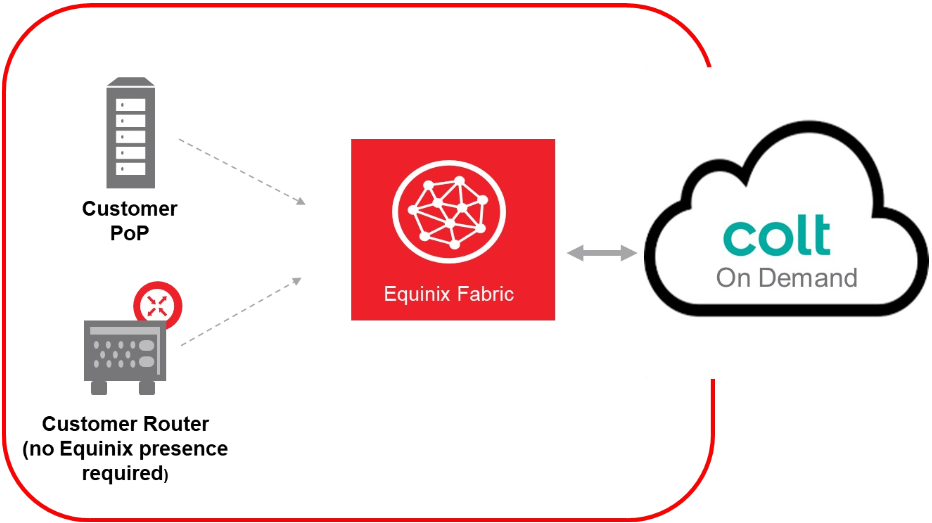
Colt On Demand network services can be reached from Equinix Fabric locally in several metros and remotely from any Equinix Fabric locations. Connect your physical or virtual infrastructure to your Colt network through Equinix Fabric to gain access to enterprise or branch locations, cloud providers, partners, and suppliers from a single access point.
Prerequisites
-
An Equinix Fabric account.
-
An existing port or Network Edge virtual device. For information about ordering an Equinix Fabric port, see Order an Equinix Fabric Port. For information about ordering a Network Edge device, see Create a Single Virtual Device.
-
Permissions to access the A-side port or Network Edge device. For information about permissions, see Equinix Fabric Permissions.
Connect to Colt On Demand
-
Log in to Equinix Fabric.
-
From the Connections menu, select Create Connection.
-
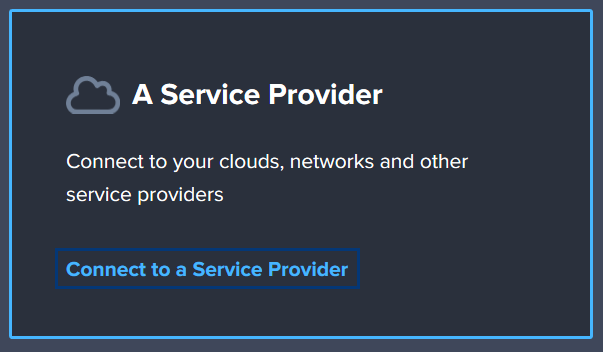
In the A Service Provider card, click Connect to a Service Provider.

-
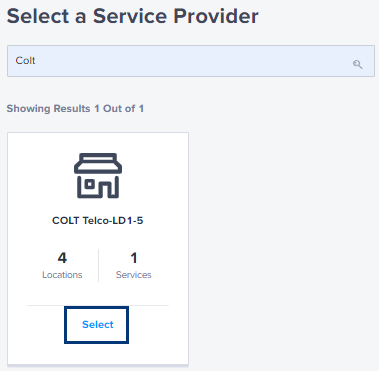
Enter Colt in the search field.
-
On the Colt card, click Select.

-
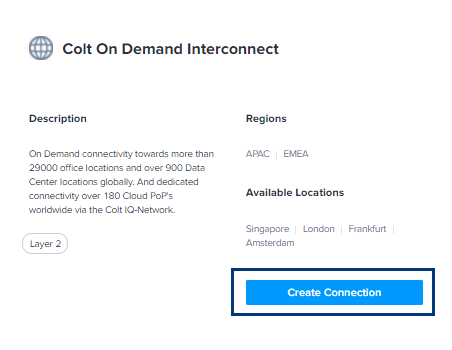
On the Colt On Demand Interconnect card, click Create Connection.

-
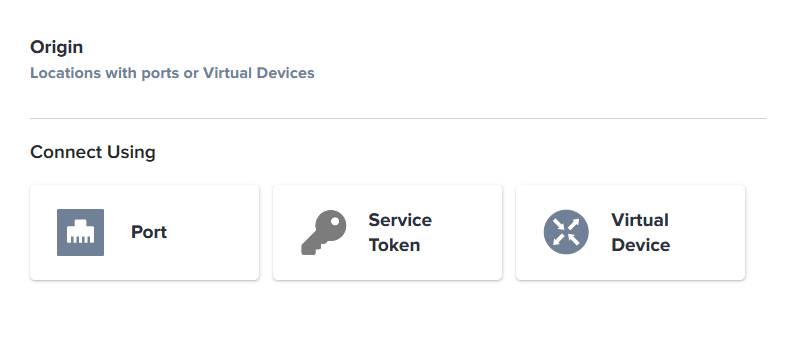
In the Origin section, click Port. (For information about connecting a Network Edge device, see Connect a Virtual Device to Colt On Demand in the Network Edge documentation.)

-
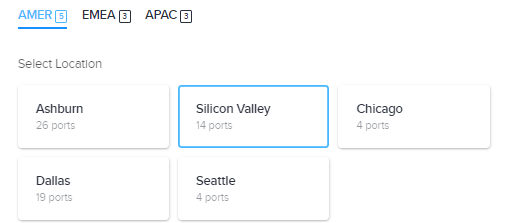
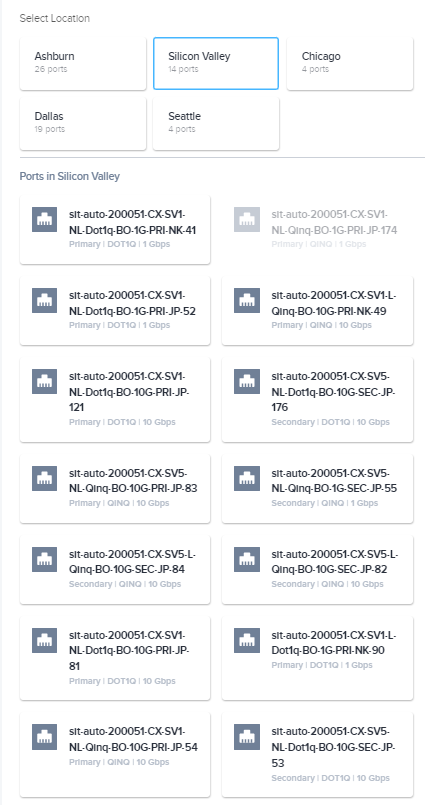
Select an origin (or A-side) location.

-
From the displayed port cards for that location, select a port.

-
Click Next.
-
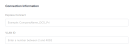
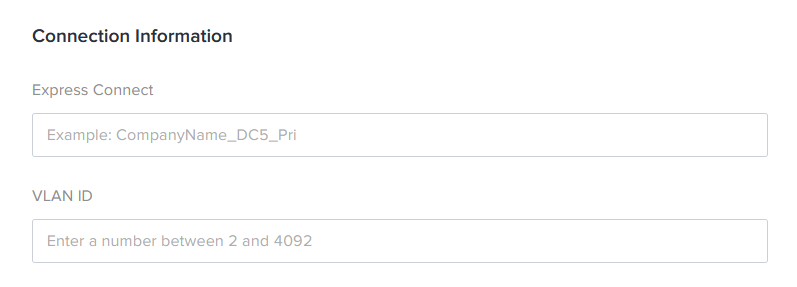
In the Connection Information section, enter:
-
Circuits – The name for your connection
-
VLAN ID – Your VLAN ID
-
-
(Optional) In the Purchase Order Number field, enter your PO number.
-
In the Connection Speed section, select a Billing Tier and Speed combination.
-
Click Next.
-
Review your order. Click Design Summary to download a PDF.
-
Click Submit Order.
-
On the order confirmation screen, copy the connection ID for use in the Colt Portal when enabling on-demand services.

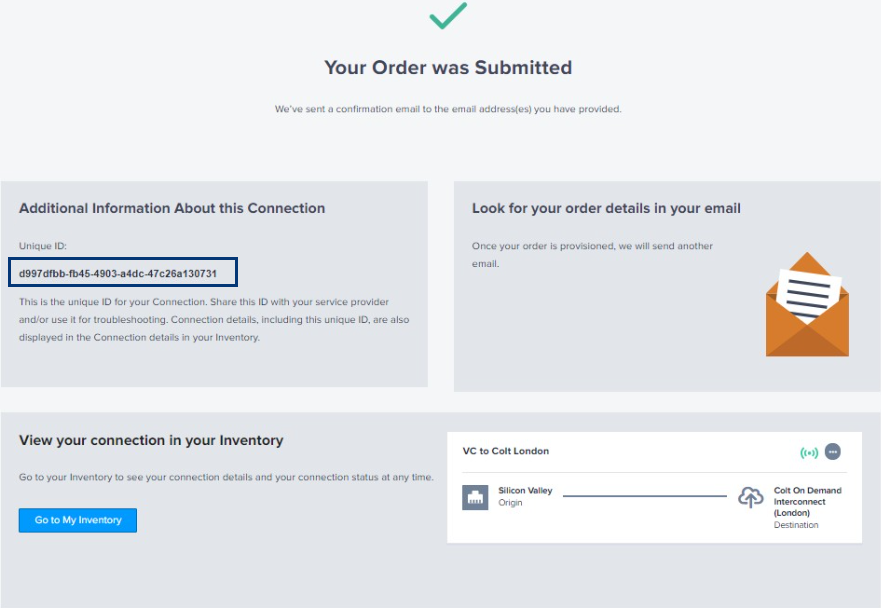
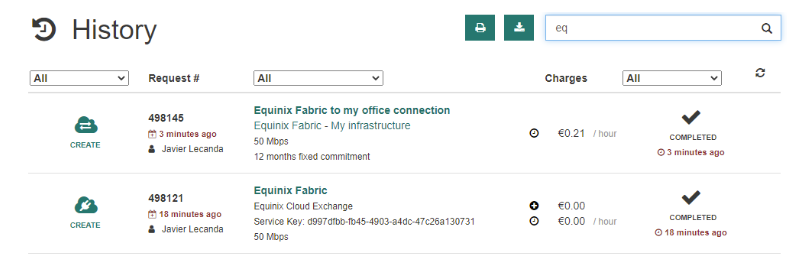
From the Connections menu, select Connections Inventory to view the status of your connection or get your connection ID if necessary.
Add a Cloud Port to Equinix Fabric
After you create the connection in the Equinix Fabric Portal, access the Colt On Demand portal to add a cloud port to Equinix Fabric.
-
Log in to Colt On Demand.
-
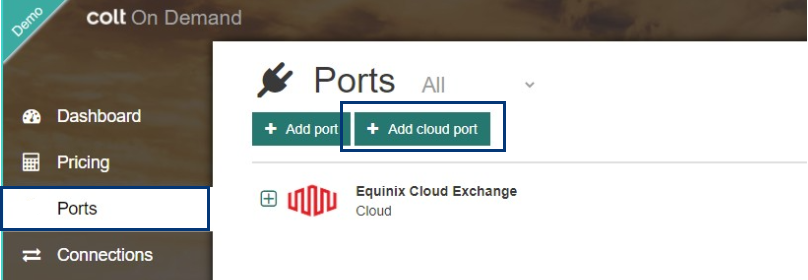
Select Ports and click + Add Cloud Port.

-
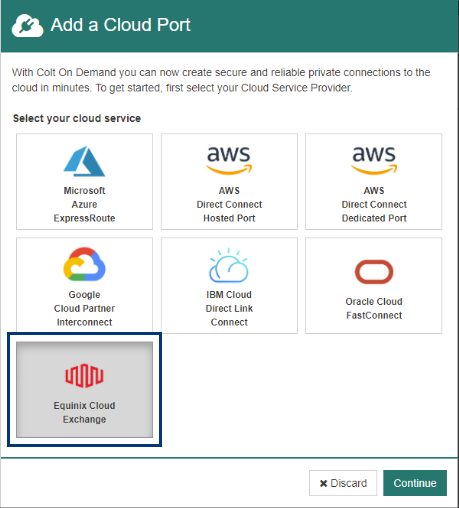
On the list of cloud providers, select Equinix, then click Continue.

-
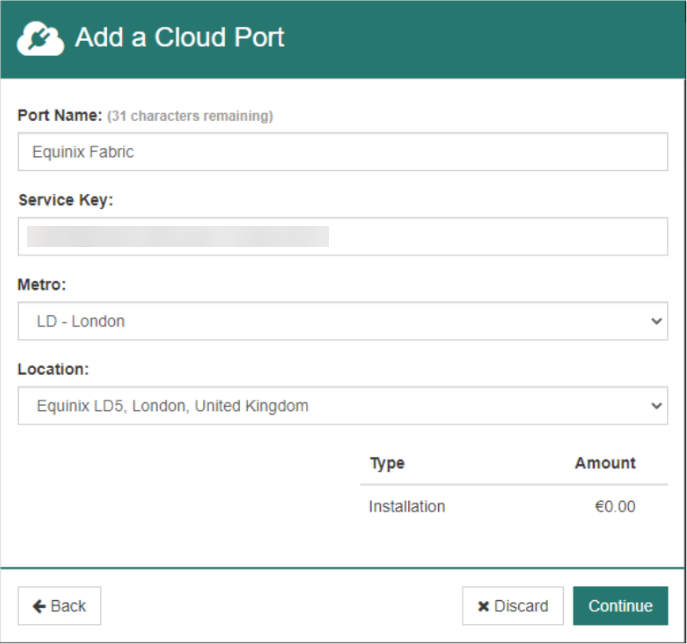
In the Add a Cloud Port window:
-
Port Name – Enter a name for the port.
-
Service Key – Paste the connection ID obtained upon submission of your order in Equinix Fabric.
-
Metro – Select the same metro region used when creating the connection in Equinix Fabric.
-
Location – Select a specific location within the metro region.

-
-
Click Continue.
-
Review your order and click Accept Charges & Submit.
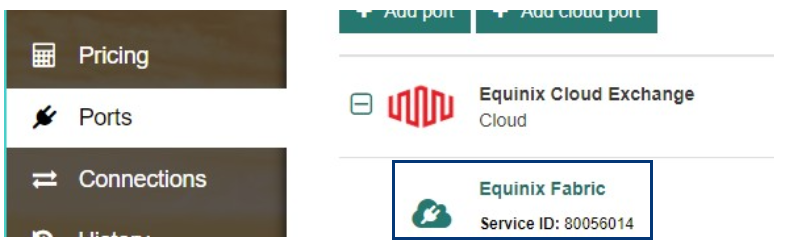
Once the order is completed, the cloud port is displayed under Equinix.
-
To add the cloud connection to your network, select Connections and click + Cloud.
-
On the list of cloud providers, select Equinix, then click Continue.
-
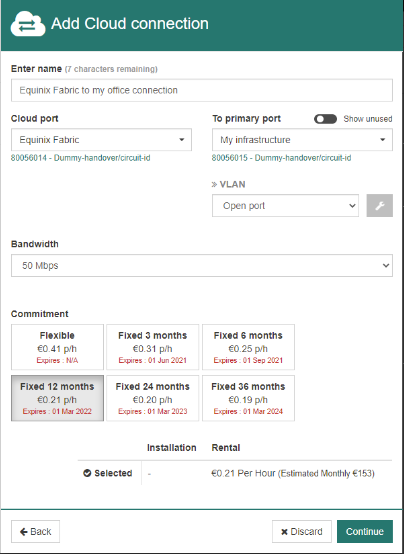
In the Add Cloud Connection window:
-
Enter Name – Enter a name for the connection.
-
Cloud Port – Select the Equinix cloud port you created.
-
Bandwidth – Select a connection bandwidth option.
-
To Primary Port – Select the port facing your network.
-
VLAN – Select Open port for port-based handover, or select Add VLAN to tag traffic with a VLAN.
-
Commitment – Select a contract term.

-
-
Click Continue.
-
Review your order and click Accept changes & submit.

The connection is automatically provisioned on the network.