Ordering a Fabric Port - Legacy
Equinix Fabric ports are available in various configurations including standard and metro ports, remote ports, and extended ports, depending on where customers are located in relation to the physical Equinix Fabric equipment.
For more information about ports, see Port Types.
Use the new default ordering flow to order your Fabric port. The legacy port ordering experience will no longer be available starting February 2026.
Prerequisites
Before ordering an Equinix Fabric port, you must have:
- An Equinix Fabric account, with one of the following IAM roles assigned: Fabric Port Manager, Fabric Manager, Fabric Service Provider, or Fabric Partner Resource Manager (applicable to Fabric reseller admin users who perform port sharing with end customers).
End customer users are not allowed to place Fabric port orders.
Starting Your Order
To order a Fabric port:
-
Log in to the Customer Portal > Fabric Dashboard.
-
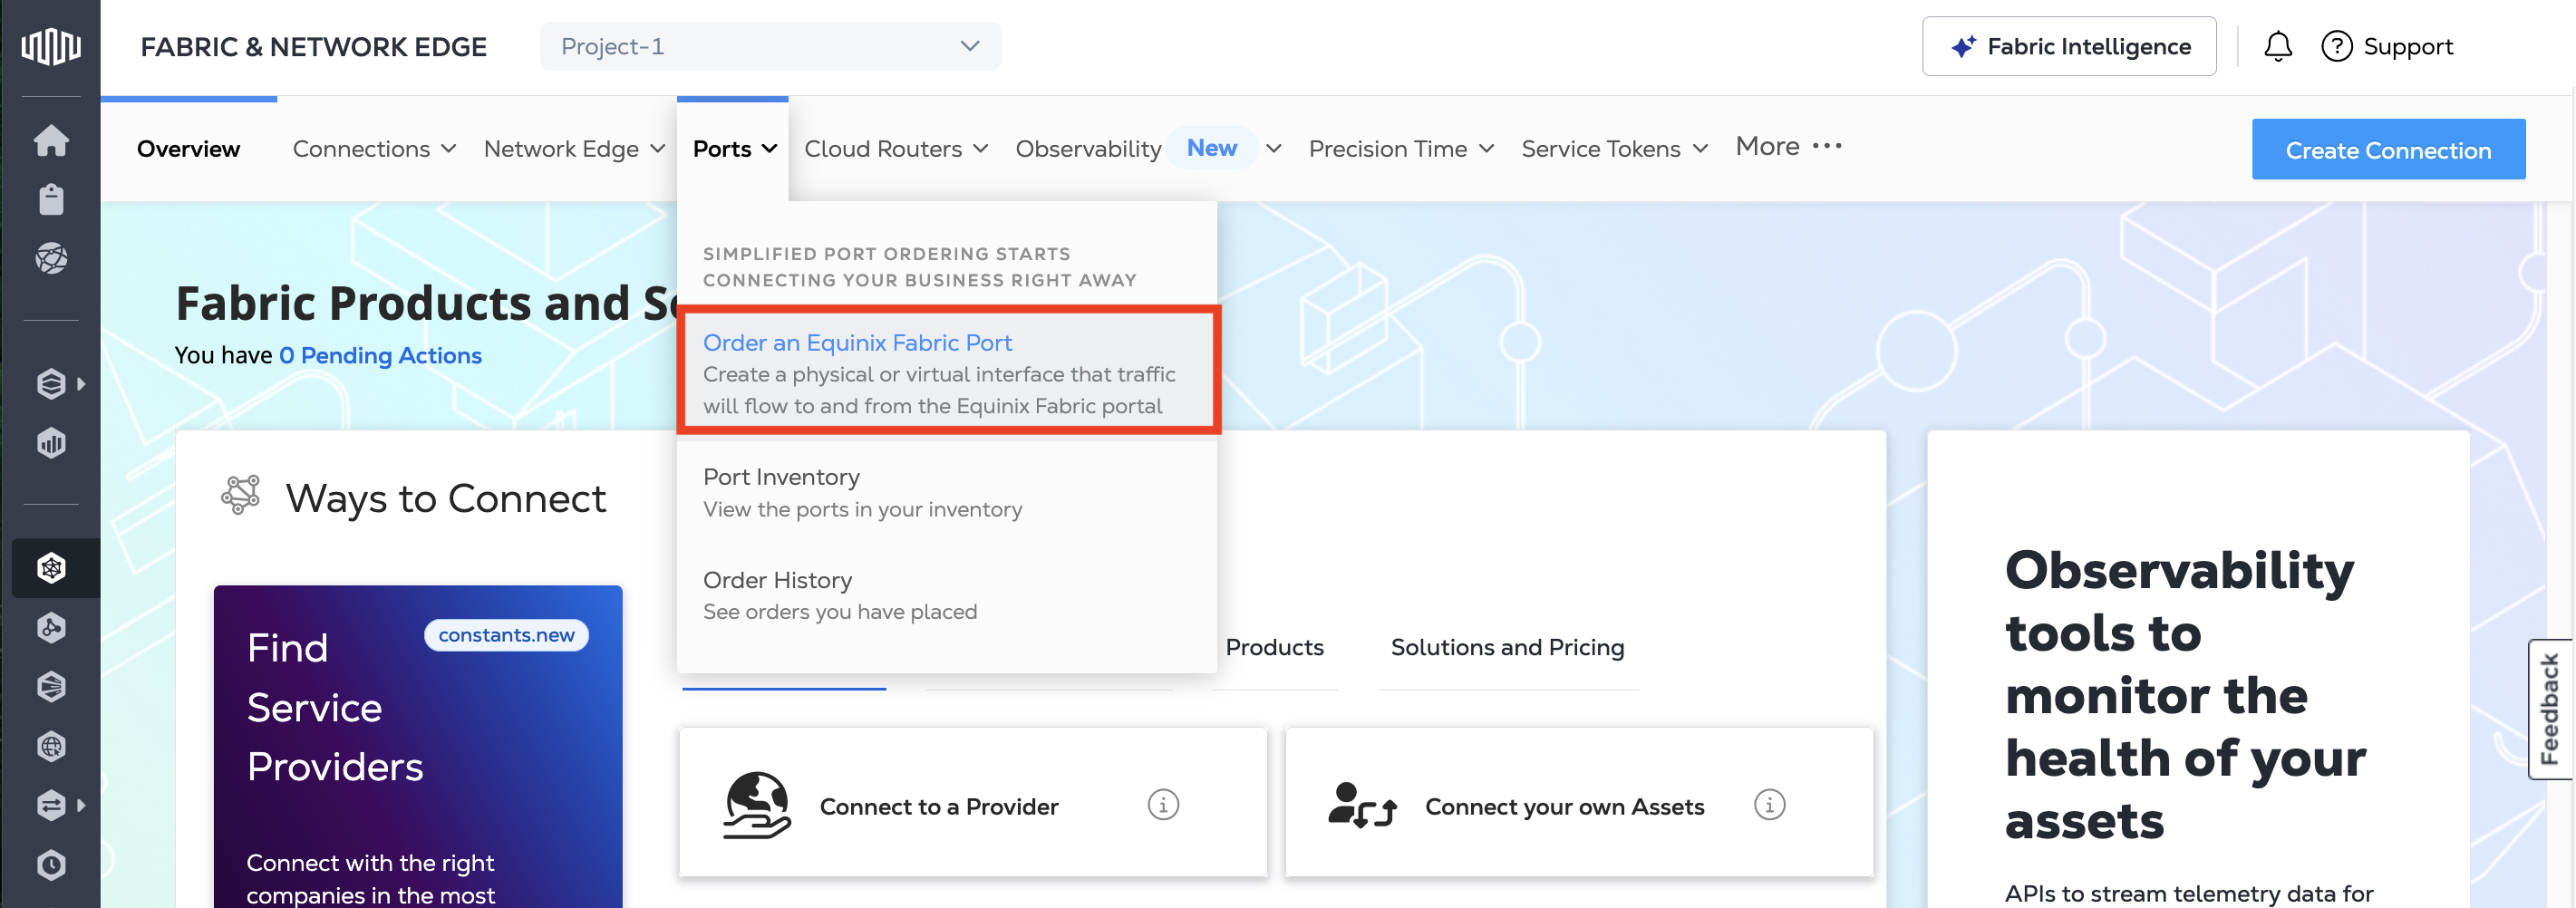
From the Ports menu, select Order an Equinix Fabric Port.
-
Select a project that the port will be assigned to.
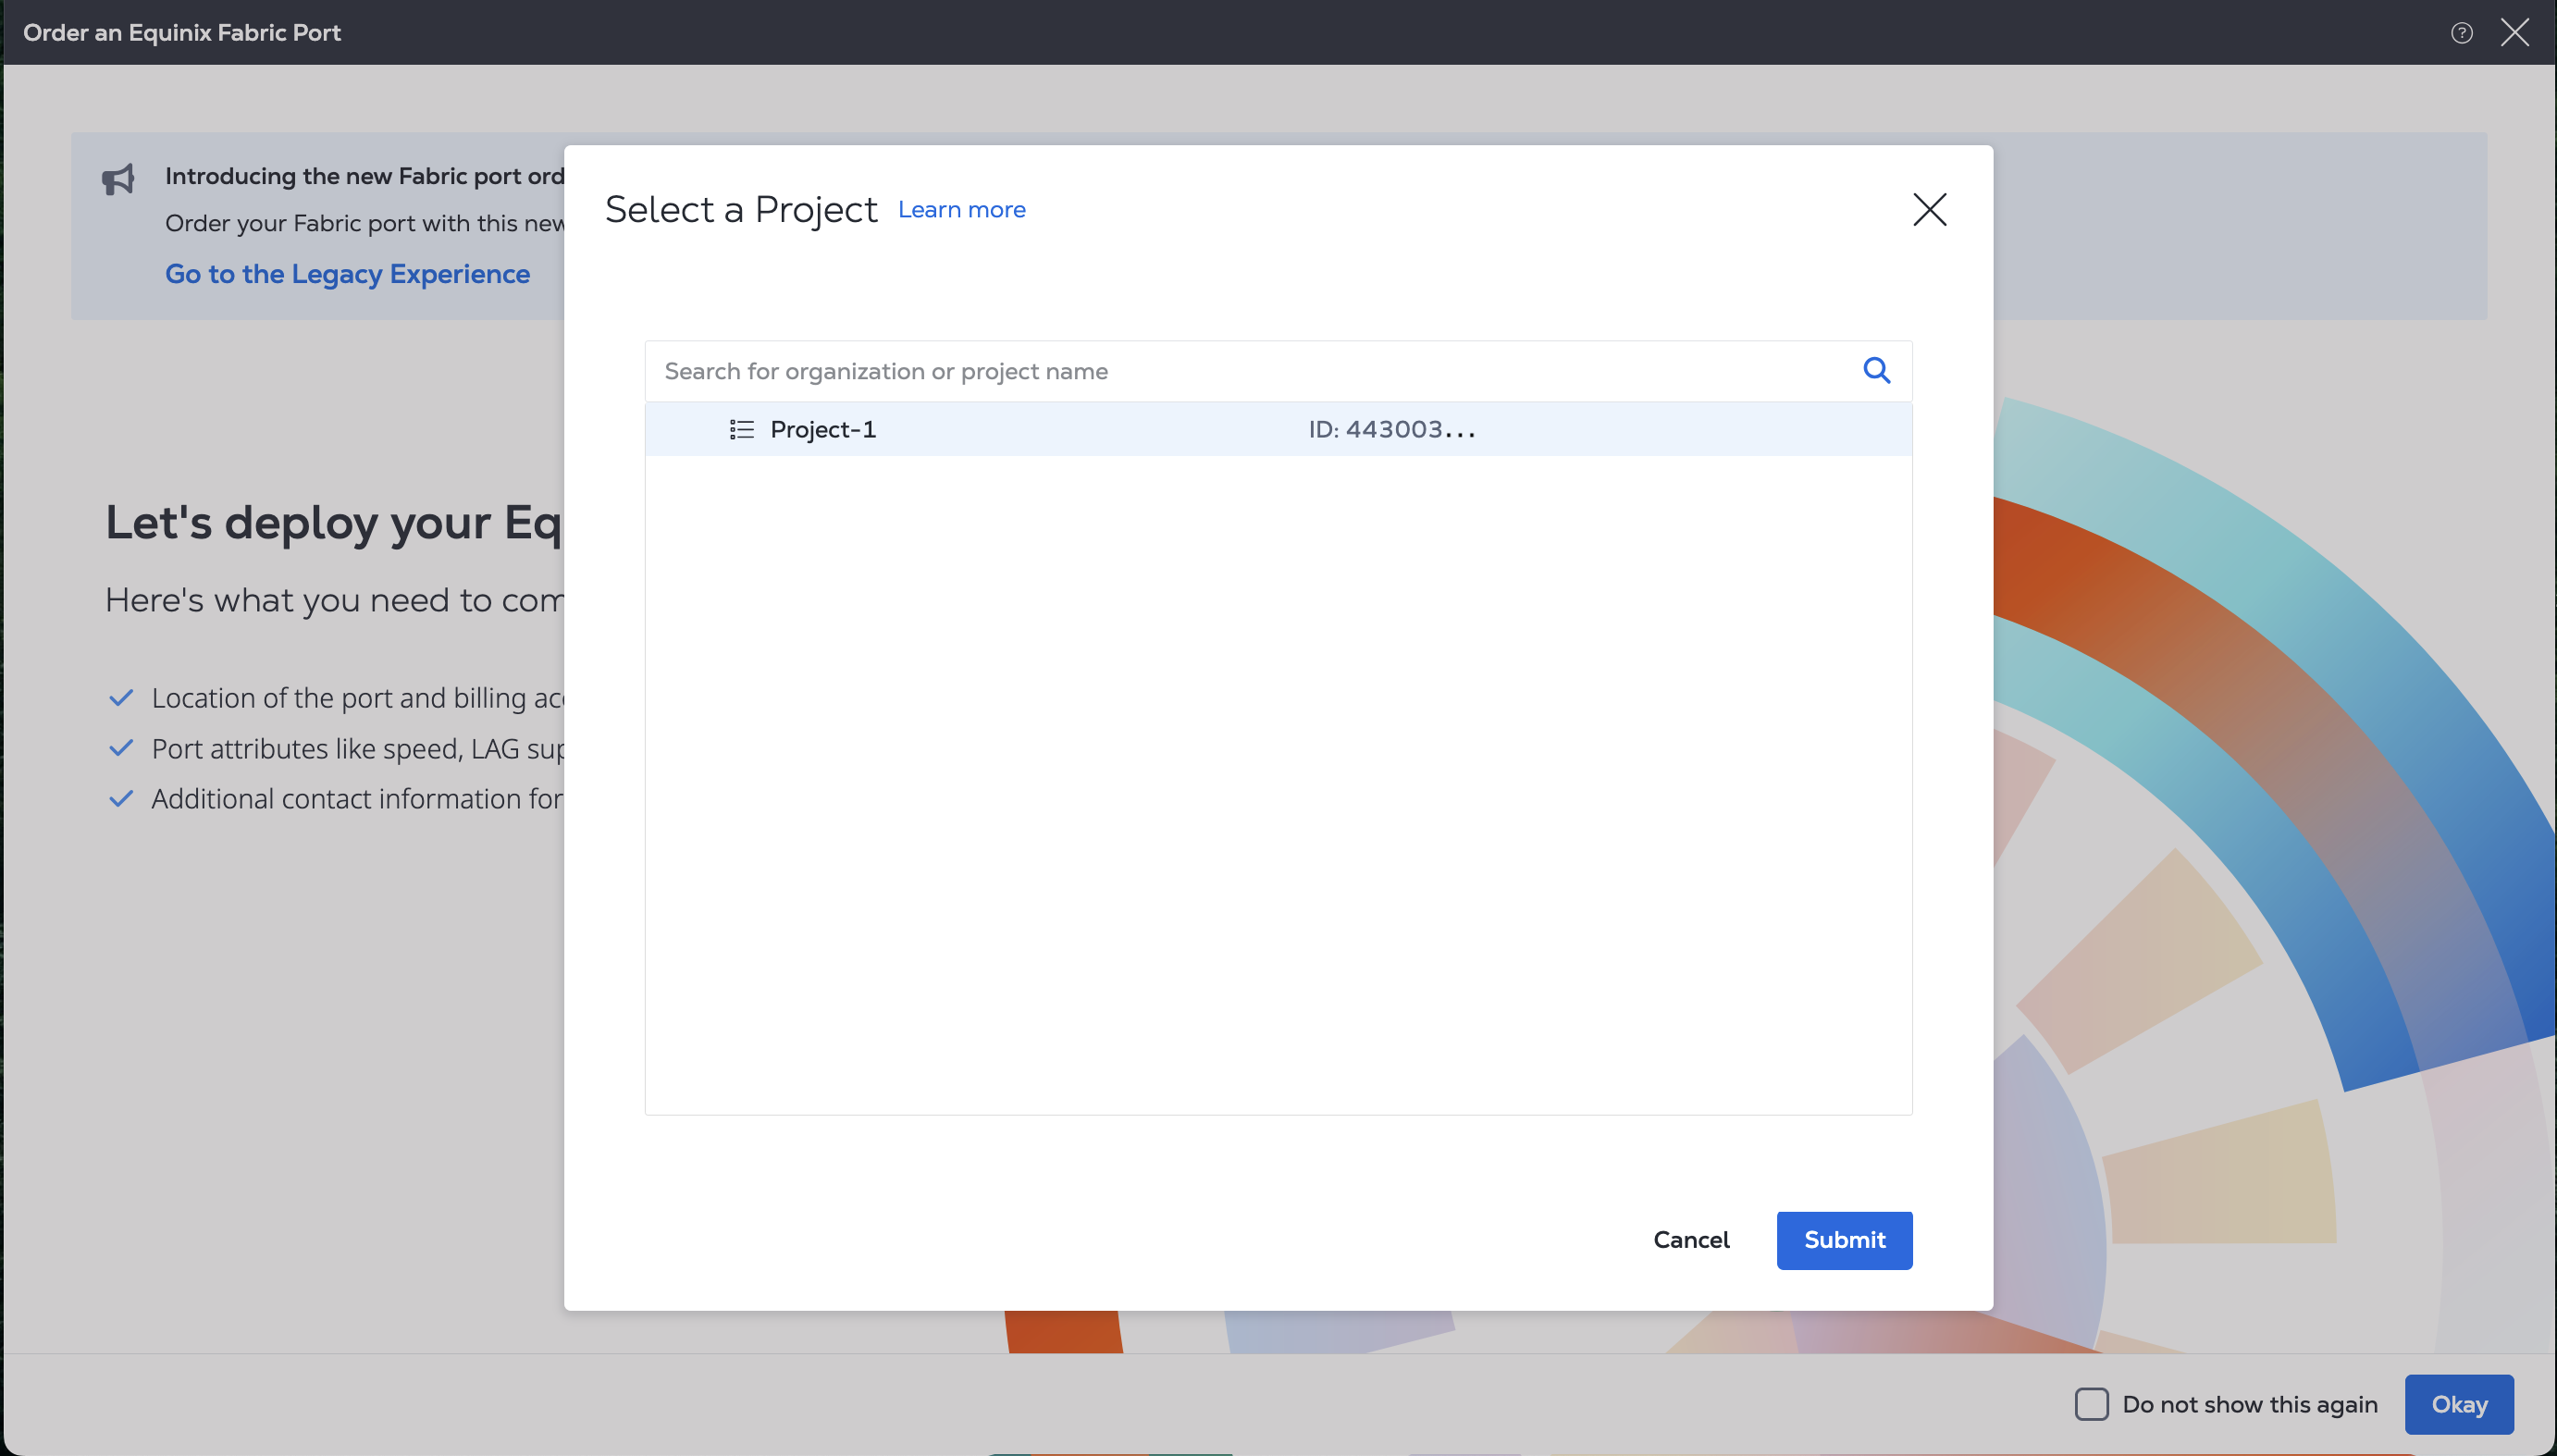
For more information on projects, see Managing Projects.
-
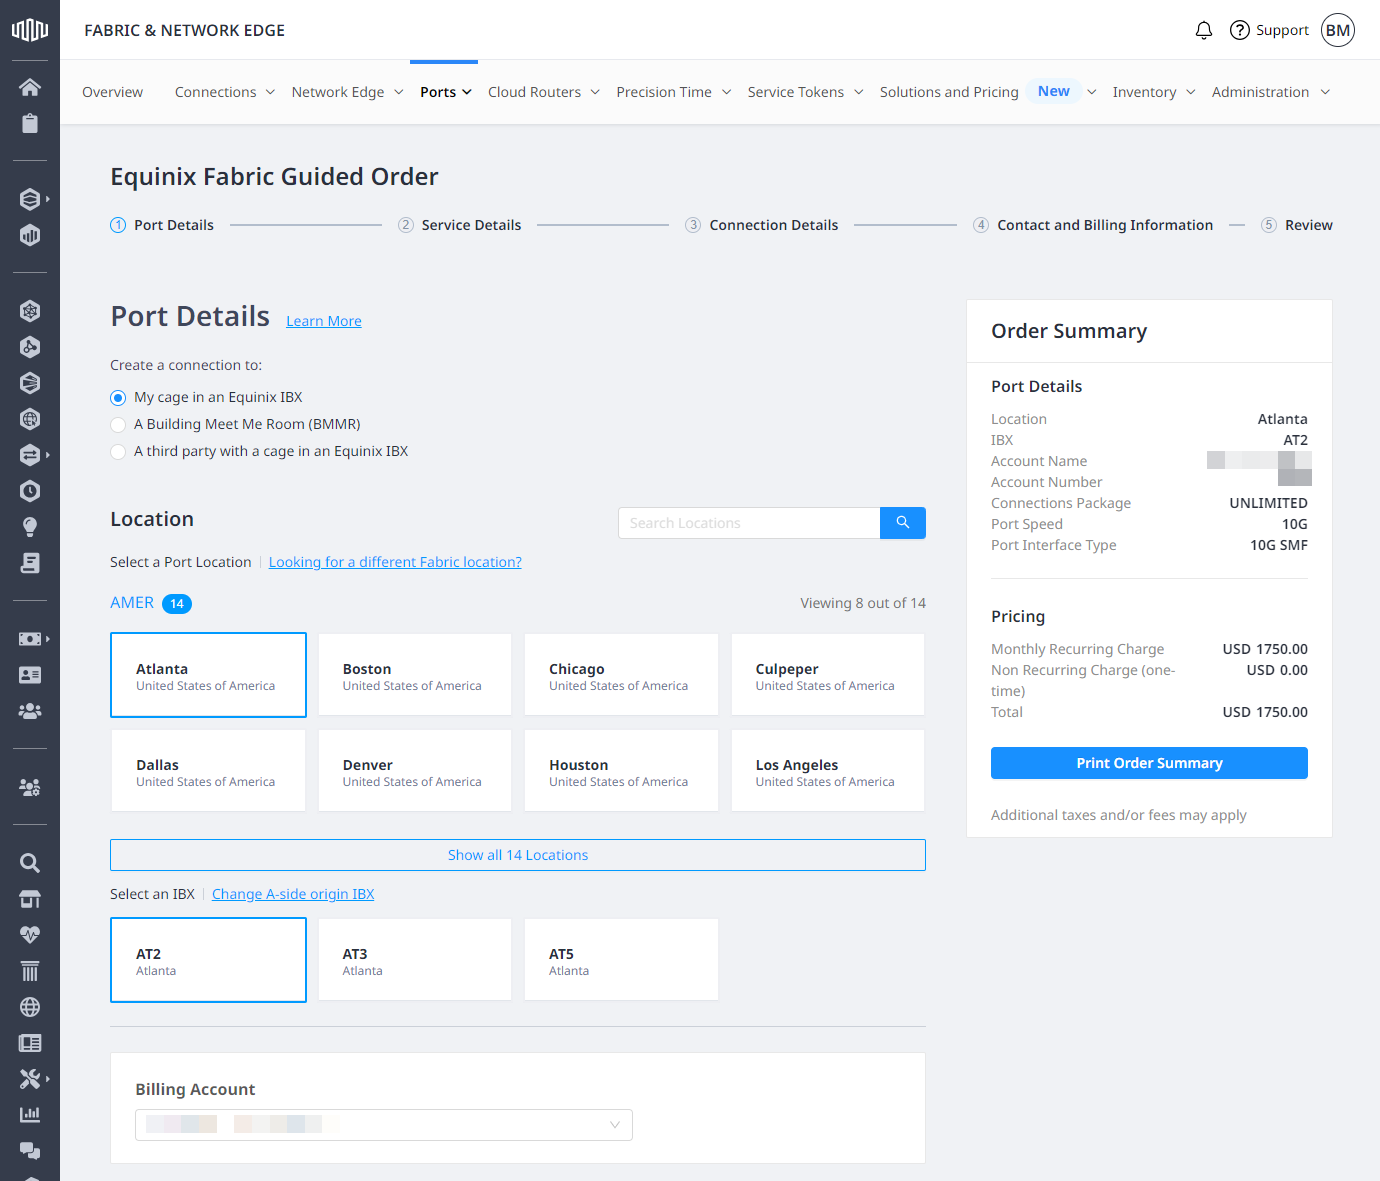
Select where you want to terminate your port:
- My Cage in an Equinix IBX – You have your own equipment in an Equinix data center.
- A Building Meet-Me Room (BMMR) – You are using a neutral cage to connect to others.
- A third party with a cage in an Equinix IBX – You are ordering a remote port and connecting via another party.
-
In the Location section, select metro, then choose an IBX data center and a billing account.
Port Configuration
In the Port Configuration section:
-
Select connections package:
- Unlimited - You are charged a single MRC that includes the port and unlimited local connections made from the port.
- Unlimited Plus - You are charged a single MRC that includes the port and unlimited local and eligible remote connections made from the port. Eligible remote connections are those connecting metros within Canada and the United States, and within Europe
- Standard - You are charged a monthly recurring charge (MRC) for each connection made from the port.
- Ethernet Private Line - You are charged a single MRC for one connection made from one EPL port to another.
-
Select port speed.
- Select port interface type.
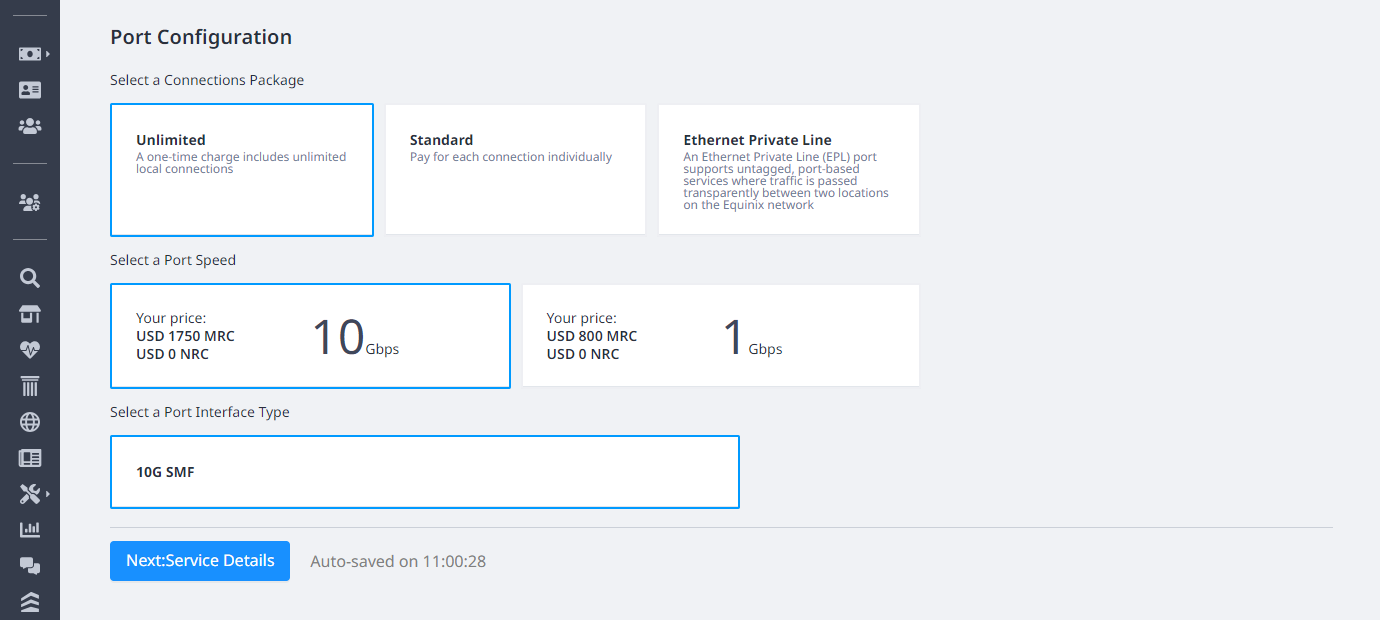
Click Next: Service Details.
Service Details
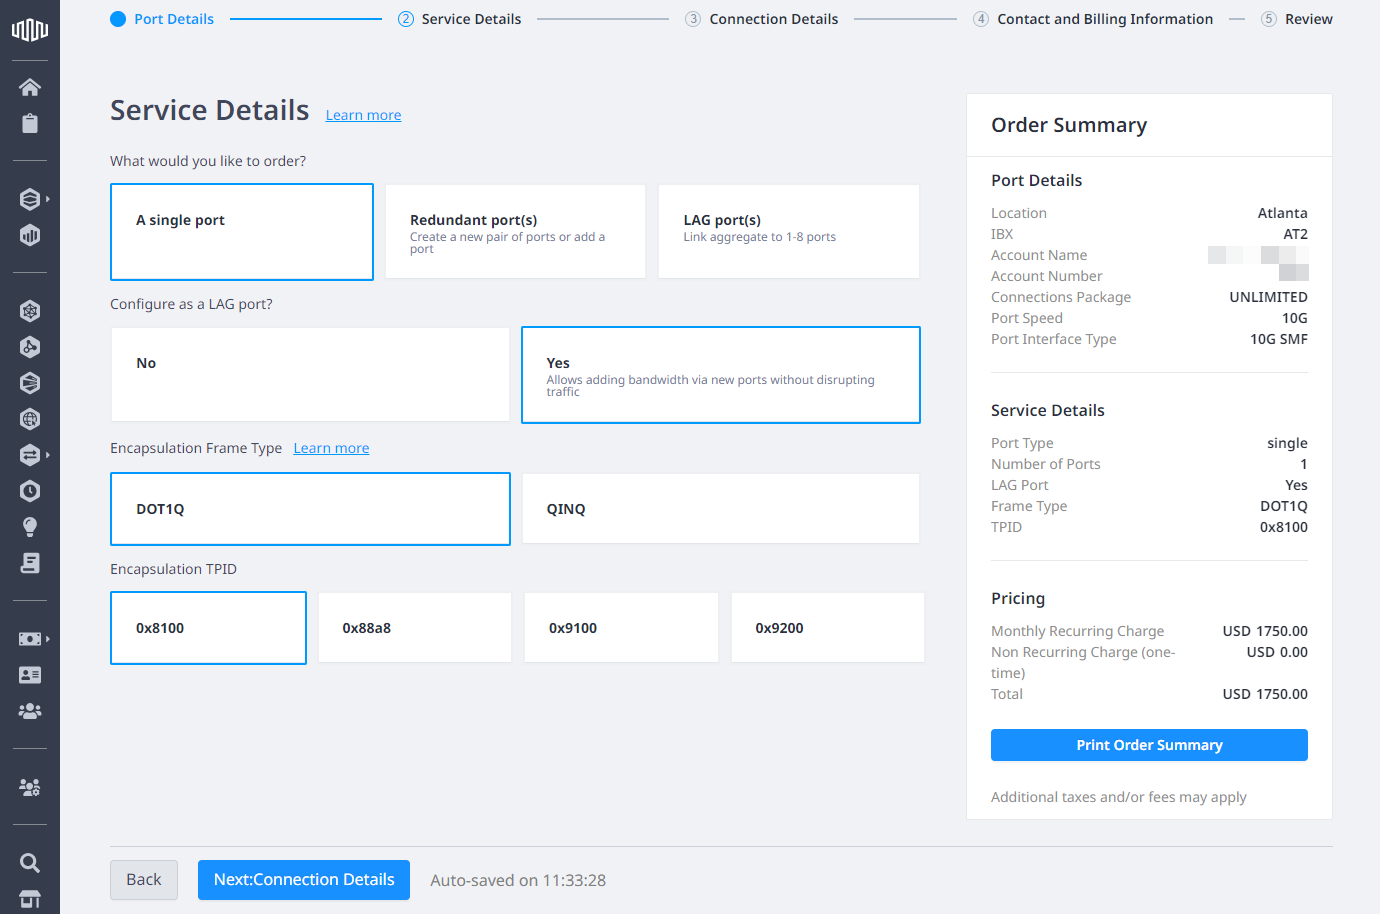
Choose the type of port you want to order.
A Single Port
Create a single, non-redundant port.
-
Click A single port.
-
Choose if you want to initiate your port as a member of a Link Aggregation Group.
tipYou can add ports to a LAG to increase the bandwidth without interrupting connections.
-
Select encapsulation frame type, choose
TPID. -
Click Next: Connection Details.
Redundant port(s)
Create a pair of redundant ports or add a port to existing one to complete a redundant ports pair.
- Click Redundant port(s).
- Choose if you want to create a new pair of redundant ports or add a port to existing one.
- (Applicable to adding a new port to existing one) Select existing port.
- (Applicable to creating a new pair) Select encapsulation frame type and choose
TPID. - Click Next: Connection Details.

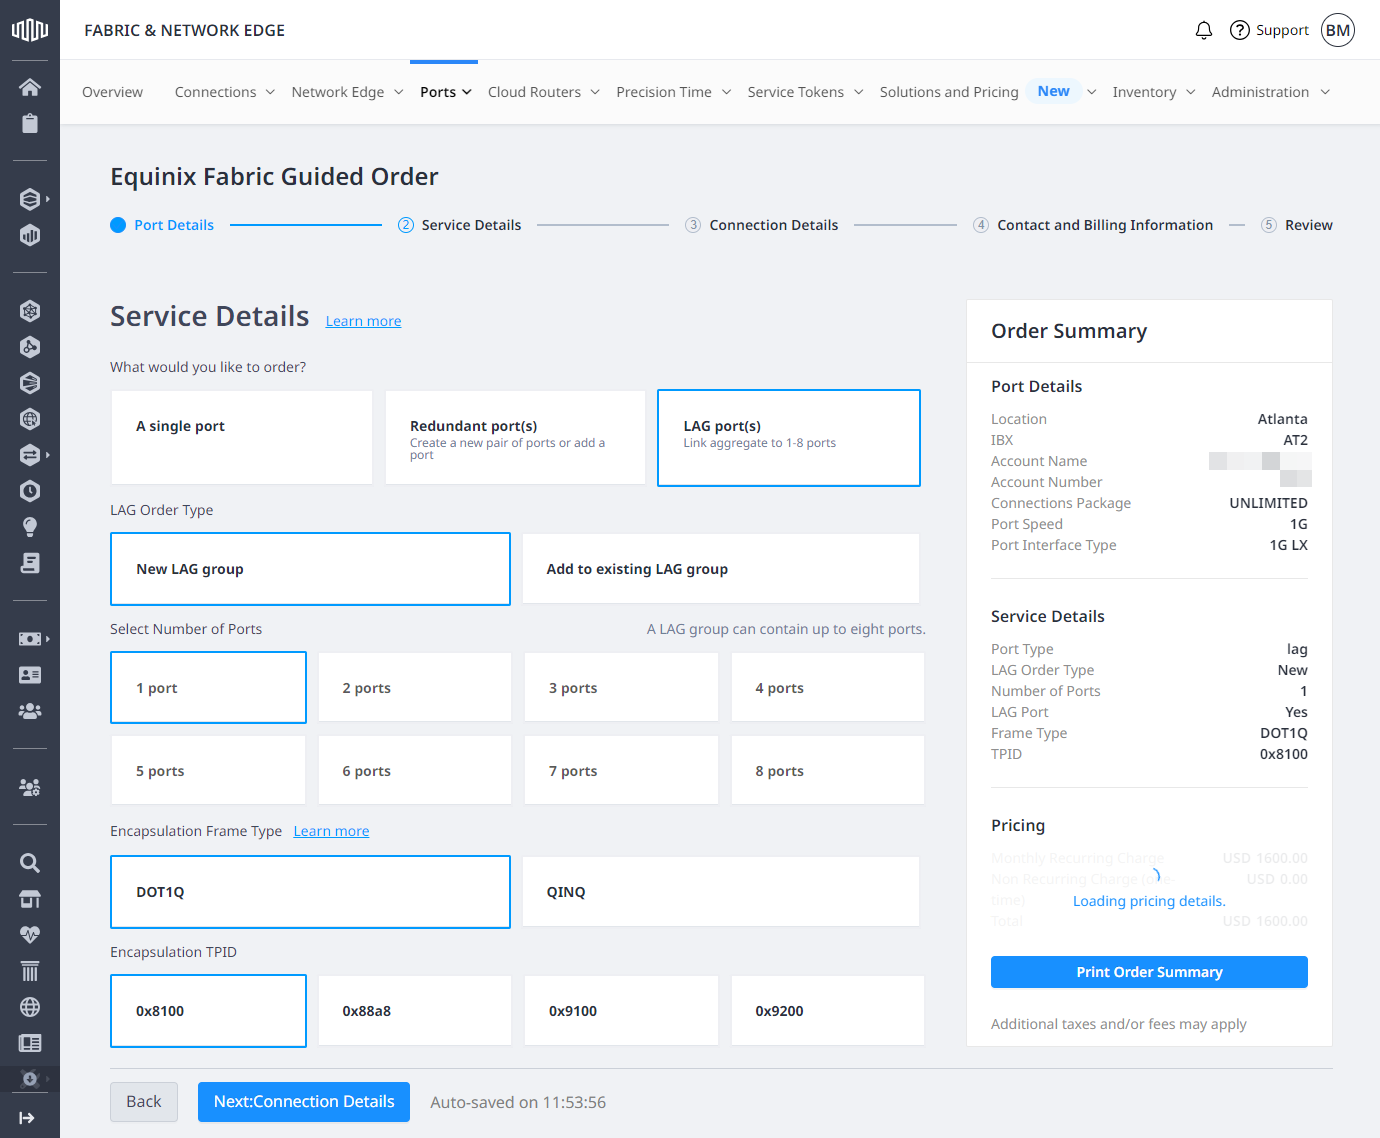
LAG port(s)
Create a new LAG or add ports to an existing LAG.
- Click LAG port(s).
- Choose if you want to create a new LAG or add ports to existing one.
- (Applicable to adding ports to existing LAG) Select existing port.
- (Applicable to creating a new LAG) Select the number of ports that will comprise your LAG.
- (Applicable to creating a new LAG) Select encapsulation frame type and choose
TPID. - Click Next: Connection Details.
Connection Details
- In the Connection Details section:
-
Applicable to single, non-redundant ports and LAG ports
- Connect New Port to Primary or Secondary Equinix Router
- Select primary or secondary.
-
Applicable to ports terminating in your colocation space
- Enter patch panel name or browse your colocation assets to find and select one.
- Select a connector type, then choose ports.
-
Applicable to ports terminating in BMMR or at a third-party's cage
- Upload your Letter of Authorization provided by the owner of the third-party demarcation in the Equinix IBX.
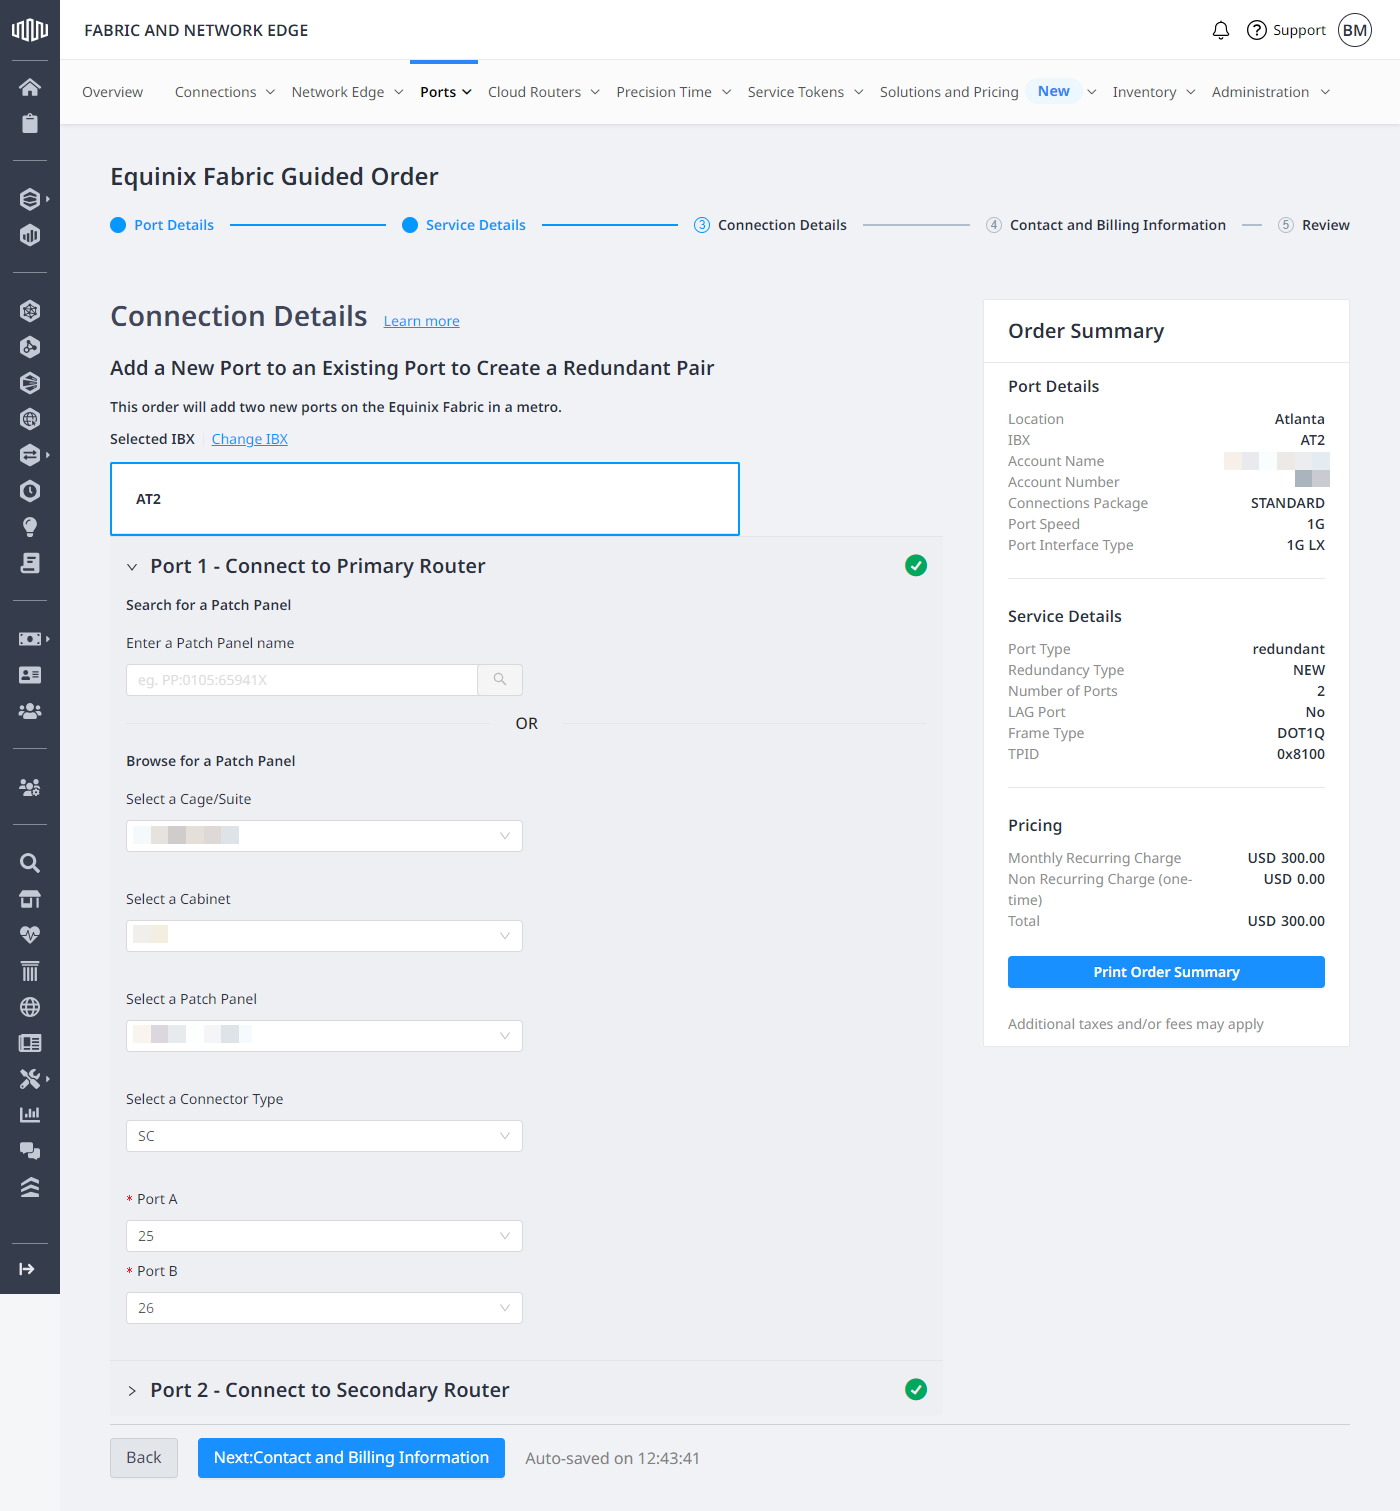
Enter the Circuit ID (if the option exists and one was provided.)
Click Next: Contact and Billing Information.
Contact and Billing Information
Review the contact information, then click Next: Review.
Review and Submit Order
-
Review your order and click Print Order Details to download your order summary.
-
In the Pricing Information section, select I agree.
-
In the Agreements section, select a signing option.
noteThe Agreements section will vary depending on whether your account requires a signature. If it does not require a signature, view the order terms and click to accept on the portal. If a signature is required, select a signing option.
-
Click Submit Order.