
The User Management feature allows primary administrators to grant granular permissions for Network Edge devices on a per-user basis.
Tip: It is important that you assign multiple users with the correct permissions, so that your organization does not have to rely on a single user to fix configuration errors or to get support. Also, it is best practice to have multiple primary administrators in your organization.
Add Multiple Users
The Primary Administrator can send invitation emails to add more users in the organization. The administrator can also add single or bulk users from the Equinix Customer Portal.
To add multiple users:
- Sign in to Equinix Fabric as the primary administrator.
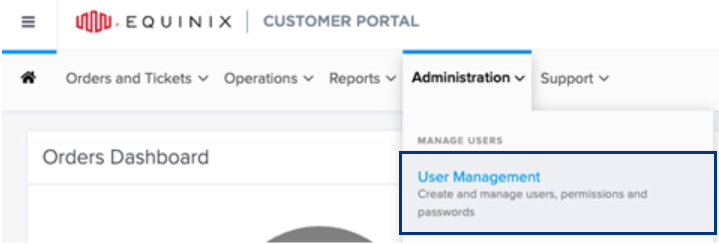
- Click
 to navigate to the Equinix Customer Portal.
 - In the Customer Portal, select User Management on the Administration menu.
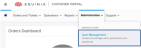
Note: All user-related management can be done from the Administration menu.
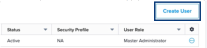
- Click Create User.

The following table summarizes user addition workflows:
| Workflow | Description | Next Action |
|---|---|---|
| Email Invitation | Send invitation to user email address | User receives email invitation. User needs to fill out user contact information, credential, PIN code and security questions. After user registration is completed, primary administrator needs to approve new user and then activation by enabling Fabric Portal access and Network Edge permission. |
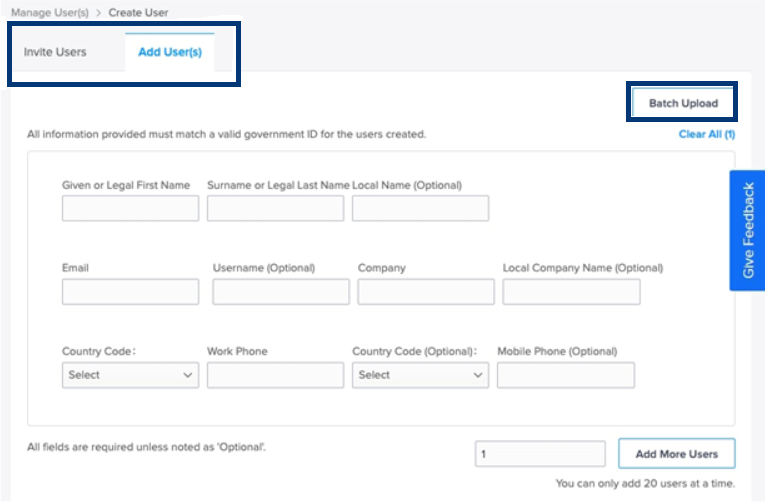
| Single or Multiple User Addition | Administrator to fill out user contact information including email address to initiate registration. Add up to 20 users at a time using the Add User form. | User receives assigned user name as well as temporary PIN and activation link in separate emails. User initiates account activation by creating password, PIN, and security questions. After user registration is completed, primary administrator needs to approve new user and then activate users by assigning Network Edge permission. If user does not receive activation email, initiate activation by enabling Fabric Portal access and Network Edge permission described in following section. After enabling permission, initiate the Create Password process, which triggers a password creation email. |
| Batch Upload for Single or Multiple User Addition | Administrator to upload spreadsheet with user contact information including email address. Portal automatically fills out user information based on uploaded file to add multiple users. | User receives assigned user name as well as temporary PIN, and activation link in separate emails. User initiates account activation by creating password, PIN and security questions. After user registration is completed, primary administrator needs to approve new user and then activate user by enabling Fabric Portal access and Network Edge permission. |
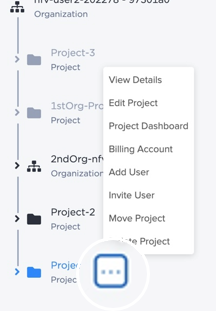
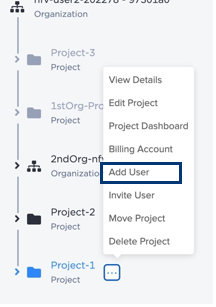
Add Users Using Identity and Access Management (IAM)
IAM gives you a better understanding into your resource hierarchy. Manage your resources (virtual devices and connections) with organizationally defined boundaries. Administrators initiate the add user workflow in the Identity and Access Management portal.
-
Sign in to the Identity and Access Management portal.
-
From the Resources menu, click Organization Hierarchy.
-
Click the menu next to the organization or project to which you want to add a user.

-
Select Add User.

-
Click Continue.

To add multiple users, see Add Multiple Users.
For more information, see the Identity and Access Management documentation.
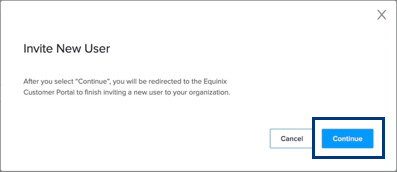
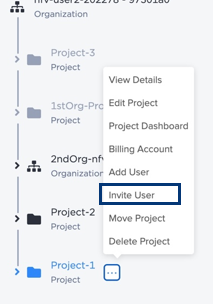
Invite Users (IAM)
To invite a user:
-
Sign in to the Identity and Access Management portal.
-
From the Resources menu, click Organization Hierarchy.
-
Click the menu next to the organization or project to which you want to invite a user.
-
Select Invite User.

-
Click Continue.
For more information, see the Identity and Access Management documentation.
Assign Privileges and Permissions
Only a primary administrator can assign primary administrator privileges to another user. To designate an existing user as a Primary Administrator:
-
Sign in to Equinix Fabric.
-
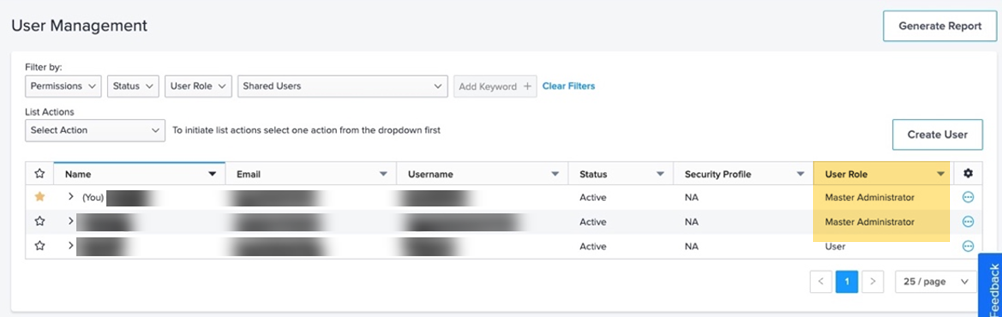
From the Administration menu, select User Management.
-
Locate the existing user you want to designate as a primary administrator, and click
 .
. -
Select Manage Permission.
-
Click the Permissions tab and select Administration & IBX Access Services Request.
-
Select Administrator Privileges and in the Administrator type section, make sure Primary Administrator is selected.
Go to Administration and select User Management to see the user role is now Primary Administrator.
Grant Access to Network Edge
To grant access to Network Edge to a user:
-
Sign in to Equinix Fabric.
-
From the Administration menu, select User Management.
-
Locate the existing user you want to grant Network Edge access to and click
. -
Select Manage Permissions.
-
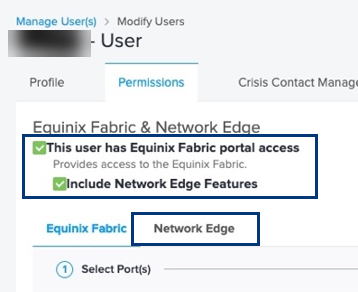
Click the Permissions tab and select Equinix Fabric and Network Edge.
-
Select This user has Equinix Fabric portal access and Include Network Edge Features.

-
Click the Network Edge tab to configure more specific permissions to manage virtual devices.
Note: When users are granted Network Edge access they can view all the devices and device configurations. Certain capabilities and functions are locked down depending on the privileges granted.
Virtual Device Permissions
Virtual Device permissions apply to all virtual devices within an organization account. Permissions are NOT granted at an individual device level. The Select Virtual Device Permissions section allows the administrator to grant Modify, Create, and Delete privileges for virtual devices. Create and Delete permissions are for virtual devices. Modify is for attributes such as device name, version update, and licenses.

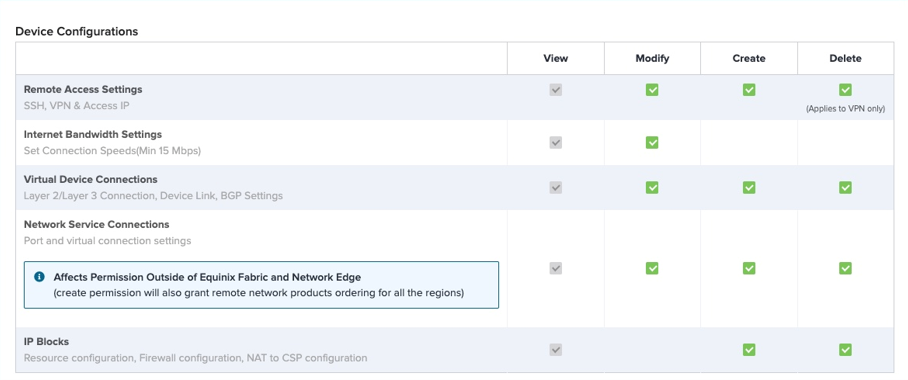
Device Configuration Permissions
Device Configuration permissions apply to all virtual devices within an organization account and enable control over remote access and internet bandwidth settings, as well as virtual device and network service connections.
| Permission Name |
Description |
|---|---|
| Remote Access Settings | Add, Remove, and Modify SSH users, VPN connections, and Access Control List templates. |
| Internet Bandwidth Settings | Create and Delete permissions are not enabled for Internet Bandwidth Settings because 15Mbps of internet bandwidth is included with the original device order and can't be removed. Modify, when selected, allows the user to add additional internet bandwidth. |
| Virtual Device Connections | View, Create, Delete, and Modify permissions for Layer 2 and 3 connections, Device Link (link between VNFs) and BGP settings. |
| Network Services Connections | Create allows the user to connect to a network service provider (NSP) offering its service on the Equinix Fabric platform through the dedicated interface on the device. Create also allows the user to order remote network ports to connect to an NSP that is not on the Equinix Fabric platform |
Shared Asset Permission Management
Shared asset permissions allow Network Edge Customers to access devices and create connections across multiple customer organizations using a single login. Granting shared asset permissions requires two separate steps:
-
The Administrator of the user's customer organization shares the user with another customer organization.
-
The Administrator of the other customer organization provides port permissions to the shared user.
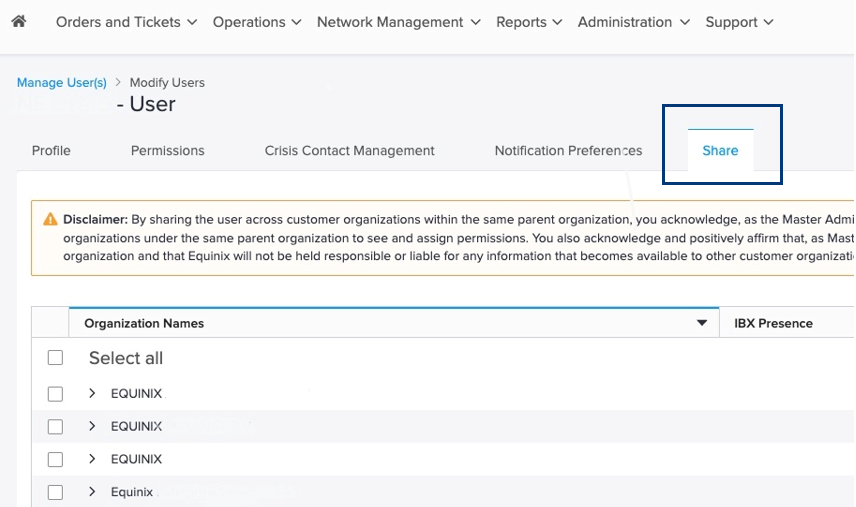
Share the User
-
Sign in to Equinix Fabric.
-
From the Administration menu, select User Management.
-
From the user list, locate the user you want to share and click Options
. -
Select Manage Permission.
-
Click Share.

-
Click the check box associated with the customer organization you want to share your user with. You can expand the organization name to view the Account Number and Account Name.
-
Click Submit Changes.
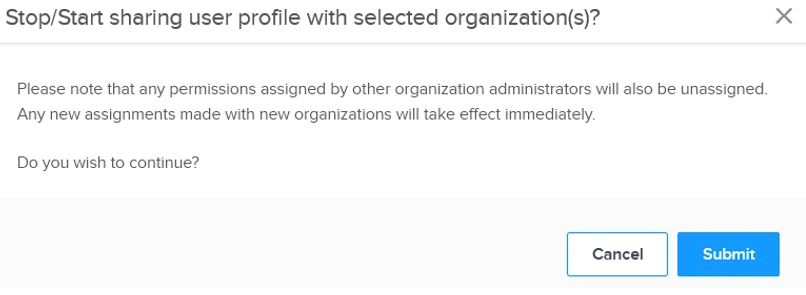
-
In the Stop/Start sharing user profile with selected organization(s)? prompt, click Submit.
Once the user has been shared, the Shared User![]() icon displays next to the user in the user list. The Primary Administrator for the customer organization you shared the user with can now grant that user port permissions.
icon displays next to the user in the user list. The Primary Administrator for the customer organization you shared the user with can now grant that user port permissions.
Grant Permissions to the Shared User
-
Sign in to Equinix Fabric.
-
From the Administration menu, select User Management.
-
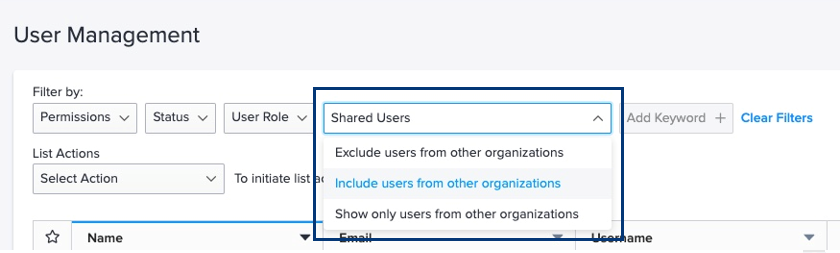
From the Shared Users menu, select Include Users from other organizations.
-
From the user list, locate the user you want to grant permissions and click Options
. -
Select Manage Permission.
-
Click the Equinix Fabric and Network Edge card.
-
In the Select Port(s) list, click the arrow associated with the IBX containing the ports you want the user to access.
-
Click the View Ports and Virtual Resources check box associated with the port(s) in the selected IBX if you want to grant these permissions.
-
Click the Place connections and service orders check box associated with the port(s) in the selected IBX if you want to grant these permissions.
-
Click Submit.

Note: When you grant a shared user permissions to access your ports, the user inherits all the same permissions from their home customer organization. As the Administrator of the shared customer organization, you will be able to see the permissions of the shared user, but you will not be able to change them.
Request Permissions
If you discover that you do not have the necessary permissions to complete an operation in Network Edge, request permissions from your administrator. Whenever you attempt to perform an action that you do not have the necessary permissions to perform, a Request Access prompt will display.
-
Click Continue in the Request Access box. The Equinix Customer Portal opens in a new tab and the Administrator(s) for your organization displays.

-
Click Add. Your email client displays. Write an email indicating which permissions you want added.
-
Click Send to request your access.

User Permissions Under IAM
If your account is enabled for IAM, all the Network Edge device permissions are managed in the Identity and Access Management portal.
You do not need to change any settings under Fabric and Network Edge Permissions. You can start managing your virtual device and other resources with the IAM framework. For more information, see the Identity and Access Management documentation.
For information about IAM with Network Edge, see Network Edge Identity and Access Management.
