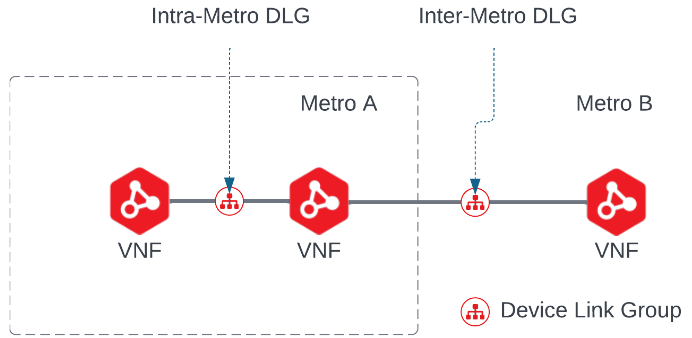
Network Edge users can connect devices together and pass traffic directly between any devices that are part of the same metro, or across metros. Customers can take advantage of service chaining, taking two devices that serve different functions and sending traffic between them.
Device Linking Video
The connectivity options for device linking are:
-
Intra Metro – Connection where devices are connected within the same metro. There is no charge for Intra-Metro DLG connections.
-
Inter Metro – Connection where devices are connected between different metros. There are charges for Inter-Metro DLG connections.
Note: Devices that were created prior to Network Edge 2020.3 (August 2020) require manual provisioning if the device is part of a device link group. This manual provisioning requires the device's network to be updated and can involve some downtime. The Equinix support team will contact you to perform the update during a maintenance window. Communication will occur through email.
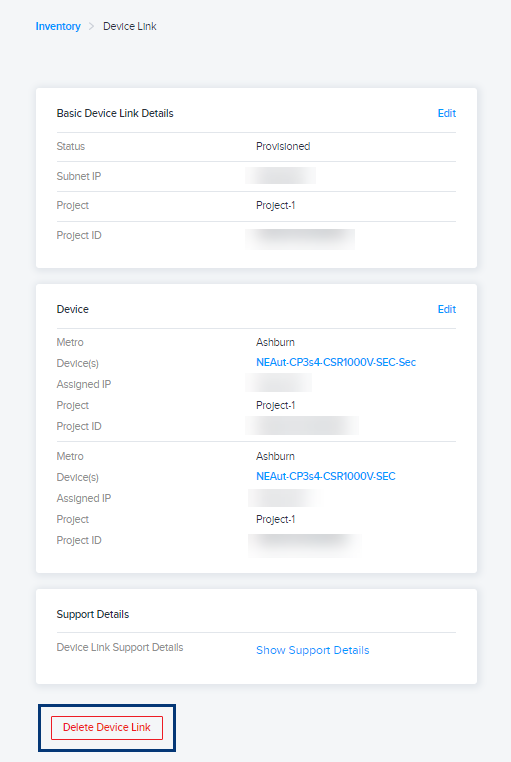
View Device Link Details
- Sign in to the Equinix Customer Portal and navigate to Network Edge.
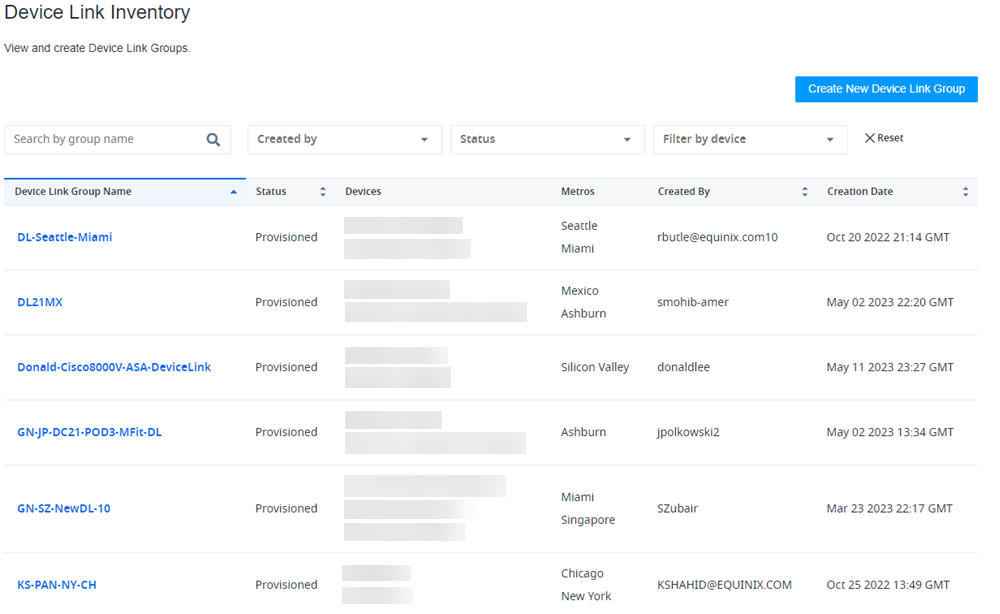
- From the Network Edge menu, select Device Link Inventory.
- Click the DLG from the inventory list.

The basic device link details, device details, and pricing overview will display. From here, you can edit the device link.
Create a Device Link
- Sign in to the Equinix Customer Portal and navigate to Network Edge.
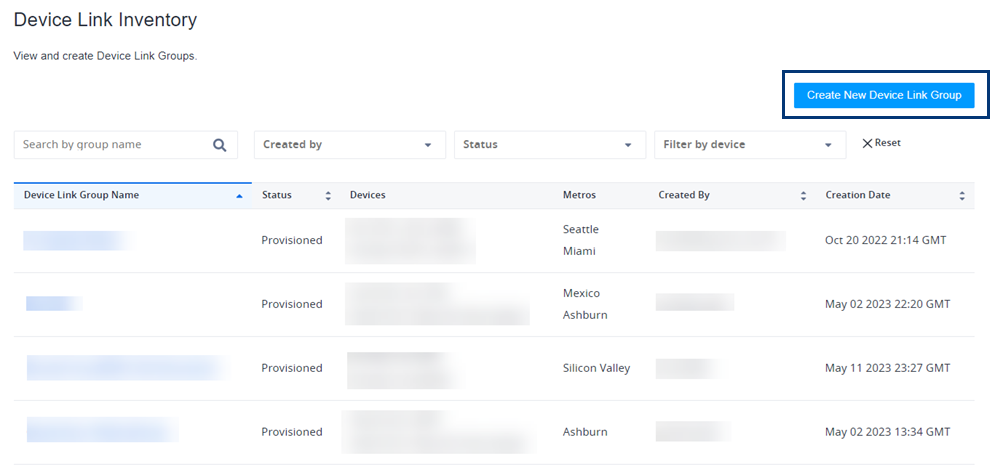
- From the Network Edge menu, select Device Link Inventory.
- Click Create New Device Link Group.
- All of your devices will display. Click the devices you want to link.
- Click Next: Device Link Details.
- In the Device Link Details section enter a link name in the Device Link Name field.
- Select Primary to create a primary DLG connection through the primary Fabric plane. (For information about creating a secondary DLG connection through the secondary Fabric plane, see Create a Redundant Device Link Group for Resiliency.)
- Select a Connection Bandwidth.
-
In the Interfaces section, select:
-
Automatically select the next available interface on my device(s) if you want to use the next available interface.
-
I will select an interface if you want to specify an interface, and then select a primary interface and a secondary interface.
-
- Click Next: Review and review your order.
- Review the details, devices, and pricing.
- Click Submit.
Add or Remove a Device in an Existing Device Link Group
- From the Network Edge menu, select Device Link Inventory.
- Click the DLG you want to edit.
- In the Device section, click Edit.
- In the Pricing Changes prompt, click Continue Editing Device Link Group.
- All of your available devices will display, and the devices in this group are selected. Click any device(s) you want to add to the Device Link Group.
- Click any of the selected devices to delete them from the group.
- Click Next: Group Details.
- Select the Connection Bandwidths.
- In the Interface section, select an interface option.
-
Automatically select the next available interface on my devices – Select if you want to use the next available interface.
-
I will select an interface – Select if you want to specify an interface.
- Enter an ASN.
- Click Next: Review and review your order.
- Select I am authorized to make this change and accept the new monthly charge.
- Click Submit Changes.
Delete a Device Link
- From the Network Edge menu, select Device Link Inventory.
- Click the DLG from the inventory list
- Click Delete Device Link.