
Important: As of April 2025, the Zscaler Private Service Edge is no longer available in the Network Edge Marketplace. At the end of June 2025, Zscaler will stop supporting Network Edge Zscaler VNFs.
Zscaler Private Service Edge Video
This topic explains how to create and operate a Zscaler Private Service Edge virtual device. See Zscaler Specifications for more information about the Zscaler virtual device.
Prerequisites
-
BYOL license from Zscaler.
Deployment Type
There is one deployment type available for Zscaler Private Service Edge:
-
Single – Provision a single device that operates as a standalone device. Another single device can be paired with the existing single device (requires same resource configuration) to form a local redundancy (redundancy in single metro) or geo-redundancy (each device operates in different metro).
Device Creation
To create a single Zscaler Private Service Edge device:
- Sign in to the Equinix Customer Portal and navigate to Network Edge. If the Identity and Access Management (IAM) feature is enabled for your account, make sure to switch to the intended Project Name/ID before proceeding to the device creation workflow.
-
Click the Zscaler Private Service Edge card to start device creation.
- In the Select Device Type section, click Single Device.
-
Click Begin Creating Edge Devices.
- In the Select Edge Device Location section, click a location.
-
In the Account section, select a billing account from the Your accounts in this metro drop-down.
Note: Metro selection is linked to your billing account country. For example, if you select Silicon Valley for deployment metro, your will need to have a billing account in the United States. If you need to deploy the VNF to a different metro such as Tokyo, you need to create a billing account in Japan.
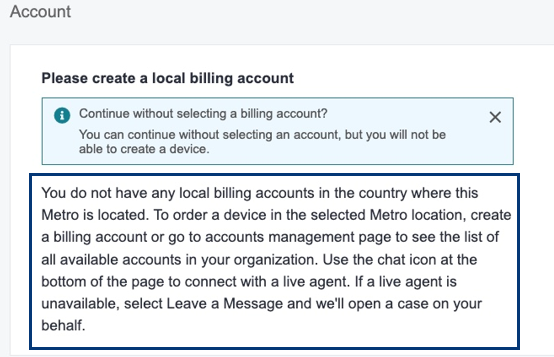
If you do not have a billing account for the selected metro, a message will display.

To create a billing account, click Go to Account Management, and then click Create New Billing Account. Without selecting an account, you will not be able to create your device. For more information, see Billing Account Management.
-
Click Next: Device Details.
-
In the Connectivity section, only the Without Equinix Public IP Address option is available.
-
In the Licensing section, only the Bring Your Own License option is available for this virtual device.
- In the Device Resources section, select the virtual machine resource type, along with the Software Package and Software Version. See Zscaler VNF Specifications for more information.
-
In the Device Details section, enter:
- Device Name – The name for the device used to identify it in the portal.
- Primary Host Name – The host name configured for the device.
- Provisioning Key – The provisioning key generated through your Zscaler Private Access portal.
Click to see guidelines for each entry.
 -
In the Interfaces section, keep the default number of interfaces available on the VNF. Then you have options to automatically map WAN/SSH interfaces to the next available interface, or manually select a specific interface for WAN/SSH use.
- In the Device Status Notifications box, enter the email addresses of anyone who should receive email notifications regarding device status.
- (Optional) In the Optional Details box, enter the Purchase Order Number and Order Reference/Identifier.
- In the Term Length drop-down menu, select a term length.
- Click Next: Additional Services to add any additional services.
-
Add Users – Enter a user name for SSH and Web-Console access.
-
(Optional) RSA Public Keys – Enter an existing RSA Public Key, or click Add New RSA Public Key to generate a new one. See Network Edge Device Access for more information about generating an RSA public key.
-
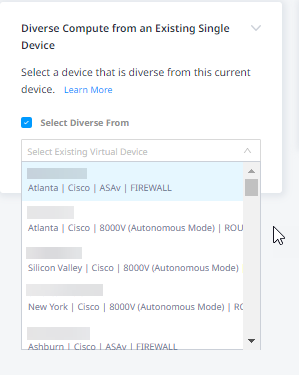
Diverse Compute from an Existing Single Device – If you already have another single device and you want this new device to exist in a different plane, click Select Diverse From and then select the existing device.

Having your devices exist on different planes minimizes the risk of single hardware failures affecting both devices.

Click View Details on the card to see a preview of the configuration options available for this virtual device.

If a software version is being retired within the next 2 months, you will see a ![]() icon next to the version number. It is strongly recommended that you select a different version because once a version is retired, Equinix will not support it.
icon next to the version number. It is strongly recommended that you select a different version because once a version is retired, Equinix will not support it.

Note: We strongly recommend adding multiple email addresses so that more than one user receives any notification for this device.
- Click Next: Review and review your order.
- Click Create Virtual Device.
