
Cisco CSR1000v SD-WAN device requires a manual recovery process in cases where the Virtual Network Function (VNF) goes into an unrecoverable state. This topic provides vendor-specific instructions for the recovery of Cisco CSR1000v SD-WAN VNF.
The recovery process steps include:
-
Generate a new bootstrap file.
-
Download the new bootstrap file.
-
Back up the Device Configuration from the failed device.
-
Restore the configuration to the new device.
Create and deploy a new Cisco CSR1000v SD-WAN VNF device using the following:
-
A unique system IP
-
The same site ID as the failed device
-
A new bootstrap file
Note: For the most up-to-date documentation on the bootstrap generation, see Bootstrap Process for Cisco SD-WAN Cloud-Hosted Devices.
Generate the New Bootstrap File
-
Sign into the Cisco vManage SD-WAN Controller.
-
Locate the SD-WAN edge device in the controller and decommission the virtual device that is having an issue due to unexpected failure.
-
On the Cisco vManage menu, select Configuration > Devices.
-
For the logical device (including the UUID) that you are using for a new cloud-hosted instance, click
 and select Generate Bootstrap Configuration.
 -
In the Generate Bootstrap Configuration box, select Cloud-Init and click OK.
The Generate Bootstrap Configuration box displays the bootstrap configuration, including the OTP token for the license, vBond address, UUID, and organization information.Note: The UUID corresponds to the identifier in the Chassis Number column in the Devices table. Ensure that the bootstrap configuration does not include more interfaces than the virtual device instance has in the cloud environment. For CSR1000v SD-WAN, the default number of interfaces is 10 and you can increase the number to 24. See Cisco VNF Specifications.
-
Click Download in the Generate Bootstrap Configuration box to save a copy of the bootstrap configuration.
Download the New Bootstrap File
-
Sign in to the Equinix Customer Portal and navigate to Network Edge.
-
On the Network Edge menu, select Virtual Device Inventory.
-
Use the search filters to locate the impacted Cisco CSR1000v SD-WAN device. Make sure you select the correct replacement device.
-
Click the device name, and then click Tools.

-
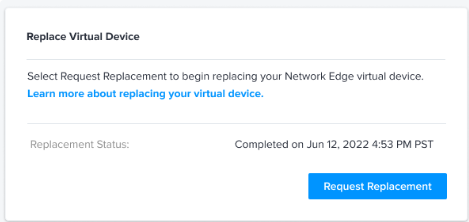
In the Replace Virtual Device section, click Request Replacement.
-
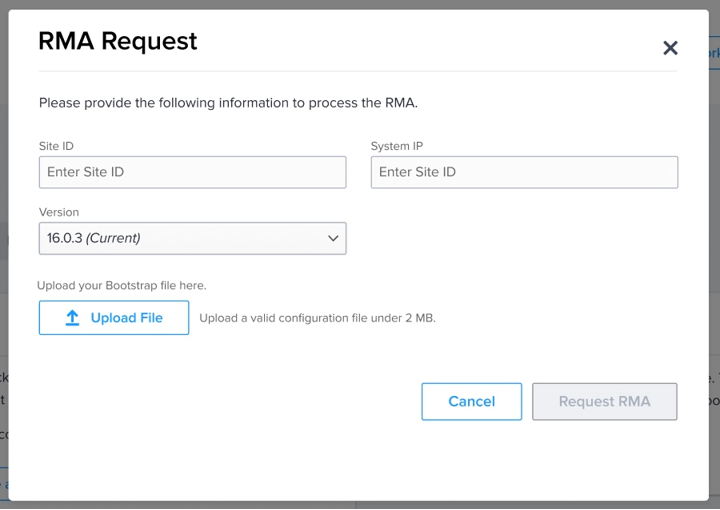
In the Request box, enter the Site ID, System IP, and click Upload File to upload your Bootstrap file.
Important: The System IP must be different from the IP for the failed device. But is highly recommended you use the same Site ID as the one used for the device you are replacing.

Note: The Bootstrap file extension must be .cfg and the file size can’t be larger than 2 MB.
-
In the Confirm Request box, click Submit Request.
-
After process is completed, log into Cisco vManage and verify that your new virtual devices are discovered by the vManage.

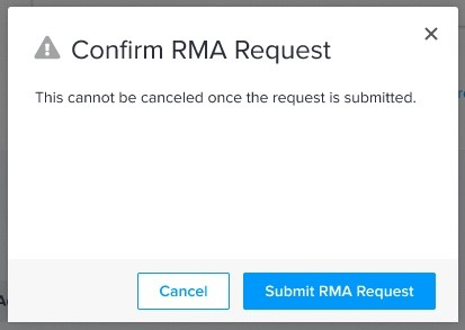
Warning: Once the request has been submitted, this process can’t be canceled.
While the device recovery request is in progress, the device status will change to Provisioning.

Once the process is done, the status changes to Completed and includes a timestamp. The Device Provisioning Status changes to Provisioned.
If any issues prevent the process from completing successfully, the status will read Failed. If a failure occurs, open a support case. For information about opening a case, see Support.
Back Up Device Configuration from Failed Device
Re-apply the configuration and license to the newly created virtual device so that the edge device can be completely recovered from the failure. To do this, you must first back up the current configuration in the device template.
-
In the Cisco vManage SD-WAN Controller, go to vManage > Configuration > Templates > Device Templates and click
 , then click Export CSV to back up the configuration in CSV format.
 -
Confirm that the failed device is reachable from vManage.
- If the failed device is reachable, remove the failed device from the Device Template Attached by going to vManage > Configuration > Templates > Device Templates, clicking , and selecting Detach Devices.
-
Invalidate the failed device by going to vManage > Configuration > Certificates > WAN Edge Listand clicking Invalid.
Note: After the device template removal, all the variable values from the templates are lost.
It is not possible to detach a device template if the Edge router is in an unreachable state. The message Please fix DTLS, NETCONF connectivity between device and vManage before template attempt workflow. displays in the vManage GUI.
- If the failed device is reachable, remove the failed device from the Device Template Attached by going to vManage > Configuration > Templates > Device Templates, clicking
-
Go to vManage > Configuration > Certificates and click Send to Controllers to send the change to the controller.
Restore Configuration to the New Device
The final step is restoring the configuration to newly created Edge device.
-
Restore the values from CSV to the Template by going to vManage > Configuration > Templates > Device Templates and clicking
. -
Click
again and then click Edit to restore the value from CSV file. -
After restoring the value, attach the device to the new template by going to vManage > Configuration > Templates > Device Templates and clicking
. -
Click
again and then click Attach Devices to attach the new device to the same template. -
Verify the configuration before committing the change.
