Ordering Internet Access
Order Internet Access through the Customer Portal for Fabric Ports or Network Edge devices. The following steps guide you through the ordering flow based on the assets that are assigned to your organization, project, and account.
This page covers ordering Internet Access over a Fabric Port or Network Edge device. Information on ordering service for a Dedicated Port is available on Ordering Internet Access for a Dedicated Port.
Prerequisites
-
An Equinix Customer Portal account.
-
You must have one of the following resources to order Internet Access service:
-
A Fabric port and one of the following roles:
Fabric Port Manager,Fabric Manager, orFabric Service Provider. For more information about Fabric ports, see the Fabric documentation. -
A provisioned Network Edge device available, such as a firewall, router, WAN, or other virtual device and the
Network Edge Connections Managerrole to order the resources. For more information about Network Edge, see the Network Edge documentation.
-
Start Your Order
To order Internet Access:
-
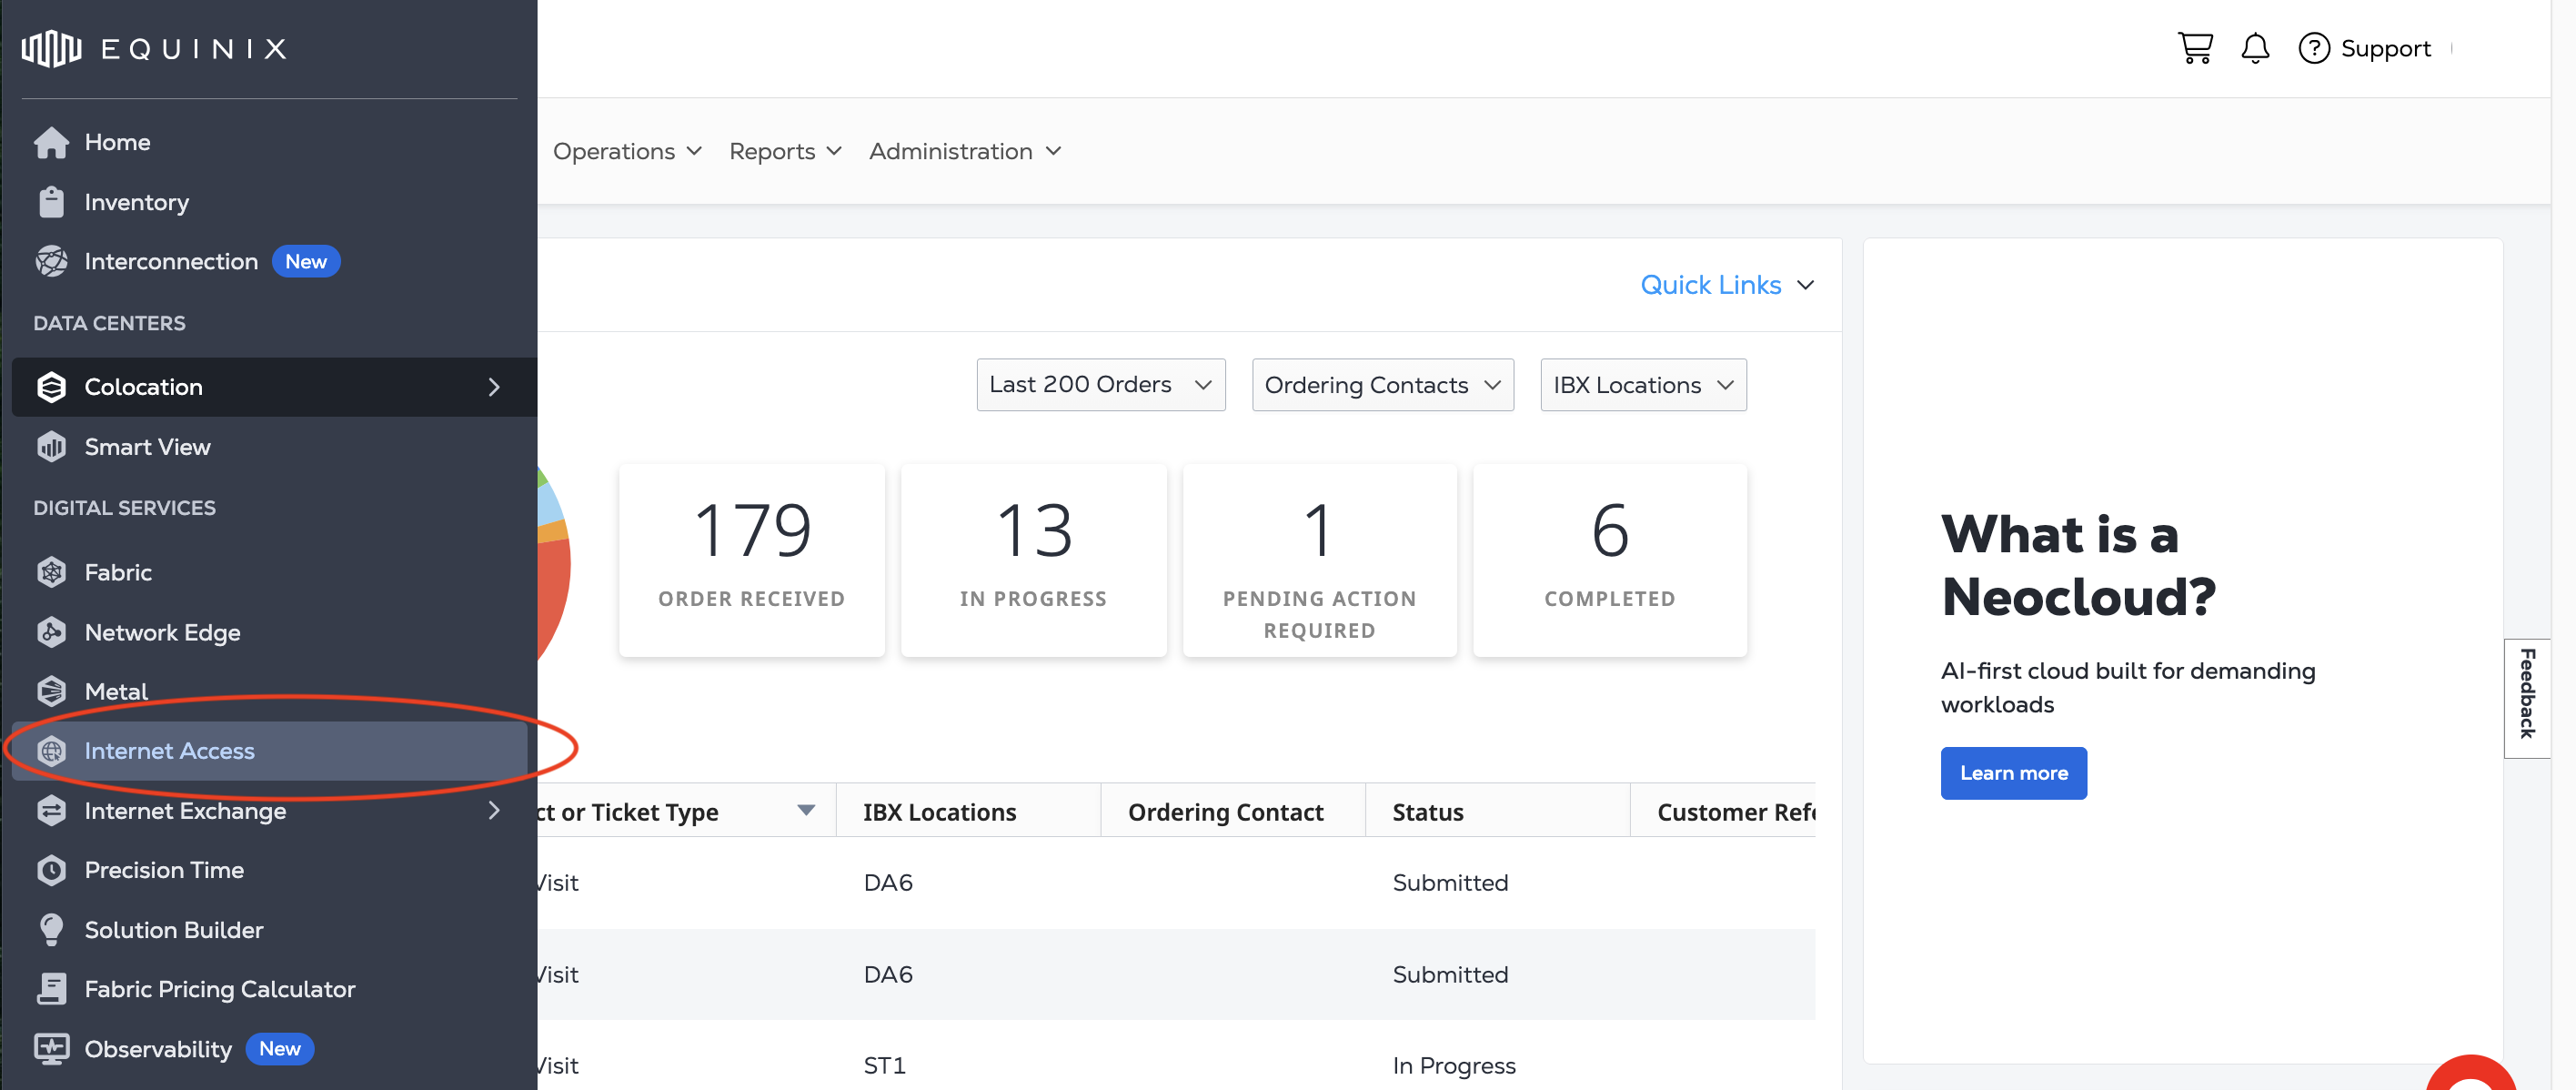
Sign in to the Customer Portal and navigate to Internet Access.
-
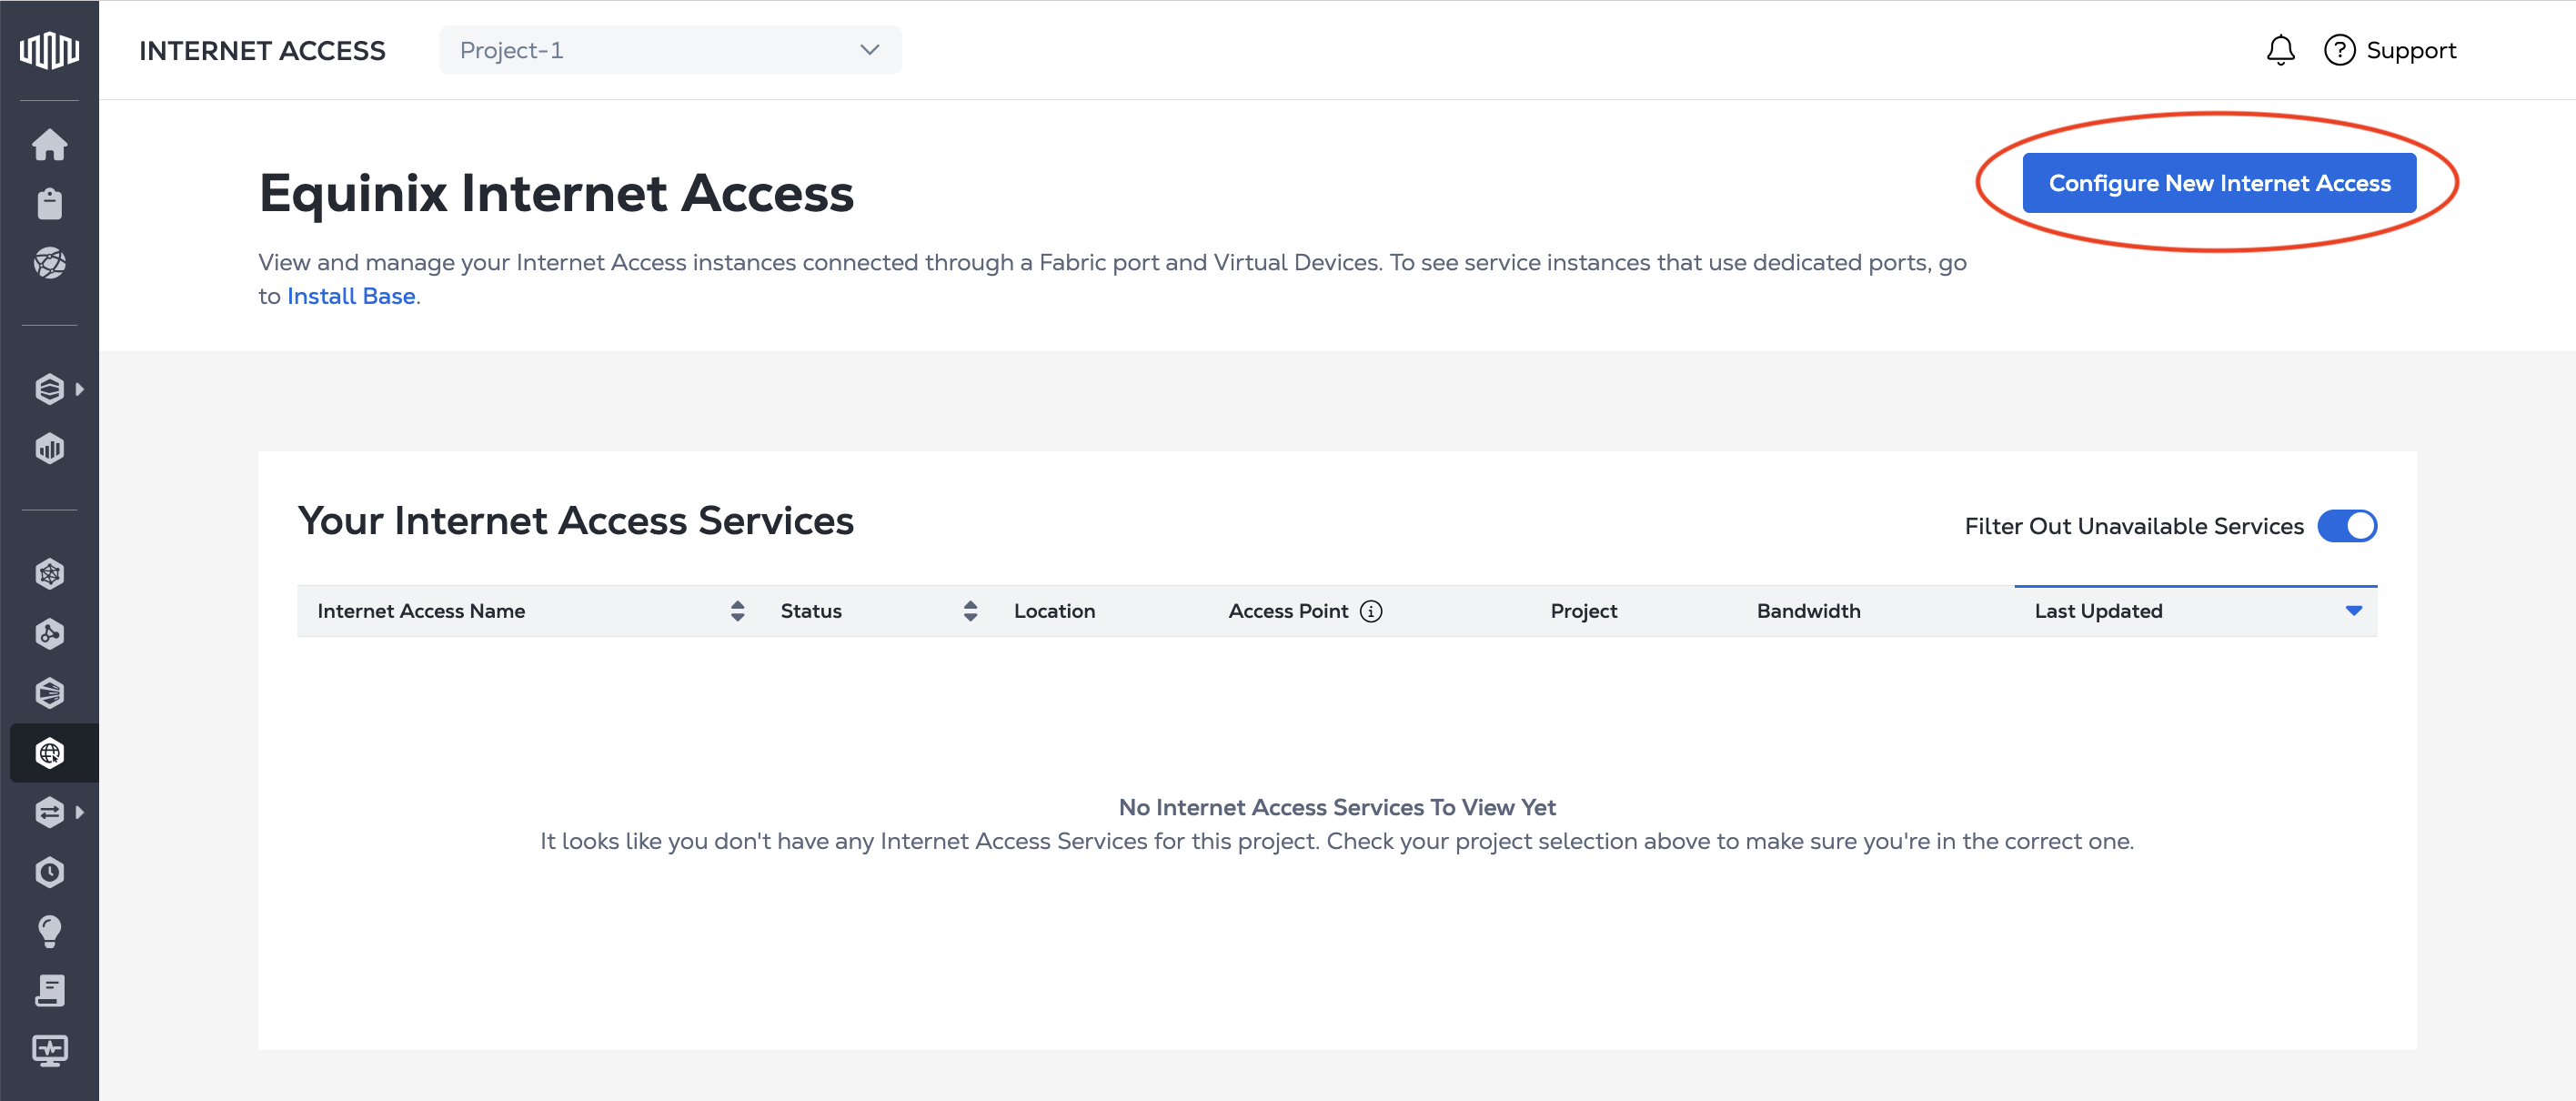
On the Internet Access page, click Configure New Internet Access.
Configure Your Connection
Configure the connection that provides your Internet Access service. Your options are determined by your choice of a Fabric Port or Network Edge device. Information on ordering service for a Dedicated Port is available on Ordering Internet Access for a Dedicated Port.
Use the Order Summary to view pricing updates as you complete your order.
Fabric Port
-
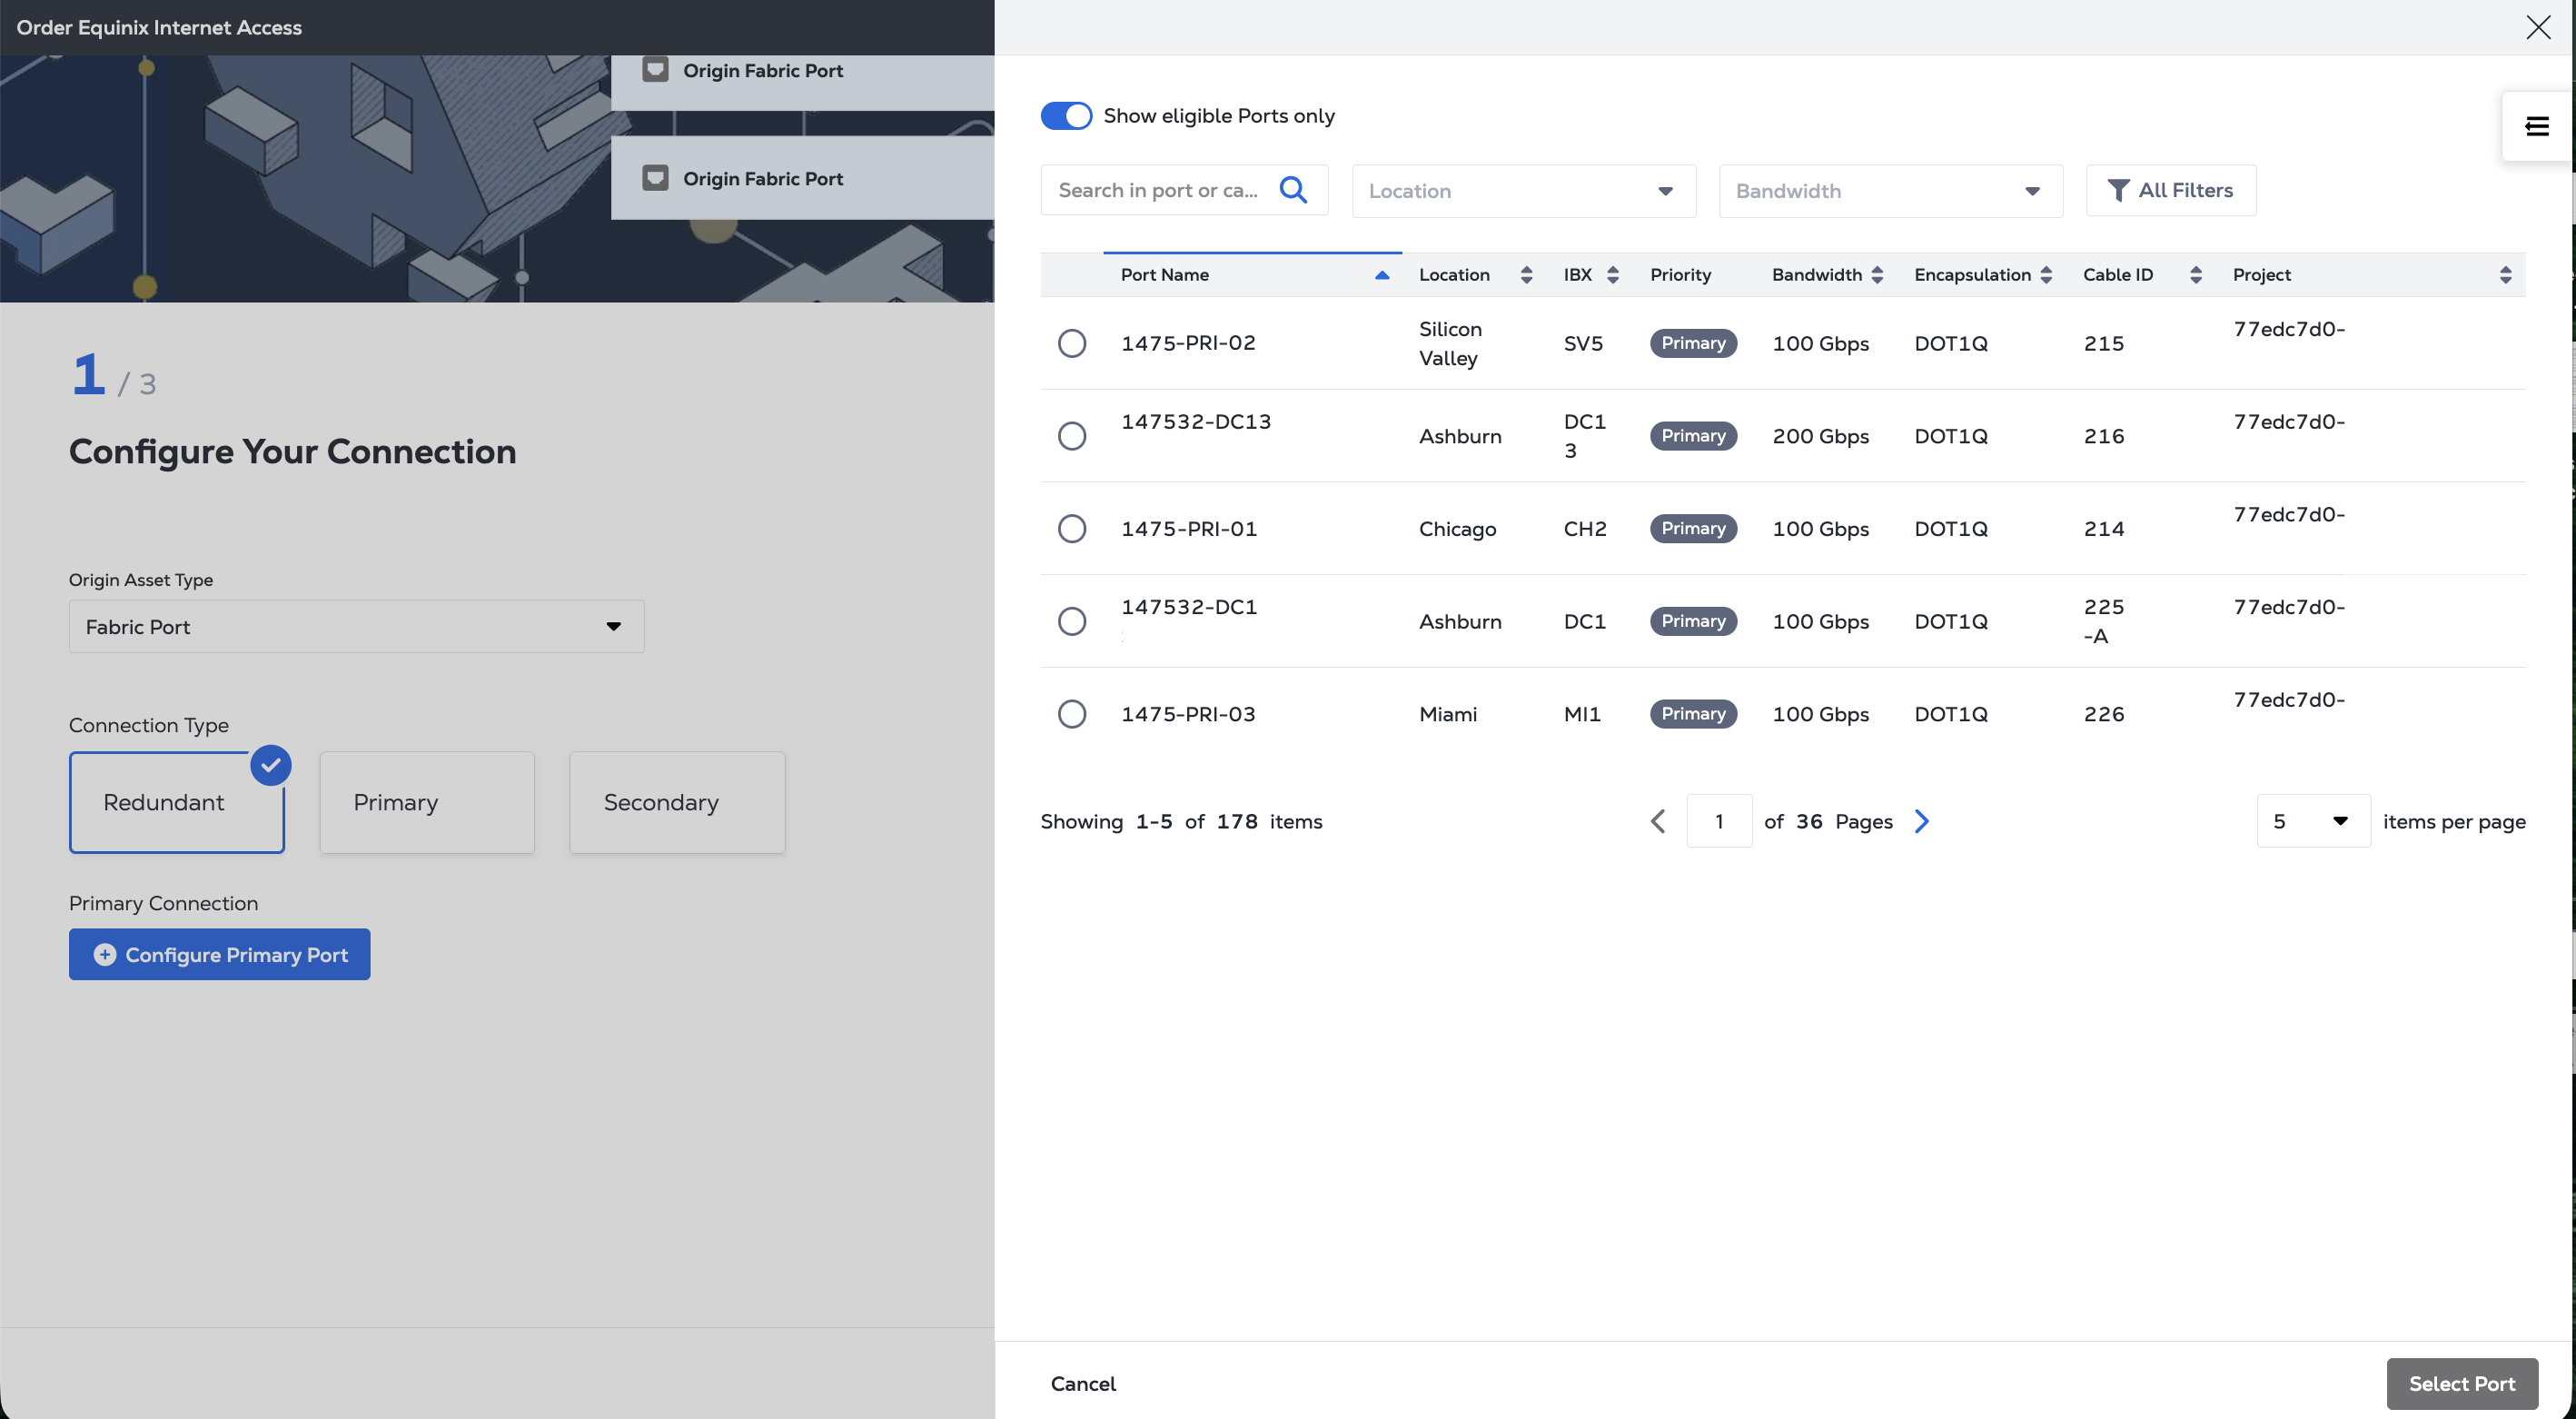
From the Origin Asset Type drop-down, select Fabric Port.
-
Choose the Connection Type:
-
Redundant Connection - A single Internet Access service with two connections to two Fabric Ports within same Metro.

-
Primary Connection - A single Internet Access service with primary connection to a Fabric Port.

-
Secondary Connection - A single Internet Access service with secondary connection to a Fabric Port.

-
-
Assign the specific ports for the Primary and/or Secondary Connection. From the Select Port panel, choose the specific port to use. Filter the list by clicking Show eligible Ports only. Click Select Port.
-
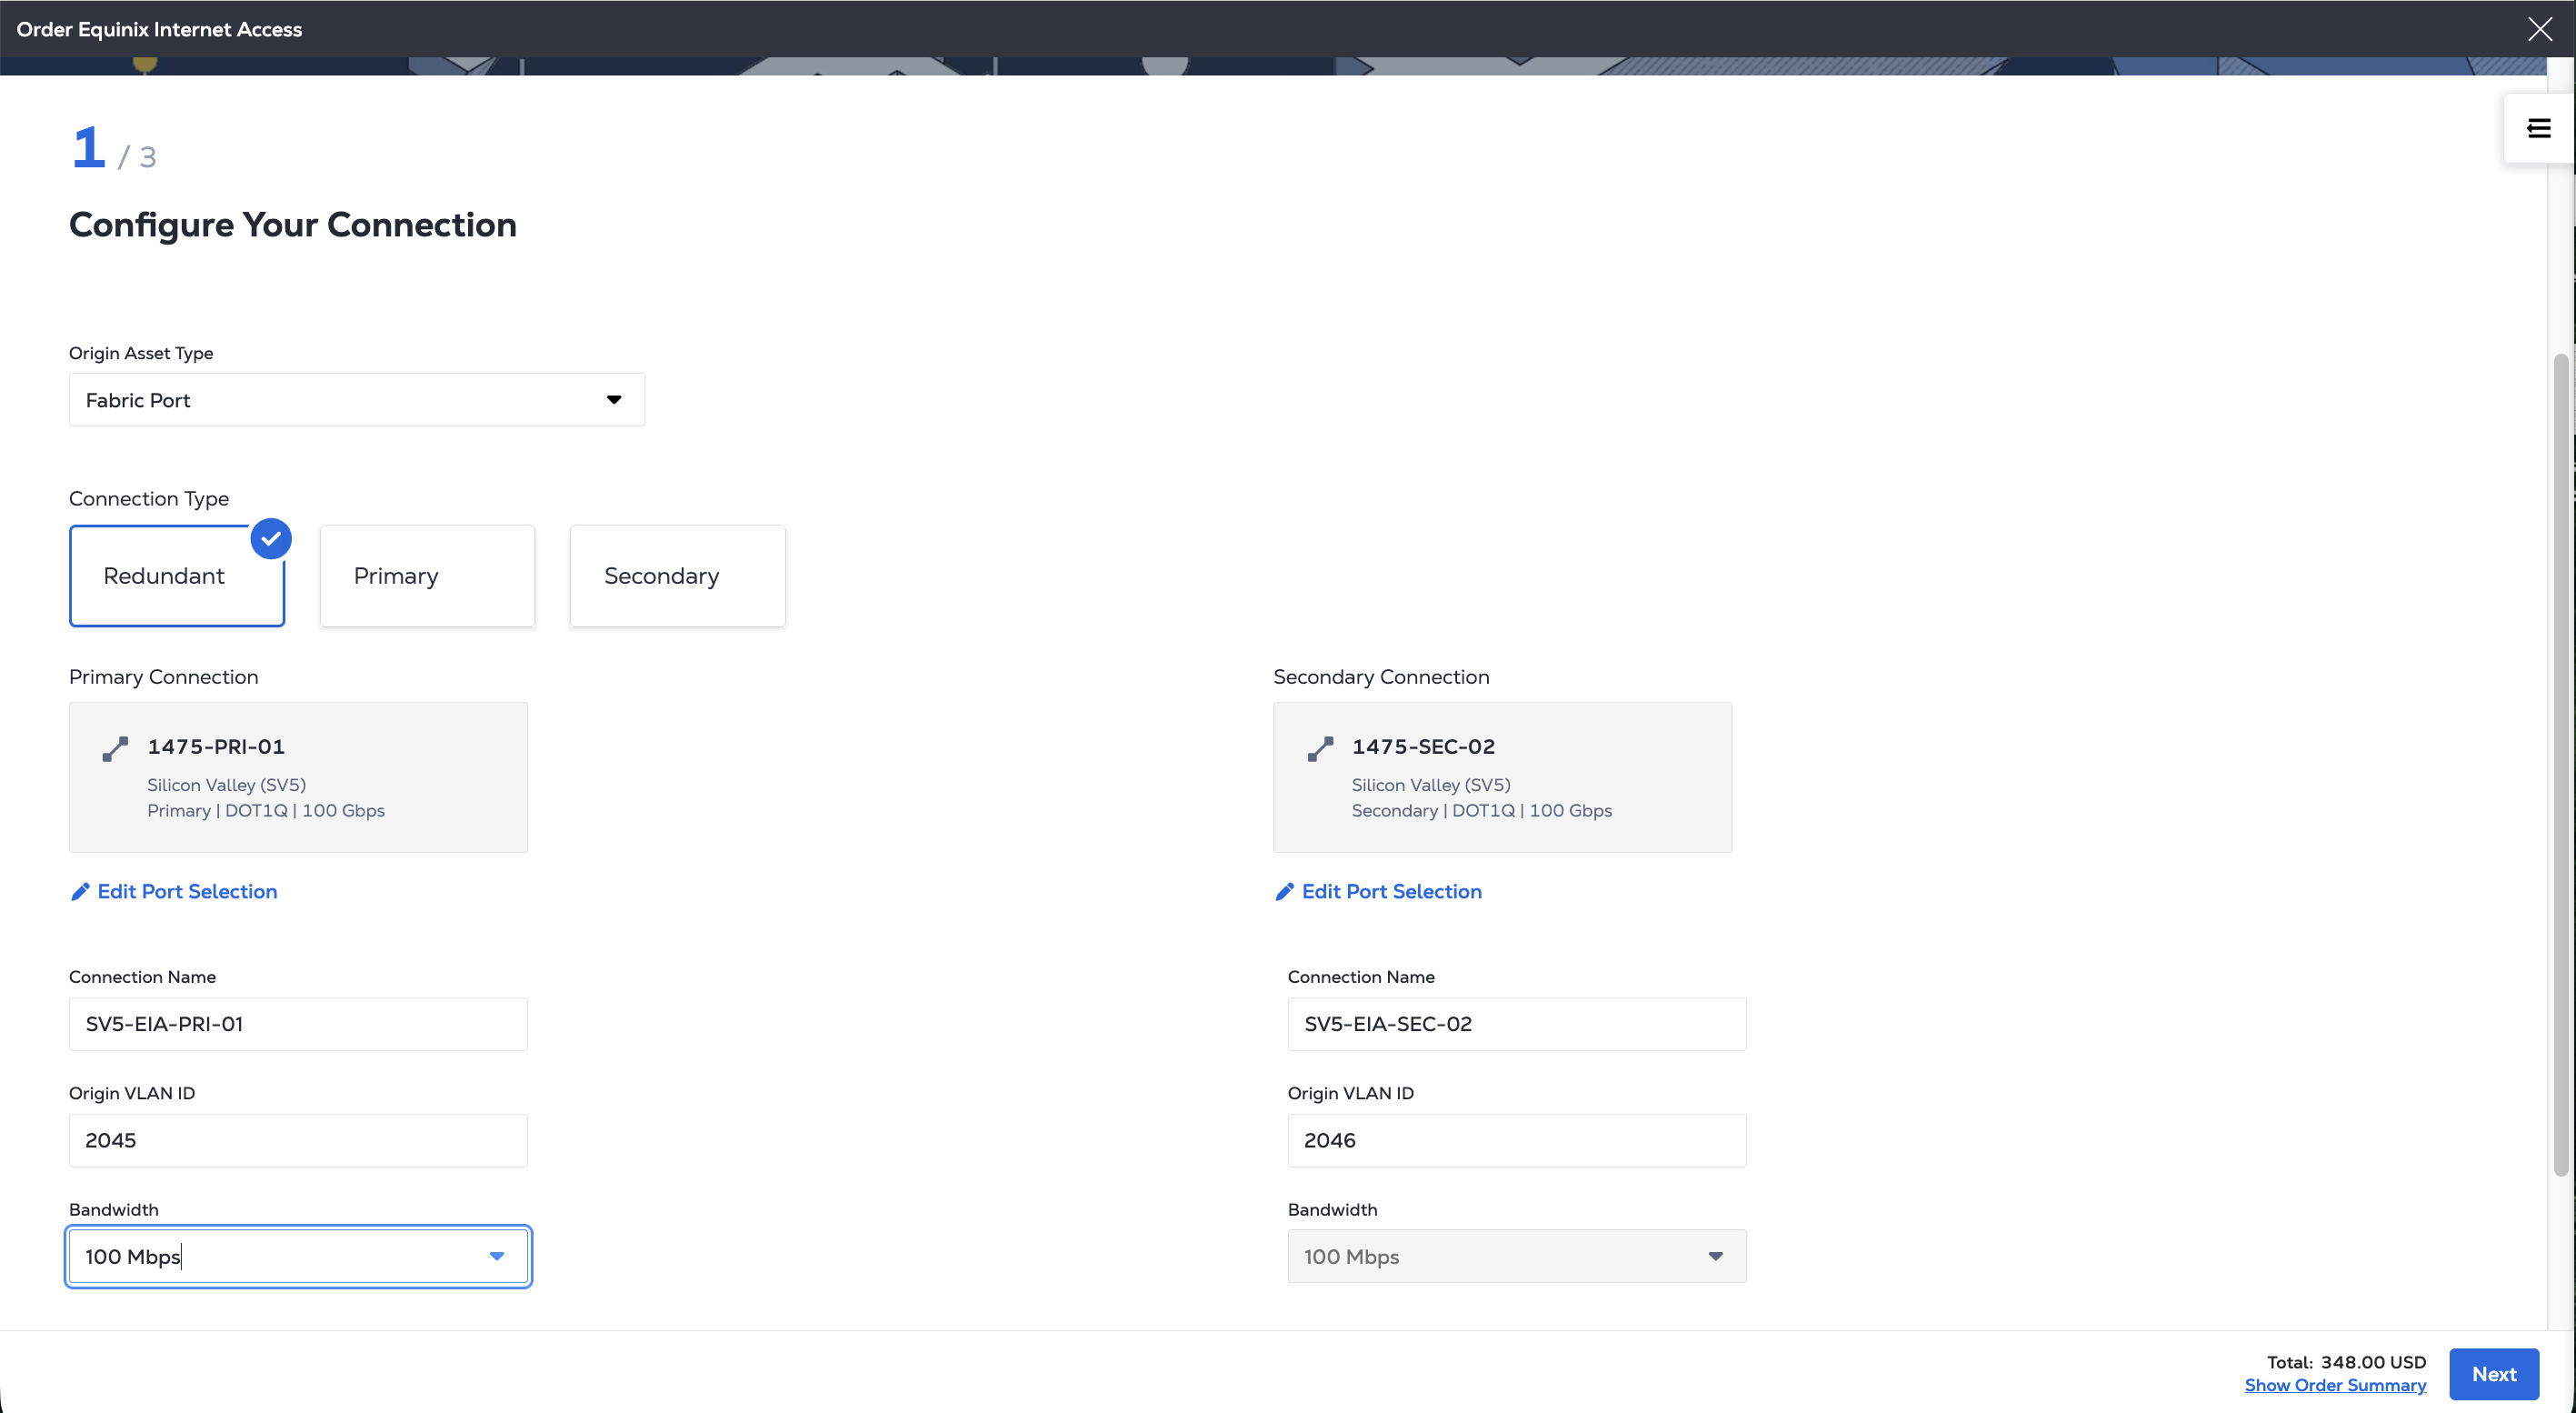
For each connection:
- Provide a Connection Name.
- Enter a VLAN ID.
- Select the connection's Bandwidth. If it is a redundant connection, the bandwidth must be the same for both primary and secondary connections.
-
Click Next to specify Your Internet Access service.
Virtual Device
-
From the Origin Asset Type drop-down, select Virtual Device.
-
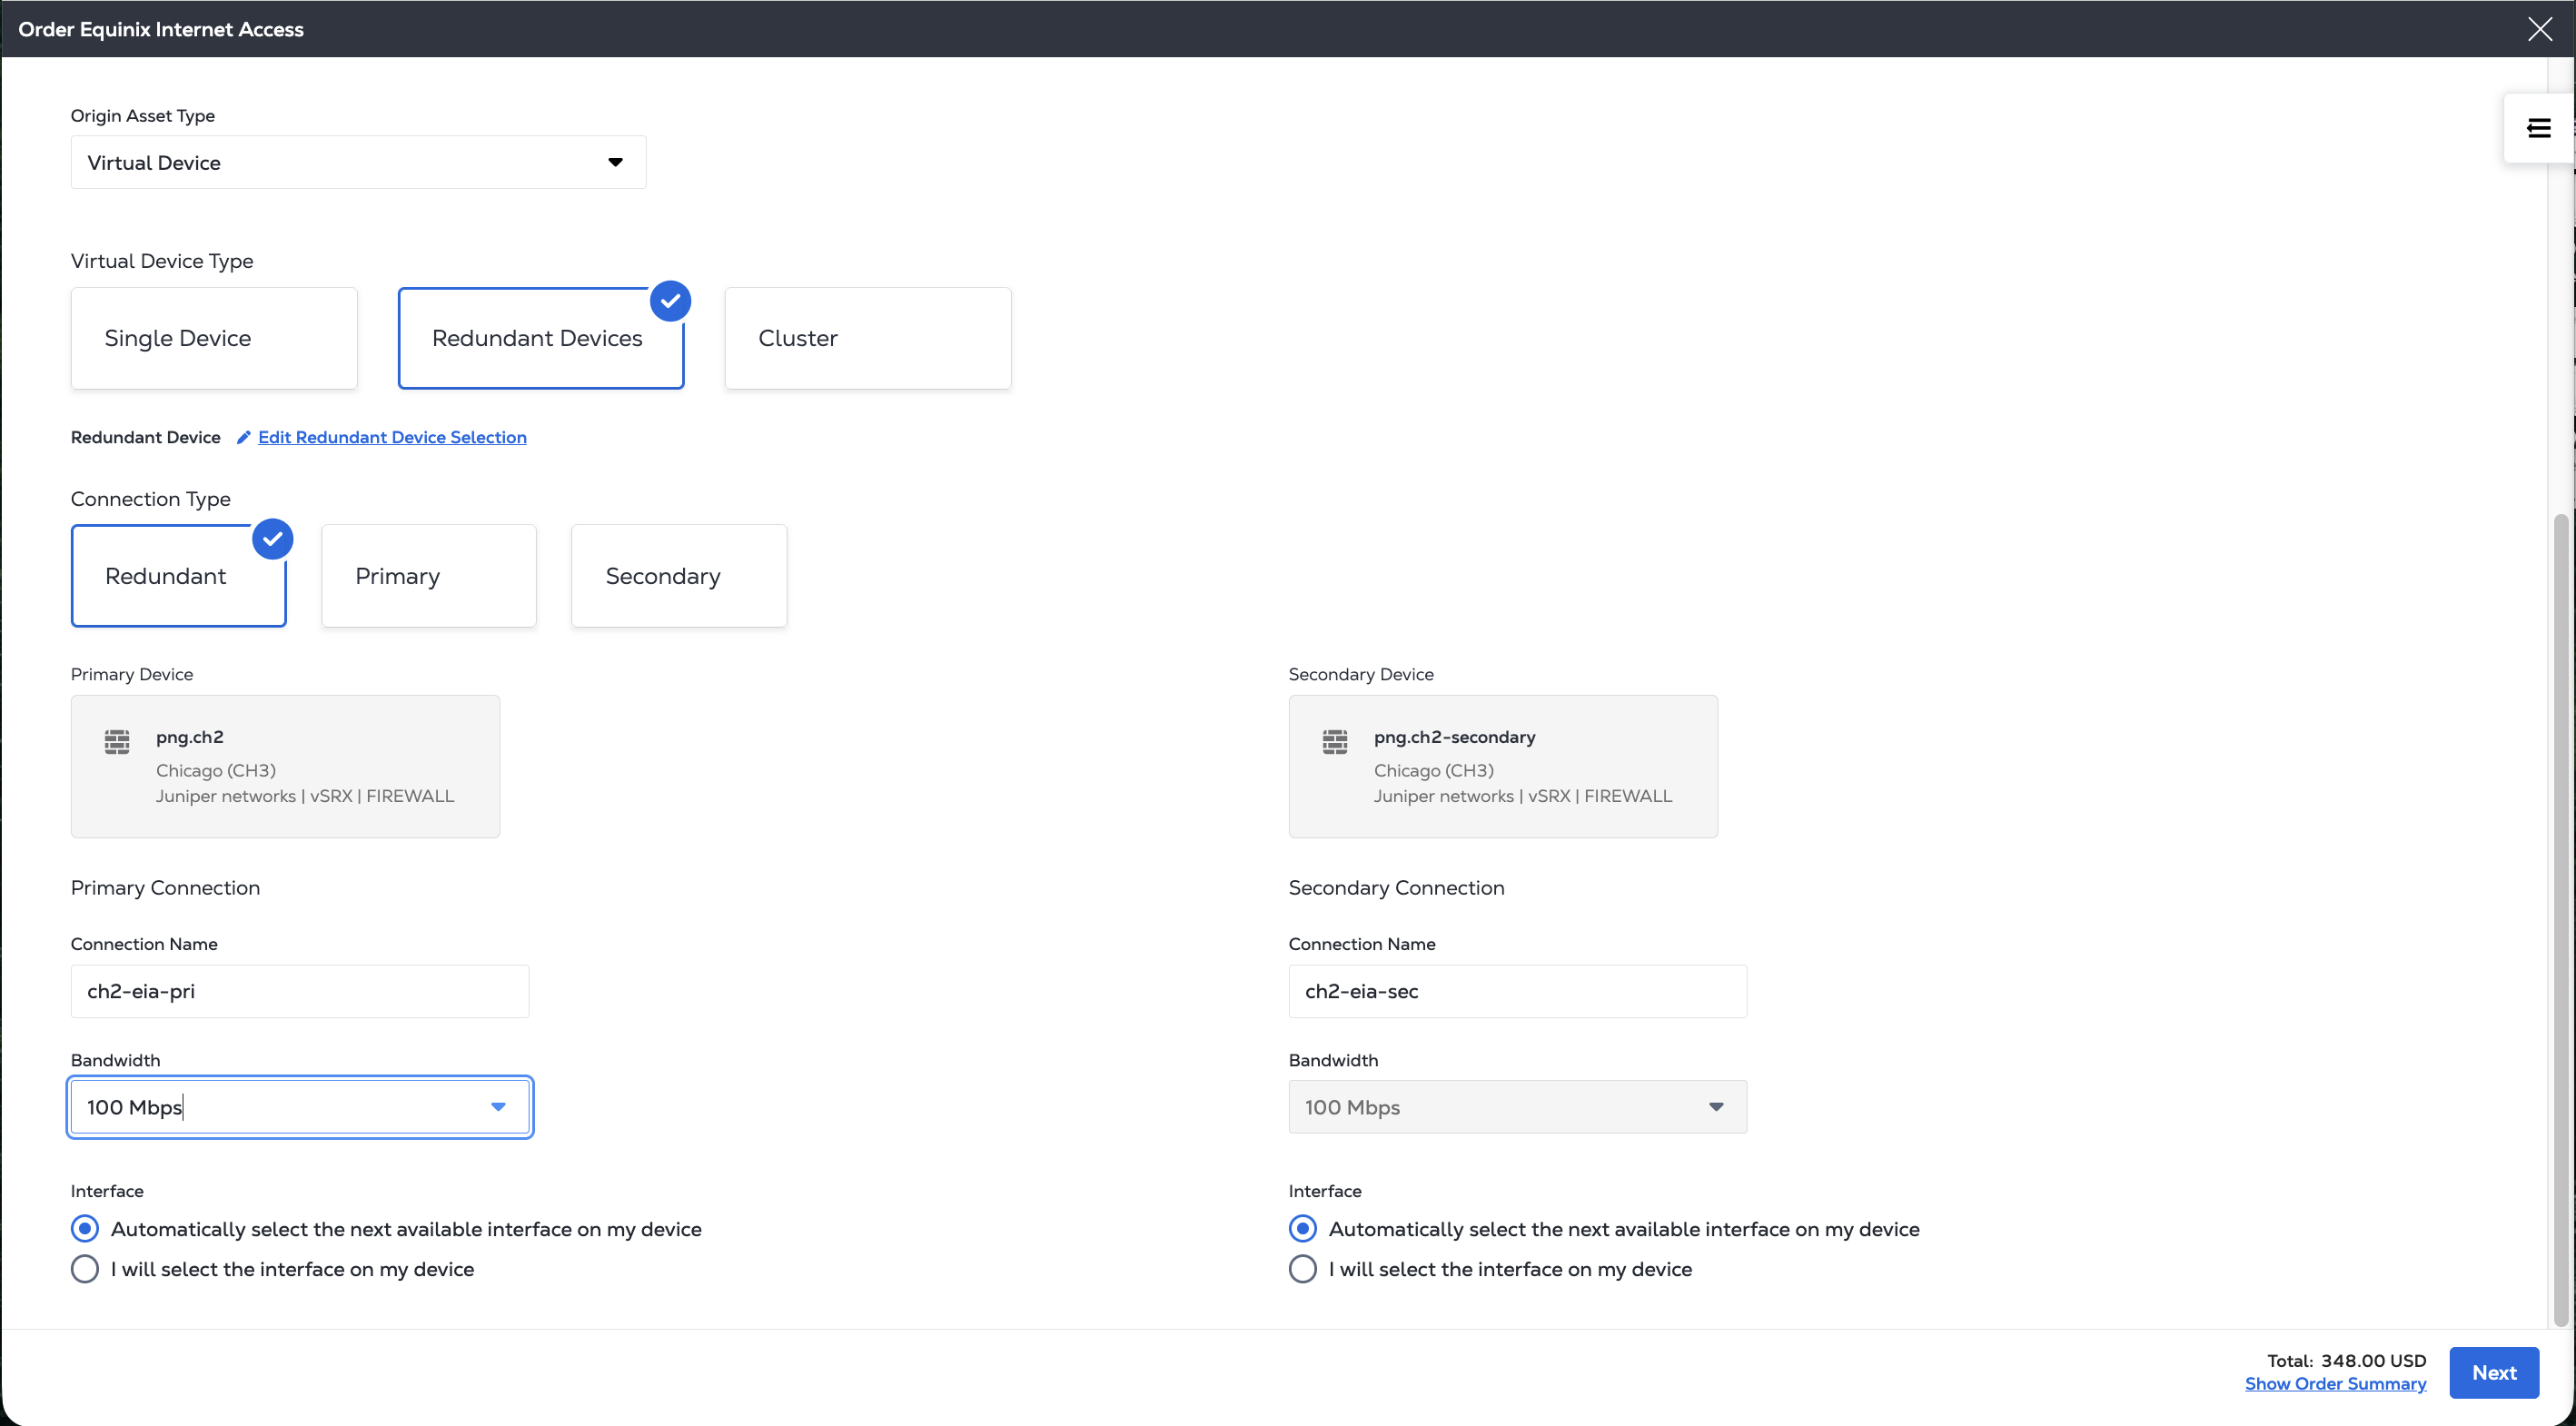
Choose the Virtual Device Type from: Single Device, Redundant Devices, or Cluster.

Internet Access supports single and dual connections on Network Edge devices, including a single independent connection for each device in a cluster pair or a redundant pair, and end-to-end resilient secondary (redundant) connections for clusters and redundant devices.
-
Select the device or devices. From the Select Device panel, choose the specific devices to use. Filter the list by clicking Show eligible Virtual Devices only. Click Select Device.
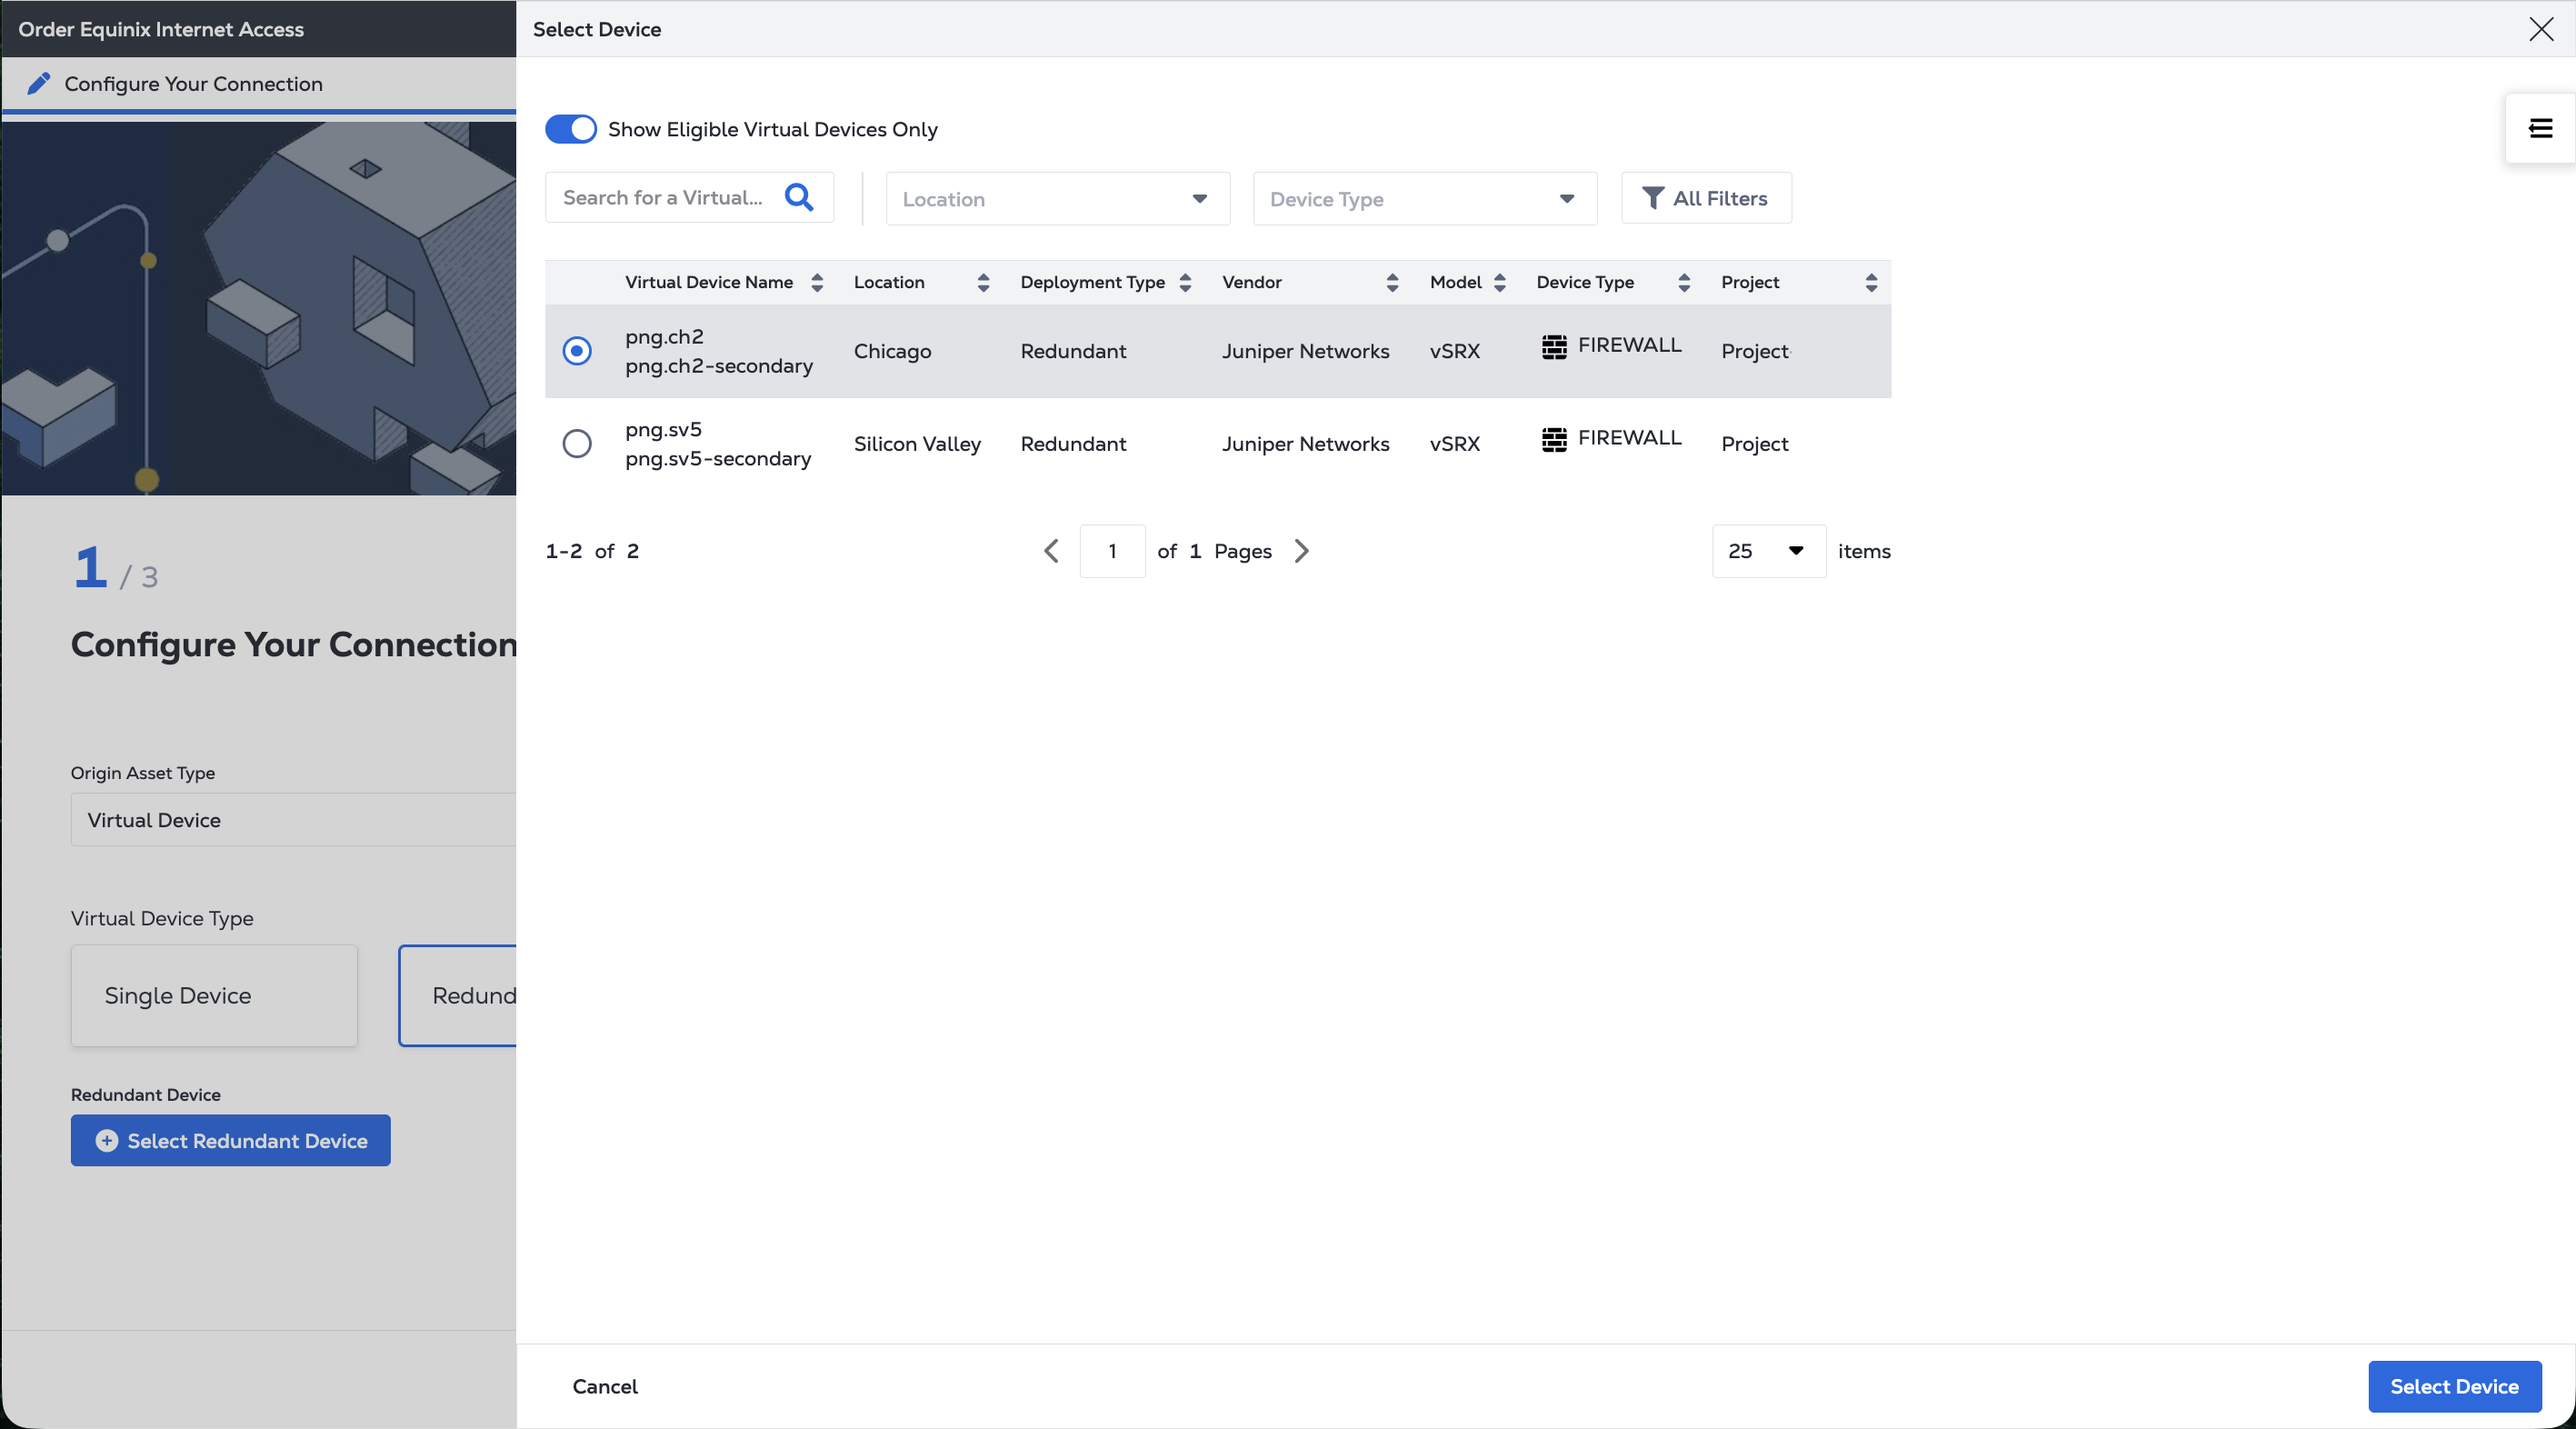
-
If you chose Redundant Devices or Clusters, select connection type:
- Redundant - Single EIA service with two connections to Virtual Device within same Metro.
- Primary - Single EIA service with primary connection to Virtual Device.
- Secondary - Single EIA service with secondary connection to Virtual Device.
-
For each connection:
- Provide a Connection Name.
- Select the connection's Bandwidth. If it is a redundant connection, the bandwidth must be the same for both primary and secondary connections.
- Choose between Automatically select the next available interface on my device or I will select the interface on my device.
-
Click Next to specify Your Internet Access service.
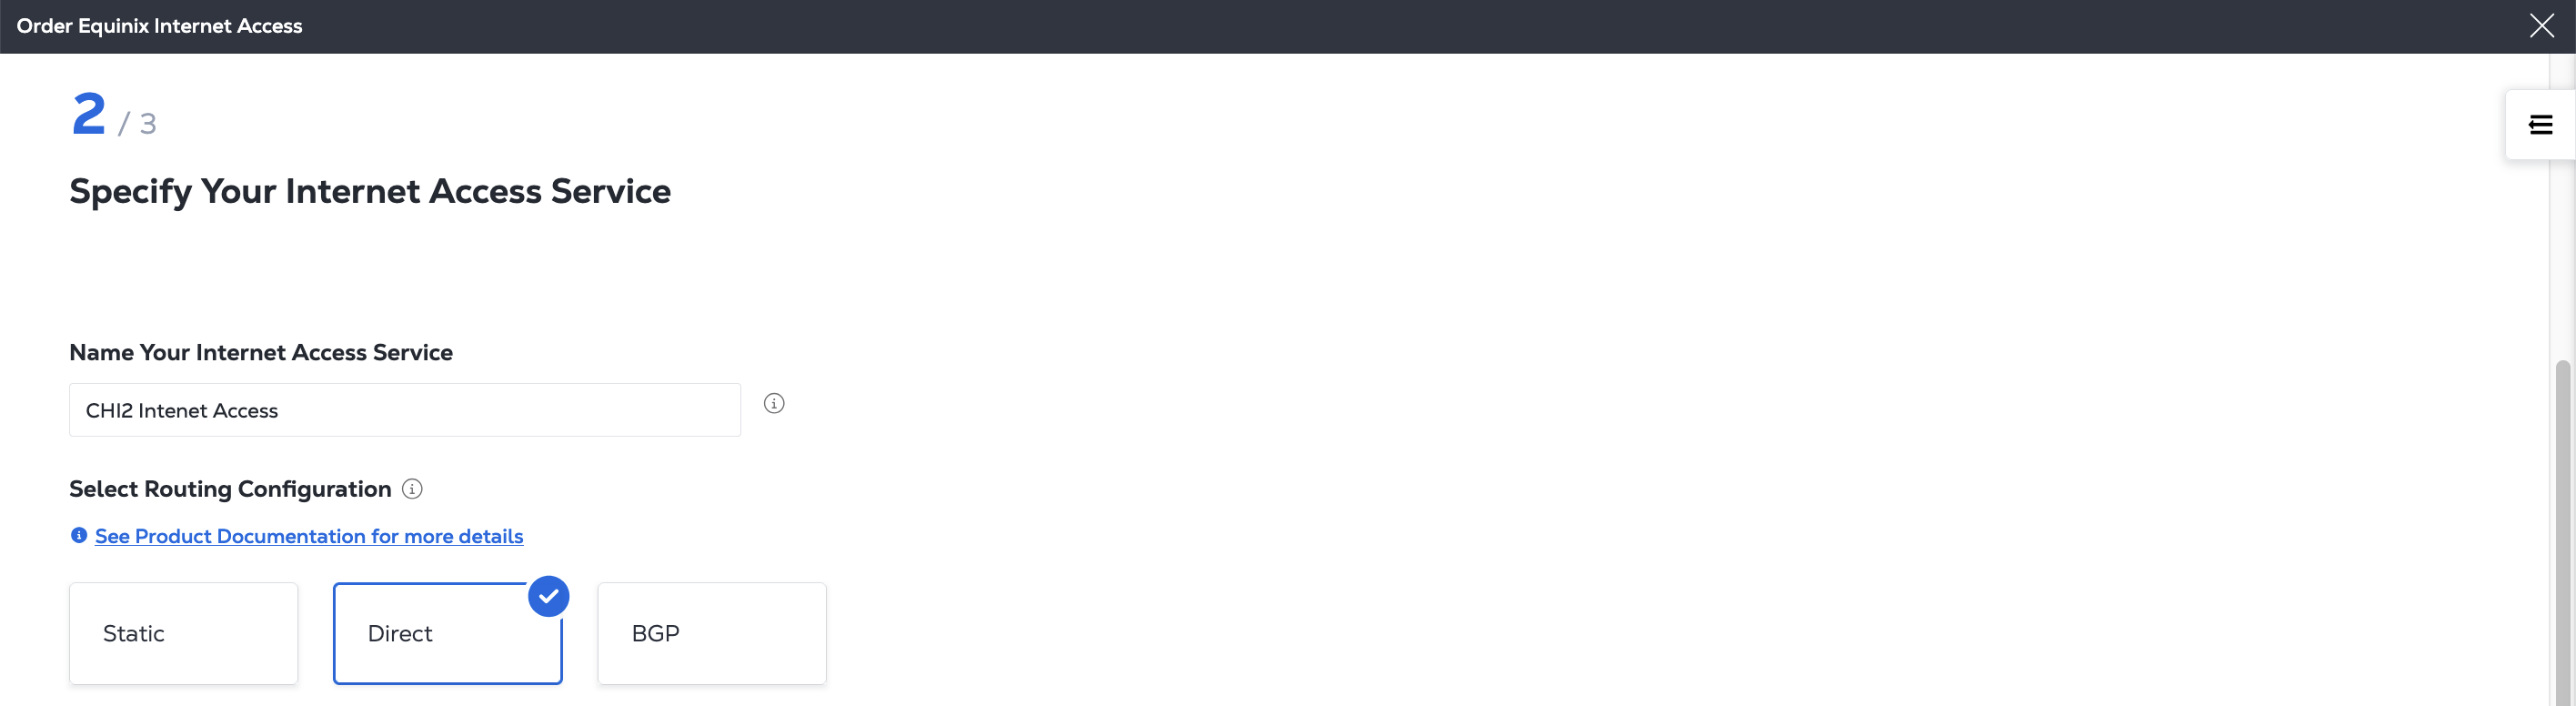
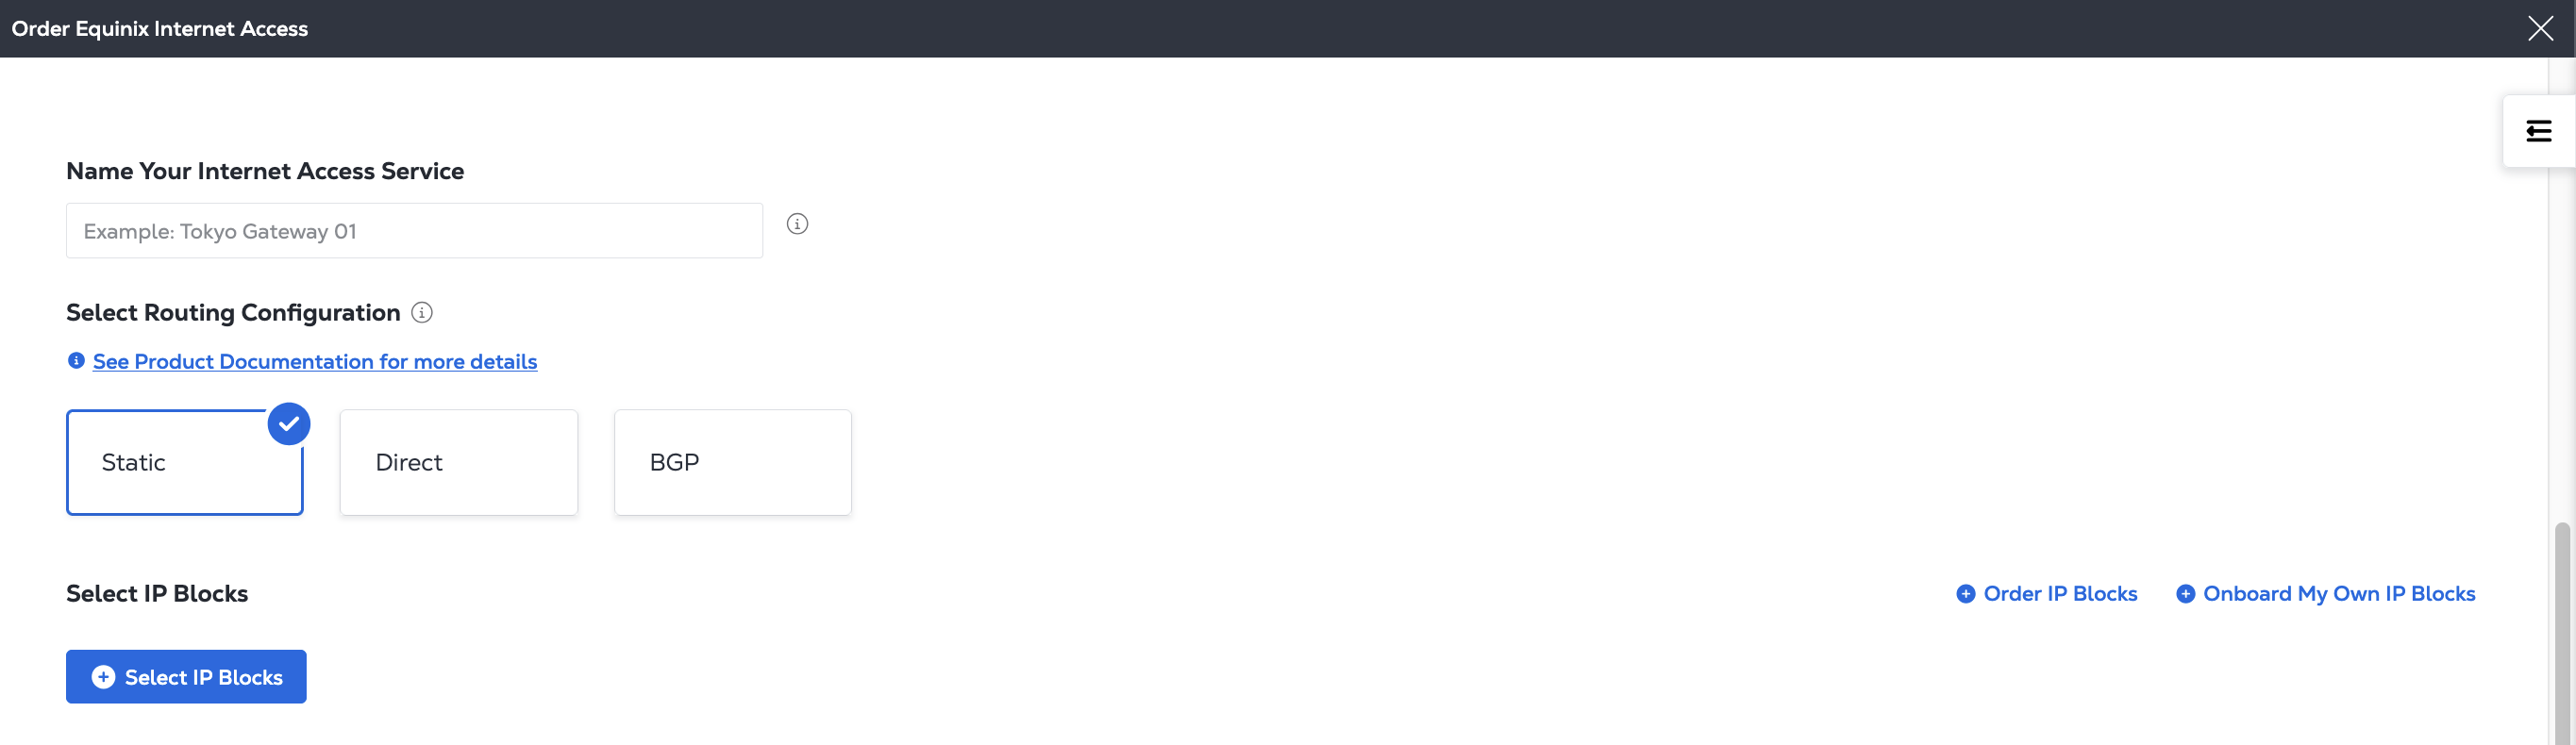
Specify Your Internet Access Service
-
Enter a name for your Internet Access service.
-
Choose a Routing Configuration.
-
Static Routing - Static routing is practical for a single network communicating with one or two other networks where you maintain the routing table manually. It is also commonly used for specific purposes, such as routing traffic to a default gateway or configuring specific routes for security or performance reasons. For more information, see Static Routing.

-
Direct Routing - Suitable for when devices on a network to communicate with each other directly and where all devices are connected to the same network segment or subnet. Direct Routing does not support Mixed IP addresses. For more information, see Direct Routing.
-
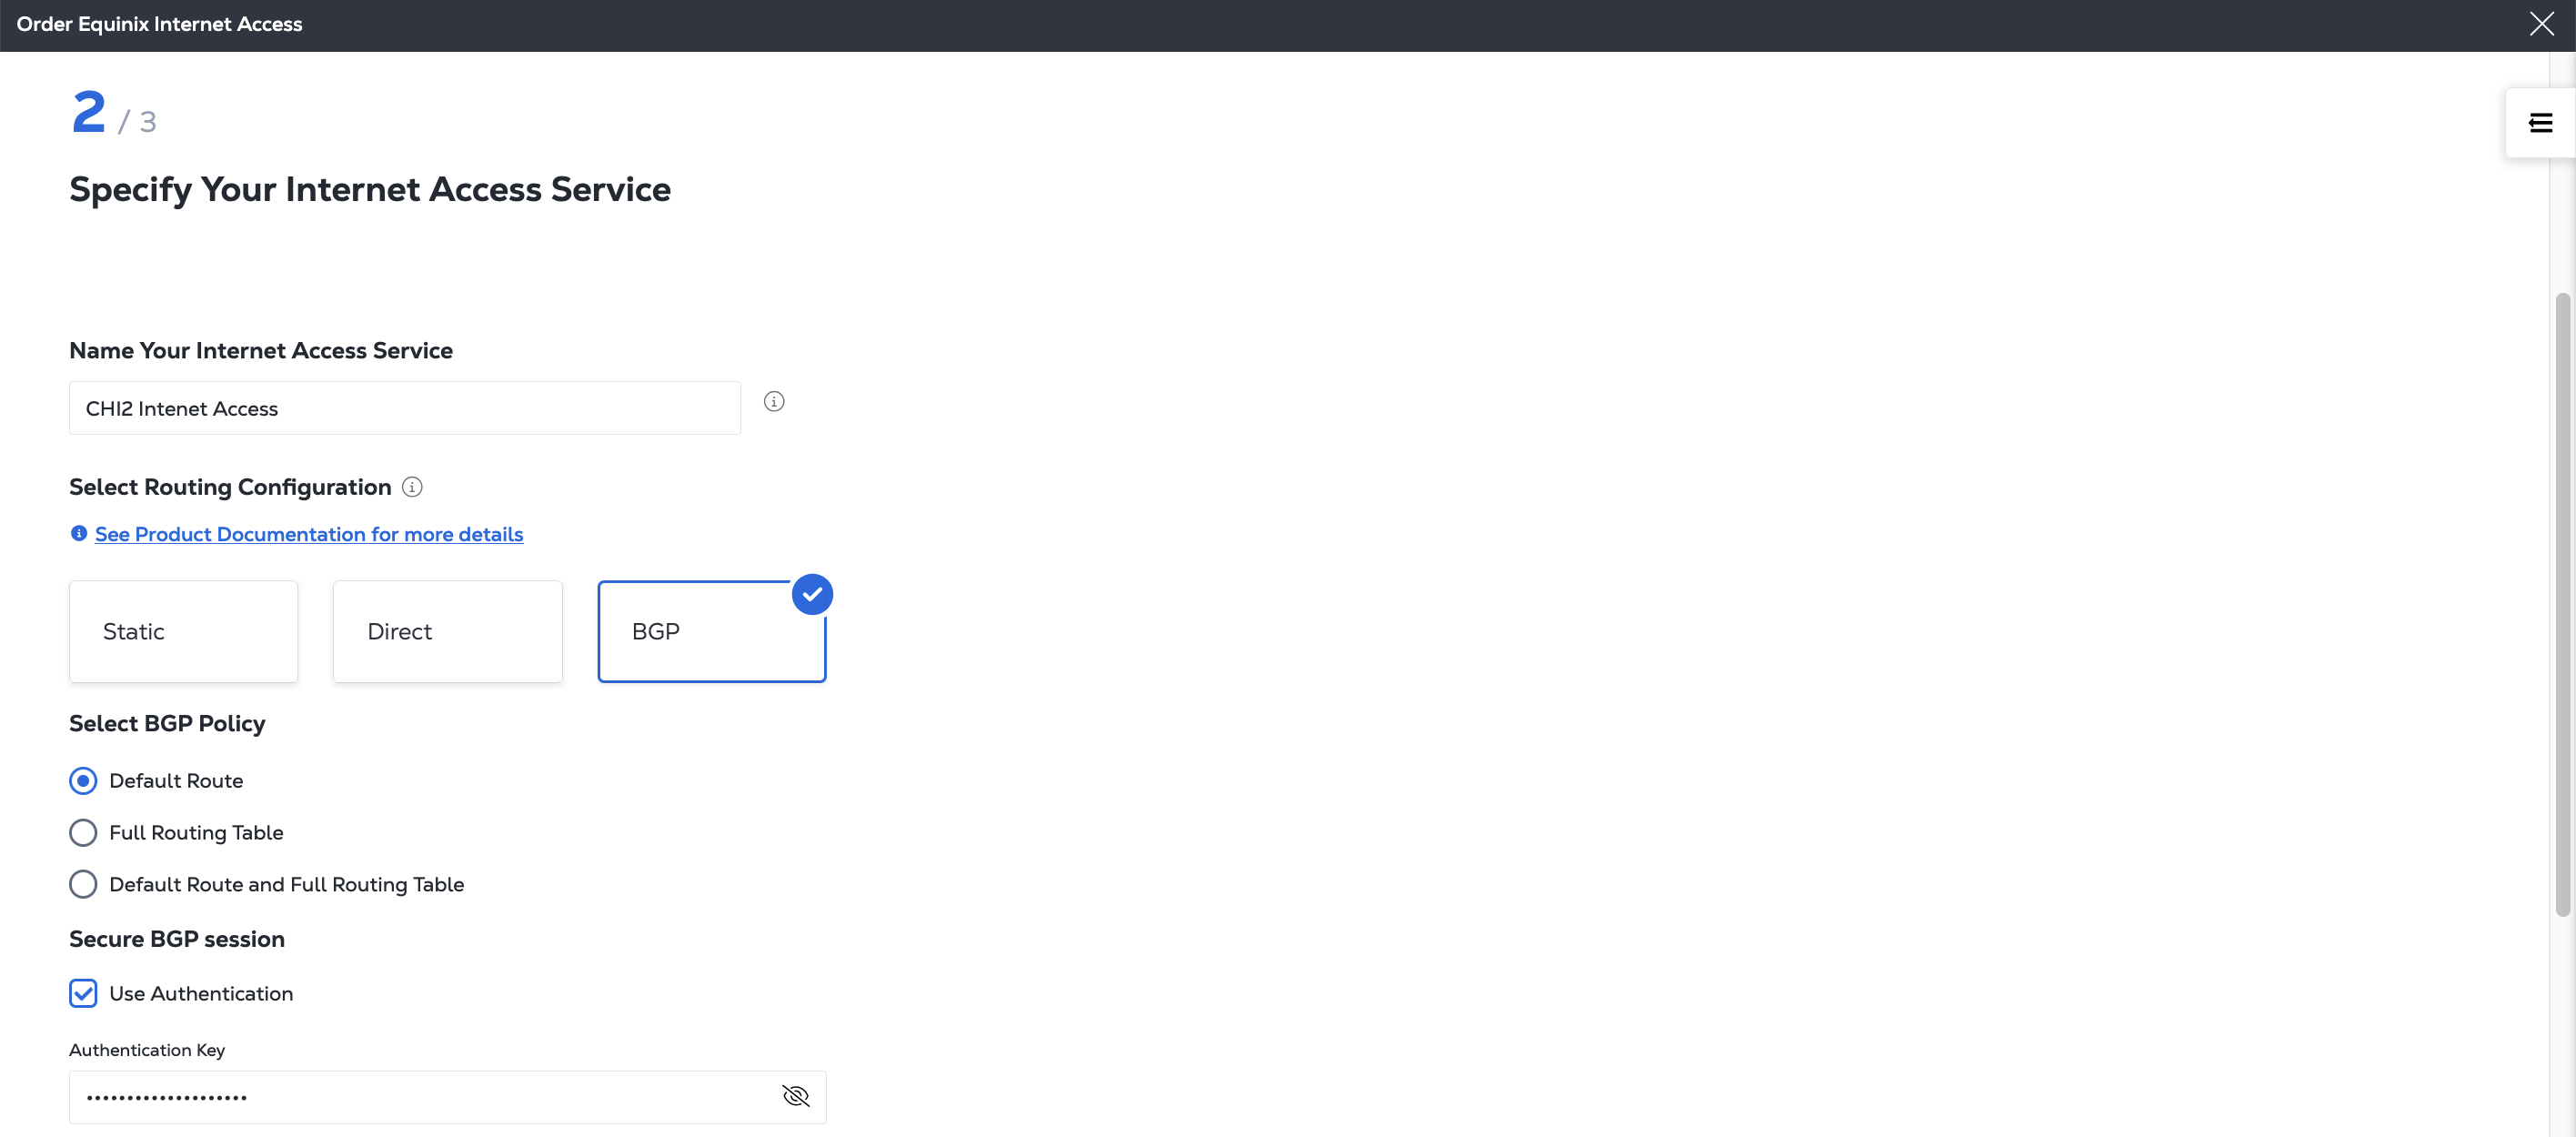
BGP Routing - Suitable for if you want to use BGP to manage your network routing. You also need to select your BGP Routing Policy and whether to use BGP Authentication. For more information, see BGP Routing.
-
-
Select your IP Blocks.
Internet Access supports three types of IP address block configurations for your service:
-
Equinix-provided IPs - Equinix assigns and leases public IP addresses to you. This option is ideal if you do not have your own IP space or want a quick setup.
-
Your Own IPs - You supply your own public IP address blocks. This option is best for businesses that already own IP blocks and want to maintain control.
-
Mixed IPs - Combines both Equinix-provided IPs and your own IPs. Useful for hybrid deployments or gradual migration. Not supported for Direct Routing.
More information on these IP address options, including details for how to bring your own IPs, is on the IP Address Allocation page.
If you do not currently have any IP Blocks, you can order Equinix-owned IP address blocks by clicking Order IP Blocks or you can register IP address blocks that you own by clicking Onboard My Own IP Blocks.
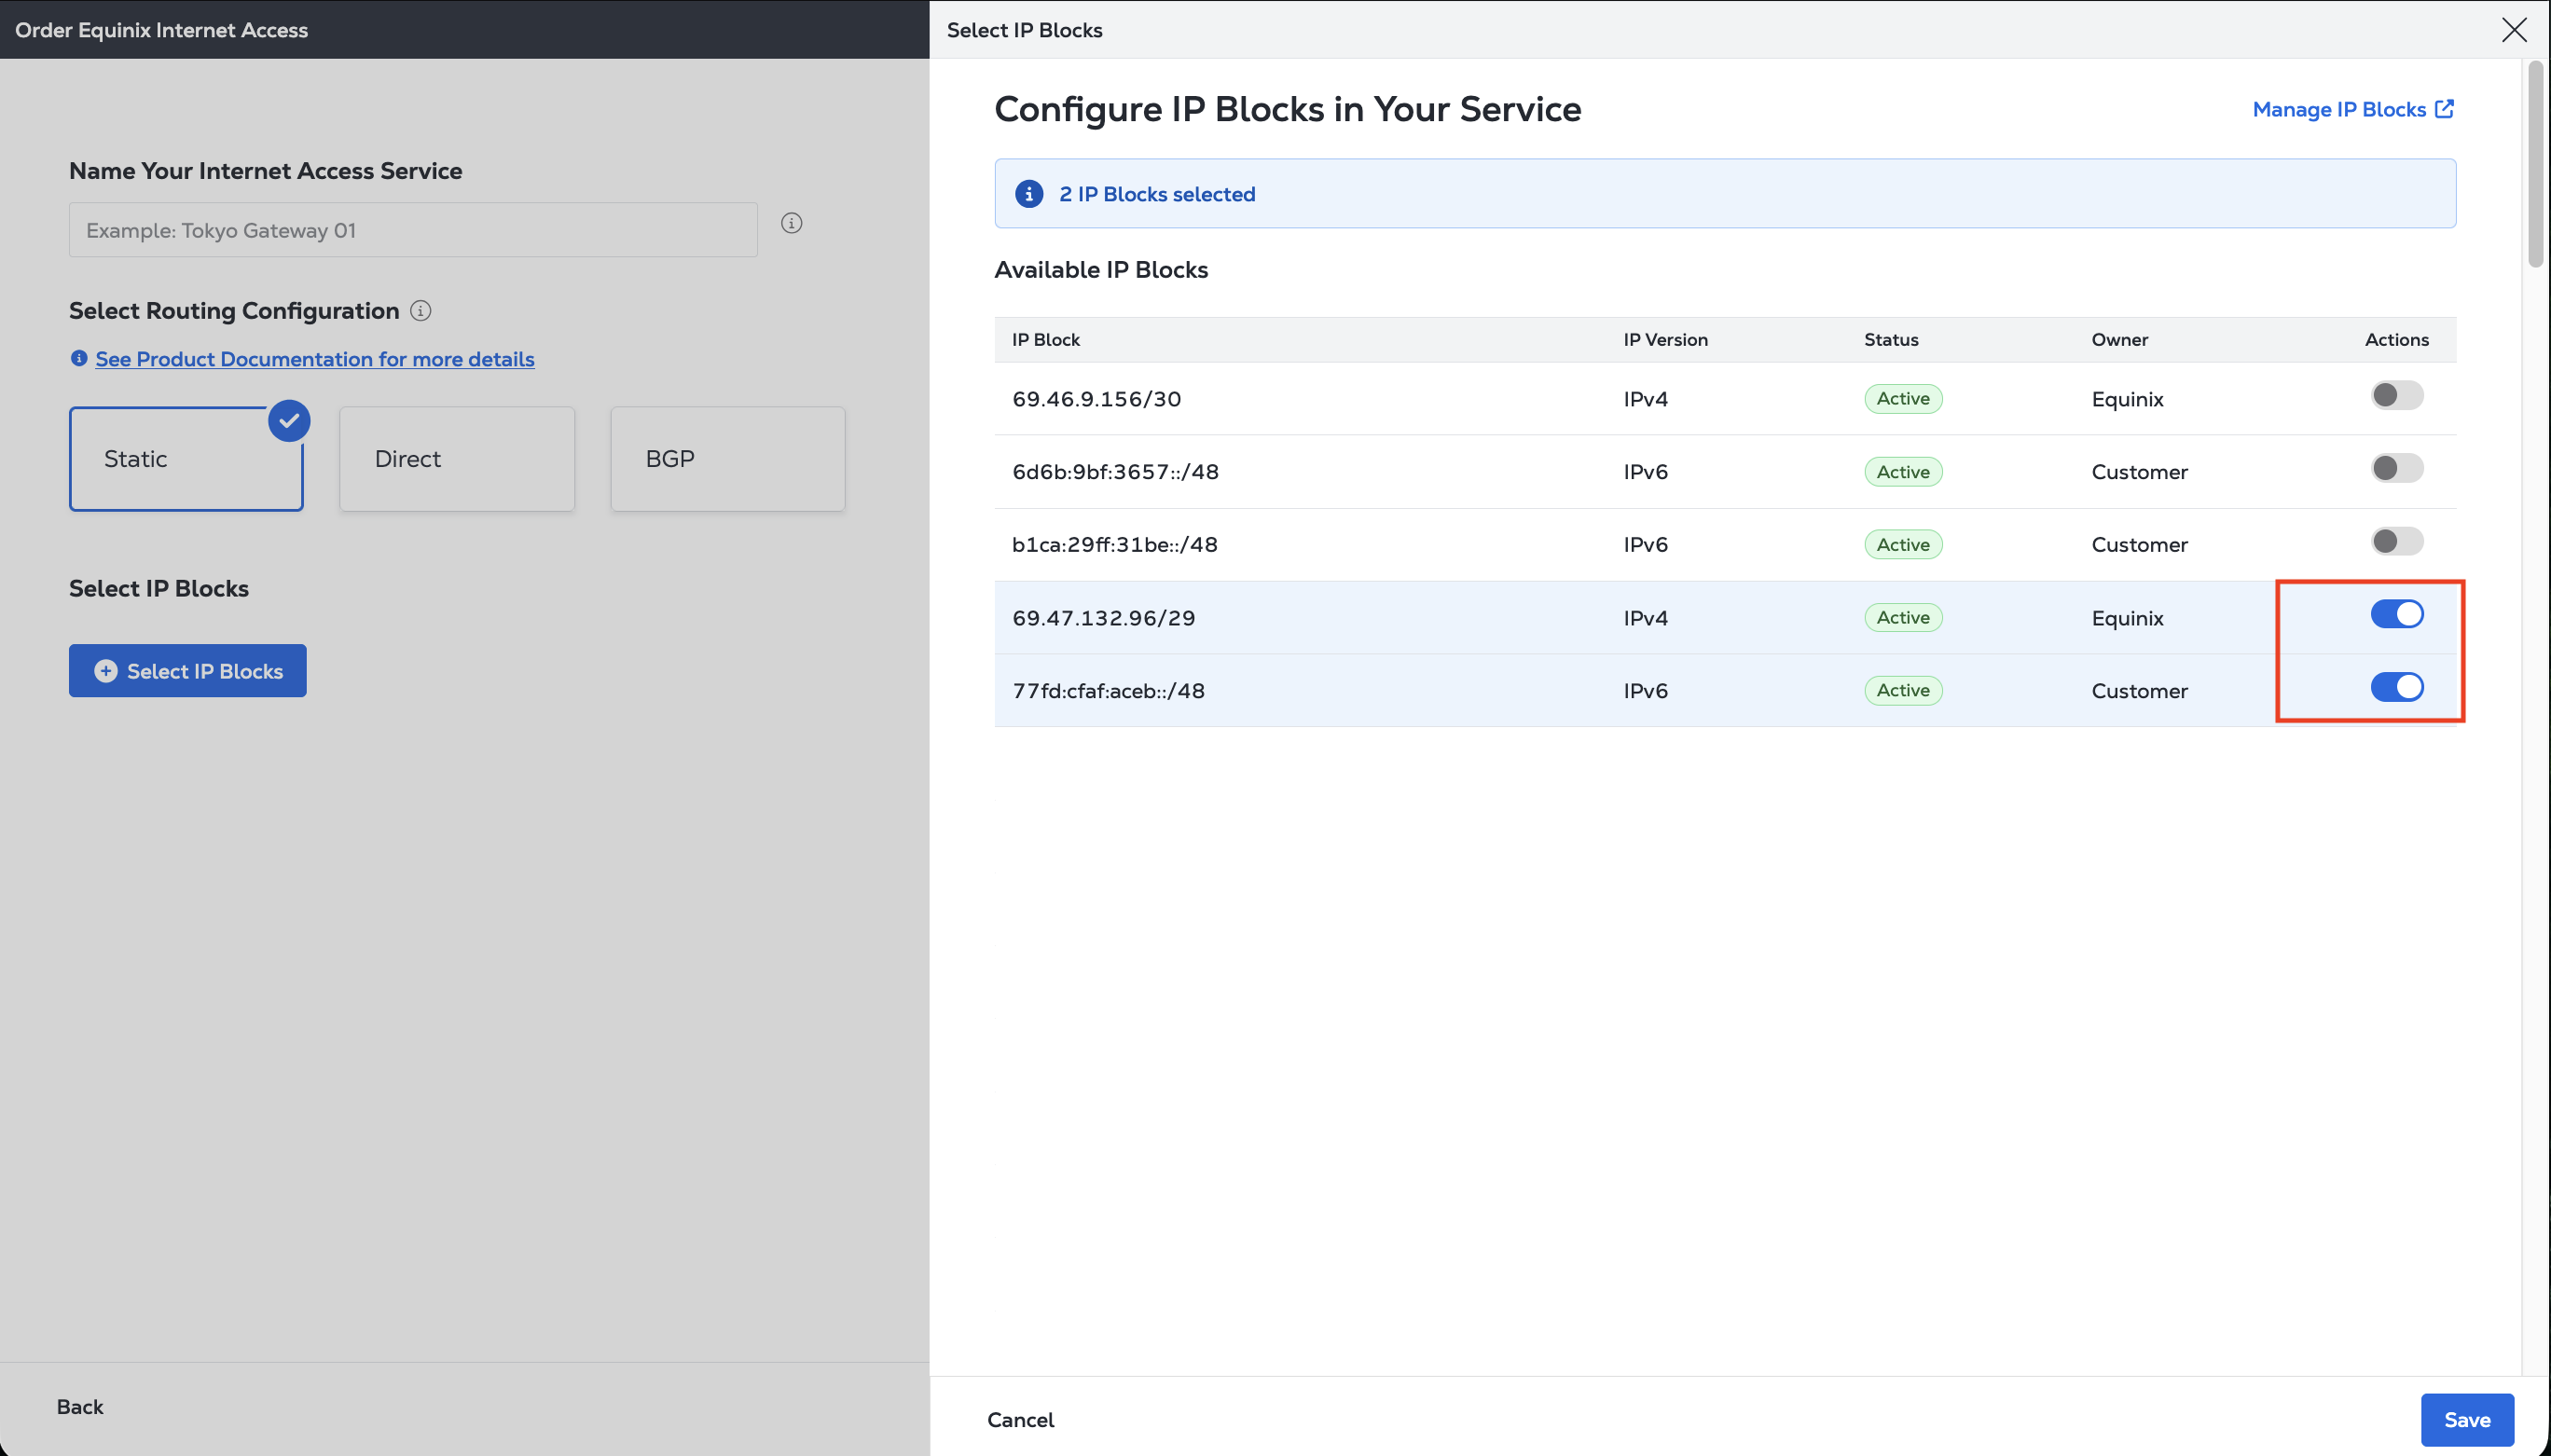
To add IP address blocks to your service:
- Click + Select IP Blocks.
- Locate the IP address blocks you want to use for your service from the list of Available IP Blocks.
noteIf you do not see your desired IP address block, or you need to add an IP address block, click Manage IP Blocks to view, add, or your IP Blocks.
-
Click the toggle in the Actions column. Only active IP address blocks that are not in use by another service can be added.
-
Click Save.
-
-
Click Next.
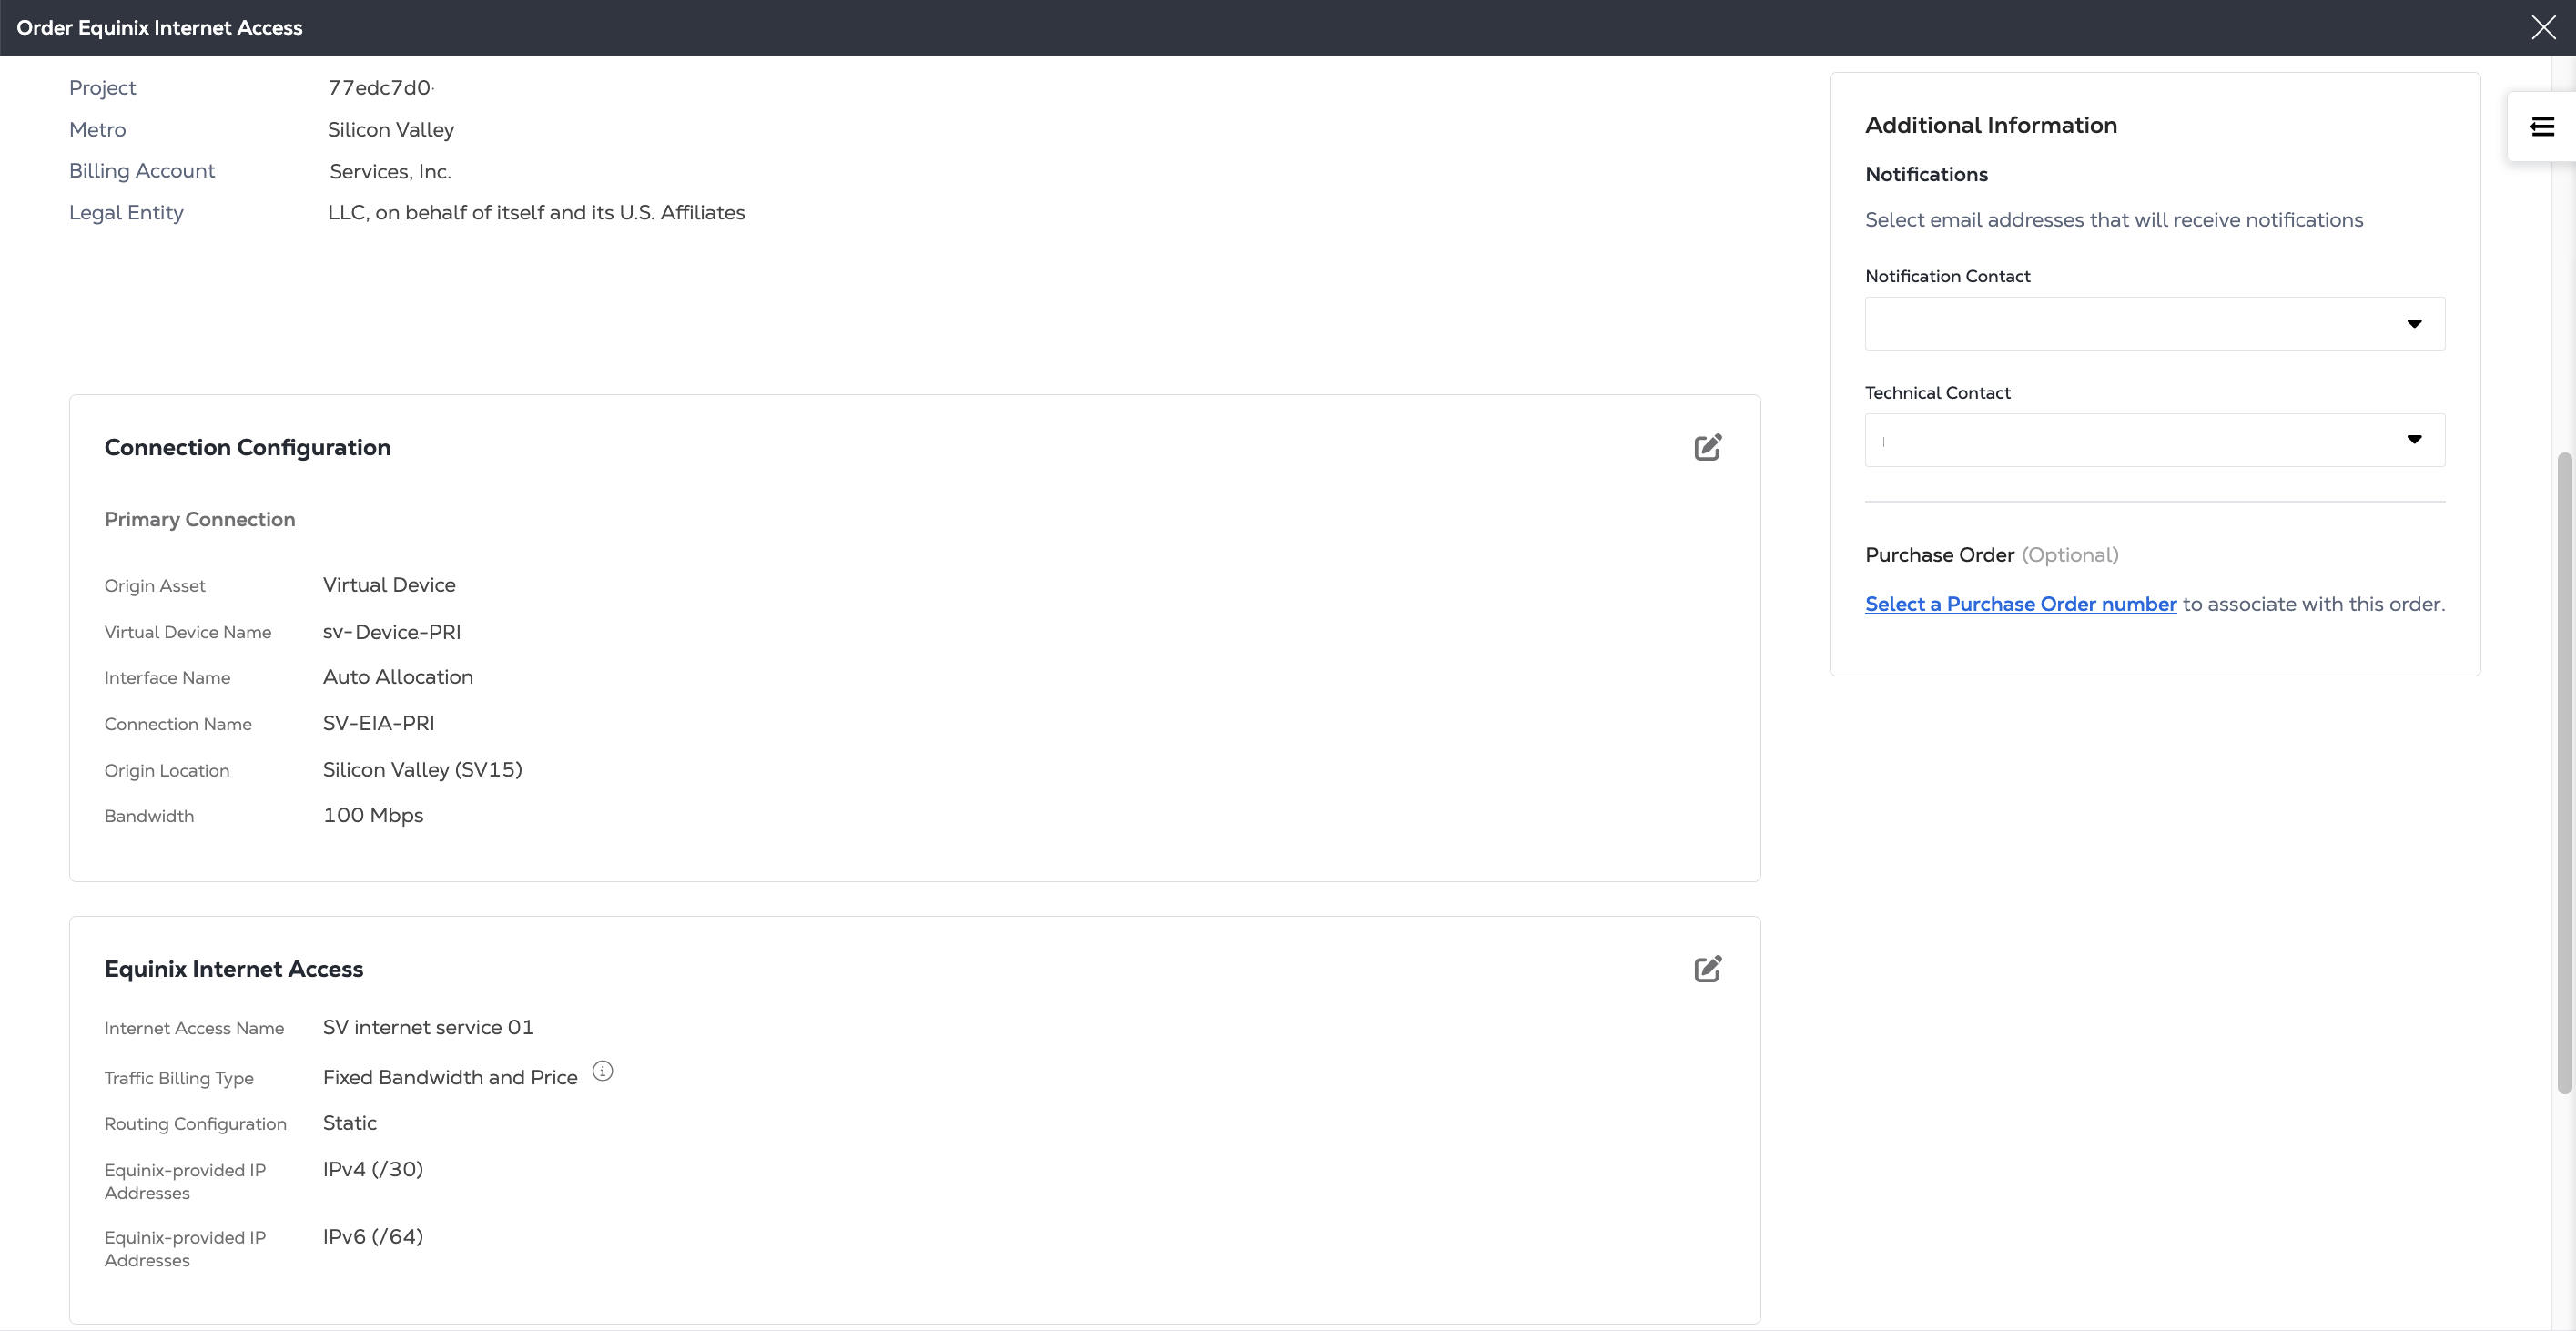
Review Order and Additional Information
-
Review the Project, Metro, and Billing Account information for this order.
-
Review the information in the Connection Configuration and Equinix Internet Access sections.
-
Review the email addresses in the Notifications section. You can enter up to 12 addresses to receive updates about this order.
-
To add a Purchase Order (PO) to this order, click Select a Purchase Order number in the Purchase Order section. Choose a PO from the list of valid numbers. If your billing account requires a PO (also known as a PO bearing account), you must complete this step.
Submit
-
To review the terms for this order, click Review Terms and Conditions.
-
Read the text in the Order Acknowledgement section. Click I Accept.

-
Click Submit Service.
A status message shows the progress of your new connection. You can view and manage your new service in Your Internet Access Inventory.