
Using the Digital LOA Manager, a Z-side user can create a Letter of Authorization (LOA) quickly by entering information into an online form. This generates a Digital LOA (DiLOA) efficiently and accurately to distribute through the Cross Connects approval process.
Create a Digital LOA Video
An LOA must be generated and approved before a Cross Connects connection can be created.
Important: For instructions on using the digital LOA to order a new connection, see the steps for uploading an LOA file in Cross Connects documentation.
In addition, A-side customers can use the Digital LOA Manager to create and view the details of their authorization requests.
Create a Digital LOA
-
Enter your username and password into the Equinix Customer Portal, then click Sign In.
-
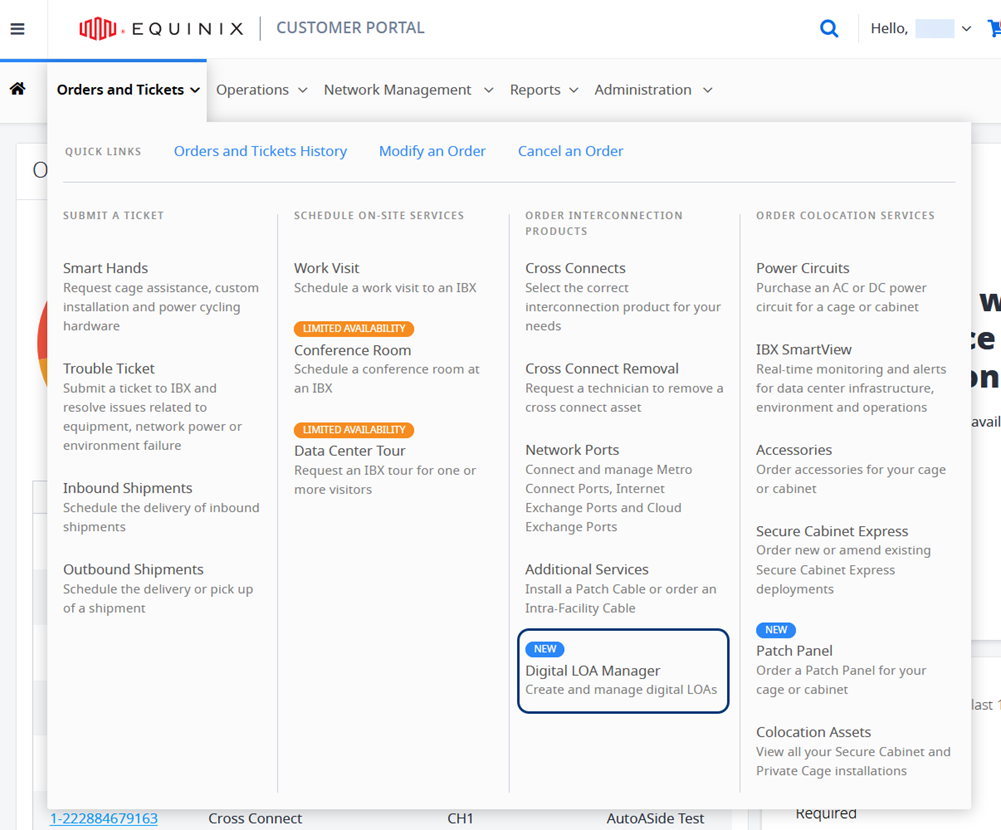
From the Orders and Tickets menu, choose Digital LOA Manager.

The Digital LOA Manager is displayed.
-
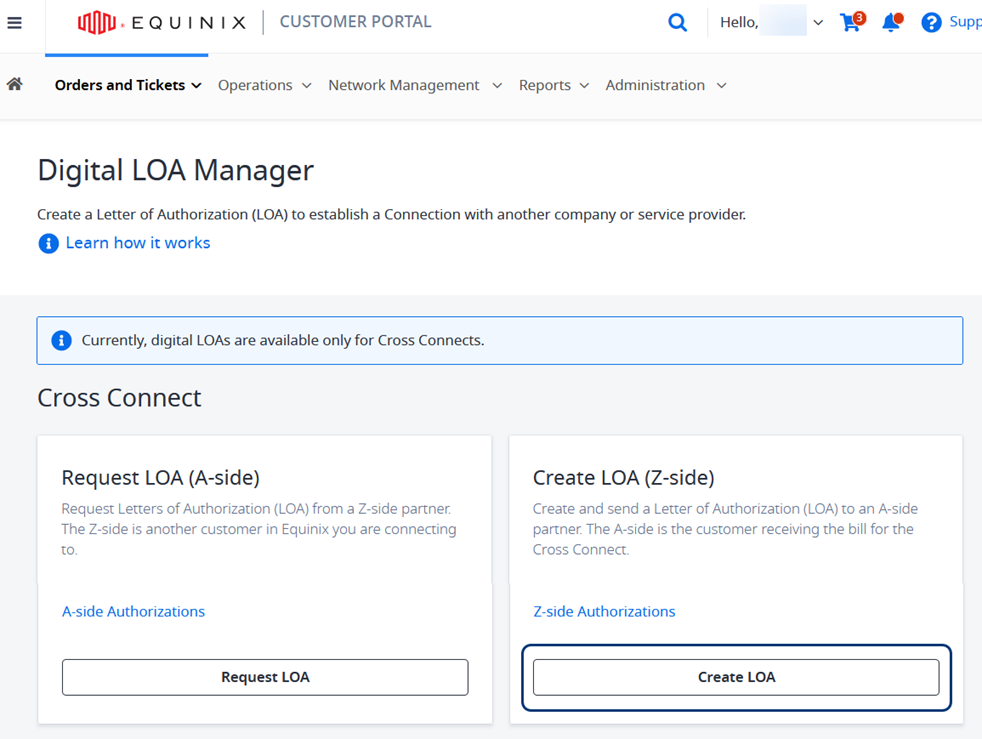
In the Digital LOA Manager, in the Create LOA (Z-side) card, click Create LOA.

The Create Digital LOA form is displayed.
Note: If you received an email request for an LOA from an A-side partner, and you clicked the provided link, complete the following sections to generate the requested DiLOA.
Create a DiLOA Based on a Request Video
Important: In the following steps, the Digital LOA Manager offers choices based on the assets that are assigned to your organization and your account. The values that are displayed are the ones that are available for your situation.
Partner Selection and Connection Details
-
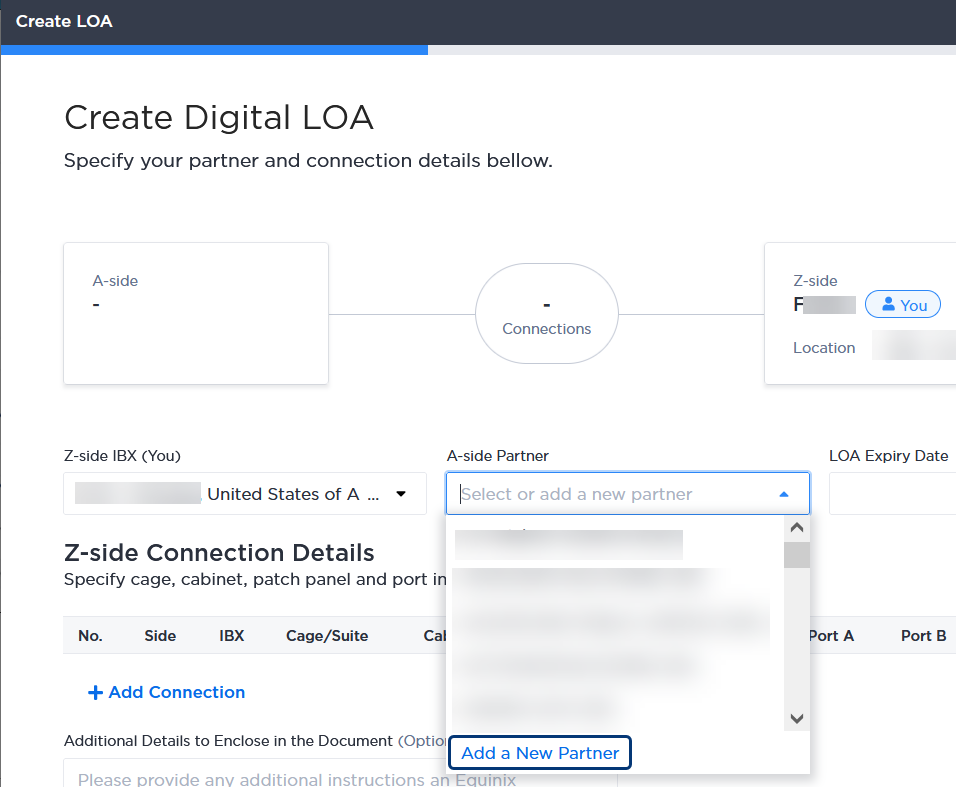
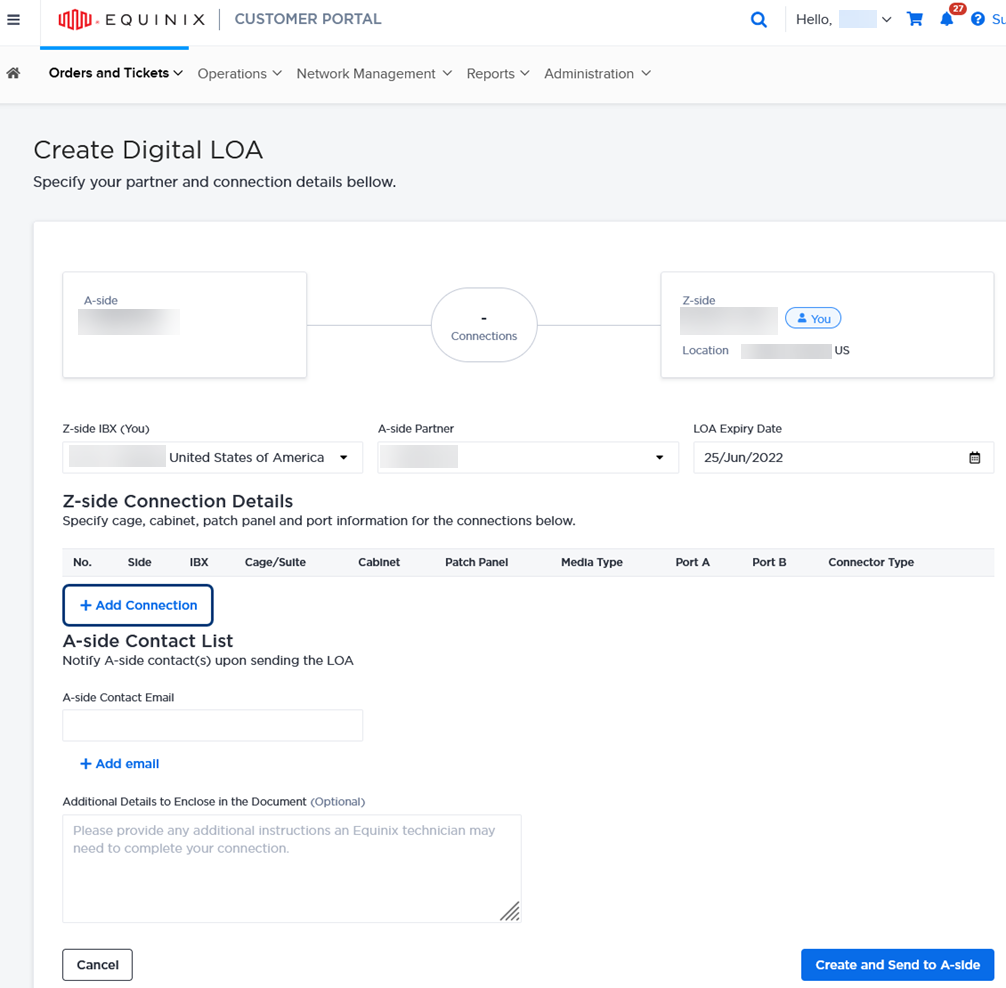
Choose a Z-side IBX and an A-side Partner from the drop-down lists.
-
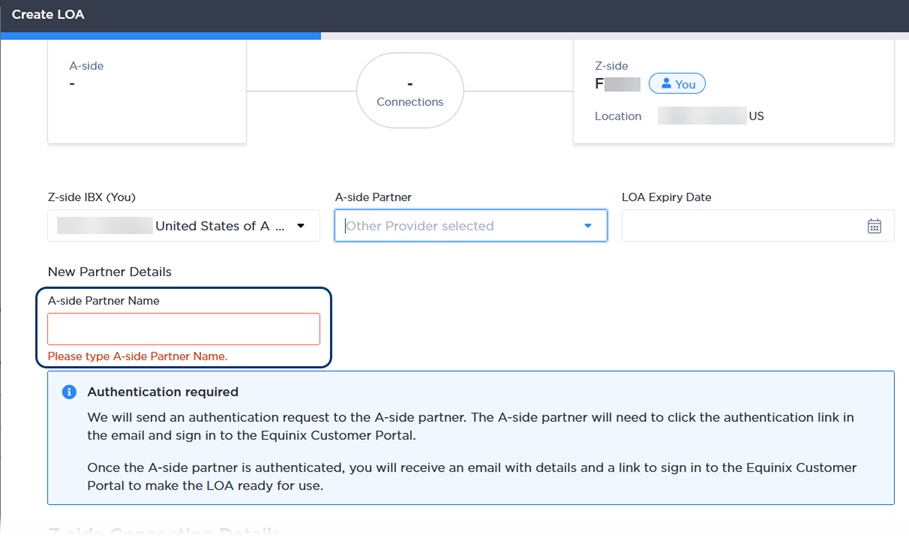
If your A-side partner is not included in the drop-down list, choose Add a New Partner.

-
Type the new name in the A-side Partner Name field.

Note:To add a new A-side partner, two-step authentication is required.
-
The A-side partner receives email that contains an authentication request. The A-side partner must click the authentication link in the email and sign in to the Equinix Customer Portal.
-
After the A-side partner is authenticated, you will receive email with details and a link to sign in to the Equinix Customer Portal to make the LOA ready for use.
-
-
Enter an expiration date for the LOA in the LOA Expiry Date field.
-
Enter a calendar date that is within 100 days.
-
Allow enough time for your A-side customer to approve the LOA and use it to order Cross Connects.
-
-
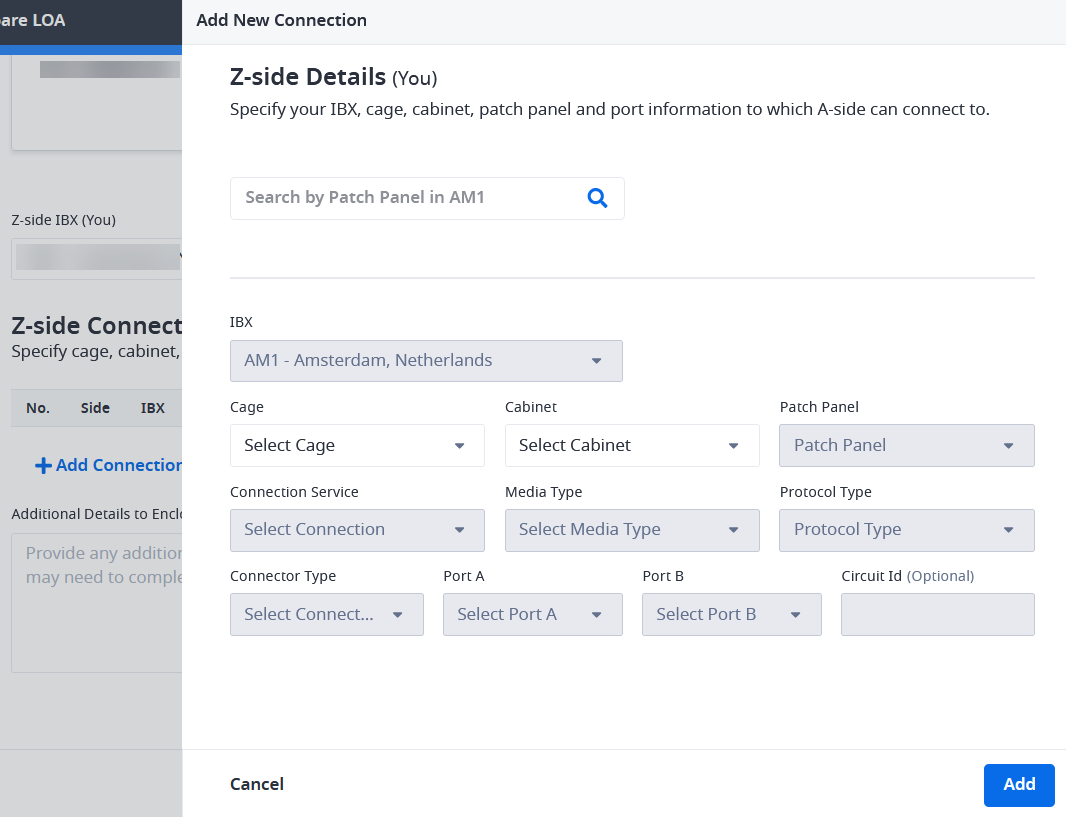
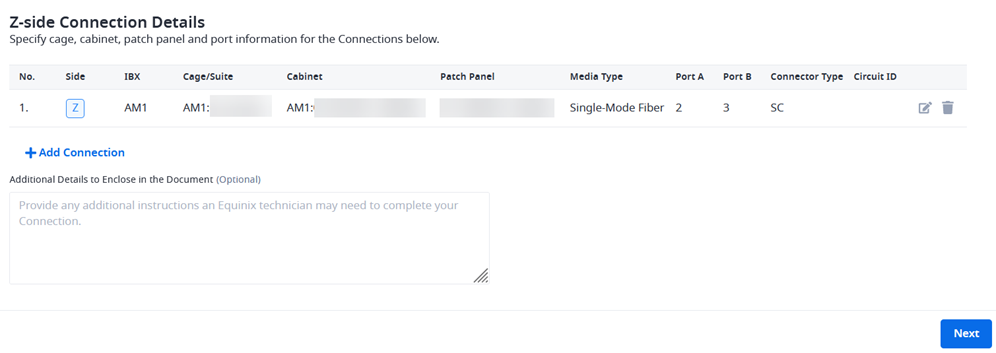
In the Z-side Connection Details section, click Add Connection.

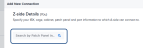
The Z-side Details (You) form is displayed on the right.

-
Provide details about the Z-side connection:
-
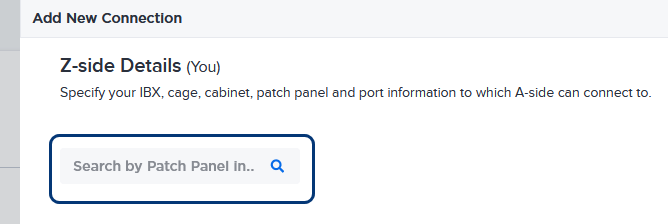
If the patch panel identification number is available, enter it in the Search by Patch Panel field.
The fields for IBX, cage, patch panel, and port information are automatically populated.
-
If you do not know the patch panel number, from the drop-down lists, choose a Cage, Cabinet, Patch Panel, Connection Service, Media Type, Protocol Type, Connector Type, and ports A and B.
Enter a Circuit ID.
Note: After you reserve a port using this form, that port is no longer included in the drop-down list for future LOA use. Also, the number of ports available in the Patch Panel drop-down list is reduced.
-
-
Click Add in the lower right corner of the form.
The new Z-side Connection Details are listed.
-
Repeat steps 4-5 to create more additional connections, up to 10.
Note: You must configure the additional connections to use the same media type as the first connection.
-
Enter any Additional Details that might be helpful to an Equinix technician.
-
Click Next.
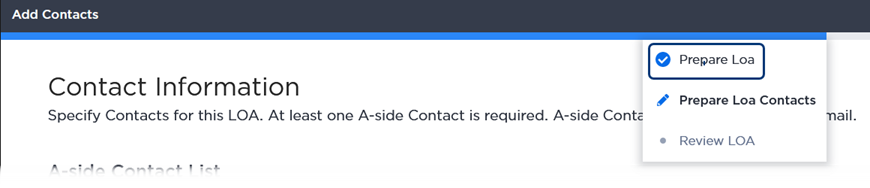
Note:A blue bar is displayed across the top of the page. Mouse over the bar to view a drop-down list that shows your progress in creating the LOA.

A check mark shows that you completed the previous page, Prepare LOA. To return to the previous page to make edits, click Prepare LOA.
Contact Information
-
In the A-side Contact List section, enter an A-side Contact Email.
To add more additional contacts, click Add Additional Email. Once the LOA is created, it's emailed to all the A-side contacts.
-
Click Next.
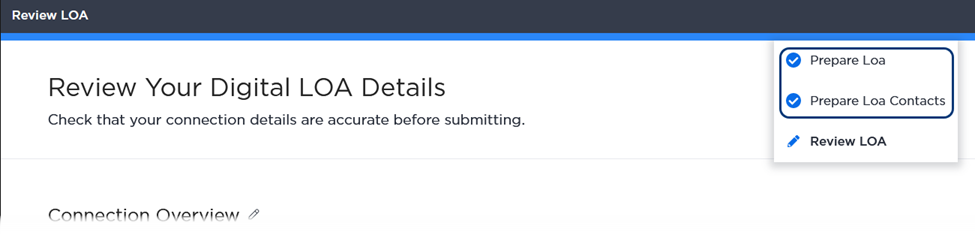
Review Your Digital LOA Details
-
In Review Your Digital LOA Details, verify that the Z-side Connection Details and the Contact Information sections are correct.
Note:To edit this information, you can click the pencil
 in the form, or mouse over the blue progress bar at the top of the page. In the drop-down list, click Prepare LOA or Prepare LOA Contacts to return to the previous pages to make edits.
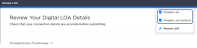
-
Click Create and Send to A-side.
-
Click Create Authorization in the Confirm Create LOA with port allocation window.
A confirmation message displays the LOA Token number and a brief survey. Your A-side contacts receive an email notification that includes the new Digital LOA as a PDF attachment.
LOA Summary
Once the confirmation message is displayed, you can view details about this new LOA in the Z-side Authorizations page.

In the LOA Summary window, click the Track LOA link to see this new LOA listed in the Z-side Authorizations page. Depending on the output, the Digital LOA status is set to Ready for use or Pending Requestor Acceptance.
