
Prosimo Connector Device Video
This topic explains how to create and operate a Prosimo Connector. See Prosimo Specifications for more information about the Prosimo Connector.
Important: A supporting device is required for cloud connectivity.
To create a single Prosimo Connector:
- Sign in to the Equinix Customer Portal and navigate to Network Edge.
-
From the Network Edge menu, select Create Virtual Device.
- In the Add New Edge Device section, locate the Prosimo card and click View Description to see the product description and available resource options.
- Click Select and Continue.
Note: Click View Details to see deployment options, device management, resource flavors, license information.
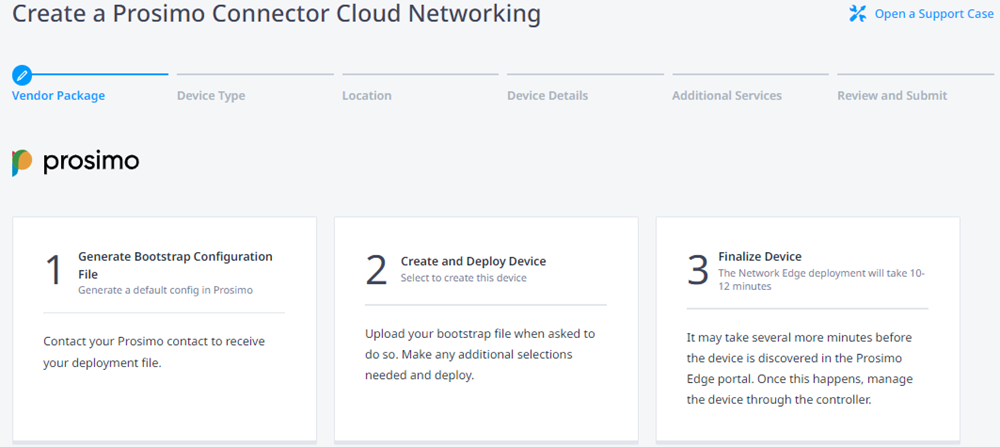
- Before you click Continue, review the steps for creating the Connector device. The Bootstrap Configuration File (a deployment file for Prosimo) needs to be obtained from your Prosimo contact.
- Select a device type (Single or Redundant). If you select Redundant Device, follow the workflow and select the Redundancy option. (Create a new pair of redundant devices or add an additional device to an existing device.)
- Click Begin Creating Edge Devices.
- In the Select Edge Device Location section, click a location.
-
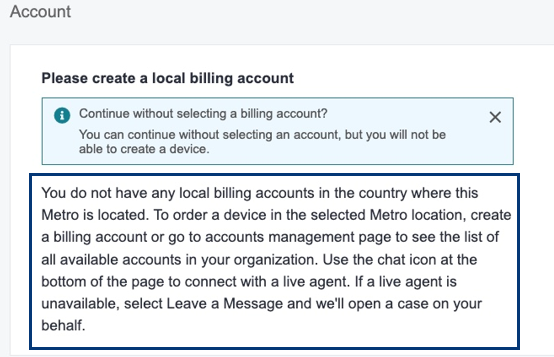
In the Account section, select a billing account from the Your accounts in this metro drop-down.
Note: Metro selection is linked to your billing account country. For example, if you select Silicon Valley for deployment metro, your will need to have a billing account in the United States. If you need to deploy the VNF to a different metro such as Tokyo, you need to create a billing account in Japan.
If you do not have a billing account for the selected metro, a message will display.

To create a billing account, click Go to Account Management, and then click Create New Billing Account. Without selecting an account, you will not be able to create your device. For more information, see Billing Account Management.
-
Click Next: Device Details.
-
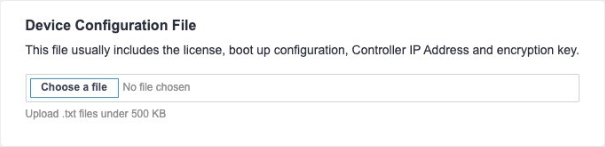
Licensing defaults to Bring your own License. The license along with other configuration variables are included in the configuration file obtained from Prosimo. Upload this file in the Device Configuration File section.

-
In the Device Resources section, select the virtual machine resource type, along with the Software Package and In the Device Resources section, select the virtual machine resource type, along with the Software Package and Software Version. See Prosimo VNF Specifications for more information.
If a software version is being retired within the next 2 months, you will see a
 icon next to the version number. It is strongly recommended that you select a different version because once a version is retired, Equinix will not support it.

-
In the Device Details section, enter:
-
Device Name – The name for the device used to identify it in the portal. Click
 to see the naming rules.
 -
Host Name Prefix – The host name prefix configured for the device. Click
to see the hostname rules. -
Username – The user name for SSH access.
-
-
In the Interfaces section, keep the default number of interfaces available on the VNF. Then you have options to automatically map WAN/SSH interfaces to the next available interface, or manually select a specific interface for WAN/SSH use.
- In the Device Status Notifications box, enter the email addresses of anyone who should receive email notifications regarding device status.
-
(Optional) In the Optional Details box, enter the Purchase Order Number and Order Reference/Identifier.
-
In the Term Length drop-down menu, select a term length.
-
Click Next: Additional Services to add any additional services. The following table summarizes Additional Services options based on the connectivity types.
Configuration With Equinix Public IP Address Without Equinix Public IP Address
Access Control List Template ü N/A Additional Internet Bandwidth ü N/A - Access Control List Template(s) – This access list is used to control ingress traffic toward the virtual device. Access list is applied to the adjacent gateway device where this virtual device WAN interface is connected.
-
Additional Internet Bandwidth – Add between 25 and 5000 additional Mbps of internet bandwidth (for a fee). 15 Mbps of Internet Bandwidth is included free in the package by default.
Note: By default, the communication required for initial bootstrap (DNS, NTP, License Server communication, etc.) is allowed to properly configure the initial VNF configuration. Additional protocols such as SSH need to be intentionally permitted using an ACL template (Custom ACL). If you need to create a template to apply to your device, click Create Access Control List Template. See Configure Access Controls on Virtual Devices for more information.
- Click Next: Review and review your order.
- Click Create-Virtual Device.
| Deployment Type | Description |
|---|---|
| Single | Provision a single device that operates as a standalone device. Another single device can be paired with the existing single device (requires same resource configuration) to form a local redundancy (redundancy in single metro) or geo-redundancy (each device operates in different metro). |
| Redundant | Provision two devices. Each device operates individually, and you are responsible for configuring those in an Active-Active fashion. You have the option of deploying both devices in two different metros (recommended) to achieve distributed architecture or keep both devices in the same metro. |

Note: We strongly recommend adding multiple email addresses so that more than one user receives any notification for this device.
The confirmation screen will display. Click Go to the Device to navigate to the device detail page. After the device provisioning process is complete, you will receive an email notifying you that device provisioning has completed.
