Palo Alto Networks Prisma SD-WAN Device Recovery Process
Palo Alto Networks Prisma SD-WAN device requires users to perform a manual recovery process if the Virtual Network Function goes into an unrecoverable state. This topic provides the vendor-specific instructions for the recovery of the VNF.
For the most up-to-date vendor documentation on the recovery steps, see Replace a Prisma SD-WAN ION Device.
High-Level Recovery Process
- Generate the ION Key and obtain the secret for the key from the Orchestrator.
- Follow the self-guided recovery process.
- Push the new configuration to your new device.
Generate ION Key and Secret
Generate the ION key and secret on your orchestrator. (See the Palo Alto documentation for detailed Instructions.) This key and secret are used in the Equinix Network Edge device detail to start to start the virtual device replacement process.
- Sign in to the Prisma SD-WAN web interface.
- Select System Administration > License Management > [your device model]
- Click Create Token.
- Select Use Type > [Single Use or Multi Use]
- Obtain ION KEY and SECRET KEY from the table.
Self-Guided Virtual Device Replacement Process
-
Sign in to the Equinix Customer portal.
-
From theNetwork Edge menu, select Virtual Device Inventory.
-
Use the filters to find the impacted PAN Prisma Virtual ION SD-WAN device. Make sure you select the correct replacement device from the previous section.
-
Select the device and click the Tools tab in the Device Details.
-
In the Replace Virtual Device section, click Request Replacement.

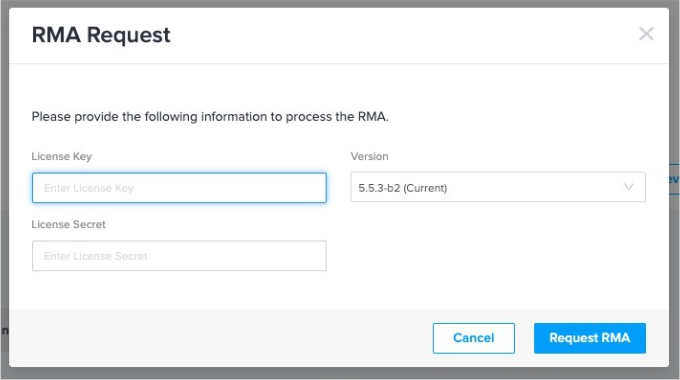
-
Enter the License Key and License Secret obtained in the virtual device replacement process in the PAN Prisma SD-WAN web interface.
-
Click Submit to confirm your request.
 warning
This process can’t be canceled once the request is submitted.
The device card will indicate that your request is in progress.

The device status will indicate Provisioning. After the virtual device replacement process is done, the status changes to Completed with a timestamp. The Provisioning status changes to Provisioned. If any issues prevent the replacement process from completing successfully, the status will indicate to Failed (displayed in red). If you see this failure status, open a customer support case.
To submit a support case, see Support.
Push Configuration to New Device
-
Sign in to the PAN Prisma SD-WAN web interface.
-
Select Manage > Setup > Devices > Unclaimed Devices.

-
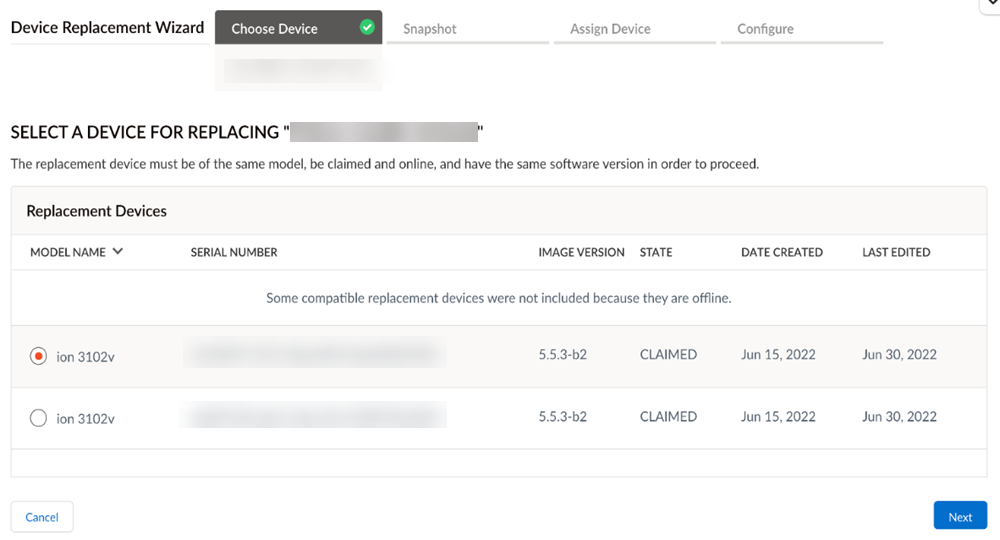
From the ellipsis menu, select Replace the Device.
-
Select a replacement device.
 note
noteThere can be multiple replacement devices, so make sure you choose the correct one.
-
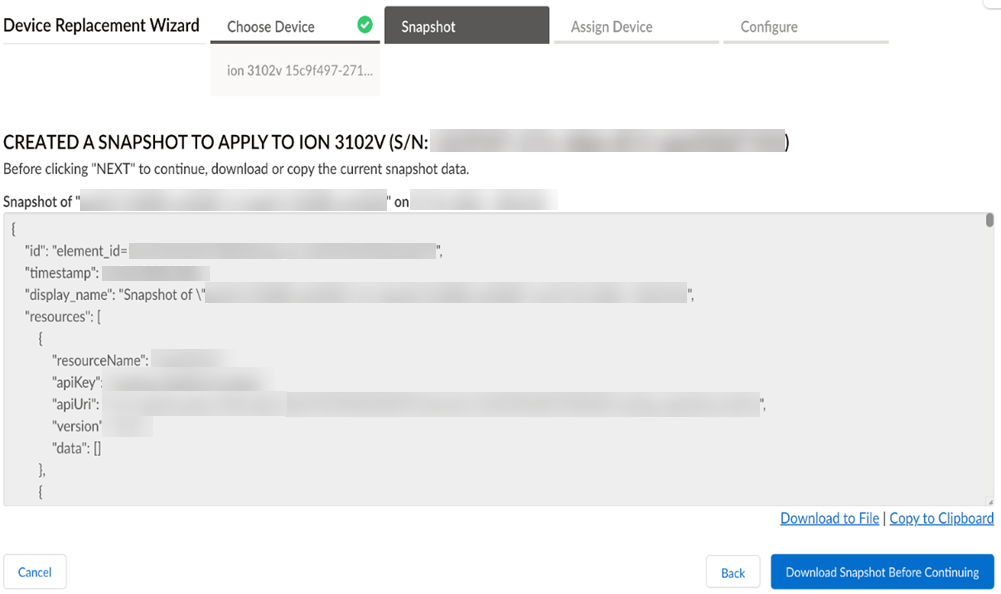
Click Next to select a snapshot for the replacement device.
noteThe replacement device must be online and claimed to apply the snapshot.
-
After the snapshot is created, click Download Snapshot Before Continuing.
-
Select Download to File or Copy to Clipboard as required.
-
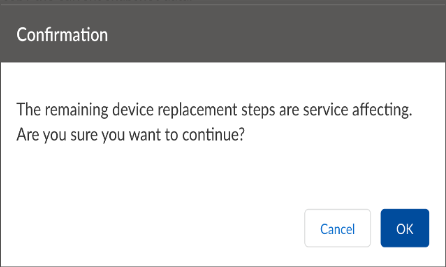
Click Next to continue after you have downloaded the snapshot. Click OK after confirming that the remaining device replacement steps are service affecting.
-
Assign the replacement device to the site.
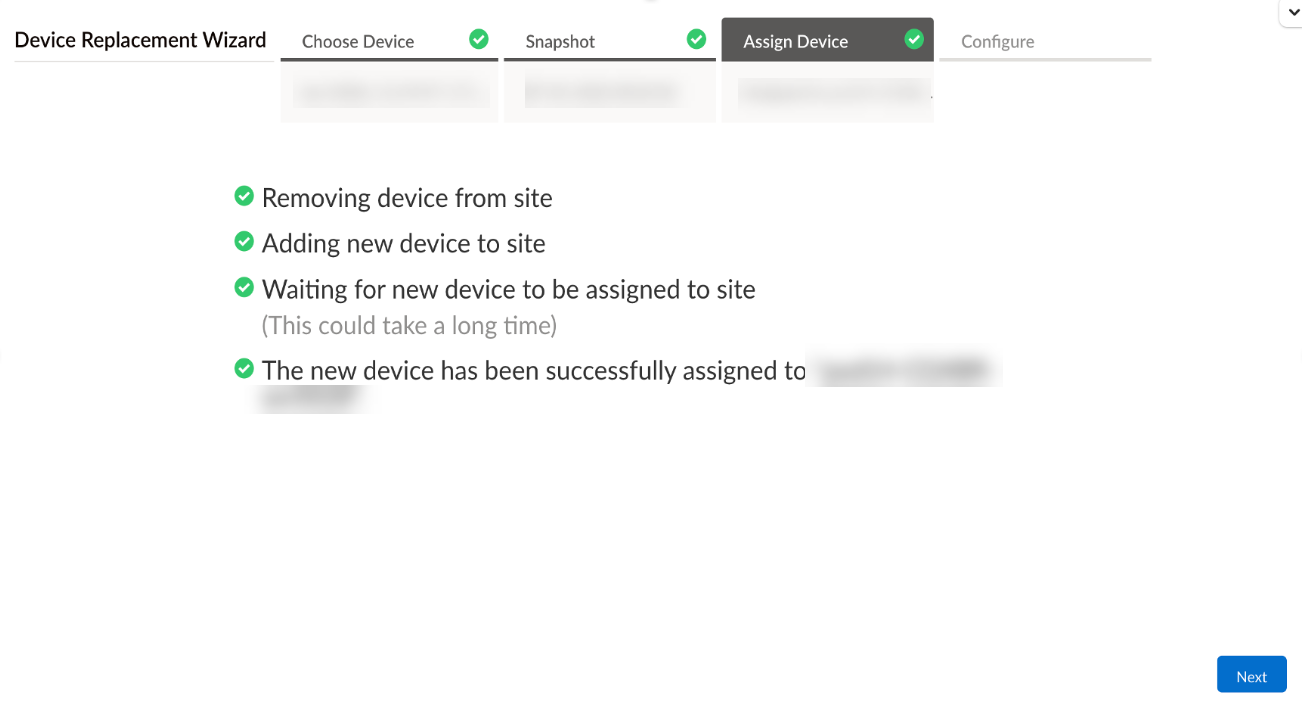
The Replacement Wizard will take the site information from the failed device and transfer it to the replacement device. When the replacement device is assigned to the site and the faulty device is unassigned, the service may be affected temporarily.
-
Click Next to configure the service.
-
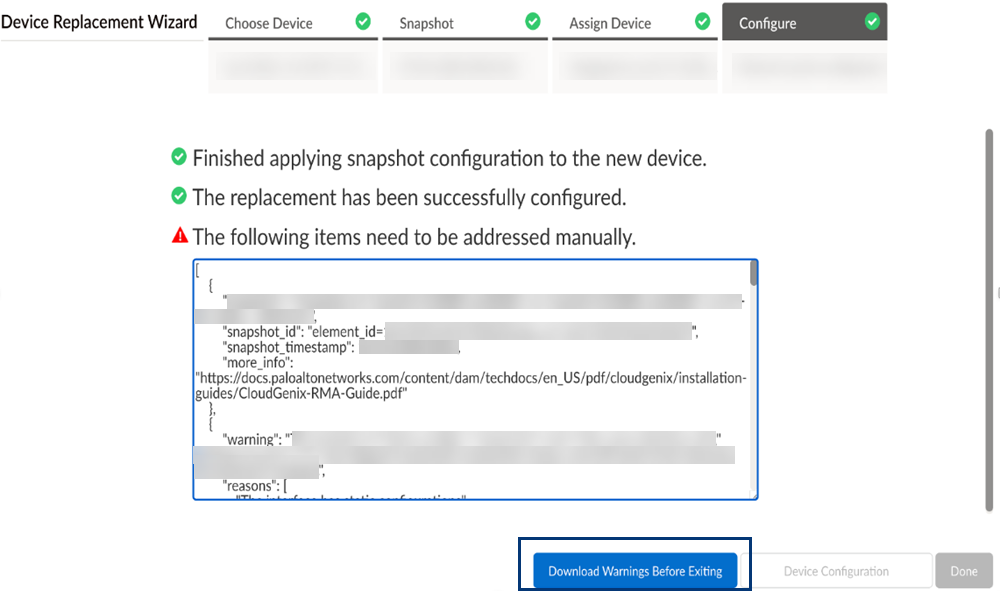
Click Done when you have copied the manual configurations to complete the replacement process.
noteThe Replacement Wizard automatically transfers the configuration from the old device to the new device. There may be flags for the functions that need to be manually configured. Configurations that are not copied will be listed in a text box.
The final screen displays when the device is successfully configured. If there are any warnings, download them before you exit the wizard.
-
Click Done to complete the device replacement process.
For the most up-to-date vendor documentation about the recovery steps, see Replace a Prisma SD-WAN ION Device.