Port-to-Port Self Connections Video
An E-Line service enables point-to-point connectivity between Equinix ports or virtual devices. Connections can be VLAN-based between two EVPL (.1q or QinQ) ports or virtual devices, or port-based (highly transparent) between two EPL ports. While EPL is highly transparent, filtering only the pause frames, EVPL is required to either peer or drop most of the Layer 2 control protocols.
This feature can be used by any Fabric customer, including sub-accounts of resellers.
-
Log in to Equinix Fabric.
-
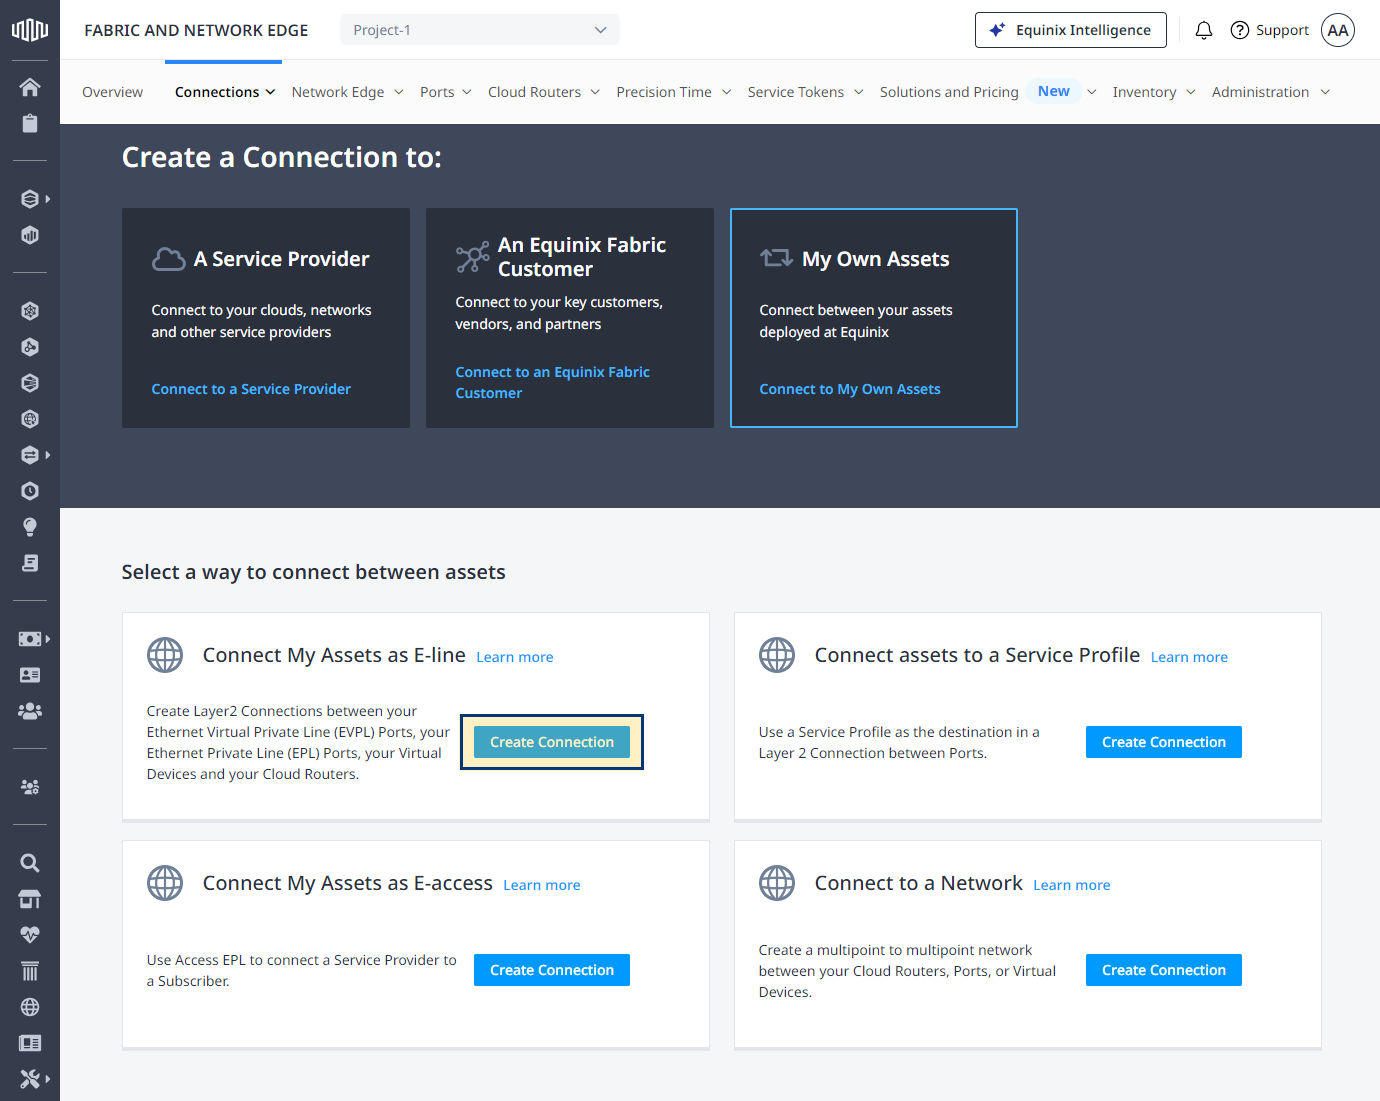
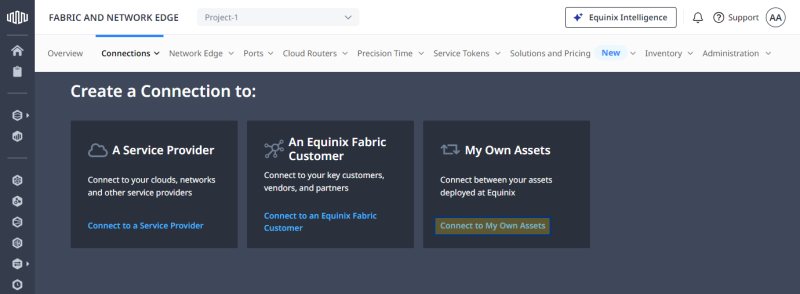
From the Connections menu, select Create Connection.
-
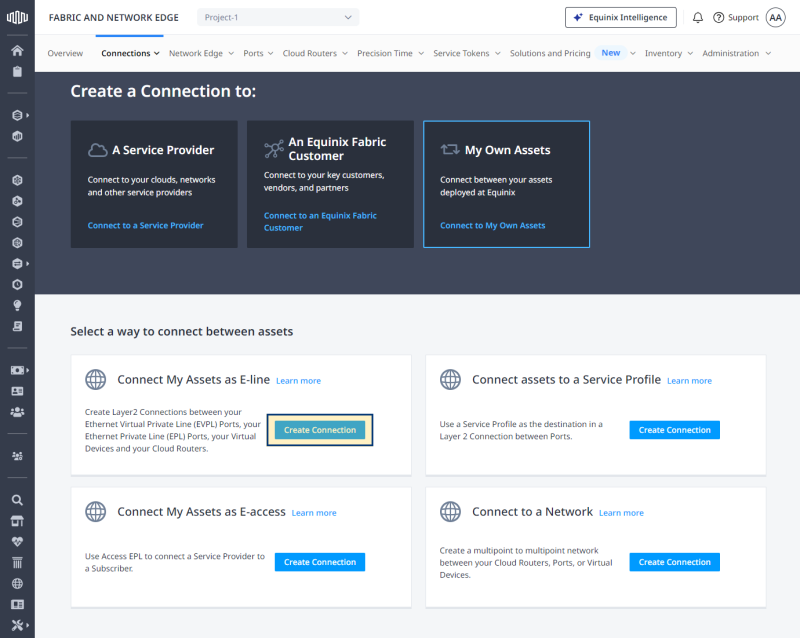
On the My Own Assets card, click Connect to My Own Assets.
-
On the Connect My Assets as E-line card, click Create Connection.
-
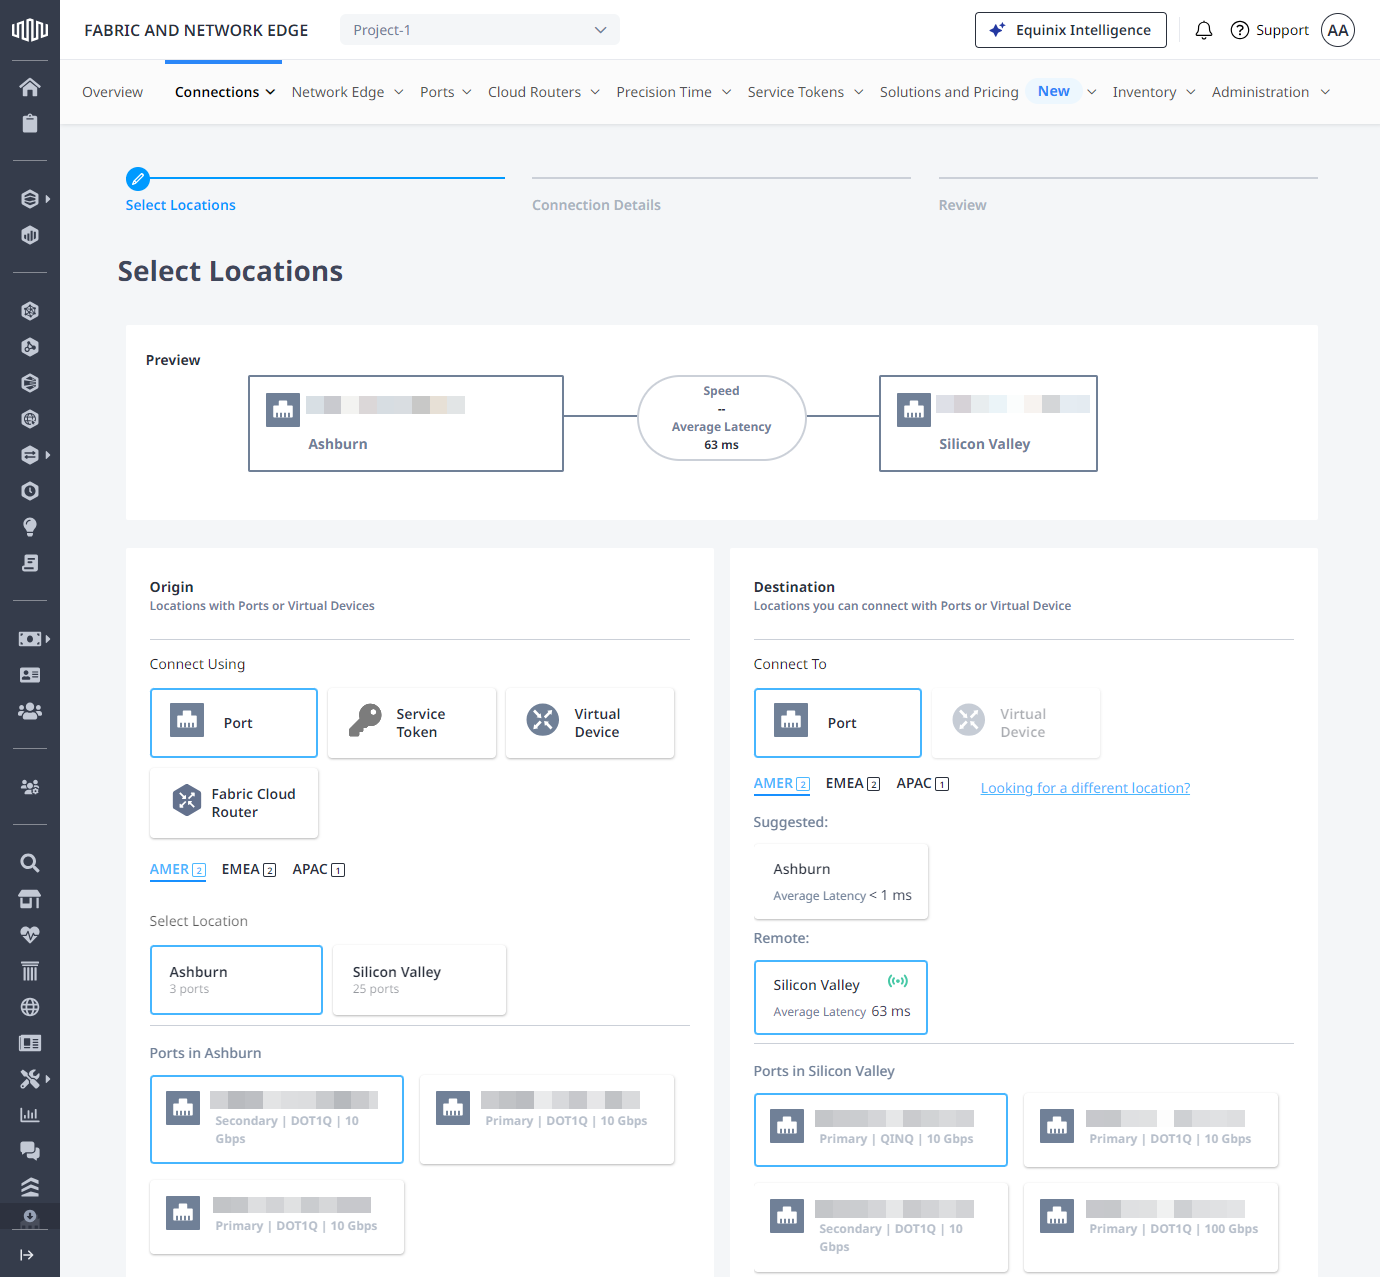
Select the connection's origin access point:
-
Port - A Fabric port.
-
Service Token - An A-side service token.
-
Virtual Device - A Network Edge virtual device.
-
Fabric Cloud Router - A Fabric Cloud Router instance.
-
-
Select location and port.
-
Select the destination metro and port, then click Next.

-
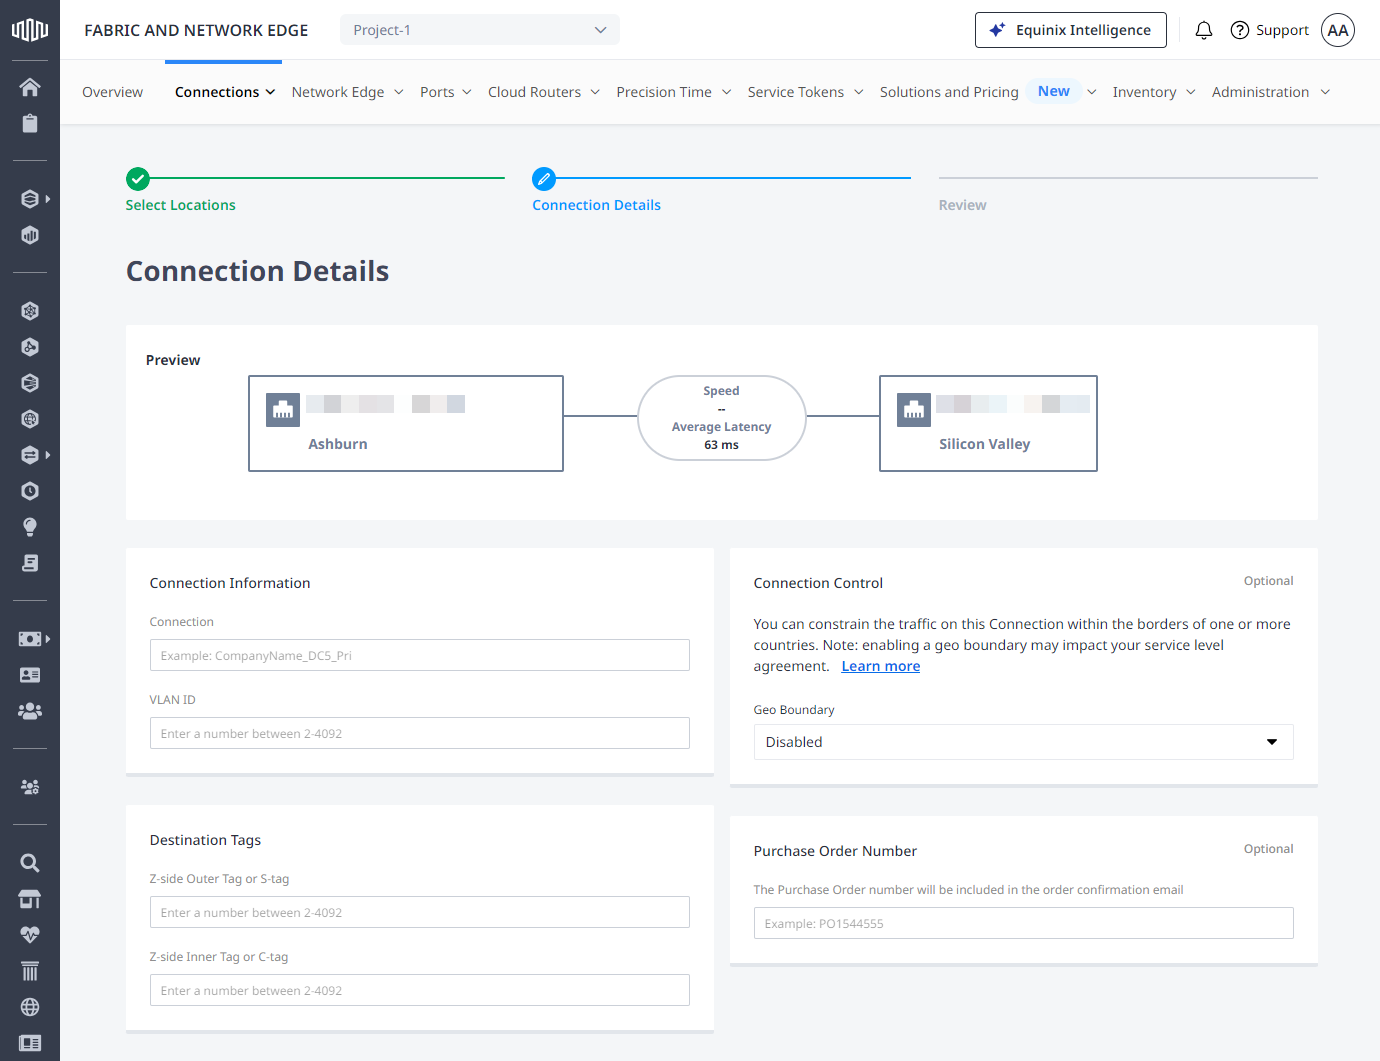
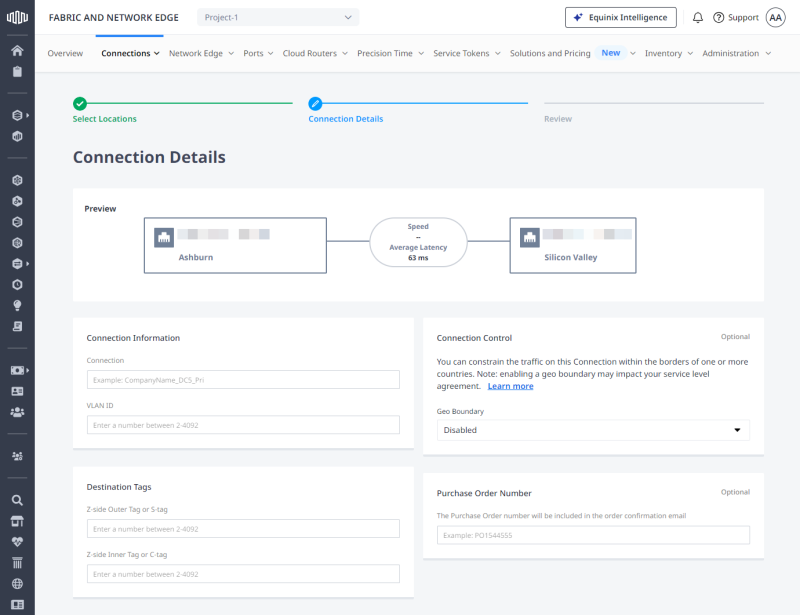
Enter connection details:
-
Connection - Connection's name.
-
VLAN ID - A-side port's VLAN tag (applicable to DOT1Q ports).
-
Outer Tag or S-tag - A-side port's outer (service) VLAN tag (applicable to QINQ ports).
-
Inner Tag or C-tag - A-side port's inner (customer) VLAN tag (applicable to QINQ ports).
-
Z-side VLAN - Z-side port's VLAN tag (applicable to DOT1Q ports).
-
Z-side Outer Tag or S-tag - Z-side port's outer (service) VLAN tag (applicable to QINQ ports).
-
Z-side Inner Tag or C-tag - Z-side port's inner (customer) VLAN tag (applicable to QINQ ports).
-
Geo Boundary - If enabled, this option ensures that traffic associated with the connection stays within the borders of one or more countries. For more information, see Connection Control – Geo Boundary.
-
Purchase Order Number - Purchase order identifier.
-
-
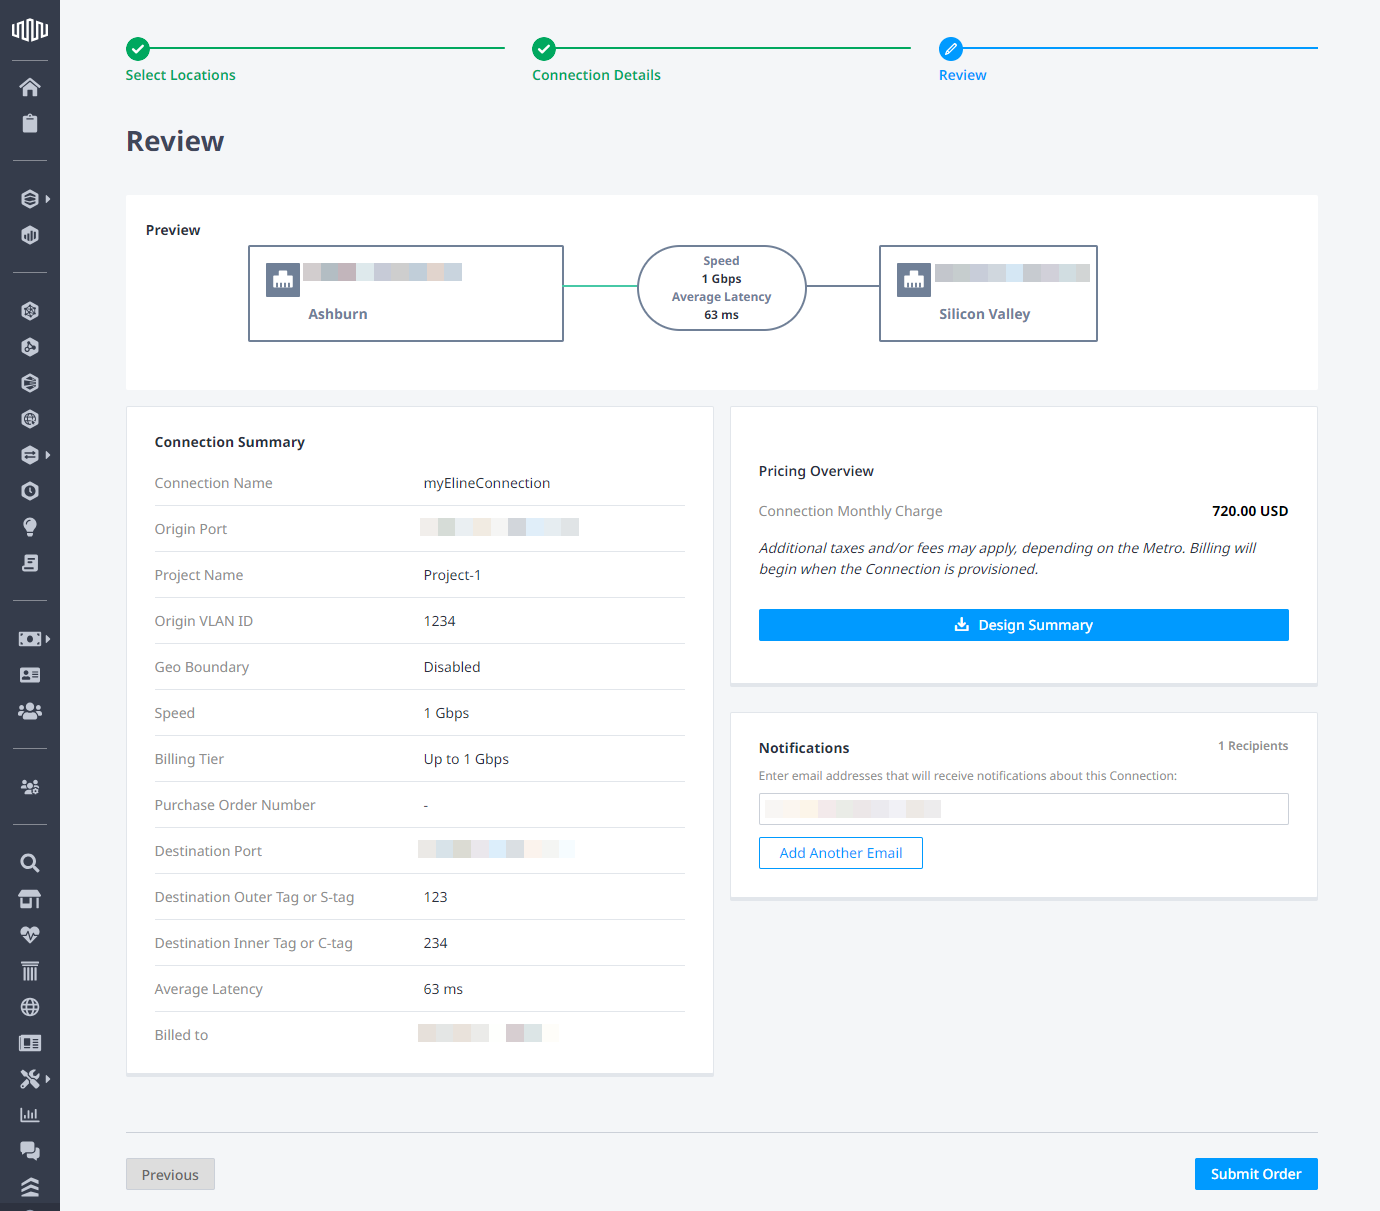
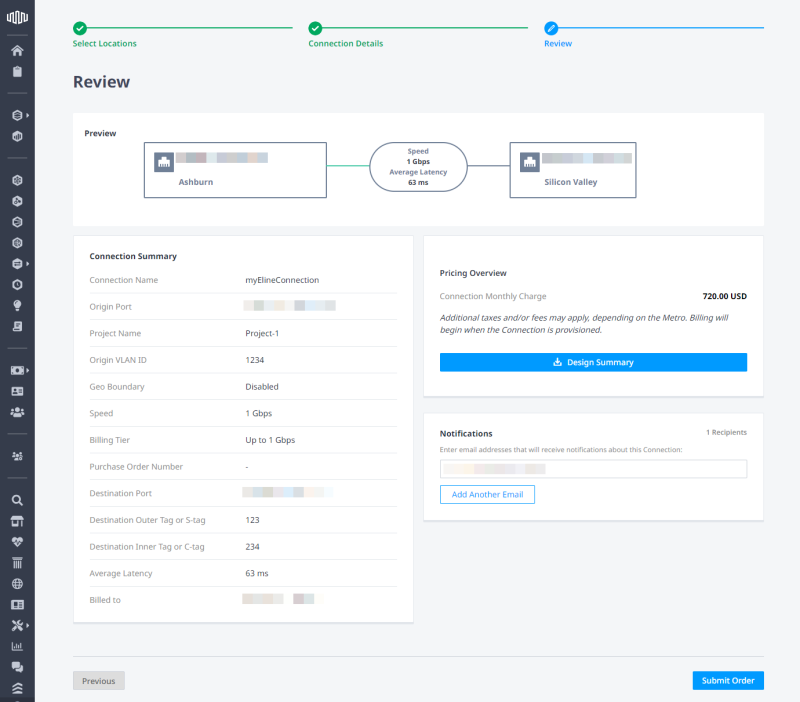
Select a Connection Speed, then click Next.
-
Review the Connection Summary and Pricing Overview, add an optional email address for Notifications, then click Submit Order.
Tip: Navigate to Connections Inventory to monitor your connection's status.