Create new ExpressRoute connections from your Equinix Fabric assets easily and quickly using Quick Connect, our improved provisioning flow. Use Quick Connect to establish connections from Fabric ports, Fabric Cloud Routers or using service tokens.
Note: For instructions on connecting from a Network Edge virtual device, see Connect to Microsoft Azure ExpressRoute (Network Edge Device).
Prerequisites
Before creating a connection to Microsoft Azure ExpressRoute, you must have:
-
An Azure account with Microsoft.
-
An ExpressRoute Service Key which is configured in the Azure Resource Manager (ARM) portal. For more information on how to create an ExpressRoute Service Key, see Quickstart: Create and modify an ExpressRoute circuit.
-
An Equinix Fabric account, with the following IAM roles assigned: Fabric Connections Manager.
-
A Fabric port, an A-side service token or a Fabric Cloud Router.
Create a Connection Using Quick Connect
To create a connection to Microsoft Azure ExpressRoute using Quick Connect:
-
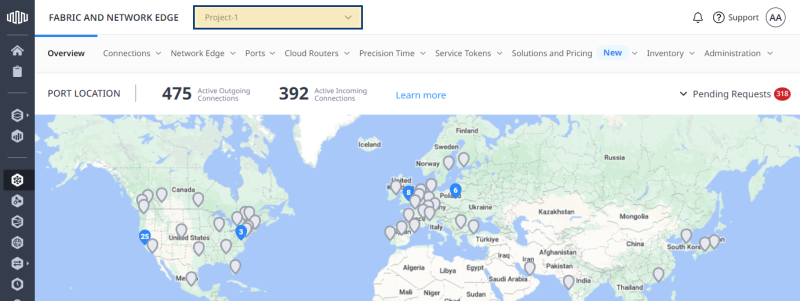
Log in to Equinix Fabric.
-
Use the Context Switcher and select the project under which you want to create the connection. For more information on projects, see Equinix Identity and Access Management: Projects.
-
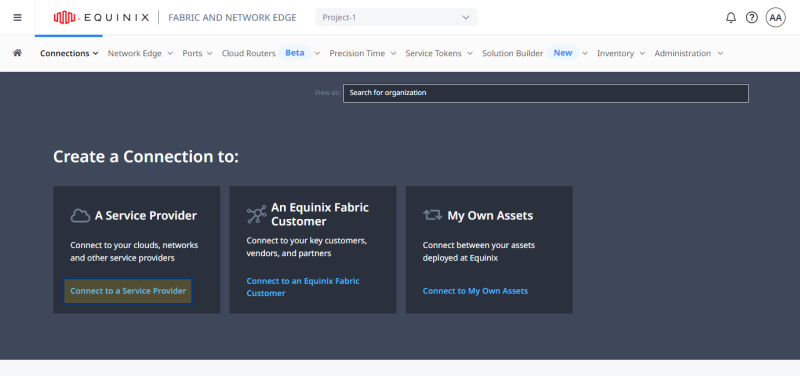
From the Connections menu, select Create Connection.
-
On the A Service Provider card, click Connect to a Service Provider.
-
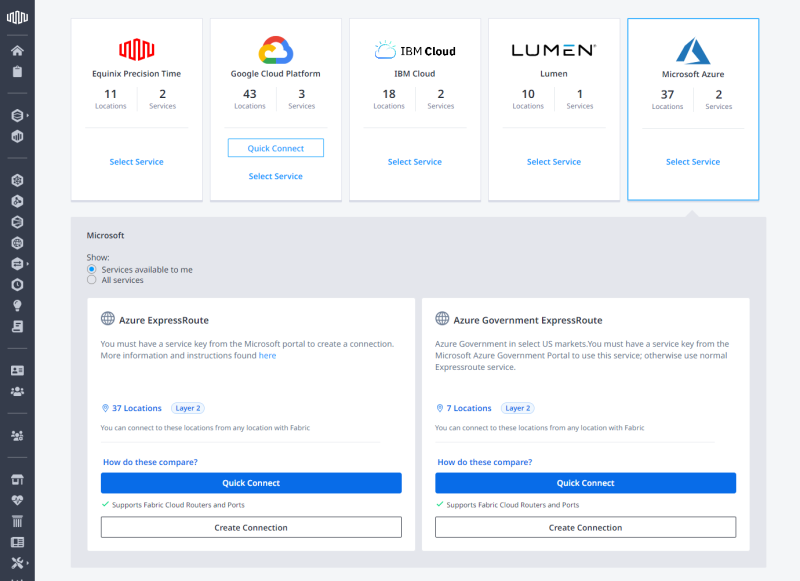
Locate the Microsoft Azure card and click Select Service.
-
On the Azure ExpressRoute card, click Quick Connect.
-
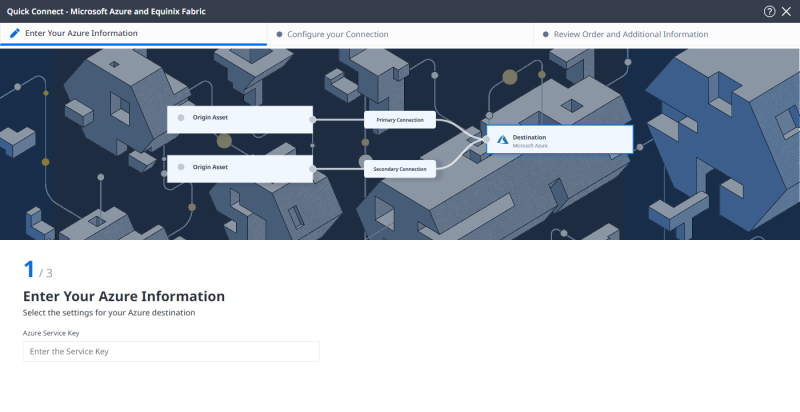
In the Enter Your Azure Information section, enter your Microsoft Azure ExpressRoute Service Key.
Note: If the service key is already in use for a primary or secondary connection you may be able to add additional connections using the same key. A banner will display indicating which connection and peering types are still available for a key already in use.
-
Select connection type:
- Redundant – Create a redundant pair of connections.
- Primary – Create a single, primary connection.
- Secondary – Create a single, secondary connection.
Important: Redundant configuration is recommended. If you select a single connection option, no Service Level Agreement (SLA) is provided by Azure.
-
Select peering type:
- Azure Private – Applicable to private virtual networks.
- Microsoft – Applicable to Office 365, Dynamics 365 and public services.
Note: You are not required to use both services (Private and Microsoft).
A single service key will support four virtual connections on dot1.Q ports (a primary and secondary connection for each peering type). However each of the four connections must have unique ExpressRoute peering VLAN IDs. Two virtual connections can be created with a service key on QinQ ports. -
Click Next.
-
Configure your connection depending on the origin asset type:
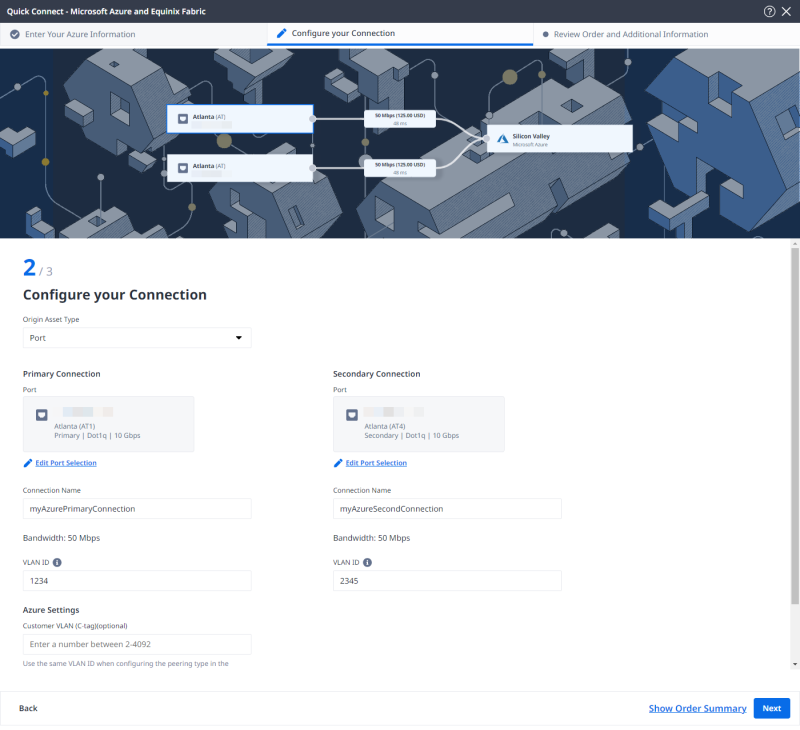
 Port
Port
-
From the Origin Asset Type drop-down list, select Port.
-
In the Primary Connection section:
-
Click + Select Primary Port, then select your primary connection port and click Select Port.
Note: Only primary ports are available for selection.
- Enter the primary connection name.
- Enter a VLAN ID.
-
In the Azure Settings section, enter Customer VLAN (C-Tag).
Important: Use the same VLAN ID when configuring the peering type in the Microsoft Azure portal.
-
-
In the Secondary Connection section:
- Click + Select Secondary Port, then select your secondary connection port and click Select Port.
Note: Only secondary ports are available for selection.
- Enter the secondary connection name.
- Enter a VLAN ID.
- Click + Select Secondary Port, then select your secondary connection port and click Select Port.
-
Click Next.
 Cloud Router
-
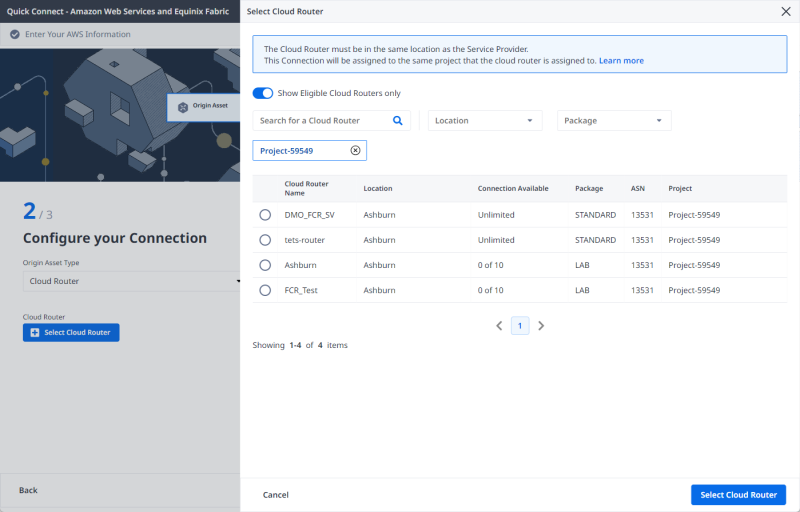
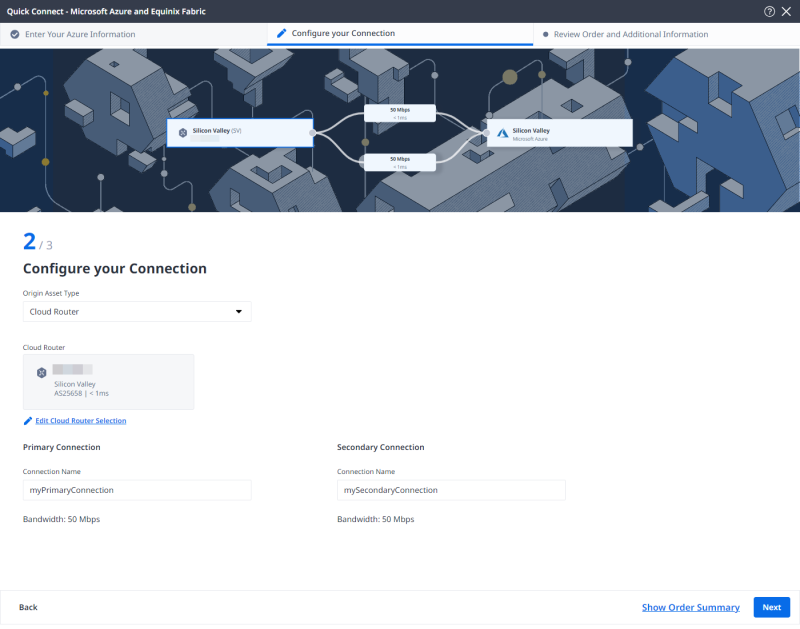
From the Origin Asset Type drop-down list, select Cloud Router.
-
Click + Select Cloud Router, select a cloud router instance, then click Select Cloud Router.
-
In the Primary Connection section:
-
Enter the primary connection name.
-
In the Azure Settings section, enter Customer VLAN (C-Tag).
Important: Use the same VLAN ID when configuring the peering type in the Microsoft Azure portal.
-
-
In the Secondary Connection section, enter your secondary connection name.
-
Click Next.
 Service Token
-
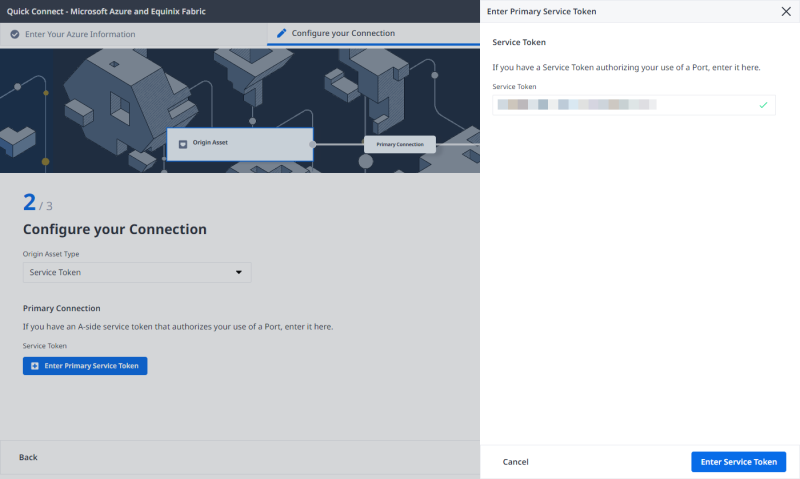
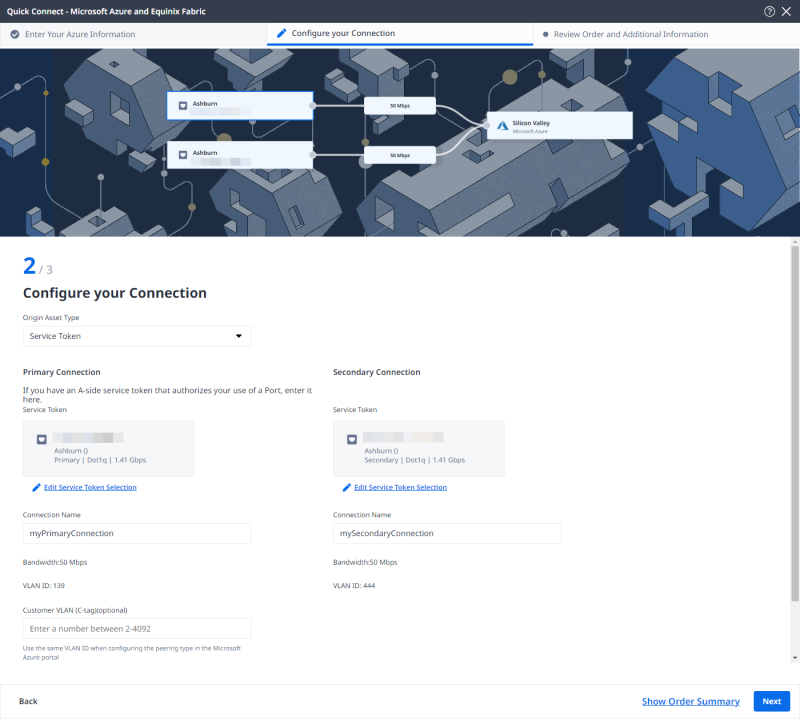
From the Origin Asset Type drop-down list, select Service Token.
-
In the Primary Connection section:
-
In the Secondary Connection section:
- Click + Enter Secondary Service Token, provide the service token, then click Enter Service Token.
- Enter the secondary connection name.
- Click + Enter Secondary Service Token, provide the service token, then click Enter Service Token.
-
Click Next.
-
-
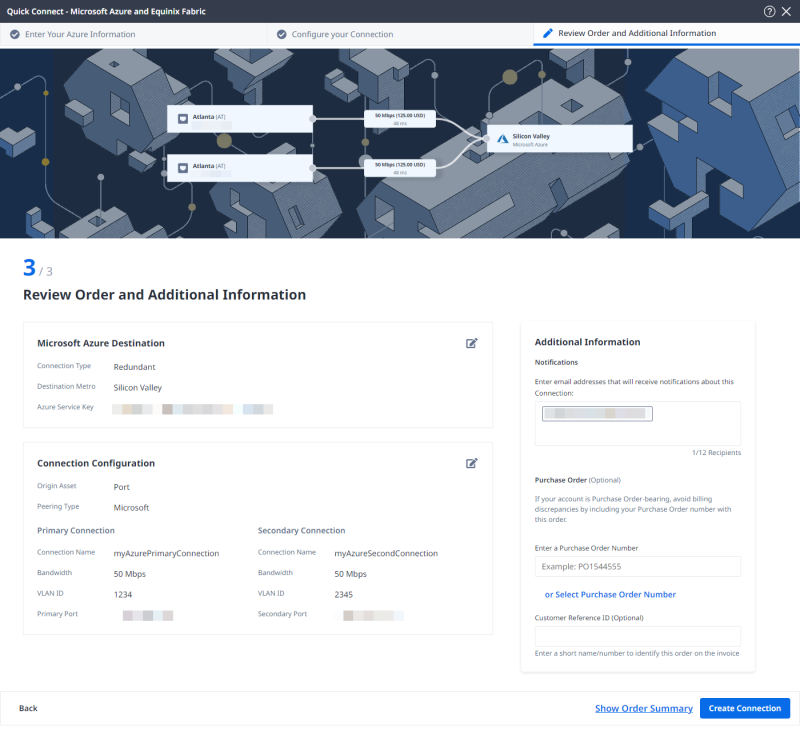
In the Contact Information section, review the email address used for notifications. This address can be changed if necessary.
-
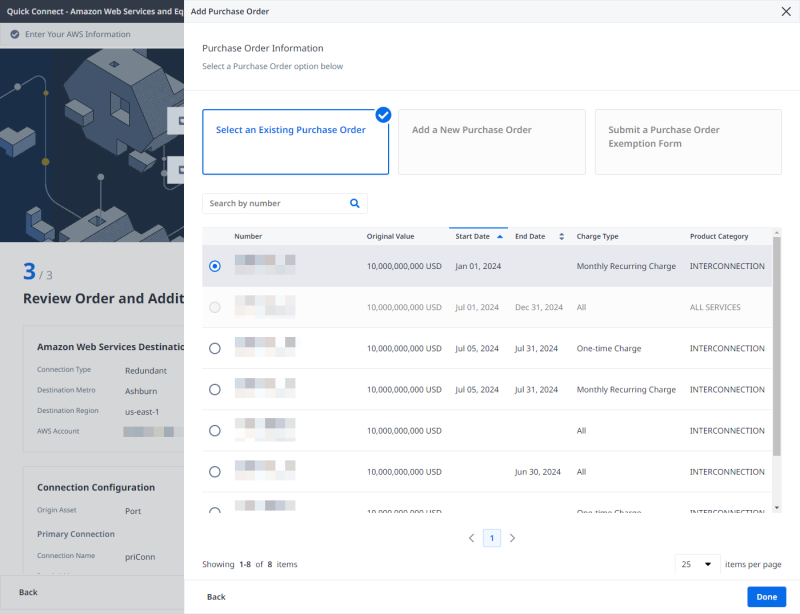
Enter or add purchase order number.
-
Enter customer reference identifier, that will help you identify this order on your invoice.
-
Click Create Connection.
-
On the confirmation page, click View this Connection in your Fabric Inventory to see the connection in you inventory.
Connect to Azure Using API
You can use Fabric's API to automate this procedure and integrate it with your internal systems. For details, see Connect to Microsoft Azure.

