Smart Data Grids
Smart data grids allow you to filter, sort, and search your Smart View data. You can also specify which columns you want to view and the order in which you want them to appear.
Smart grids are available on the System Alerts screens and the Maintenance screens.
The general features of smart grids are described below. The availability of these features might vary by screen.
Hide/Show/Rearrange Columns
To see a list of columns available in the data grid, click the gear icon.
A checkmark indicates that the column is currently visible; any unselected columns are currently hidden from the grid:
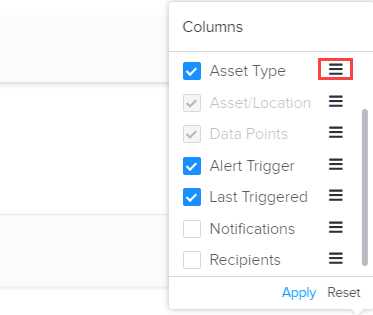
To display or hide a column, click the checkbox to toggle it on/off. Mandatory columns are grayed-out and you cannot unselect them.
To reorder the columns, click the lines icon beside a column name and drag it up or down to the preferred location in the list.
To save your changes to the column configuration, click Apply. The system updates the data in the grid with the changes.
To discard your changes and return to the default view, click Reset.
Pagination
The top right corner above a grid shows the number of rows currently in view. As you scroll in the grid to view additional rows, the system updates this number.

Select All
Some data grids allow you to select all displayed rows. Click the checkbox in the header of the first column to select all rows:

Apply Bulk Actions
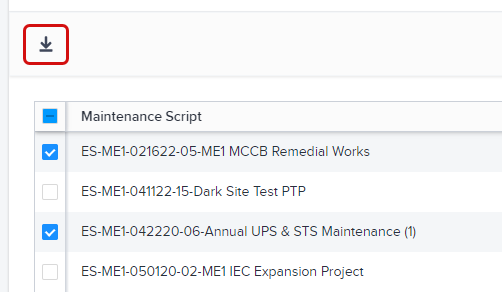
Bulk actions appear at the top left above a data grid and allow you to perform an action on multiple rows at once. To use them, select the desired rows, then select a bulk action.
For example, on the System Alerts Settings screen, enable the checkboxes for the alerts you want to configure. Click the bulk action icon and select one of the available bulk actions.

Or on the Maintenance Scripts screen, enable the checkboxes for the scripts you want to download, then click the download icon.
Apply Row Actions
Row actions appear at the right end of a data grid row. These actions apply only to a single row.
For example, on the Maintenance Scripts screen, click the download icon to download the script associated with that row.

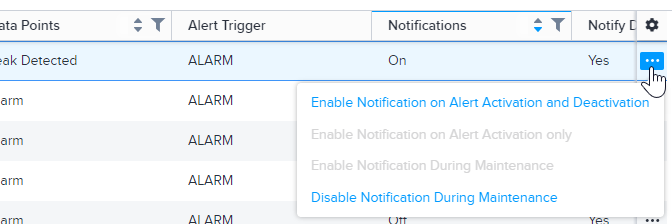
For screens with multiple actions available (such as System Alerts Settings), click the ellipsis icon and select one of the available actions.
Sort Data
You can sort data by a specific column. The system will order the data alphabetically or numerically (depending on the type of data).
To sort the data in ascending order, click a column header once. Click the header again to sort the data in descending order.

When sorting is active for a column, a blue line appears above the column header. (If the up arrow is blue, the system sorts the column in ascending order; if the down arrow is blue, the system sorts the column in descending order.)
Filter Data
To filter data for a column, click the filter icon in the column header. For most columns, the system shows a list of available values for the column. Select one or more items you want to see and click Apply. The system will hide all other data from the grid.
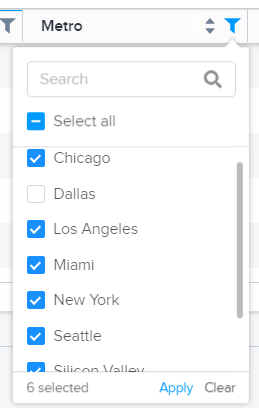
When filtering data for a column, if the list of available values is long, you can use the search box to find the value you want.
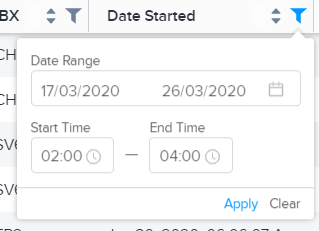
To filter a date column, click the filter icon and choose the date range and start/end times for the data you want to see. Click Apply to update the grid.
To remove a filter, click the filter icon and then click Clear.
Above some grids, a filter box shows you the filters currently applied to the data. In the example below, a filter is currently applied for the Asset Type column:

To search the entire grid for a specific word, partial word, or phrase, click Filter by Keyword +. Enter your search term(s) and press Enter. The search is not case-sensitive.

The keyword filter appears in the filter box to indicate that the filter is applied.

To remove a keyword filter, click the blue X.