System Alerts
System Alerts are Equinix-defined alerts for Mechanical and Electrical assets that are standardized across all IBX data centers. You can view your System Alerts from the Alerts page in the Customer Portal.
The System Alerts table shows alerts for the last 24 hours across all of your IBX data centers and accounts.
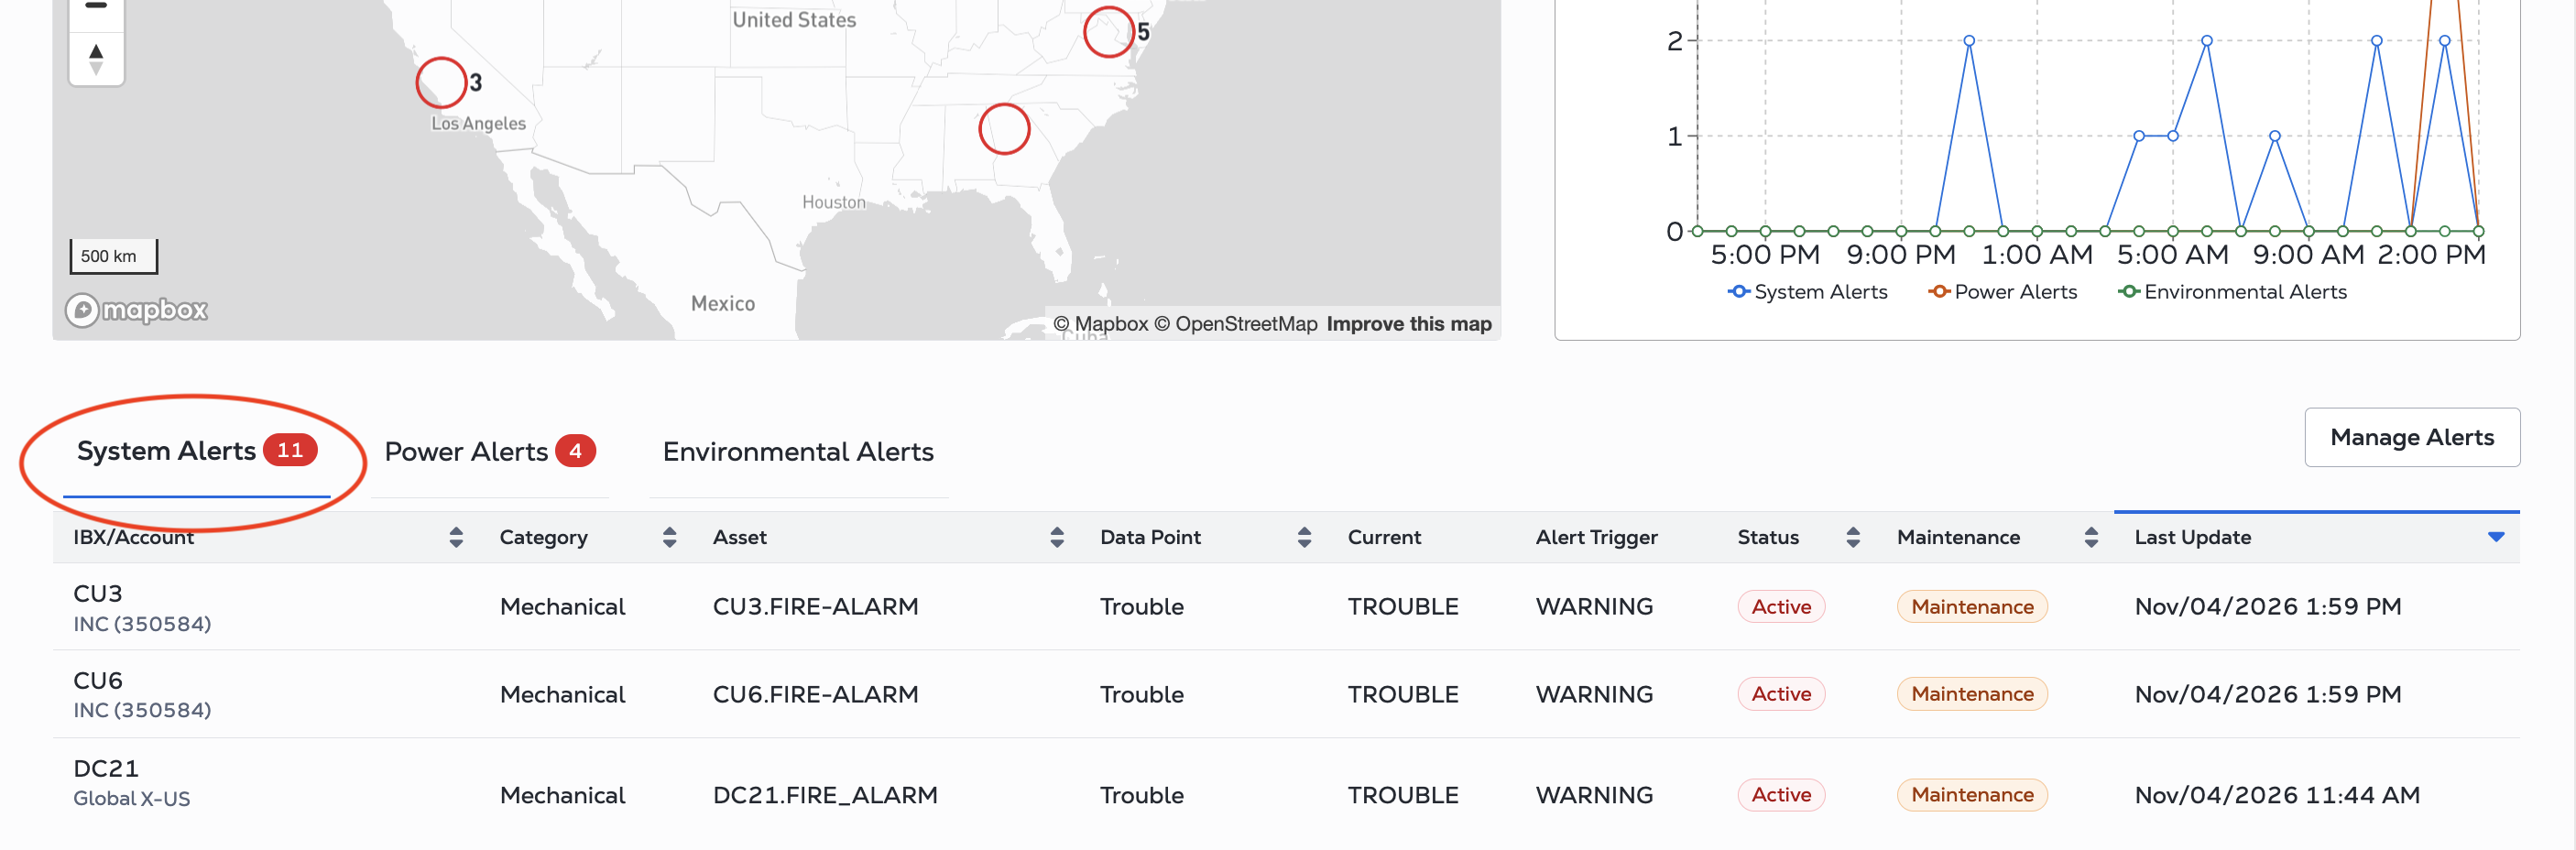
| Column | Description |
|---|---|
| IBX/Account | The IBX code and the account the alert belongs to. The system only shows the data centers for which you have a Smart View subscription. |
| Category | Asset category - Electrical or Mechanical. |
| Asset | Unique ID of the asset. |
| Data Point | Name of the alert data point, such as Supply Air Temperature or Load On Bypass. For details, see the Electrical System Alerts Reference and Mechanical System Alerts Reference. |
| Current | Current reading for the data point. |
| Trigger | The operating threshold or state that triggers the alert. |
| Status | Active while the alert condition is true. Inactive after the condition resolves. Inactive alerts move to history; the system retains historical alert data for one year. |
| Maintenance | Shows Maintenance if the asset was undergoing maintenance work when the alert triggered. |
| Last Update | Date and time of the most recent update to the alert, shown in your local time zone. To change the time zone, see User Preferences. |
Click on an alert to see the Alert Details.
System Alert Settings
System Alert definitions are pre-defined and can be found on the Mechanical System Alerts Reference and the Electrical System Alerts Reference pages.
To access the Alert Settings page, click Manage Alerts.
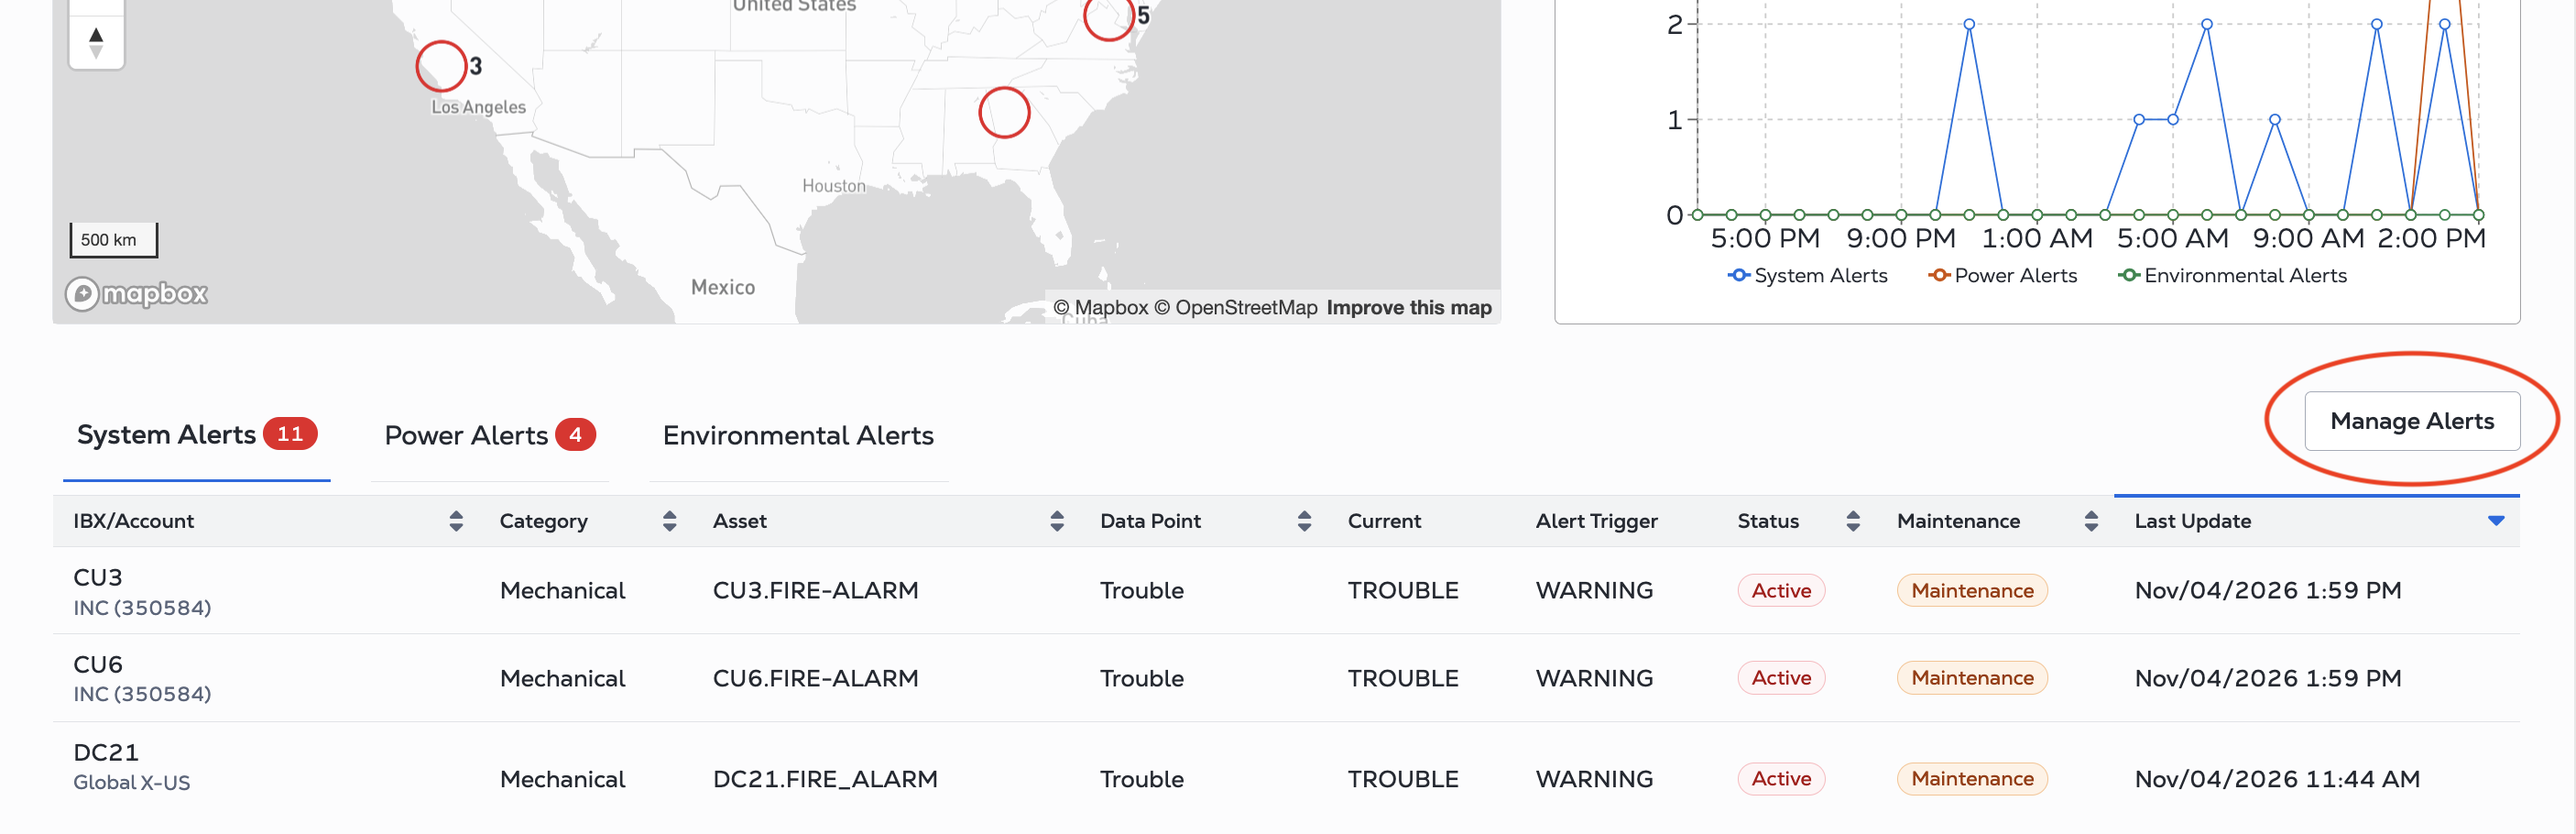
You cannot change the alert definitions, but on the Alert Settings page you can:
- View the settings for each configured system alert
- Turn alert notifications on or off
- Enable or disable alert notifications during maintenance
- Enable or disable notifications for alert deactivations
- Add or remove recipients
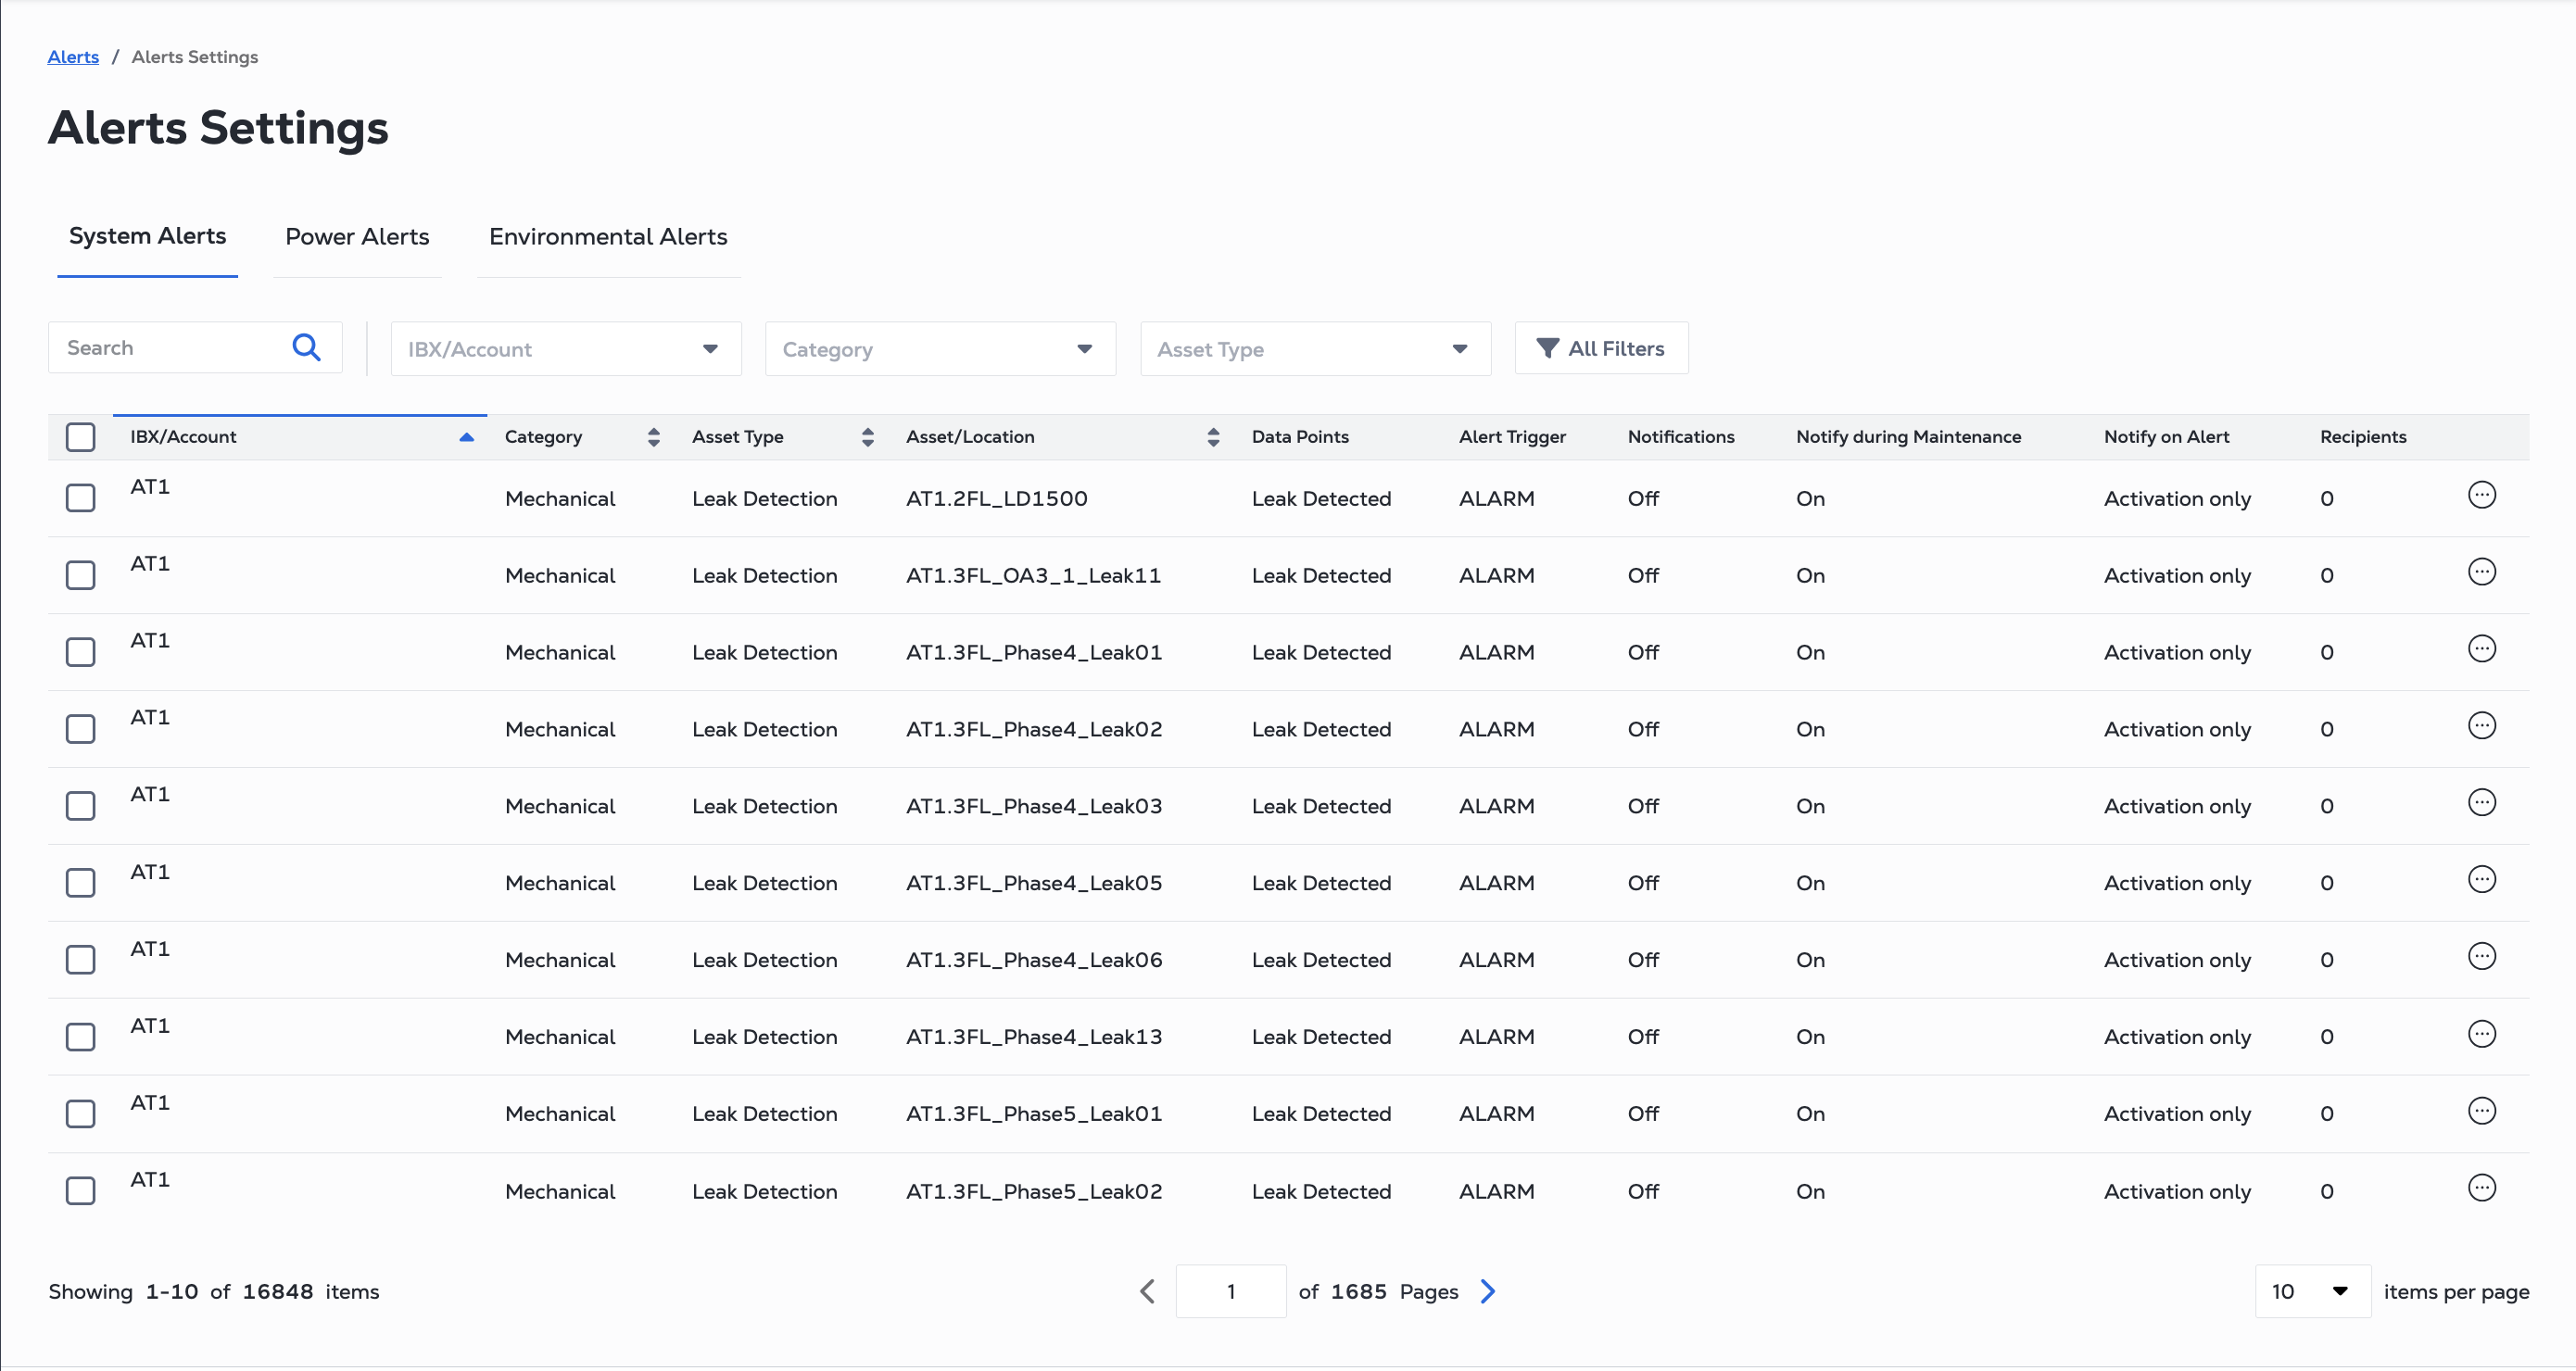
Use the Search field, or the IBX/Account, Category, Asset Type, and All filters to find specific alerts.
| Column | Description |
|---|---|
| IBX/Account | The IBX code and account. The system only shows data centers for which you have a Smart View subscription. |
| Category | Asset category: Electrical or Mechanical. |
| Asset Type | Type of asset, such as CRAH, ATS, UPS, PDU, Generator, or Fire Alarm. |
| Asset/Location | Unique ID of the asset. |
| Data Points | Name of the alert data point, such as Dirty Filter or Source 1 Failure. For details, see the Electrical System Alerts Reference and Mechanical System Alerts Reference. |
| Threshold | The operating condition that triggers the alert. |
| Notifications | Indicates whether notifications are enabled for this alert, either On or Off. |
| Notify during Maintenance | Yes if recipients continue to be notified while the asset is under maintenance. |
| Notify on Alert | Indicates whether recipients are also notified when the alert clears, either Activation only or Activation and Deactivation. |
| Recipients | The number of recipients from your organization who are configured to receive notifications for this alert. |
System Alert Notification Settings
To manage alert notifications and recipients, click the options menu for the alert you want to change. To change multiple alerts at once, select the checkbox for each alert you want to change, then click Manage Recipients and Notifications Settings. To select every alert, click Select All.
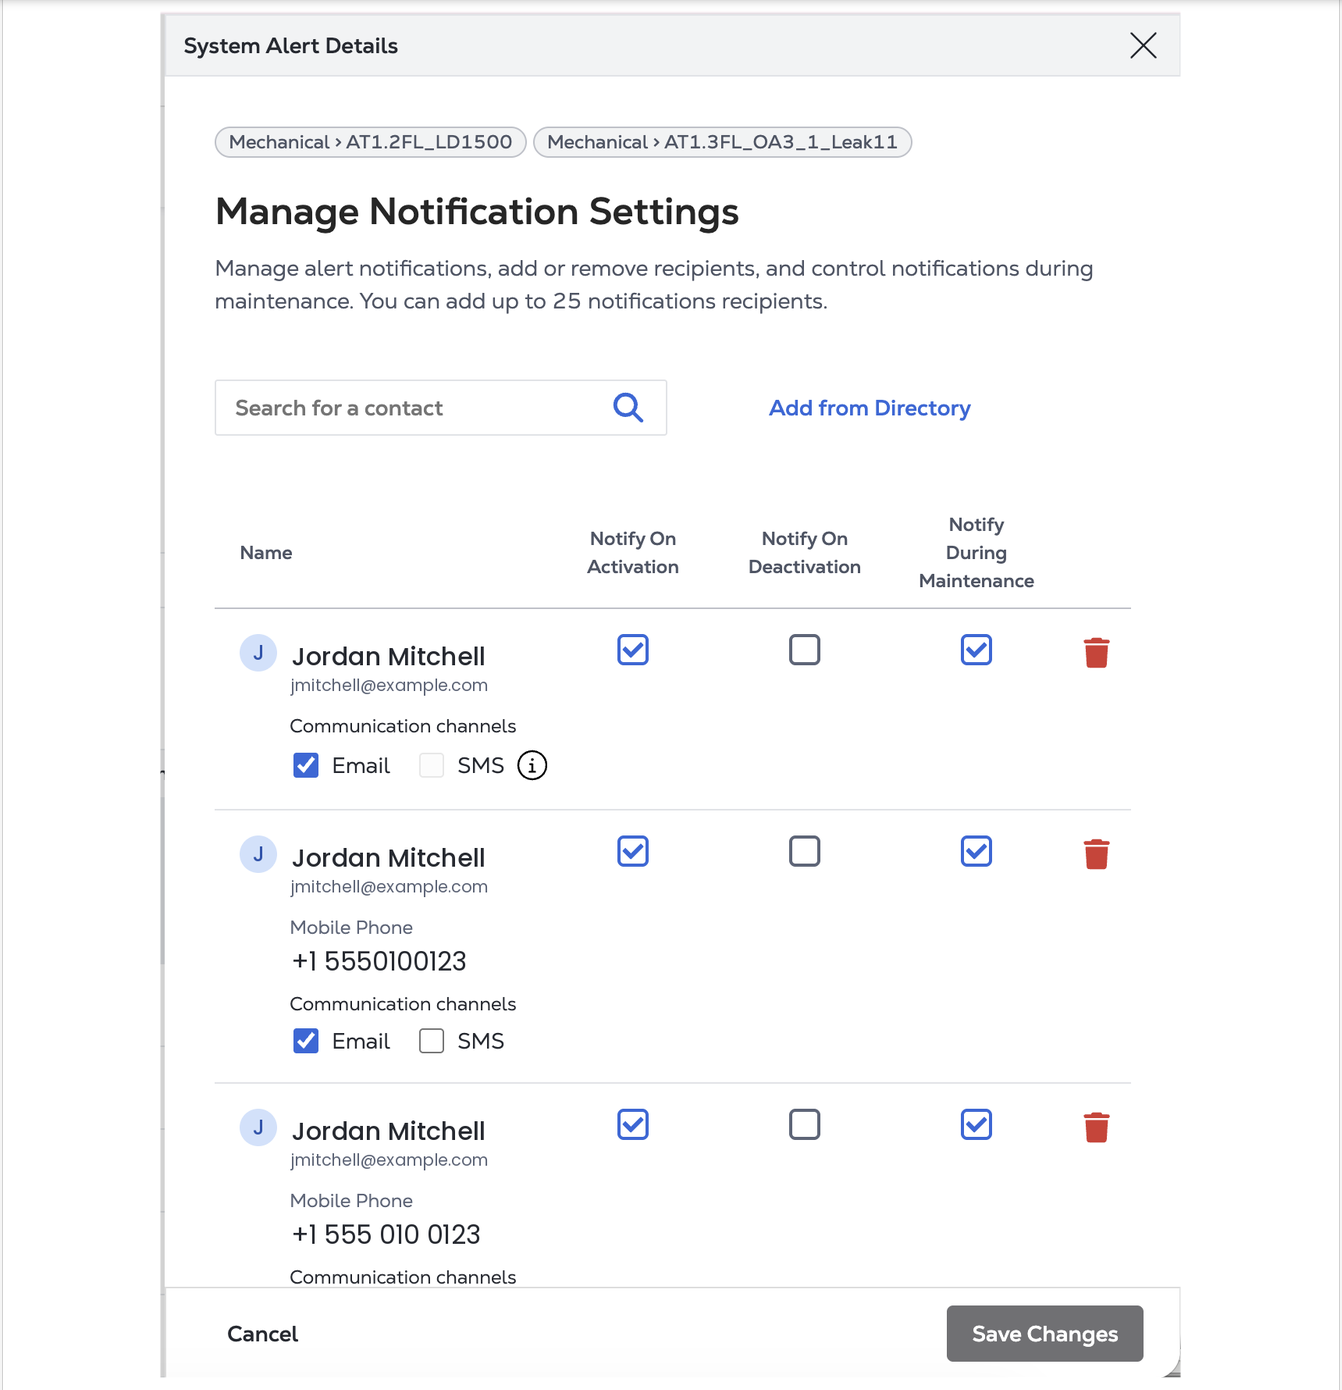
The Manage Notification Settings panel, lists the selected alerts under Events and shows each current recipient and the notification options.
| Option | What it does |
|---|---|
| Notify On Activation | Sends a notification when the alert is triggered. |
| Notify On Deactivation | Sends a notification when the alert condition clears (resolves). Off by default. |
| Notify During Maintenance | Sends notifications even when the asset is under maintenance. Clear this checkbox to suppress notifications that occur during maintenance work. |
| Notification channels | Email and/or SMS. Enter a mobile phone number to receive SMS text messages. |
Note: These options control notifications sent by email and SMS. They do not affect notifications displayed in the Customer Portal.
Adding Recipients
To add recipients to an alert:
-
Open Manage Notification Settings for the alert(s) you want to change.
-
Click Add Recipients from Directory.
-
Search or filter the list of contact, then select the checkbox for each person you want to add. Click the star to mark a contact as a favorite. The count of selected users shows at the top.
-
Click Done. The Manage Notification Settings panel recipients list updates to show the new recipients.
-
For each new recipient, select the Email and/or SMS channel, enter a mobile phone number if you chose SMS, and set the Notify On Activation, Notify On Deactivation, and Notify During Maintenance options. Each recipient needs at least one delivery option. If you clear both Email and SMS, you are prompted to “Select at least one delivery option” and you cannot save.
-
Click Save Changes.
The Recipients column for each updated alert updates with the new recipients list.
You can add up to 25 recipients per alert. If you exceed this limit, up to 25 contacts are added and as message tells you how many were not added. To add more recipients, you must remove existing contacts.
Removing a Recipient
To remove a recipient from an alert:
-
Open Manage Notification Settings for the alert(s) you want to change.
-
Locate the recipient that you want to remove, and click the trash can.
-
Click Save Changes.
Change a Recipient’s Notification Method
To change how a recipient receives an alert notification:
-
Open Manage Notification Settings for the alert(s) you want to change.
-
Locate the recipient that you want to change and select or clear Email and SMS. If you select SMS, enter a mobile phone number.
-
Click Save Changes.
Change Notification Timing
By default, recipients are notified when an alert activates but not when it resolves. To change when a recipient gets a notification:
-
Open Manage Notification Settings for the alert(s) you want to change.
-
Locate the recipient that you want to change and select or clear Notify On Activation, Notify On Deactivation, and/or Notify During Maintenance. Changes apply to every alert listed under Events.
-
Click Save Changes.