Submit a Smart Hands Order
Smart Hands is a pay-per-use product integrated with the Customer Portal. To start ordering, request Smart Hands Ordering permissions. Once permissions are granted, you can place orders for Smart Hands services directly through the Customer Portal.
-
If you're not sure which type of ticket to submit, see Smart Hands Order vs. Trouble Ticket.
-
Smart Hands work is charged per cage. You cannot combine work orders for multiple cages into a single Smart Hands order. If you want to have services performed on multiple cages, you must submit separate Smart Hands orders for each cage (regardless of whether you order online or through a sales representative).
Creating an Order
For complex orders that involve multiple services for the same cage, you can combine them into a single Smart Hands bundle. Then you can track the progress of each service individually, as well as track the overall progress of the bundle. To create a bundled order, use the Add Another Service option (included in the steps below). This bundling only applies to services within the same cage. You cannot bundle service orders across multiple cages.
-
Log in to the Customer Portal
-
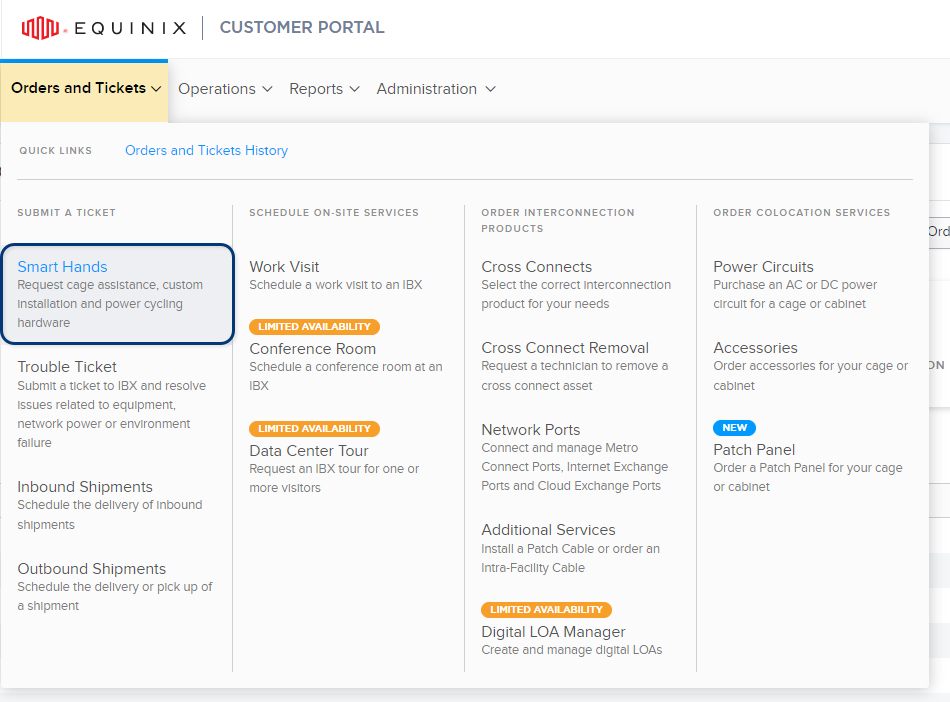
From the Orders and Tickets menu, select Smart Hands.
-
From the Smart Hands Catalog, select the type of service you need. This streamlines the order process and ensures your request is processed correctly.
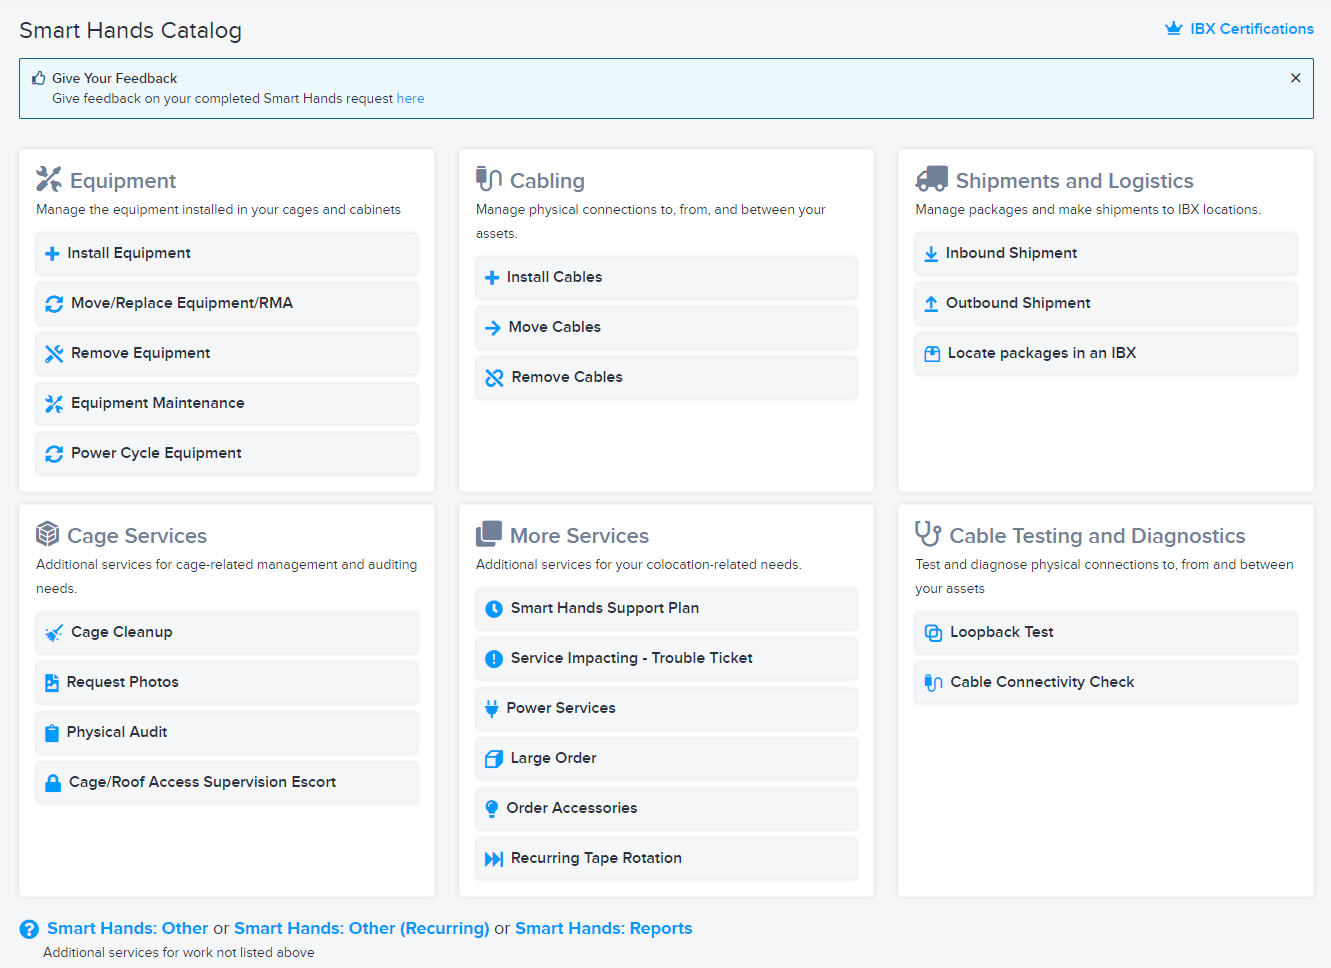
- If your request type isn't listed, use Smart Hands: Other.
- To create an order that automatically repeats on a specified schedule, use Smart Hands Other: Recurring.
-
For Location, select the intended IBX data center, cage, and cabinet.
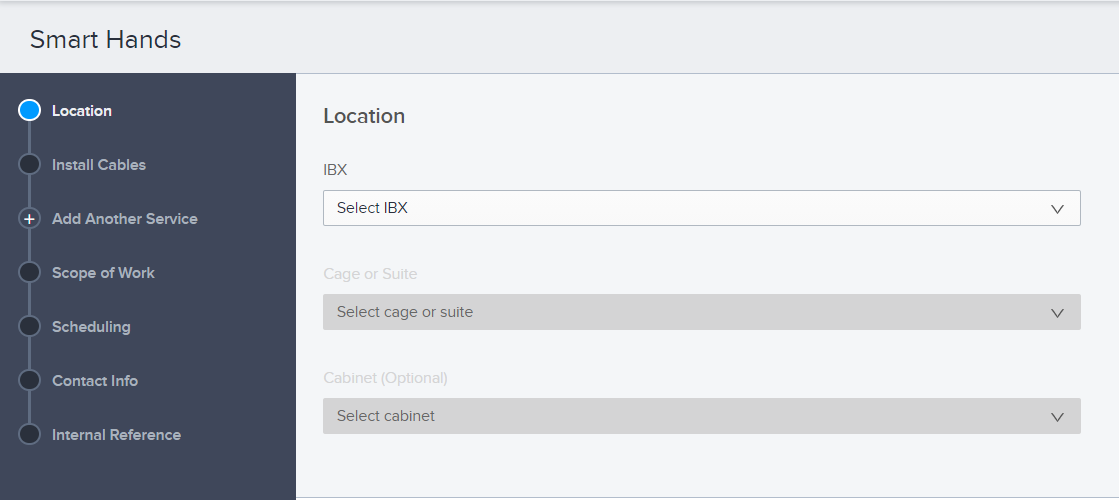 note
noteIf you are creating an order for a SHARED cage, you must select a cabinet. For private cages, cabinet is optional.
Once you select a location, the screen displays the location details (including the street address, hours of operation, and a link to a map of the surrounding area).
Order Details
Enter details for the request. Each request type has different fields available.
Some fields are automatically populated with information based on your earlier selections.
-
If this will be a bundled order containing multiple services (such as Install Equipment and Equipment Maintenance), click Add Another Service and enter the details for the added service.
noteThis option is available for the following service types: Install Equipment, Move/Replace Equipment/RMA, Remove Equipment, Equipment Maintenance, Install Cables, Move Cables, Remove Cables, Loopback Test, Cable Connectivity Check, Shipments, and Smart Hands: Other.
-
If you want the Equinix technician to call your designated Primary Technical Contact person before the work starts and/or once the work is completed, use the Call contact options under Scope of Work.

-
If you want to send and receive messages with the technician once your order is started, select Enable messaging with technician when work is in progress. For details, see Technician Messaging.
-
If the Request a video conference option is shown, you can use Zoom to collaborate with the technician when they're working on your order. This feature is only available at specific data centers, for selected order types. For details, see Technician Video Calls.
-
Use Upload File(s) to add any relevant attachments to your request.
- Add up to 5 files.
- The maximum size for each file is 5MB.
- The files can be any of the following formats: bmp, jpg, jpeg, gif, png, tif, tiff, txt, doc, docx, xls, xlsx, ppt, pps, ppsx, pdf, and vsd.
Your attachments are sent to on-site technicians to ensure your installation goes smoothly.
Scheduling
Under Scheduling, specify when the work should occur:

For details, see Scheduling Options.
The scheduled work time is shown in the IBX’s local time zone. To see the scheduled work time in your local time zone, click Show time zone. To change your local time zone in the portal, click your username and select an option from the Time Zone list.
Contact Info
Under Contact Info, specify at least one Technical Contact and at least one Notification Contact:
| Contact Types | Description |
|---|---|
| Technical Contact | For troubleshooting or clarification of the order. If questions arise, and if multiple Technical Contacts are specified on the order, Equinix contacts the person designated as the Primary Technical Contact. Note: Technical contacts do not receive booking or completion notifications. |
| Notification Contact | Contact(s) who will receive email notices about the status and pricing of the order. Note: If an Unlisted contact is selected as a Notification Contact, order pricing details are not included in the notifications they receive. |
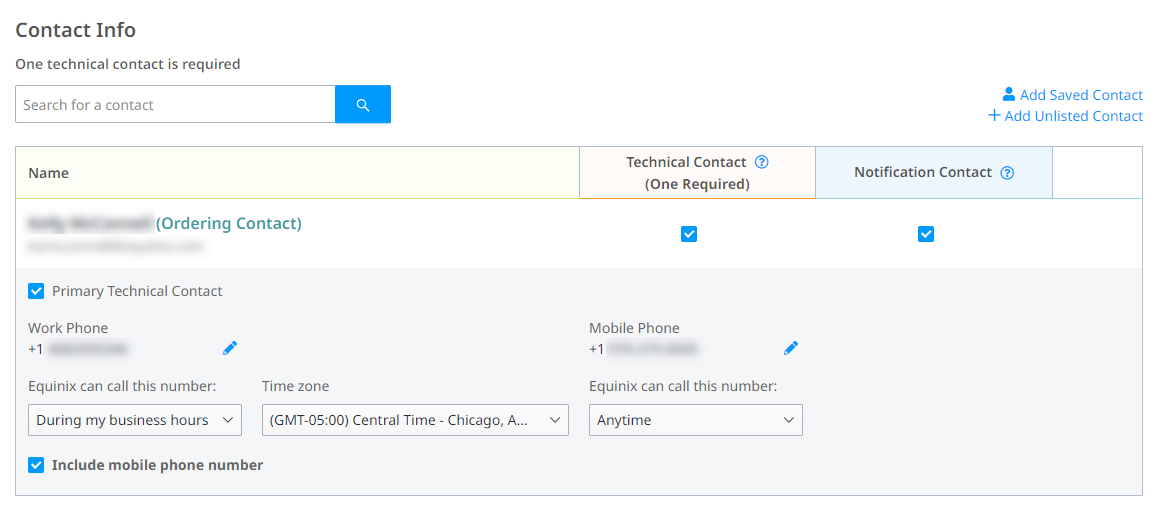
- The Technical Contact and the Notification Contact can be the same person.
- If you select multiple Technical Contacts, designate one as the Primary Technical Contact.
- For each contact listed, enable at least one of the boxes (Technical Contact and/or Notification Contact).
- To remove a contact from the order, click
X.
Adding a Contact
-
To find a contact by name or email address, use the Search box.
-
For additional search/filter options, or to add multiple contacts, click Add Saved Contact.
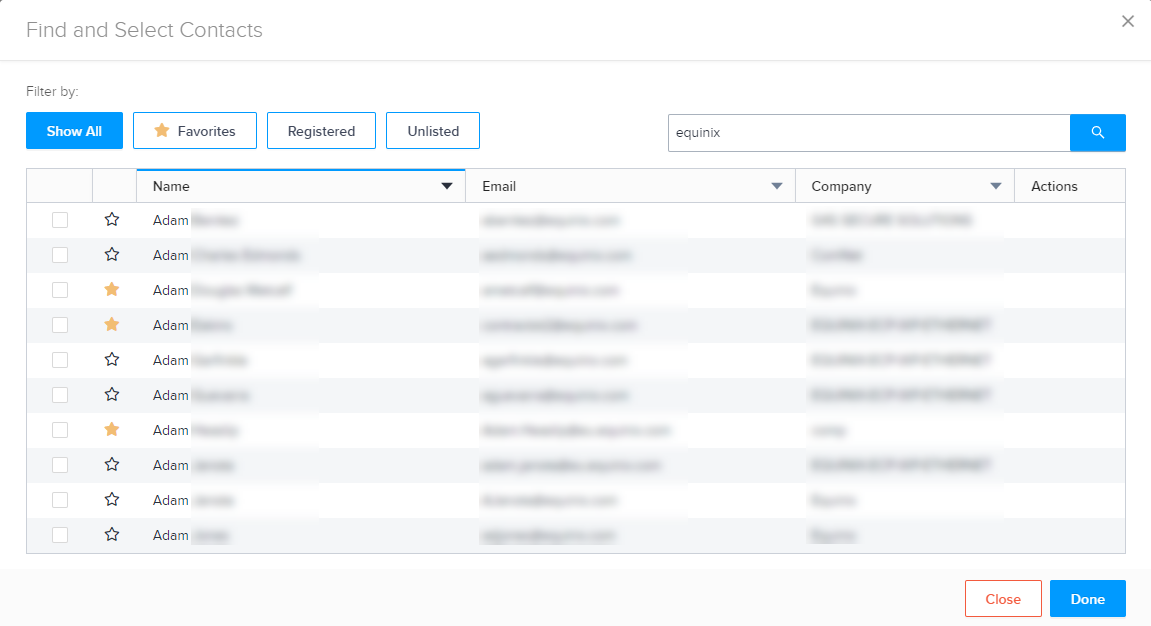
You can use the search box, sort the columns, and/or use the filters at the top. Click the checkbox for the chosen contact(s) and click Done.
tipFor frequently used contacts, click the star beside the name. Then you can use the Favorites filter to quickly find these contacts.
-
To add someone who doesn't have a Customer Portal account, click Add Unlisted Contact. Add their contact details and click Add.
If you plan to use this contact again, you can select Save this Unlisted Contact for future use. To later change or delete a saved Unlisted contact, click Add Saved Contact. Locate the contact, then click edit or delete in the Actions column.
Review and Submit
Enter any Internal Customer Reference Information. This field provides a place to enter your internal reference information, such as P.O. numbers, ticket numbers, or descriptive text.
This information can be searched for on the Orders and Tickets History screen, and will also appear on any related invoices.
Click Review Order.
You will have a chance to review all the details and pricing before your order is submitted. If you have a Smart Hands Support Plan, your order will be deducted from your plan hours automatically. If any required information is missing, it is shown in red. For example:
![]()
Review all the order and pricing information, then click Submit.
Once your order is placed, use Orders and Tickets History to:
- Monitor the status of your request.
- Add more information to your order.
- Respond to 'Action Required' orders.
- Re-open a completed order.
- Finish a saved draft order.
After your Smart Hands order is completed, you’ll receive a survey email inviting you to share feedback about your experience. This survey allows you to comment on how the order was fulfilled and whether you were satisfied with the work performed.