Image Onboarding and Certification (Private Beta)
The Image Self Onboarding platform lets vendors and users independently onboard their virtual network functions (vNFs) on Equinix Network Edge. Upload a private virtual device image, create a device profile, and deploy a virtual device from the Equinix Customer Portal to validate the image.
- This private beta is not intended for production use. Do not use it for live workloads or customer traffic where disruptions could have business impact.
- Only KVM-based QCOW2 images are supported in this release. Images in other formats are not supported.
- Image onboarding is provided on a best-effort basis. The product team may encounter technical limitations, and successful onboarding or deployment is not guaranteed for all submitted images.
- Beta devices cannot be moved to production when the beta period ends. Plan accordingly.
- Delete all test devices and associated resources after testing is completed.
Licensing
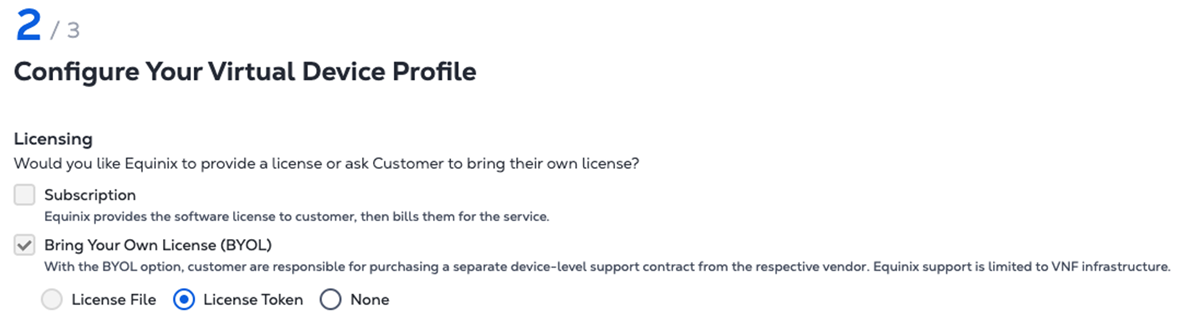
Device profiles support Bring Your Own License (BYOL). You purchase a separate device-level support contract directly from the device vendor.
License File upload is not currently supported.
Beta Considerations
-
Virtual devices created through the Image Onboarding workflow can only be deployed in the Helsinki, Montreal, and Paris metros.
-
The virtual device and its associated connections are free during the Beta, with these caveats:
- Day 1 connections to Equinix Internet Access (EIA) from Network Edge data interfaces are not supported.
- Connection to Port is free when the port is customer-owned.
- Device to CSP is free when you are responsible for the applicable CSP-side charges.
-
Clustering is not supported in the Beta. At General Availability, Network Edge will provide clustering support at the infrastructure layer; you will be responsible for configuring and managing the cluster within your virtual appliances.
Onboard an Image
Before You Begin
To access the Image Self Onboarding platform, set up your account and obtain the necessary permissions:
- Go to Equinix Customer Portal and create a user account. If you are a new organization, create the account directly. If you belong to an existing organization, request an invitation from your organization admin.
- Share your username with Equinix so that Equinix can assign the necessary permissions.
Create the Device Profile
-
Sign in to the Equinix Customer Portal and go to the Network Edge Dashboard.
-
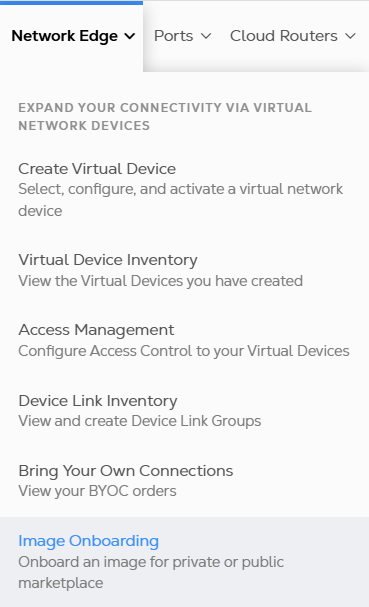
From the Network Edge menu, select Image Onboarding.
-
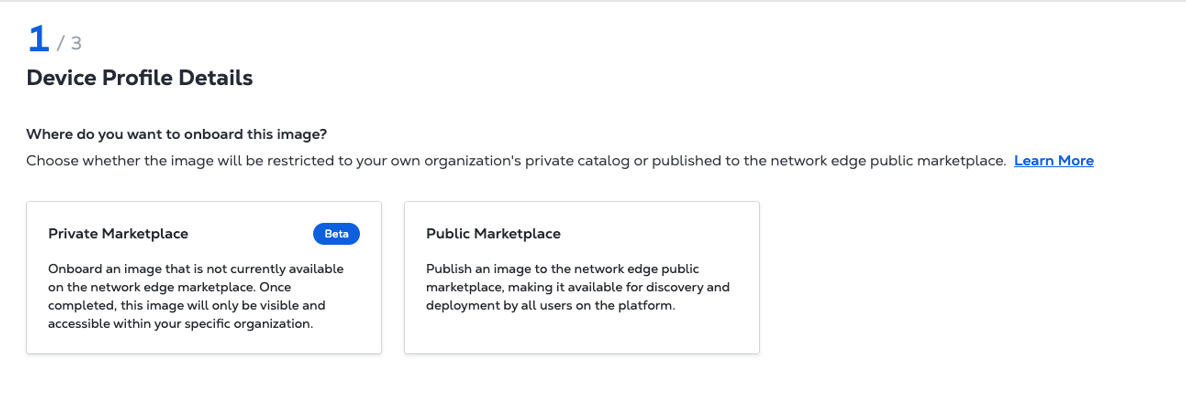
Select Marketplace Type:
-
Private Marketplace is for users who want to bring their own image and onboard it for use within their own organization.
-
Public Marketplace is for vendors who want to test and certify an image before it is published to the Network Edge public marketplace.
-
-
Click Create Device Profile.
-
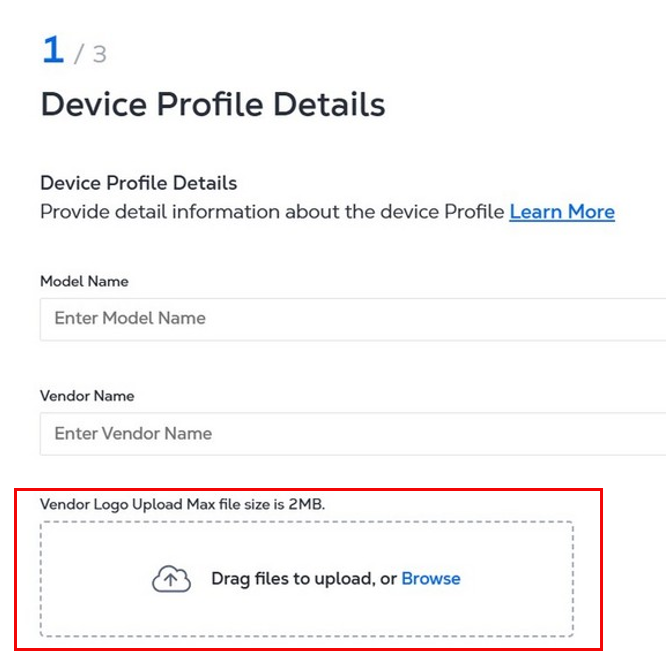
In the Device Profile Details section, enter a Device Model Name.
-
Enter the device Vendor Name.
-
Drag and drop a vendor logo image into the Vendor Logo Upload section. If you don’t upload a logo, Equinix applies a default logo.
-
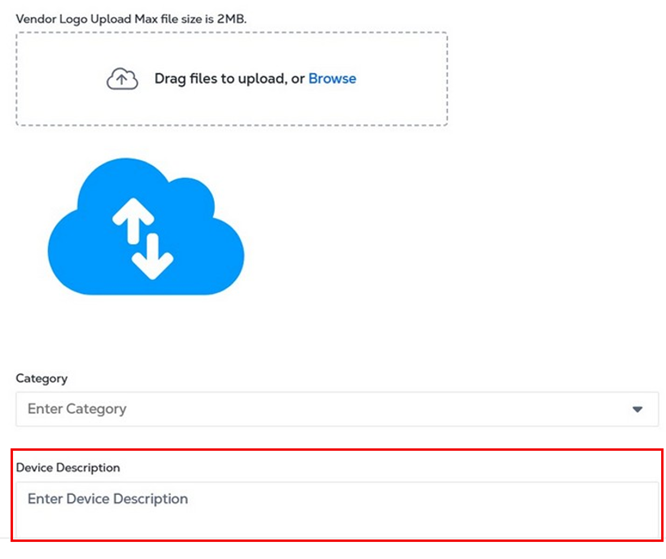
Enter a device Category.
-
Enter a device Description.
-
Click Next.
Configure the Device Profile With Equinix IP Address
-
In the Configure Your Device Profile section, select Bring Your Own License. Subscription licensing is not supported in Beta.
-
Select a licensing method (License Token or None). License File Upload is not supported in Beta.
-
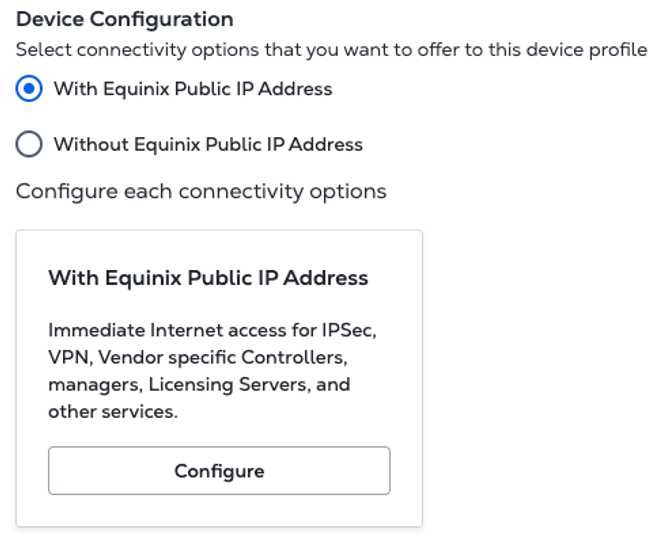
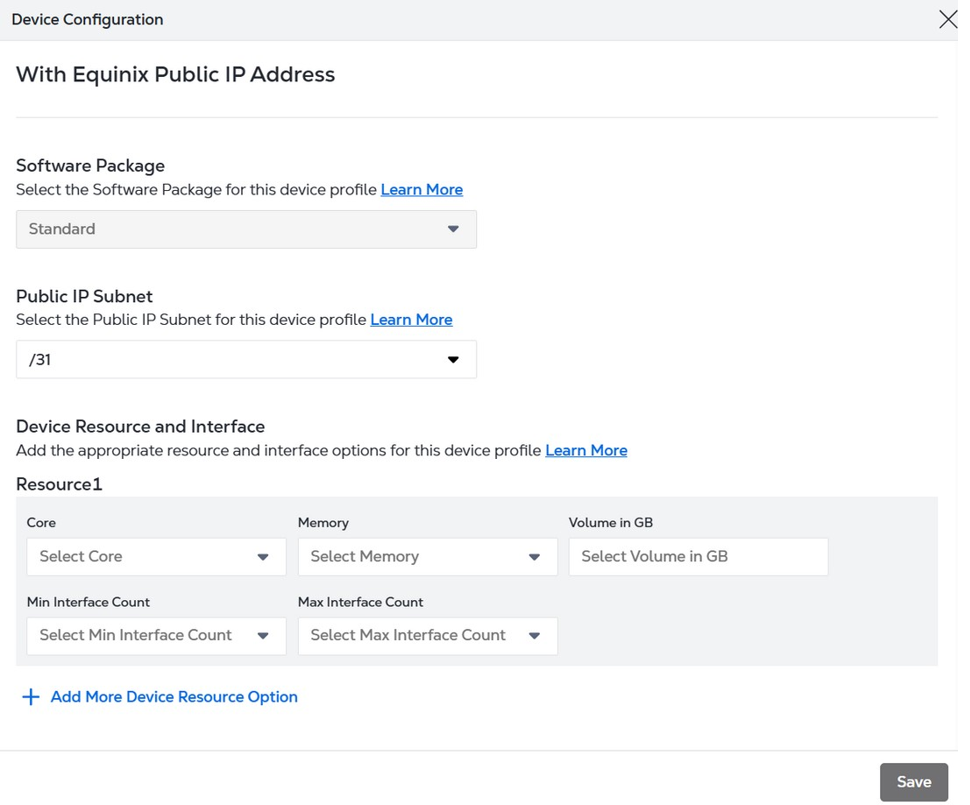
In the Device Configuration section, With Equinix Public IP Address is selected by default. Click Configure to open the Device Configuration drawer. A Without Equinix Public IP Address option is also available for onboarding devices without a public IP.
-
Select a Software Package and a Public IP Subnet.
-
In the Device Resource and Interface section, configure Core, Memory, Volume in GB, Min Interface Count and Max Interface Count.
-
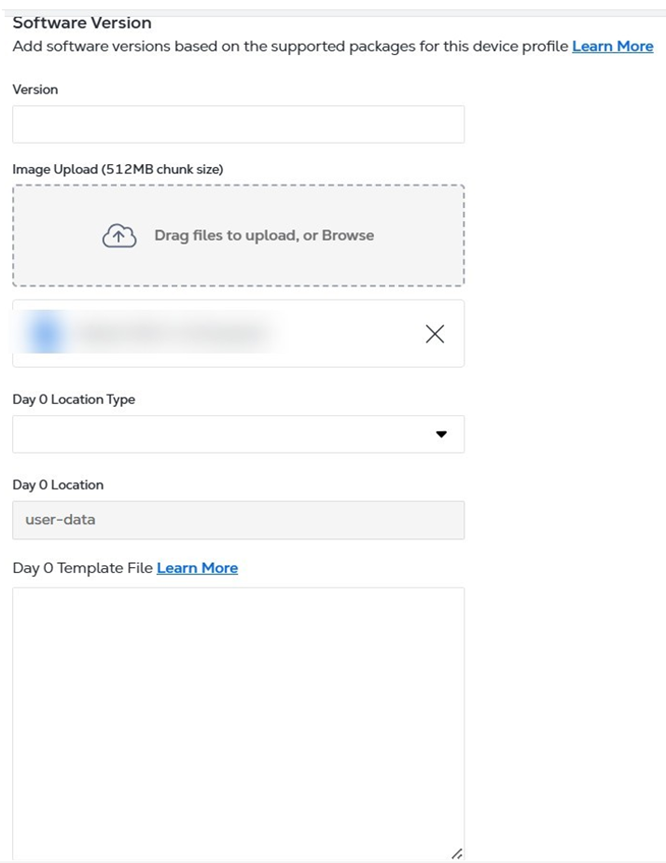
In the Software Version section, enter the software version.
-
Select a Bootloader Type: GRUB/LILO or UEFI (SCSI).
-
Upload your image file in QCOW2 format.
-
Select the Day 0 Location Type: User Data or Custom Path.
-
If you selected User Data, copy and paste the Day 0 Template File (see Day 0 Configuration)
-
If you selected Custom Path, enter the custom path and the Day 0 configuration in the Day 0 Template section.
-
-
(Optional) Click + Add More Day0 to add additional Day 0 files.
-
(Optional) Click + Add More Software Version to add additional software versions.
-
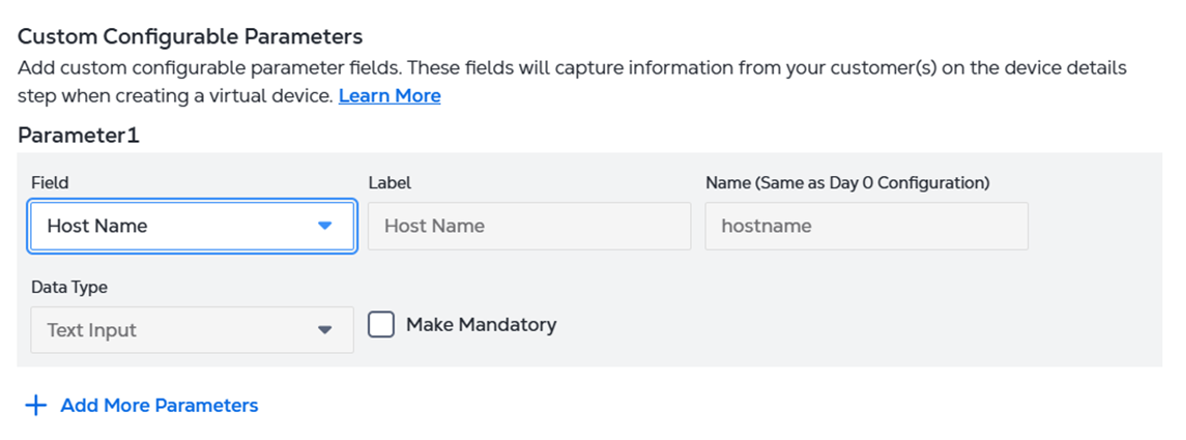
(Optional) In the Custom Configurable Parameters section, select a Field. The Label, Name and Data Type fields auto-fill based on your selection.
-
(Optional) Click Make Mandatory to make a parameter mandatory.
-
(Optional) Click + Add More Parameters to add additional parameters.
-
In the Custom Configurable Parameters section, add a customized parameter by selecting a Field. The Label, Name, and Data Type fields will auto-fill based on your selection.
-
Click Save.
-
(Optional) Provide the Default Access Control List Rule (ACL) for DNS and NTP that should be applied. Administrators can pre-configure ACLs for DNS and NTP, which will be automatically applied when the device is created.

Finalize and Test the Device Profile
-
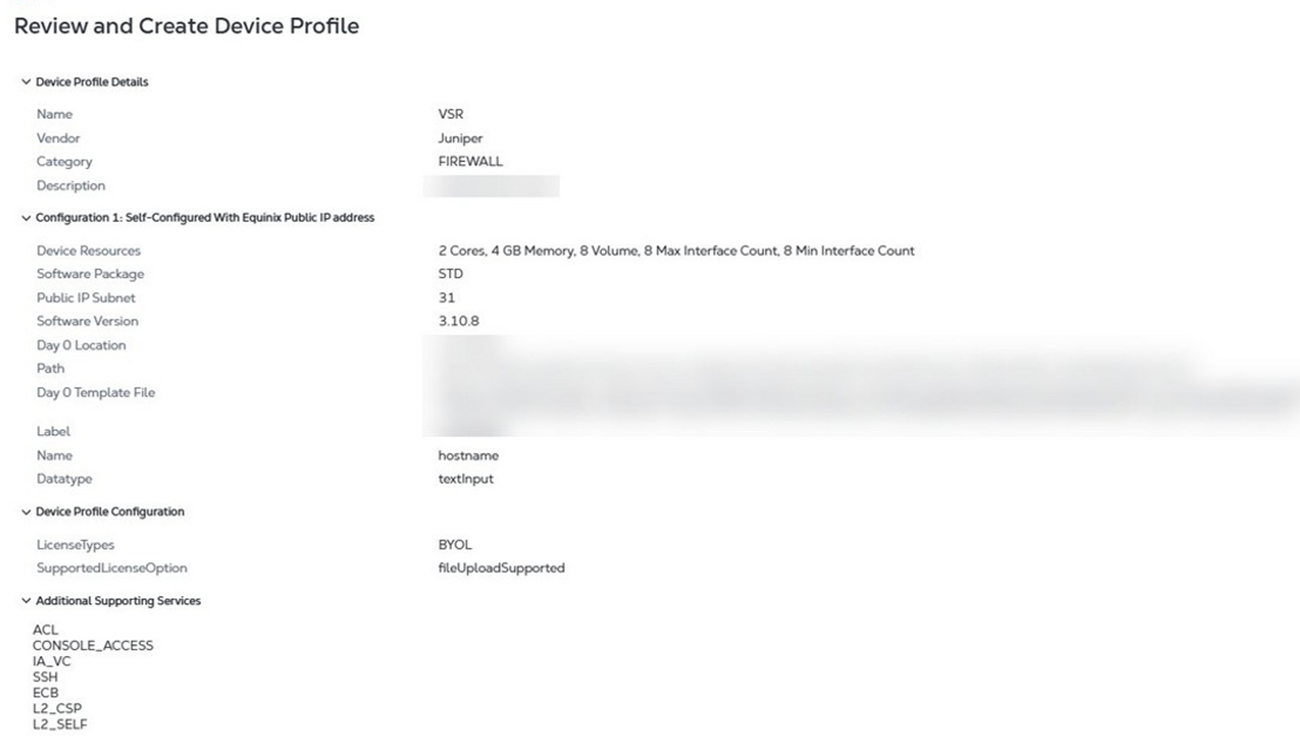
Click Next and review the details of your device profile.
-
Click Submit to complete the device profile creation.
-
Go to the Device Profile Inventory to view the device profile.
-
Click Test to start the device creation workflow.
Download the Serial Port Logs
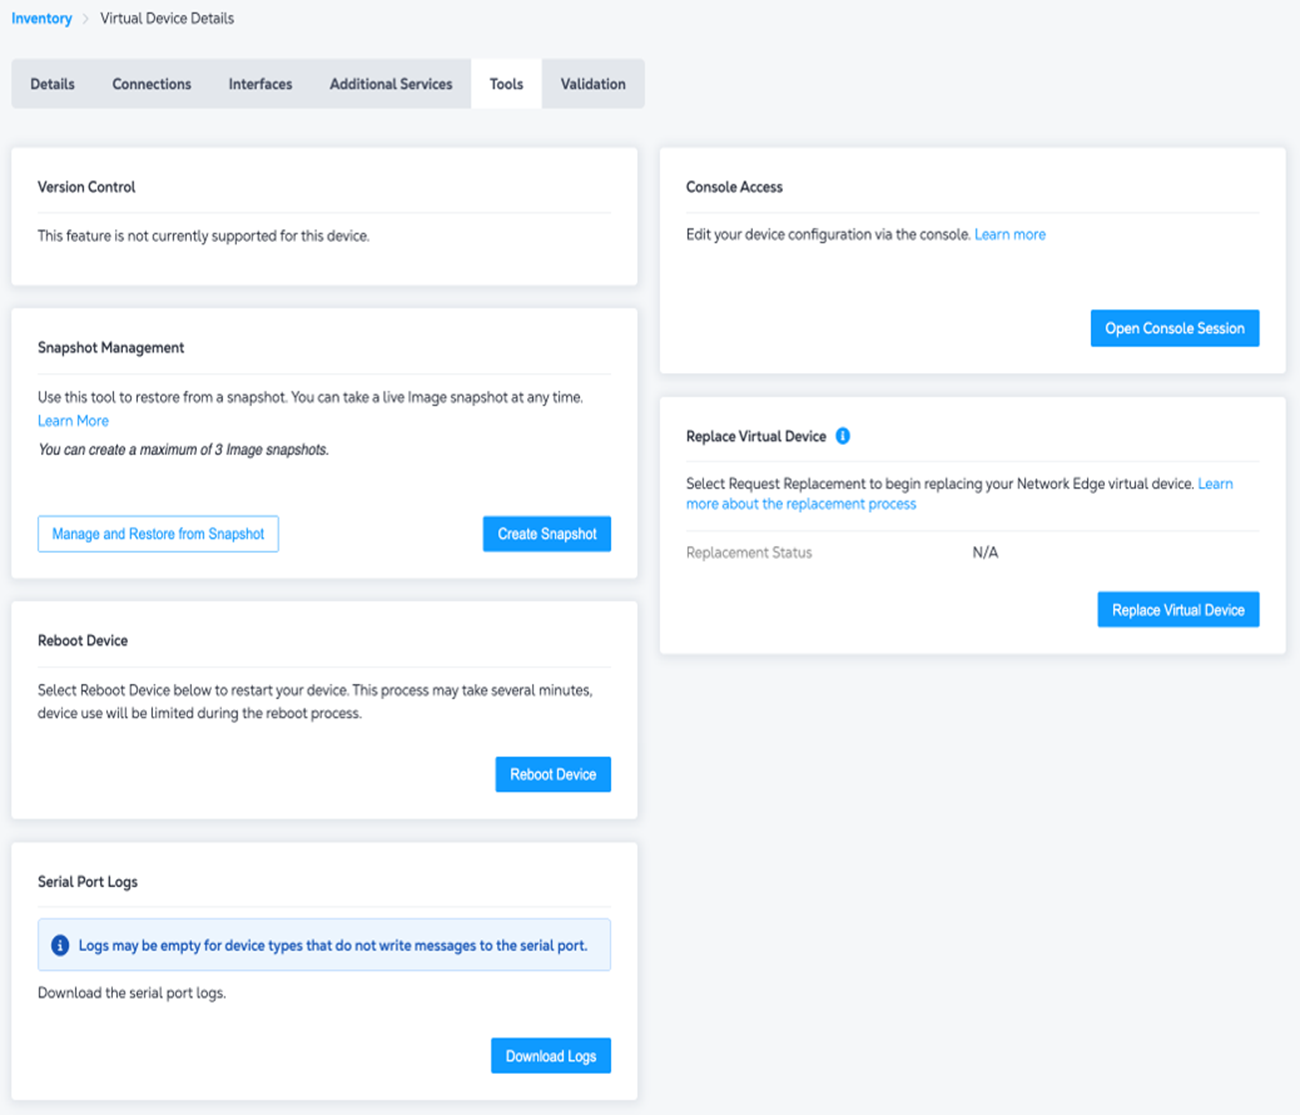
The Tools tab of the Virtual Device Details page provides access to serial port logs for your virtual device. You can download the logs if messages are being written to the serial port. They are useful for debugging boot-time issues, such as a device that fails to boot or stalls during initialization.
-
Go to the Virtual Device Details page and click the Tools tab.
-
Scroll down to the Serial Port Logs section and click Download Logs. A save prompt appears with the log file named using the device uuid (for example,
serial-logs-<device-uuid>).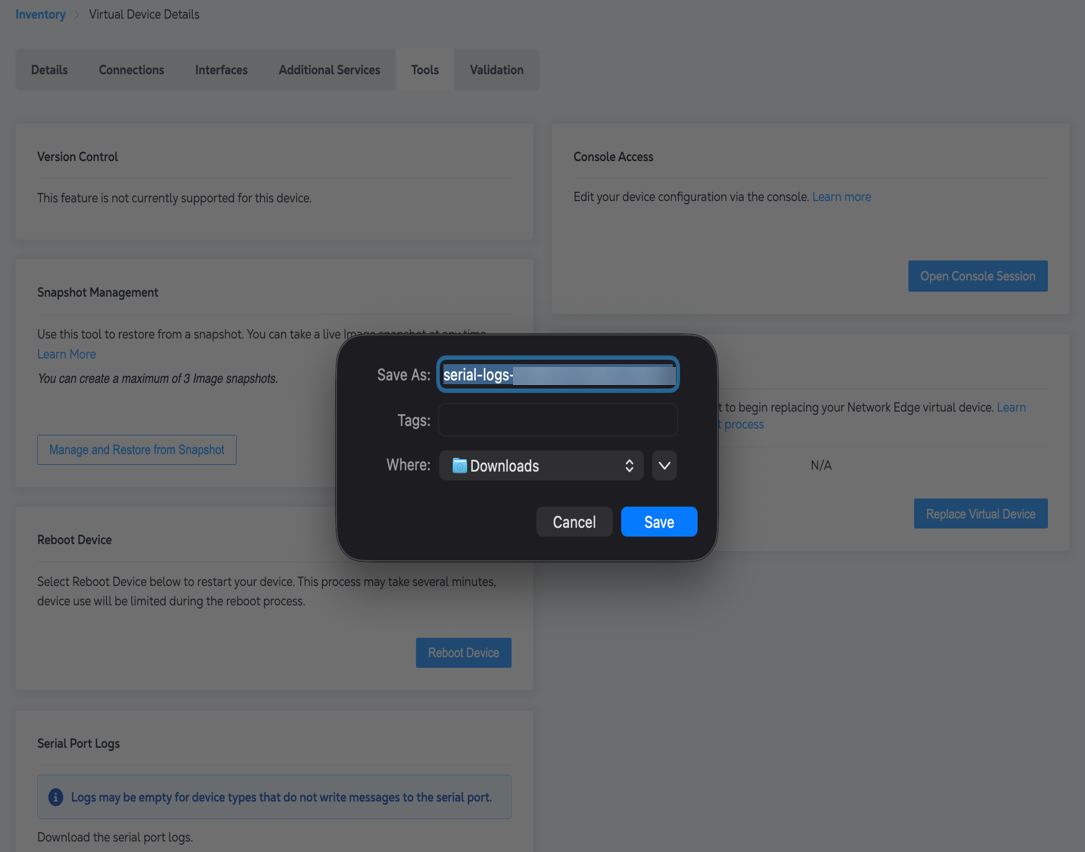
-
Save the file and open it in any text editor to review the boot output.
Day 0 Configuration
Copy your existing Day 0 (cloud-init) configuration file and modify it to work with Equinix Network Edge provisioning. Handle each variable in one of three ways:
-
Replace vendor-specific variables with Equinix predefined variables.
-
Hardcode static values where dynamic input is not required.
-
Add custom variables if needed. They are provided during the provisioning workflow.
Supported Equinix Variables
- Replace all vendor-specific variables with Equinix variables using the format
[(${variablename})]. - Variable names are case-sensitive. Make sure they match exactly.
- Hardcode values only when dynamic input is not required.
- Map any custom variables you add during the provisioning workflow.
- Validate the final Day 0 file before submitting it for onboarding.
| Variable | Description |
|---|---|
gateway | Default gateway IP address |
ipAddress | IP address assigned to the device interface |
subnetMask | Subnet mask for the device interface |
addressMask | Address mask (CIDR notation) |
interfaceId | Unique identifier for the network interface |
ipAddressWithCidr | IP address combined with CIDR prefix (for example, 192.168.1.1/24) |
adminPwd | Administrator password for device login |
publicKey | SSH public key for key-based authentication |
userName | Username for device login |
hostname | Hostname assigned to the device |
Example: Original Vendor Day 0 File
Vendor-provided Day 0 file with vendor-specific variables:
#cloud-config
vyos_config_options:
  network_config: disabled
vyos_config_commands:
  - delete interfaces ethernet eth0 address
  - set interfaces ethernet eth${PUBLIC_INTF_NUM} address '${PUBLIC_ADDRESS_WITH_MASK}'
  - set protocols static route 0.0.0.0/0 next-hop ${PUBLIC_GATEWAY}
  - set service ssh disable-host-validation
  - set system login user ${USERNAME} authentication encrypted-password '${ADMIN_PWD}'
  #if (${IS_PUBLIC_KEY_EXISTS} == "true")
  - set system login user ${USERNAME} authentication public-keys equinix_key key '${PUBLIC_KEY}'
  - set system login user ${USERNAME} authentication public-keys equinix_key type 'sshrsa'
  #end
  - delete system login user vyos
  - set system host-name '${HOSTNAME}'
  - set system name-server '${NAME_SERVER_PRI}'
  - set system name-server '${NAME_SERVER_SEC}'
  #if (${IMAGE_VERSION} == "VER_14_ONWARDS")
  - delete service ntp server
  - set service ntp server '${NTP_SERVER_SUBNET}'
  #else
  - set system ntp server '${NTP_SERVER_SUBNET}'
  #end
  - set system login banner pre-login
Example: Modified Day 0 File Using Equinix Variables
The same file with vendor-specific variables replaced and static values hardcoded where appropriate:
#cloud-config
vyos_config_options:
  network_config: disabled
vyos_config_commands:
  - delete interfaces ethernet eth0 address
  - set interfaces ethernet eth0 address '[(${ipAddressWithCidr})]'
  - set protocols static route 0.0.0.0/0 next-hop [(${gateway})]
  - set service ssh disable-host-validation
  - set system login user [(${userName})] authentication encrypted-password '[(${adminPwd})]'
  - set system login user [(${userName})] authentication public-keys equinix_key key '[(${publicKey})]'
  - set system login user [(${userName})] authentication public-keys equinix_key type 'ssh-rsa'
  - delete system login user vyos
  - set system host-name '[(${hostname})]'
  - set system name-server '8.8.8.8'
  - set system name-server '8.8.4.4'
  - set system ntp server '216.239.35.0/28'
  - set system login banner pre-login
Example: Ubuntu/Debian cloud-init
Day 0 file for Ubuntu-based virtual devices. It sets the root password, enables SSH password authentication, configures the network interface with Equinix variables through netplan, and applies the configuration on first boot:
#cloud-config
chpasswd:
  list: |
    root:test
  expire: false

ssh_pwauth: true

write_files:
  - path: /etc/netplan/50-cloud-init.yaml
    owner: root:root
    permissions: '0600'
    content: |
      network:
        version: 2
        renderer: networkd
        ethernets:
          ens3:
            addresses:
              - [(${ipAddressWithCidr})]
            routes:
              - to: default
                via: [(${gateway})]
            nameservers:
              addresses: [8.8.8.8, 8.8.4.4]

runcmd:
  - netplan apply
In the Ubuntu example, ipAddressWithCidr provides the IP with CIDR prefix (for example, 192.168.1.10/30) and gateway provides the default gateway. The Equinix provisioning engine injects both at device creation time. The netplan apply command in runcmd applies the network configuration on first boot.
Move Your Image to the Private Marketplace
After you complete testing, submit a request to have the image moved to your Private Marketplace by emailing the Network Edge Product team.
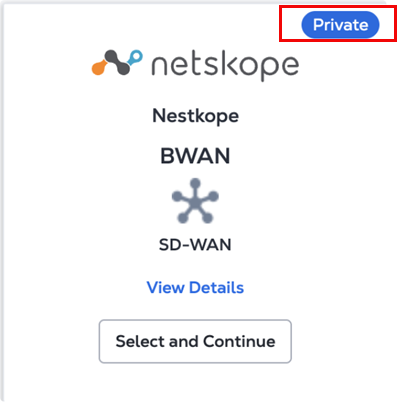
Once published, your image appears as a selectable device card in your Private Marketplace, with a Private badge, vendor logo, device name, and category.
Request Process
| Step | Action | Responsible |
|---|---|---|
| 1 | Complete image validation | Customer |
| 2 | Email Network Edge Product team requesting Private Marketplace publication | Customer |
| 3 | Review and publish image to Private Marketplace (up to 48 hours) | Equinix |
| 4 | Deploy virtual devices from Private Marketplace in any Network Edge metro | Customer |
Support & Resources
For questions or support, contact the Equinix Network Edge Product team at Network-Edge-Product@equinix.com.