# Colt On Demand
The Equinix Fabric and Colt On Demand integration enables customers to quickly and securely connect their physical or virtual infrastructure hosted in Equinix to the [Colt On Demand](https://docs.colt.net/on-demand/user-guides/cloud-on-demand) NaaS platform. Using Equinix Fabric and Colt’s automated network services, connections can be provisioned on demand, providing flexible, scalable connectivity to enterprise locations, data centres, cloud providers, and partners from a single access point.
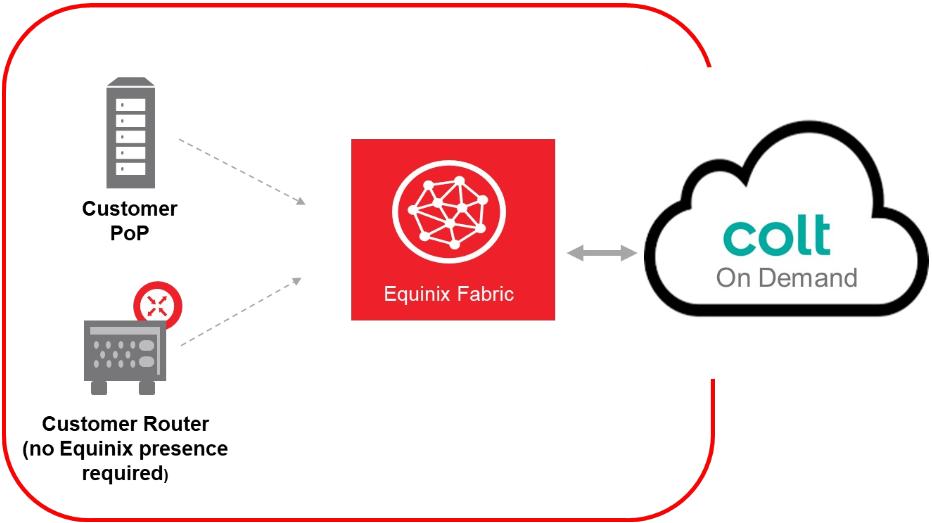
Equinix Fabric supports connecting Colt On Demand through the *Colt On Demand Interconnect* service profile, which offers local connections in:
| **EMEA** | **APAC** |
| ------------------------------------------------------------------------------------- | ---------------------------------------------- |
| Amsterdam
Frankfurt
London
Madrid
Milan
Paris
Stockholm | Hong Kong
Osaka
Singapore
Tokyo |
You can also connect remotely from any Equinix Fabric location.
To establish connectivity between Equinix Fabric and the Colt On Demand NaaS platform, start in the Equinix Customer Portal to:
* Create the virtual connection.
* Generate the connection ID.
Then, sign in to the Colt On Demand platform and:
* Create the Equinix Cloud Port using the connection ID.
* Add the connection to the Cloud Port.
## Prerequisites[](#prerequisites "Direct link to Prerequisites")
* A [Colt On Demand](https://docs.colt.net/on-demand/registration) account.
* An [Equinix Customer Portal](/pt-BR/customer-portal/new-customer-onboarding.md) account.
* A [Fabric port](/pt-BR/fabric/ports/fabric-order-port-new.md), an [A-side service token](/pt-BR/fabric/service-tokens/redeem-a-side-service-token.md), a [Fabric Cloud Router](/pt-BR/fabric-cloud-router/index.md), or a [Network Edge virtual device](/pt-BR/network-edge/index.md)
* In order to create connections in Fabric, you must have the `Fabric Connections Manager` role.
## Creating the Fabric Connection[](#creating-the-fabric-connection "Direct link to Creating the Fabric Connection")
1. Sign in to the Equinix [Customer Portal](https://portal.equinix.com/) and navigate to the *Fabric Dashboard*.
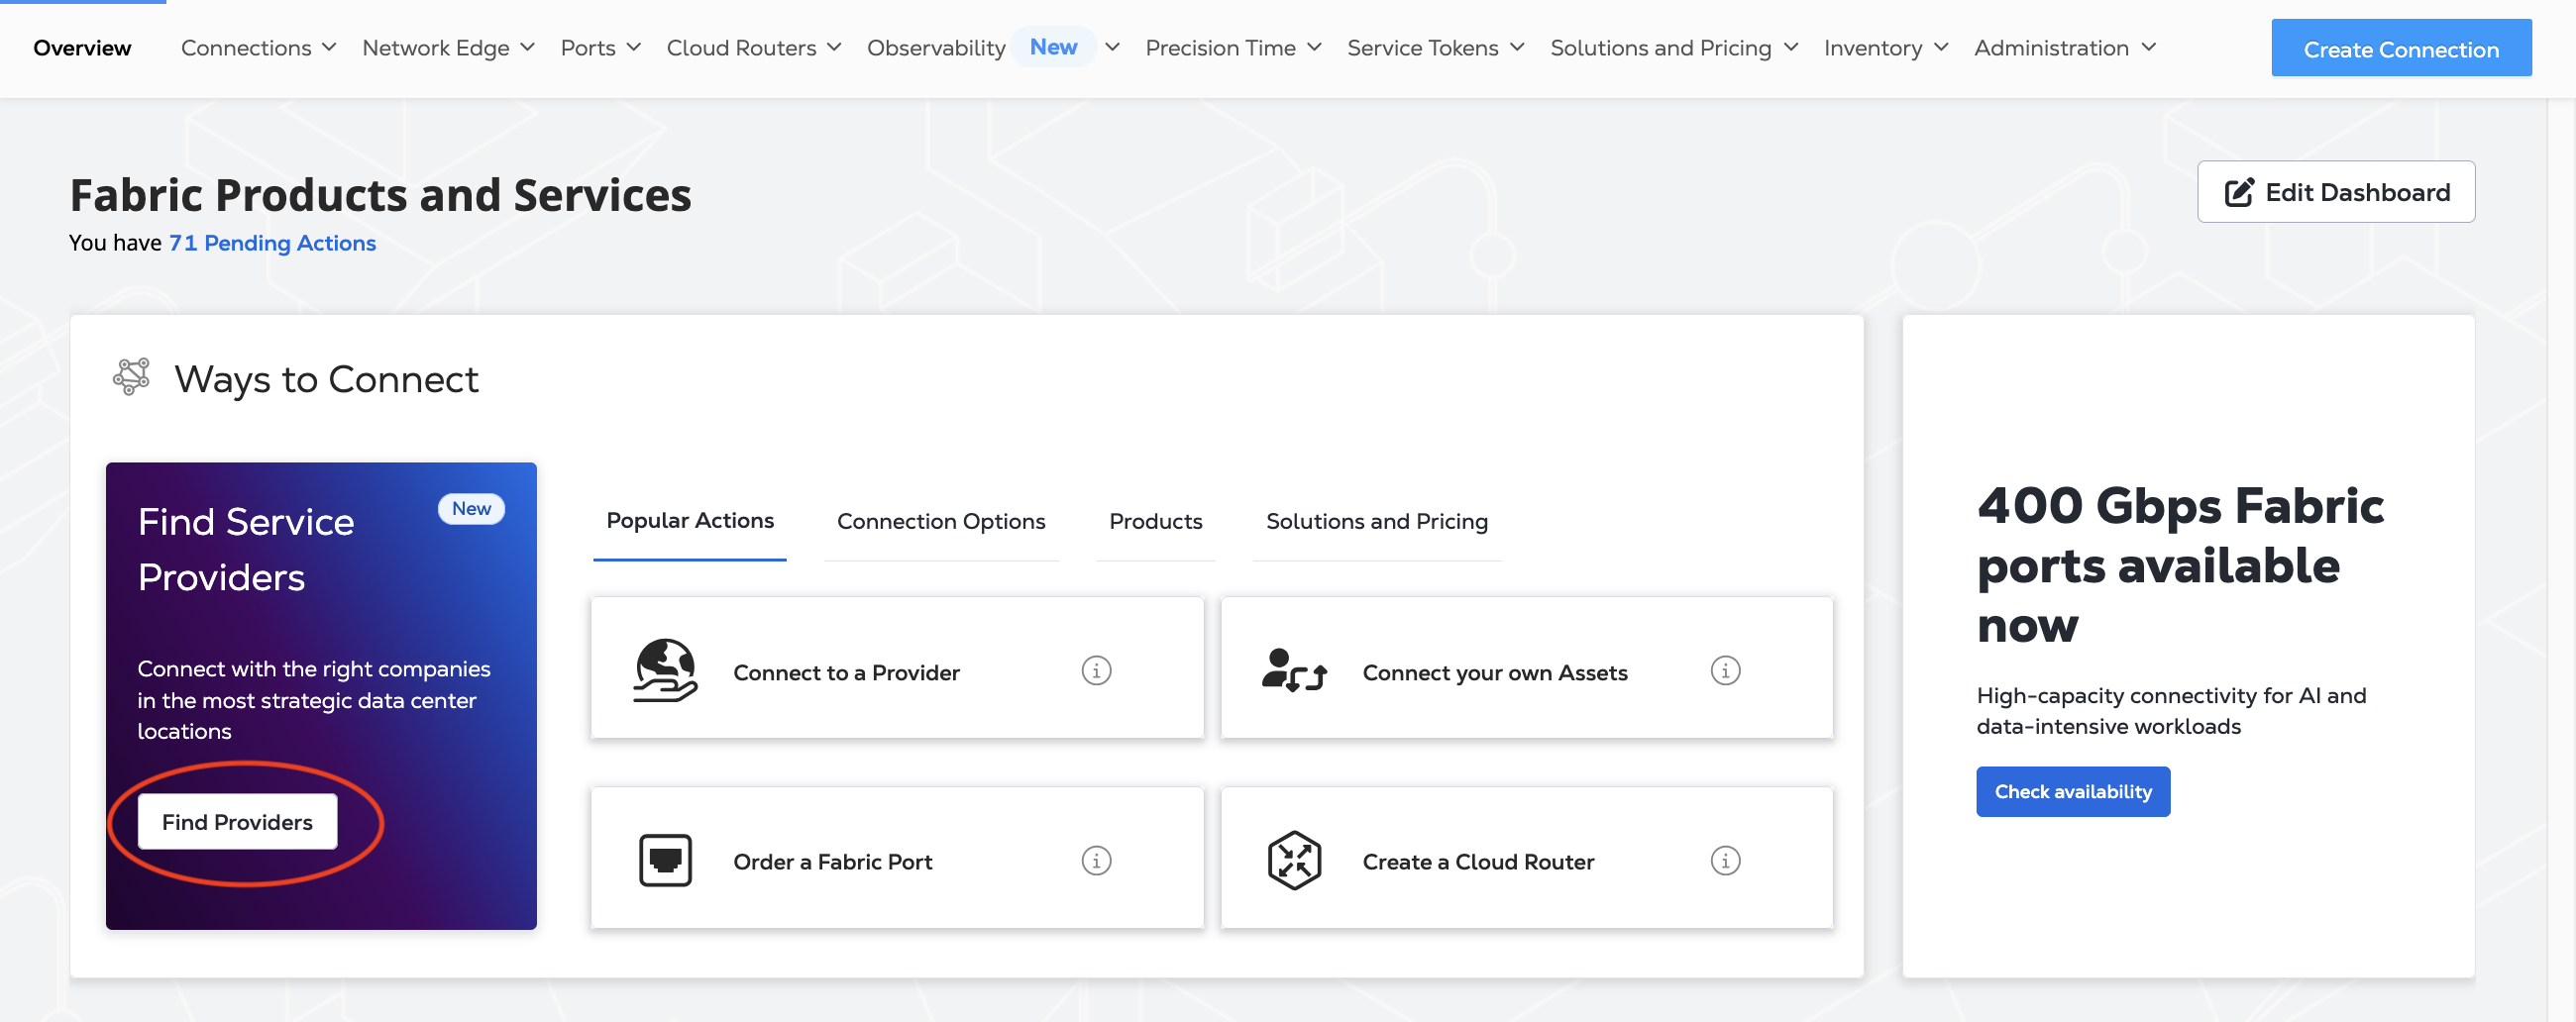
2. In the *Fabric Marketplace* panel, click **Find Providers**.
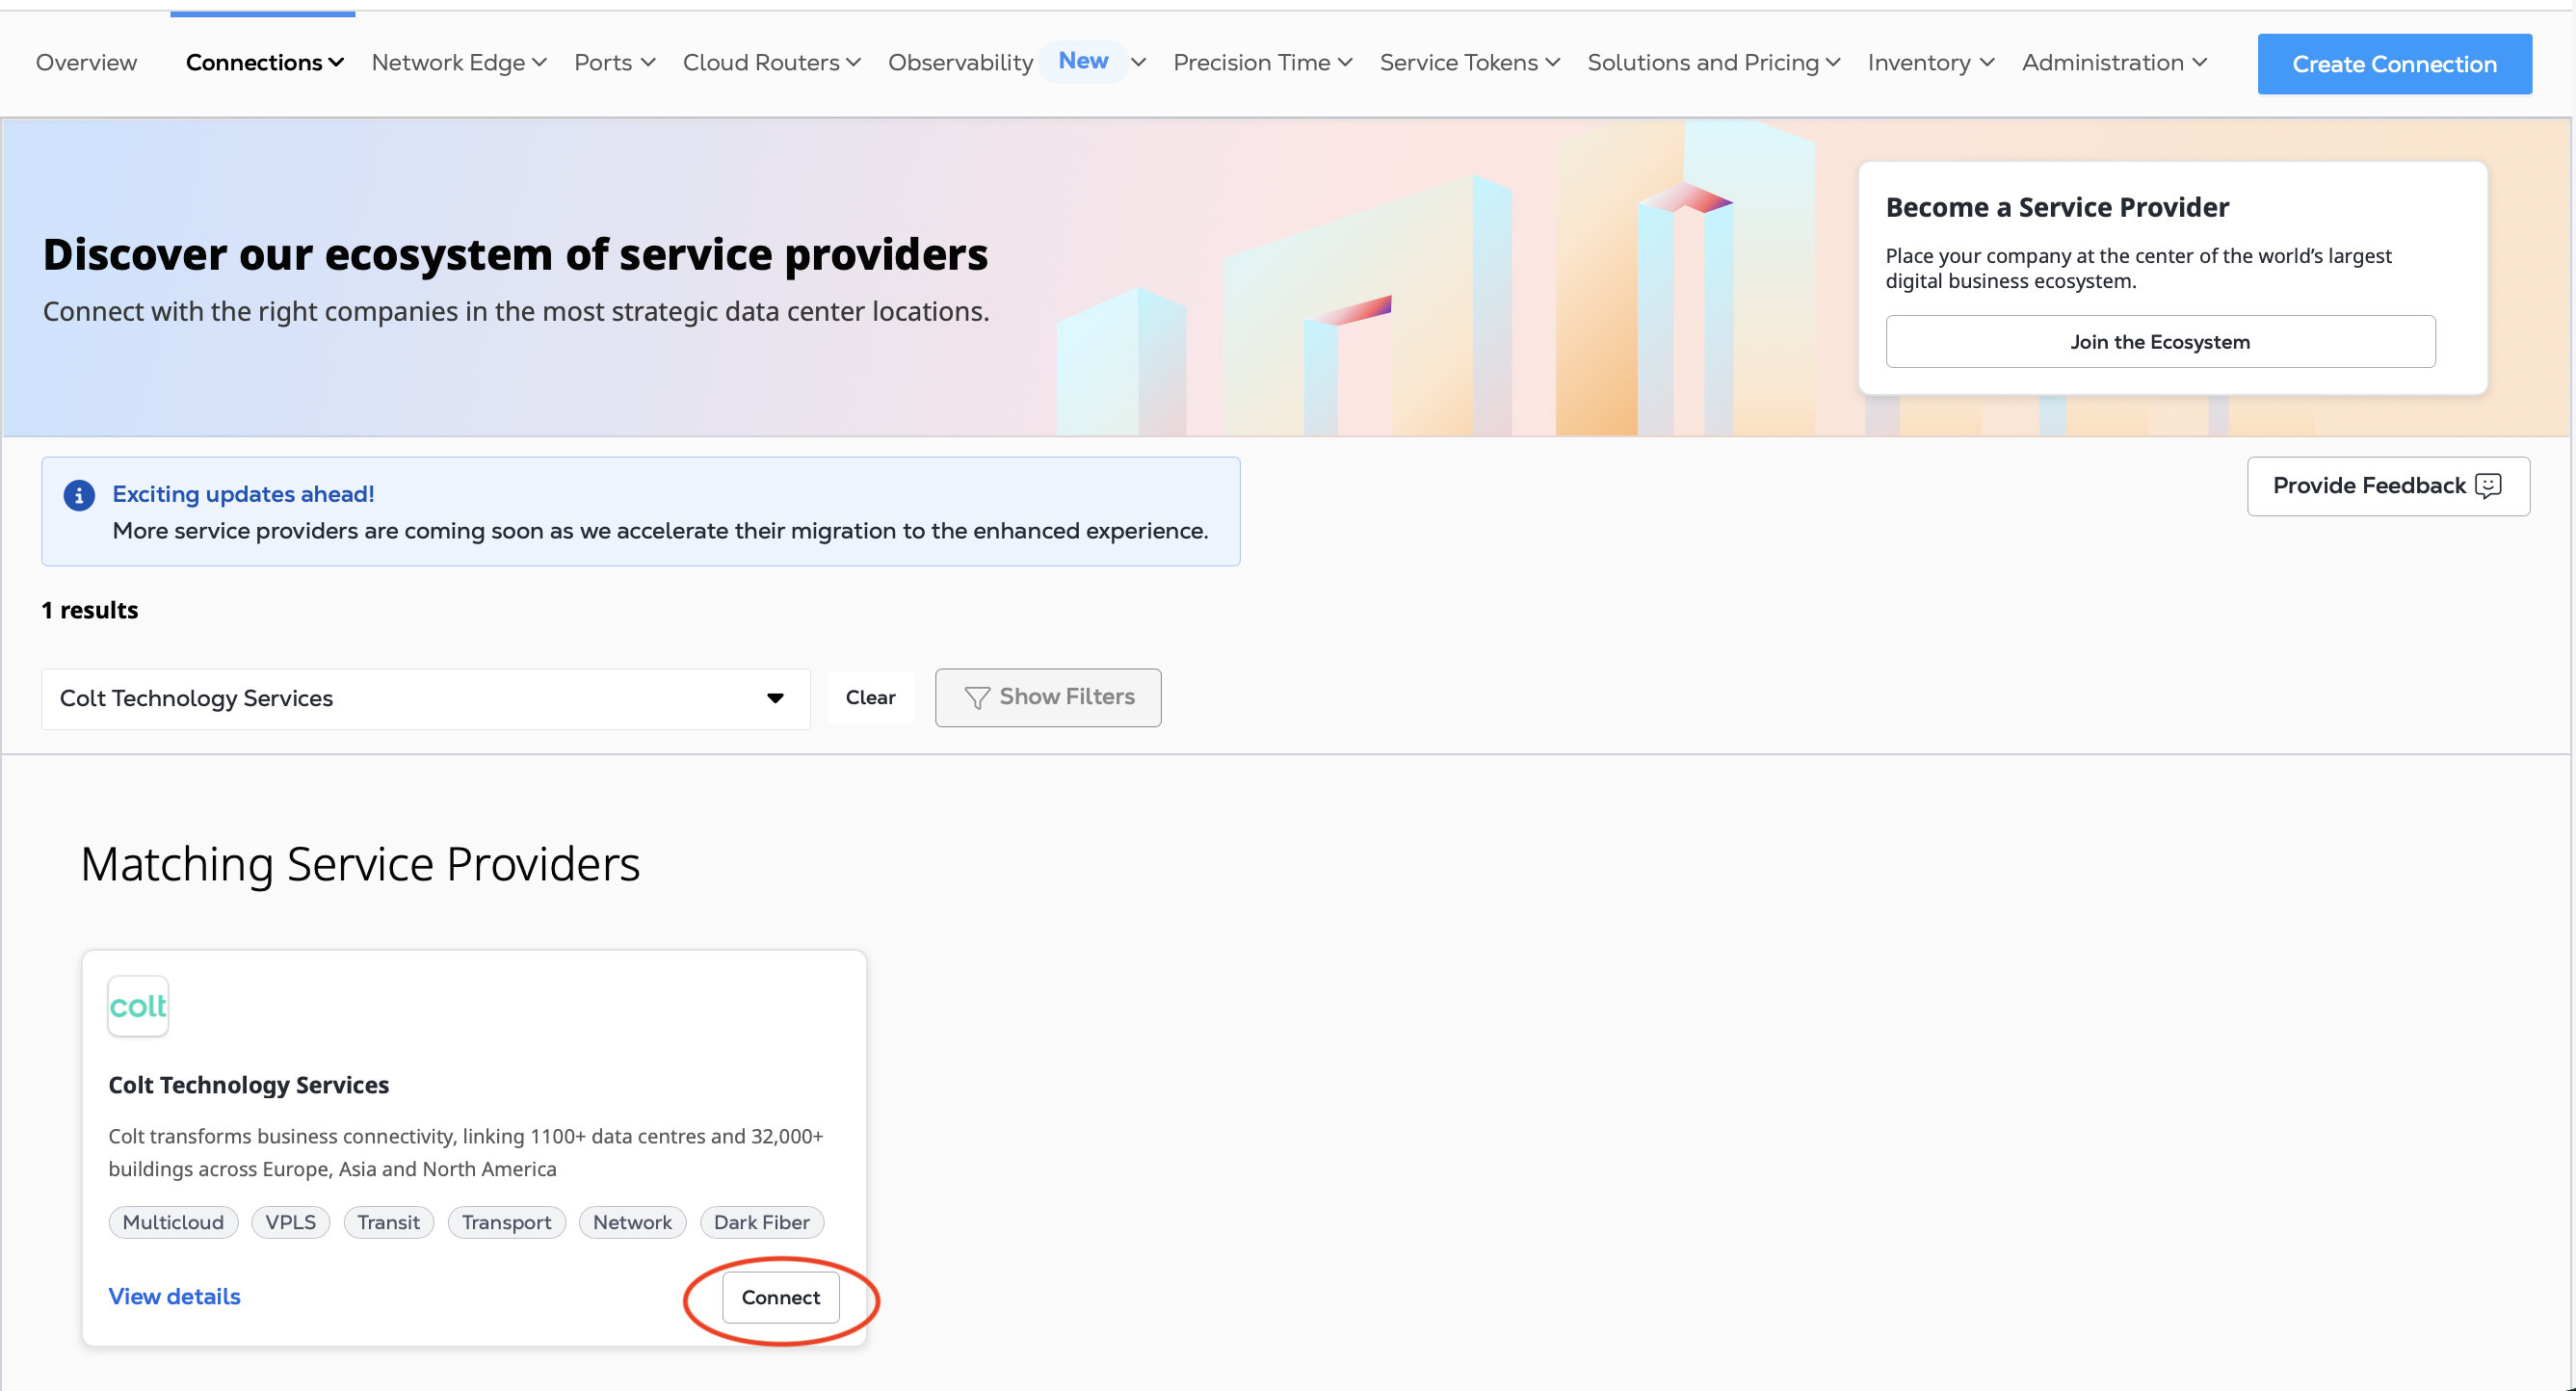
3. Search for "Colt". On the *Colt Technology Services* card, click **Connect**.
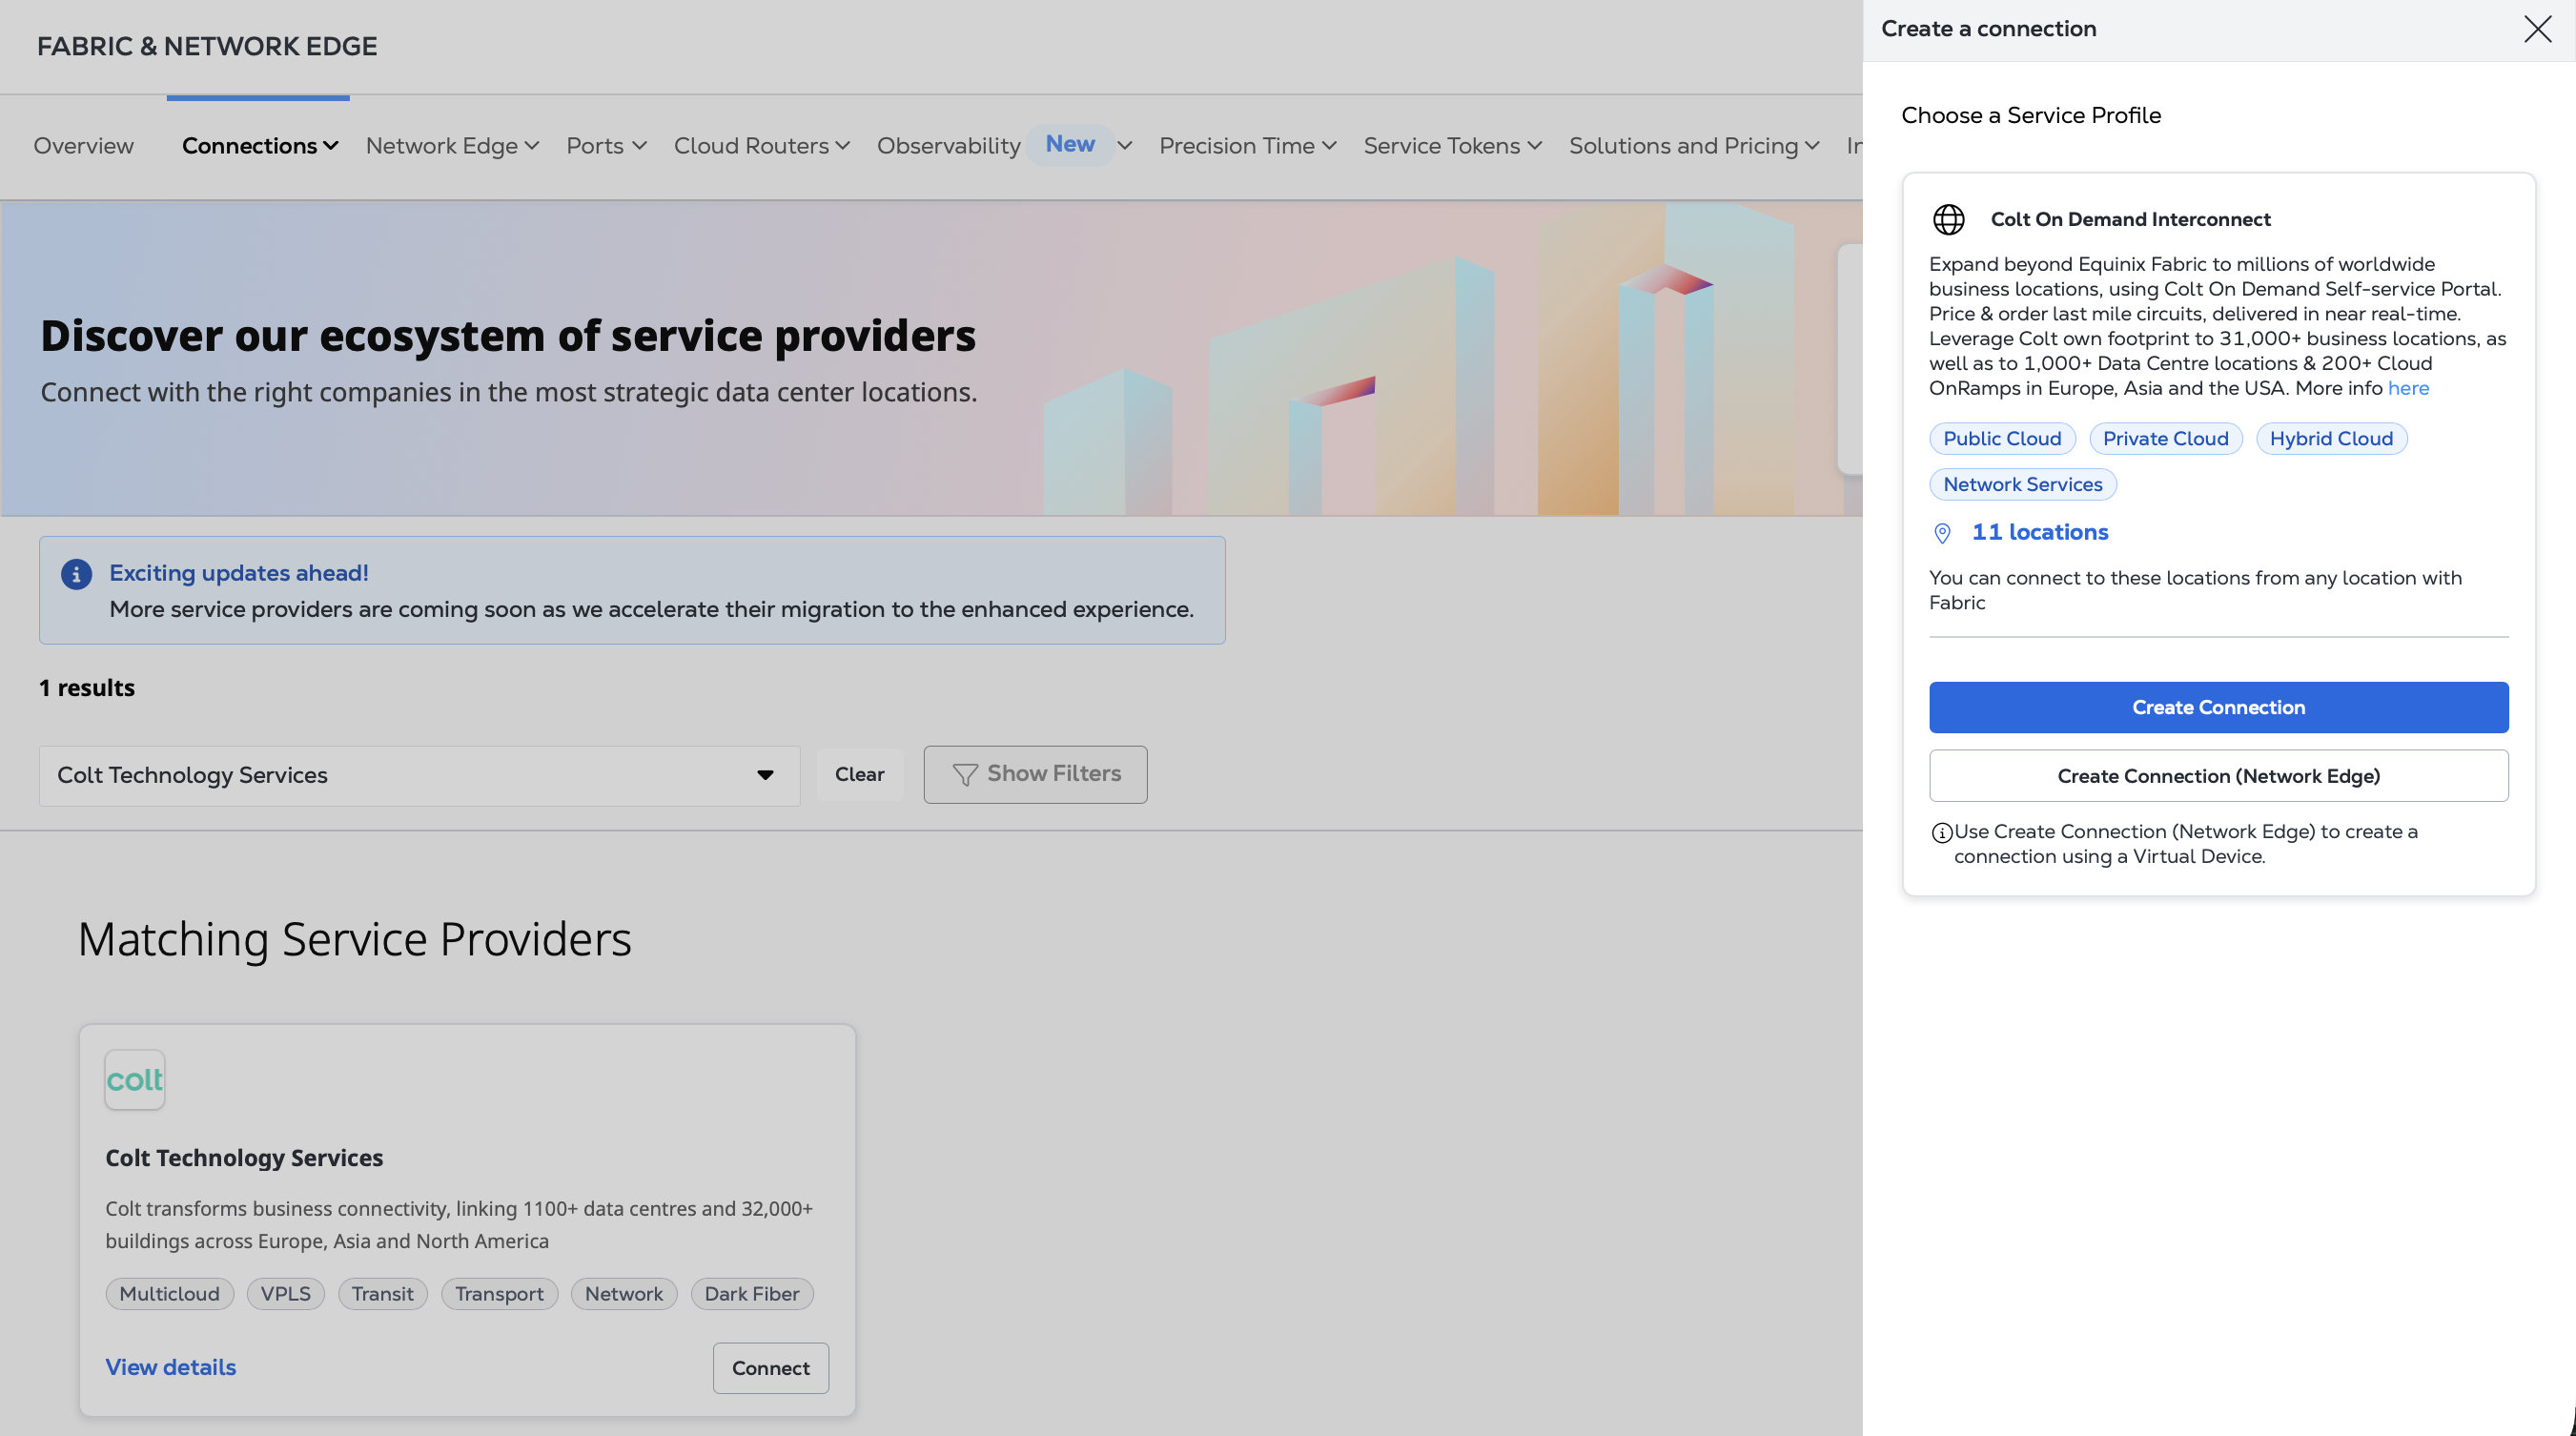
4. From the *Colt On Demand Interconnect* service profile, choose **Create Connection**. If you are connecting from a Network Edge virtual device, choose **Create Connection (Network Edge)** and see [Connecting from a Virtual Device](#connecting-from-a-virtual-device).
### Enter Your Colt Information[](#enter-your-colt-information "Direct link to Enter Your Colt Information")
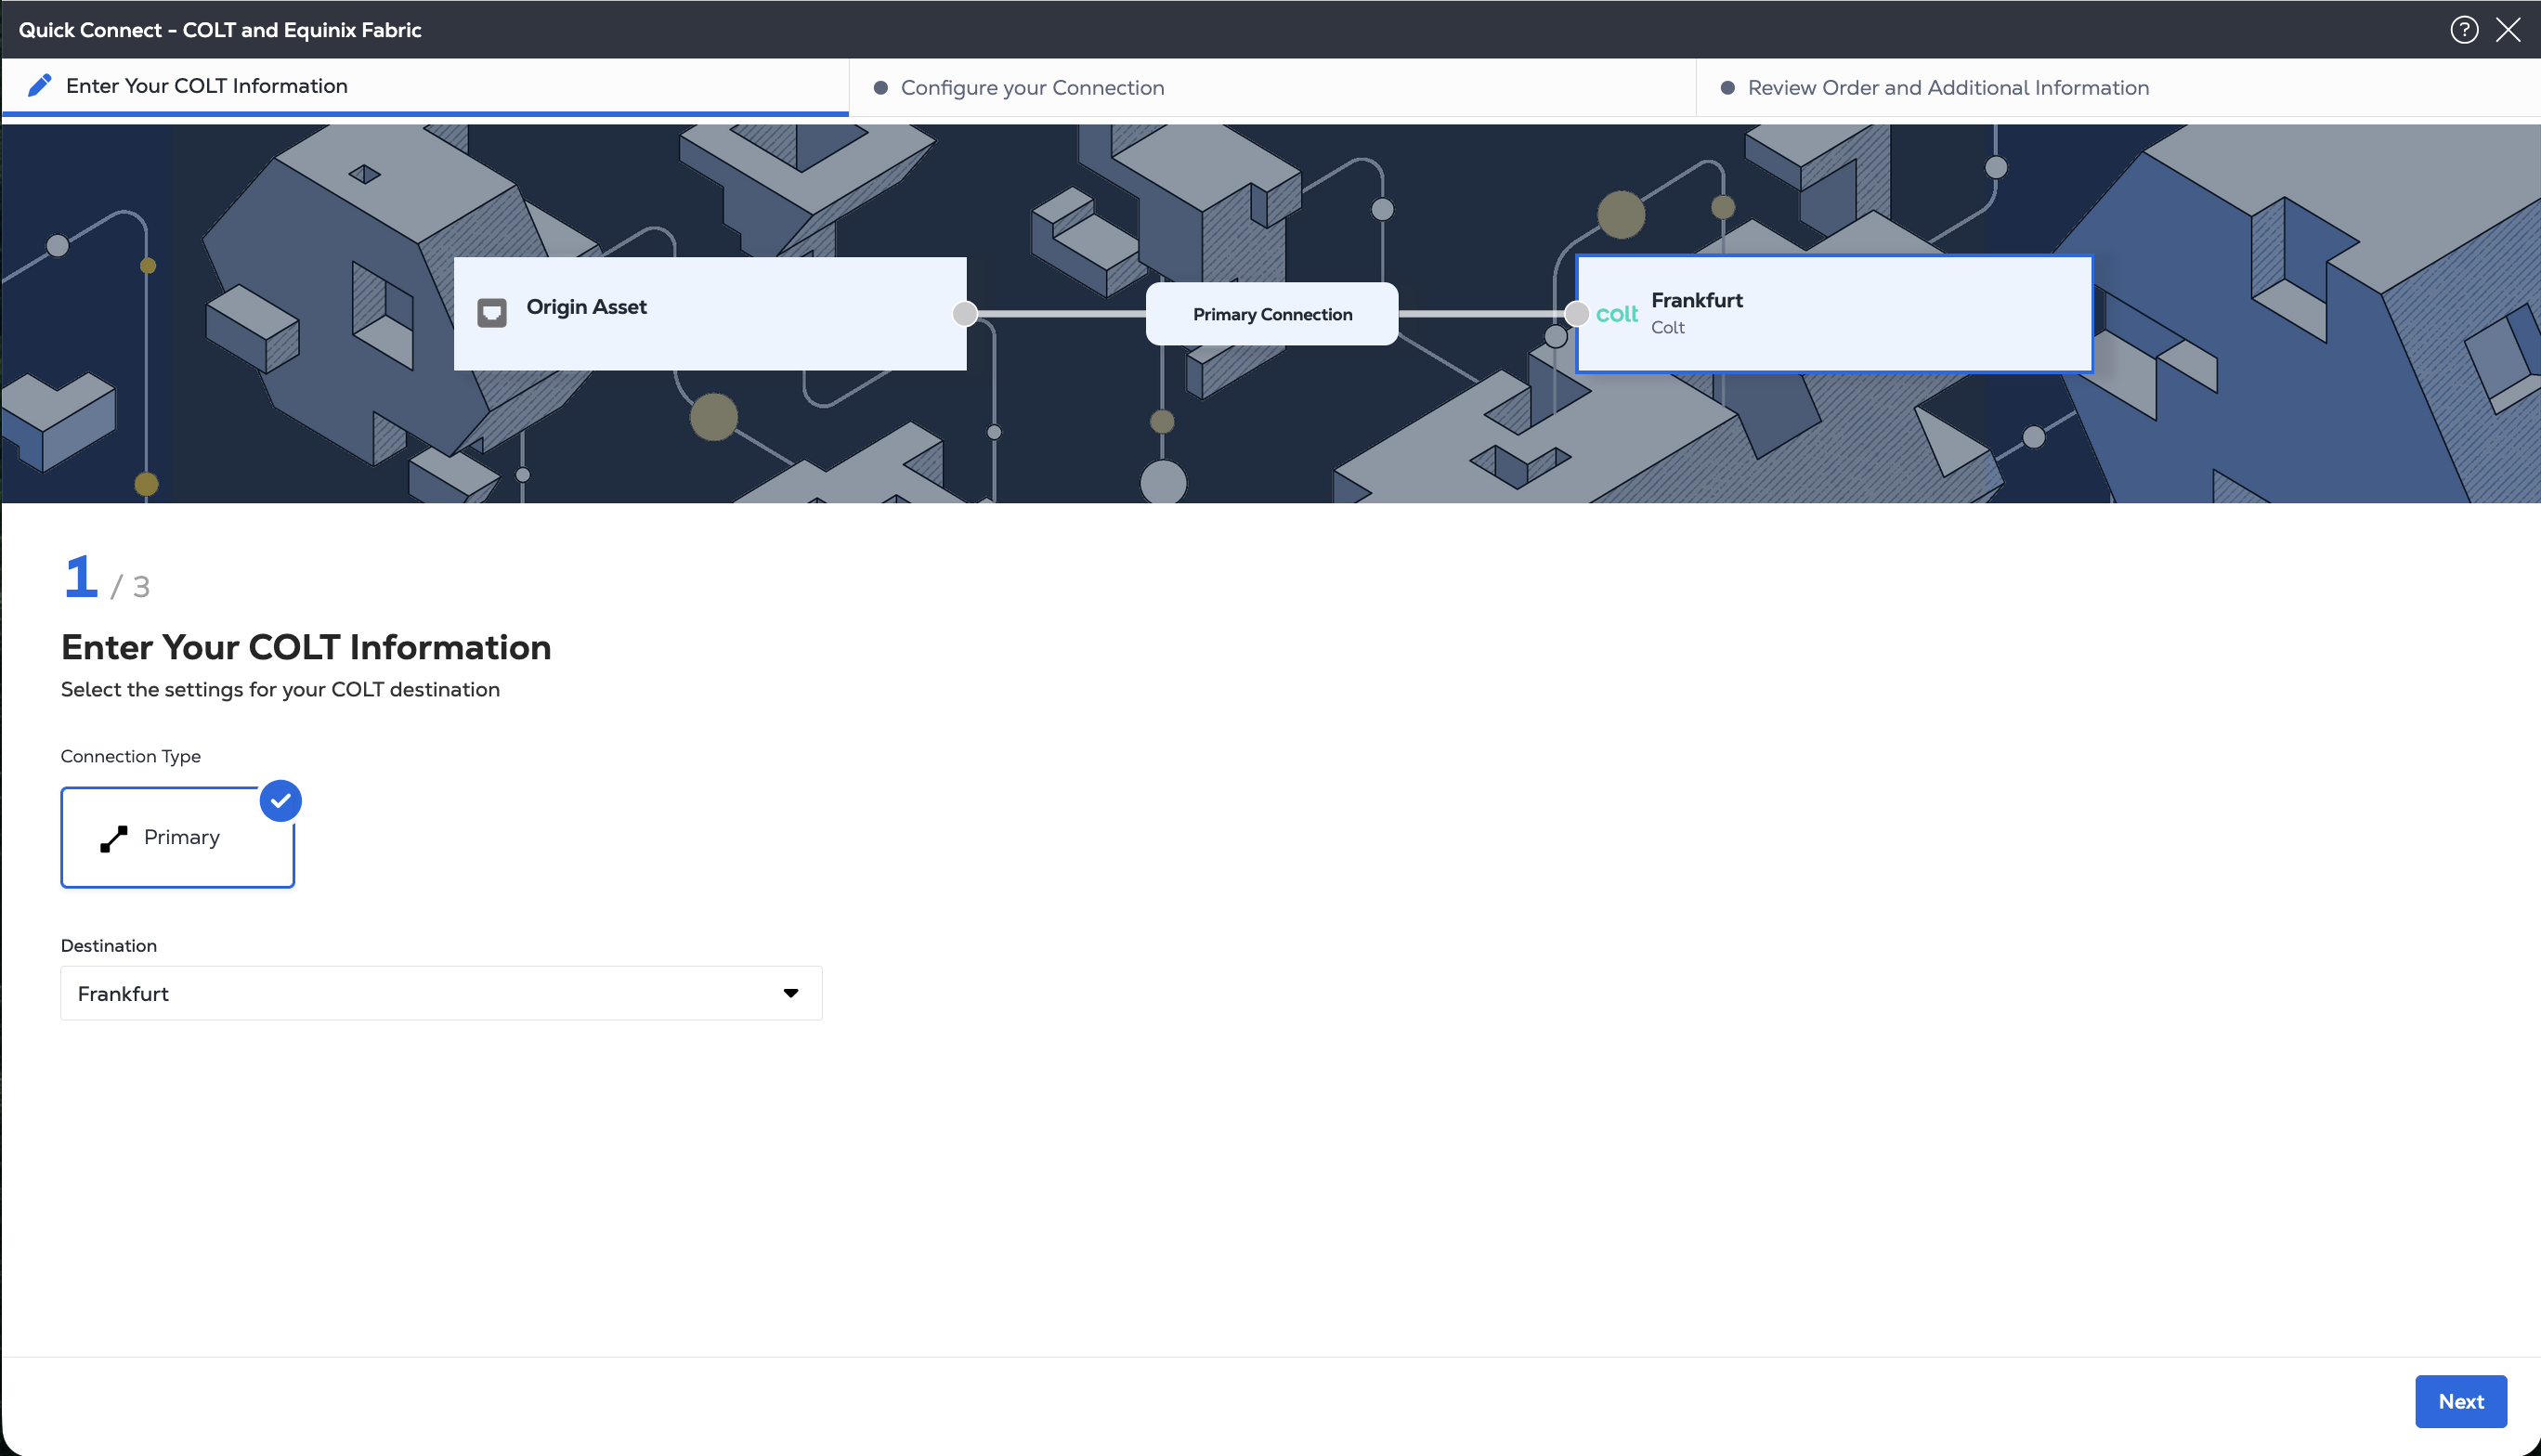
1. Under *Connection Type*, **Primary** is automatically selected.
2. Select the Metro of the Colt on Demand *Destination* from the drop-down menu. This is the location of the Colt services that you want to connect to. Only eligible destinations are shown.
3. Click **Next**.
Your connection configuration options vary by the *Origin Asset Type*: [port](#connecting-from-a-port), [service token](#connecting-from-a-service-token), or [cloud router](#connecting-from-a-fabric-cloud-router).
### Connecting from a Port[](#connecting-from-a-port "Direct link to Connecting from a Port")
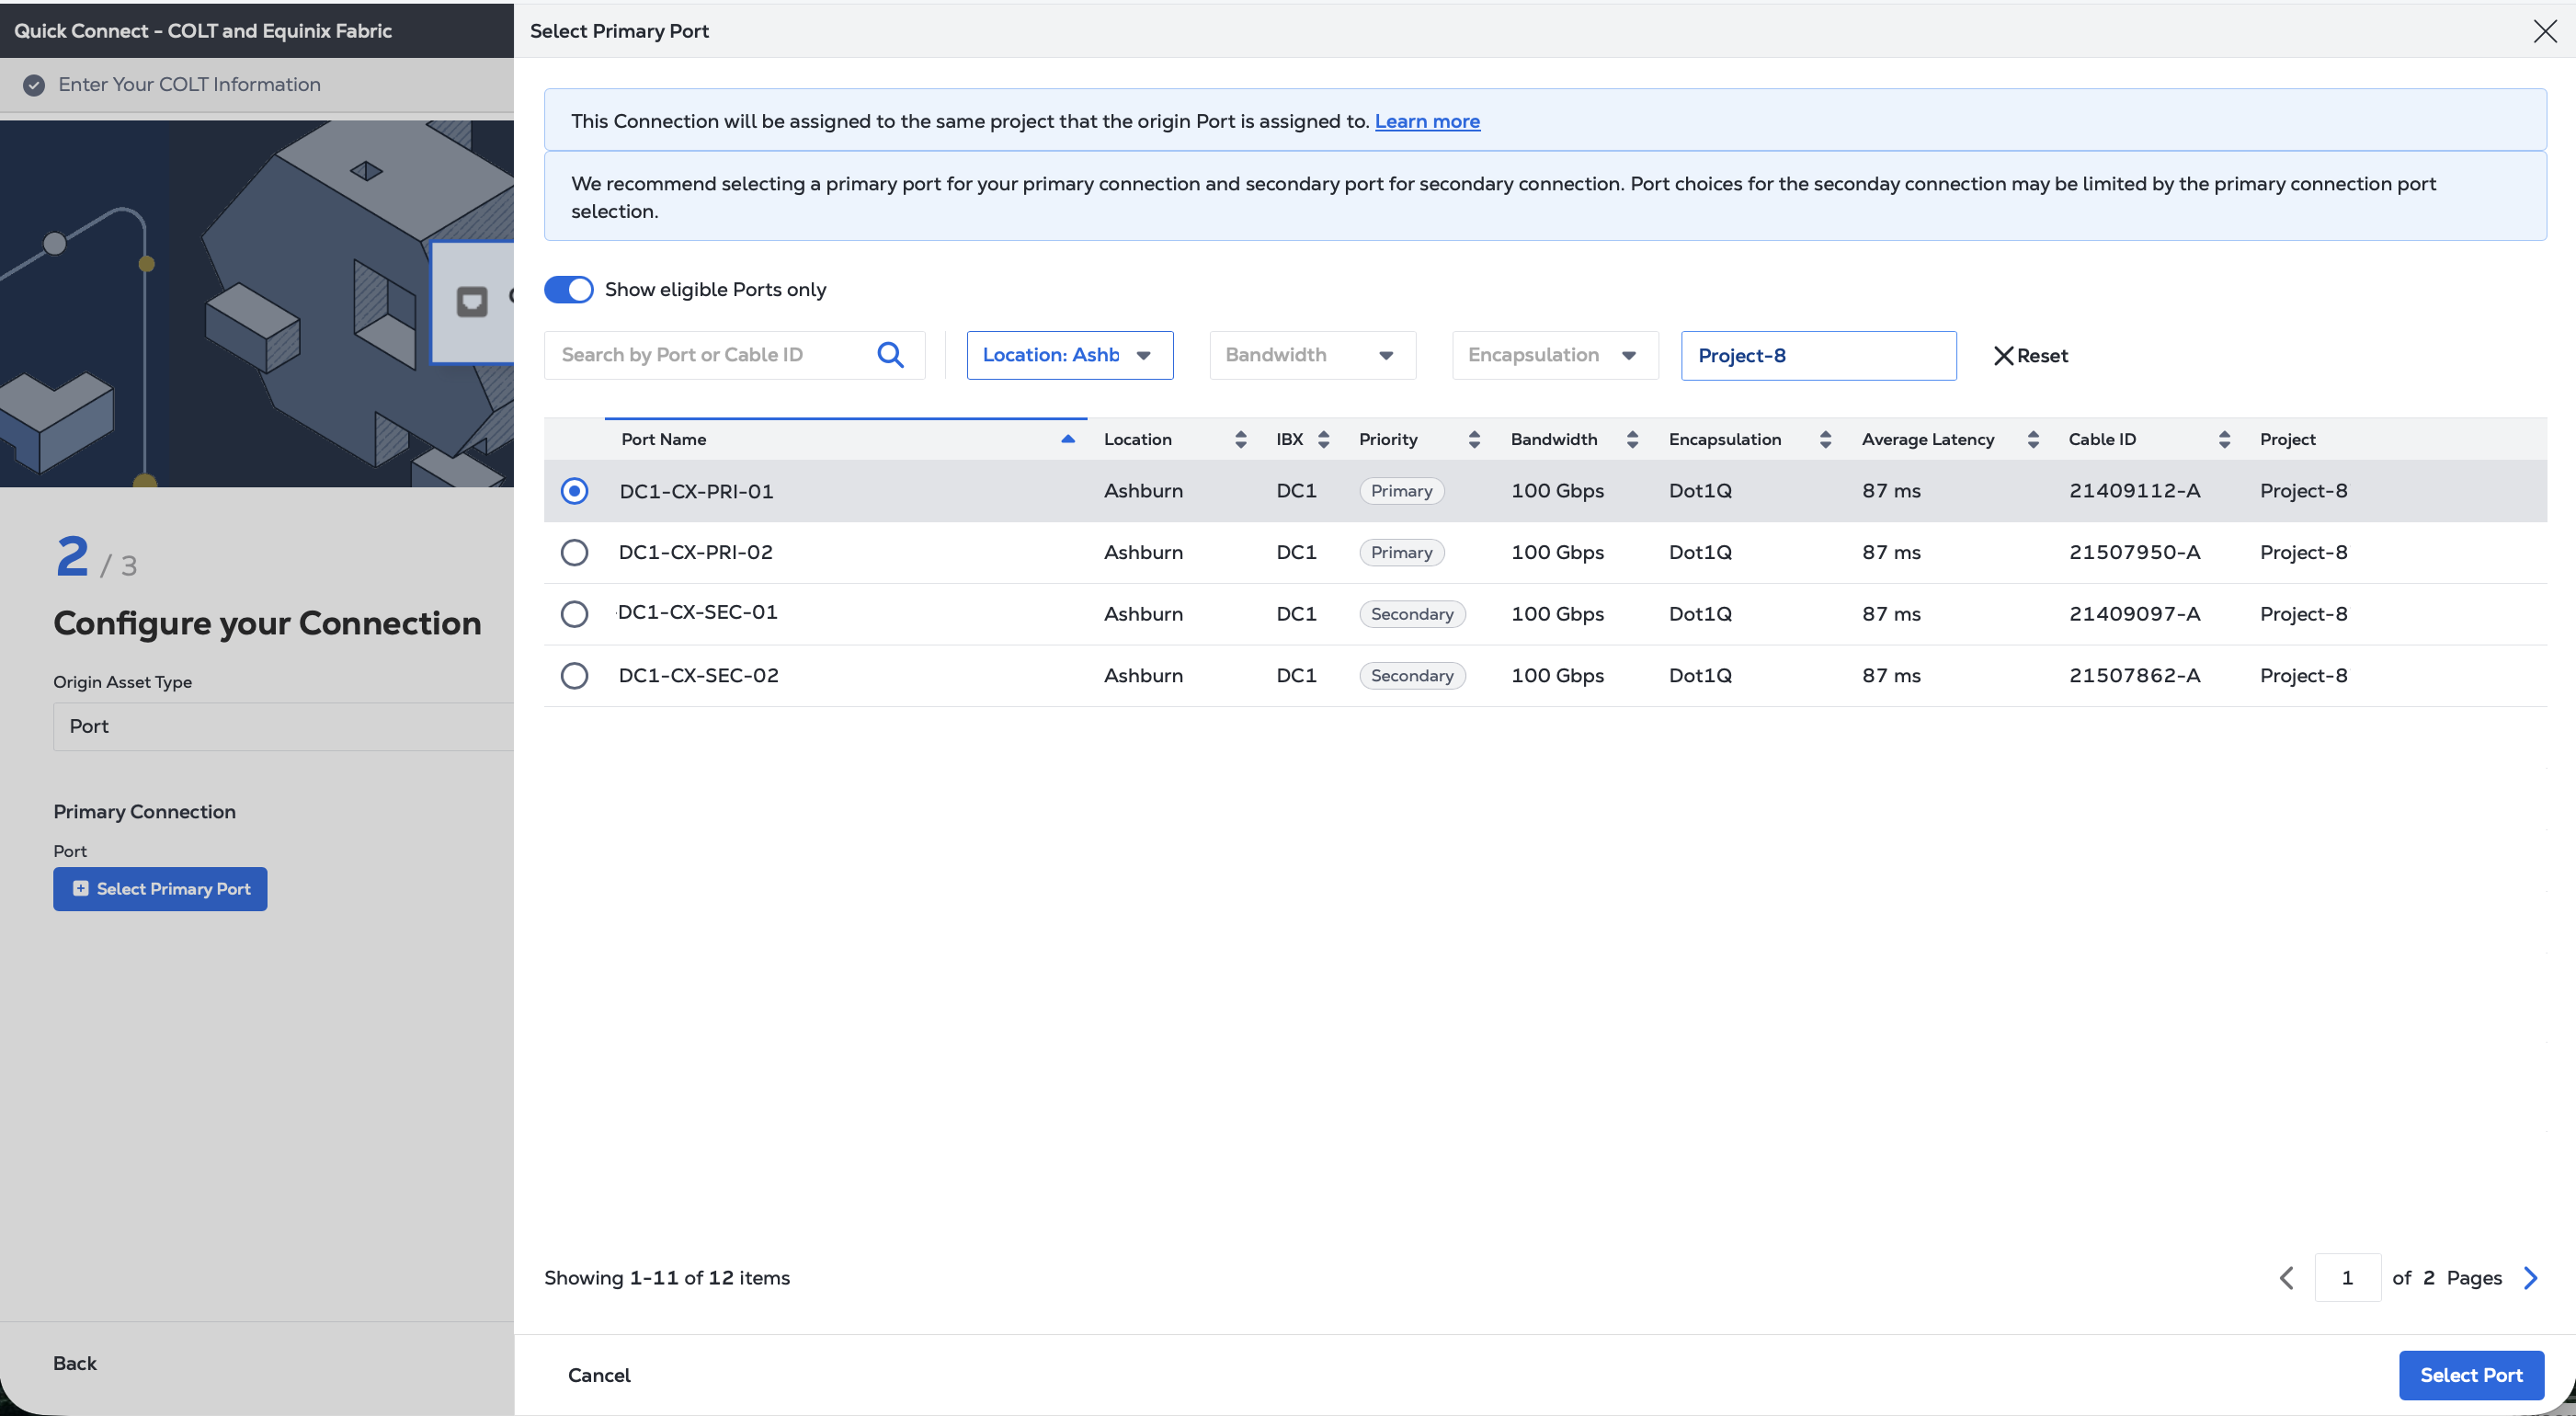
1. From the *Origin Asset Type* drop-down list, select **Port**.
2. In the *Primary Connection* section:
* Click *+ Select Primary Port*, then select your primary connection port and click **Select Port**.
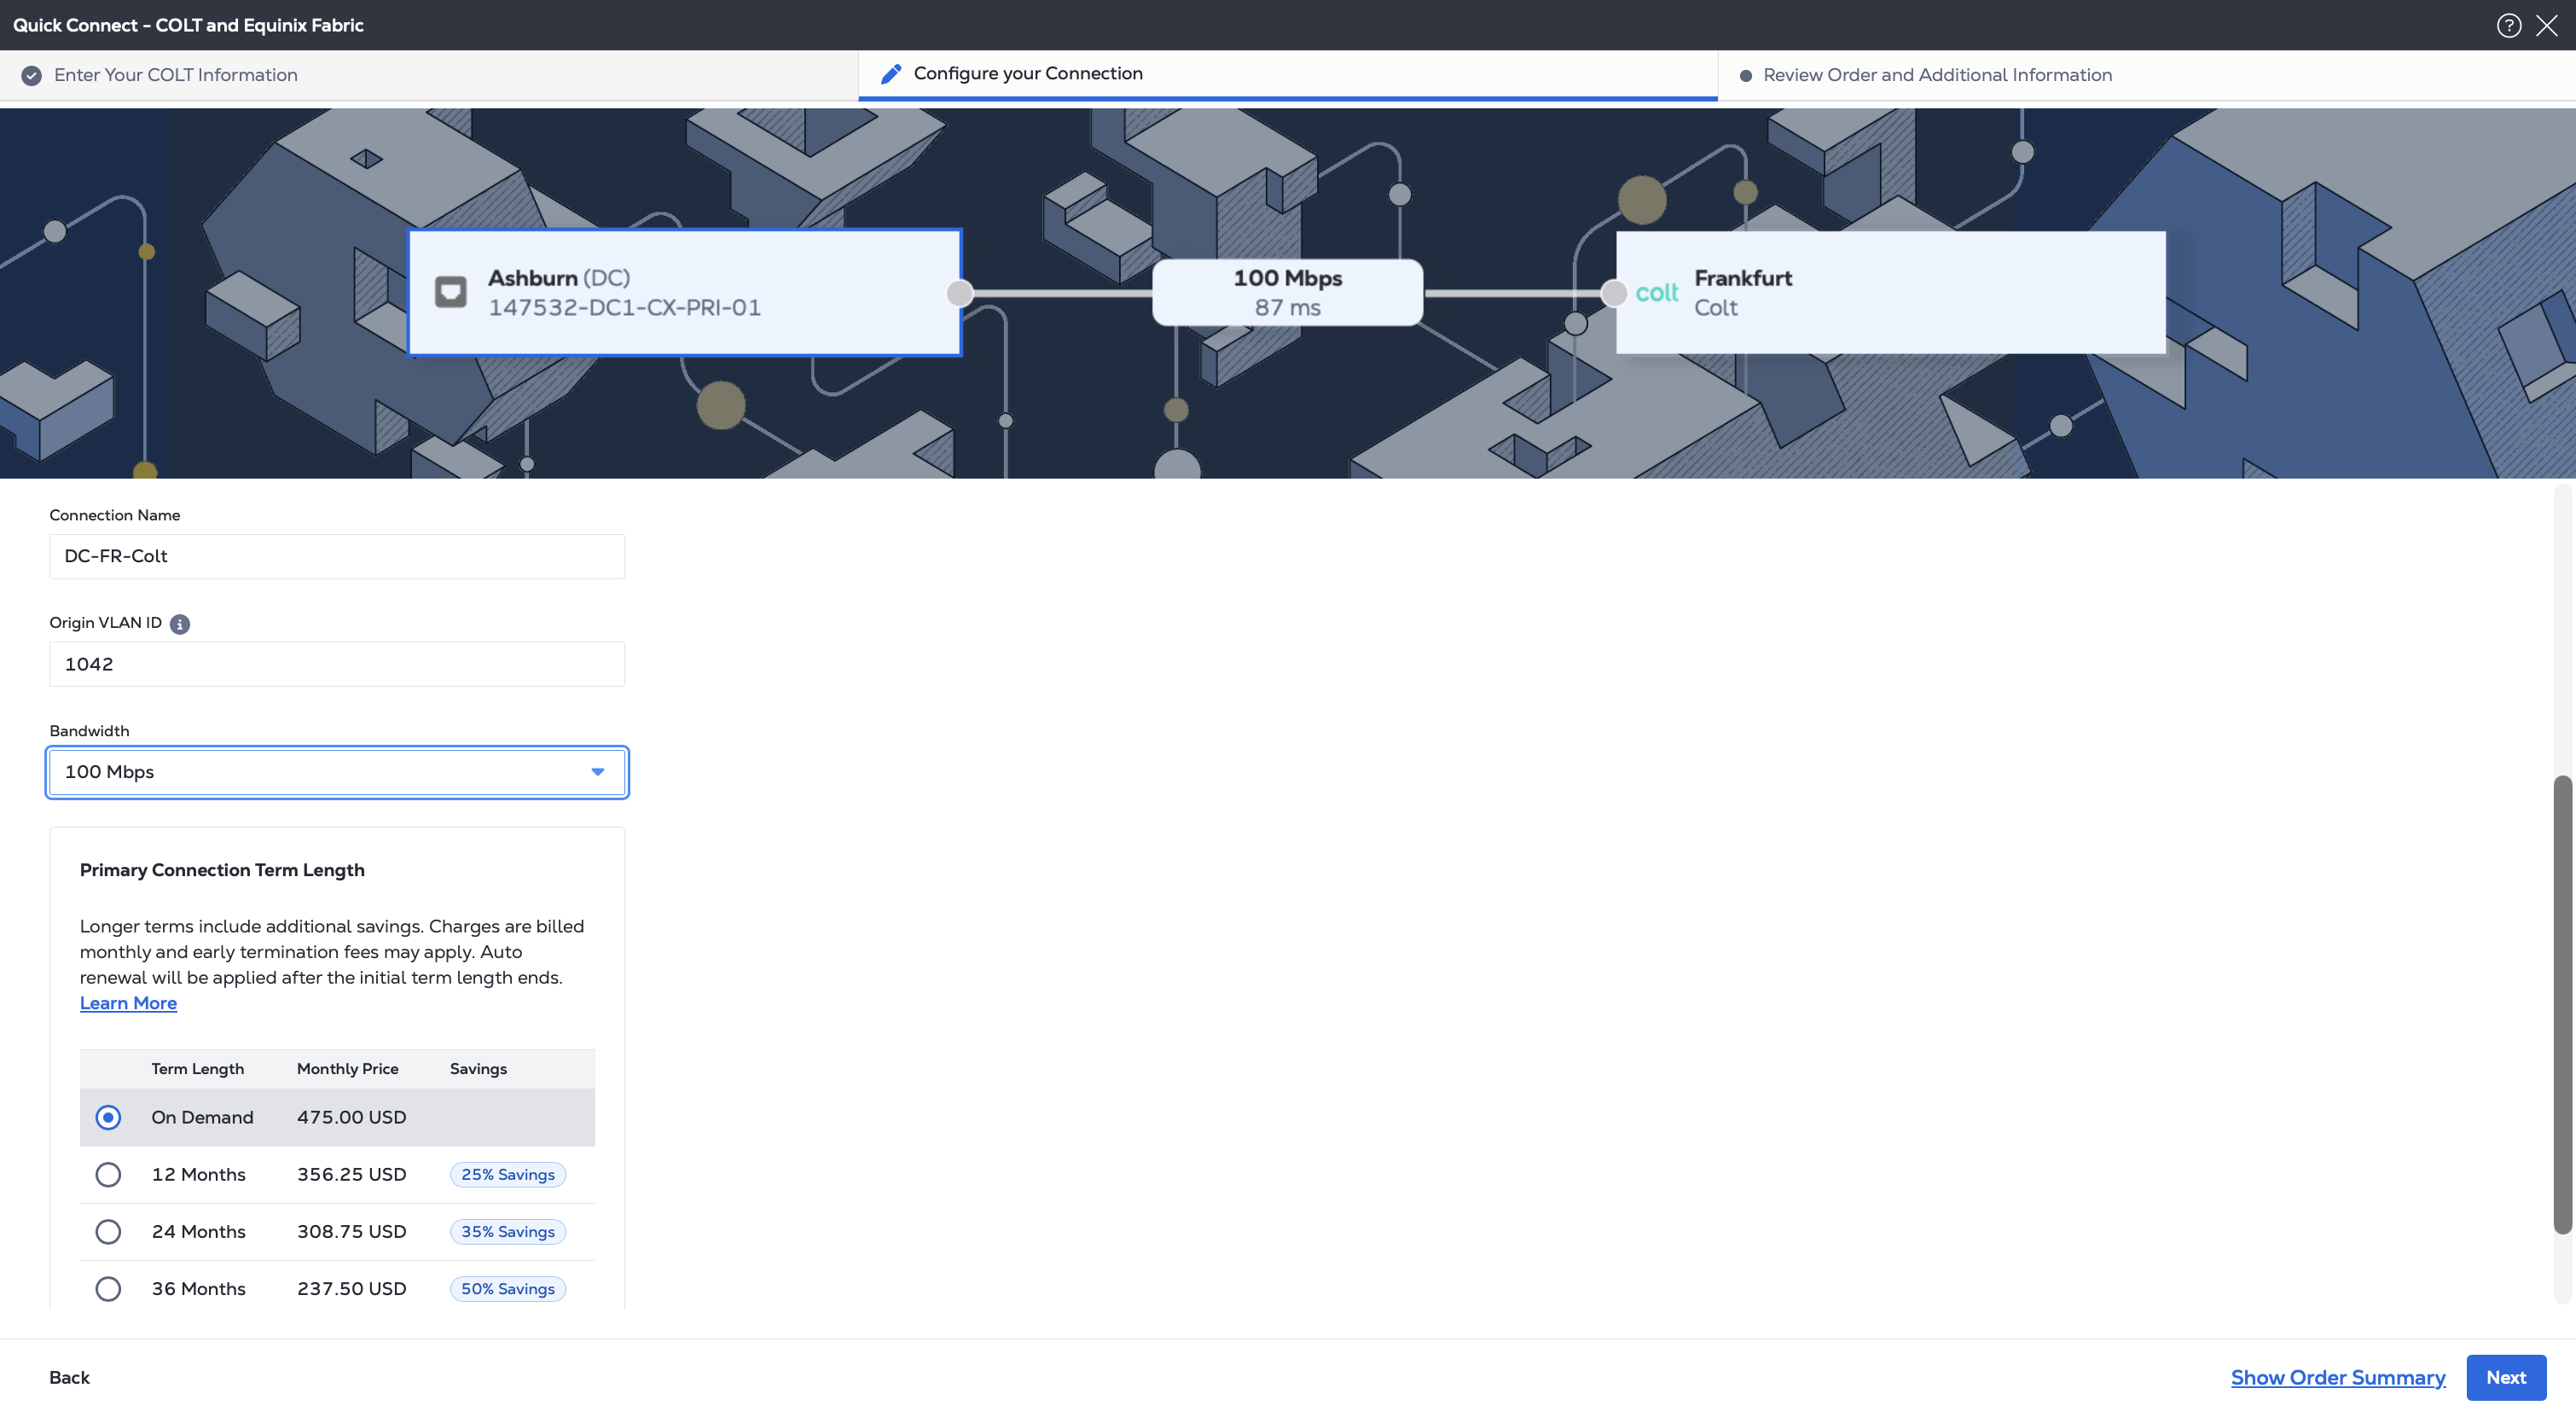
* Enter the primary connection name.
* Select a bandwidth.
* Enter a VLAN ID.
* If you are creating a remote connection, where your port is not in the same Metro as the Colt On Demand destination, you can choose a *Term Length*.
3. Click **Next**, to [review and create the connection](#review-and-submit).
### Connecting from a Service Token[](#connecting-from-a-service-token "Direct link to Connecting from a Service Token")
1. From the *Origin Asset Type* drop-down list, select **Service Token**.
2. In the *Primary Connection* section:
* Click *+ Enter Primary Service Token*, provide the service token, then click **Redeem Service Token**.
* Enter the primary connection name.
* Select a bandwidth.
* If you are creating a remote connection, where your port is not in the same Metro as the Colt destination, you can choose a *Term Length*.
3. Click **Next**, to [review and create the connection](#review-and-submit).
### Connecting from a Fabric Cloud Router[](#connecting-from-a-fabric-cloud-router "Direct link to Connecting from a Fabric Cloud Router")
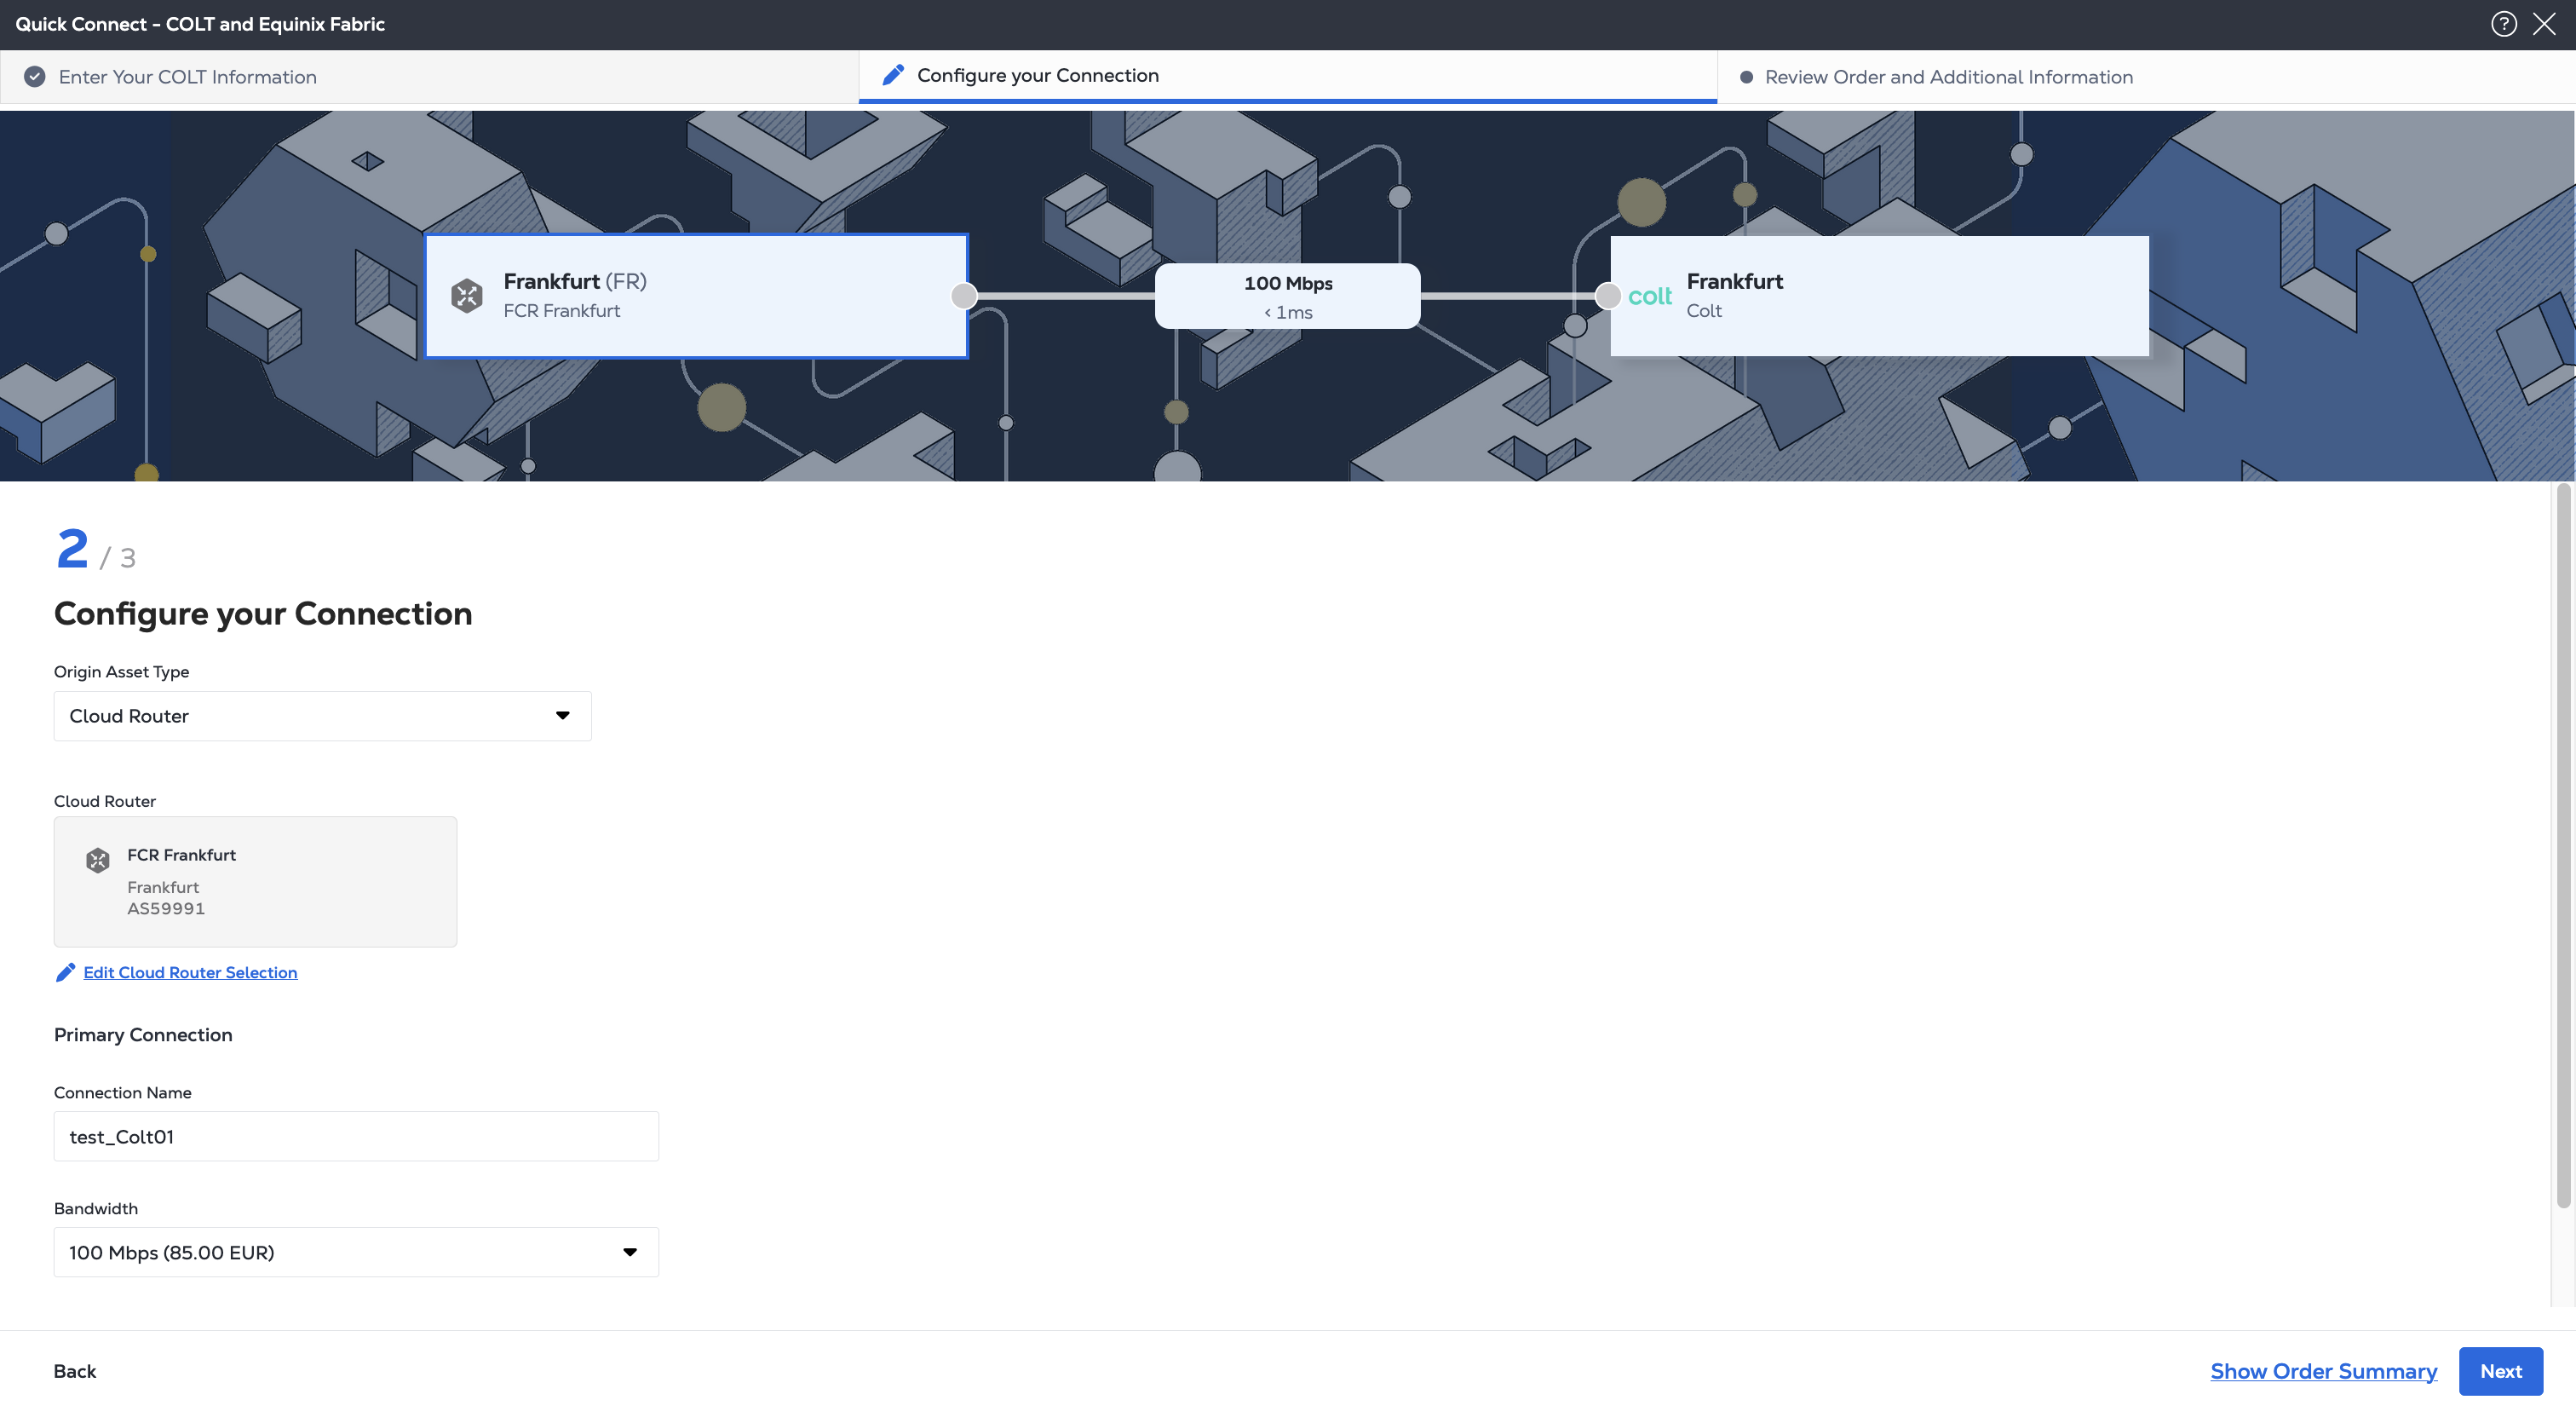
1. From the *Origin Asset Type* drop-down list, select **Cloud Router**.
2. Click *+ Select Cloud Router*, select a cloud router instance, then click **Select Cloud Router**.
3. In the *Primary Connection* section:
* Enter the primary connection name.
* Select a bandwidth.
4. Click **Next**, to [review and create the connection](#review-and-submit).
### Review and Submit[](#review-and-submit "Direct link to Review and Submit")
1. On the *Review Order and Additional Information* page, review the information in the *Connection Configuration* sections.
2. Use the *Notifications* field to provide the email addresses of the recipients to be notified about the connection's status. You can add up to 12 email addresses.
3. (*Optional*) Enter or add order information in the *Purchase Order* section.
4. Provide a customer reference identifier that will help you identify this order on your invoice.
5. Click *Show Order Summary* to see order details and connection pricing information.
When you are ready, click **Create Connection**.
On the order confirmation screen, copy the connection's *Unique ID*. You need this ID when you enable the service in the Colt On Demand platform.
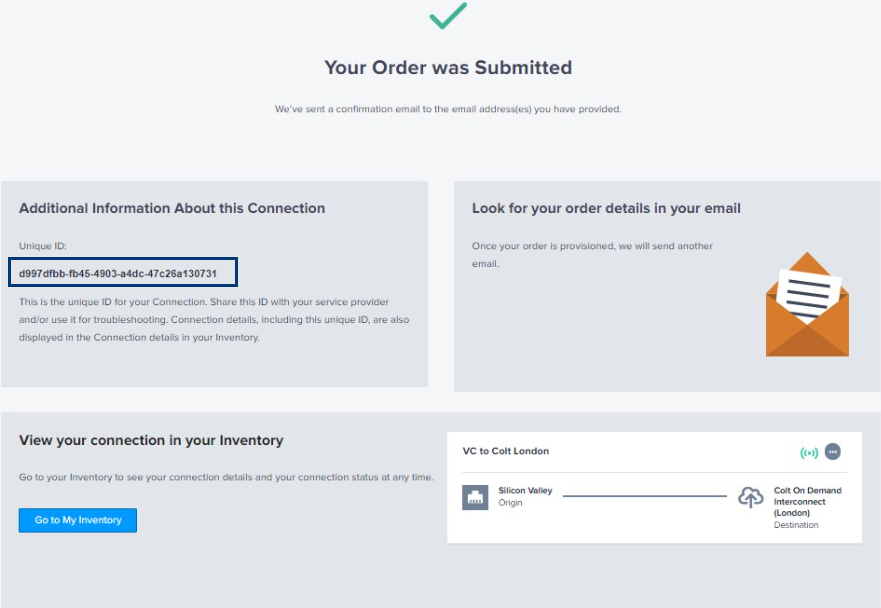
You can also find the connection ID and other details in your [Connections Inventory](/pt-BR/fabric/managing-connections/fabric-new-connections-inventory.md)
### Connecting from a Virtual Device[](#connecting-from-a-virtual-device "Direct link to Connecting from a Virtual Device")
After clicking **Create Connection (Network Edge)**:
1. Choose your locations and virtual device on the *Select Locations* page.
* In the *Origin* section, click **Virtual Device**. If the *Virtual Device* option is disabled, there are no virtual devices available in the selected project. Choose a different project, that has virtual devices assigned to it, or create a new virtual device in this project.
* Select a Metro to connect from.
* Choose virtual device type, select connection type, then select a virtual device instance.
* In the *Destination* section select the Colt On Demand Metro where you want to terminate your connection.
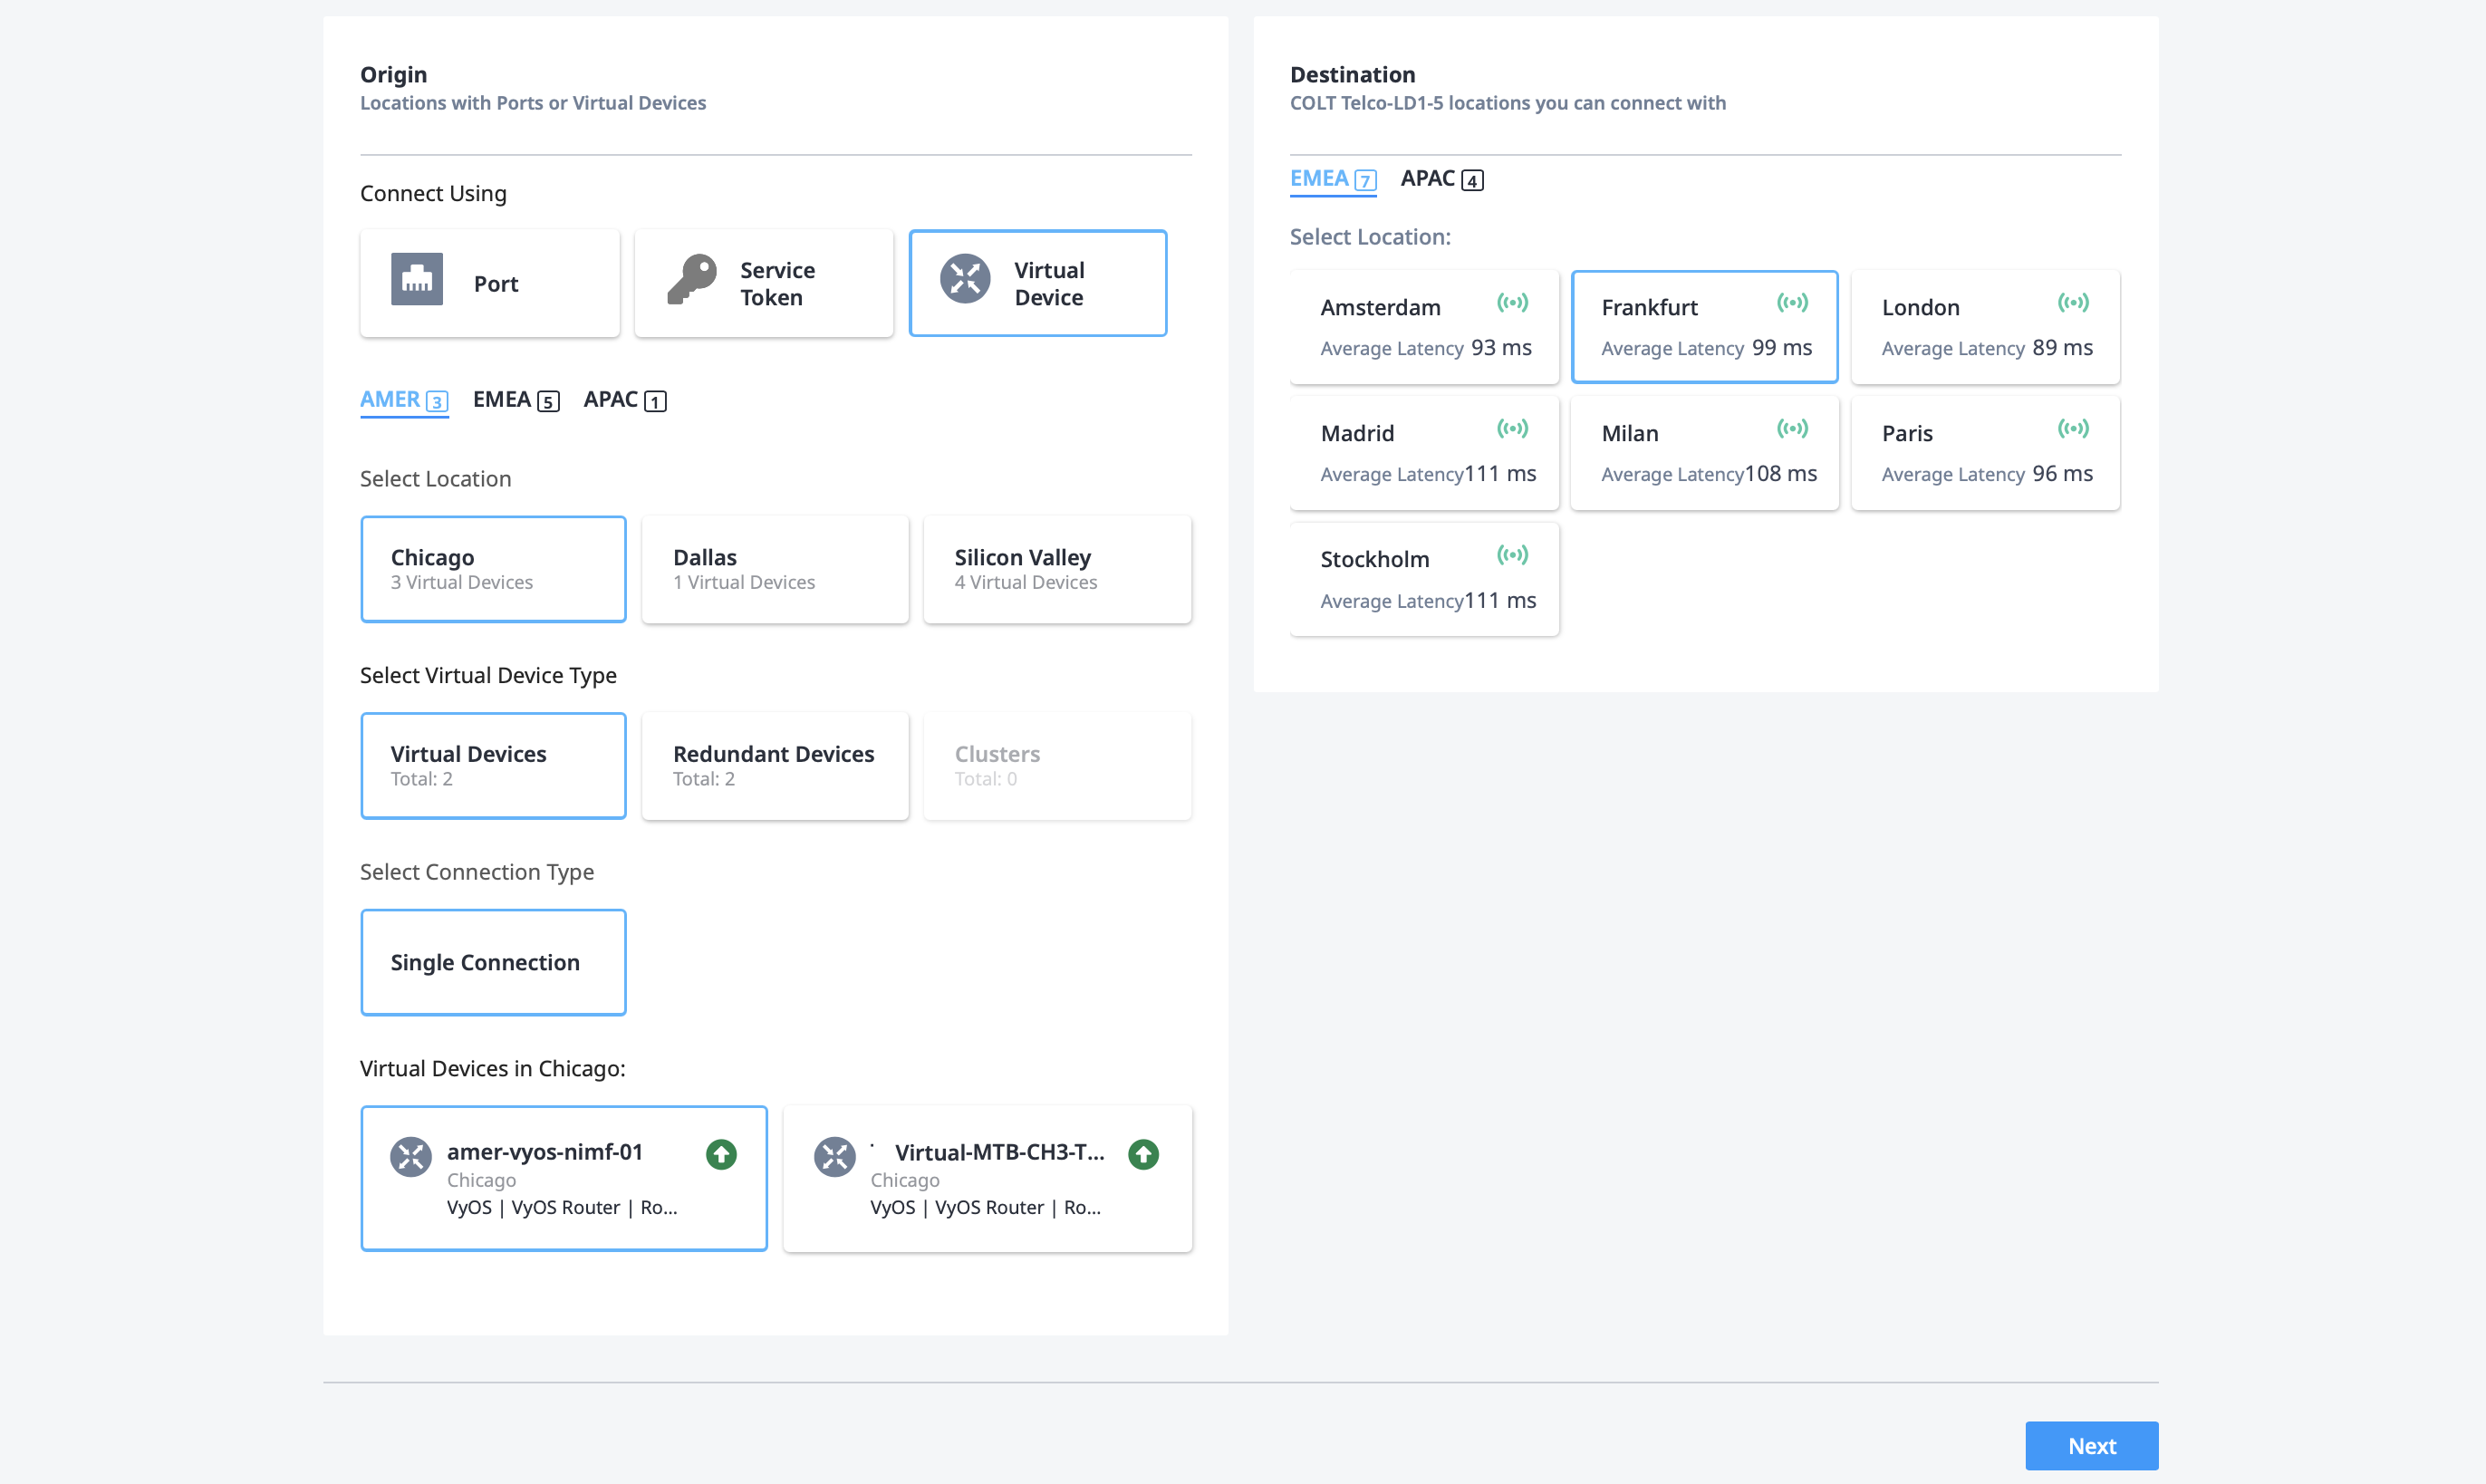
* Click **Next**.
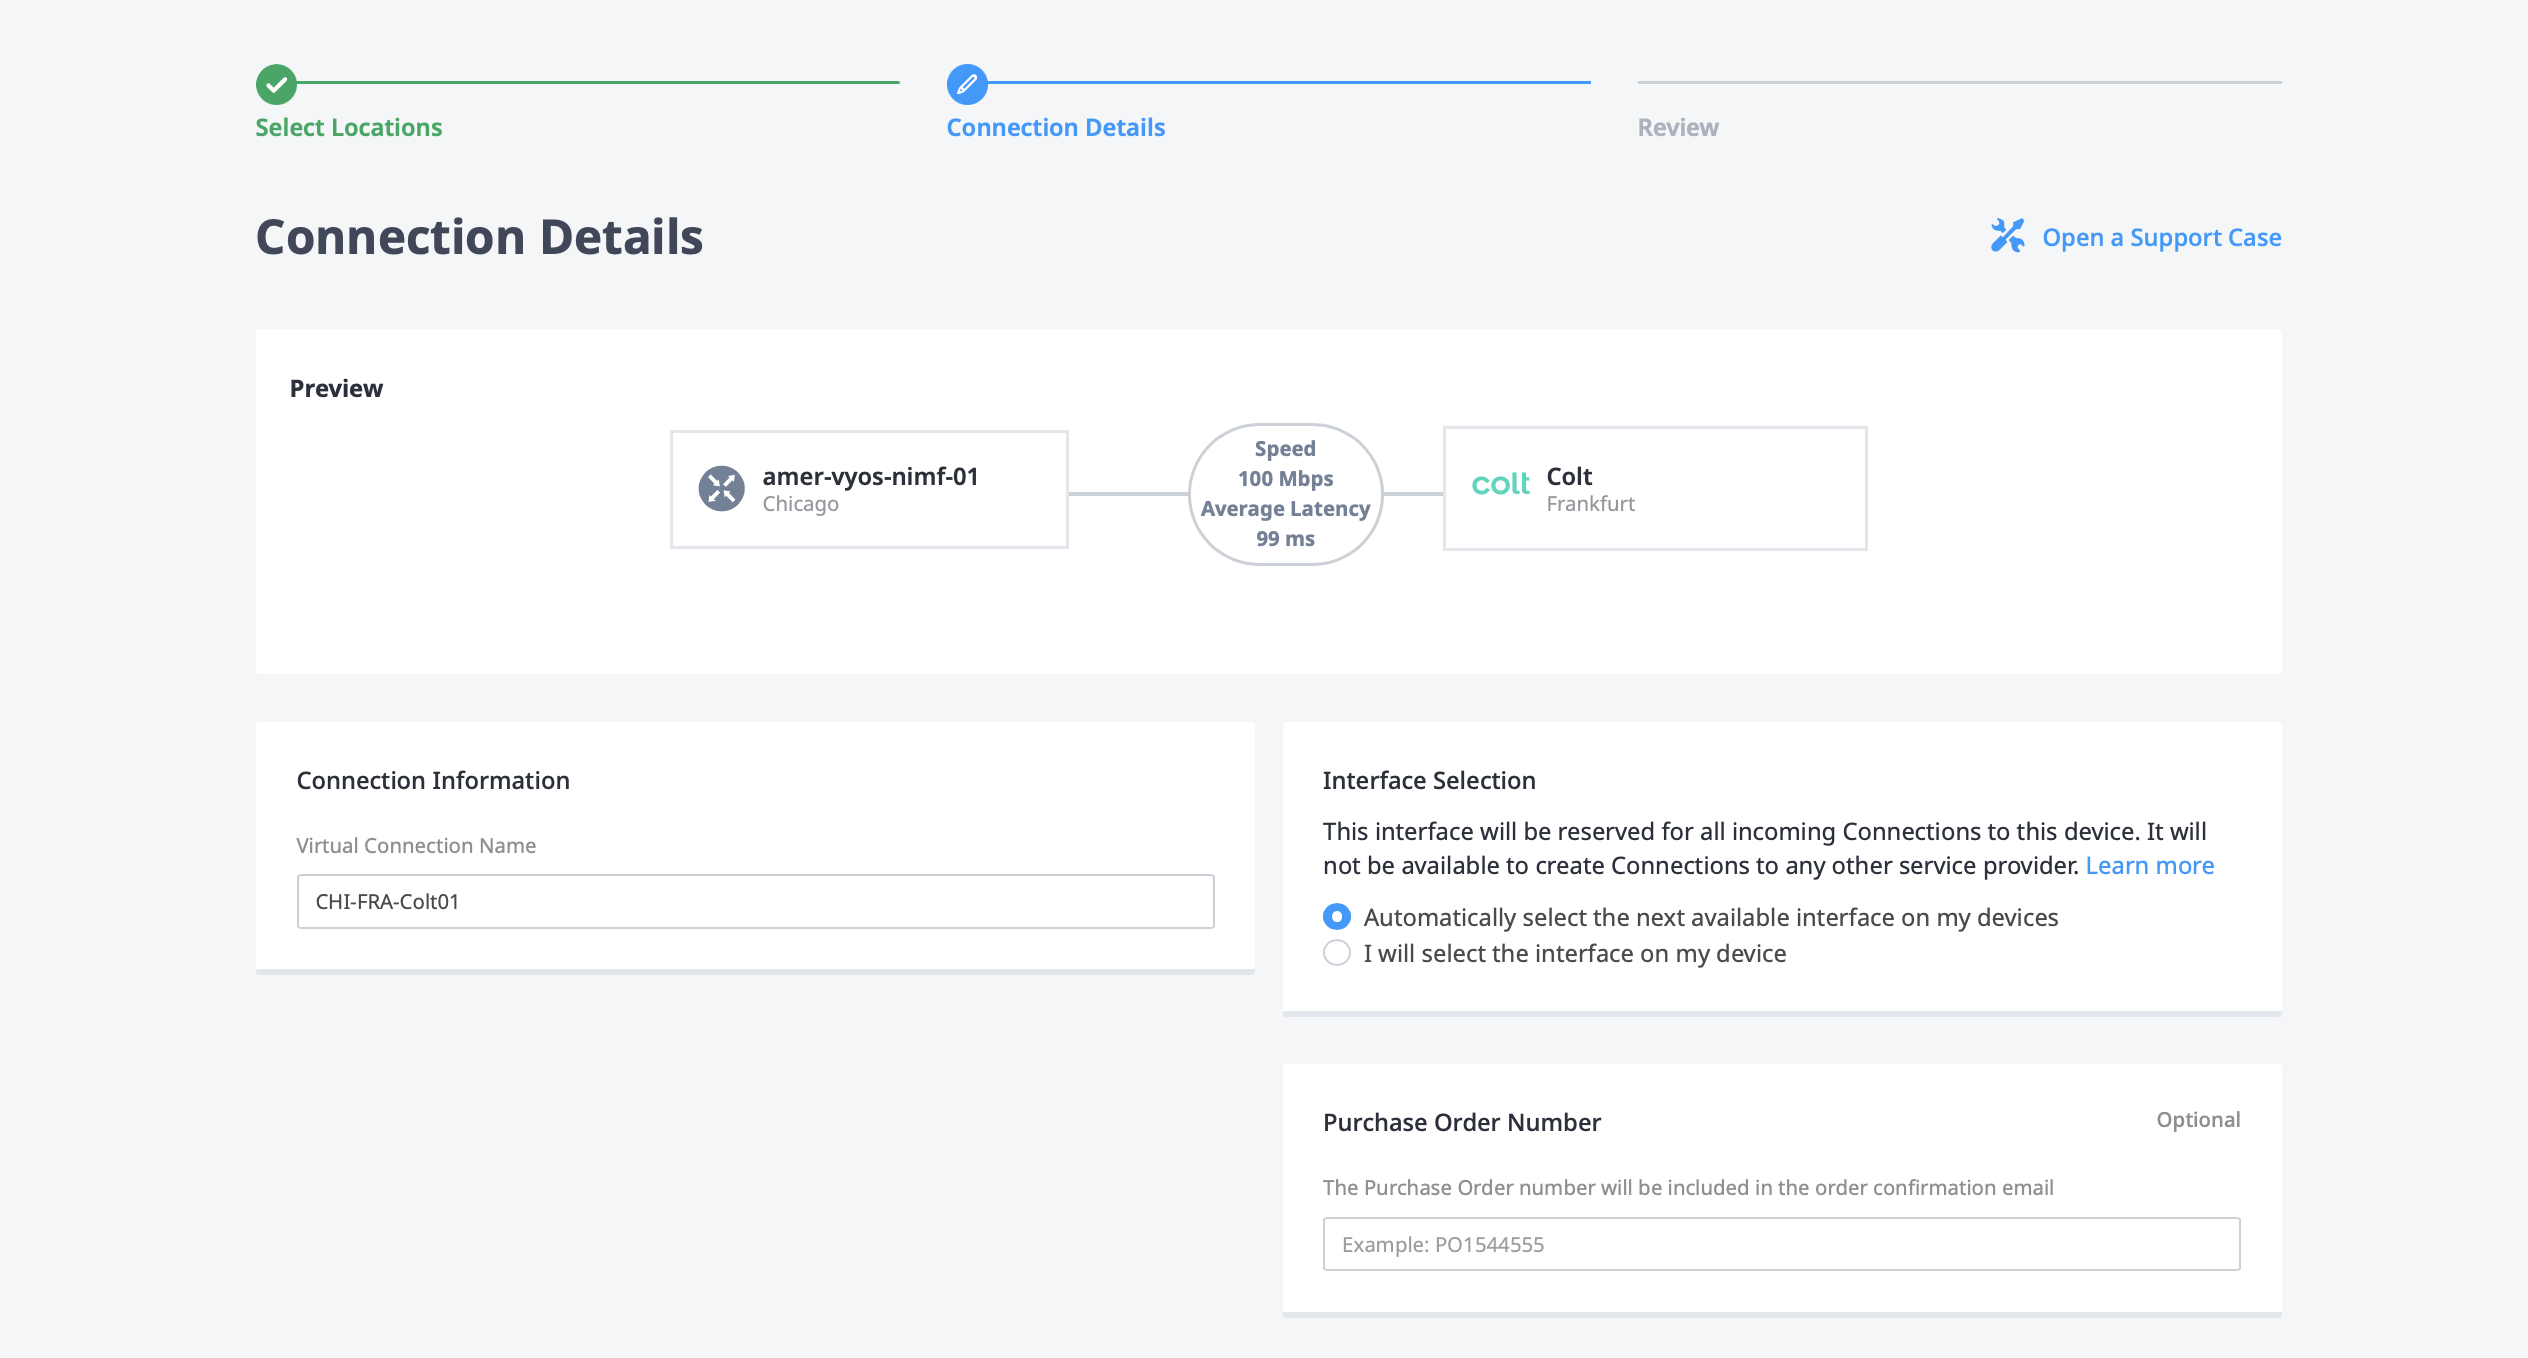
2. On the *Connection Details* page, configure the connection.
* Enter a connection name in the *Connection Information* box.
* Choose to either *Automatically select the next available interface on my devices* or *I will select the interface on my device*.
* Enter a Purchase Order number (optional).
* Choose the *Connection Speed*. - If you are creating a remote connection, where your virtual device is not in the same Metro as the Colt destination, you can choose a *Term Length*.
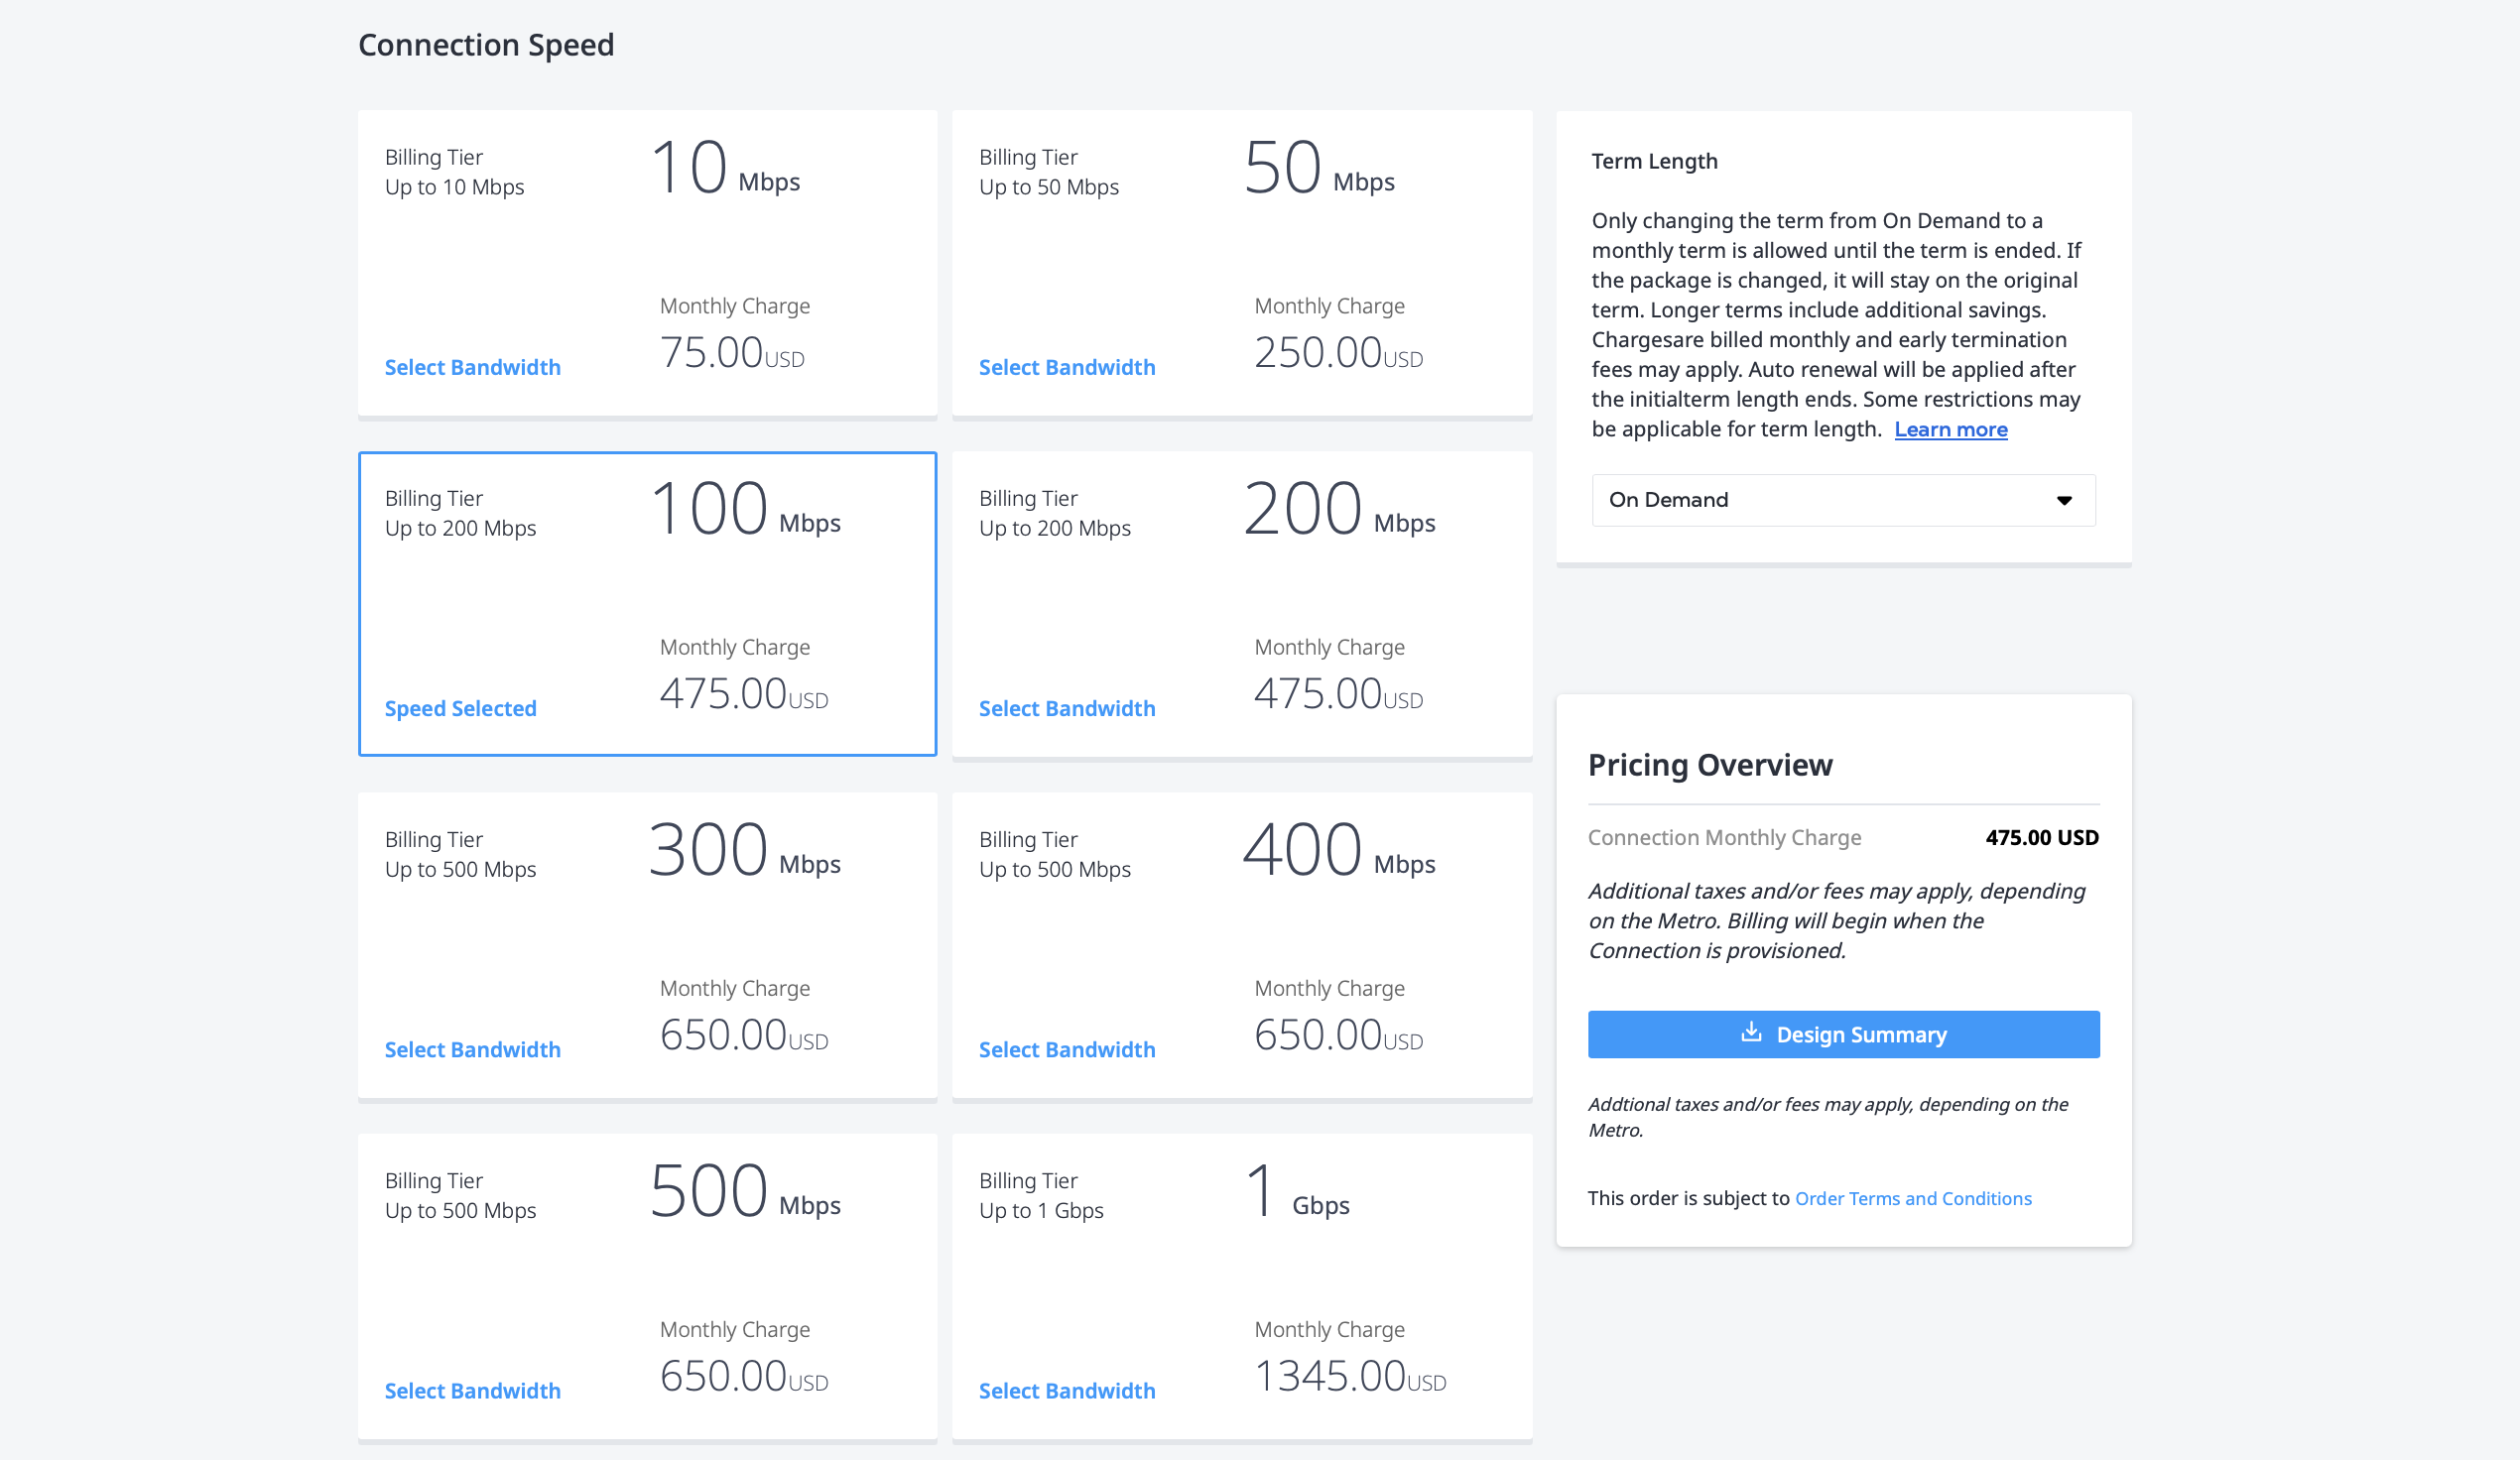
* Click **Next**.
3. On the *Review* page:
* Review the information in the *Connection Summary*.
* Review the *Pricing Overview*. Click **Design Summary** to download a PDF summary of your order.
* Use the *Notifications* field to provide the email addresses of the recipients to be notified about the connection's status. You can add up to 12 email addresses.
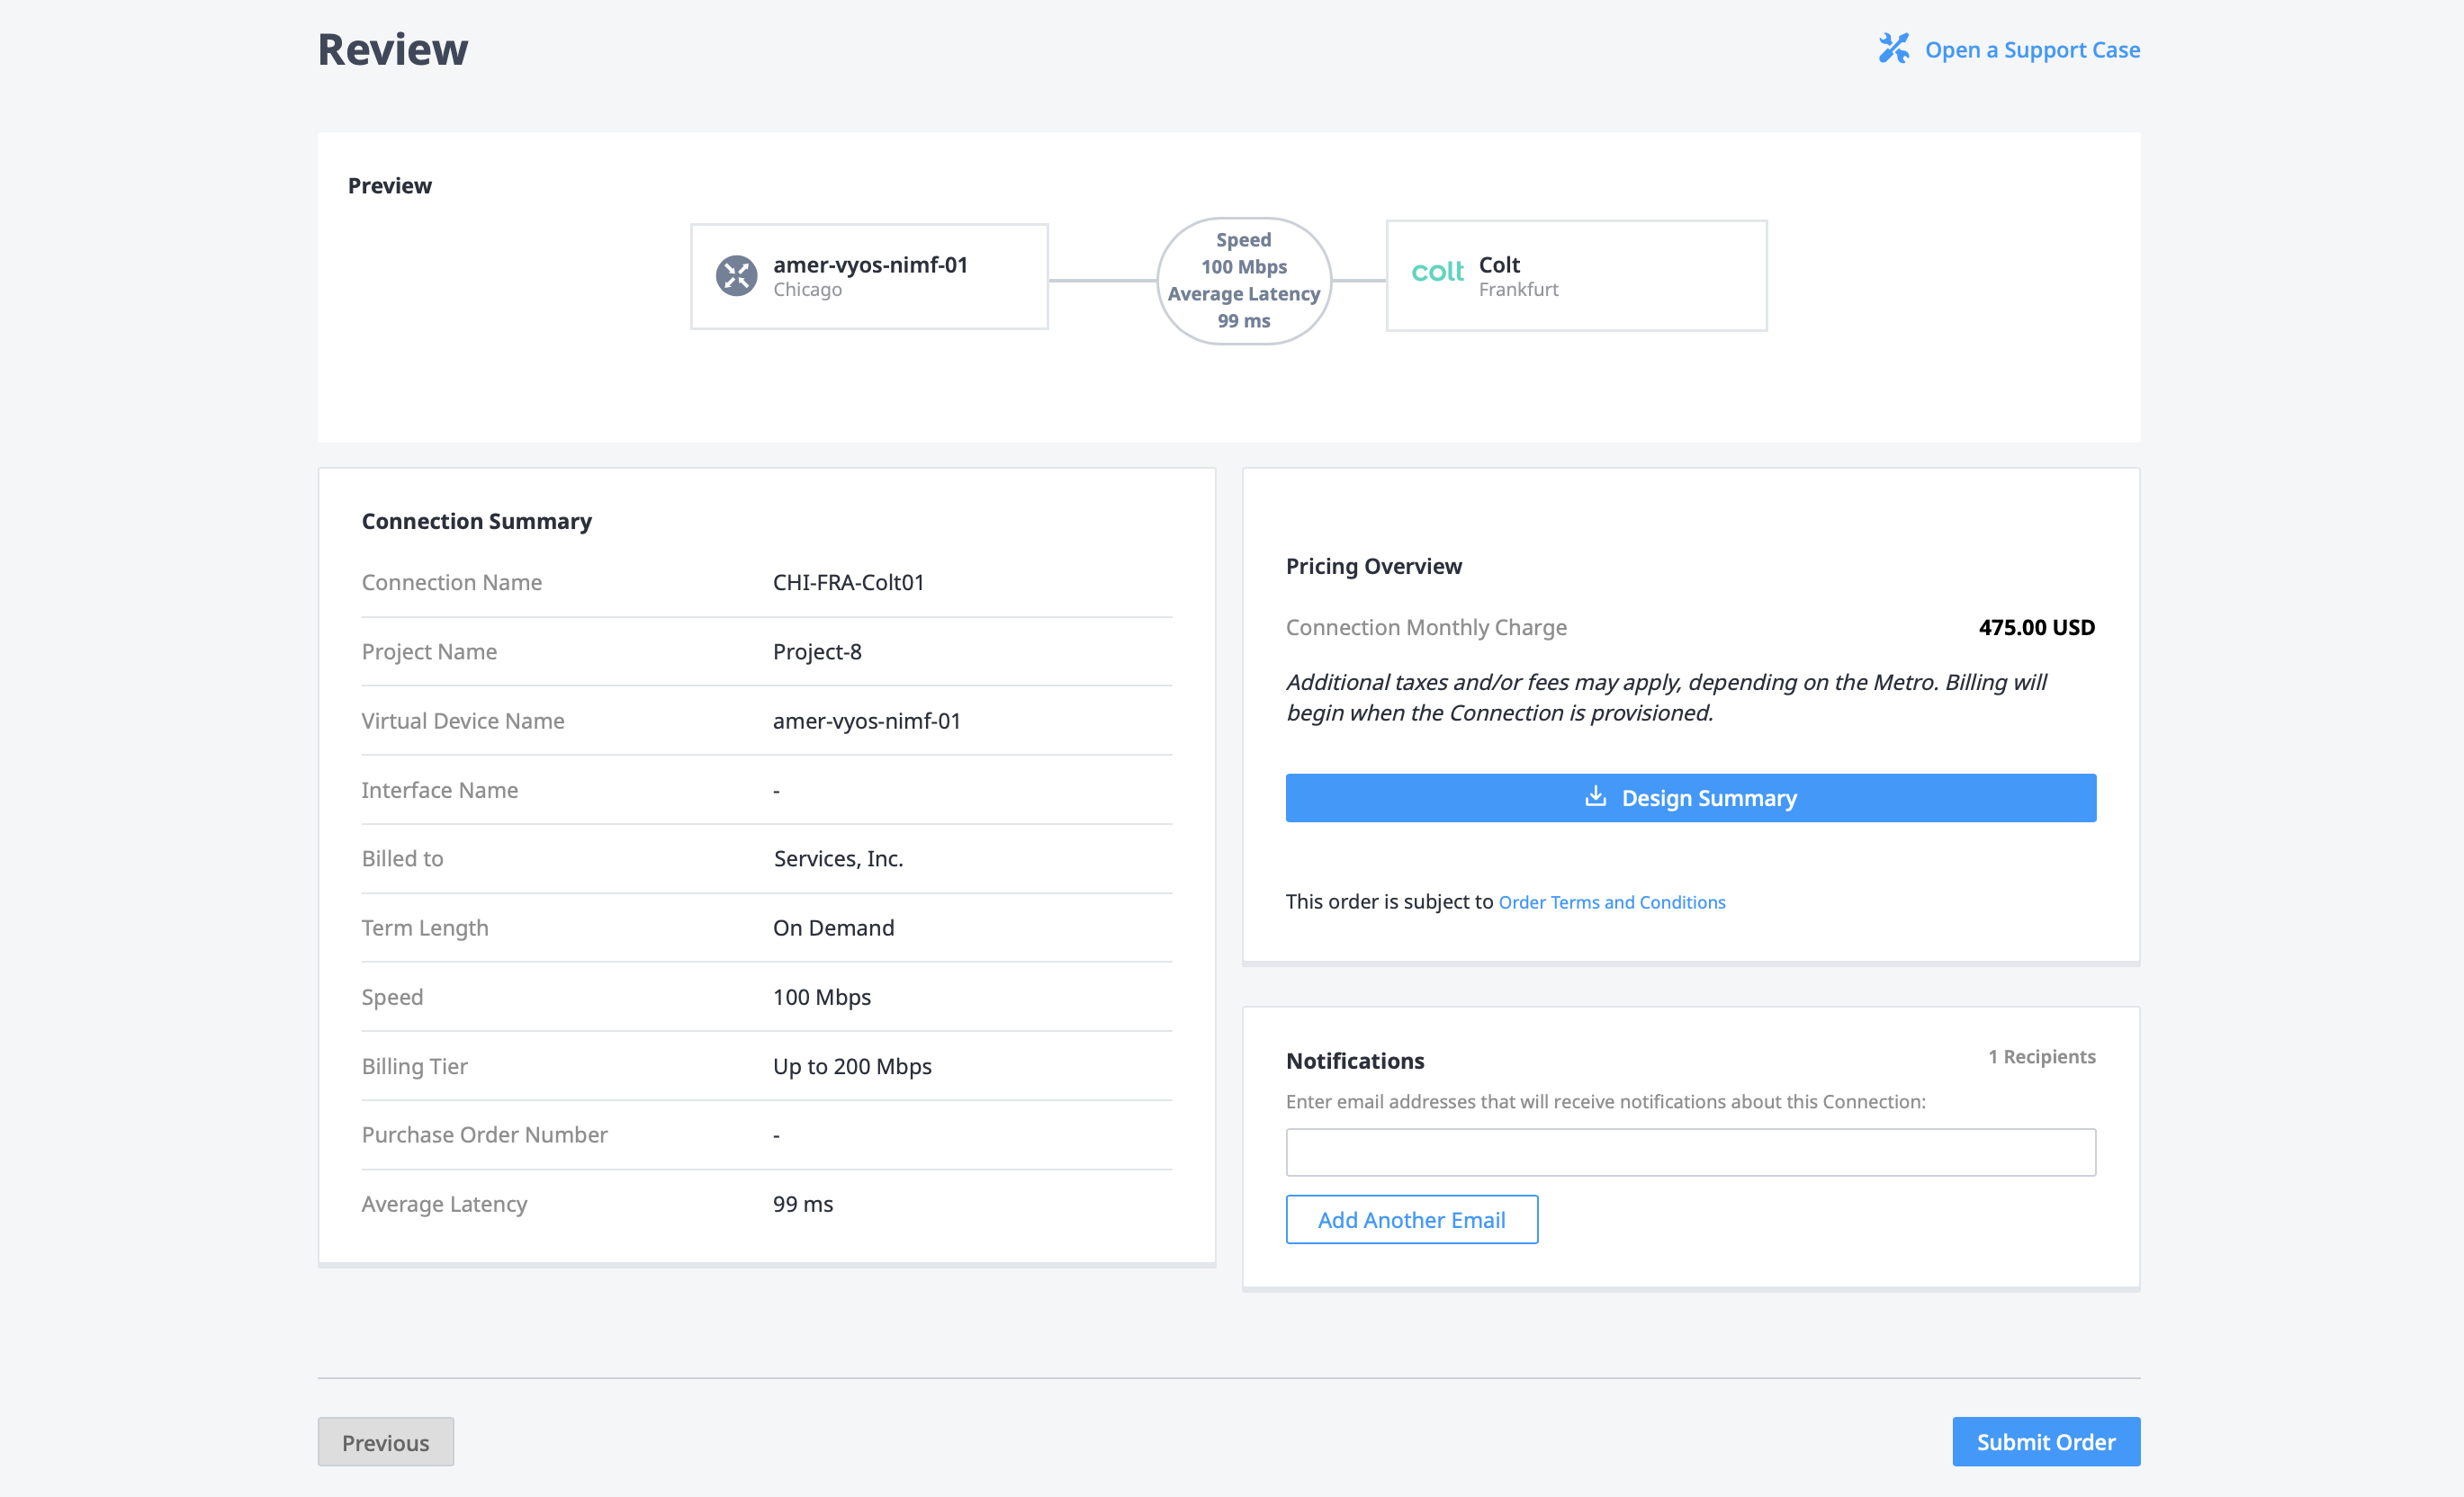
When you are ready, click **Submit Order**.
On the order confirmation screen, copy the connection's *Unique ID*. You need this ID when you enable the service in the Colt On Demand platform.

You can also find the connection ID and other details in your [Connections Inventory](/pt-BR/fabric/managing-connections/fabric-new-connections-inventory.md)
## Adding a Cloud Port to Colt On Demand[](#adding-a-cloud-port-to-colt-on-demand "Direct link to Adding a Cloud Port to Colt On Demand")
After you create the connection in the Equinix Customer Portal, access the Colt On Demand platform to [add a cloud port](https://docs.colt.net/on-demand/user-guides/quick-start-guide#add-an-origin-port) to Equinix Fabric. You need the connection ID from creating the virtual connection.
1. Log in to [Colt On Demand](https://ondemand.colt.net/login-sso).
2. Select *Ports*, click **New Port**, then **New cloud port**.
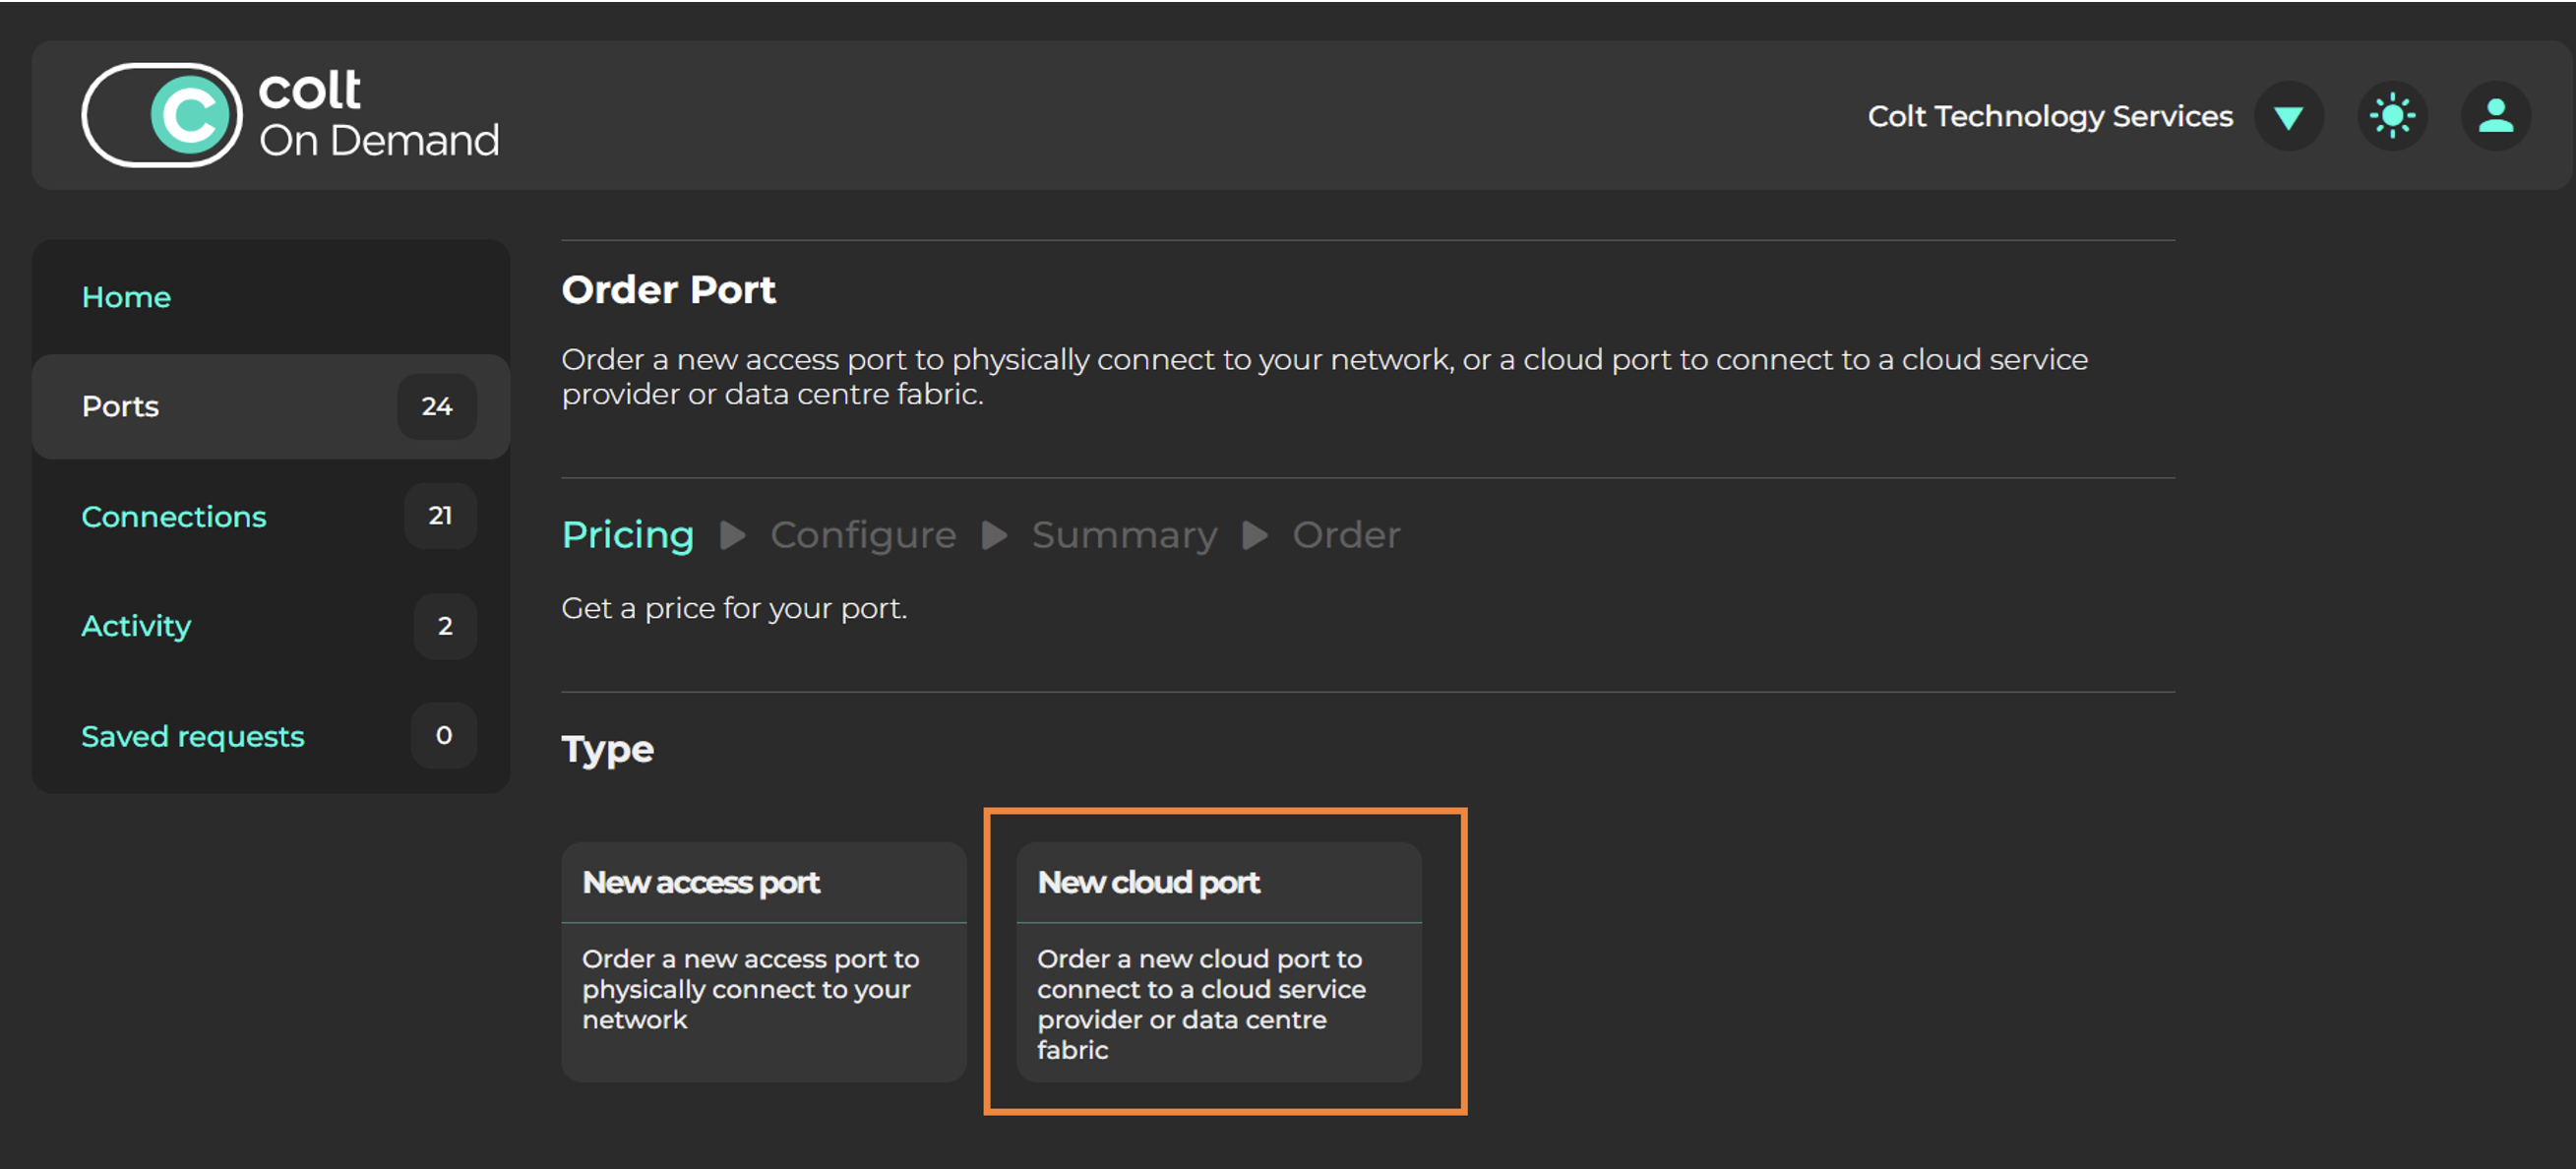
3. On the list of cloud providers, select *Equinix*.
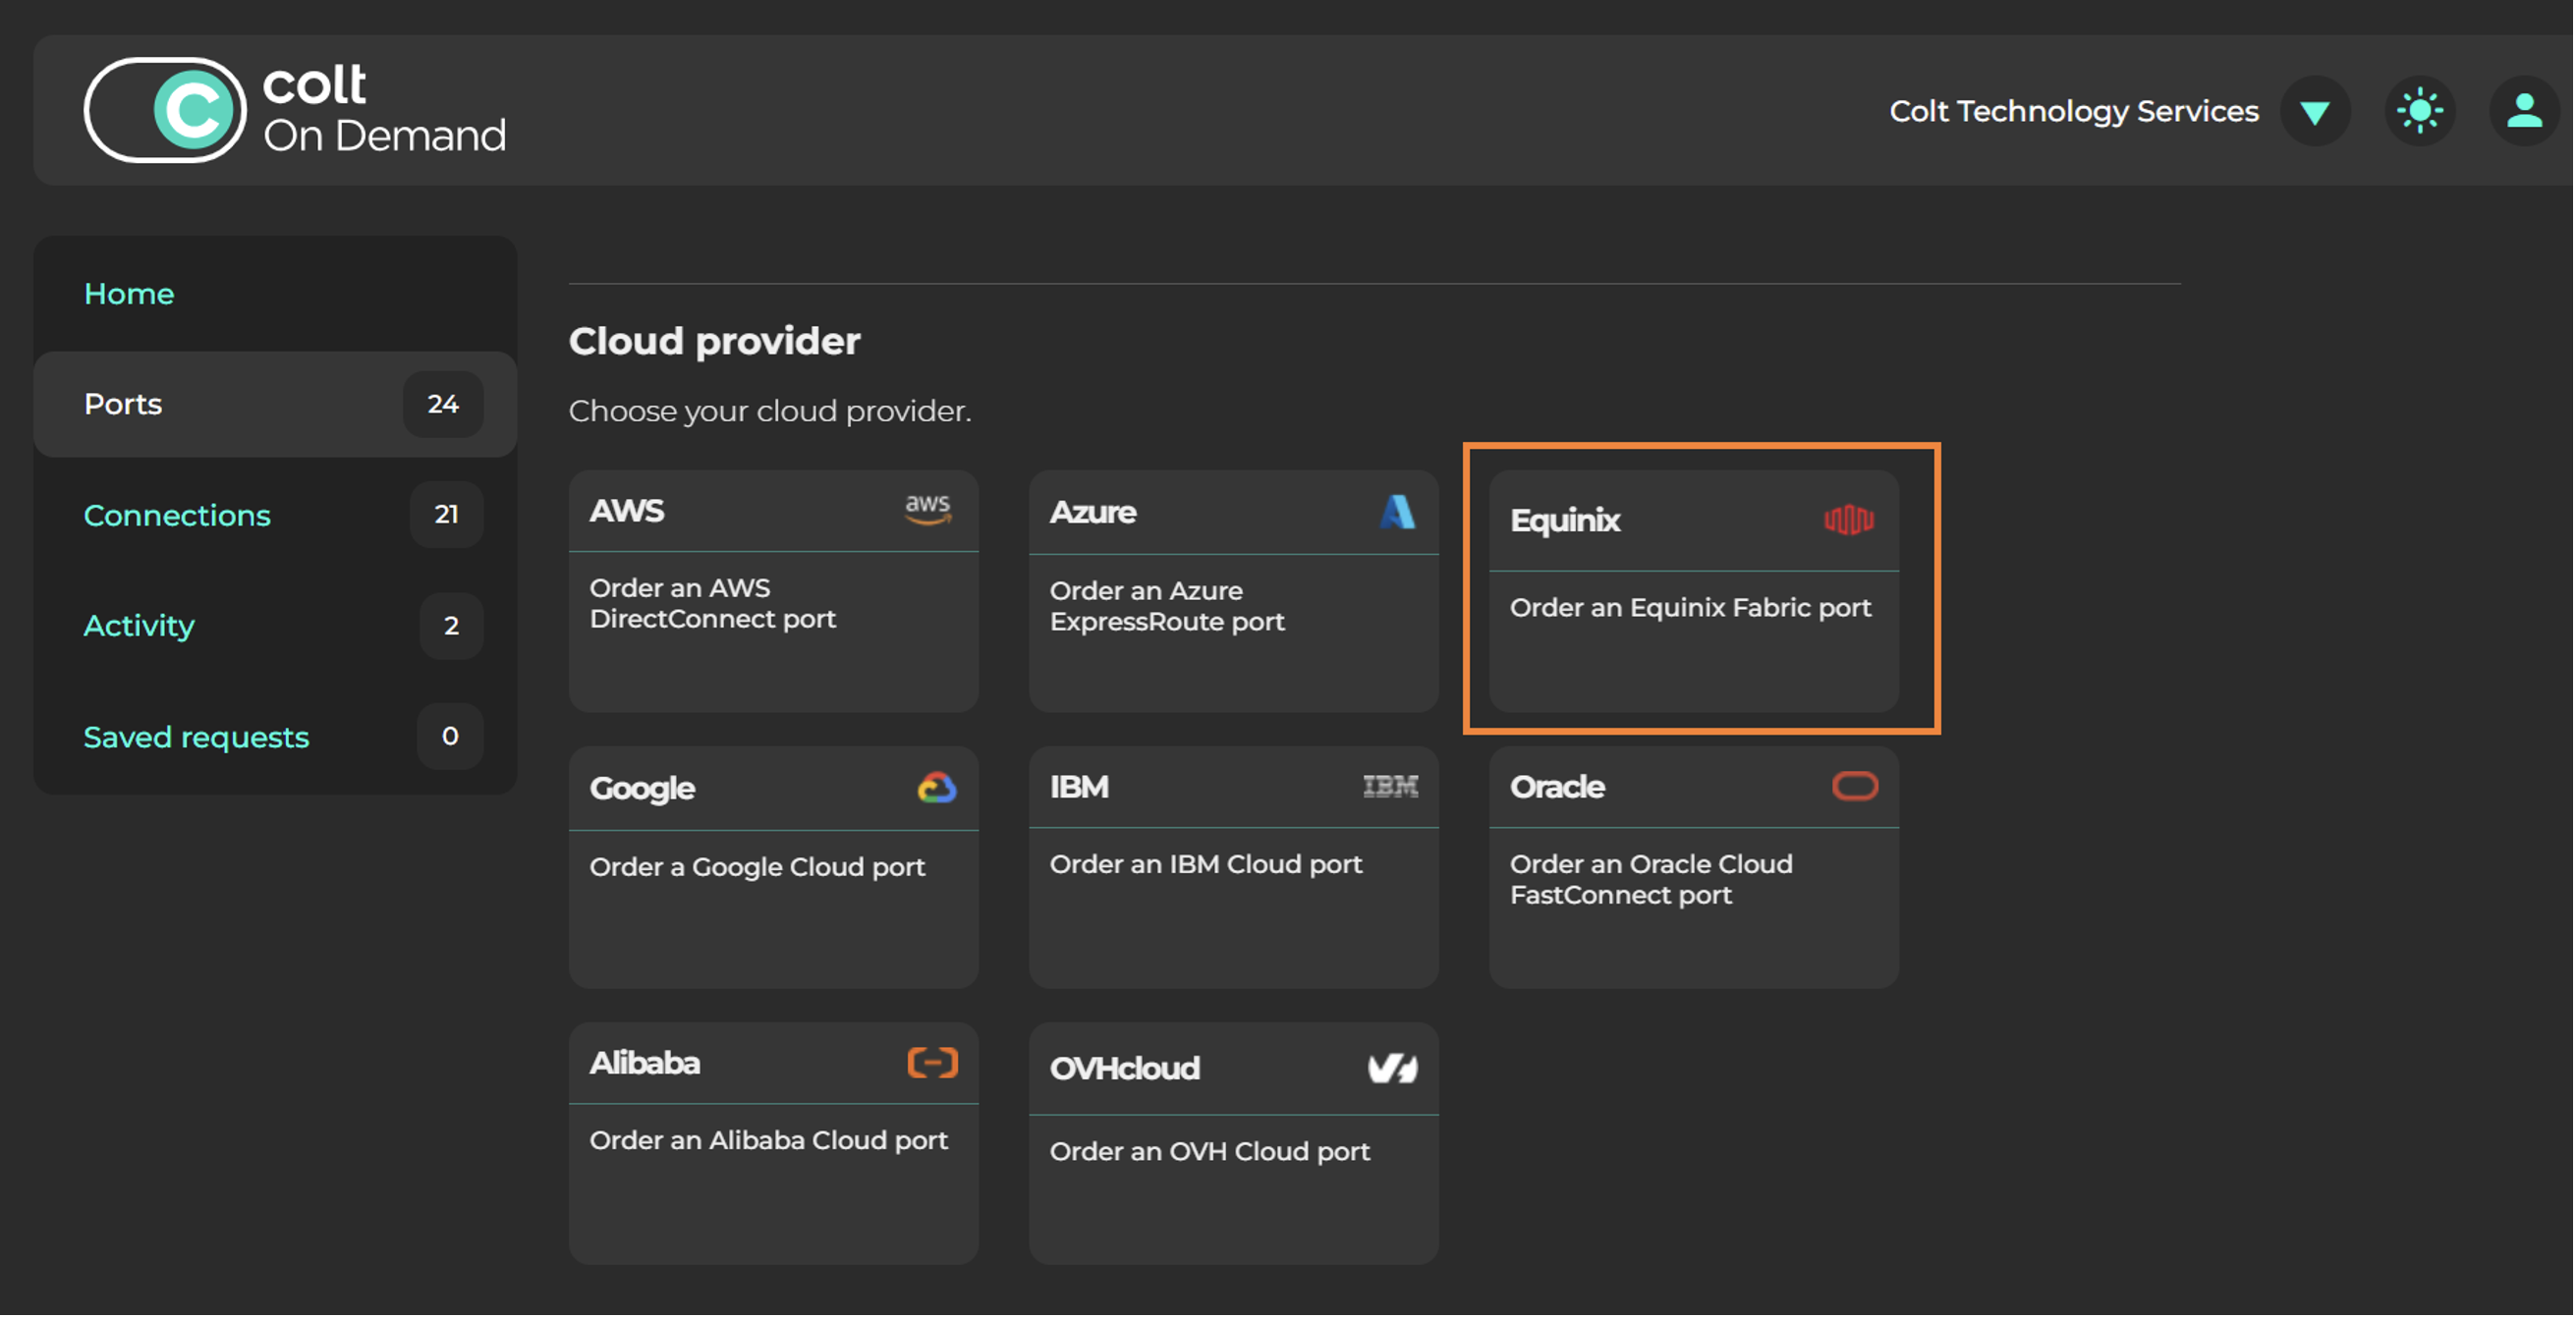
* Choose the *Region* - select the same metro region used when creating the connection in Equinix Fabric.
* Choose the *Location* - the specific location within the metro region.
* Choose the Port bandwidth.
* The *Commitment* option is always "Flexible".
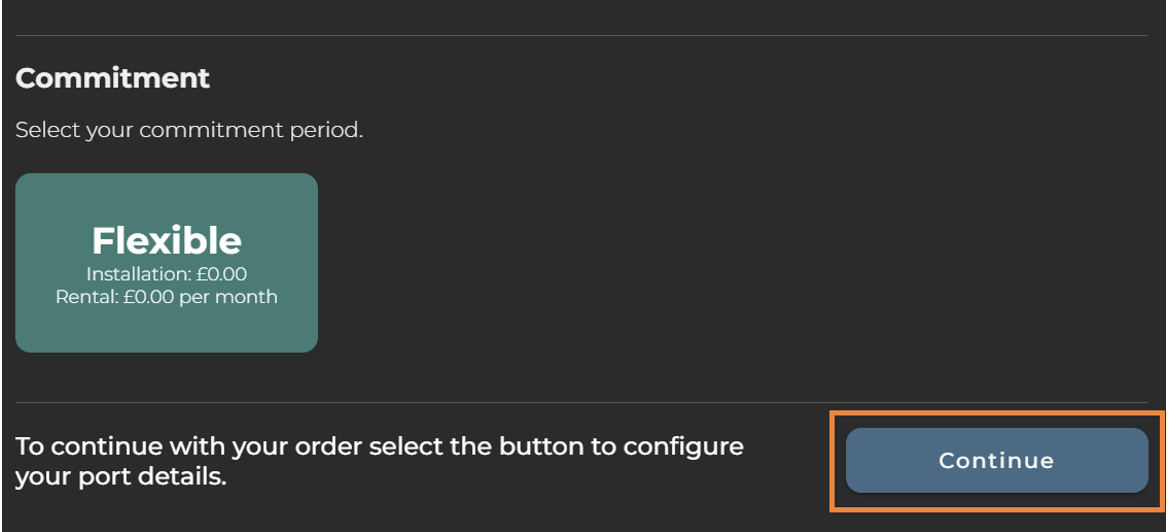
* Click **Continue** to configure your port details.
4. In the *Configure* window, configure your port:
— In the *Service Key* field, enter your connection ID from Equinix Fabric.
* In the *Name* field, assign a unique name to the port.
* Click **Continue**.
5. Review your order, when you are ready, click **Accept and place order**.
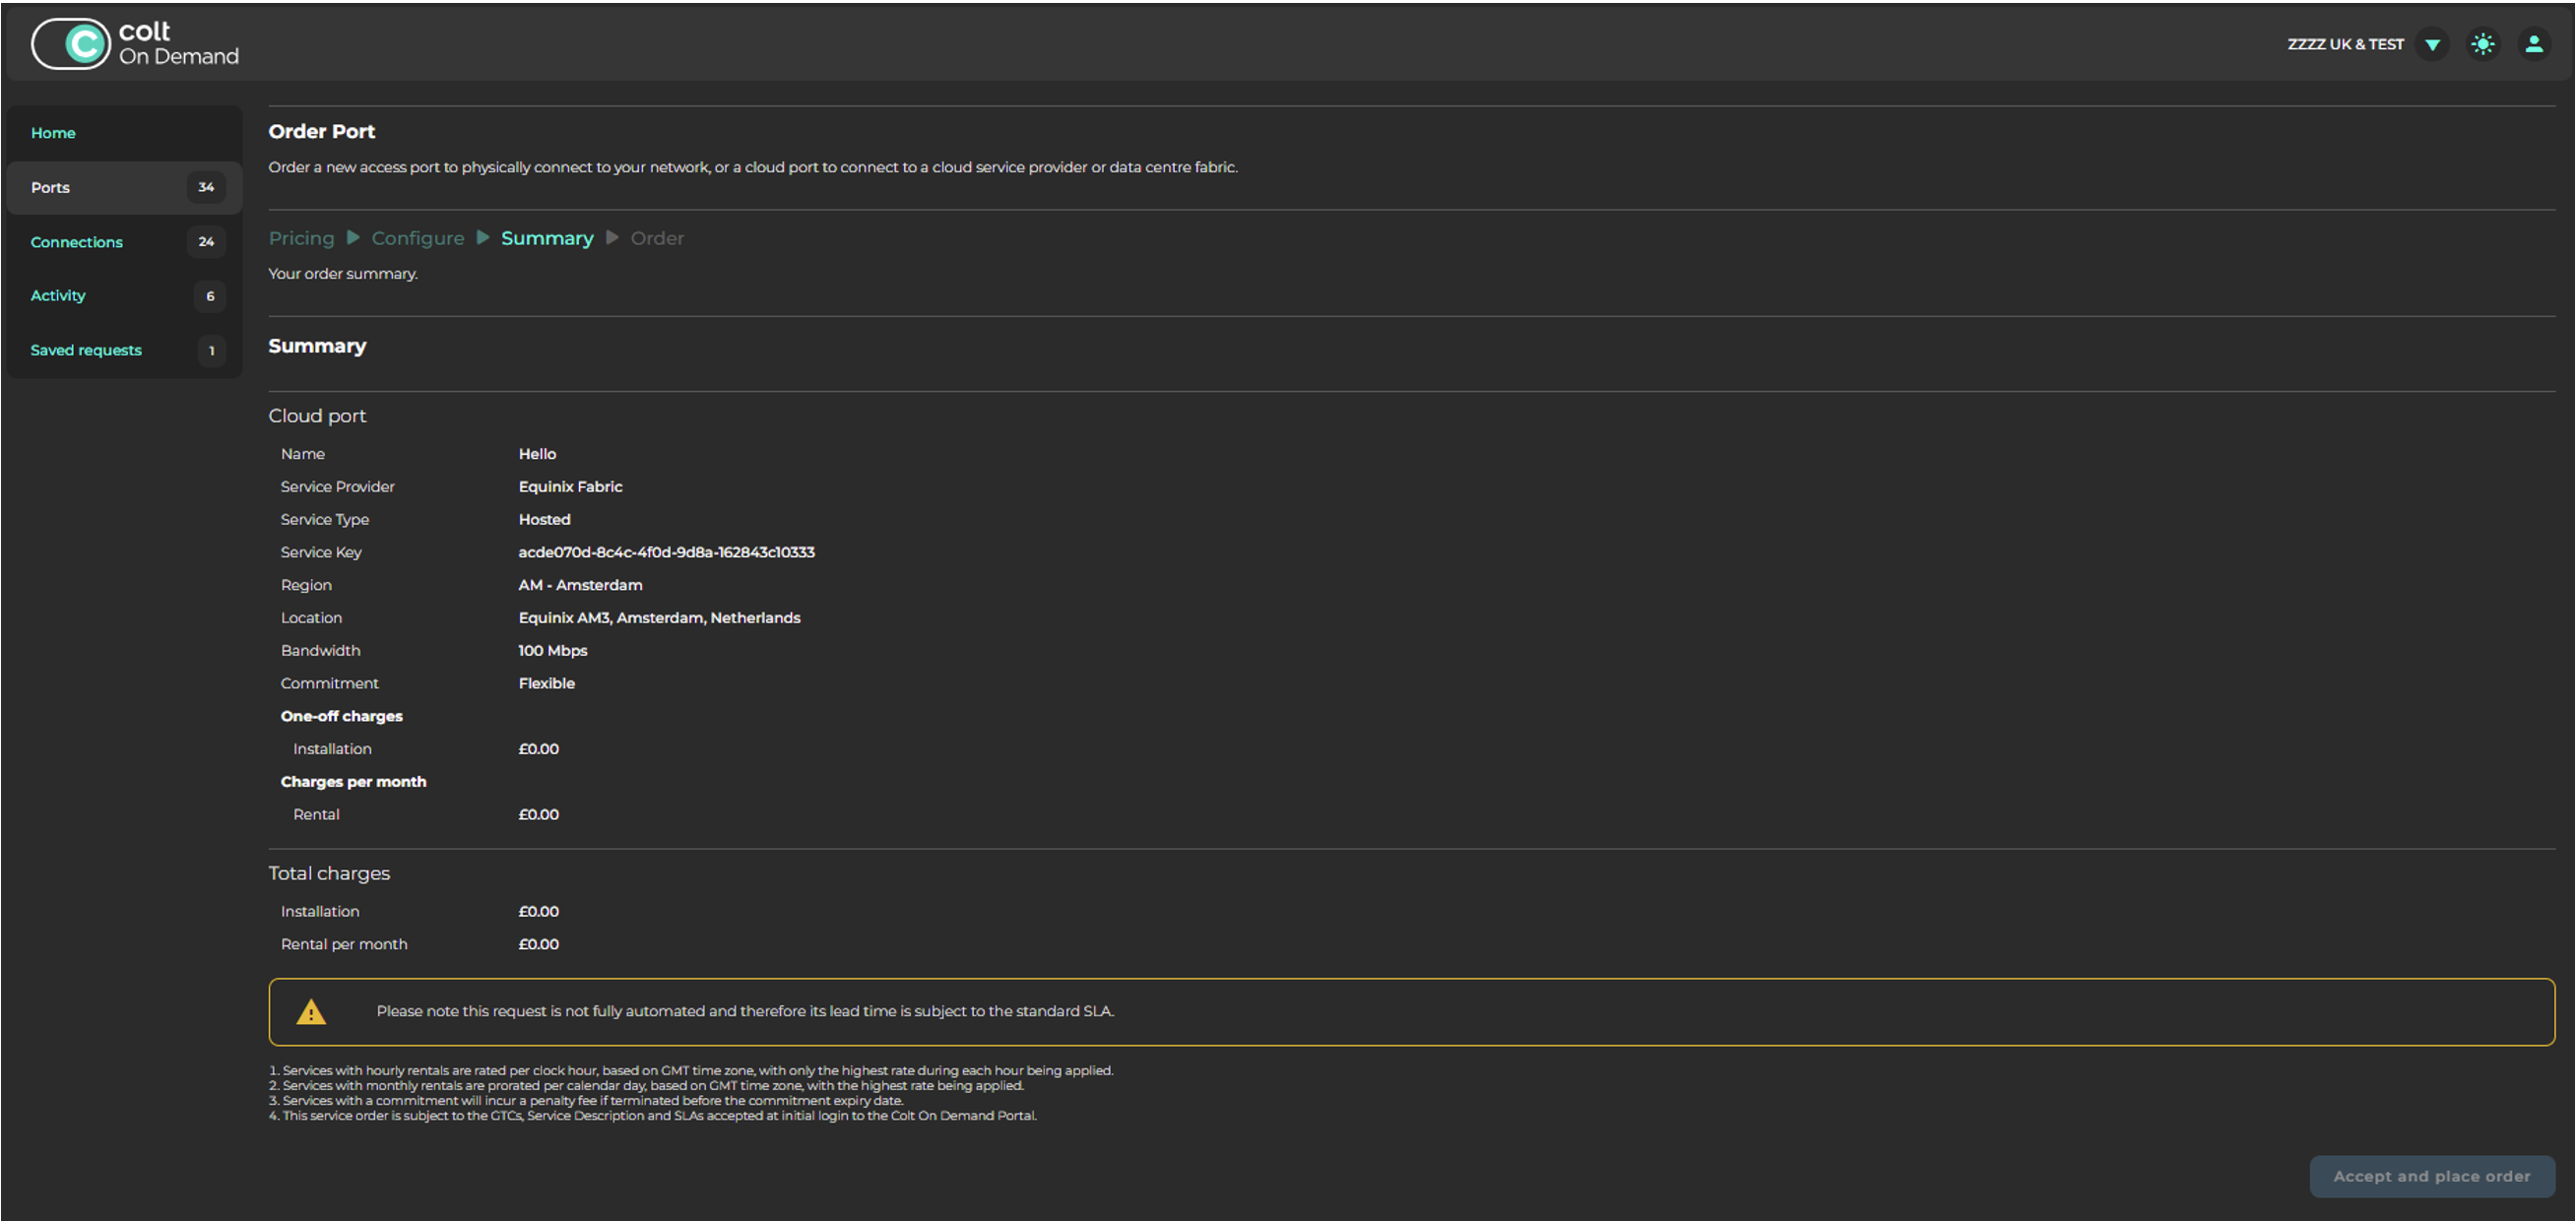
Once the order is completed, the cloud port is displayed under *Equinix*.
## Adding the Connection to the Cloud Port[](#adding-the-connection-to-the-cloud-port "Direct link to Adding the Connection to the Cloud Port")
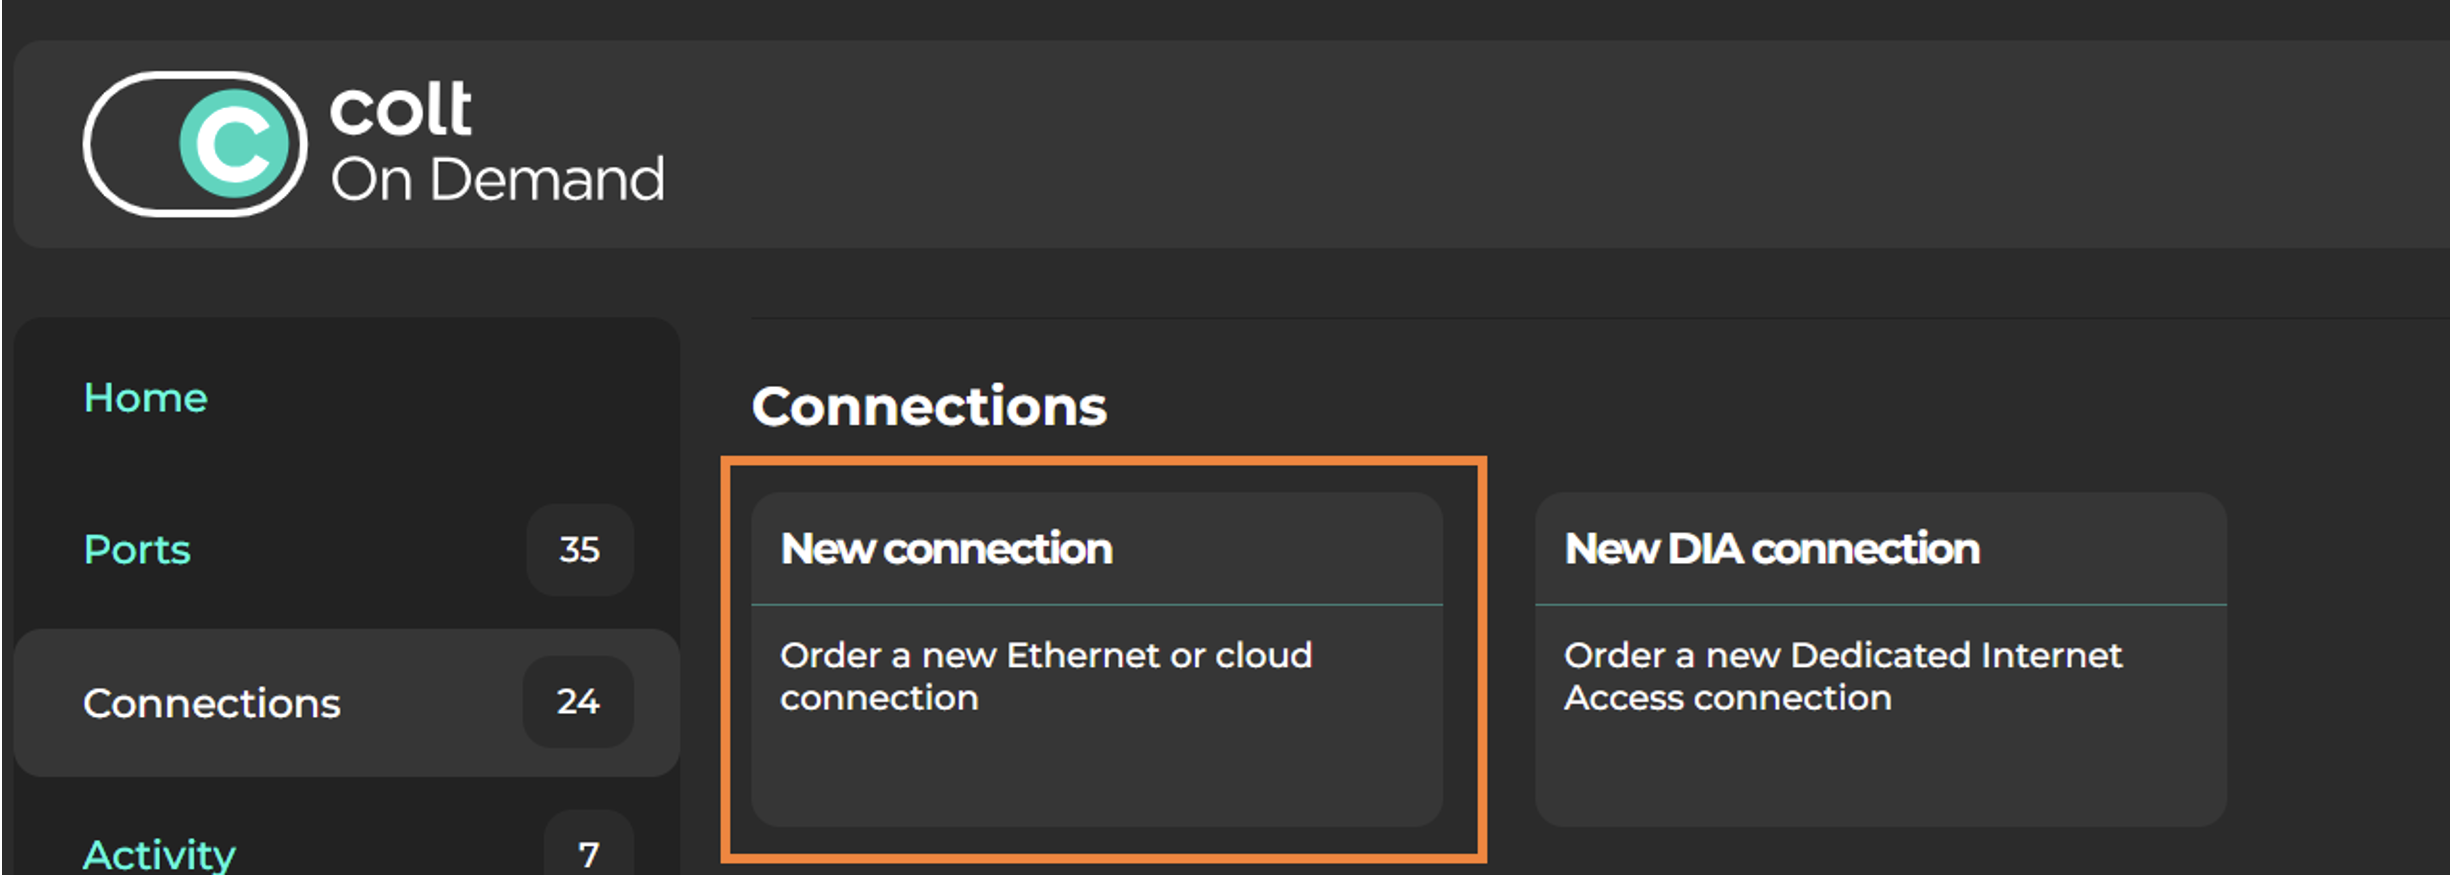
1. To add the cloud connection to your network, select *Connections* and click **New Connection**.
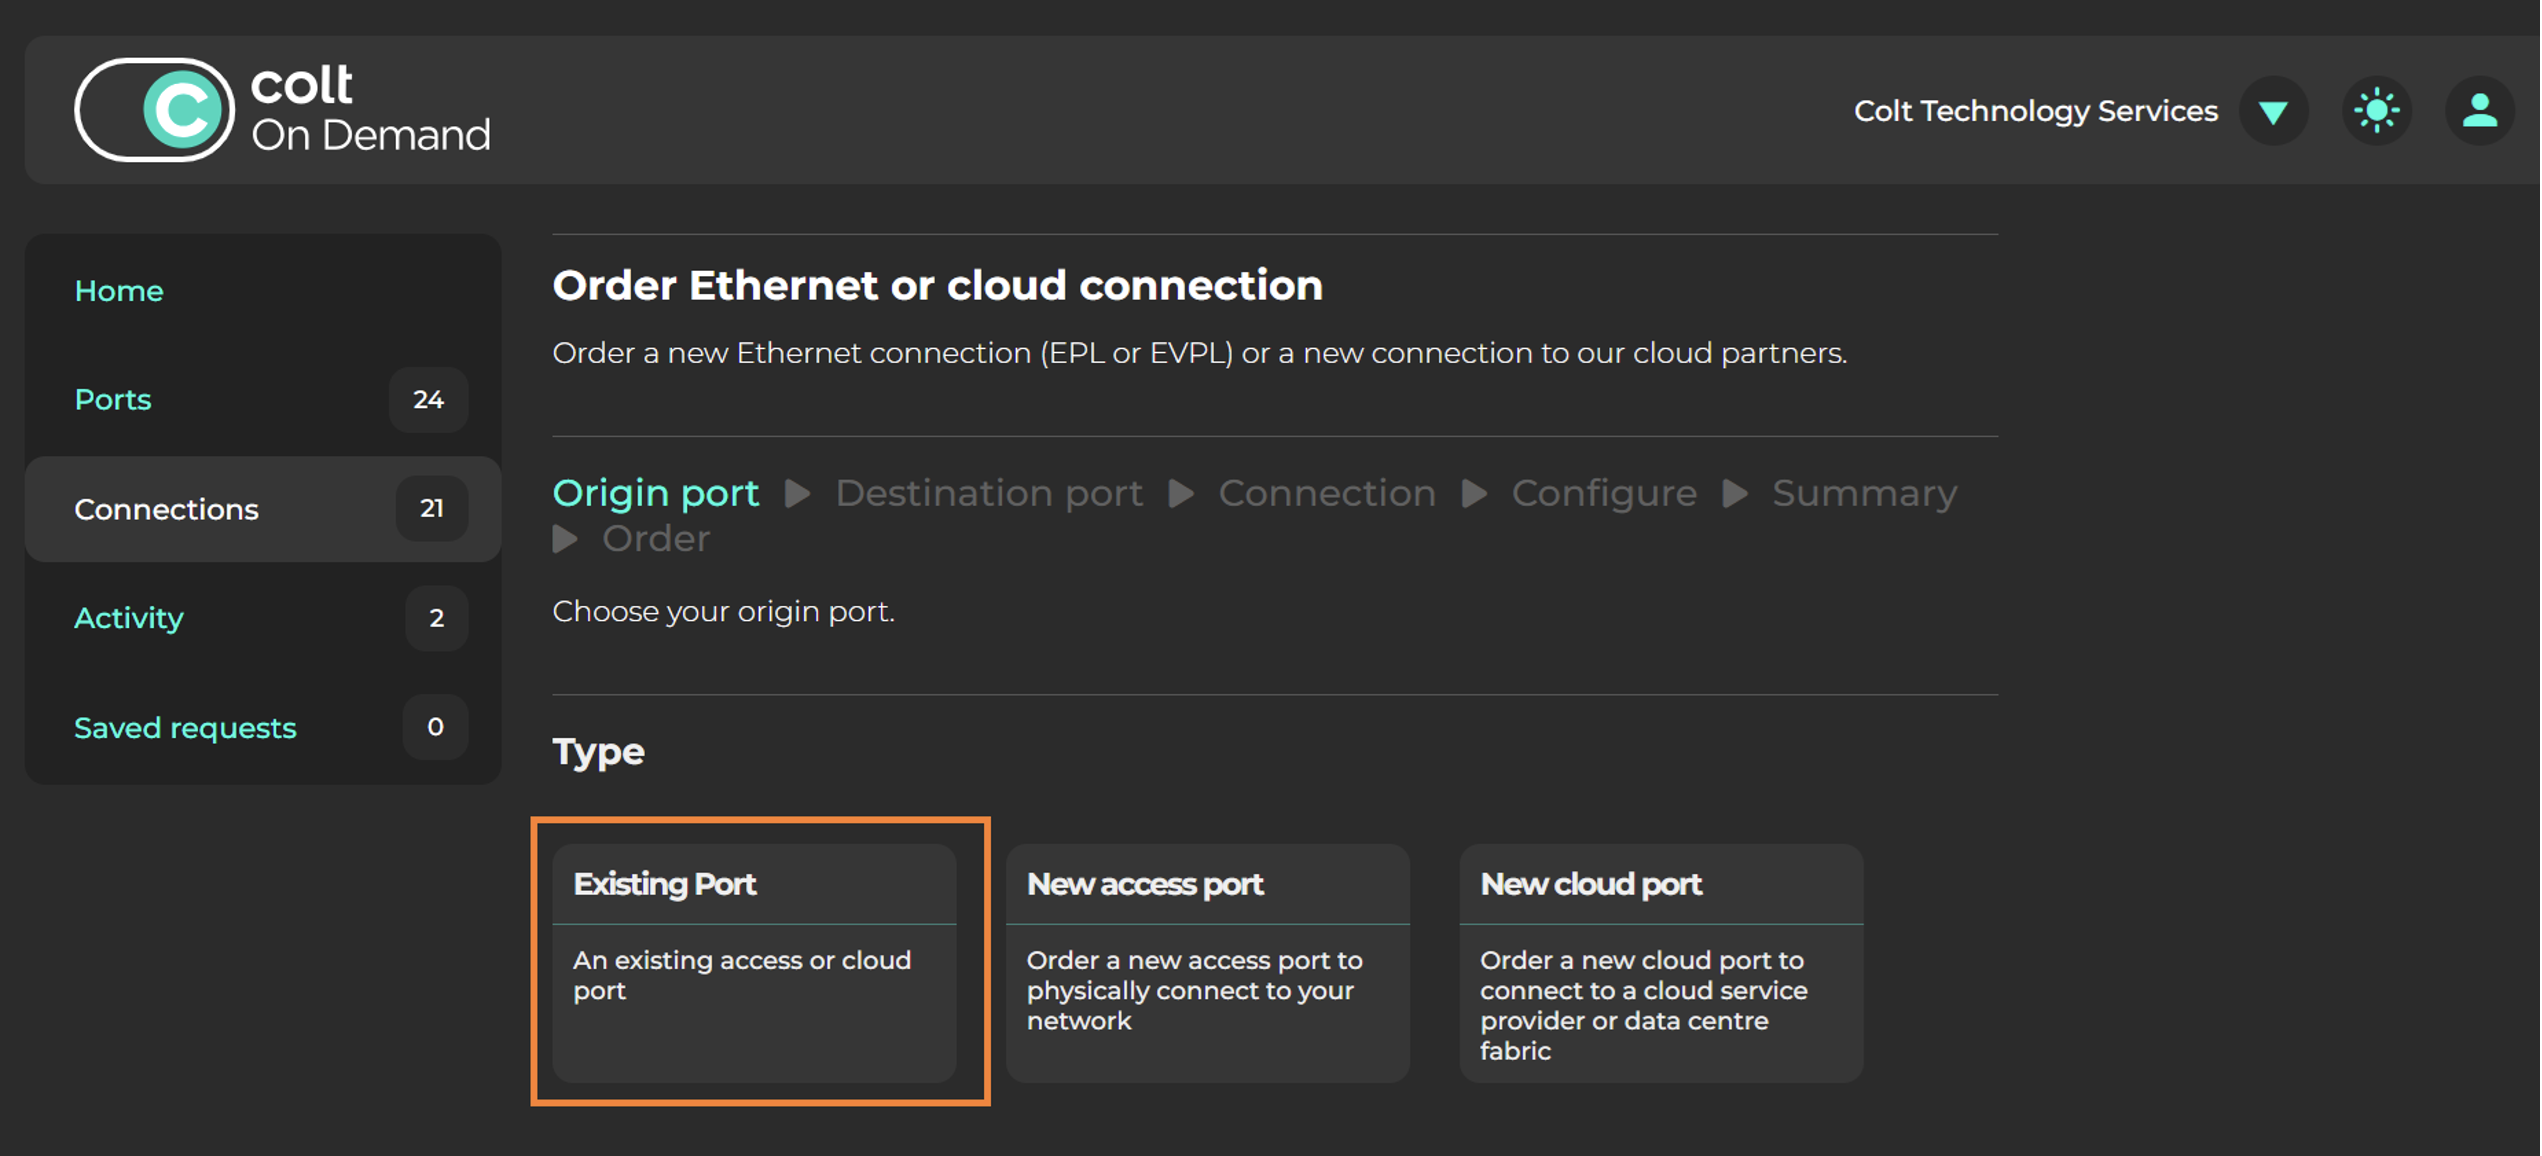
2. To add the connection to your Equinix cloud port, select **Exiting Port**.
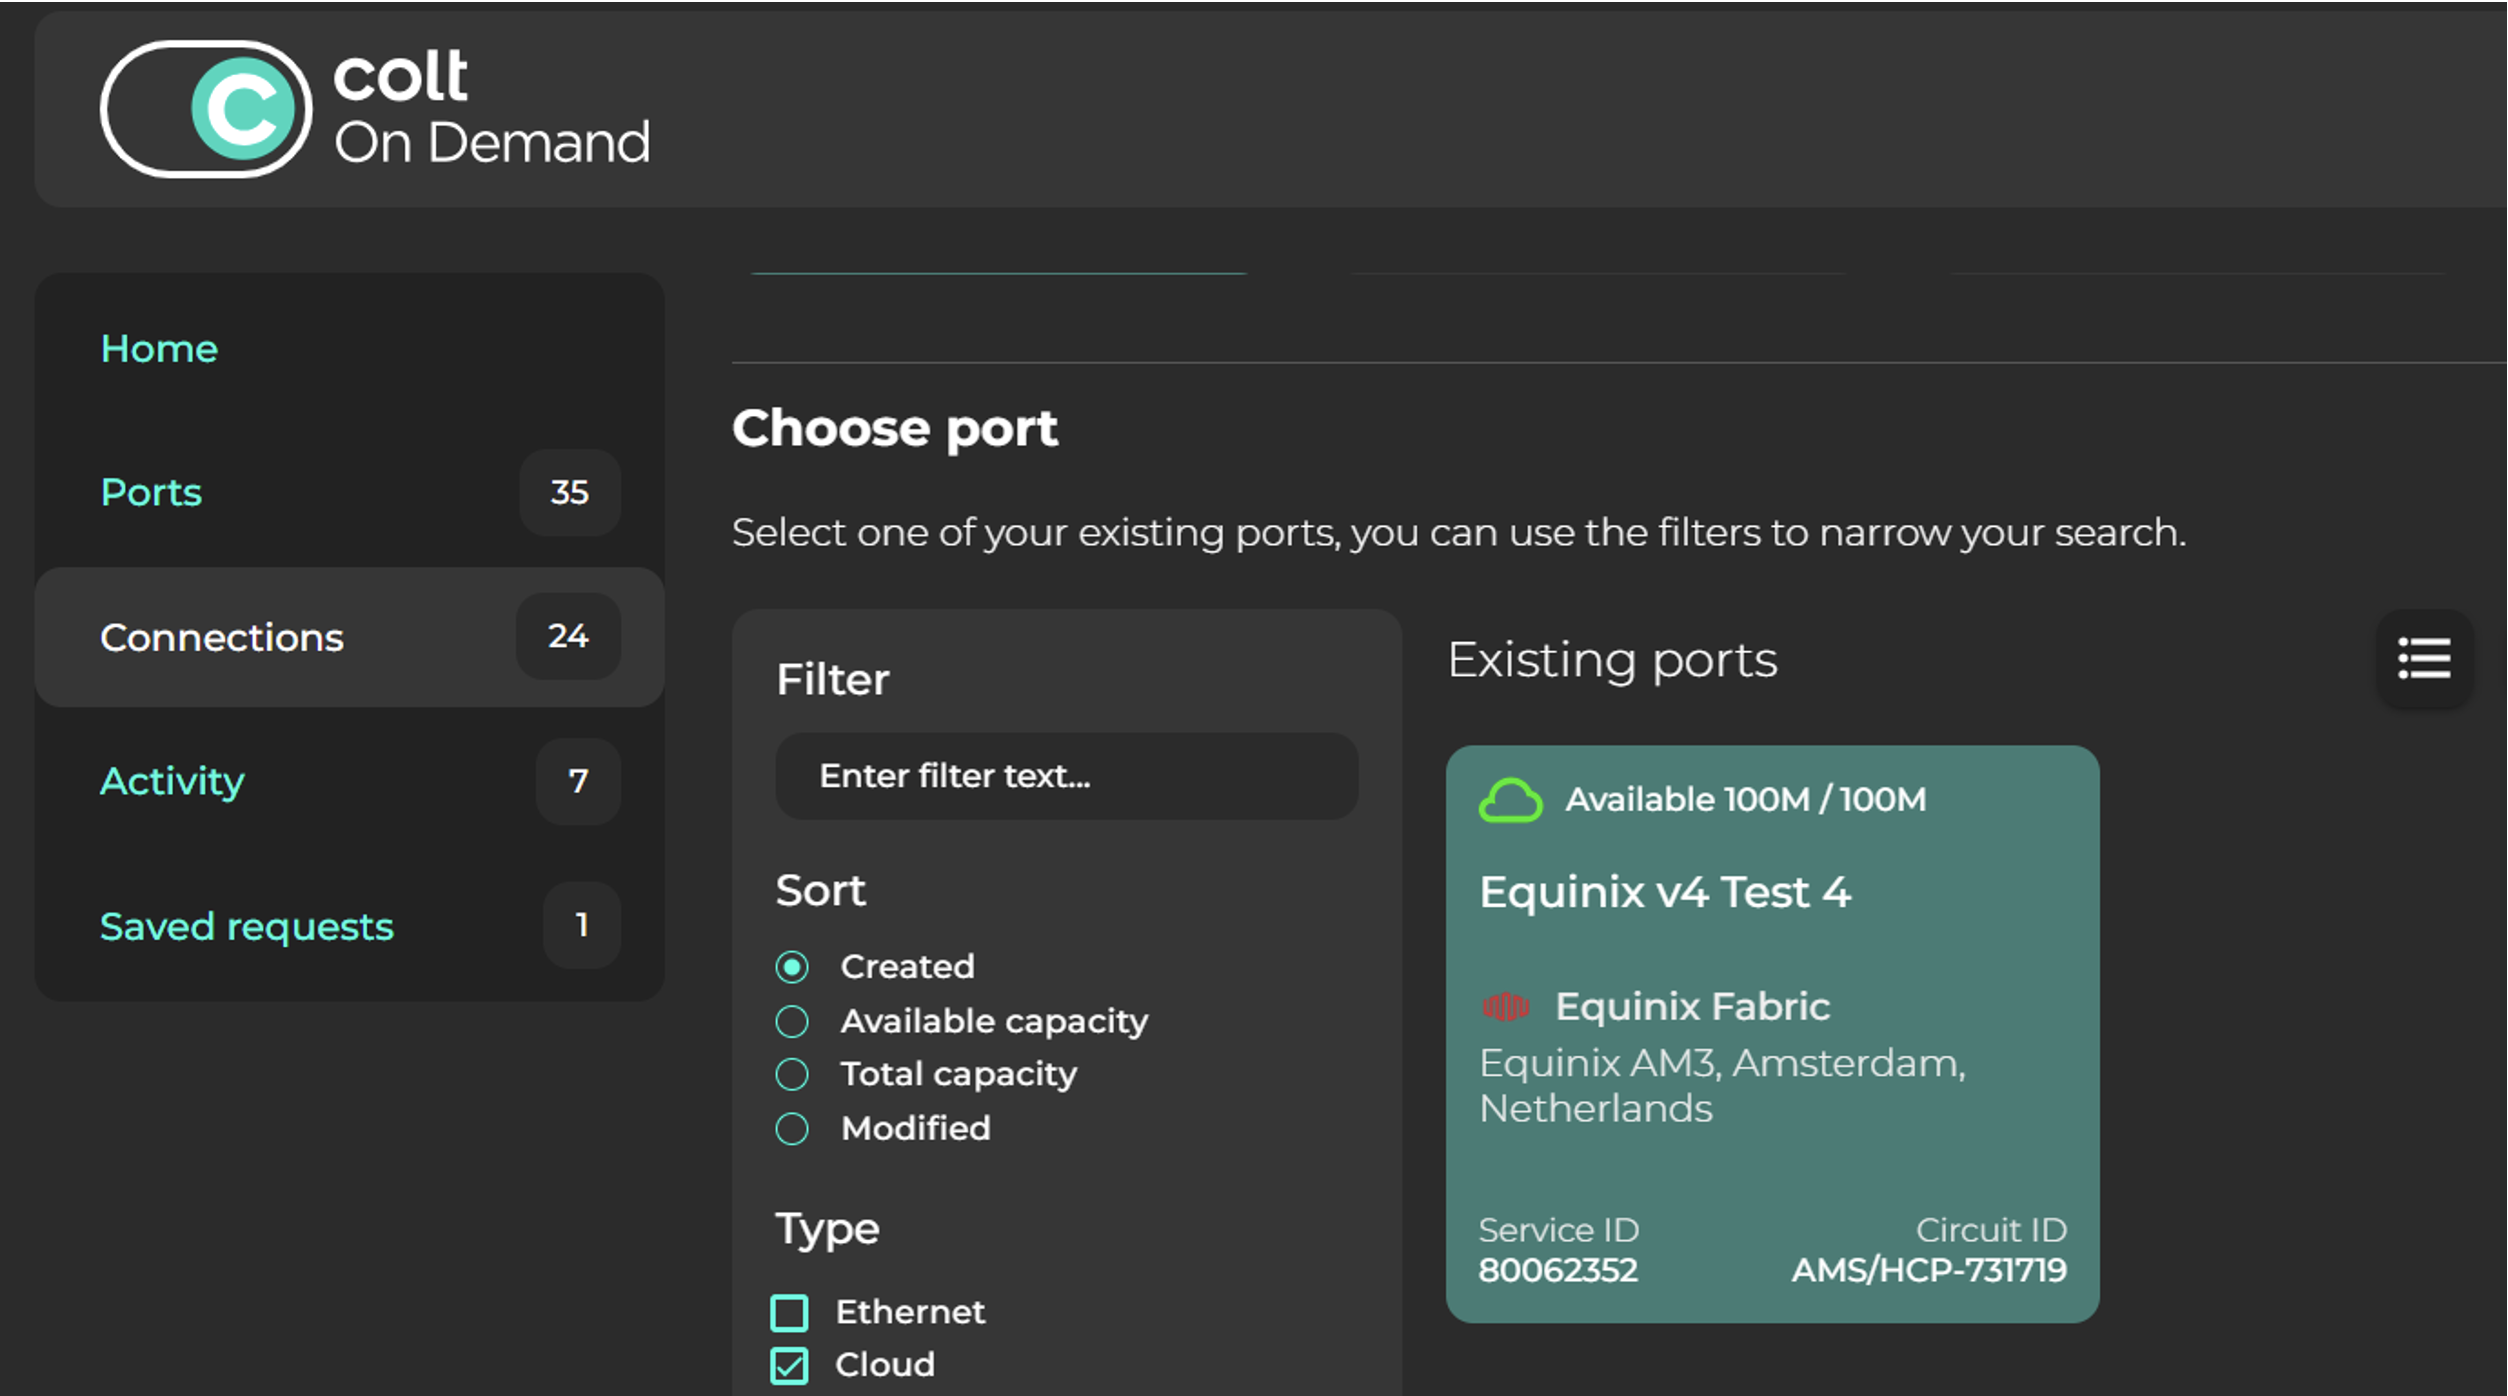
3. Under *Choose Port*, select the Equinix cloud port.
4. Configure the connection.
* Enter a name for the connection.
* Select a circuit bandwidth, then a contract duration between 1 hour and 36 months.
* Select VLAN configuration on destination port.
* Click **Continue**.
5. Review your order and click *Accept changes & submit*.
The connection is provisioned automatically within a few minutes.