VERSA Deployment
This topic explains how you can provision and operate a VERSA device from Network Edge.
Currently, you can order the VERSA FlexVNF 2 core CPU version (also known as small size) that provides a throughput of up to 1 Gpbs.
SD-WAN devices, including the VERSA FlexVNF, are originally provisioned to be a hub within a hub-and-spoke architecture. However, there are no limitations on how users can incorporate this device into their networks.
Part 1: Conceptual Workflow
VERSA Director is the key orchestrator controlling the device. Before beginning this process, users should procure the appropriate licensing and pre-staging details directly from VERSA.
Requirements
Users who intend to provision VERSA device should have the following:
- Access to VERSA Director
- Pre-staging details from VERSA, including: their Local ID, Remote ID, Controller 1 and 2 IP addresses.
- An active Equinix Fabric account
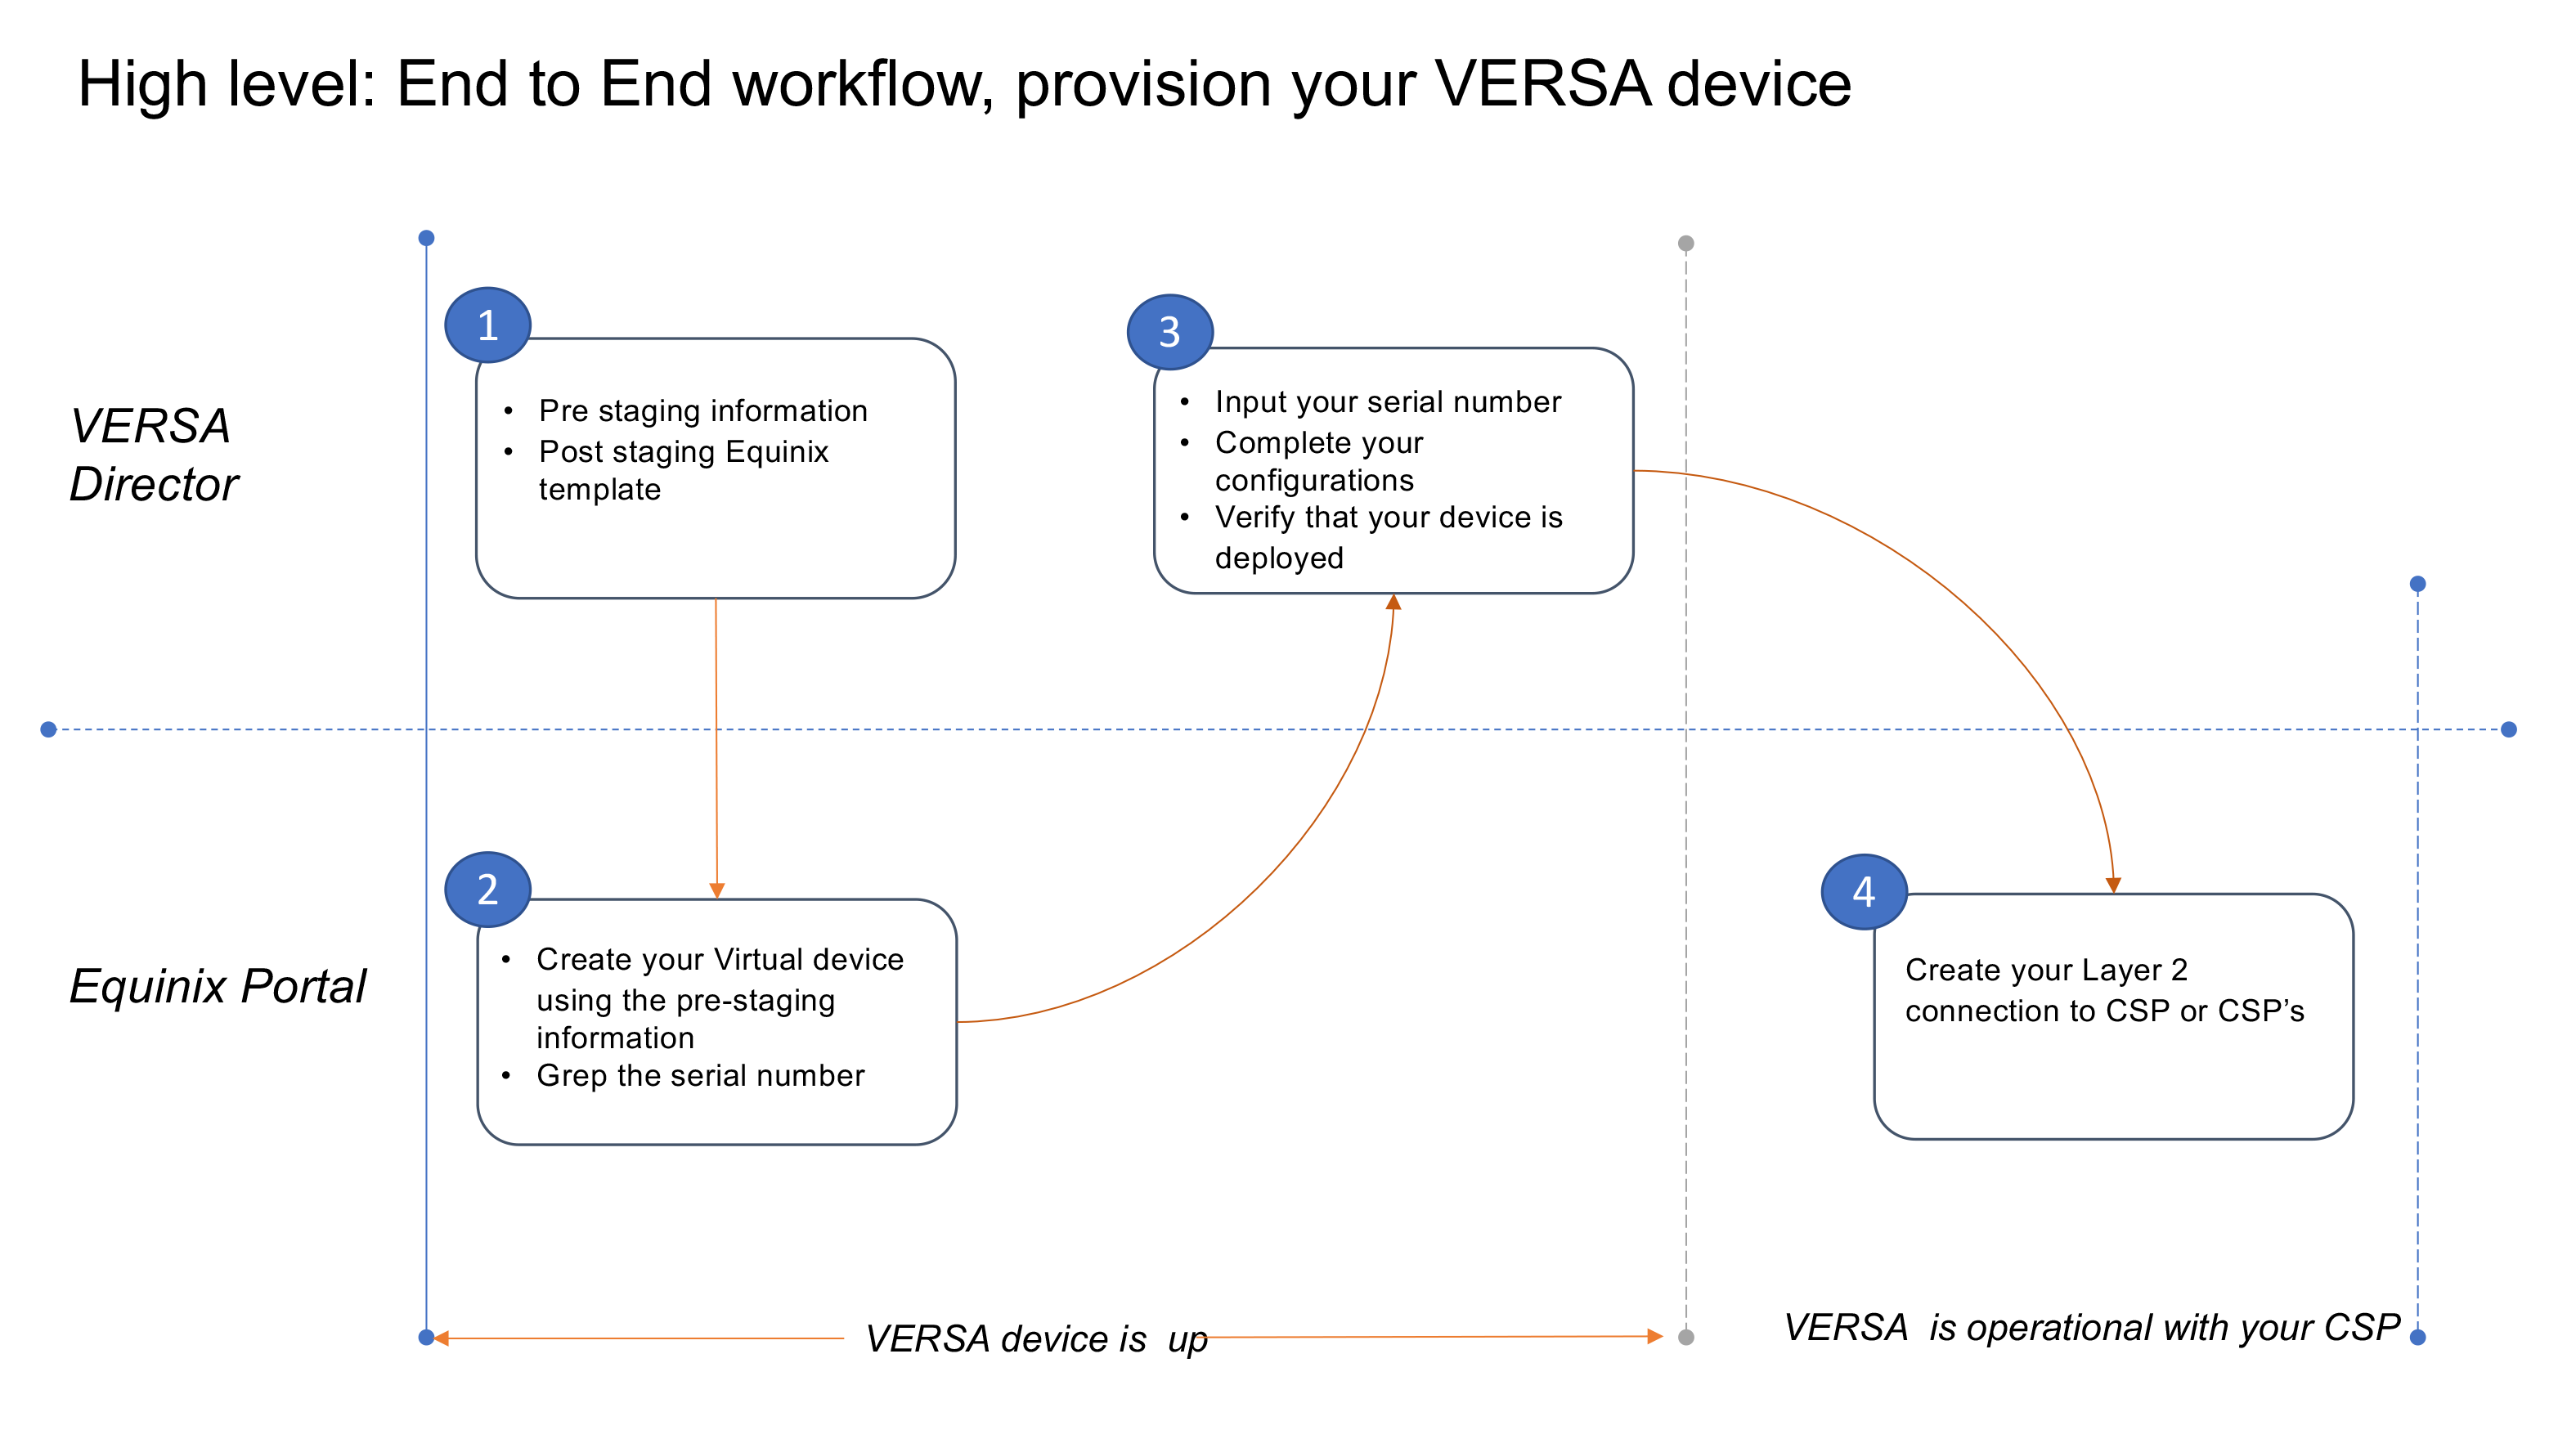
High level, end-to-end workflow: provisioning your VERSA device
Part 2: Verify that the Organization is Set Up on VERSA Director
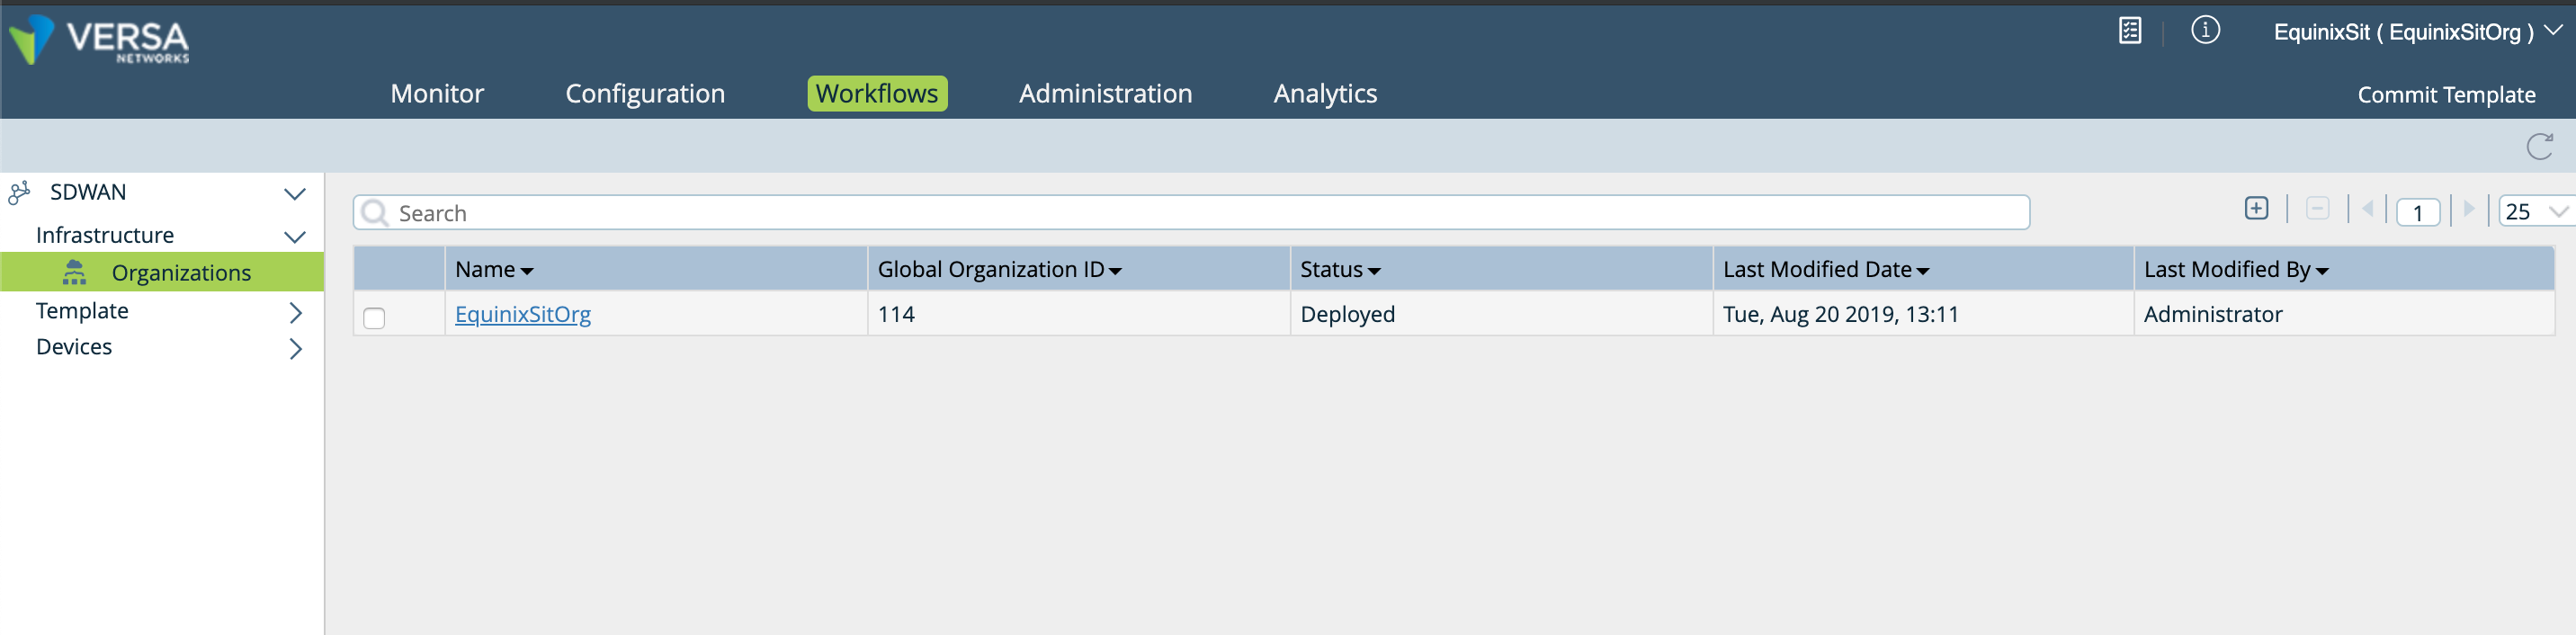
-
View organizations on VERSA Director.

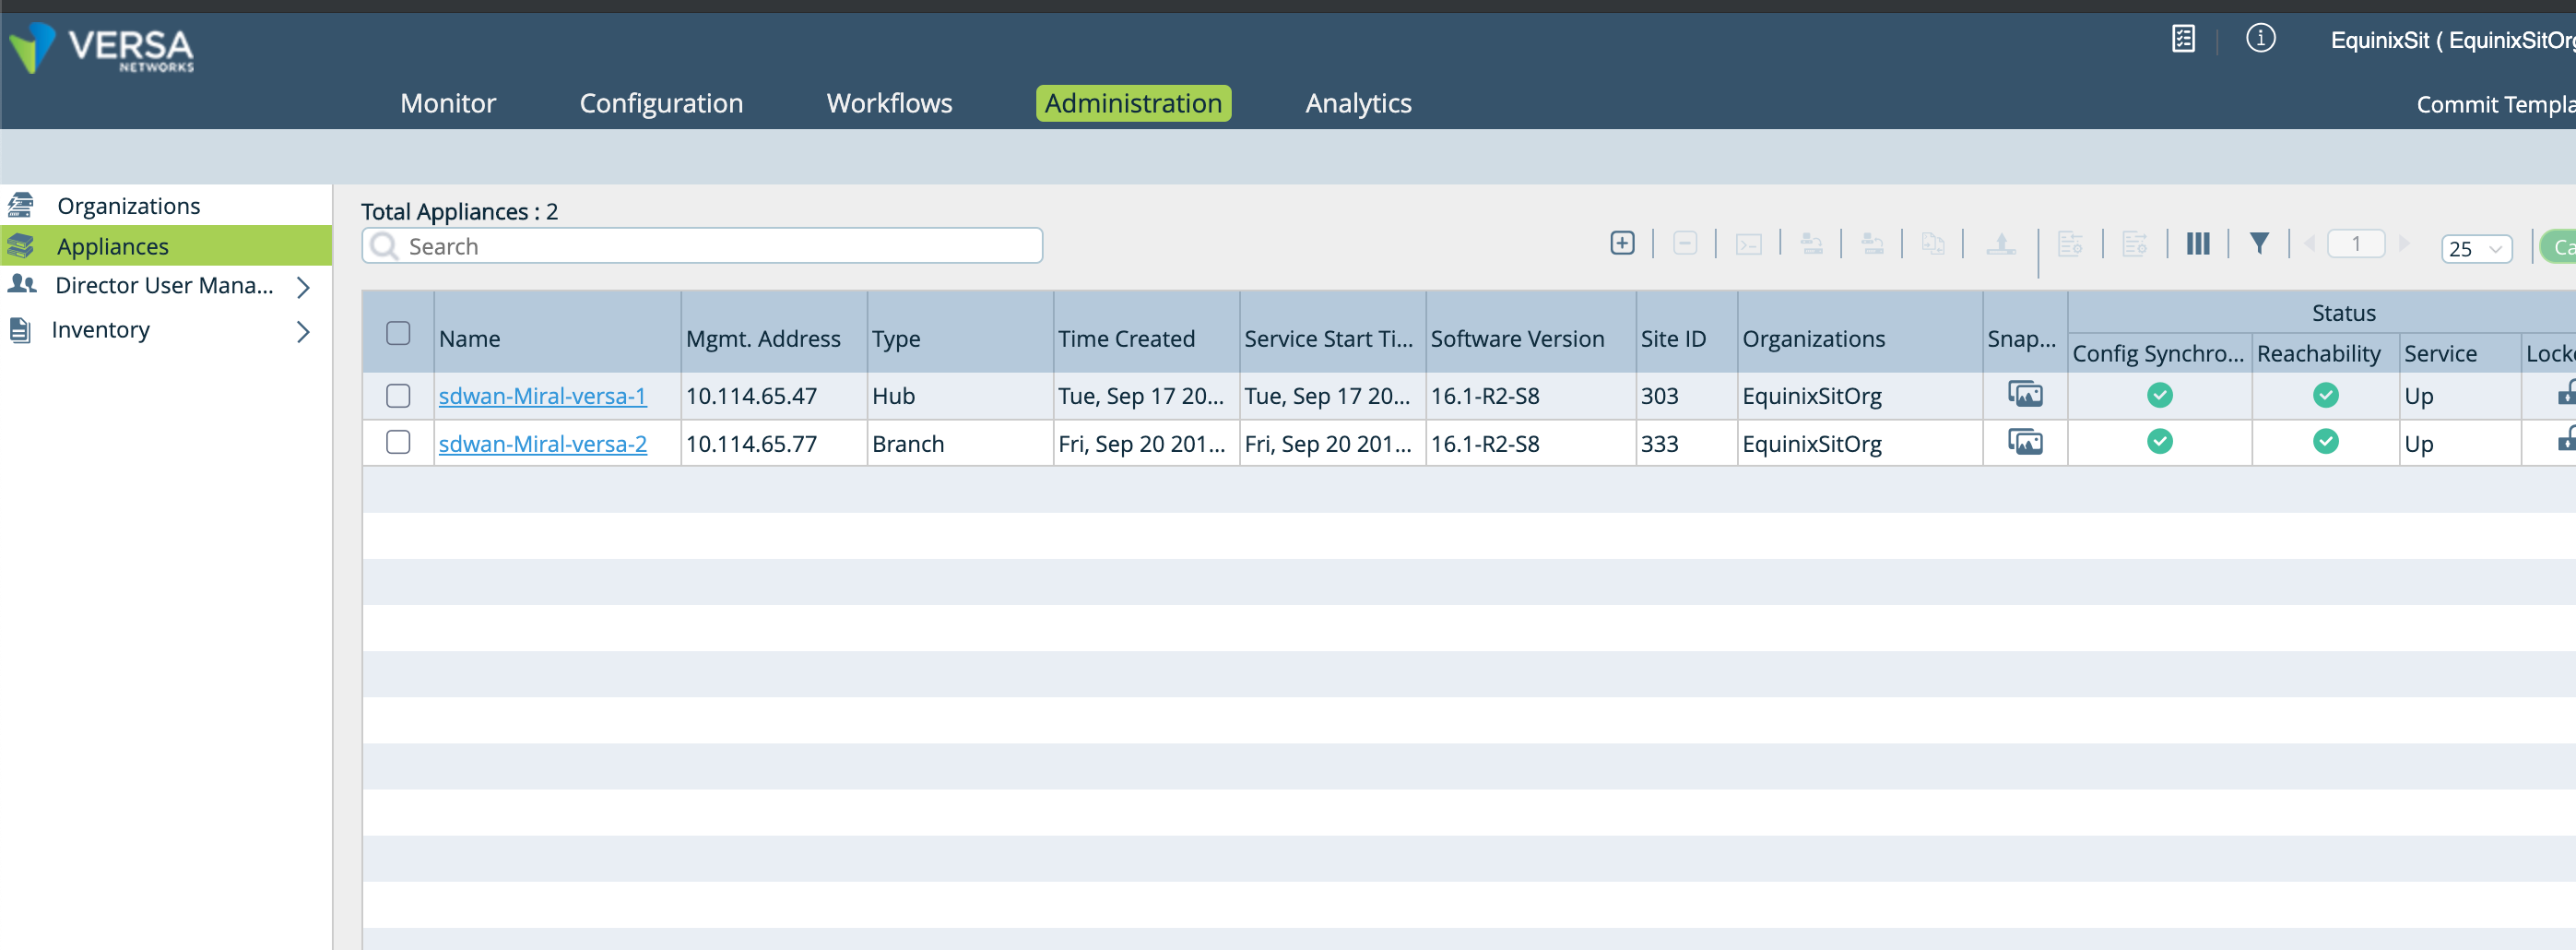
-
View appliances on VERSA Director.
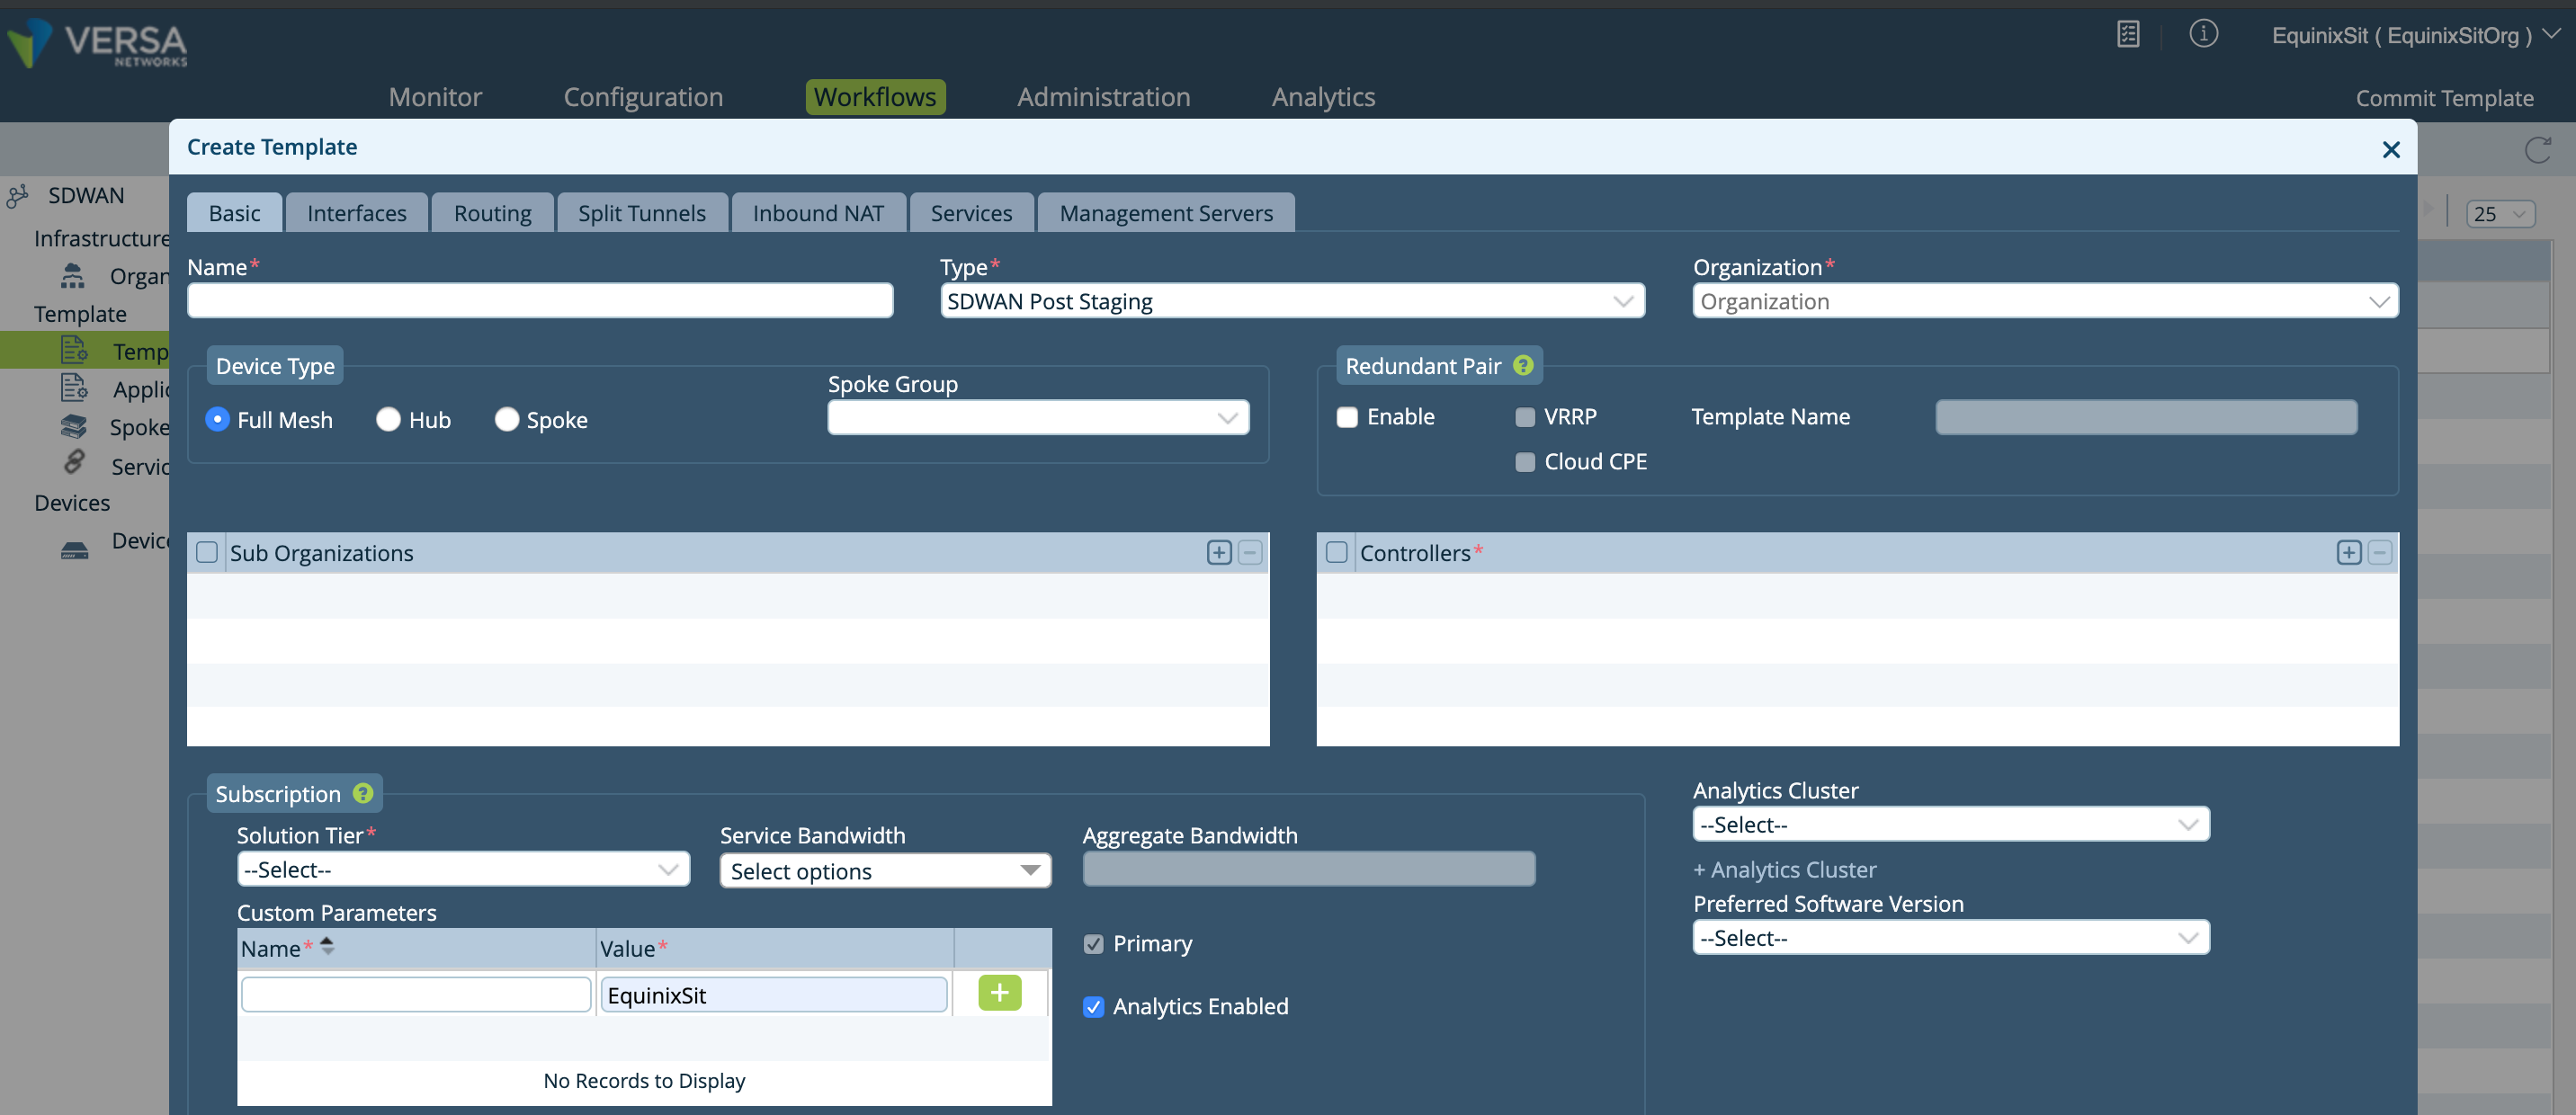
Part 3: Post-Staging Template Creation
Once your device is created, it’s time to name, then label the device. See the following page shots on how this process looks within the VERSA Director interface.
-
Provide a name for your device.
-
Next, label your device.
-
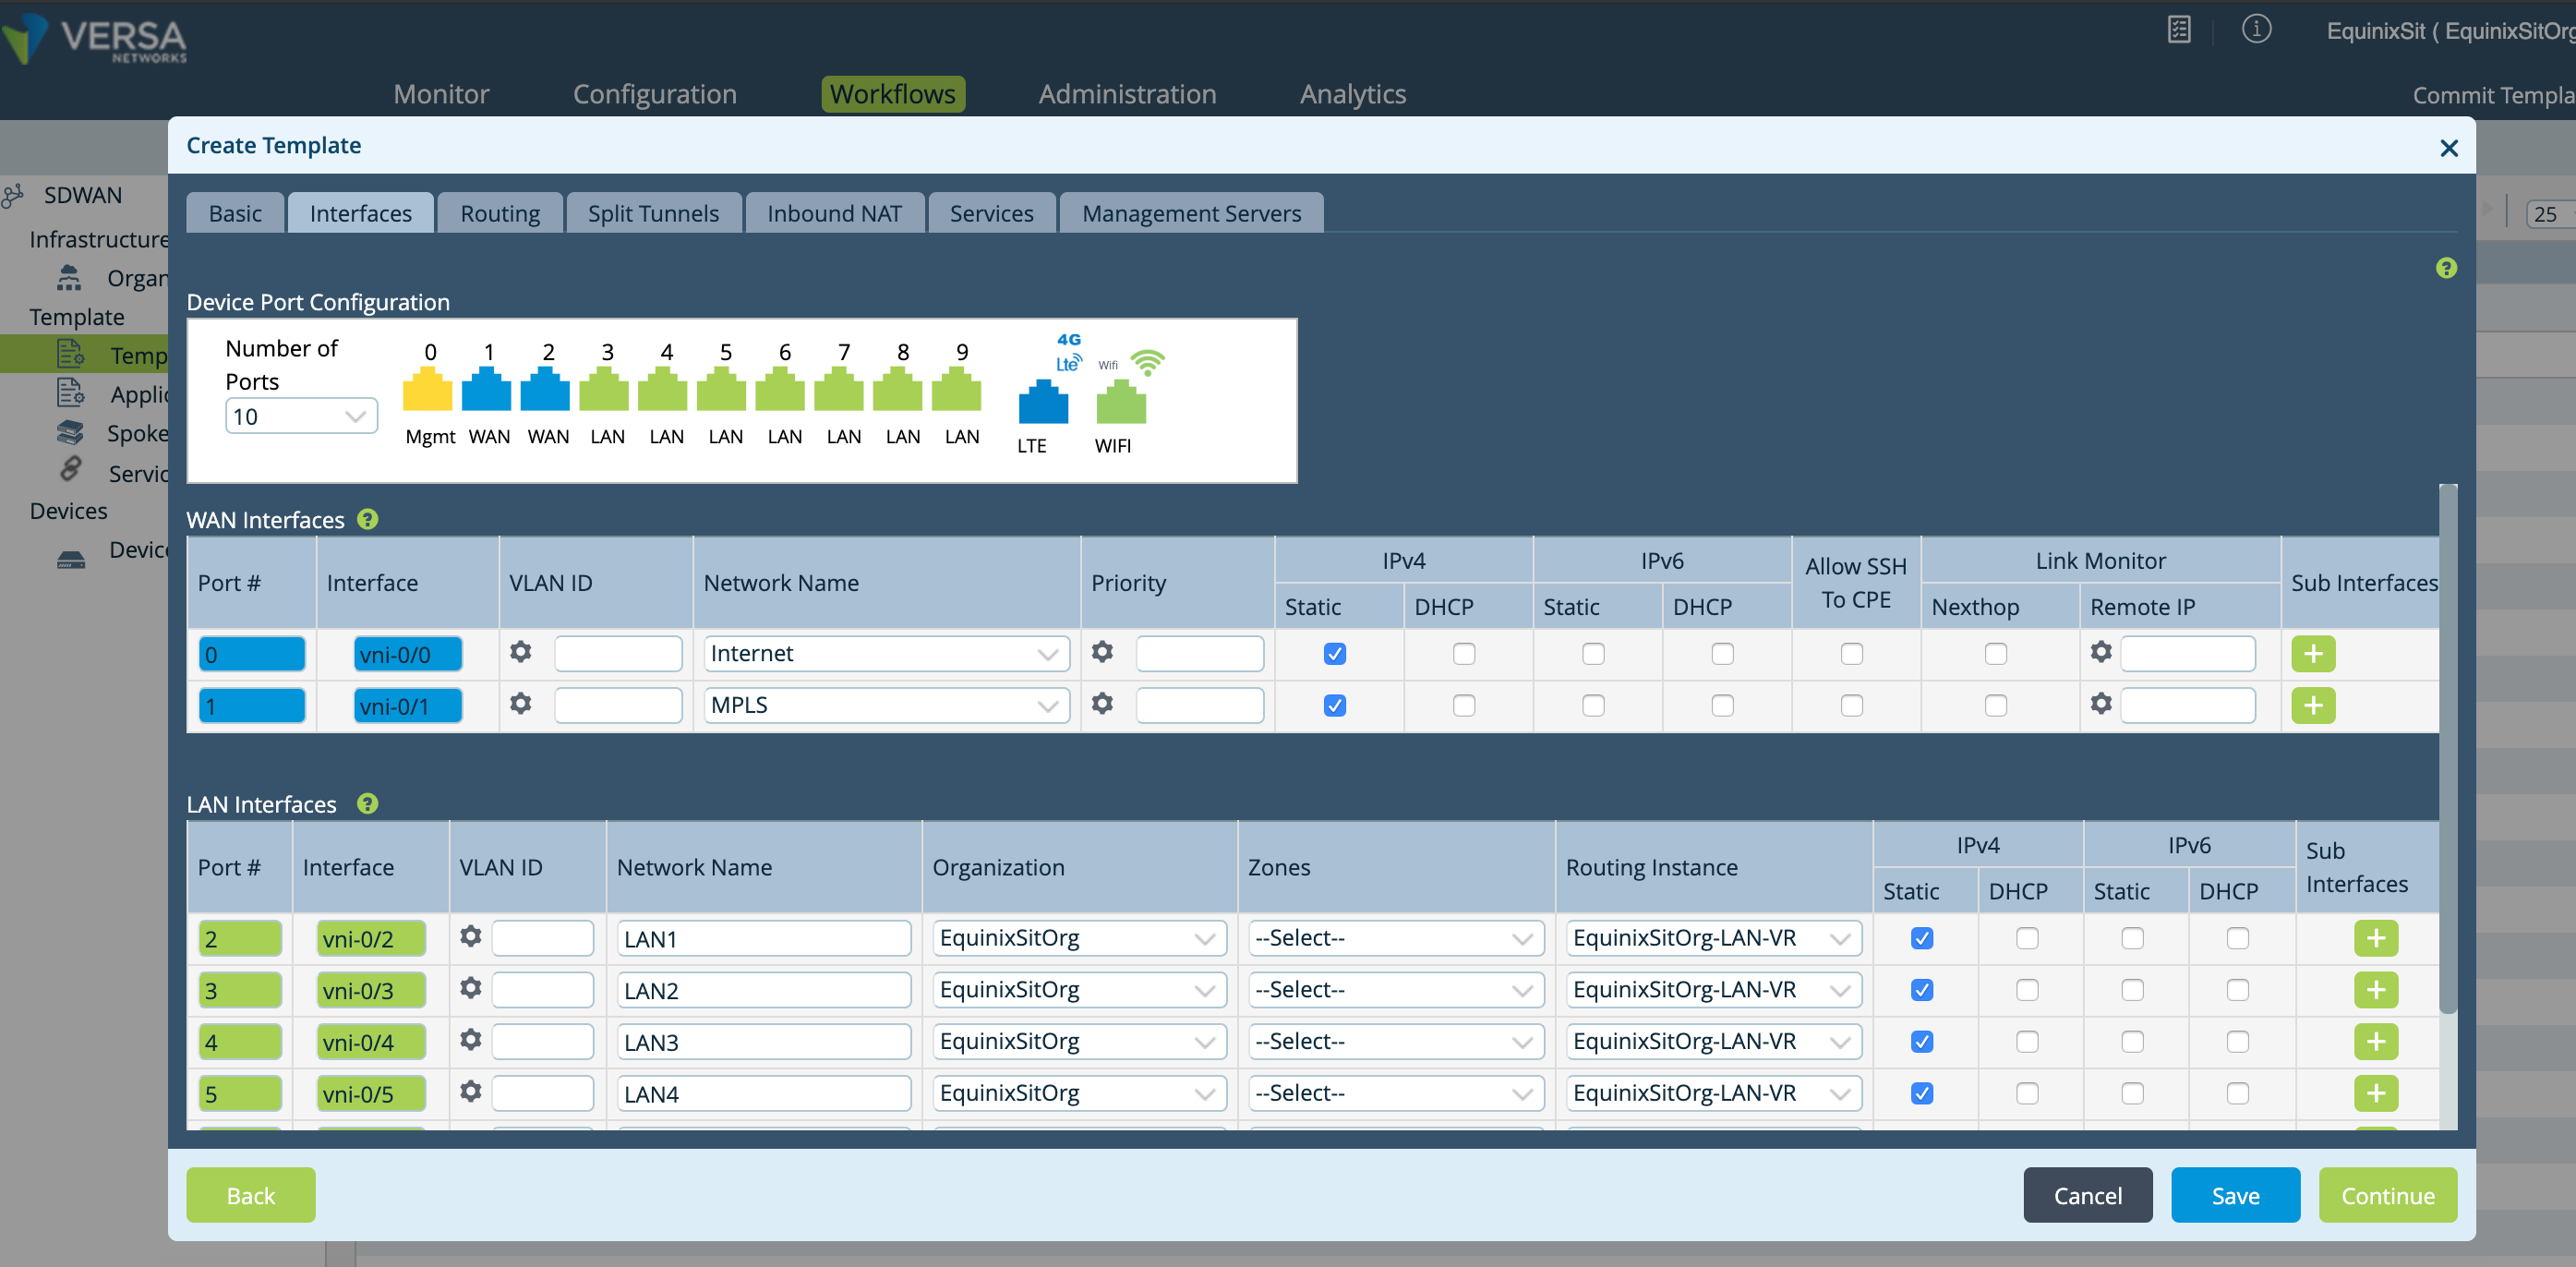
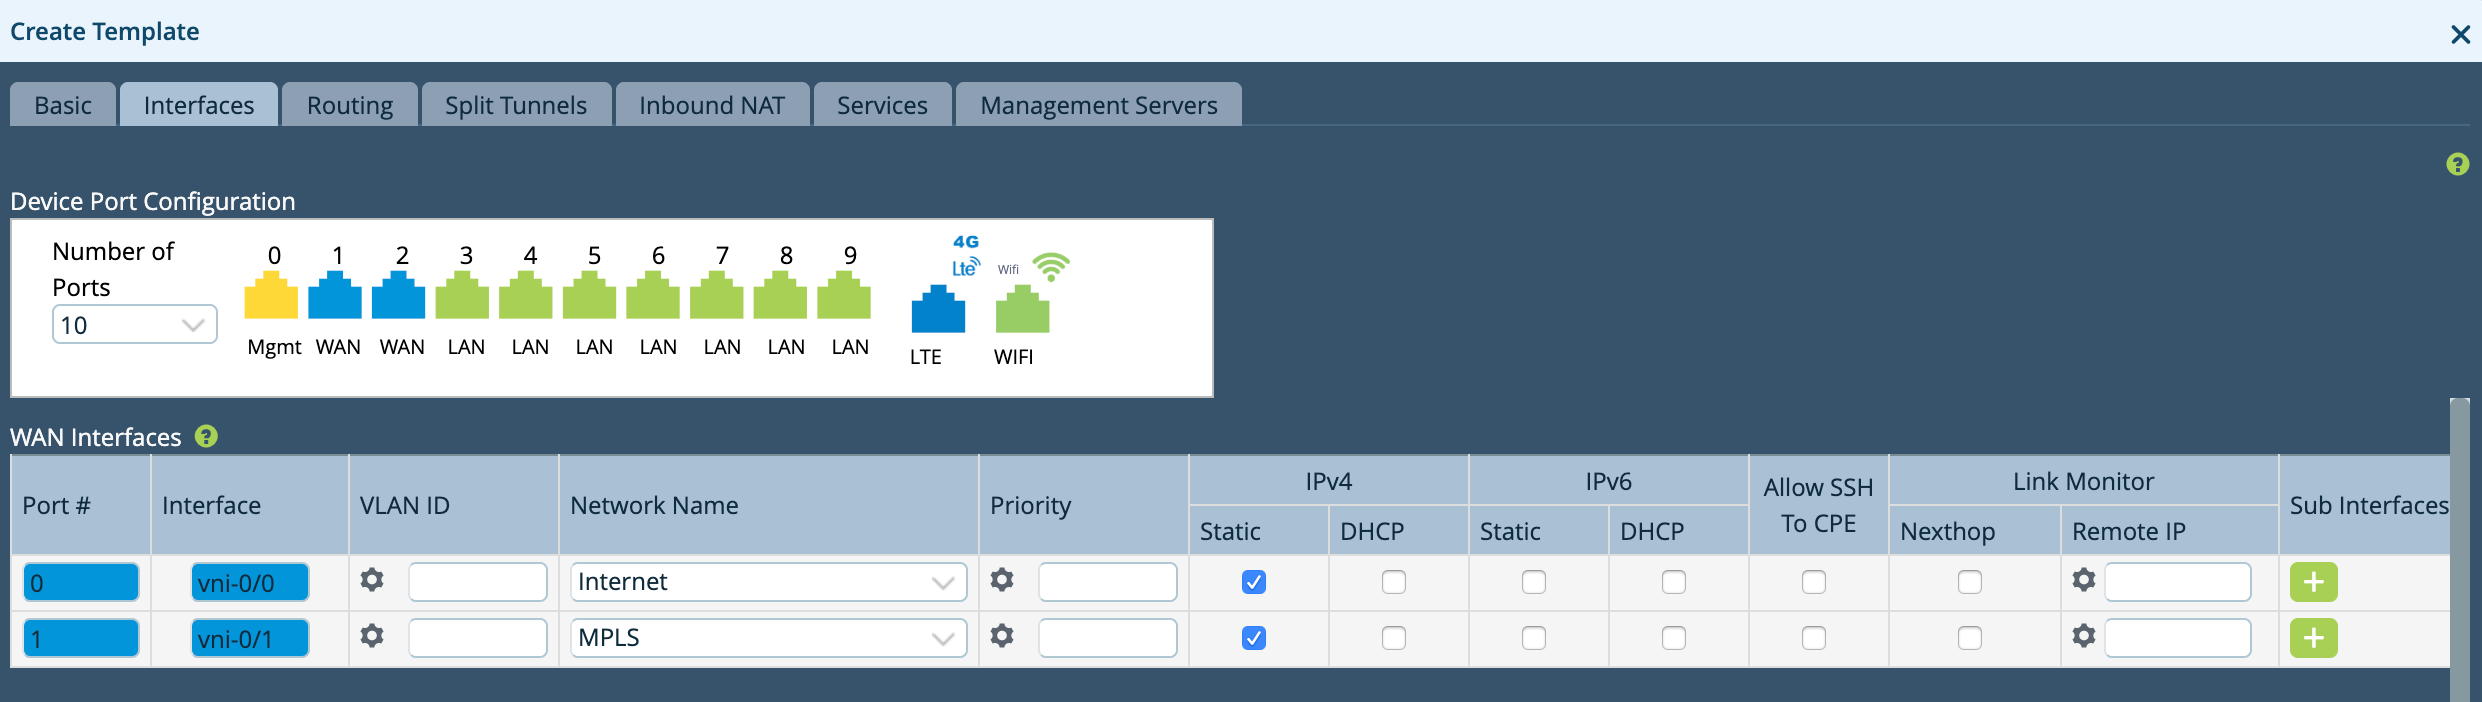
Create your LAN interfaces, then create your WAN interfaces and add the device to the Virtual Routing and Forwarding (VRF) cloud.

The following shows where to create your LAN interfaces within VERSA Director.

-
Create your WAN interfaces and add to the VRF cloud.
-
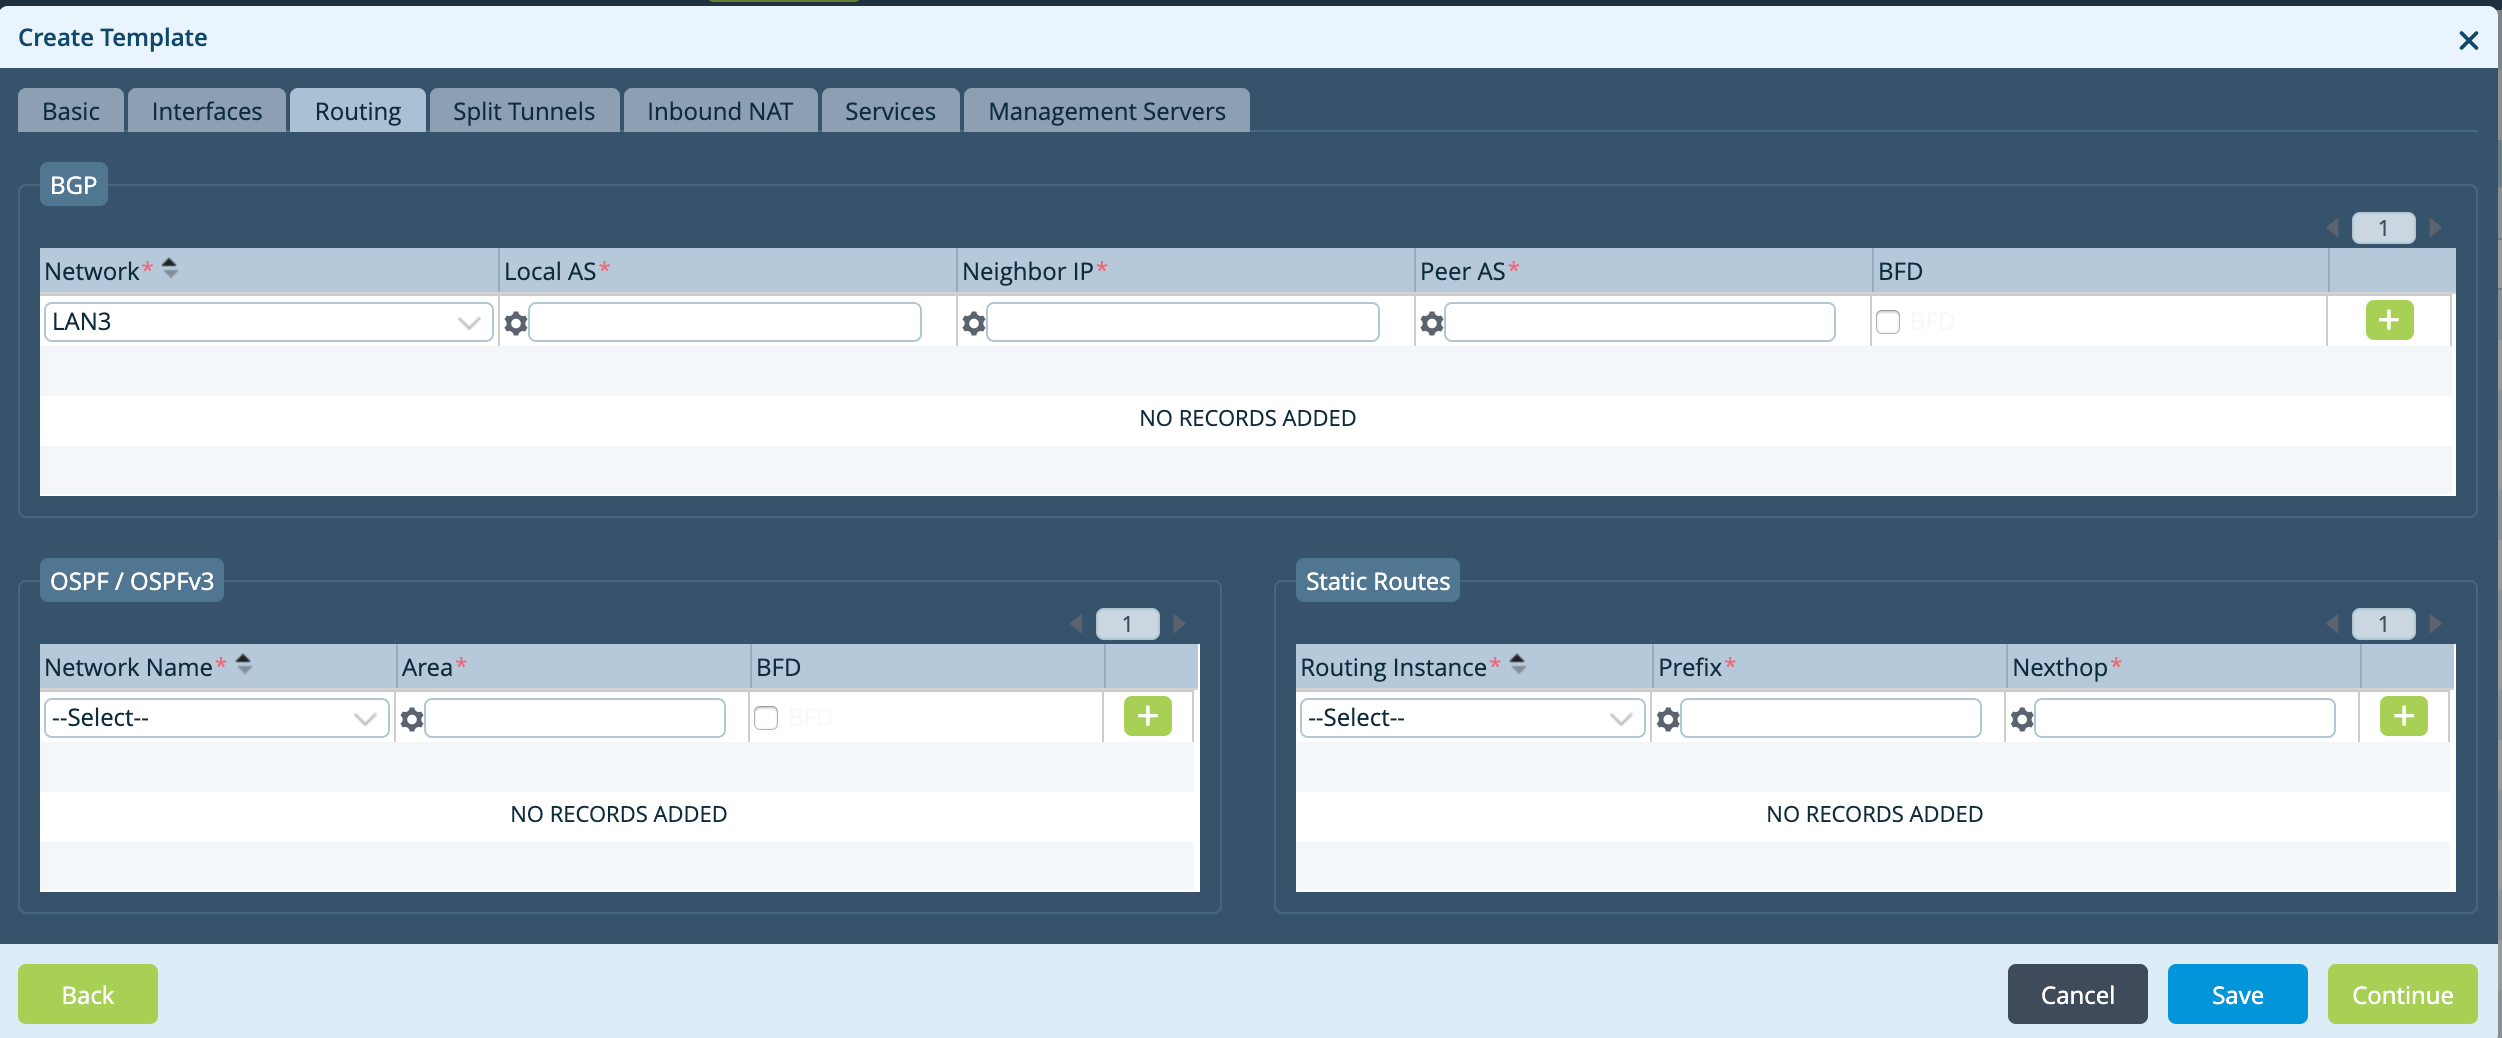
Create the LAN-side BGP.

-
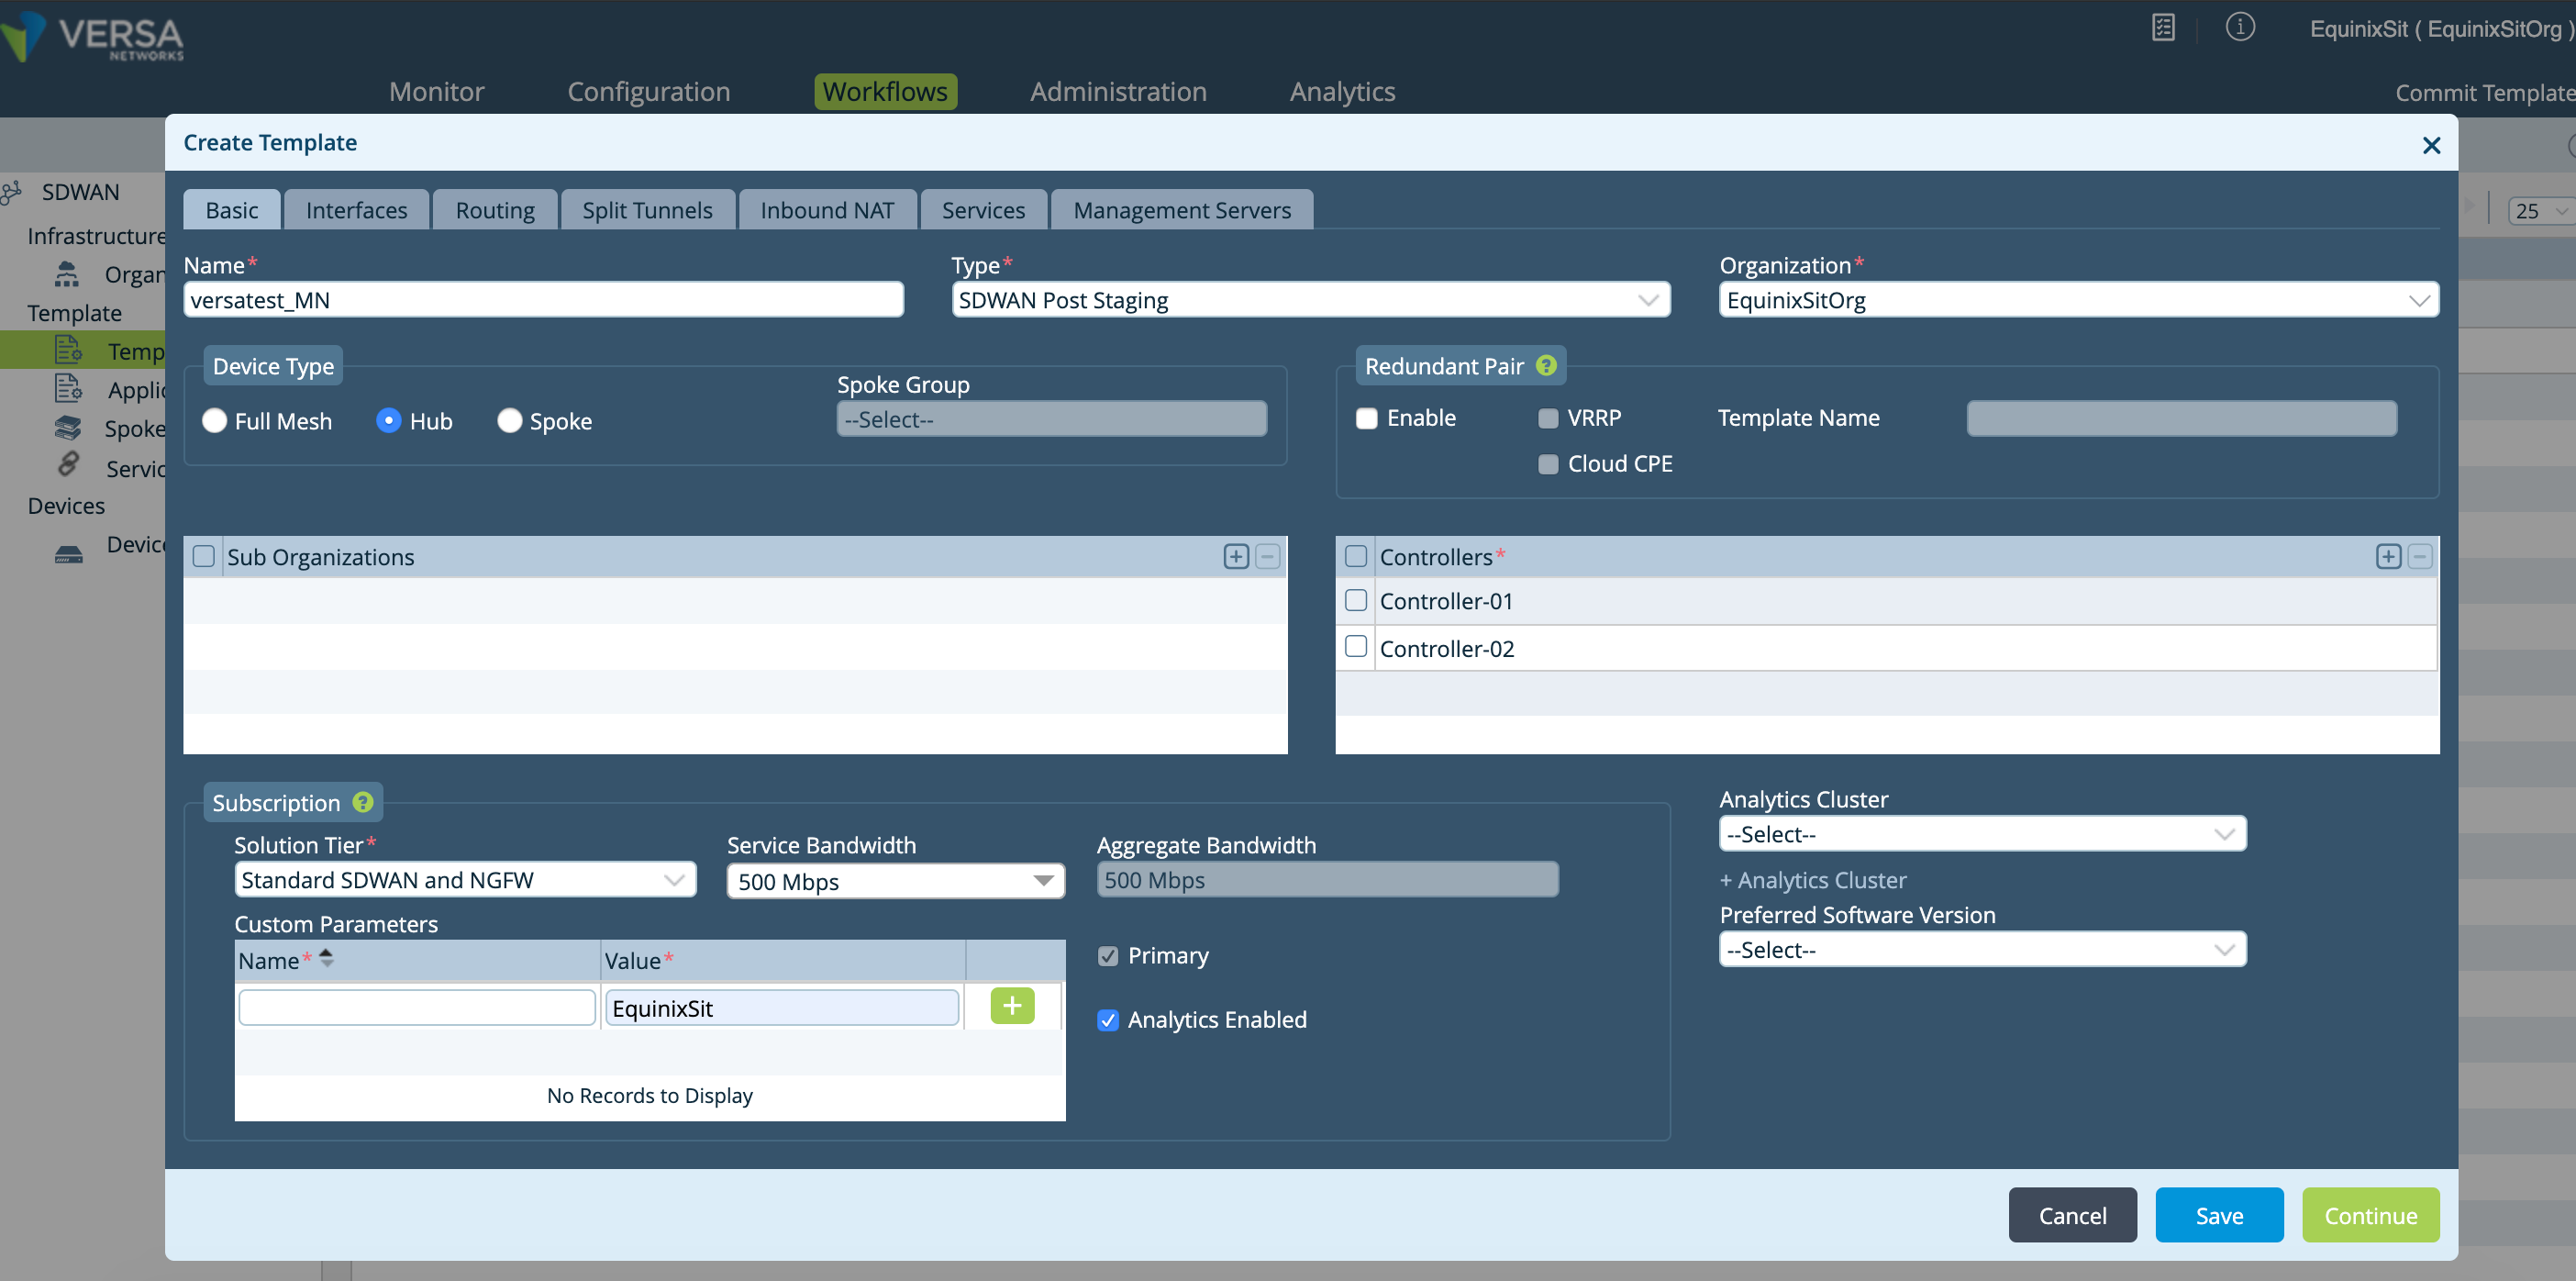
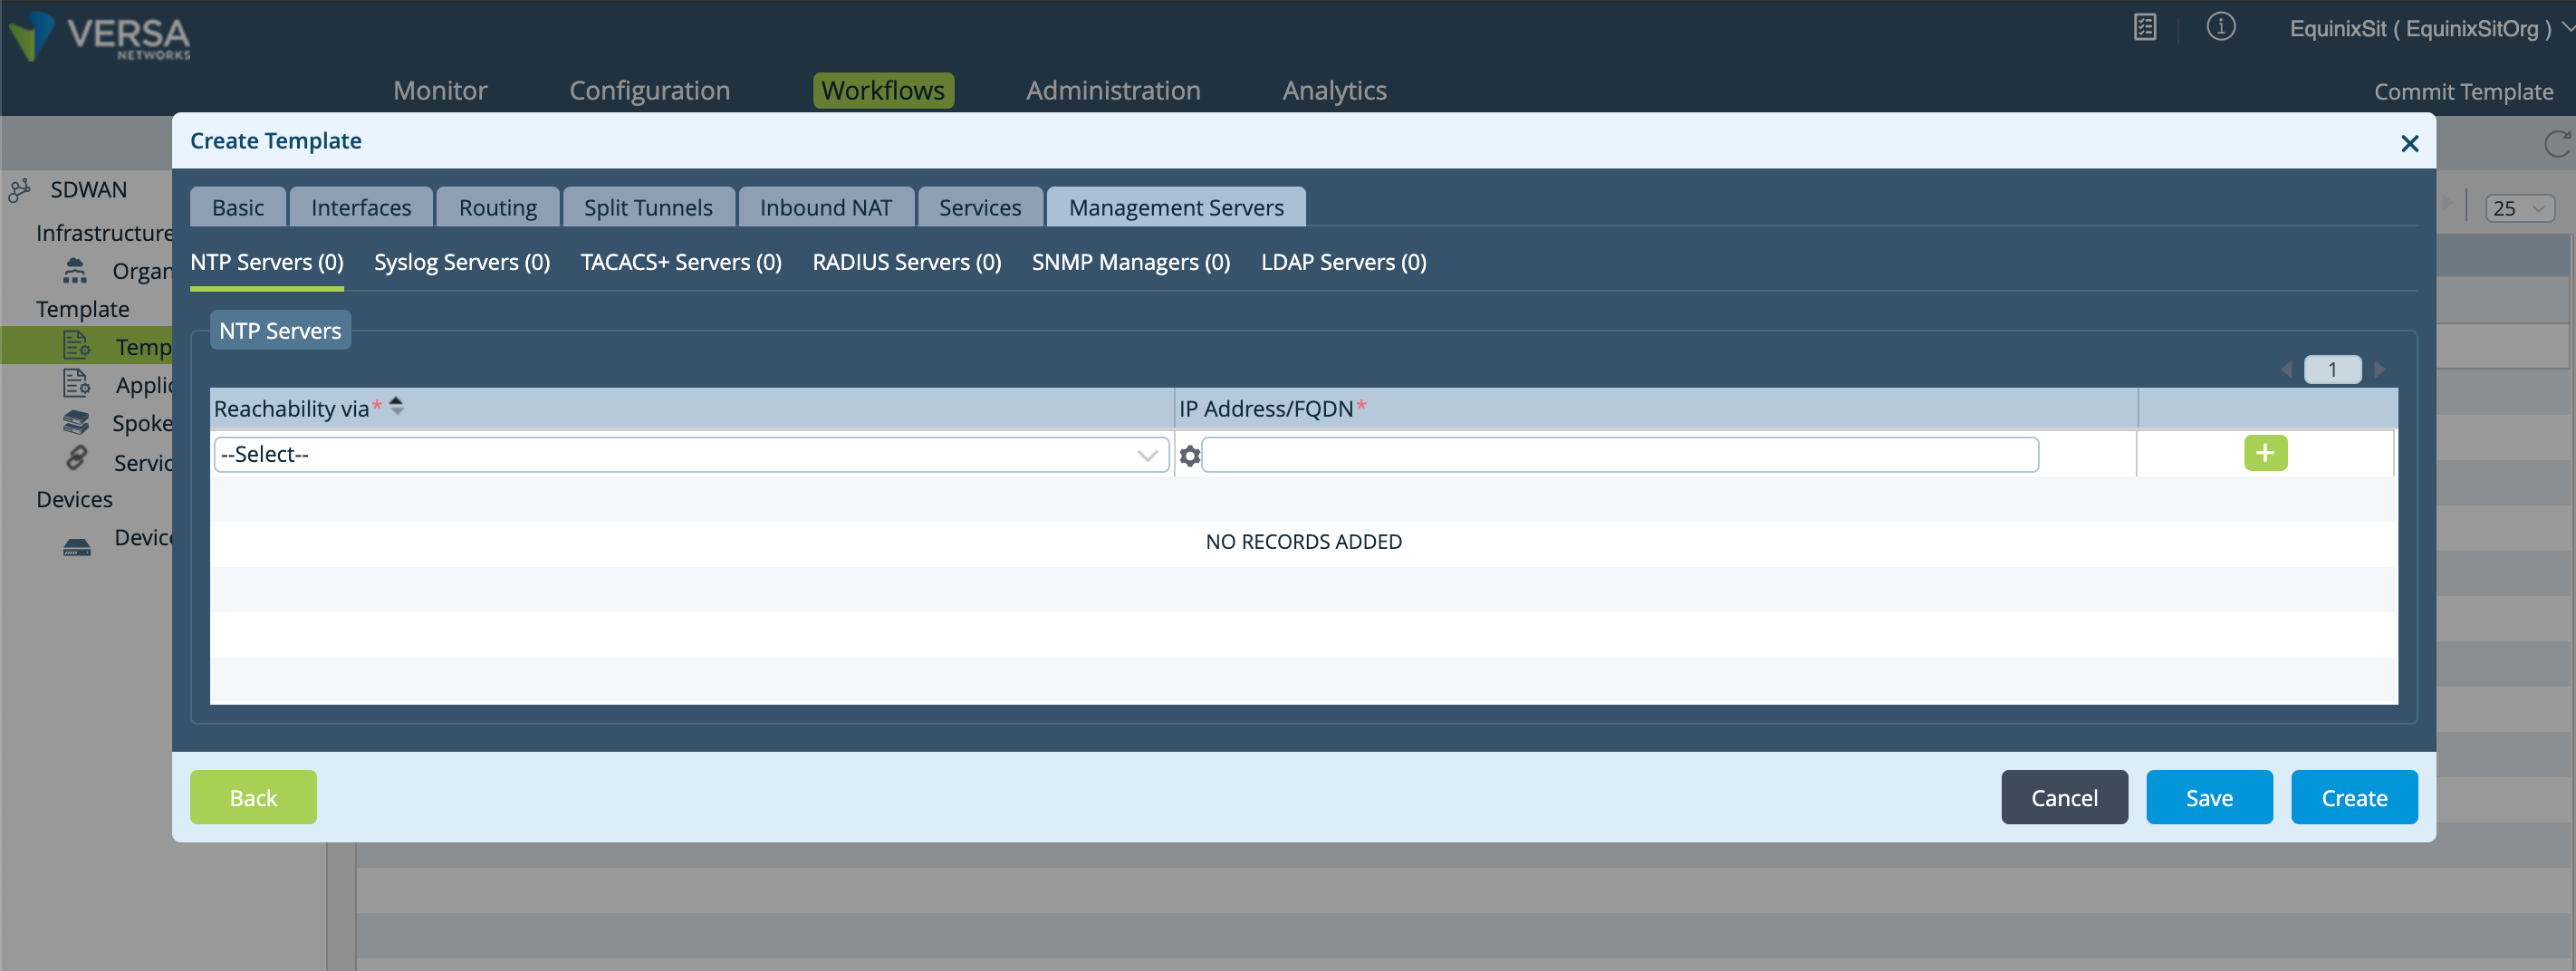
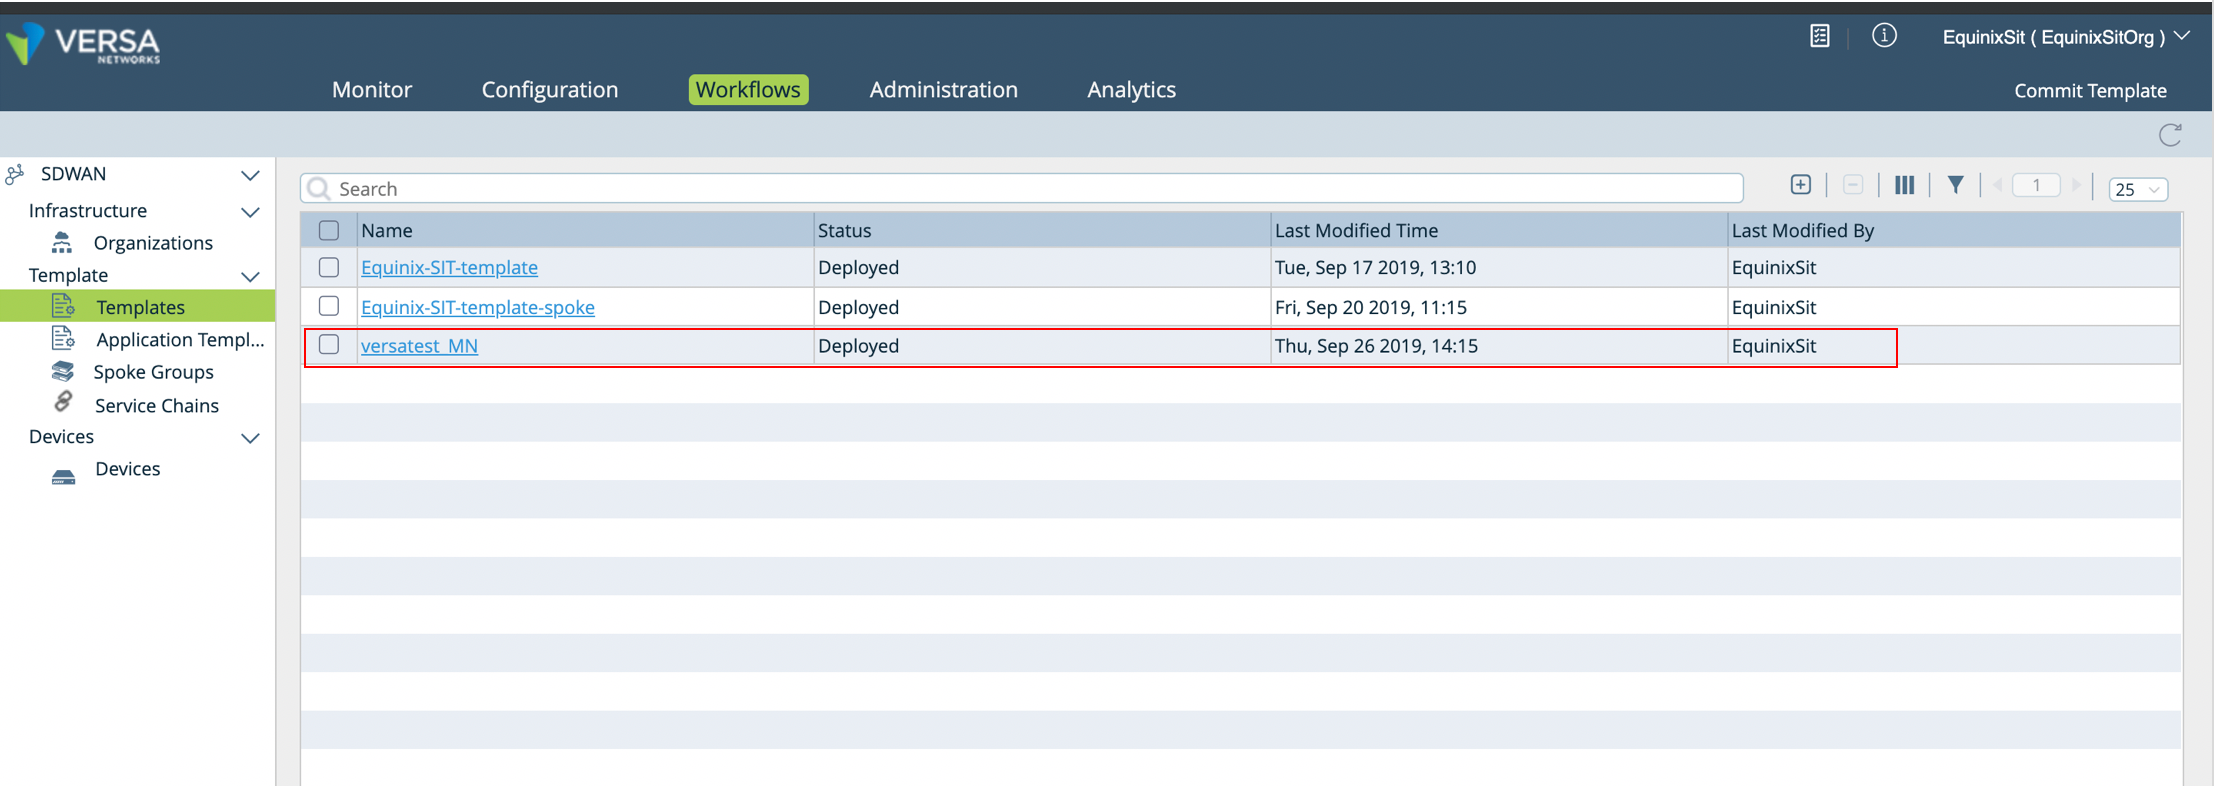
Create the post-staging template.

This displays when the template is created.


Part 4: Provision the Device on Equinix Network Edge
Now that you’ve completed the configurations with the VERSA Director, the next step is to provision the device on the Network Edge Marketplace.
-
Based on your network design, you can select either High Availability or Non-High Availability mode of operation.
 note
noteHA mode instantiates two separate devices in active-active mode on the Equinix Network Edge infrastructure.

-
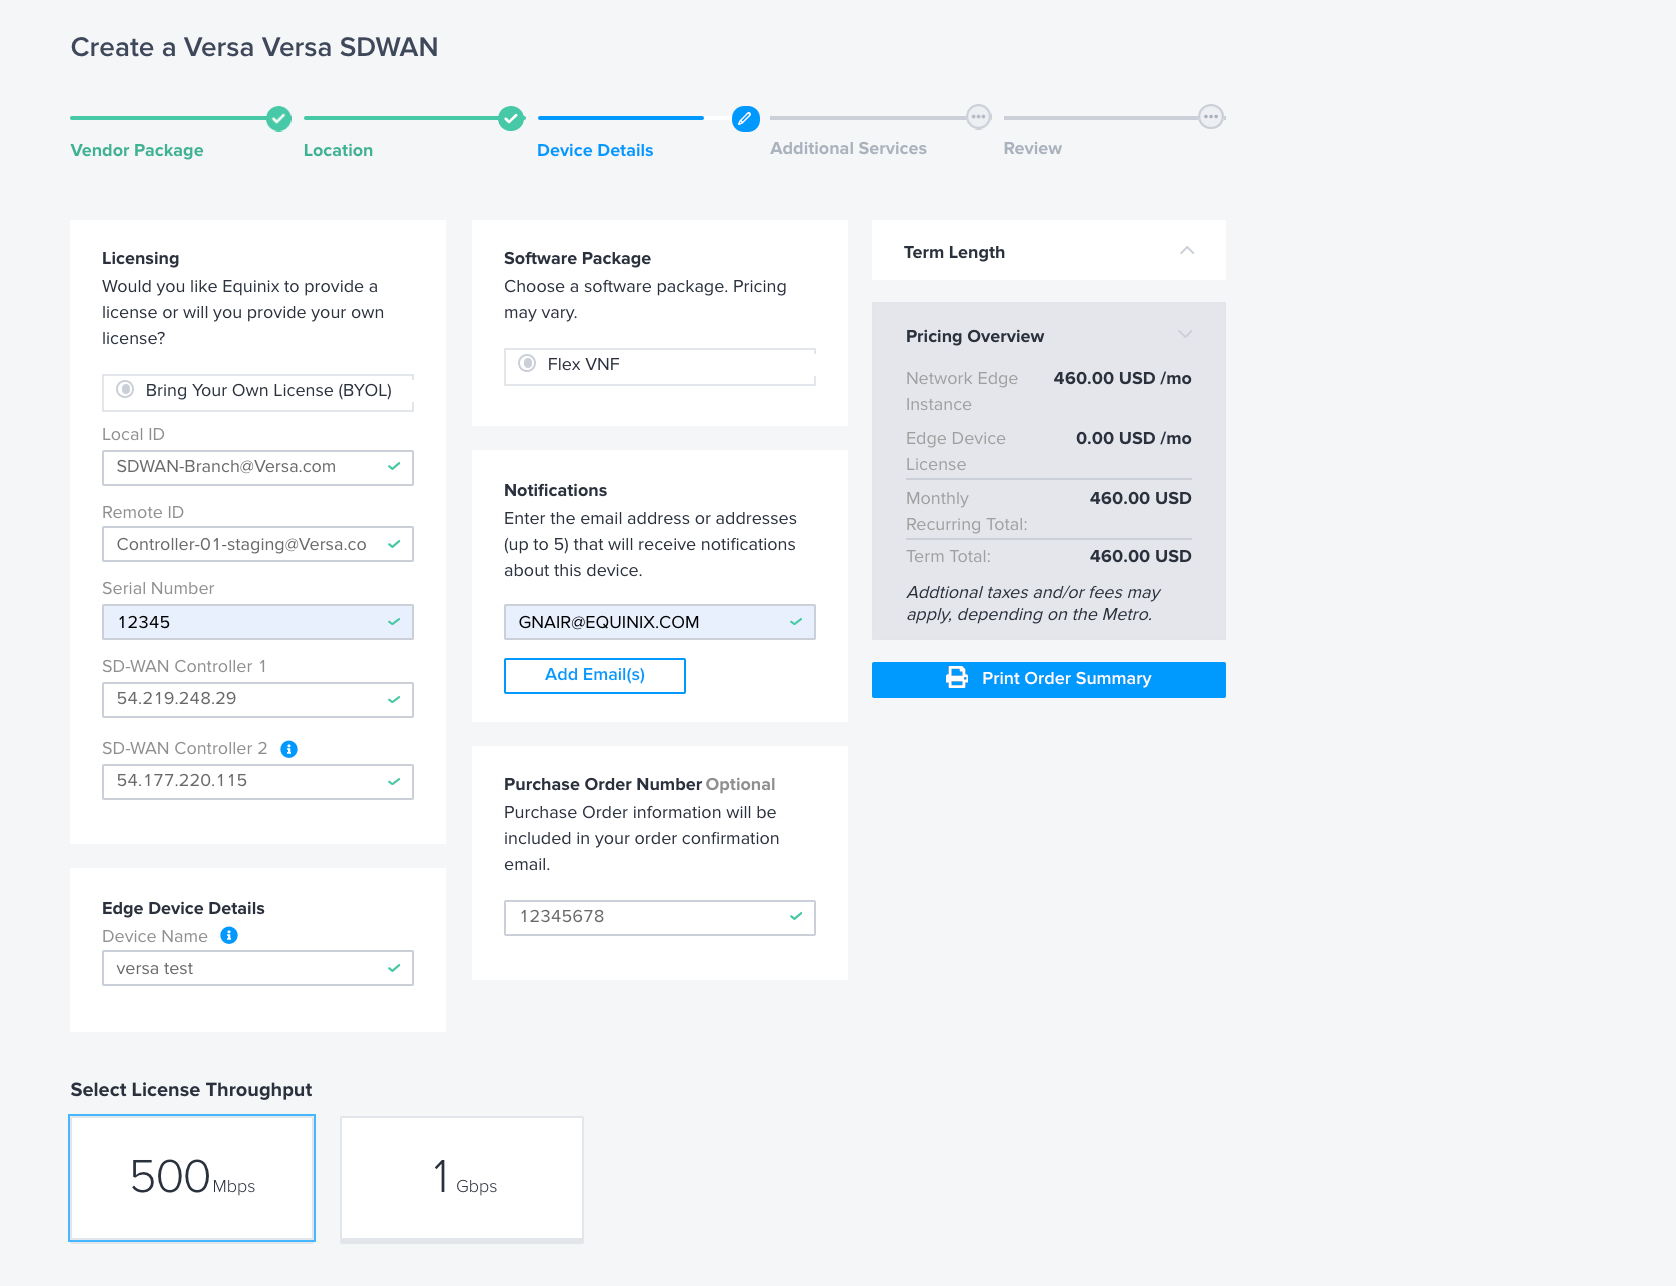
Enter the pre-staging information from the VERSA Director and your serial number.

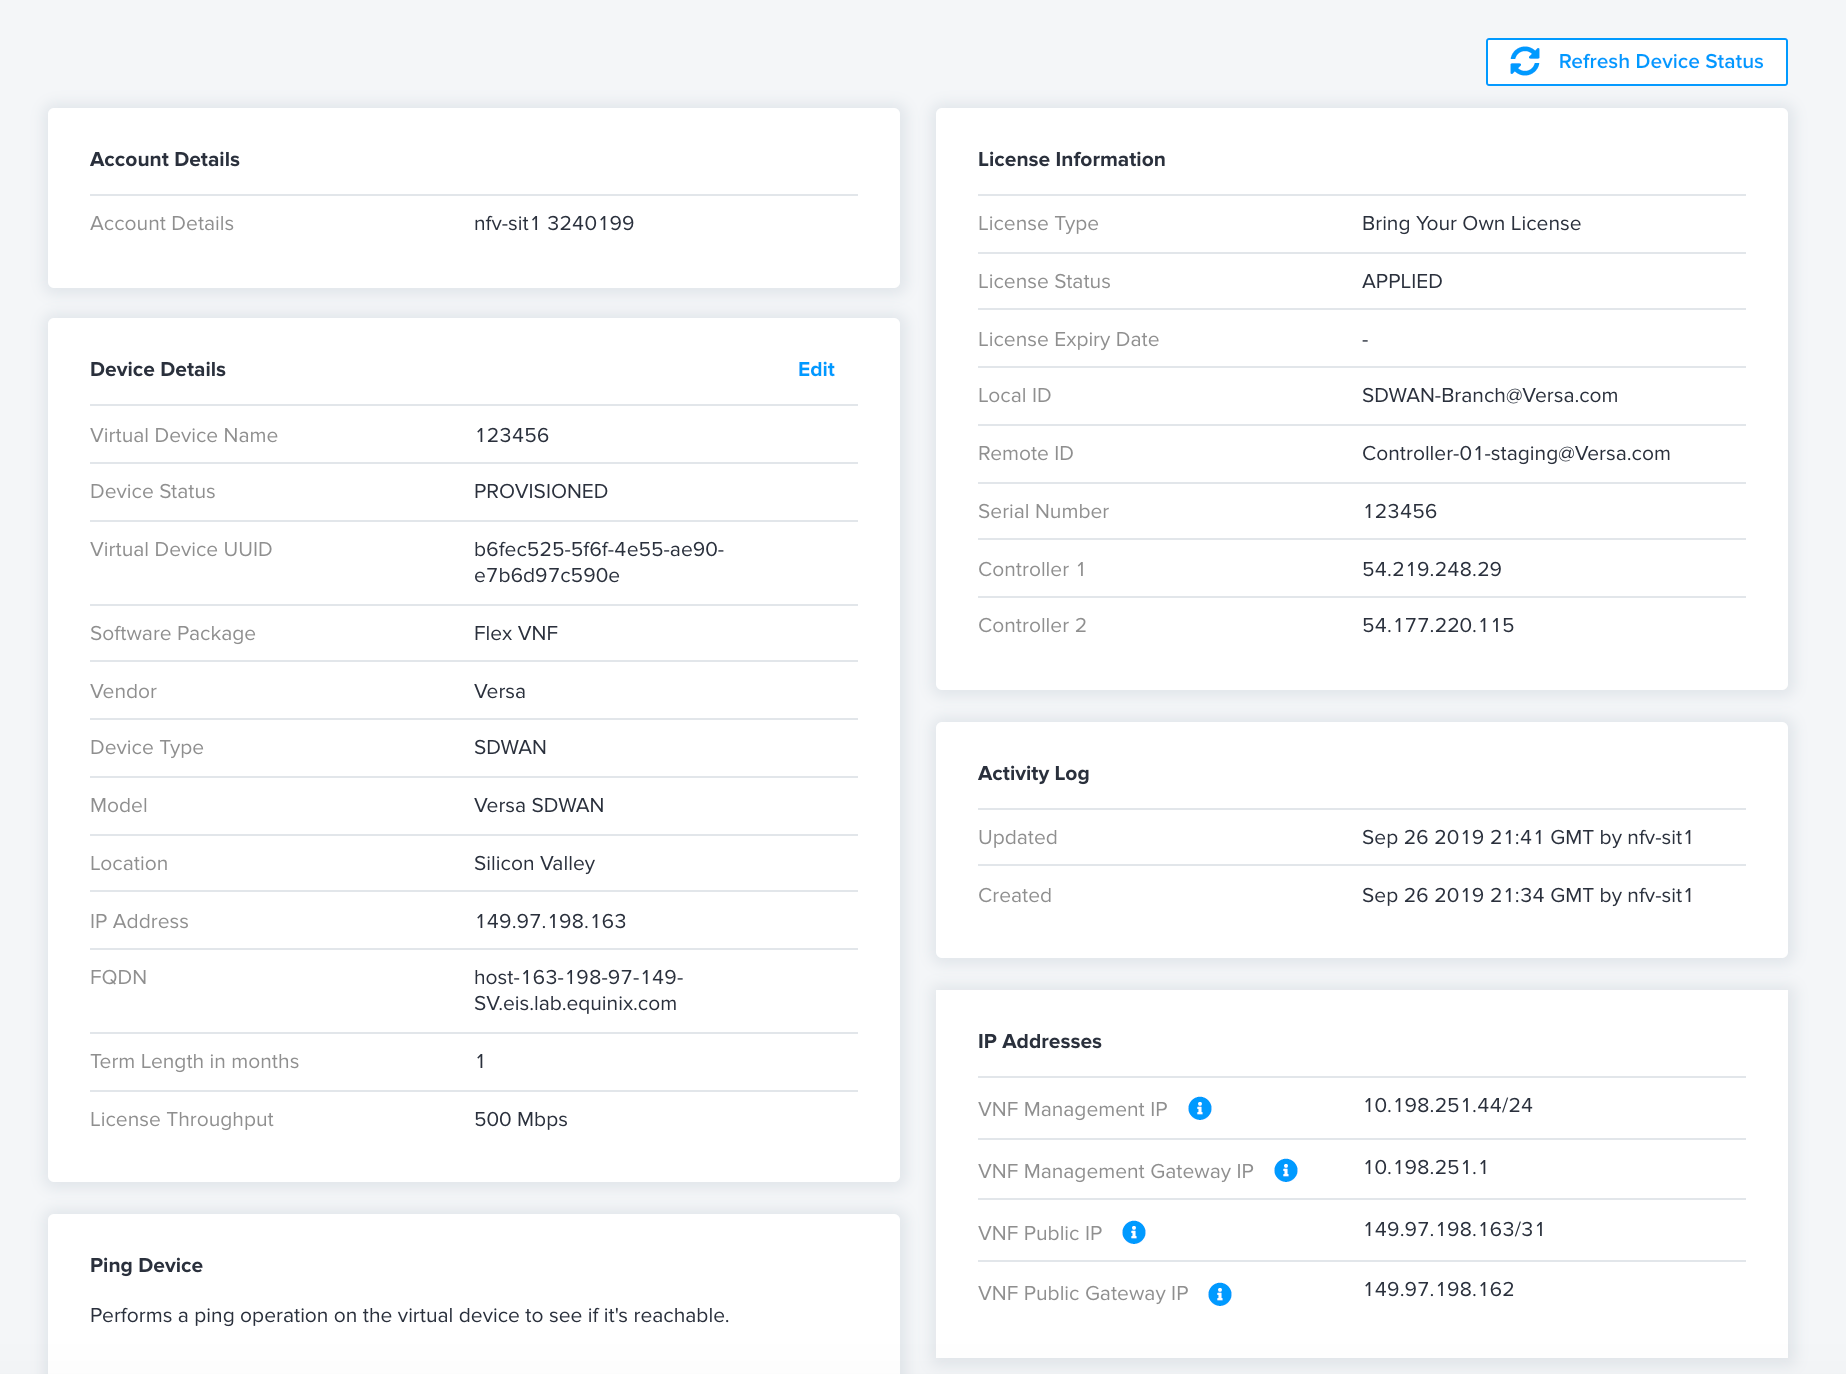
The device is now provisioned.
noteRemember the allocated public IP addresses.

Part 5: Complete the Configuration on VERSA Director
-
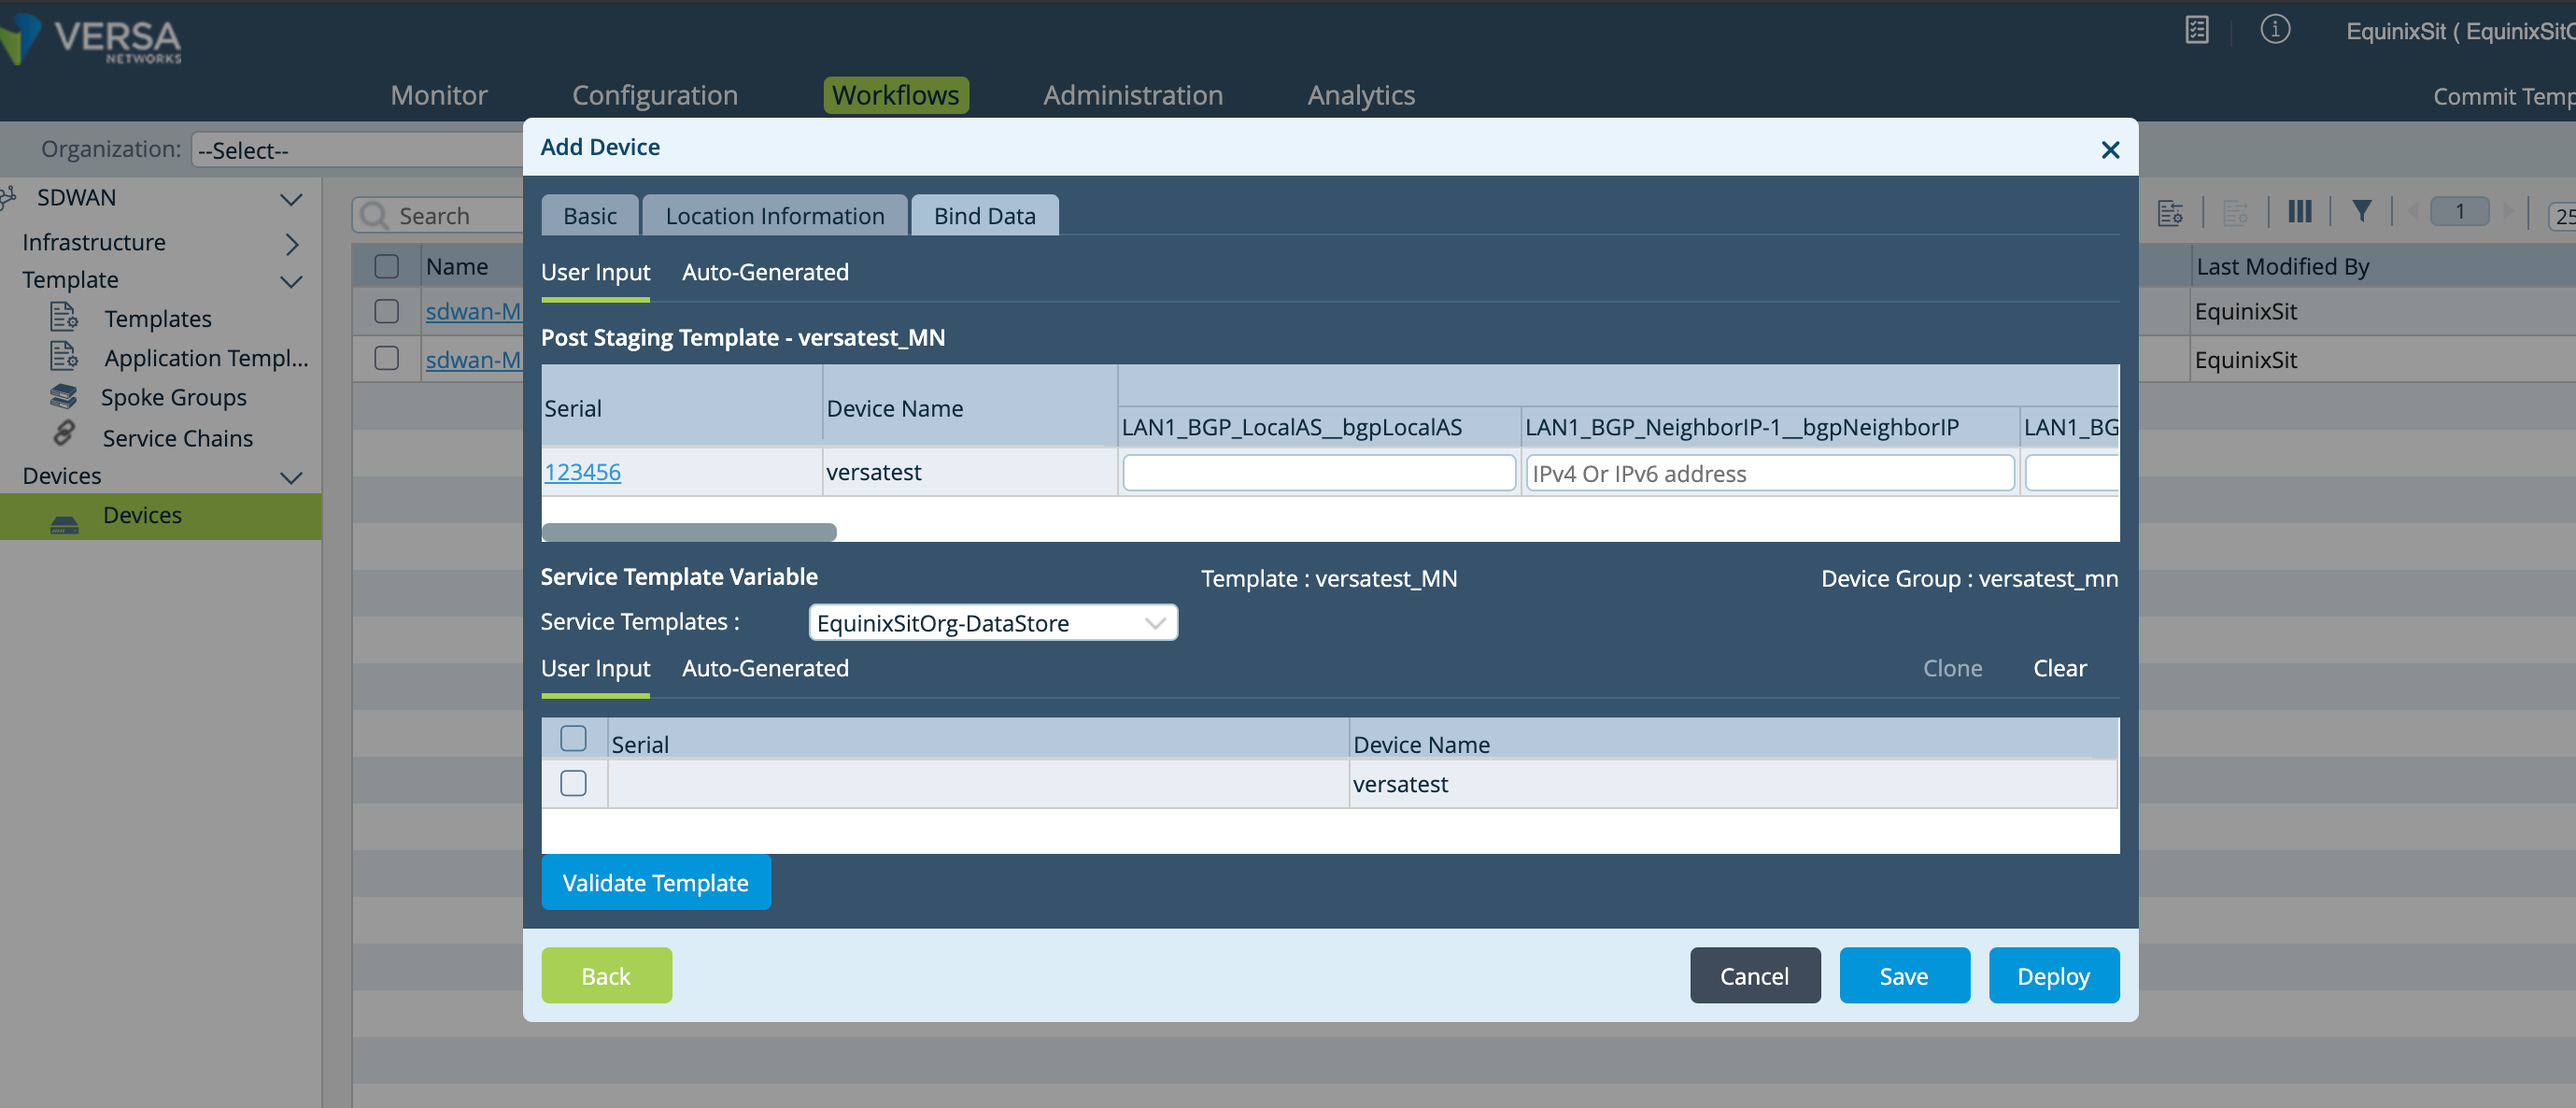
Return to the VERSA Director and complete the configuration.
-
Walk through these steps required to complete the device deployment in the VERSA Director.

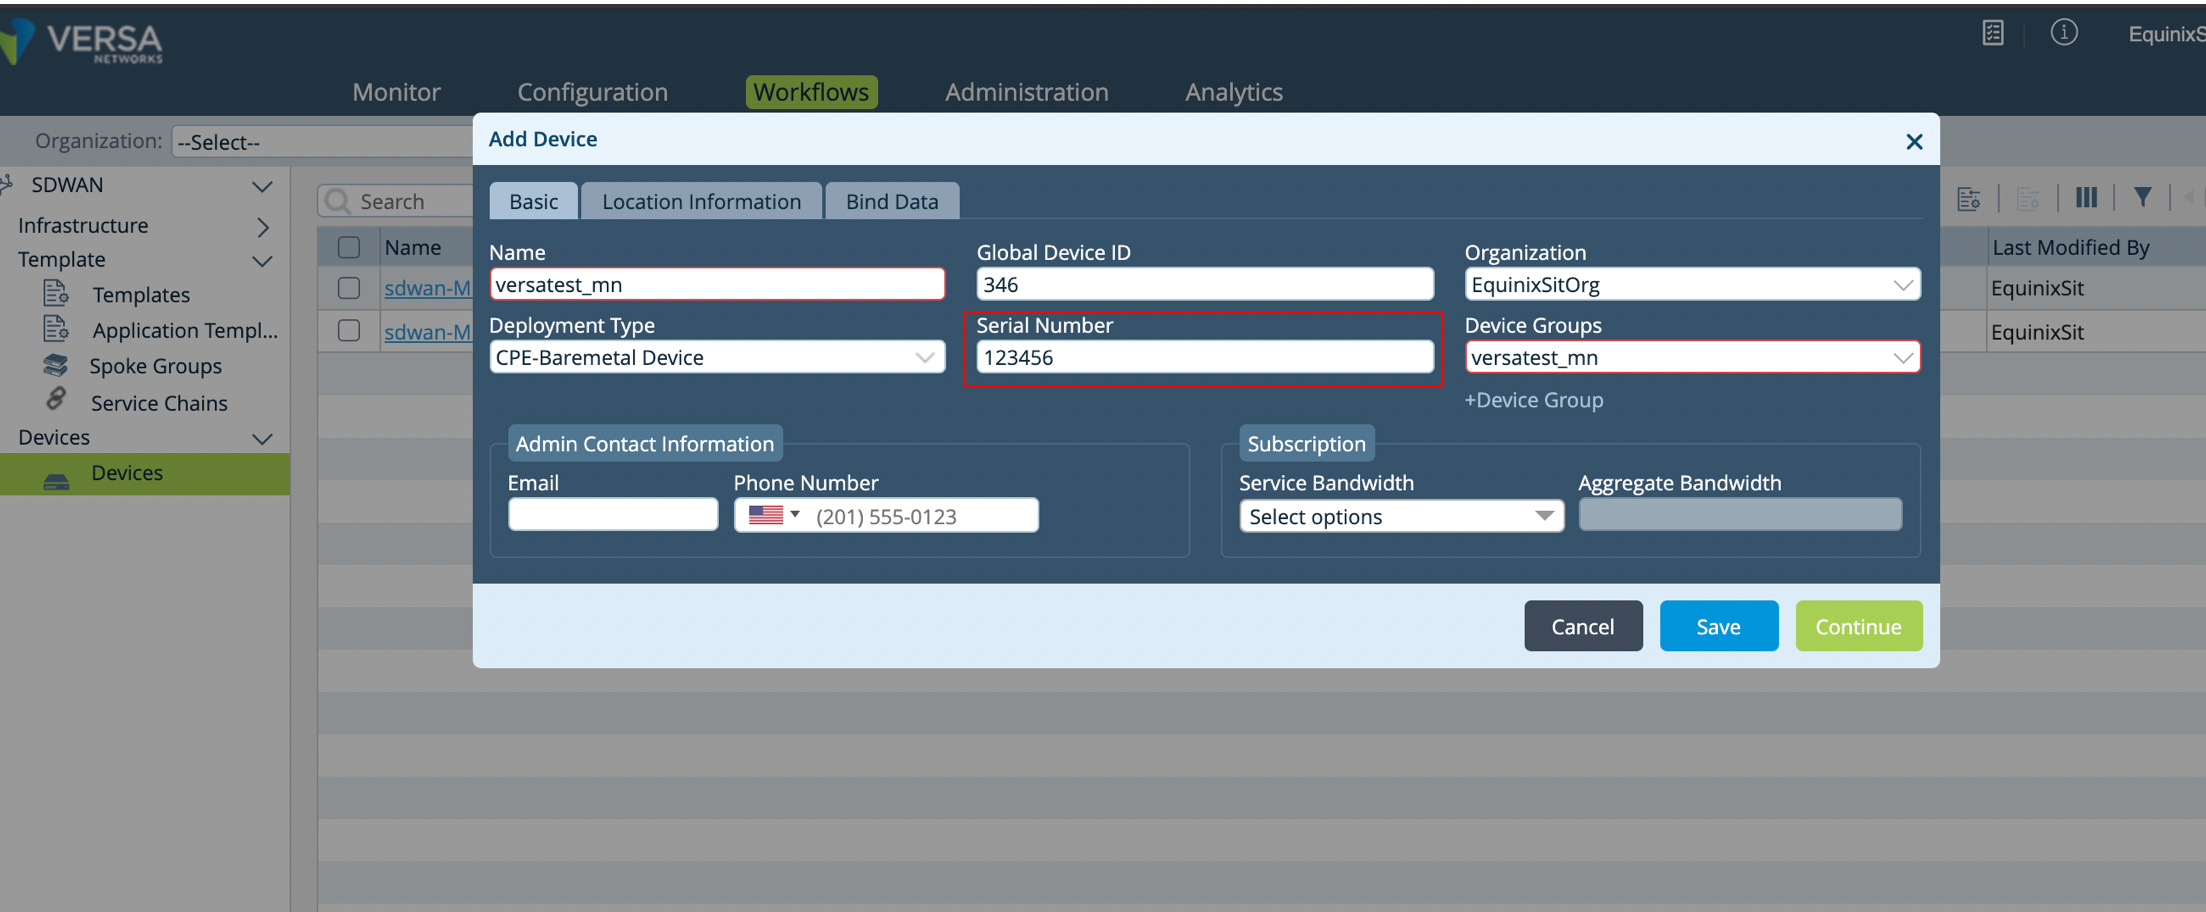
-
Enter the serial number and other basic information.

-
Enter the public IP addresses provided by Equinix and complete the configuration.

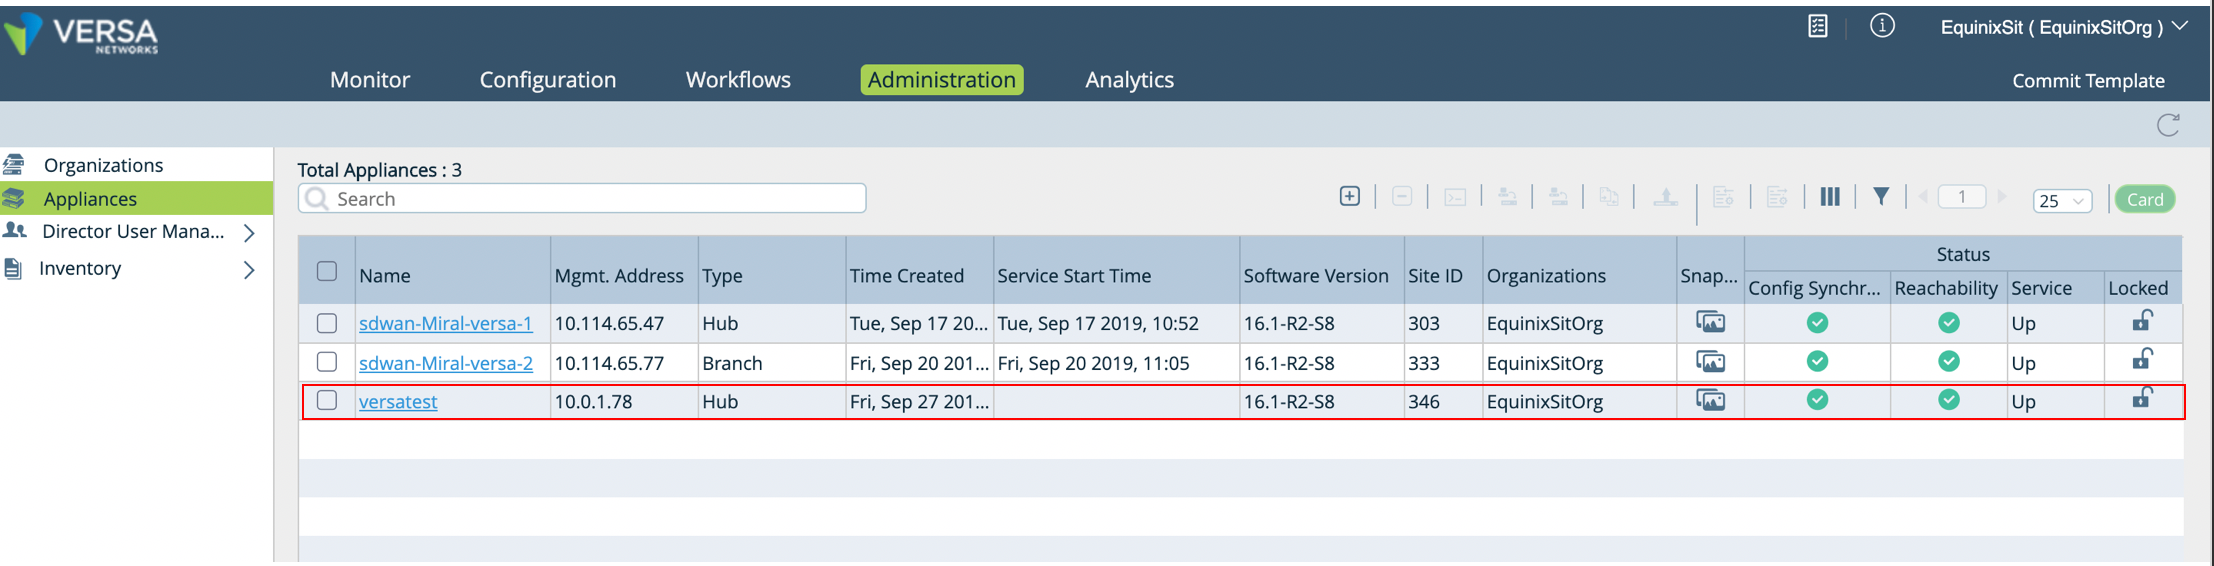
-
Confirm that your device is active.