Create a Virtual Device
Create and configure a Network Edge virtual device, redundant devices, or cluster in the Equinix Customer Portal.
To create a virtual device you need the Network Edge Device Manager role.
-
Sign in to the Equinix Customer Portal and navigate to Network Edge.
-
From the Network Edge dashboard, click Create a Virtual Device.

Vendor Package Selection
On the Vendor Package page, locate and select the vendor and device type. The cards are organized by vendor in alphabetical order. To filter the cards by vendor, use the Select Vendor drop-down menu. To filter the tiles by device type, use the Select Device Type drop-down menu.
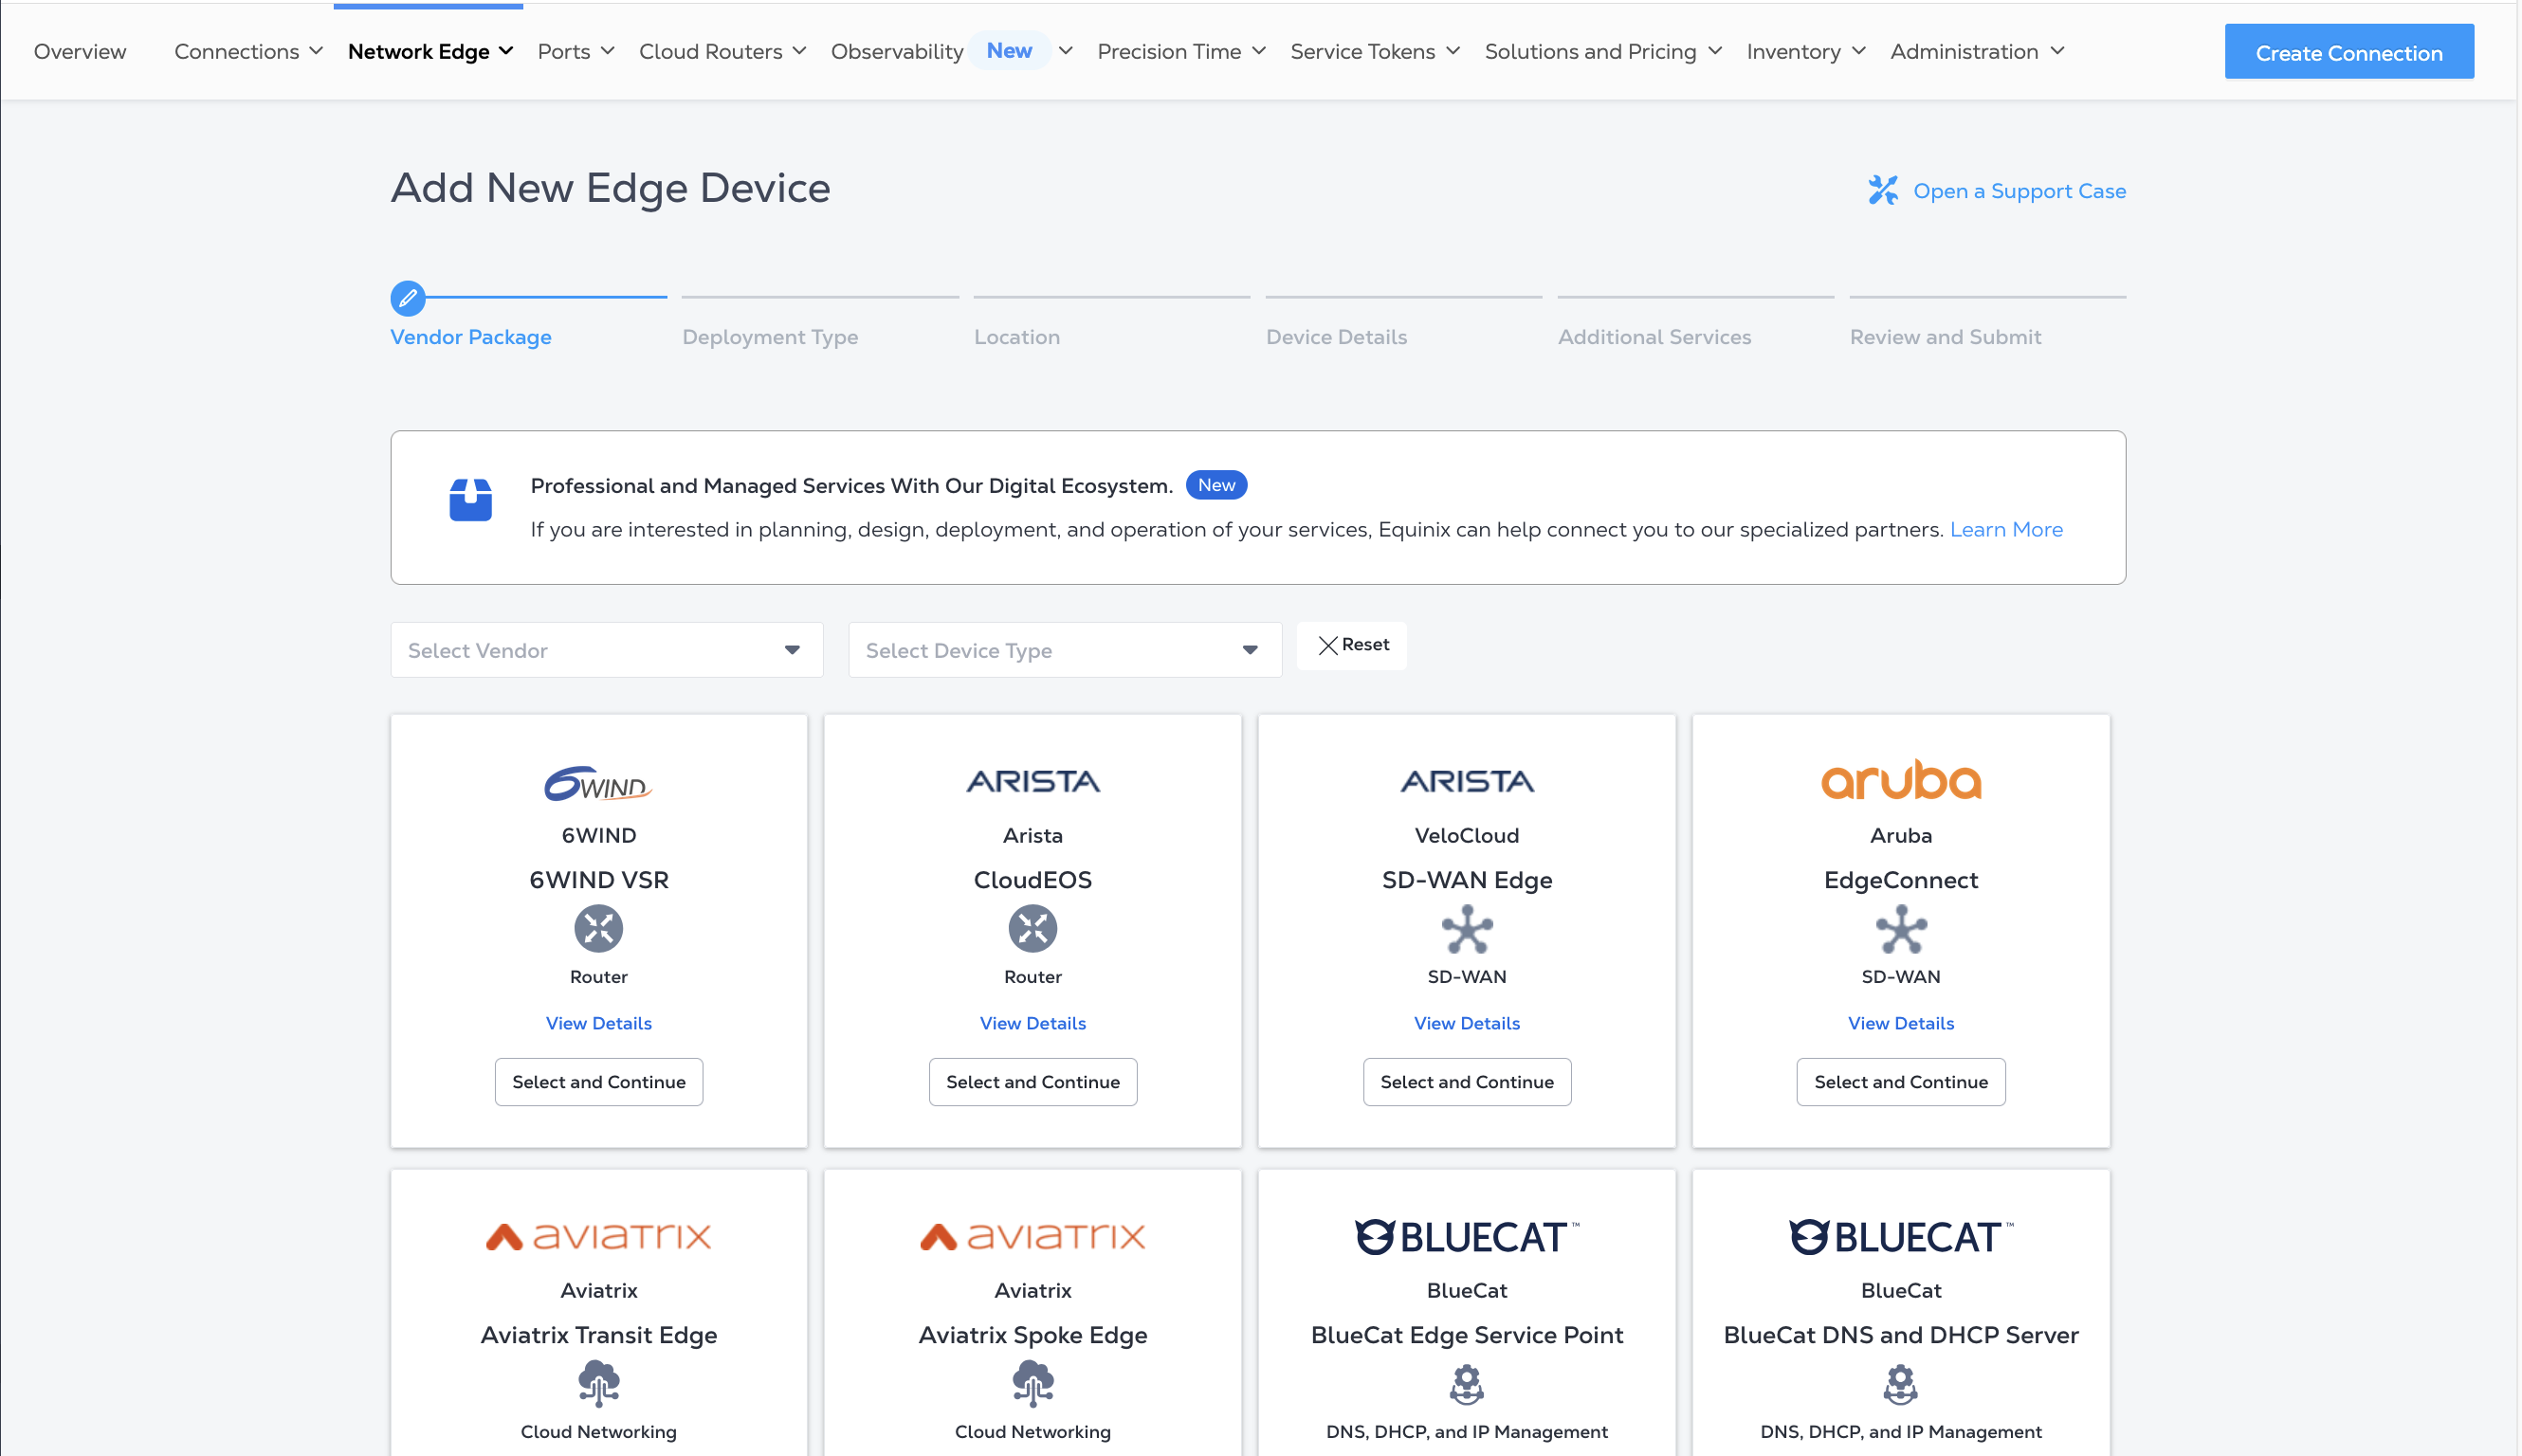
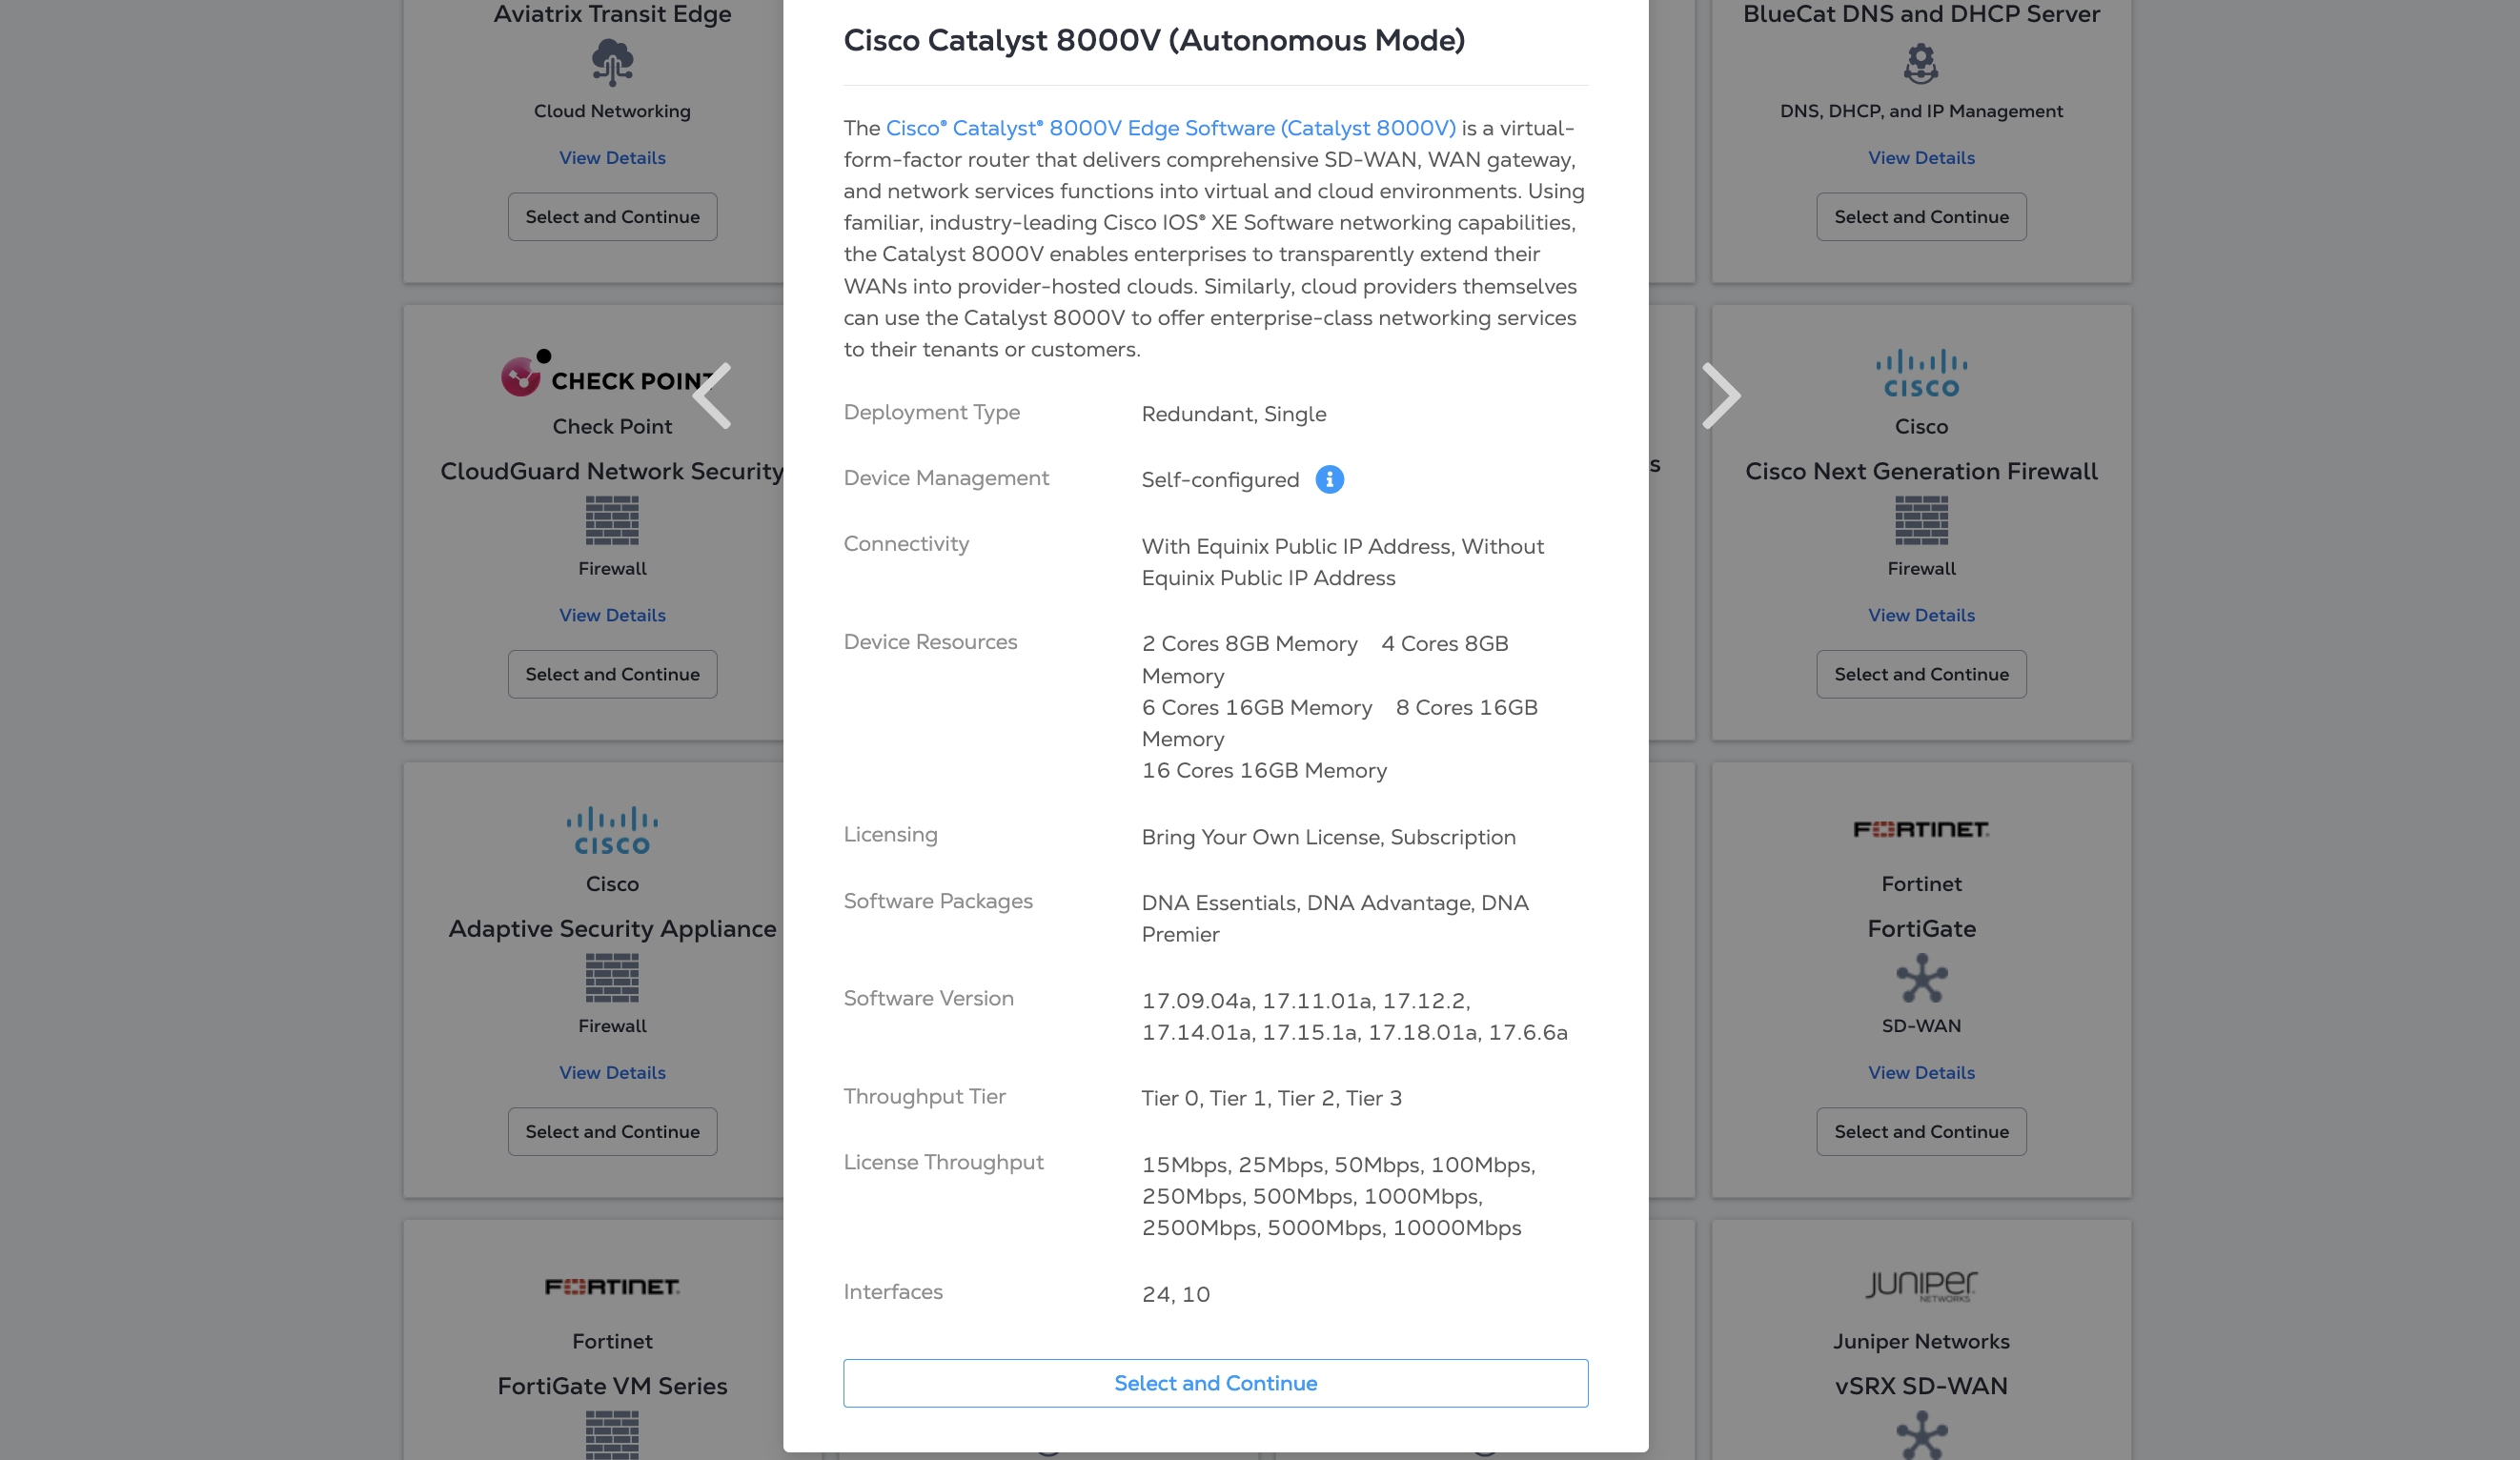
Click View Details for a description and configuration overview for the device.
Once you have found the device you want to create, click Select and Continue.
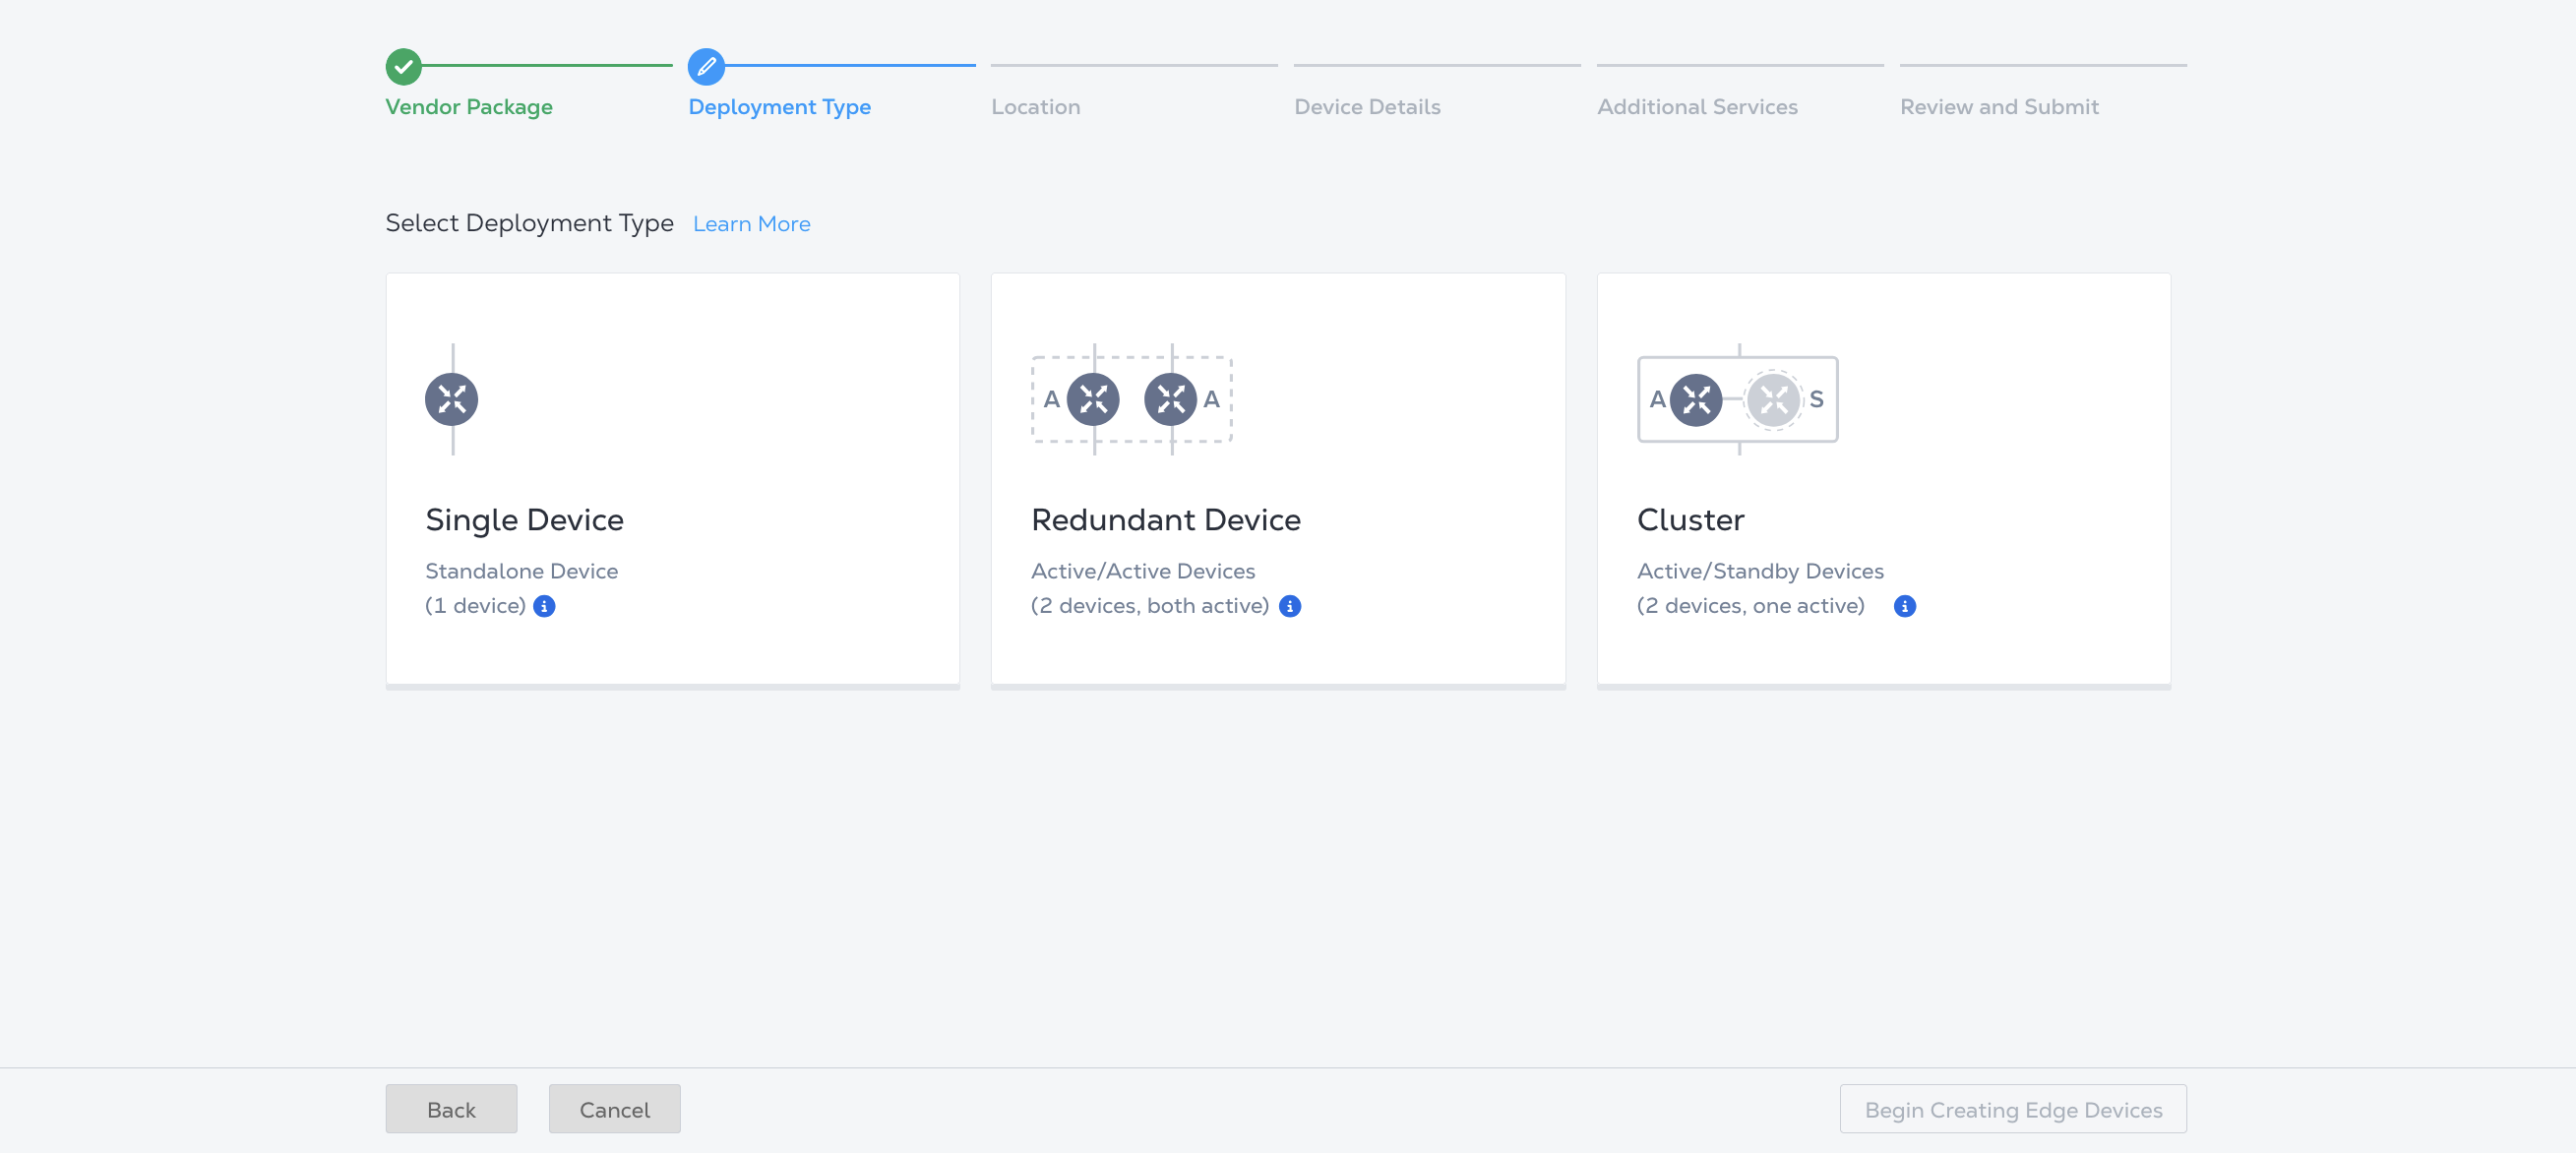
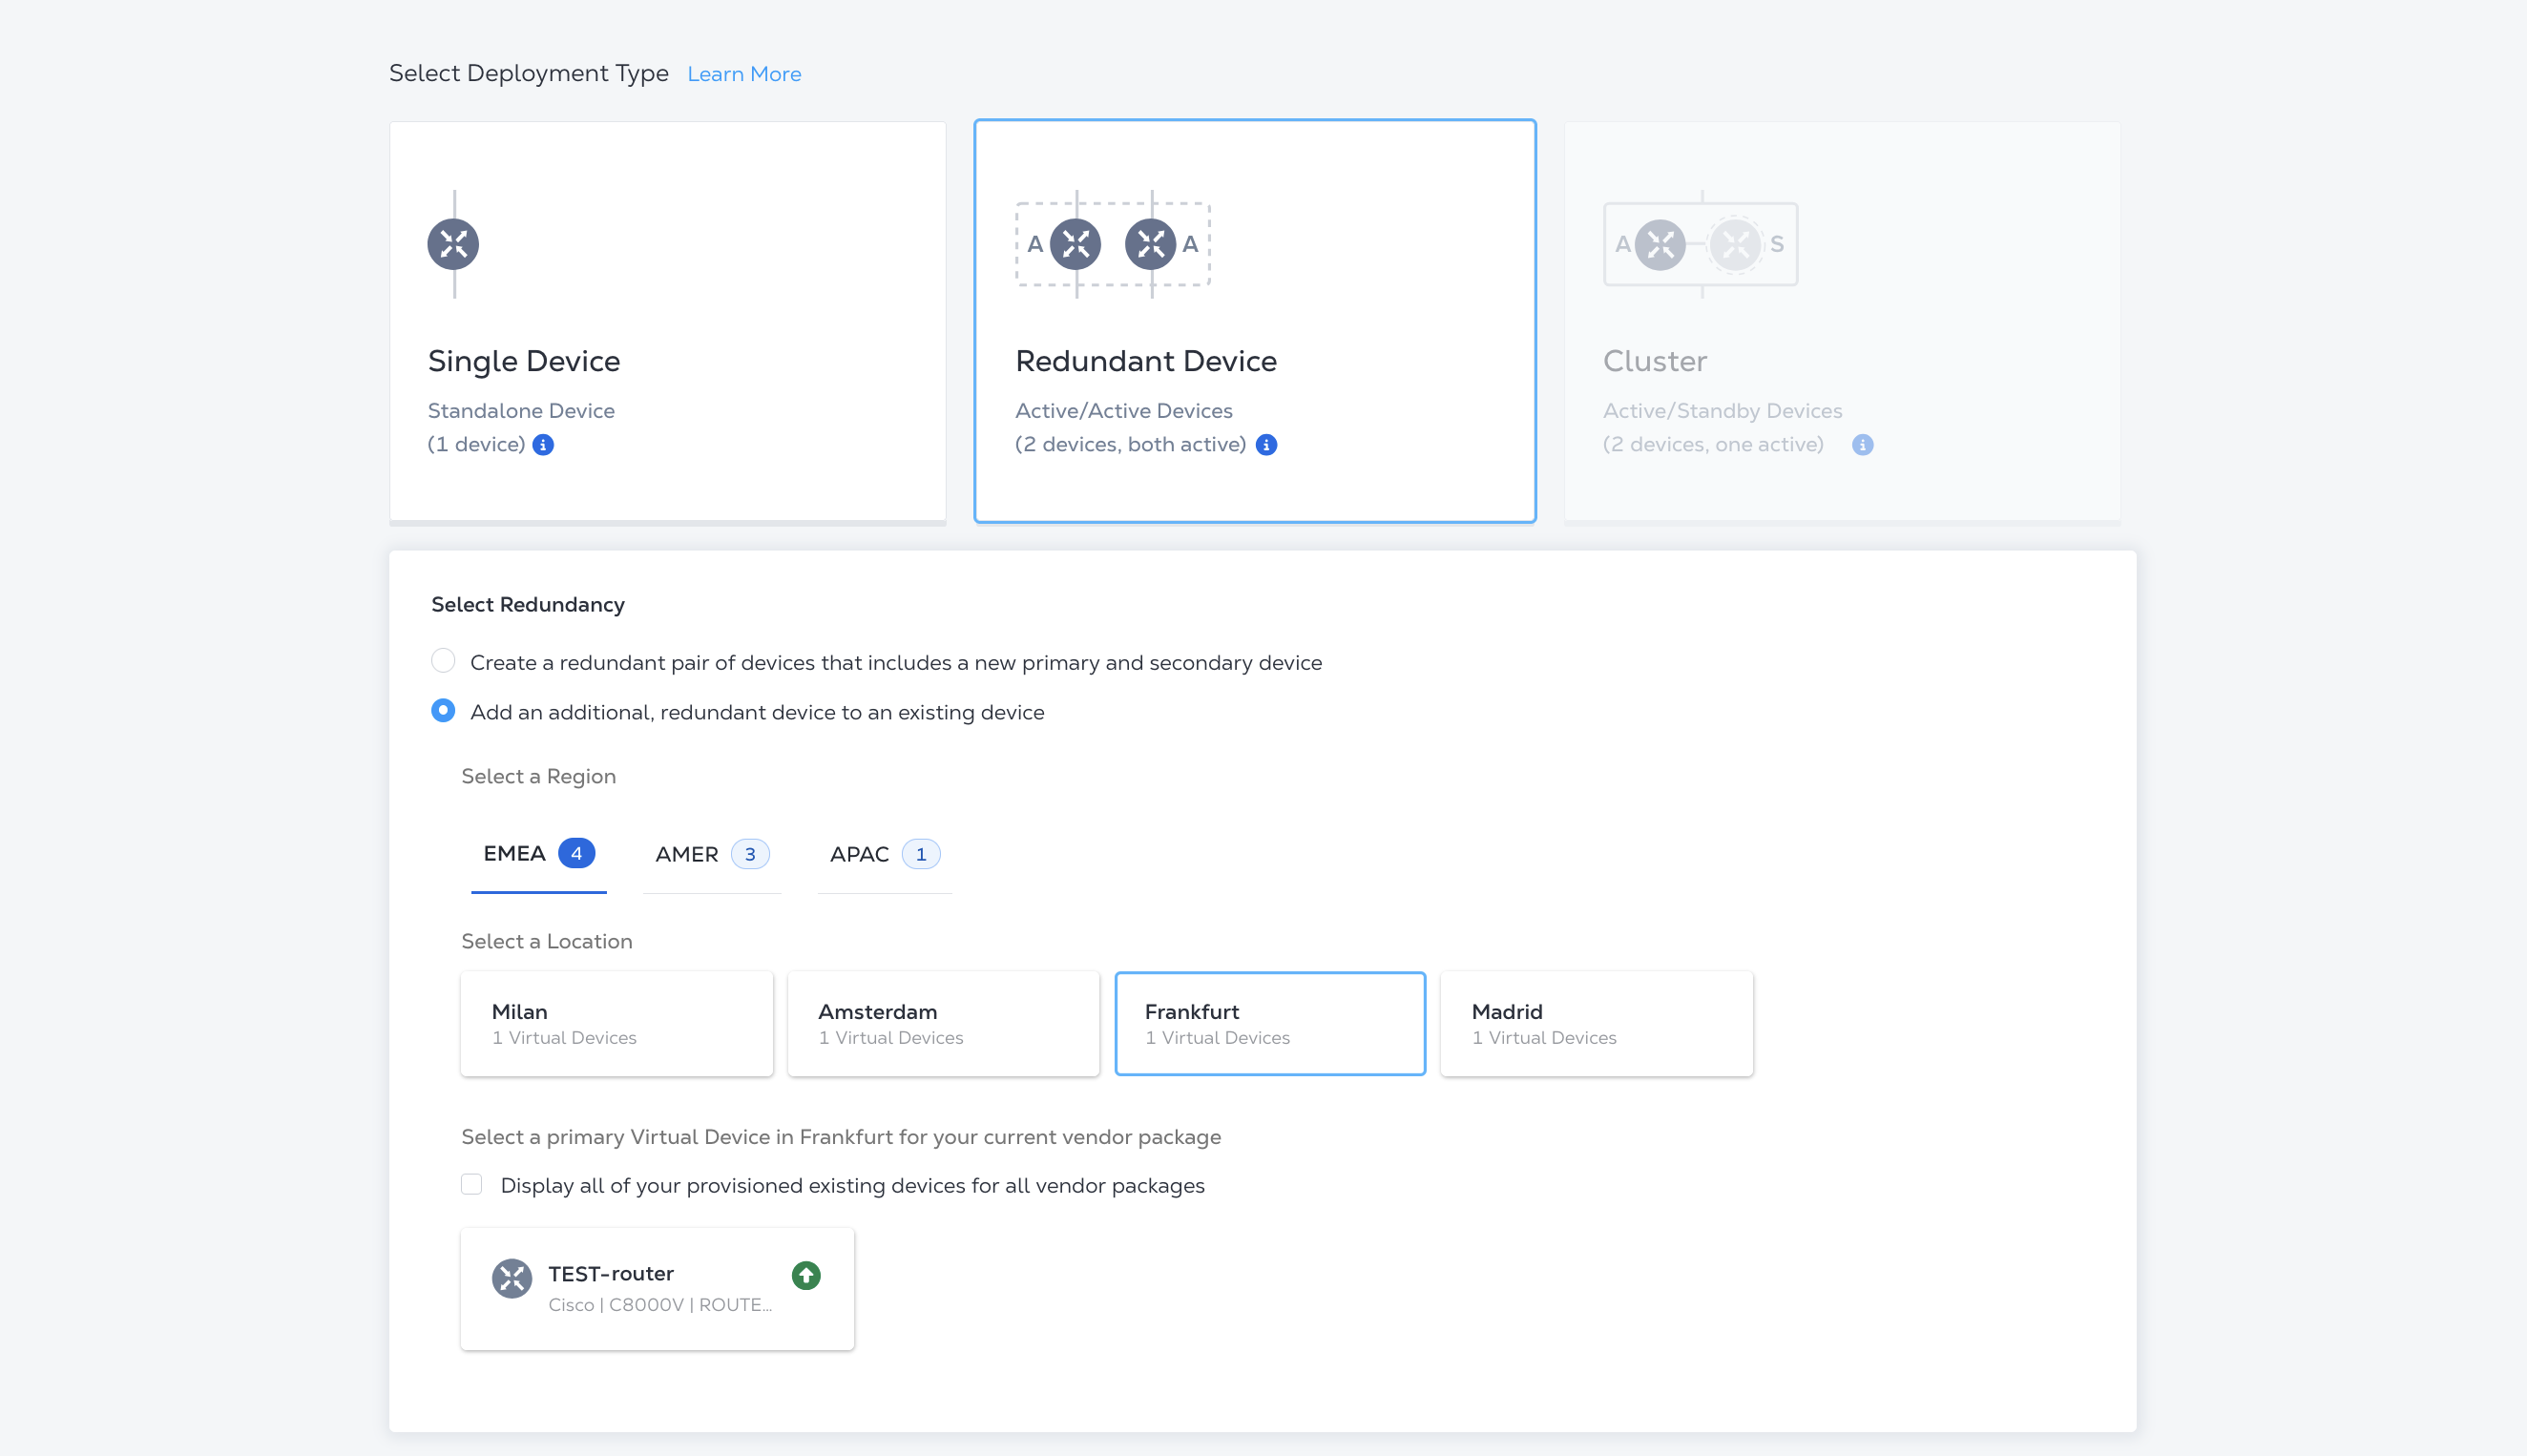
Deployment Type
In the Select Deployment Type section, choose the level of device redundancy.
-
Single Device - To create a single standalone device, click Single Device.
-
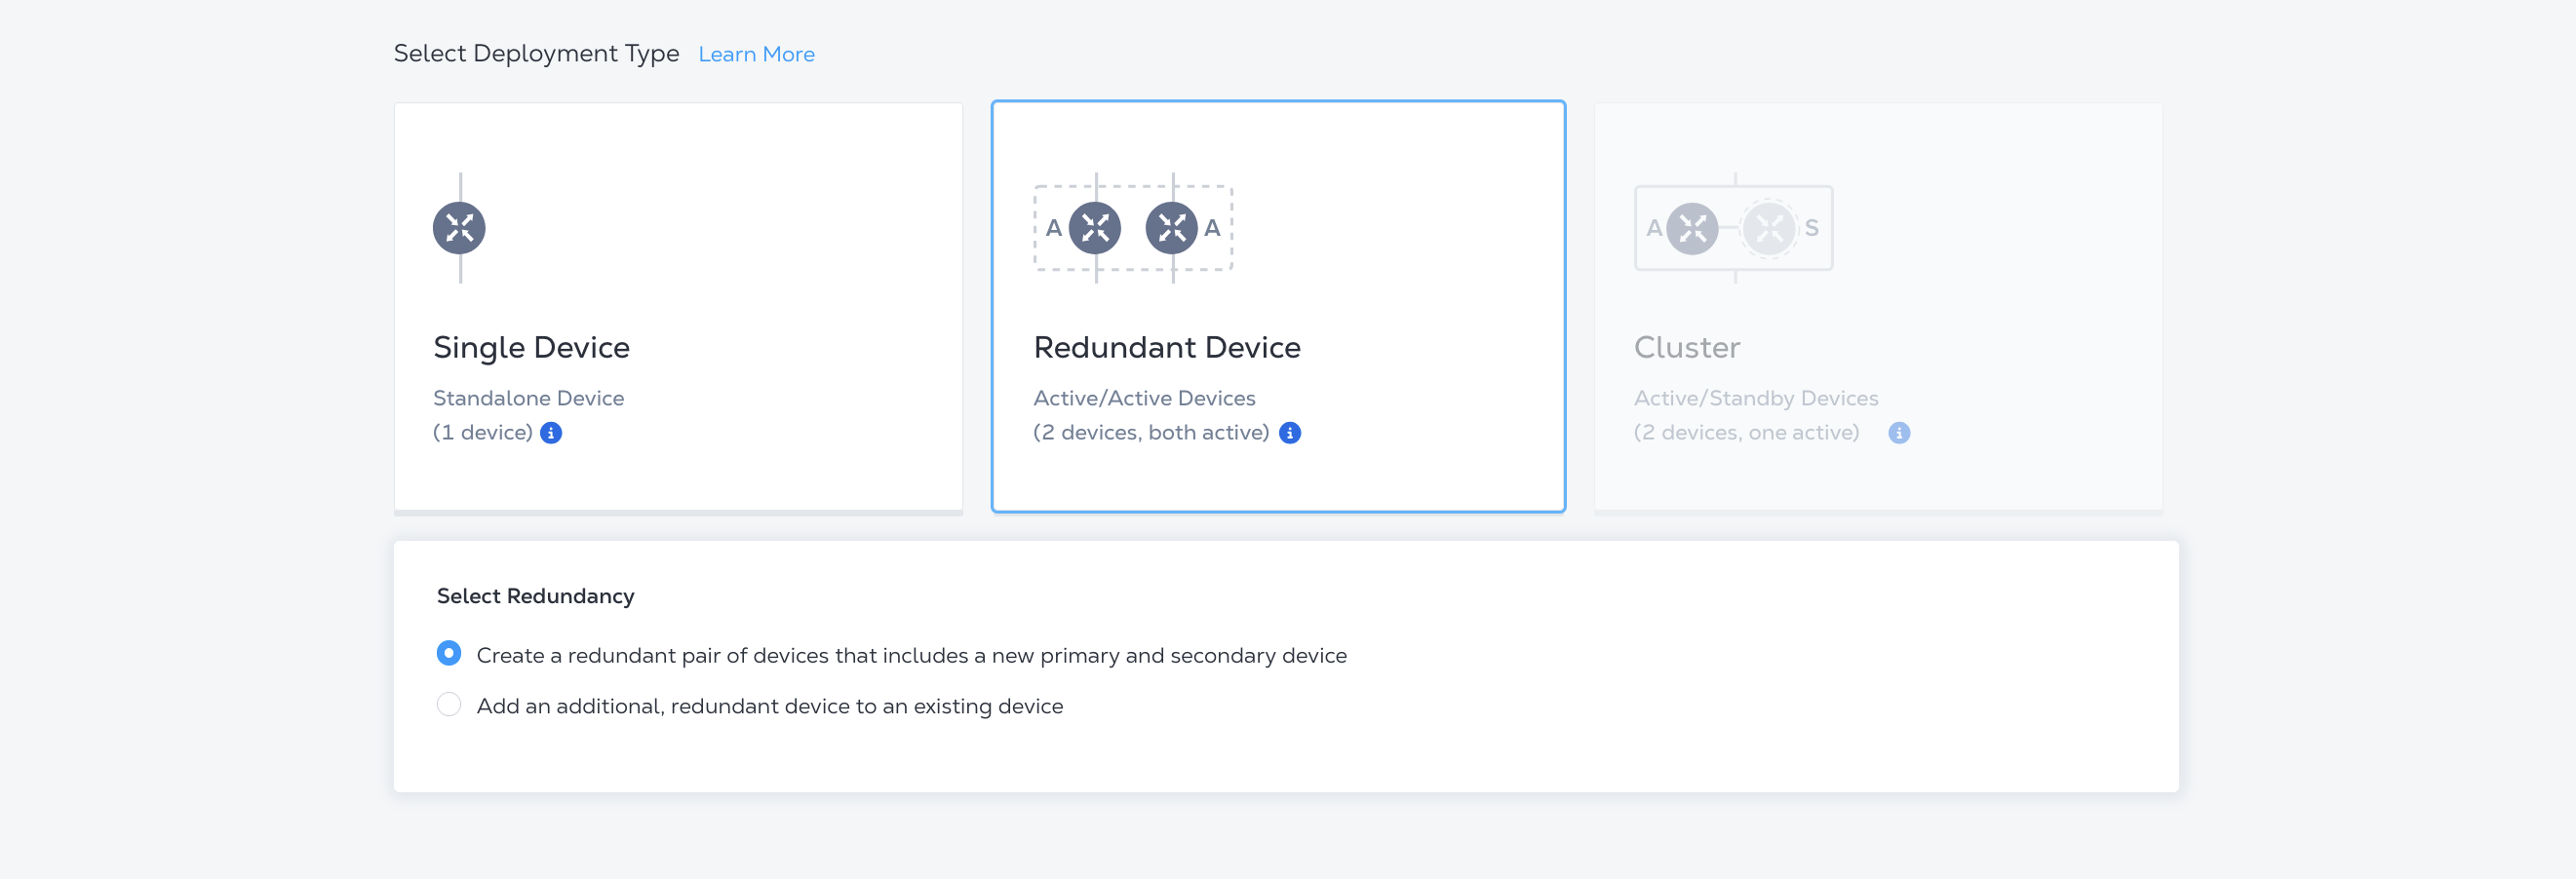
Redundant Device - To create a pair of redundant devices or to create a device to add to an existing device, click Redundant Device.
-
A redundant pair of devices is typically deployed in active/active operation. One device is connected to Fabric's Primary Plane and the other device is connected to Fabric's Secondary Plane. The two devices can be provisioned in the same metro for local redundancy or different Metros for Geo-redundancy.
-
Select Add an additional, redundant device to an existing device if you want to create a redundant pair with an existing device. Select the location and device that you are adding redundancy to.
-
-
Cluster - To create a cluster, click Cluster. Device clusters are only available for select vendors that support active/standby operation with synchronized device configurations. Both devices must be in the same metro. One device is connected to Fabric's Primary Plane and the other device is connected to Fabric's Secondary plane. The cluster is treated as one logical device. Interfaces are associated with the cluster, not the individual devices.
For more information on the primary/secondary planes and cluster redundancy, see Device Resiliency.
Once you have selected your device's redundancy, click Begin Creating Edge Devices.
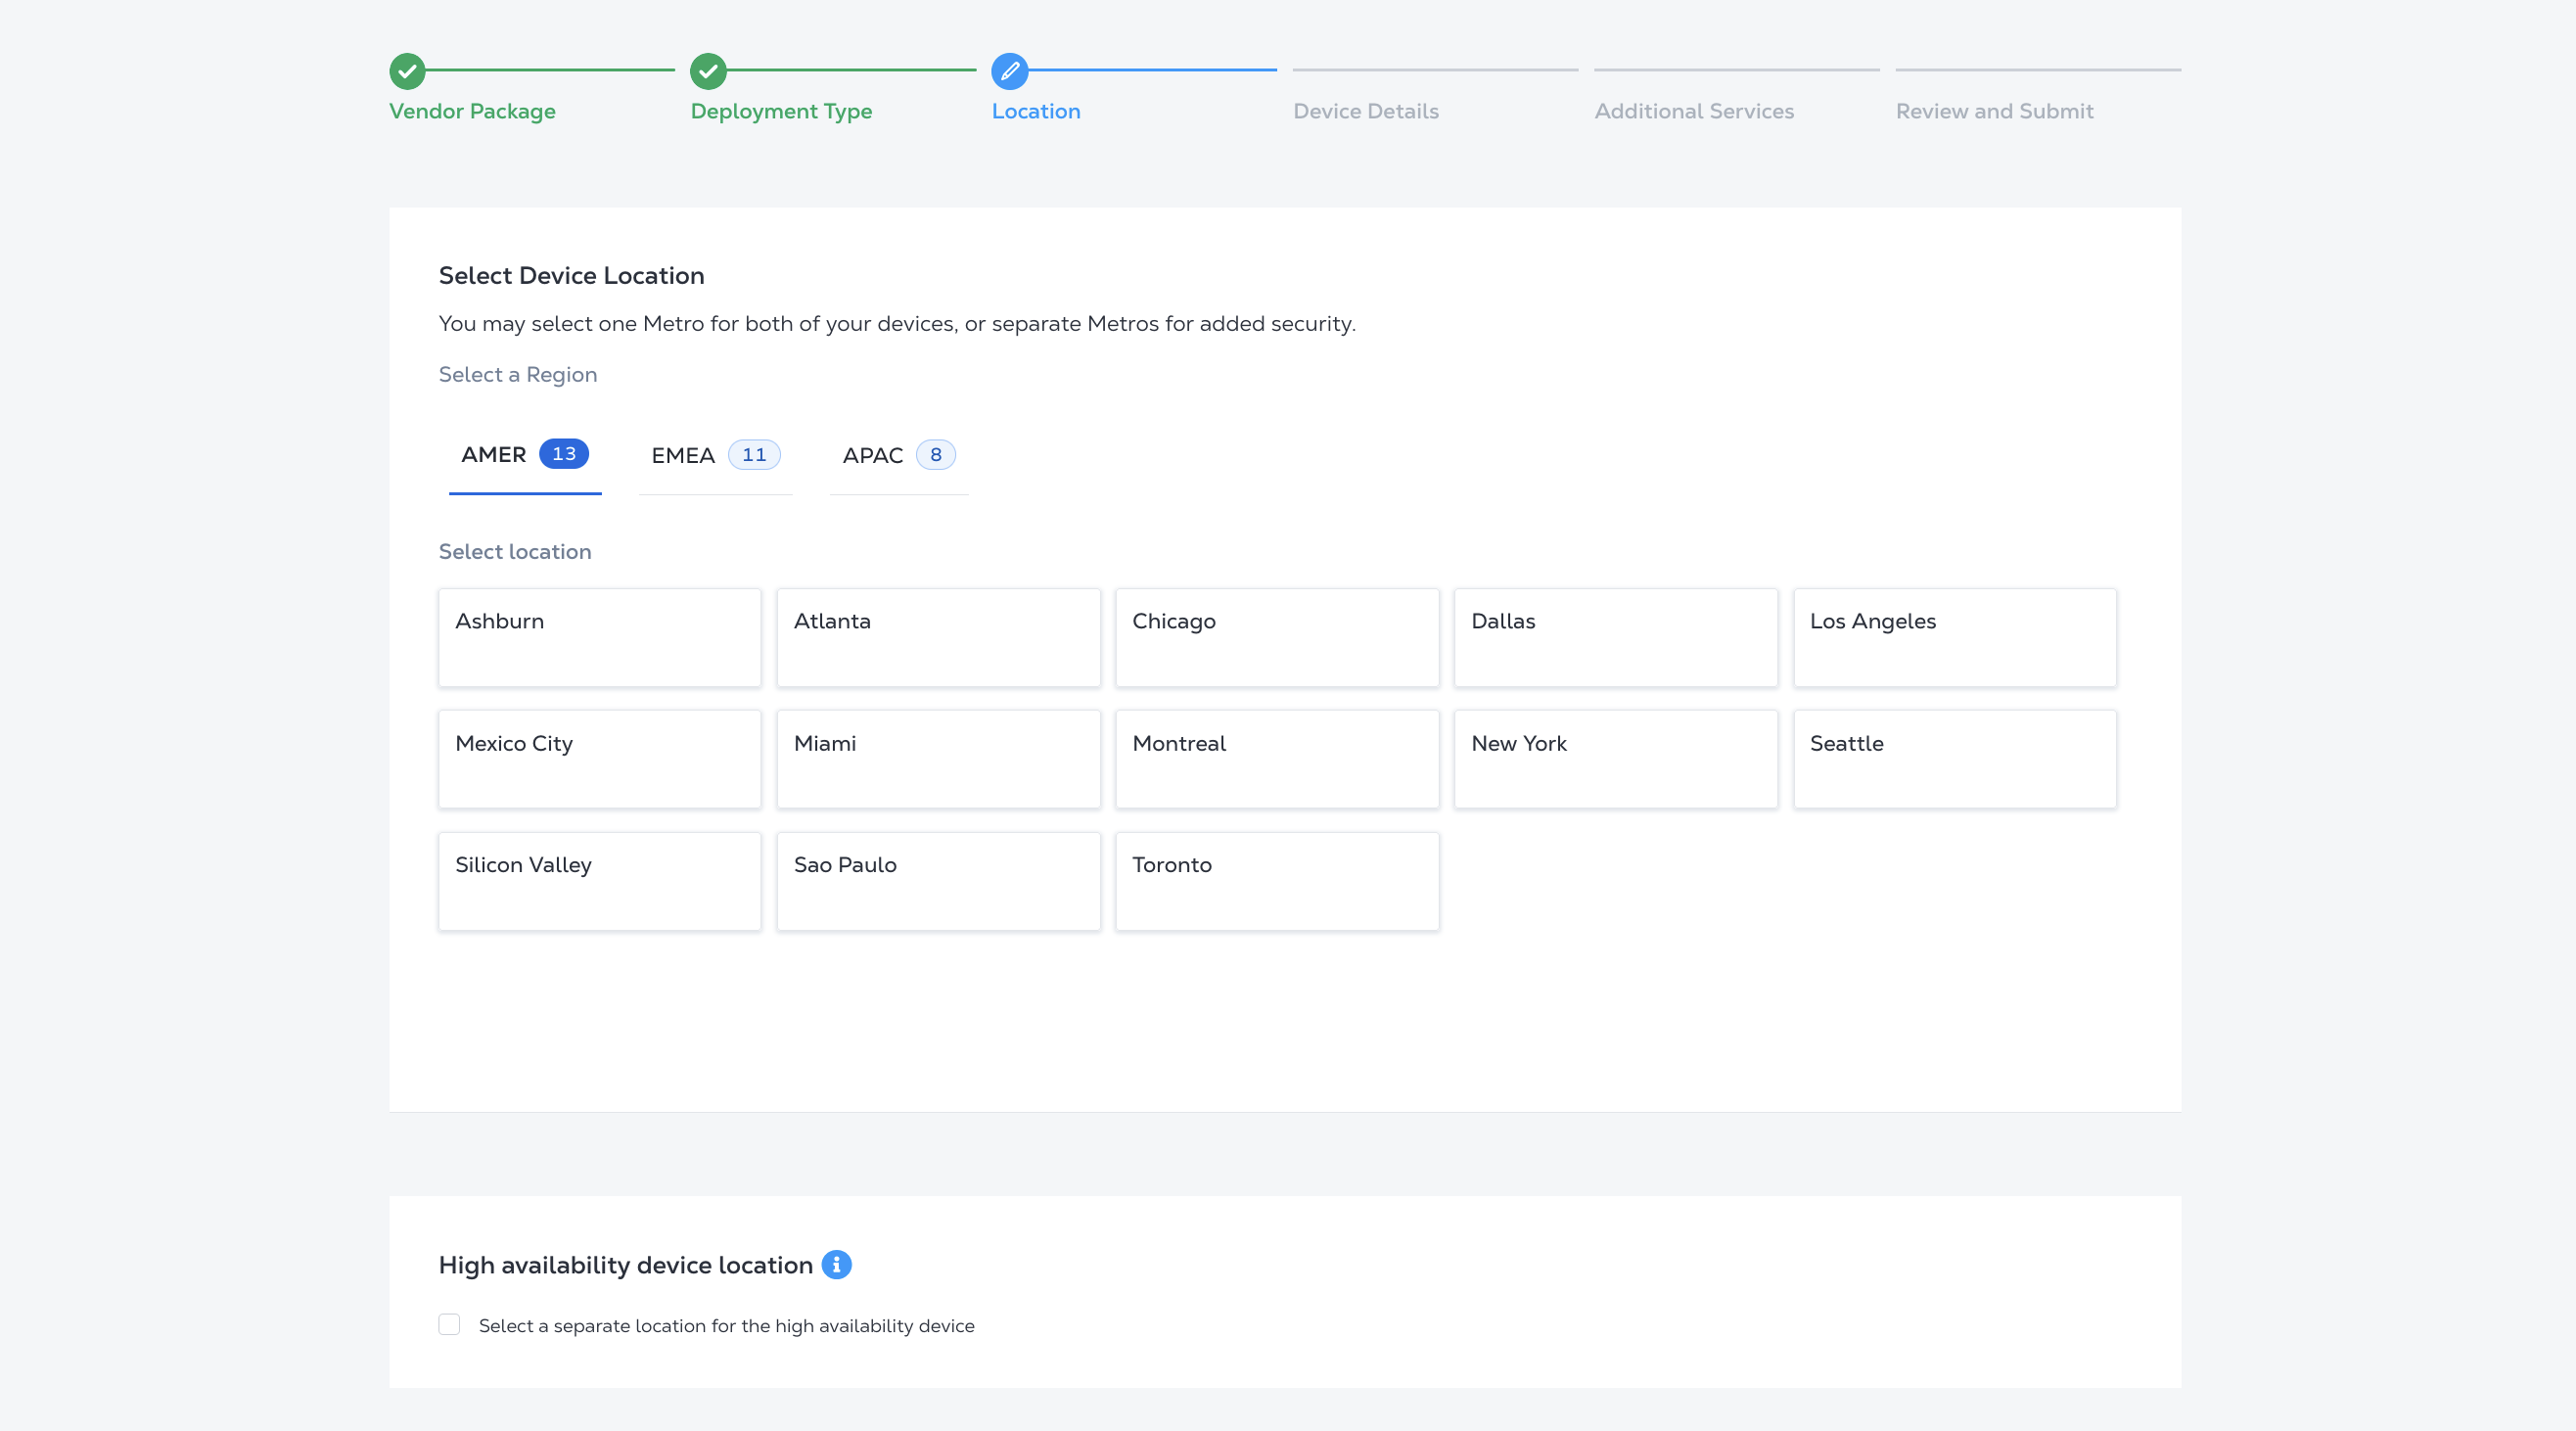
Location and Billing Account
In the Select Edge Device Location section, select a region and location to create your virtual device in.
-
If you are creating redundant devices, choose the location for both devices. If you require a separate location for the redundant device, click Select a separate location for the redundant device and choose the second location.
-
If you are adding a redundant device to an existing device, choose whether to use the same Metro as your primary device, or select a new location.
In order to create a device in a specific metro location, you need either a global billing account or a local billing account for that location. In the Select Billing Account section, select a billing account from the Your accounts in this metro drop-down menu.
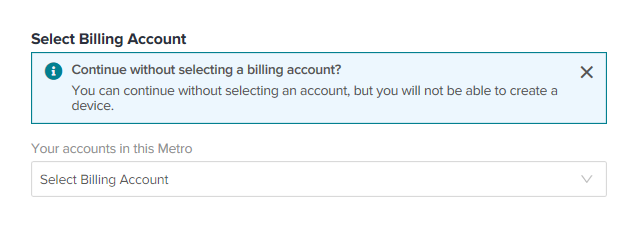
If you are creating redundant devices in different metros, you can select a billing account for each. You can continue without selecting a billing account, but you won’t be able to create your device.
Click Next: Device Details.
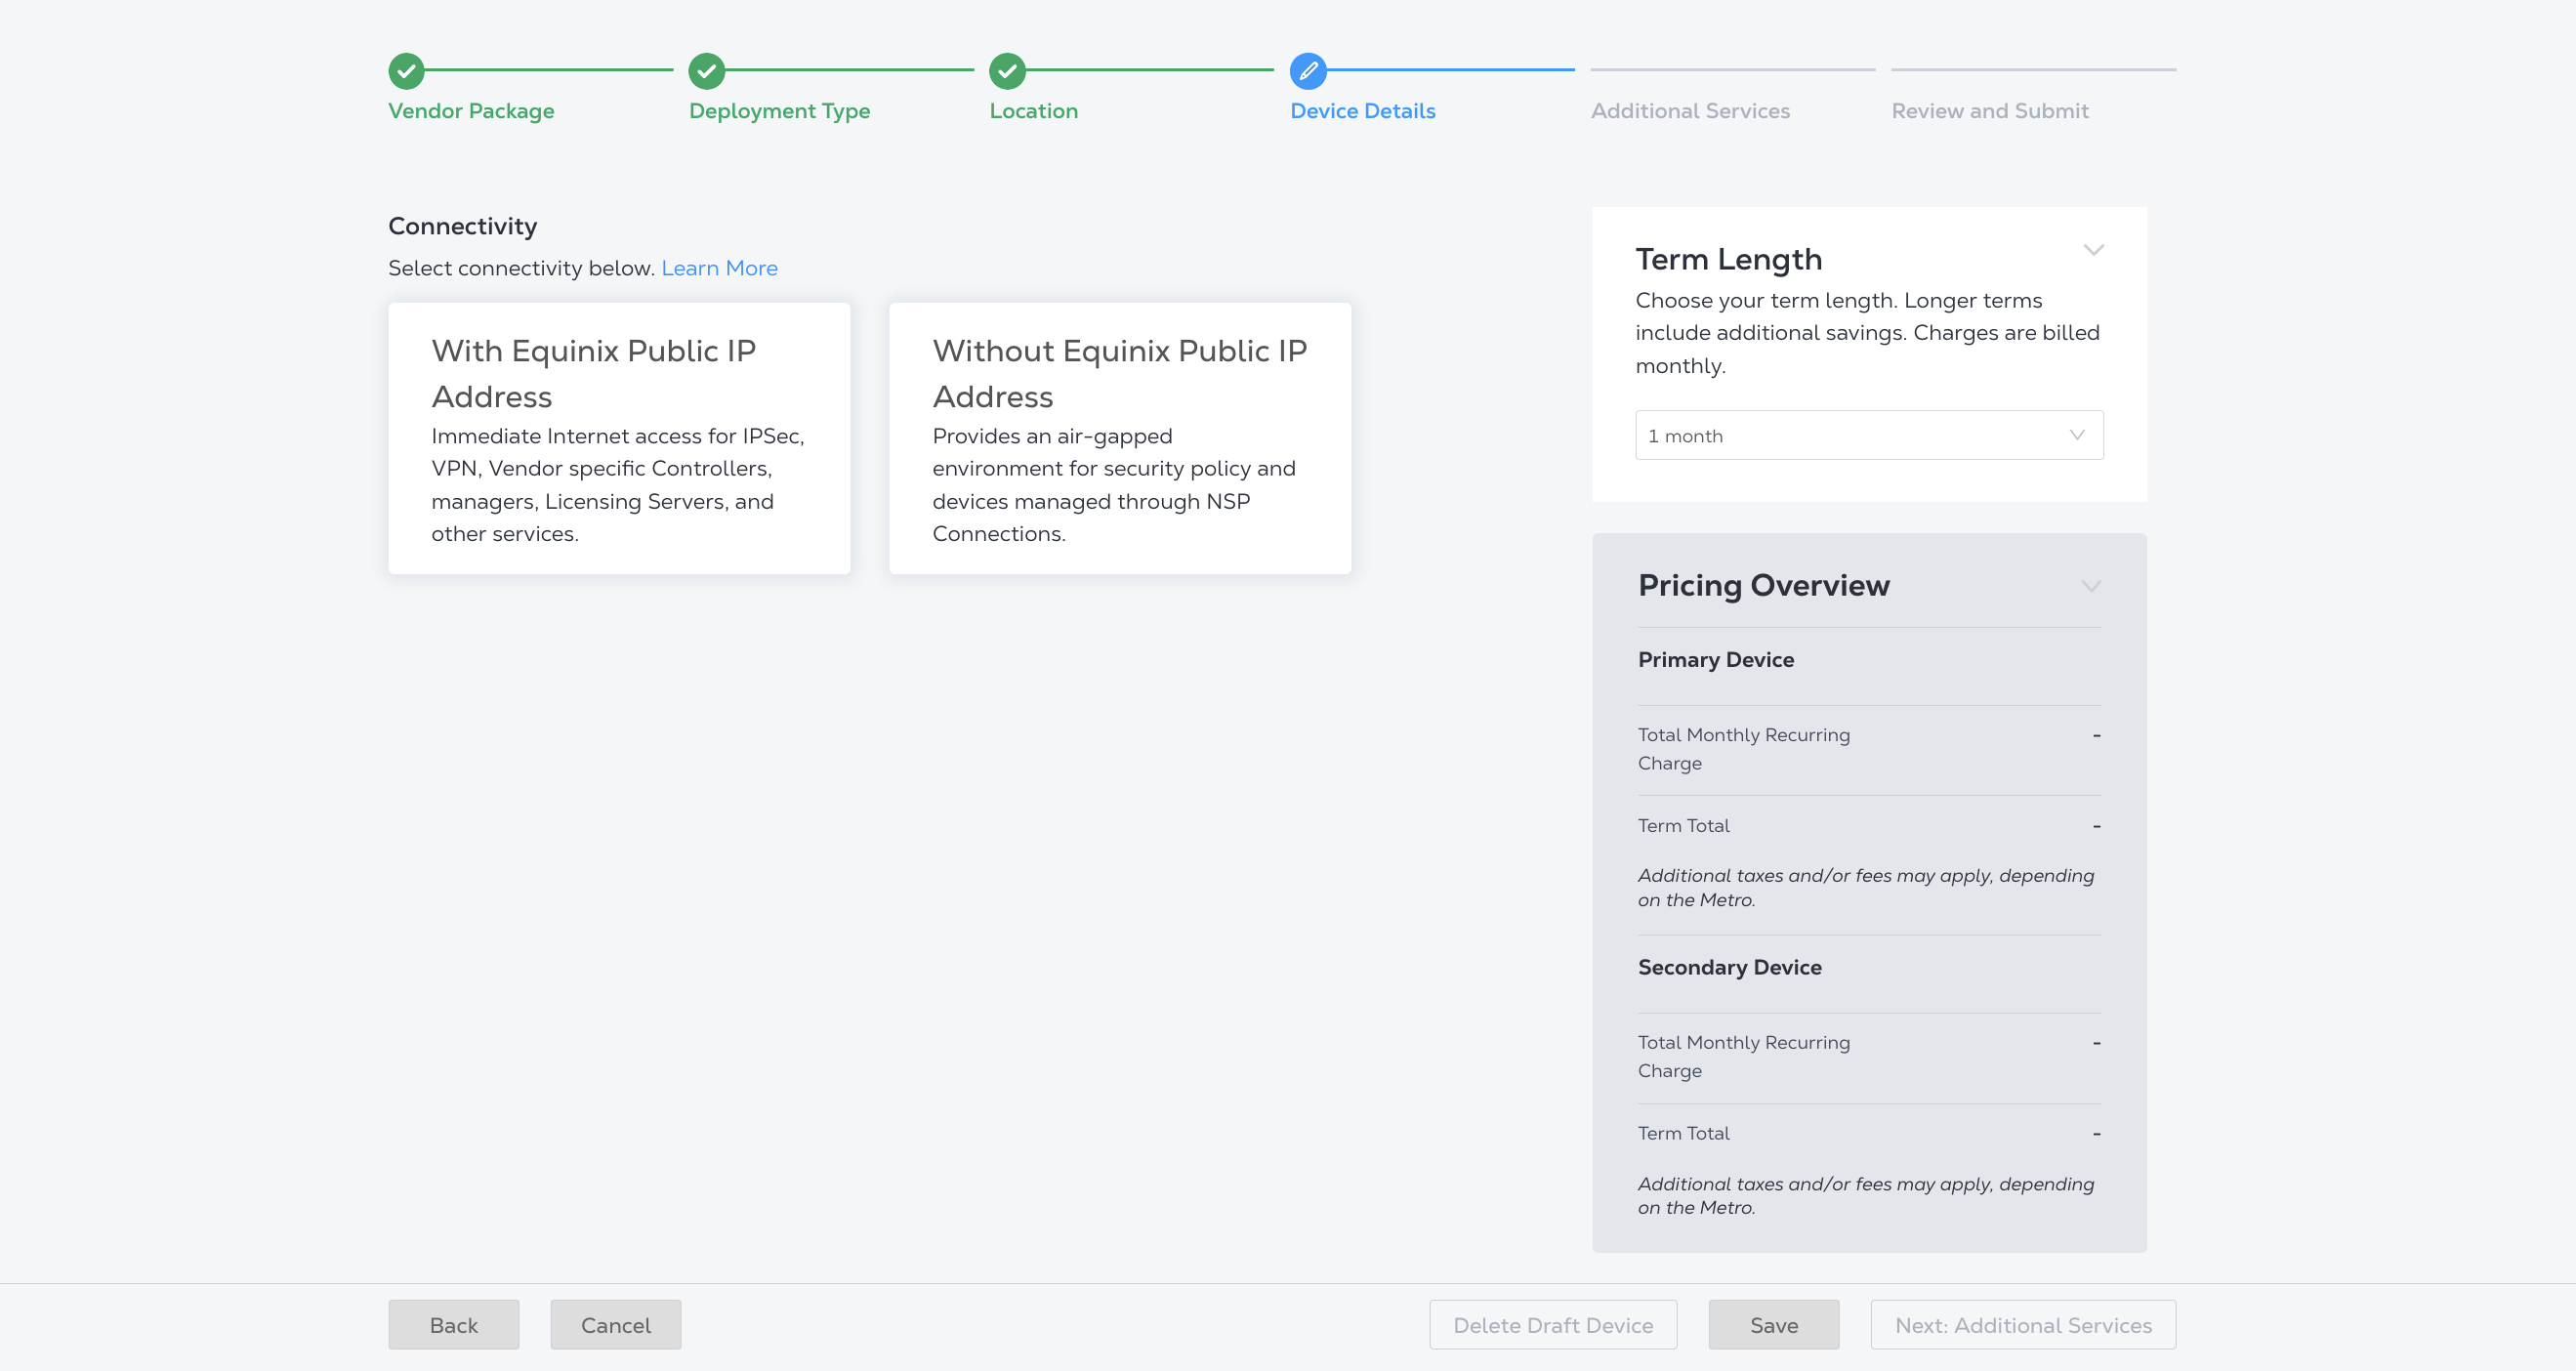
Device Details
Options on the Device Details page vary by vendor and device type. Some may require additional vendor or device configuration while selecting these options or post-device creation.
-
In the Connectivity section, select whether to create the device With an Equinix Public IP Address or Without an Equinix Public IP Address.
-
In the Licensing section, click Subscription or Bring Your Own License.
- If you chose Bring Your Own License, enter the Primary License Token and the Secondary License Token.
- If you are creating redundant devices, enter license tokens for both devices.
- You can skip this step and enter the license later.

-
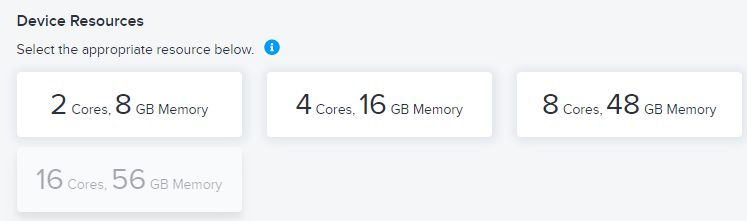
Select the Device Resources.
-
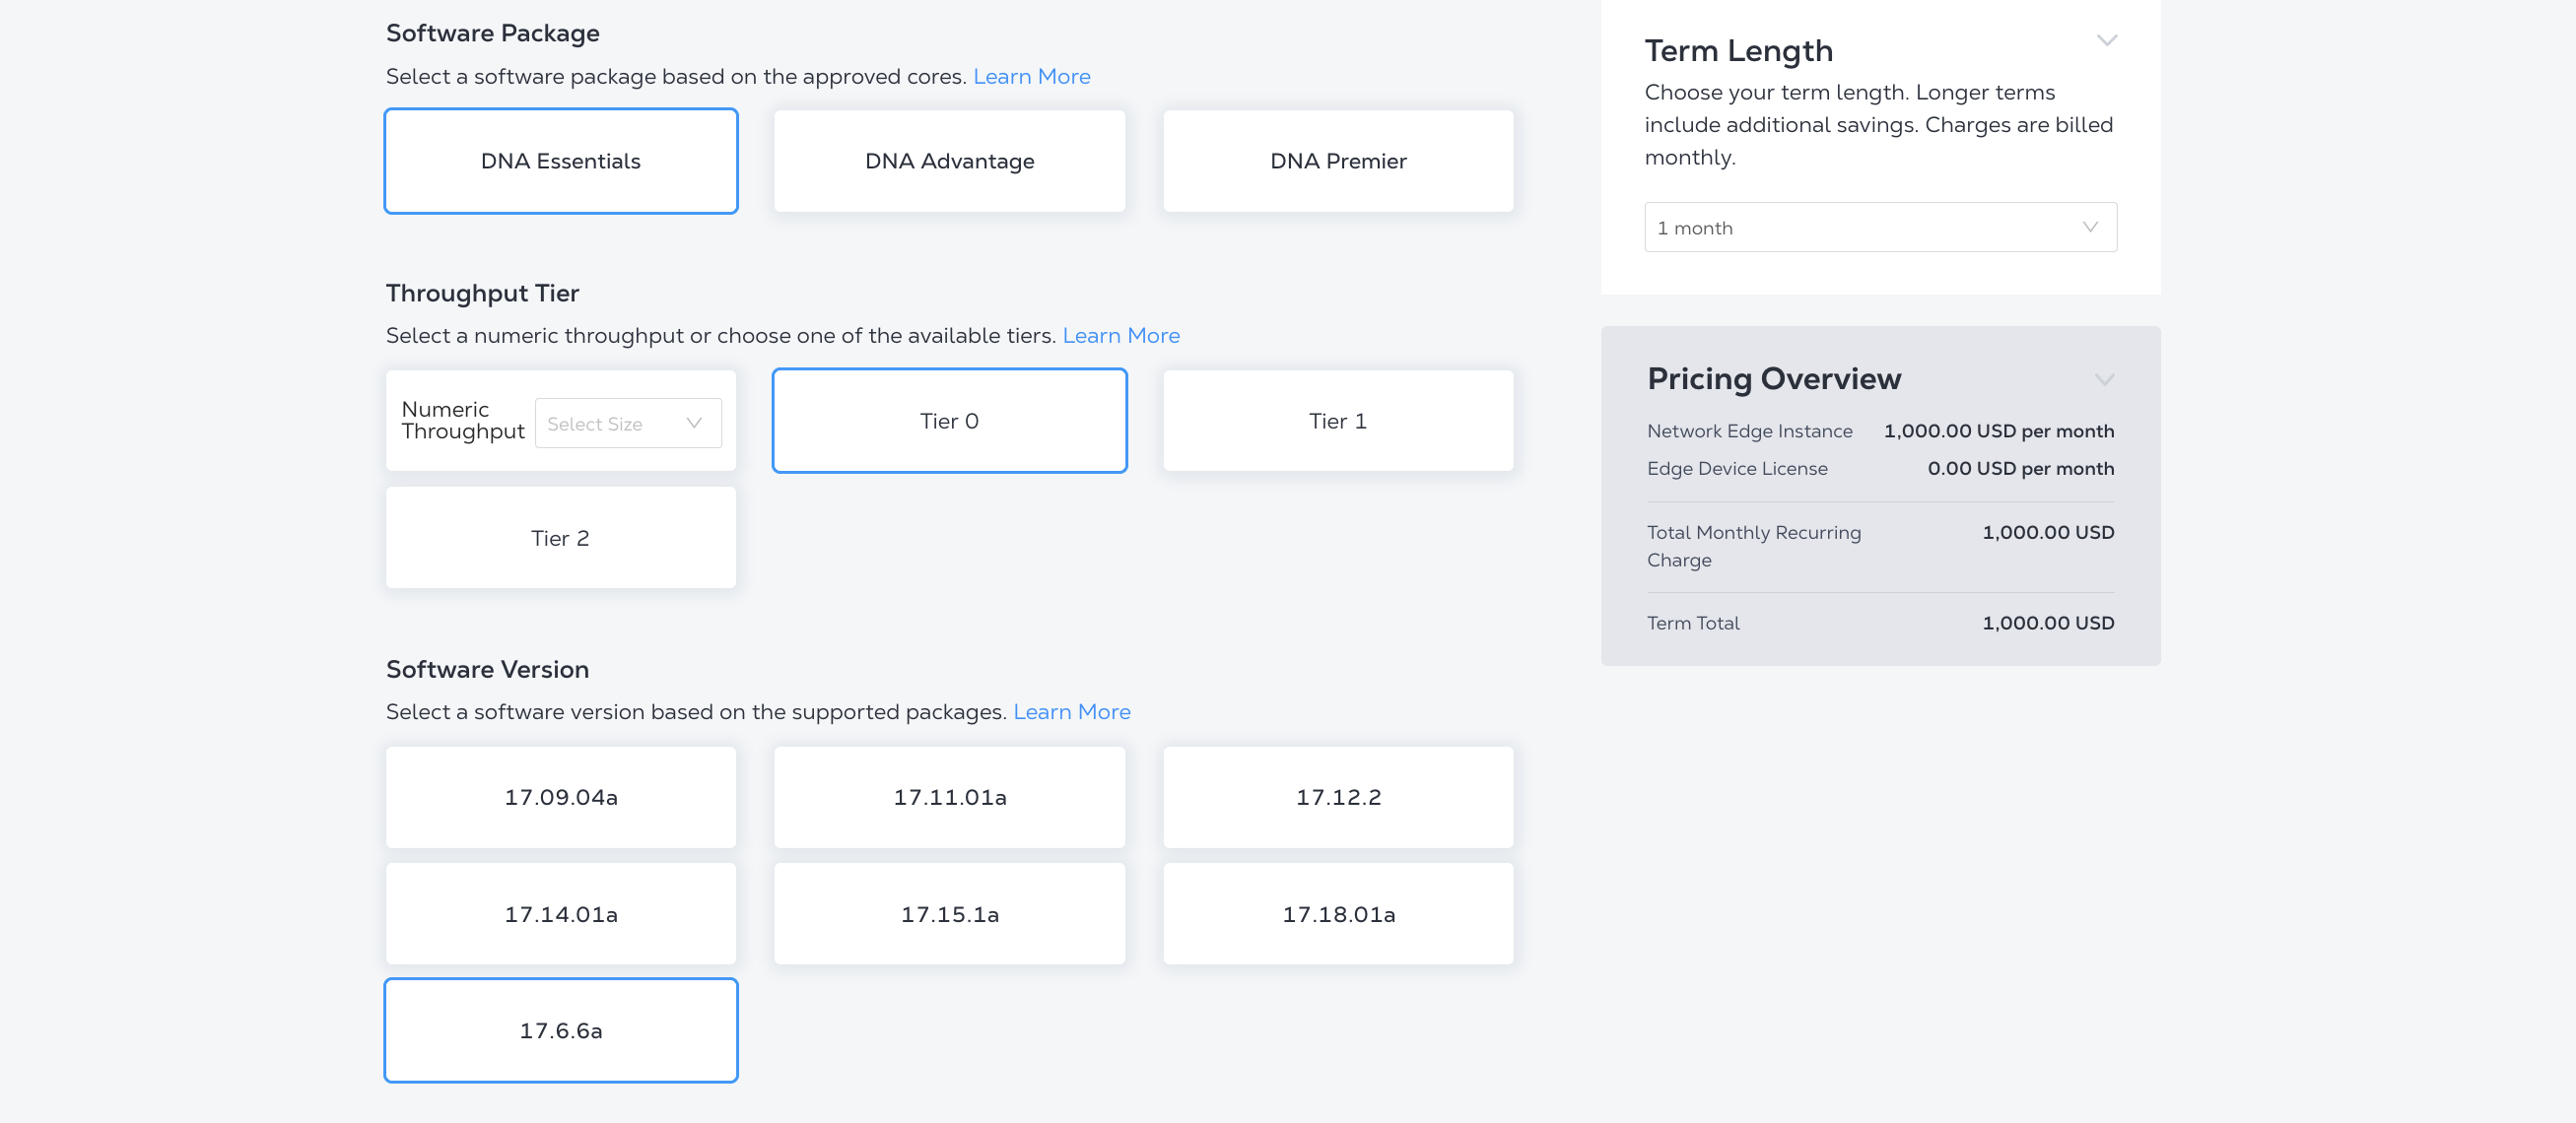
Select a Software Package, Throughput Tier and a Software Version, if multiple options are available. Options vary by vendor and device type.
-
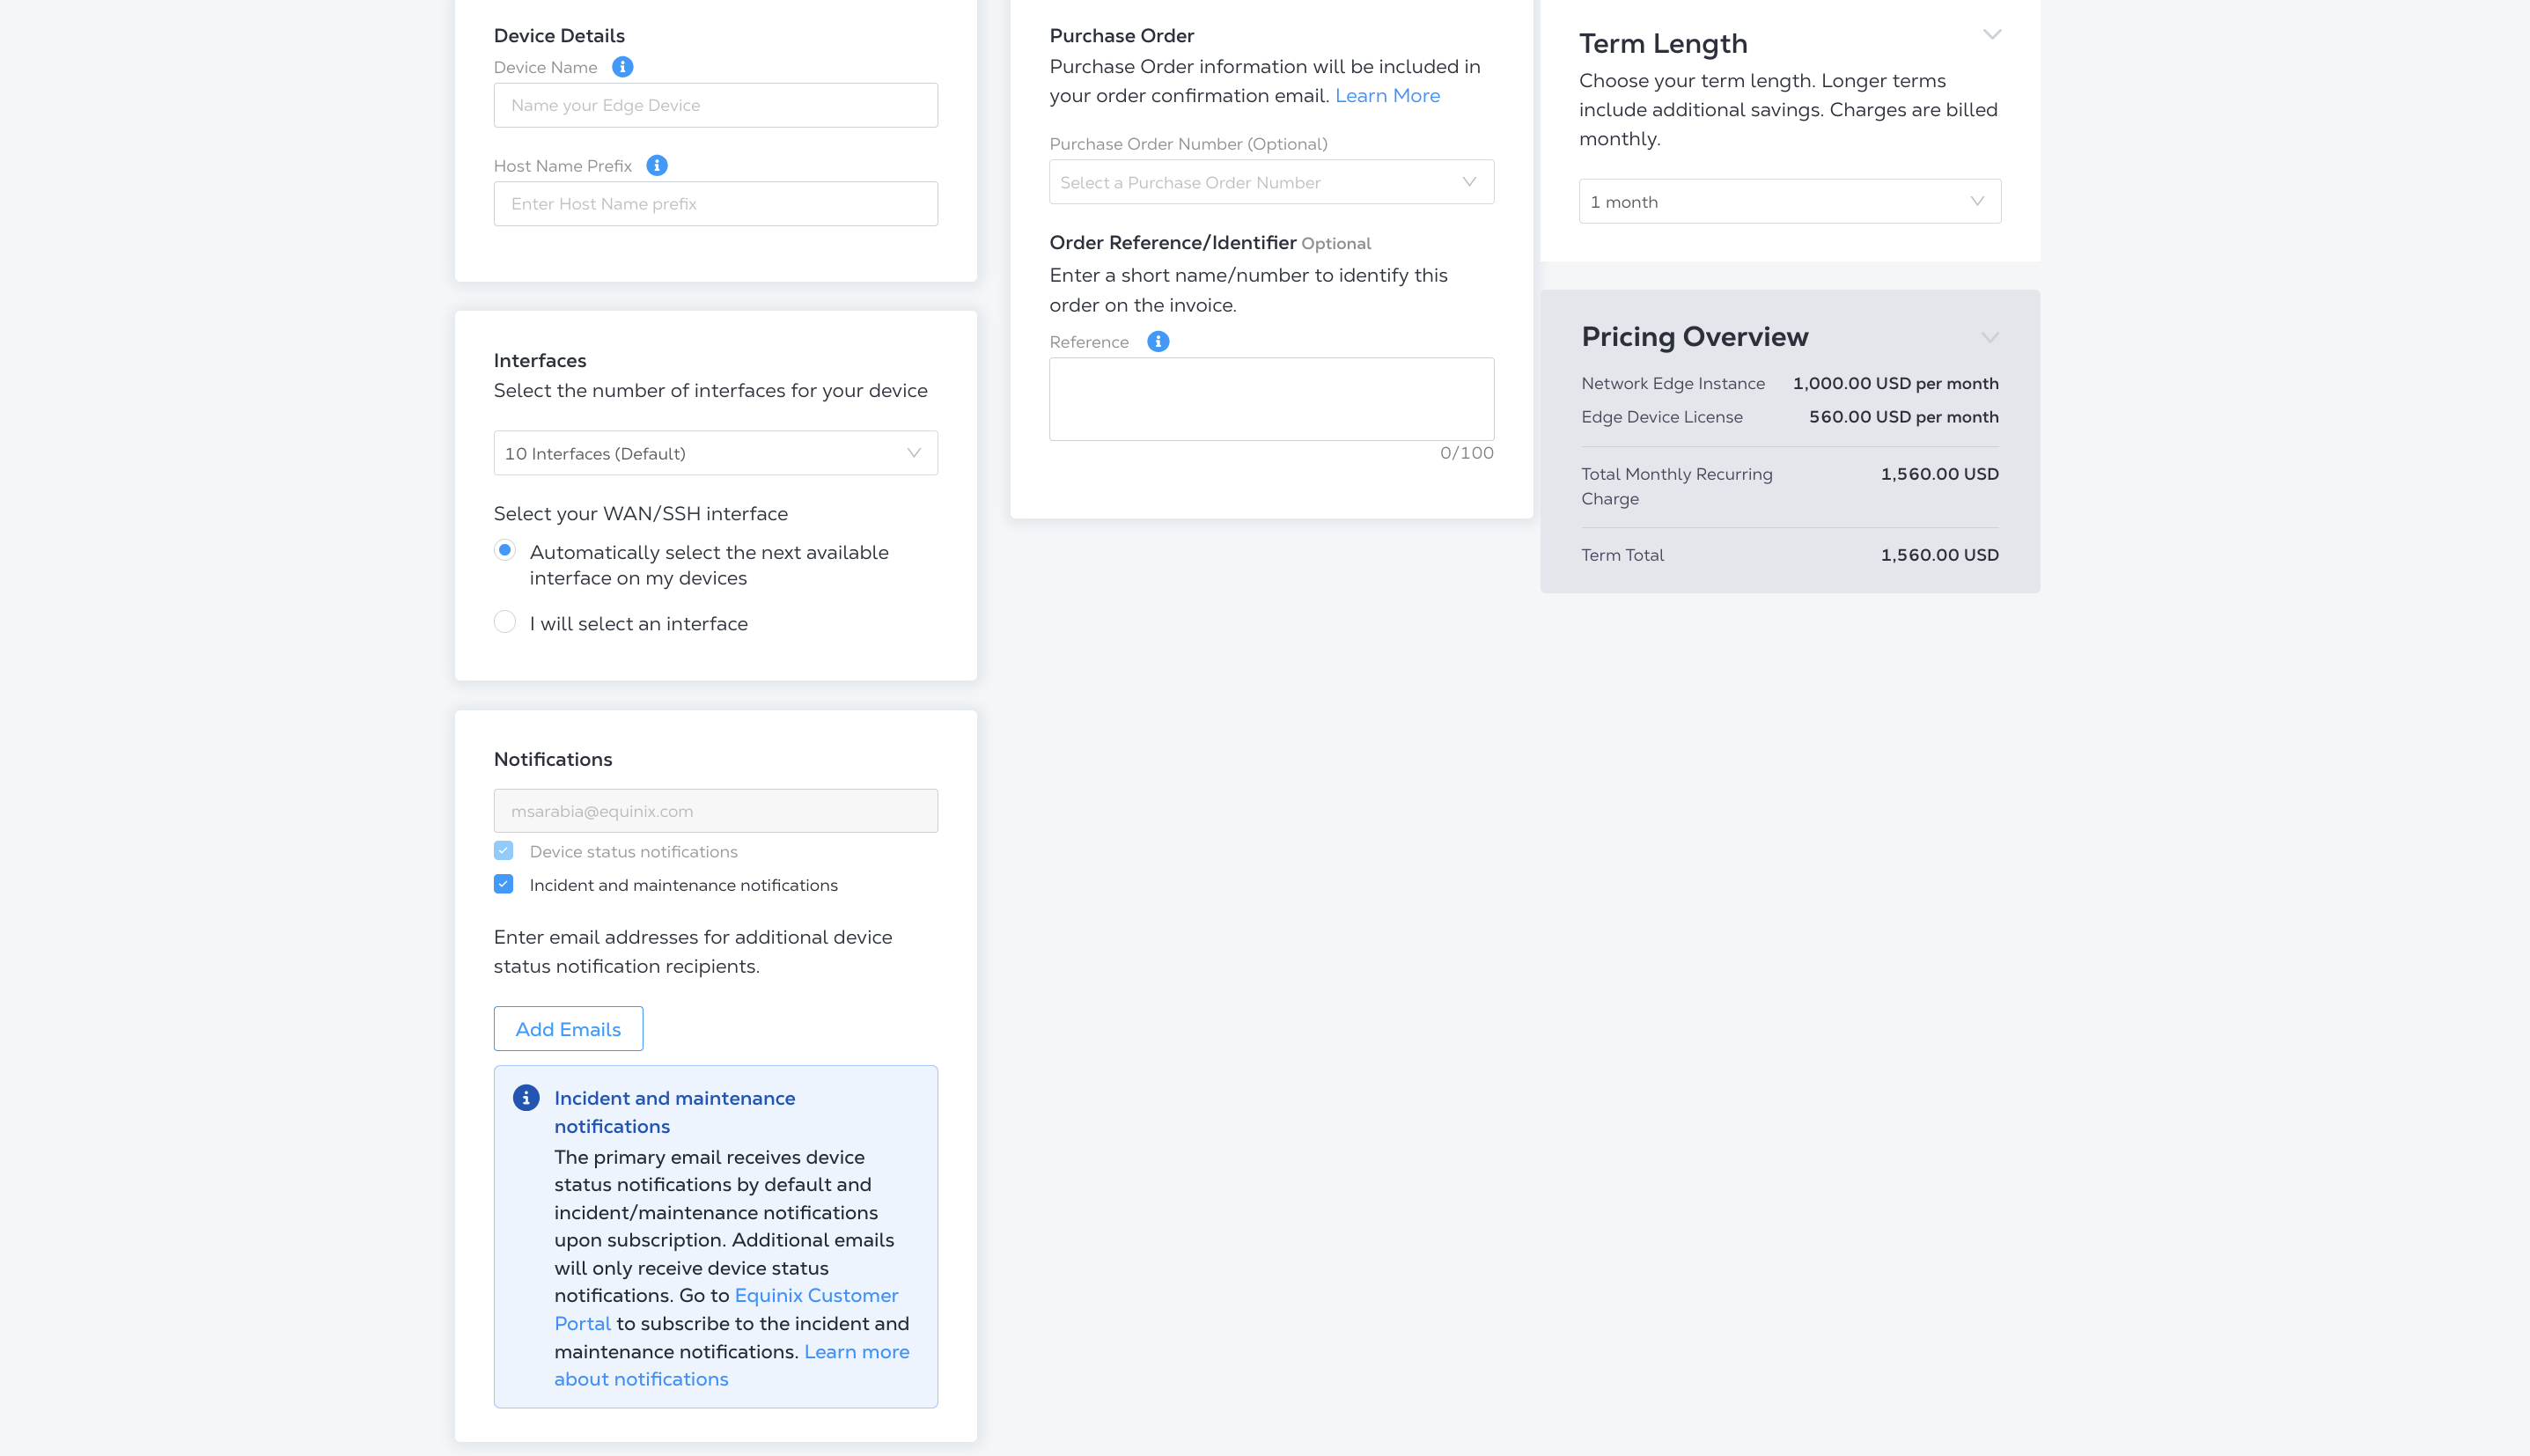
In the Device Details box, enter:
- Device Name – Enter a name for the device.
- Host Name Prefix – Enter a host name prefix for the device.
-
In the Interfaces drop-down menu, select the number of interfaces.
-
In the Device Status Notifications box, enter the email address(es) of anyone who should receive email notifications regarding device status.
-
(Optional) In the Optional Details box, enter the Purchase Order Number and Order Reference/Identifier.
-
In the Term Length drop-down menu, select a term.
If you want to print the pricing overview, click Print Order Summary. If you want to save your device configuration and order later, click Save.
To proceed, click Next: Additional Services.
Additional Services
Configure your access and additional services for the device.
-
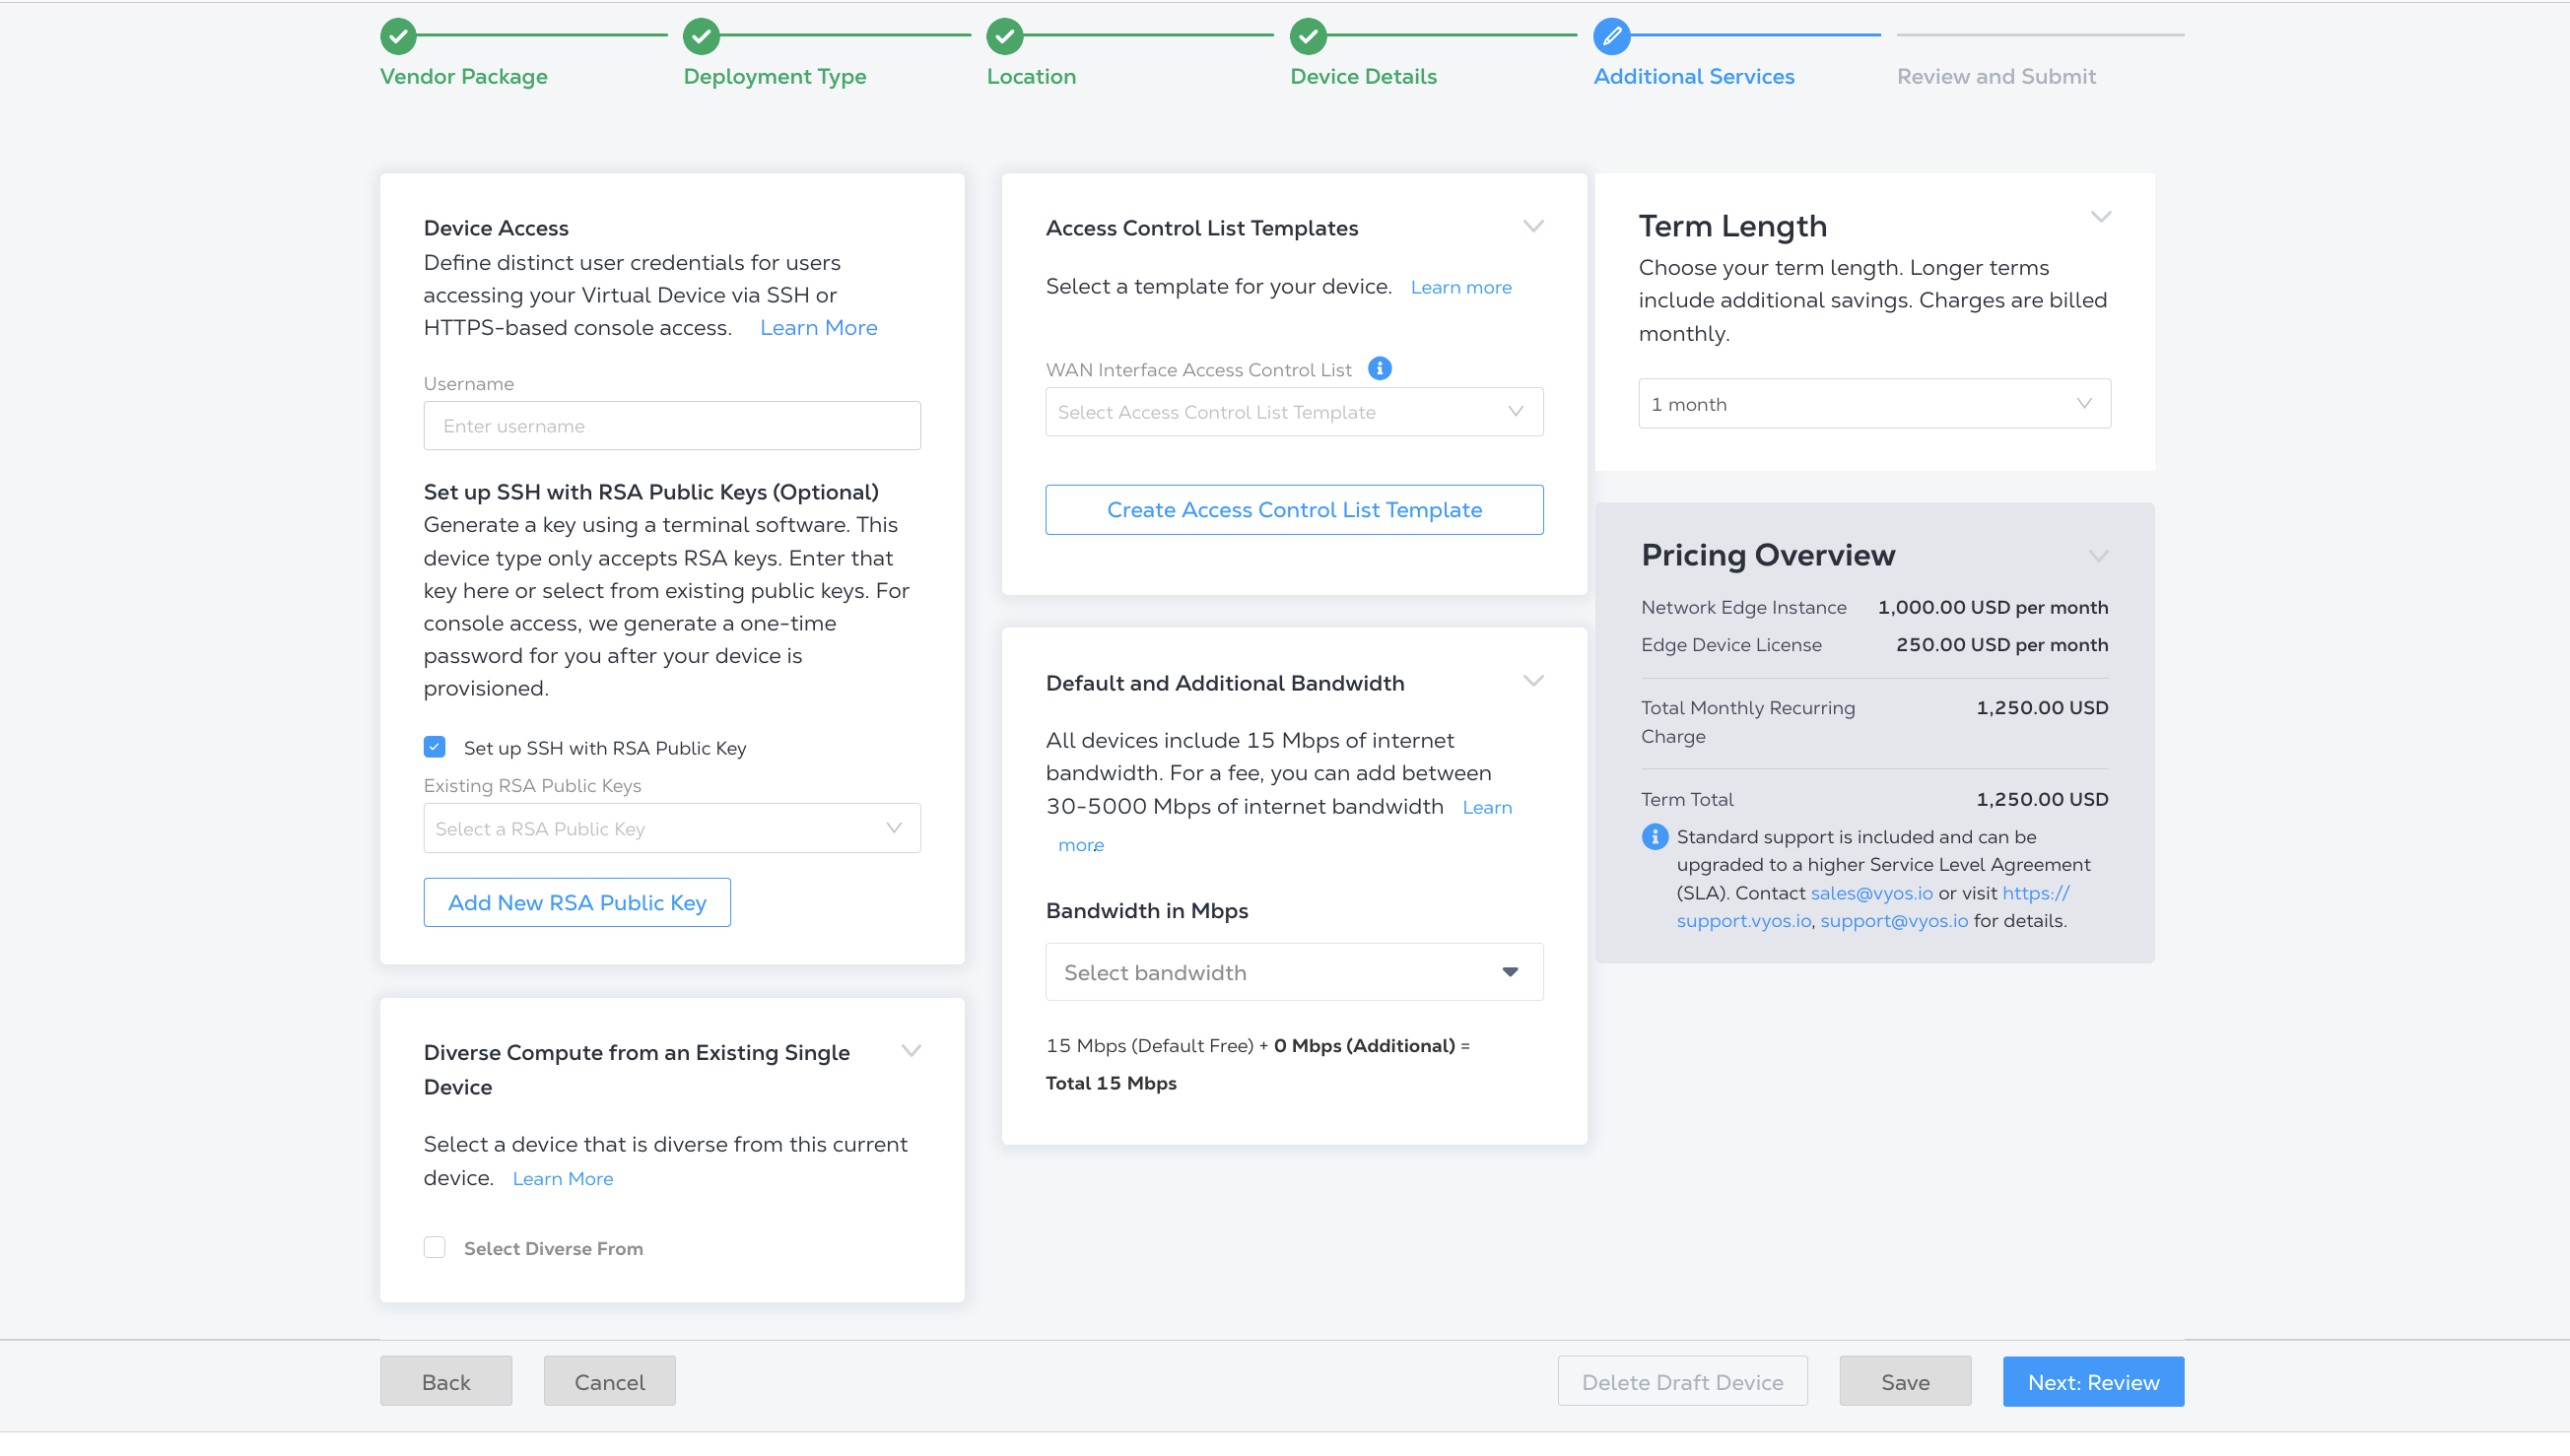
In Device Access, add a username for the user who will access your device through SSH/HTTPS. For console access, we generate a one-time password for you after your device is provisioned.
To set up SSH with RSA Public Keys (Optional), check the box and select an existing RSA Public Key, or click Add New RSA Public Key to generate a new one. See Network Edge Device Access for more information about generating an RSA public key.
-
In Diverse Compute from an Existing Single Device, choose whether to create the new device on a different redundancy plane than an existing device. Select the existing device.
-
In Access Control List Templates, choose which access control list (ACL) template to apply to the gateway interface connected to the WAN interface of your device. Select the ACL from the drop-down.
ACL templates control communication from the Internet. By default, the communication required for initial bootstrap (DNS, NTP, License Server communication, SD-WAN controller communication, etc.) is allowed to properly configure the initial VNF configuration. Additional protocols such as SSH need to be intentionally permitted using an ACL template (Custom ACL). If you need to create a template to apply to your device, click Create Access Control List Template.
See Configure Access Controls on Virtual Devices for more information.
-
In Default and Additional Bandwidth, choose whether to add between 25 Mbps and 5000 Mbps of additional internet bandwidth (for a fee). 15 Mbps of Internet bandwidth is included with your device by default. Select the additional bandwidth amount from the drop-down.
Once you have made your selections, click Next: Review.
Review and Submit
Review the Device Details, Additional Services, and Pricing Overview. If you need to change or update anything, click Back. If you need to save your order for later, click Save.
If there are additional terms in the Shared Support Structure section, check the box to acknowledge them.
When you are ready, click Create Virtual Device.