Equinix Metal was sunset on June 30, 2026. The user documentation will be removed on September 30, 2026.
SSH Keys
To securely access and manage your Equinix Metal™ servers, add SSH keys to your account or project. SSH is the default method of accessing an Equinix Metal server. SSH keys are added to each server you provision. Equinix Metal also uses SSH keys as authentication for our SOS/OOB console.
Generating SSH Keys
To use SSH keys with Equinix Metal™, you must first generate a public and private key pair on your local machine, and then add your public key to your Equinix Metal account or project.
To generate an SSH key pair on your local machine, do the following:
-
Enter the
ssh-keygencommand in the command prompt to generate an SSH key pair. Thessh-keygencommand is supported on Linux, Mac, and modern Windows versions.ssh-keygen -t ed25519If either your local machine or your Metal server's operating system does not support Ed25519 keys, use RSA keys with a recommended 2048-bit minimum key size.
ssh-keygen -t rsa -b 2048 -
Follow the prompts to generate the SSH keys. Press enter to save the keys and accept the default location and key names. Note: If this is your first SSH key, it is recommended that you accept the default location and key names.
-
Using a passphrase: It not required to enter a passphrase, however, it will provide an additional layer of security. If you decide to use a passphrase, you are required to enter the passphrase every time you use SSH to access your server. If you do not want to use a passphrase, press enter to leave it empty.
-
Once the key generation is finished, the public and private SSH keys are saved in the following path, if you accepted the default location:
/home/<name>/.ssh/<key-name>.pubon Linux/Users/<name>/.ssh/<key-name>.pubon MacC:\Users\<name>/.ssh/<key_name>.pubon Windows
You will upload this key to the Equinix Metal console. For more information on adding the key to the Metal console, refer to Adding Your SSH Key to your Account. The other key file in the same directory, <key_name>, is the private key. Do not share your private key with anyone.
Note: If you are on an older Windows version that does not include a built-in SSH server and client, you will need to download and configure a third-party application such as PuTTY to generate keys and SSH into your servers.
Adding Your SSH Key to Your Account
- Console
- CLI
- API
Once your SSH keys are created on your local machine, you are now ready to add your public key to your Equinix Metal account.
To add your public key to your Equinix Metal account, do the following:
-
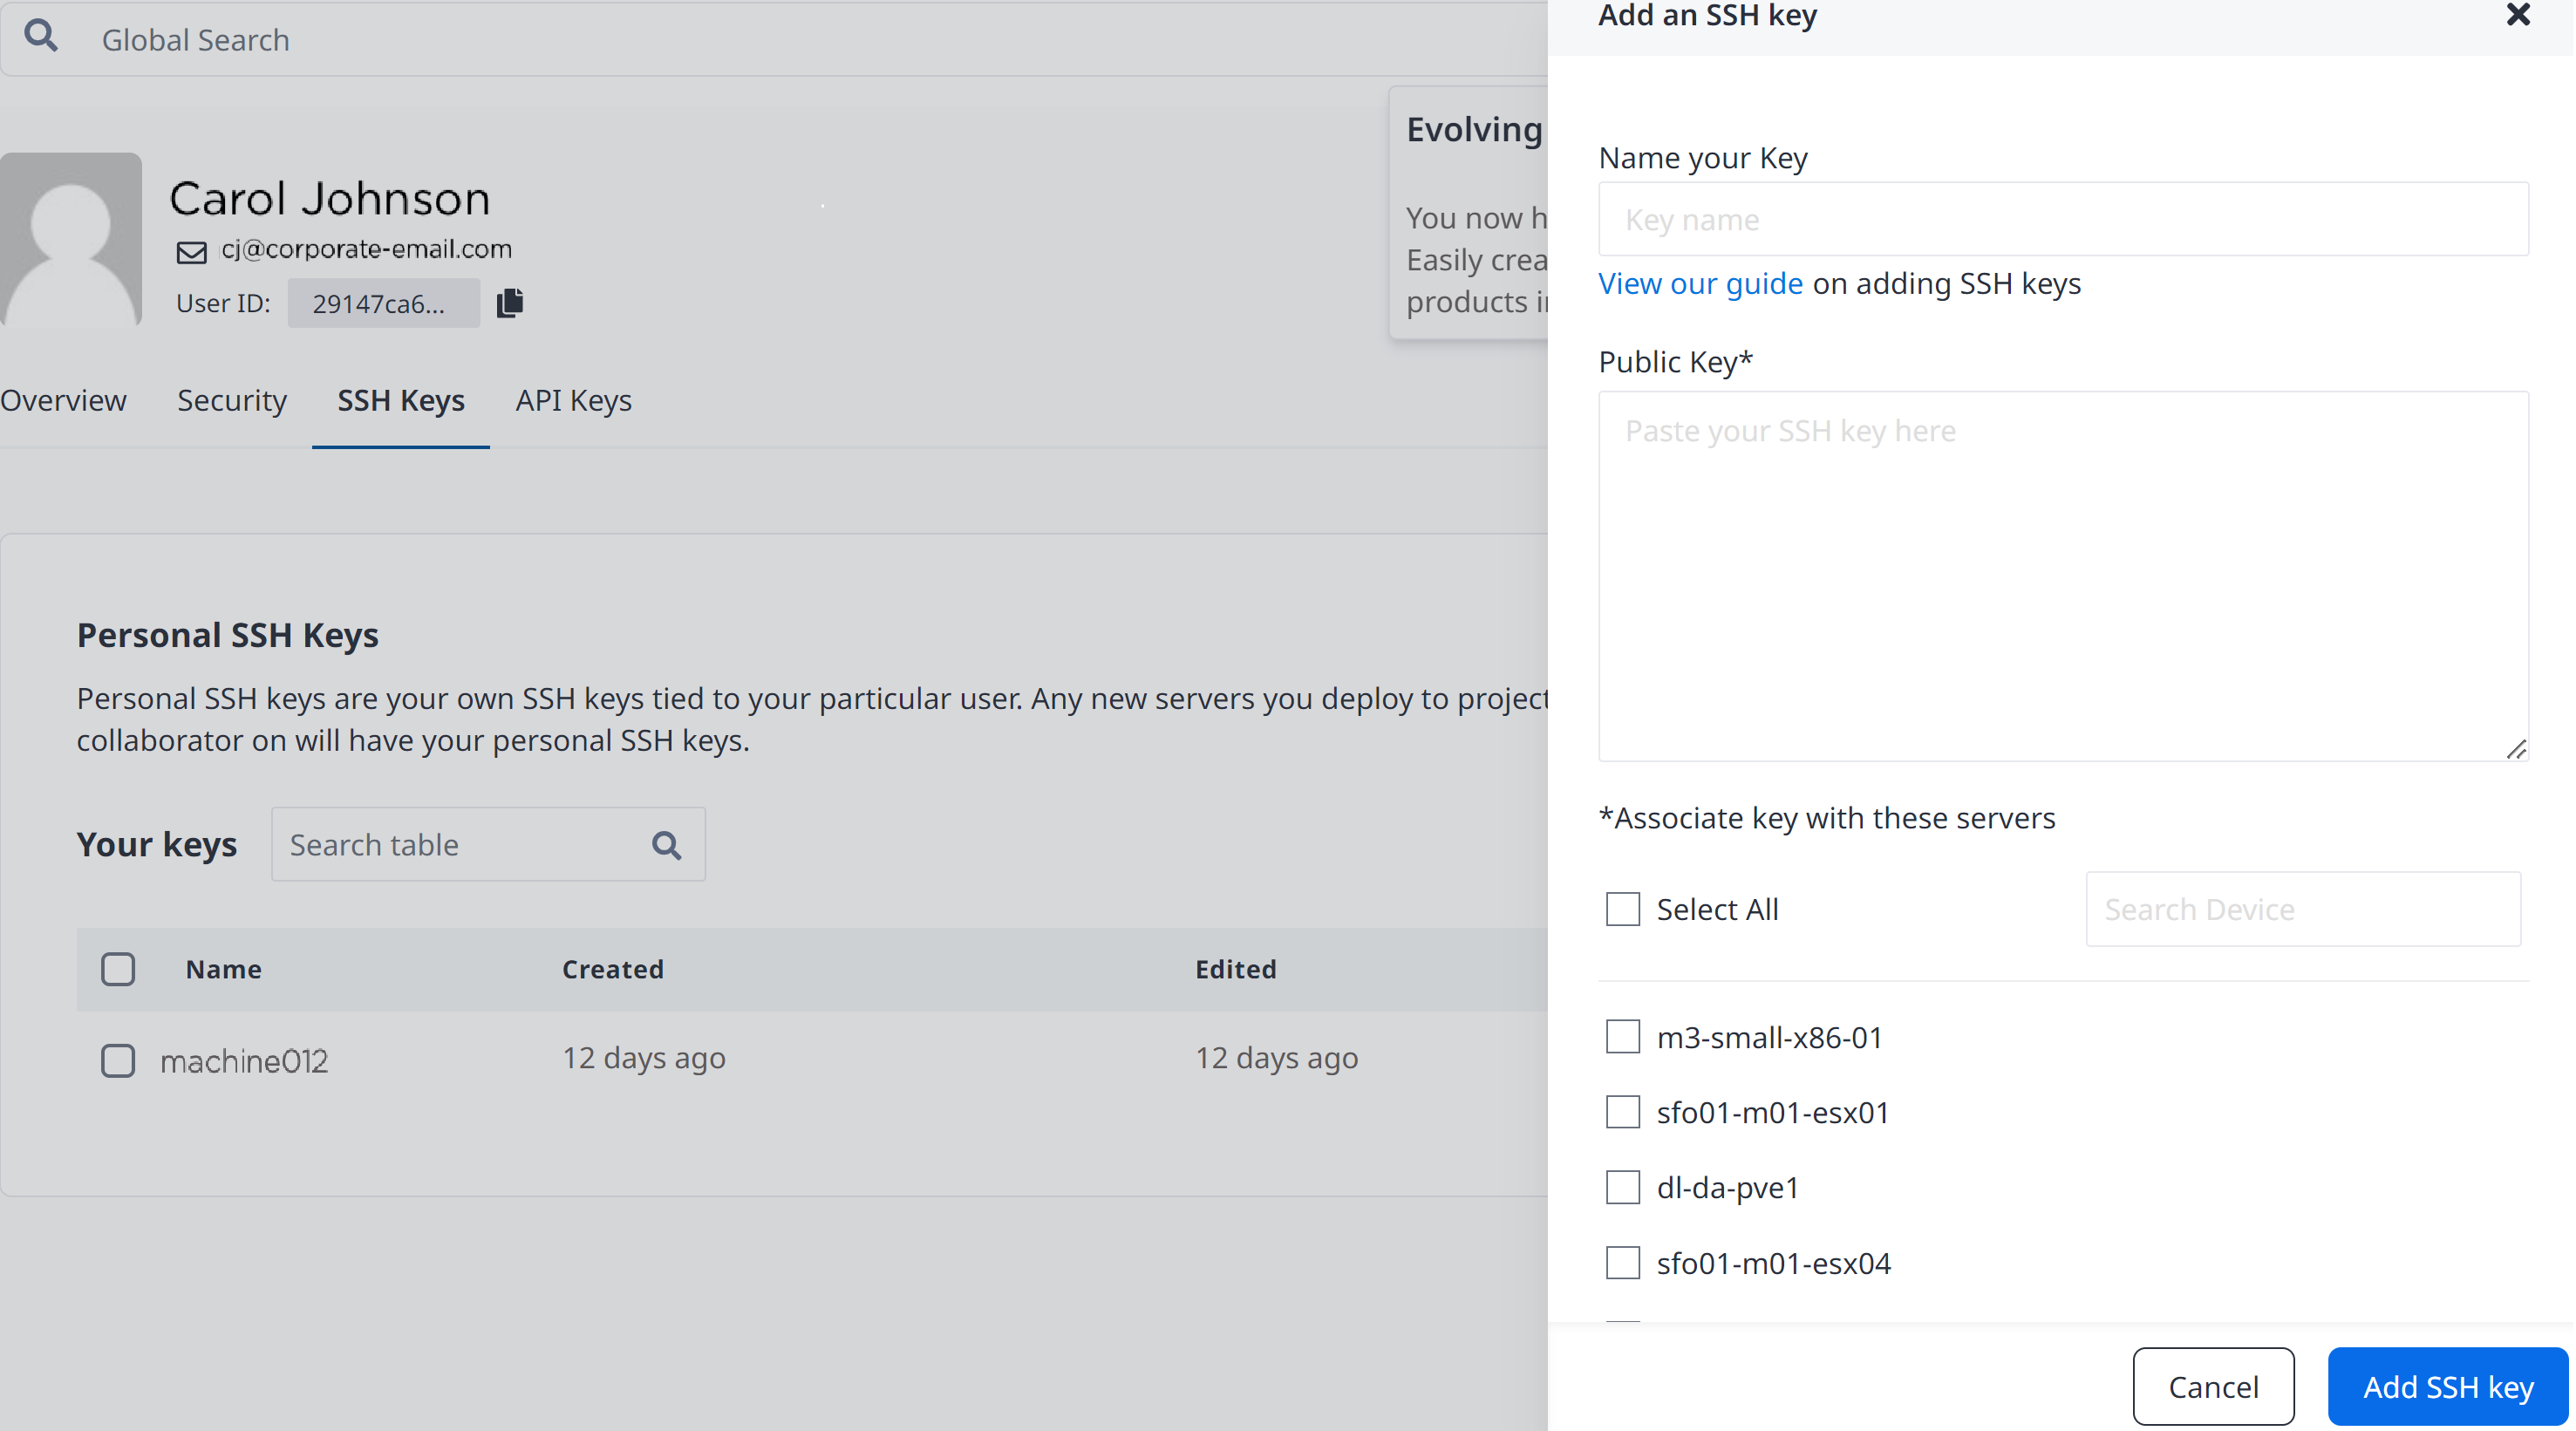
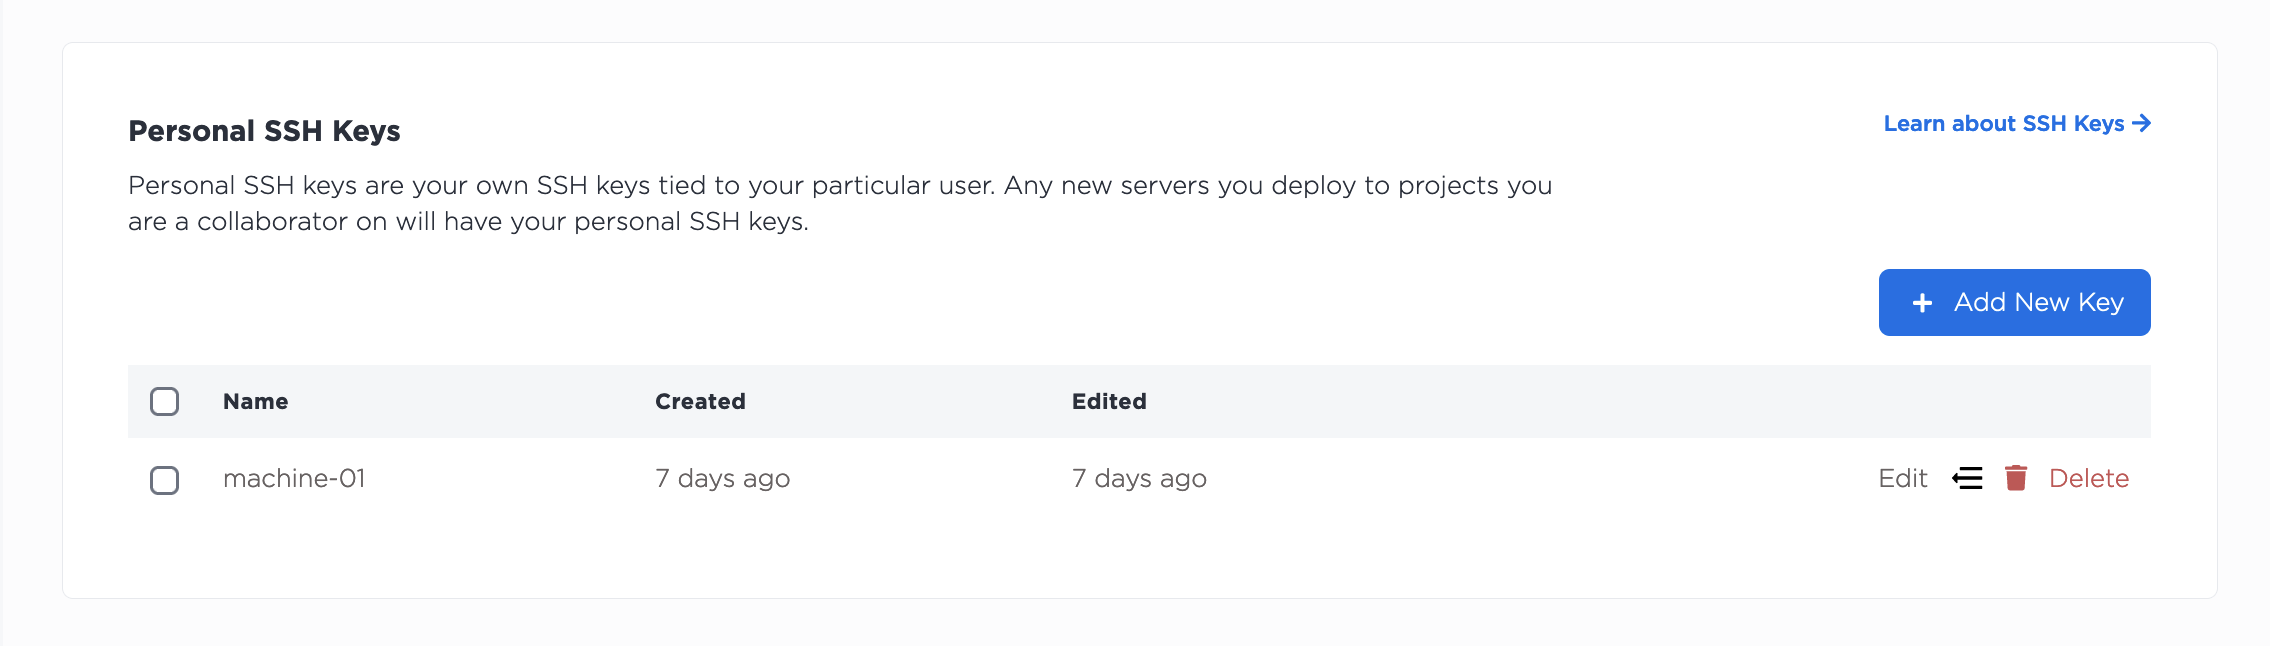
In the console, in the upper right corner, click your user profile > My Profile.
-
Click the SSH keys tab to open your personal SSH keys for your user profile.
-
Click + Add New Key to add a new SSH Key to your account.
-
On your local machine, open the
<key_name.pub>file and copy the contents. -
Paste the contents into the Public Key field.
-
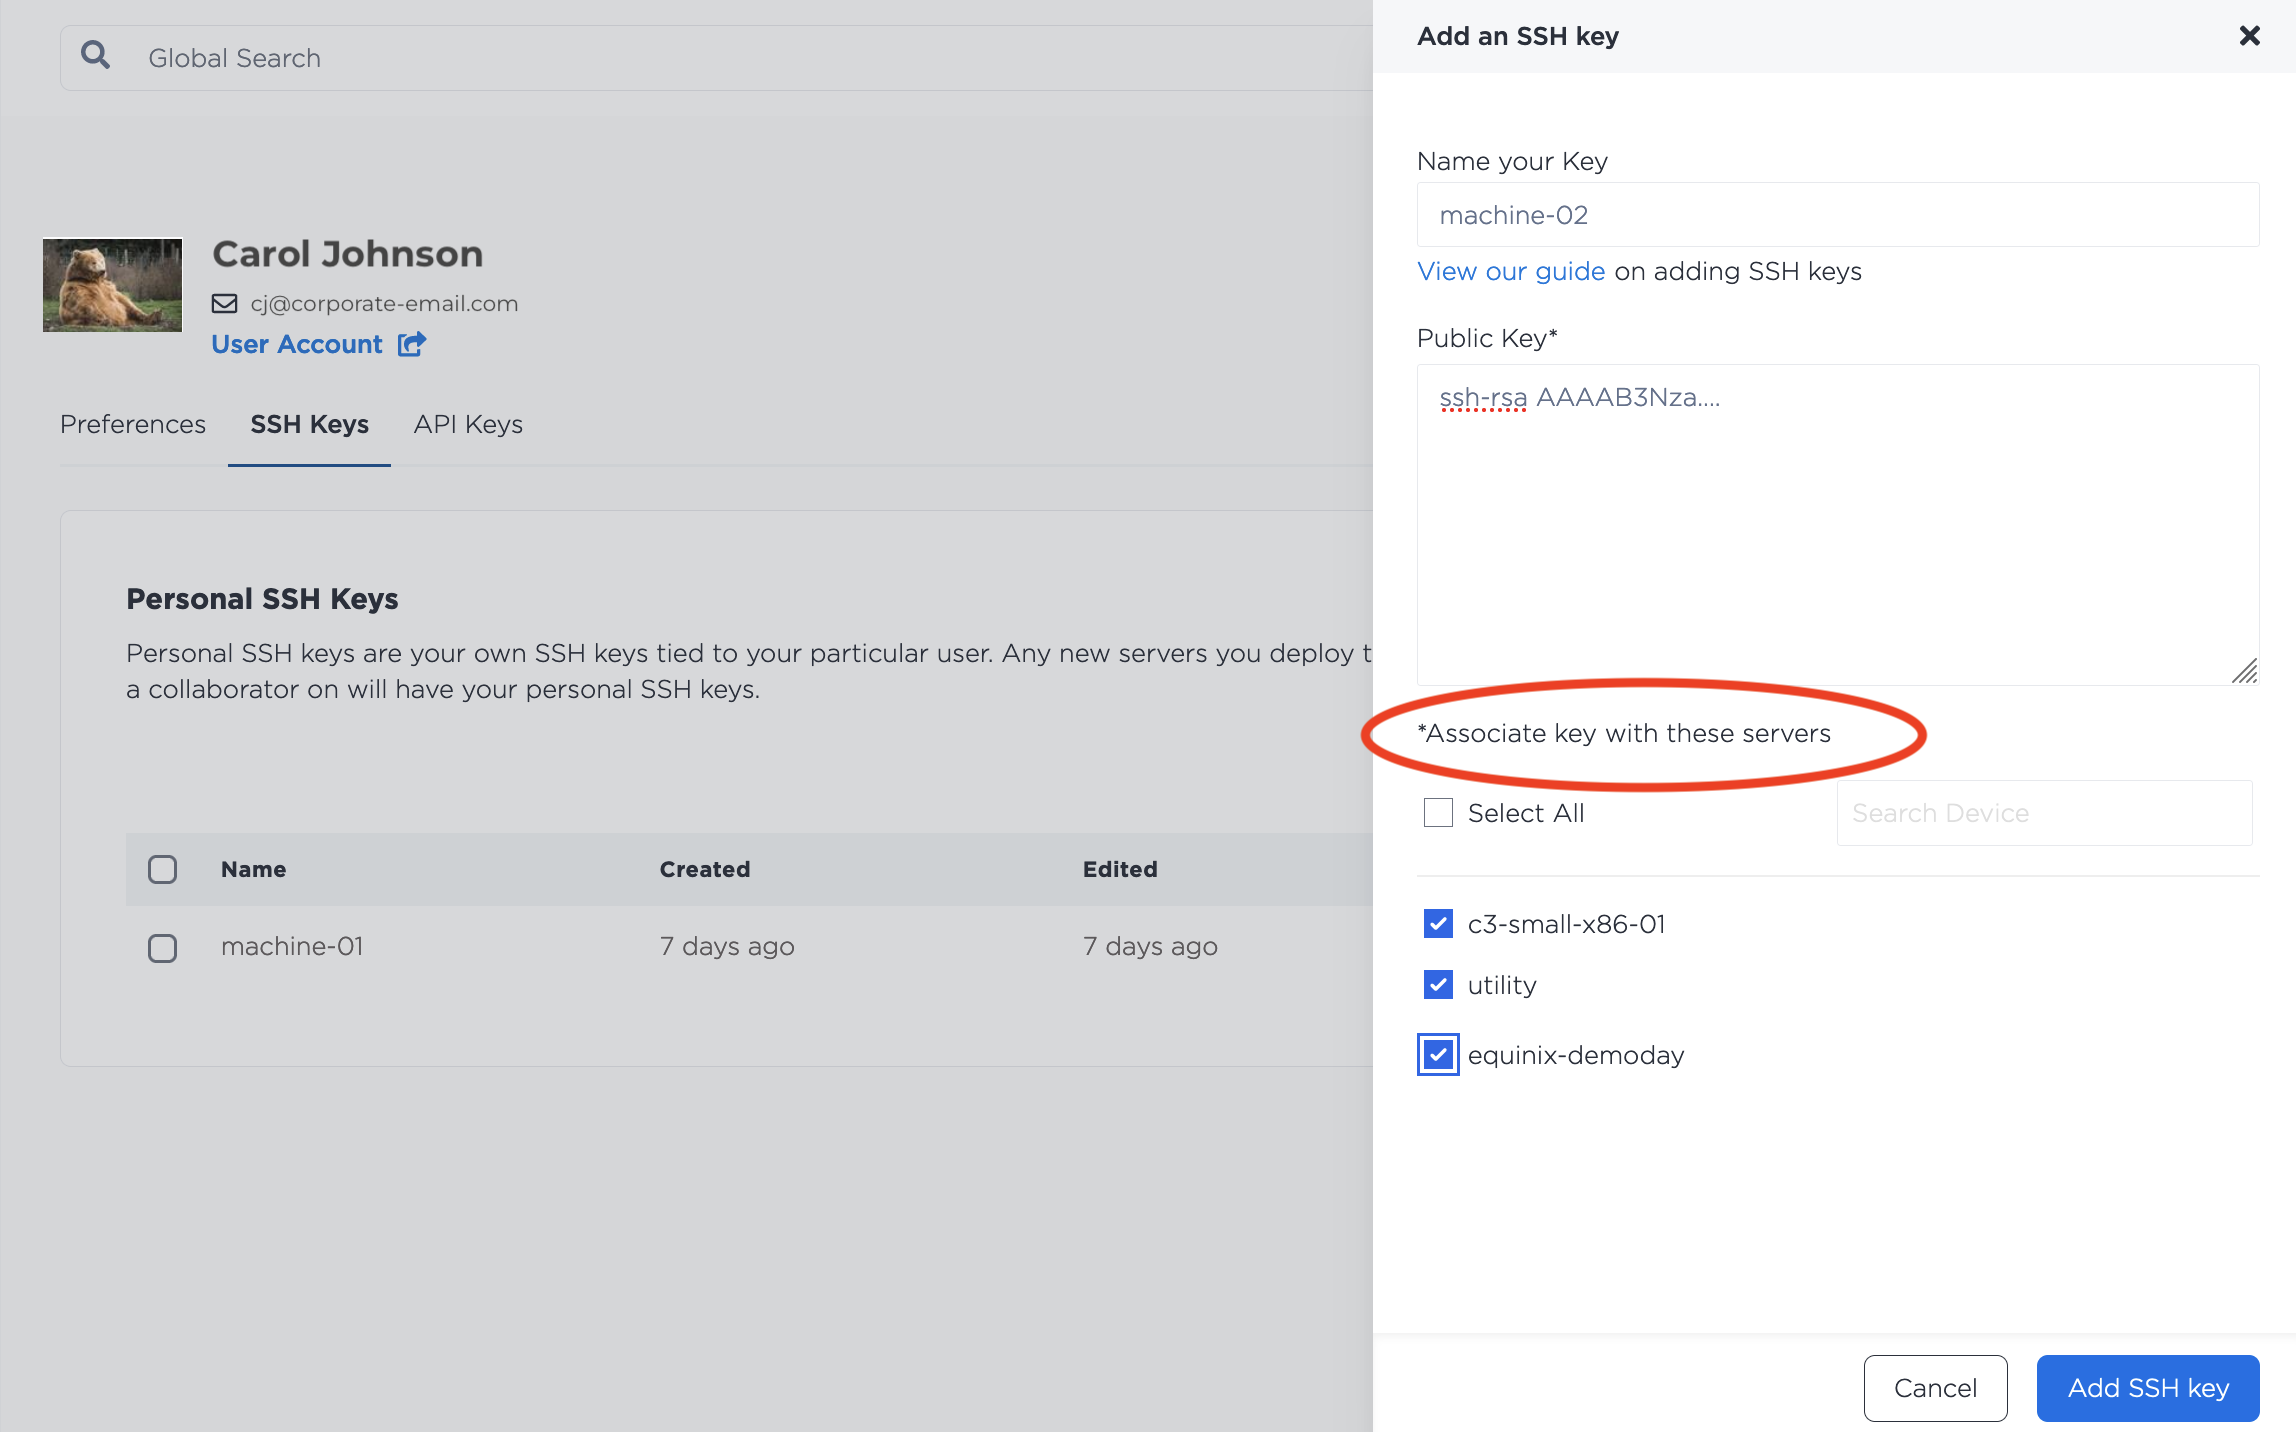
Enter a name for your key in the Name your Key field.
-
To associate the key with other servers, use the Search Device text box to find a device or select the device(s) from the list. This option is also only available through the Equinix Metal console.
Note: If you selected a device that already has a key associated with it, a pop-up message appears informing you that a key already exists with that server. Deselect the checkbox for the device.
-
Click the Select All checkbox to associate all servers in the list with the key.
-
Click Add SSH Key. Once the SSH key has been added, the key will appear in the list of SSH keys from the SSH keys tab.
-
Click Edit to rename your key or update the key.
You can add an SSH key to your user with the metal ssh-key create command. Enter the the full SSH public key string to the --key flag and a name or other user-friendly description with the --label flag.
metal ssh-key create --key <ssh_public_key> --label <string>
If you need to update an SSH key, you can do so with the metal ssh-key update command. You can update either the --label, the --key, or both.
metal ssh-key update -i <SSH-key_UUID> --key <ssh_public_key> --label <string>
You can add a public key to your account by sending a POST request to the /ssh-keys endpoint of the Equinix Metal API.
curl -X POST \
-H "Content-Type: application/json" \
-H "X-Auth-Token: <API_TOKEN>" \
"https://api.equinix.com/metal/v1/ssh-keys" \
-d '{
    "label": "<string>",
    "key": "<ssh_public_key>"
}'
If you need to update an SSH key, send a PUT request to the /ssh-keys/{id} endpoint. You can update either the "label", the "key", or both.
curl -X PUT \
-H "Content-Type: application/json" \
-H "X-Auth-Token: <API_TOKEN>" \
"https://api.equinix.com/metal/v1/ssh-keys/{id}" \
-d '{
    "label": "<string>",
    "key": "<ssh_public_key>"
}'
Provisioning Servers with SSH keys
By default, when you provision a server, all your user account SSH keys, team member’s SSH keys, and Project SSH keys are added to the server. The SSH keys provide authorized access to the server.
- Console
- API
To override the default when you provision a server, you must specify which SSH keys you want the server to have access to.
To specify SSH keys, do the following:
-
In the console, go to Bare Metals > Deploy > On Demand.
-
Click Optional Settings > SSH Keys.
-
Review the Project, Personal, and Collaborator keys and make your selection.
-
Click Select all keys to allow all SSH keys authorized access to the server.
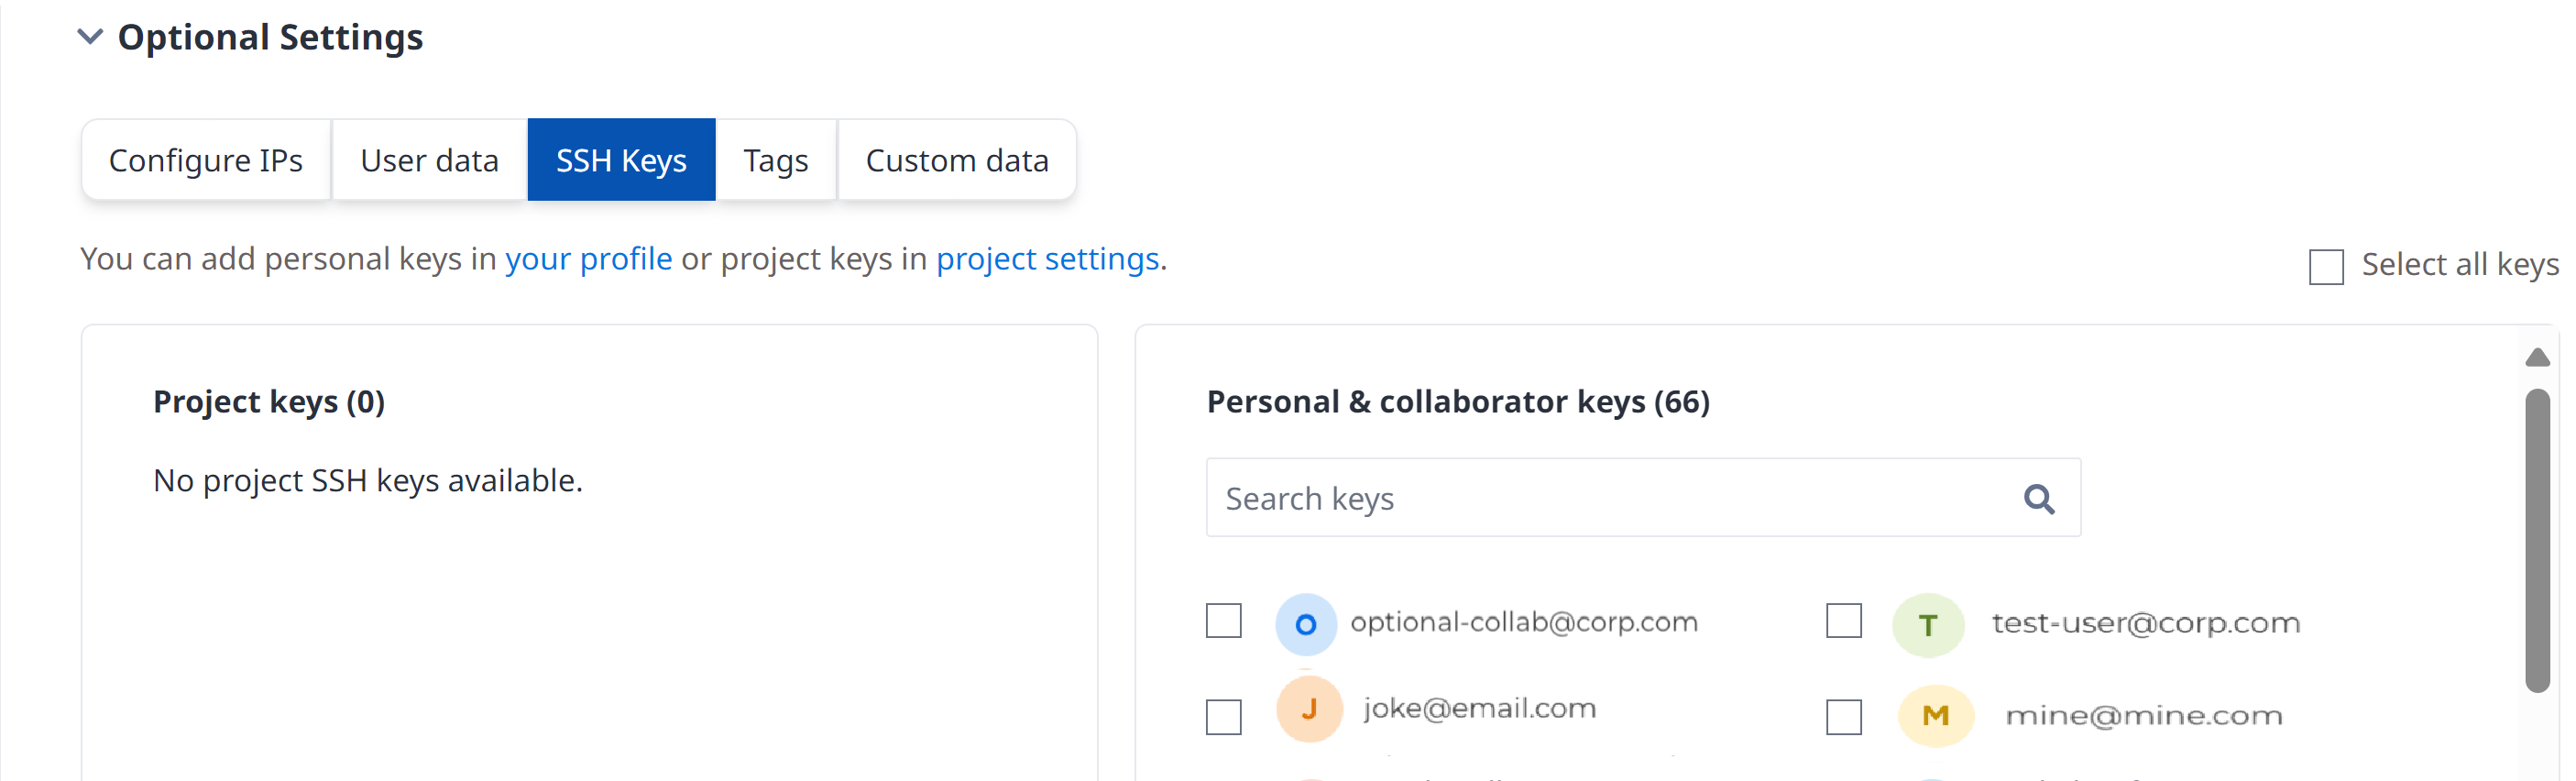
Note: If all keys (Project, Personal, and Collaborator) are unchecked, all keys will be added to the server by default. You cannot provision in the console without SSH keys. To provision without SSH keys, use the API.
To customize which SSH keys are included on a server when provisioning with the API, include the "user_ssh_keys" or "project_ssh_keys" parameters in your POST request to the projects/{id}/devices endpoint. These parameters will override the default behavior of adding all SSH keys to the server, and add only the SSH keys specified.
curl -X POST \
-H "Content-Type: application/json" \
-H "X-Auth-Token: <API_TOKEN>" \
"https://api.equinix.com/metal/v1/projects/{id}/devices" \
-d '{
    "metro": "<metro_code>",
    "plan": "<server_type>",
    "operating_system": "<os_code>",
    "user_ssh_keys": [
        <uuid>
    ],
    "project_ssh_keys": [
        <uuid>
    ]
}'
Notable Body Parameters:
"user_ssh_keys"- An array containing a list of UUIDs of your user account's SSH keys and team members SSH keys used to authorize access to this server. These keys will also appear in the device metadata. The users must be members of the project or organization."project_ssh_keys"- An array containing a list of UUIDs of the Project's SSH keys used to authorize access to this server. These keys will also appear in the device metadata.
You can also add public SSH keys that are not uploaded and managed by Equinix Metal to a server by using the "ssh_keys" body parameter in your POST request to the projects/{id}/devices endpoint. These keys are added to the server along with any keys defined by "project_ssh_keys" and "user_ssh_keys", or in addition to the default behavior of adding all available SSH keys.
curl -X POST \
-H "Content-Type: application/json" \
-H "X-Auth-Token: <API_TOKEN>" \
"https://api.equinix.com/metal/v1/projects/{id}/devices" \
-d '{
    "metro": "<metro_code>",
    "plan": "<server_type>",
    "operating_system": "<os_code>",
    "ssh_keys": [
        {
            "key": "<ssh_public_key>",
            "label": "<string>"
        }
    ]
}'
Notable Body Parameter:
"ssh_keys"- An array of SSH key objects that will be added to the server to authorize SSH access to it. These keys will also appear in the device metadata.
By default, if no SSH keys are specified ("user_ssh_keys", "project_ssh_keys", and "ssh_keys" are all empty lists or omitted), all available user SSH keys, Project SSH keys, and team member's SSH keys will be included.
Provisioning Without SSH Keys
To provision a server without SSH keys, you must explicitly include the "no_ssh_keys" parameter in your POST request to the projects/{id}/devices endpoint.
curl -X POST \
-H "Content-Type: application/json" \
-H "X-Auth-Token: <API_TOKEN>" \
"https://api.equinix.com/metal/v1/projects/{id}/devices" \
-d '{
"metro": "<metro_code>",
"plan": "<server_type>",
"operating_system": "<os_code>",
"no_ssh_keys": true
}'
Notable Body Parameter:
"no_ssh_keys"- Boolean that overrides default behavior of attaching user, team member, and Project SSH keys to a server and provisions it without any authorized SSH access. Set the"no_ssh_keys"totruein the body of the request.
SSH Keys Post-Provisioning
To view the available keys provisioned on a server, do the following:
- Console
- CLI
- API
-
In the console, go to Bare Metals Servers > Manage.
-
Select the server you want to view.
-
Click the SSH keys tab to view the SSH keys.
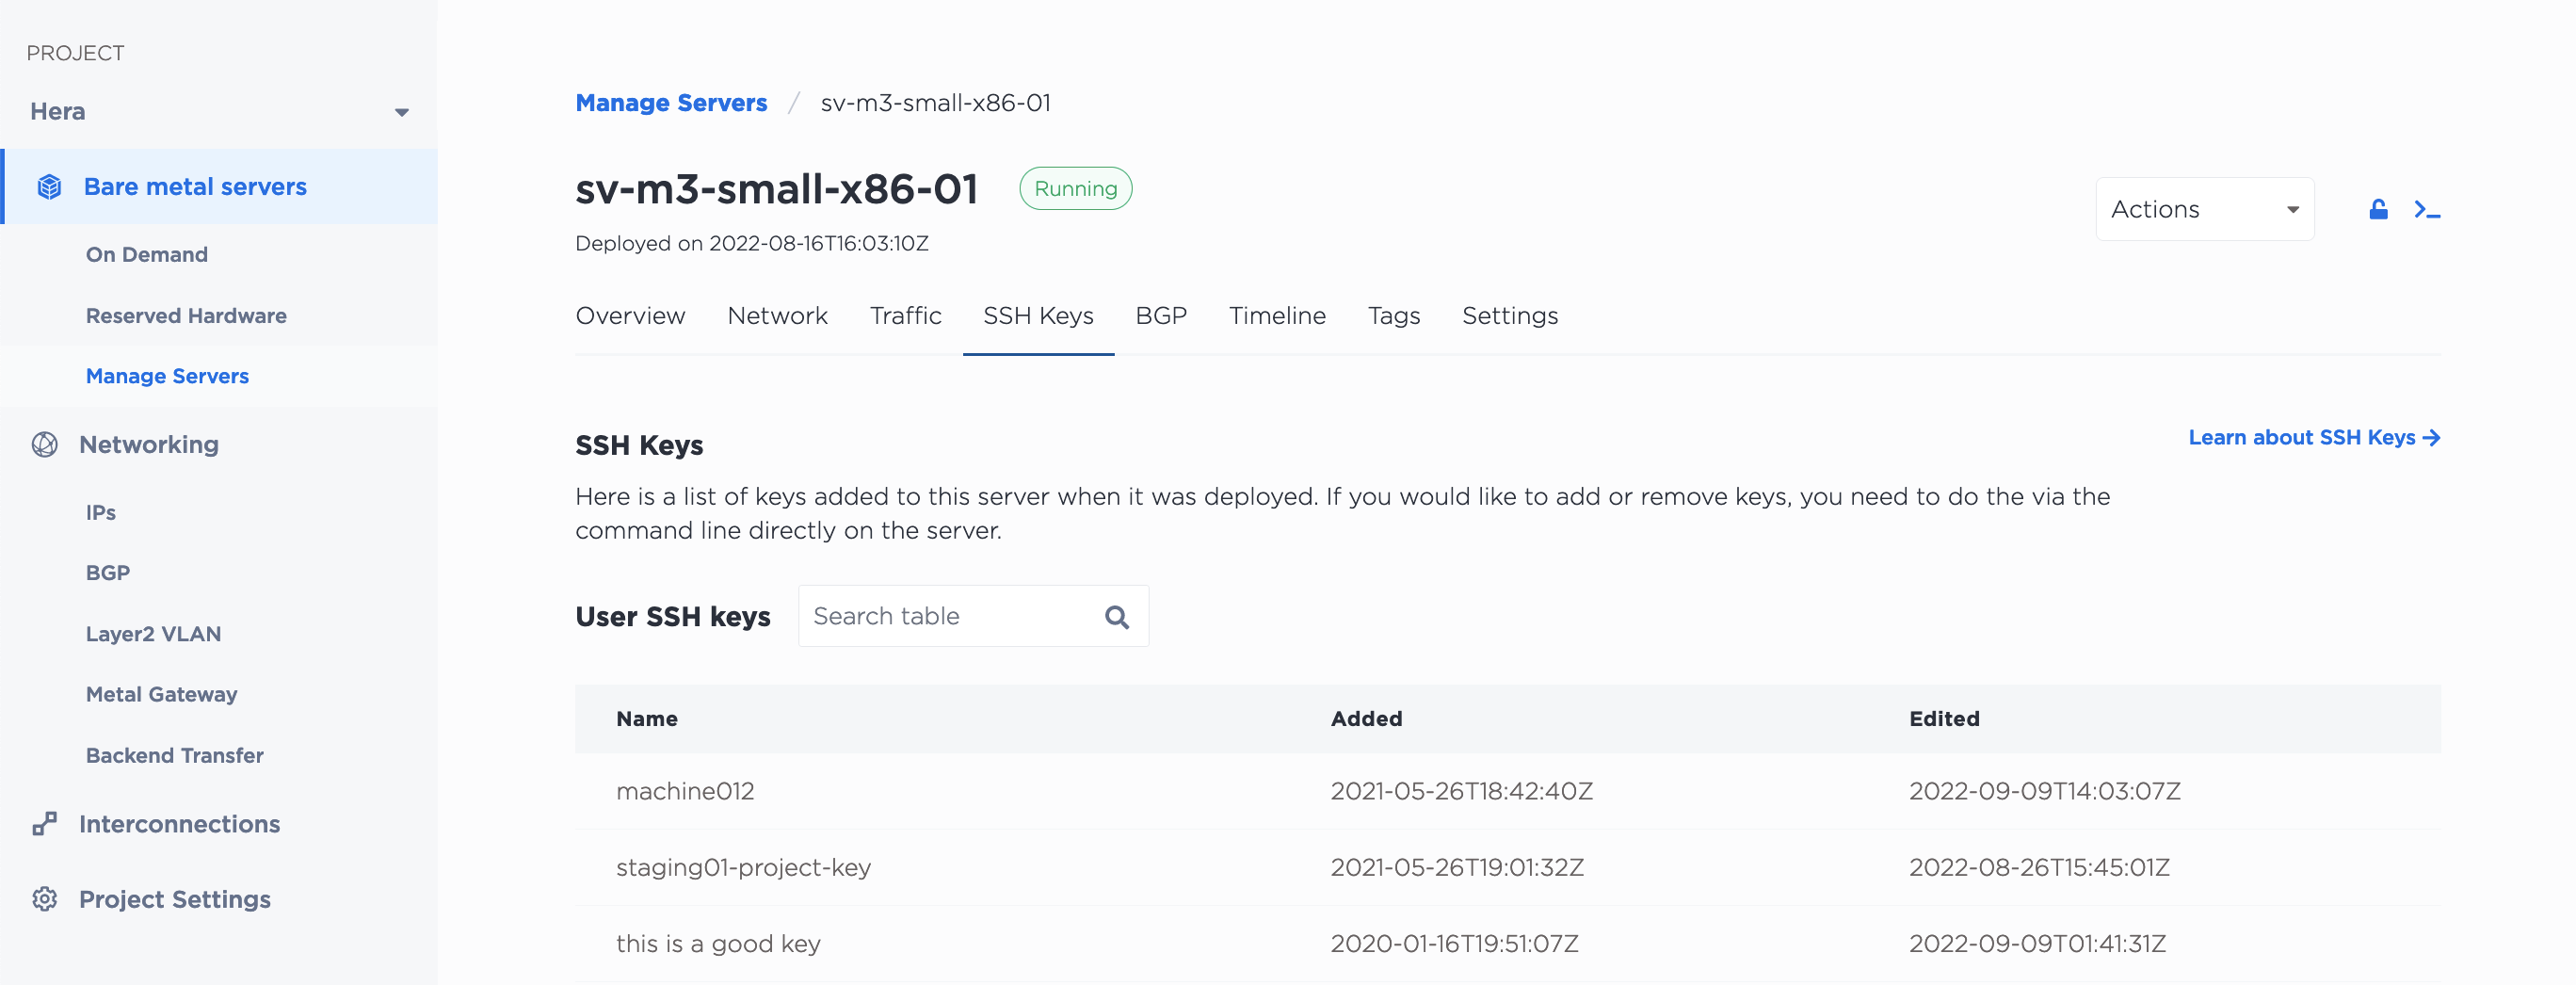
The SSH keys that have been added to a server at provision-time can be retrieved from the CLI with the metal device get command with the --output flag to specify the JSON output. The list can be found in the ssh-keys object in the response.
metal device get -i <device_id> -o json
You can also get a server's SSH keys from the API by sending a GET request to the /devices/{id}/ssh-keys endpoint.
curl -X GET -H 'X-Auth-Token: <API_TOKEN>' \
"https://api.equinix.com/metal/v1/devices/{id}/ssh-keys"
Add SSH keys to your account at any time by following the instructions in Adding Your SSH Key to Your Account, however keys added to your account or your Projects through the console or API are NOT automatically added to the servers. Equinix Metal does not keep any agent or process on provisioned servers to perform this action. To grant access, you have to add SSH keys to the server itself.
If you add a key that you want to use with provisioned servers, check the option to associate the new key with specific servers or all servers when you add it to the console. This does not authorize SSH access directly to the server, but it does allow the new SSH key to be used when logging into and using the SOS/OOB console. You can then use the SOS/OOB console to add your new SSH key to the authorized keys on the server.
This option is also only available through the Equinix Metal console.
Connecting with SSH
To SSH into your server, run the following command:
ssh root@<your_public_ipv4>
Note: SSH password authentication is disabled by default on Equinix Metal servers.
Removing SSH Keys
- Console
- CLI
- API
You can remove SSH keys from your account in the Equinix Metal console from your user profile, on the SSH Keys tab. Click Delete next to the key you want to remove. The SSH key will not be added to any future servers that you provision.
You can remove an SSH key from your user account with the metal ssh-key delete command.
metal ssh-key delete --id <SSH-key_UUID>
The SSH key will not be added to any future servers that you provision.
In the API, SSH keys can be removed from your account by sending a DELETE to the /ssh-keys/{id} endpoint.
curl -X DELETE \
-H 'X-Auth-Token: <API_TOKEN>' \
"https://api.equinix.com/metal/v1/ssh-keys/{id}"
The key will no longer be added to servers at provision time.
Note: Keys removed from your account or from your Projects through the console or API are NOT automatically deleted from servers. Equinix Metal does not keep any agent or process on provisioned servers to perform this action. To revoke access, you have to manually remove SSH keys from the server.