Public Cloud Provider Access
Microsoft Azure
To manage the Microsoft Azure cloud, an application must be registered in the Azure Active Directory.
A secret access key must be created, and a role must be assigned with the privileges required for the new application through identity and access management (IAM), based on the following instructions.
Create an Azure Active Directory Application
-
Access your account on the Microsoft Azure portal.
-
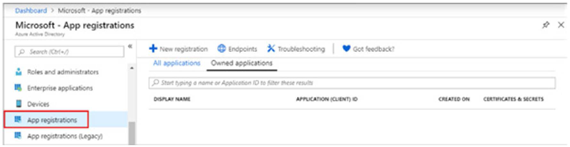
On the left-hand menu, select Azure Active Directory.
-
Select App registrations.
-
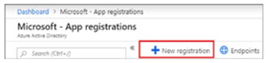
Select New registration.
-
Enter a name, choose the default support for organization accounts type, and click Register.
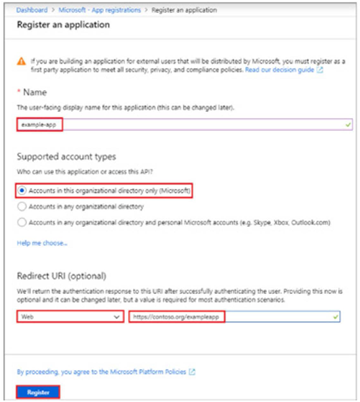
-
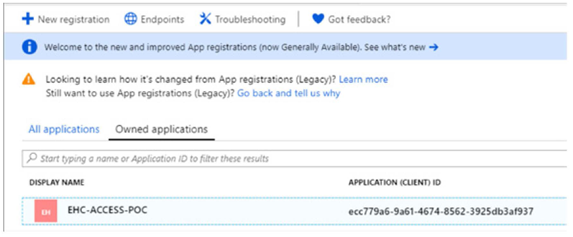
In the menu Azure Active Directory | App registrations, check that the newly created APP was registered.
Authenticate Certificates and Secrets
There are two forms of authentication credentials for apps with Azure AD; certificates or secret keys.
-
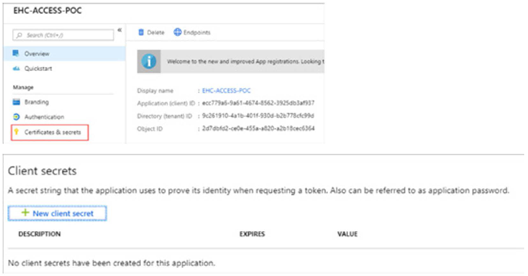
In the menu Azure Active Directory -- > App registrations, open the registered application (in this example: EHC-ACCESS-POC).
-
Select the menu Certificates & secrets, and add a new secret key to authenticate the app.
-
Click New client secret.
-
Enter a name and a validity for the new key, and click Add.
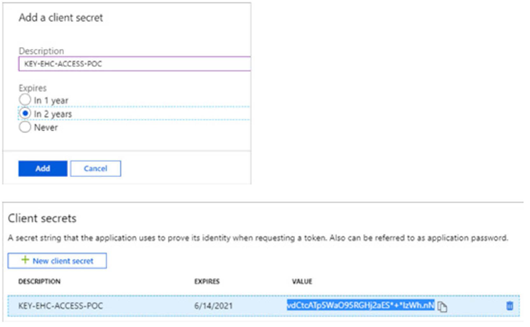
Important: After generating the new secret key, copy the value and save it somewhere secure. It cannot be retrieved later. If the key is lost, a new key must be generated, and application access information must be revalidated for authentication in the cloud provider.
Define Access Role
-
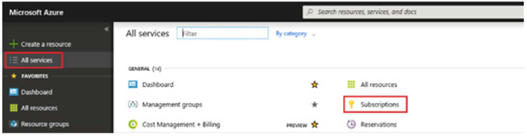
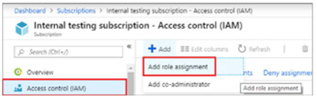
Access your subscription on the menu All Services | Subscriptions.
-
Select the capability IAM, and click Add role assignment.
-
Select the role to assign, and enter the app name in the search field (for example, EHC-ACCESS-POC).
Azure AD apps are not shown among available options by default. To locate your app, search by name, select the app and click Save.
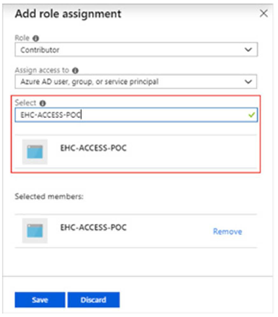
Important: To allow the app to perform actions such as rebooting, starting and stopping VM Instances, select the Contributor role.
Obtain Access Information
After clearing access in the Microsoft Azure portal, the following values are required to configure the new cloud provider in the Equinix MultiCloud Portal management console.
| Values | Menu | Description |
|---|---|---|
| TENANT ID & CLIENT ID | Azure Active Directory | App registrations |
| SUBSCRIPTION ID | All Services | Subscriptions |
| CLIENT KEY | Azure Active Directory | App registrations |
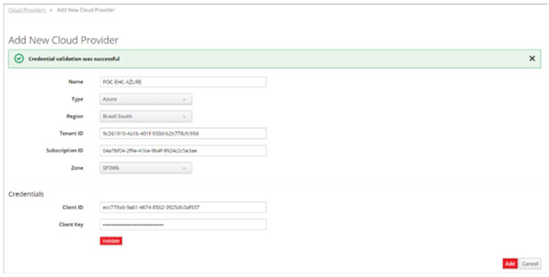
Register the New Provider
-
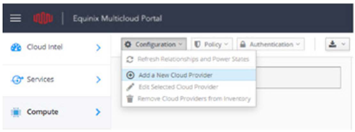
Access the Equinix MultiCloud Portal and select Add Public Cloud Providers.

-
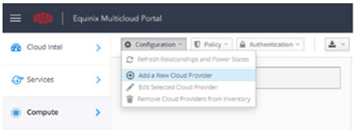
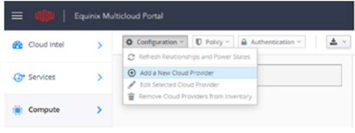
On the Cloud Providers dashboard, open the menu Configuration and select Add a New Cloud Provider.
-
On the Add New Cloud Provider screen, enter a name for the new provider, select the required information based on the desired region, and enter access and authentication data.

-
Click Validate to confirm registration, and click Add.
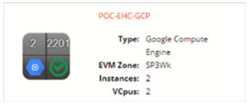
Important: The Zone option must be configured with the SP3WK zone by default, since it contains a set of servers to process requests made to public cloud providers.
Update the New Inventory
To complete the provider addition process, run the catalog Update Public Cloud Providers, synchronizing the inventory of new items.
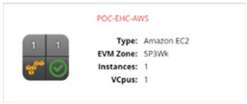
View the New Provider
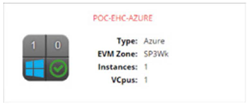
Click the menu Compute -- > Clouds -- > Providers.
AWS EC2
To enable AWS EC2 management, a user account of the Programmatic access type must be created to consume AWS capabilities through APIs, CLI, SDK or other development tools.
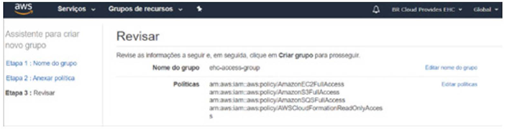
Through the IAM (Power User Identity and Access Management) capability, create the following objects and permissions.
-
Create a group with the access policies of AmazonEC2FullAccess (in this example, ehc-access-poc: AmazonS3FullAccess, AmazonSQSFullAccess, and AWSCloudFormationReadOnlyAccess).
-
Create a user and associate it to the ehc-access-poc group.
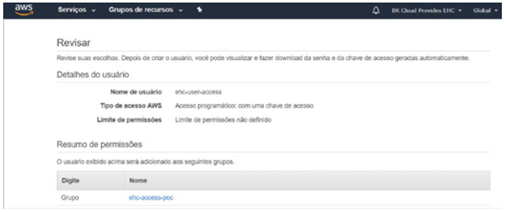
A new secret key will be generated to access the AWS. Copy and save it in a secure location.
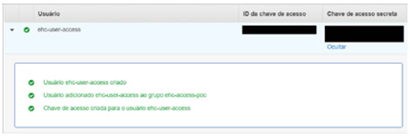
Important: After generating the new secret key, copy the value and save it somewhere secure. It cannot be retrieved later. If the key is lost, a new key must be generated and application access information must be revalidated for authentication in the cloud provider.
Register the New Provider
-
Access the Equinix MultiCloud Portal and select Add Public Cloud Providers.

-
In the Cloud Providers dashboard, open the menu Configuration, and select Add a New Cloud Provider.
-
On the Add New Cloud Provider screen, enter a name for the new provider, select the required information based on the desired region, and enter access and authentication data.
-
Click Validate to confirm registration, and click Add.
Important: The Zone option must be configured with the SP3WK zone by default, since it contains a set of servers to process requests made to public cloud providers.
Update the Inventory
To complete the provider addition process, run the catalog Update Public Cloud Provider, synchronizing the inventory of new items.
View the New Provider
Click the menu Compute -- > Clouds -- > Providers to view the newly created providers.
Google Cloud Engine
The requirements to connect and manage Google Cloud Engine from the Equinix Hybrid Cloud Portal are:
- A Google Cloud Platform account
- A Google Compute Engine project with the Google Compute Engine API enabled
- A service account JSON key for the project
Activate the Google Cloud Platform API
-
In the Google Cloud Platform, select your project on the top menu bar (in this example, EHC-GoogleCloud), and open the menu APIs & Services -- > Dashboard.
-
In the APIs & Services panel, select ENABLE APIs AND SERVICES.

-
On the next screen, search for Compute Engine API, access the capability and check if it is enabled.
If not, click Manage | Enable API.

Enable a Service Account for Authentication
-
On the Google Cloud Platform, go to the menu IAM & Admin | Service Accounts.
-
Click CREATE SERVICE ACCOUNT.

-
Service account details – Enter a name and description for the service account (for example, ehc-access-gcp).
-
Service account details – Select the role Compute Admin.
-
Grant users access to this service account.
-
(Optional) Create key – Create a new JSON key.
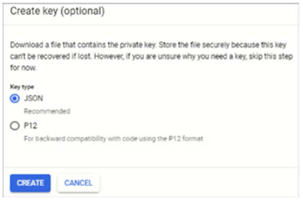
After the download, save the file in a secure location.
-
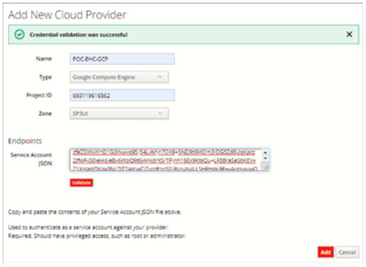
Register the New Provider
-
Access the Equinix MultiCloud Portal, and select the option Add Public Cloud Providers.

-
In the Cloud Providers dashboard, open the menu Configuration, and select Add a New Cloud Provider.
-
On the Add New Cloud Provider screen, enter a name for the new provider.
-
Select the required information based on the desired region, and enter access and authentication data.
-
Click Validate to confirm registration.
-
Click Add.
Important: The Zone option must be configured with the SP3WK zone by default, since it contains a set of servers to process requests made to public cloud providers.
Update the Inventory
To complete the provider addition process, run the catalog Update Public Cloud Provider, synchronizing the inventory of new items.
View the New Provider
Click the menu Compute -- > Clouds -- > Providers.