ユーザー権限の管理
Identity & Access Managementにオンボードされていない資産および製品については、カスタマーポータルのコロケーションダッシュボードの_Administration_セクションで利用可能な権限を使用します。
この機能は現在、AdministrationおよびIBX Access Services Request、Ordering、Install Base、Billing and Payments、IBX Services Notifications、Smart Hands Support Plan、Colocation Ordering、Virtual Asset Notification Permissions、Power Consumption Report Permissions、Sustainability Report Permissionsでご利用いただけます。
IBX、ケージ、キャビネットへの物理アクセスを許可するには、IBXアクセス許可を参照してください。
Identity & Access Managementに組み込まれた資産や製品へのアクセスを許可し、ユーザーの役割を管理するには、Managing Users' Access and Rolesを参照してください。
ユーザーへの権限の手動割り当て
-
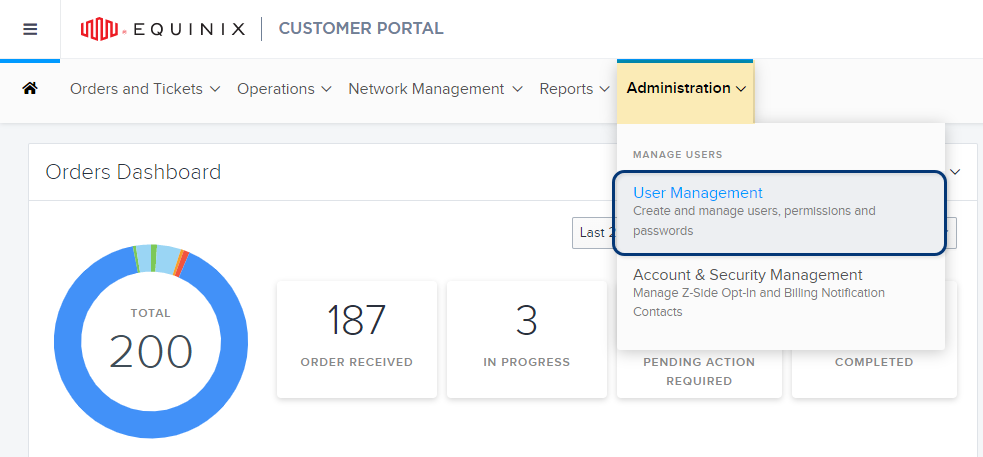
管理]メニューから[ユーザー管理]を選択します。
-
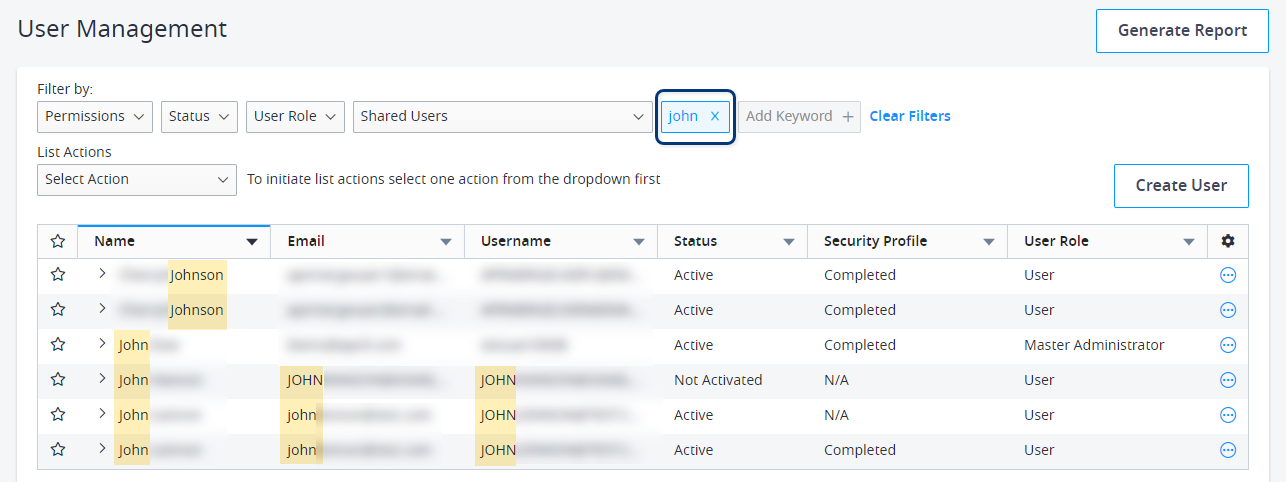
管理したいユーザーアカウントを探します。
-
特定のユーザーを検索するには、Add Keyword フィールドにファーストネーム、ラストネーム、ユーザー名、Eメールアドレスを入力してください:
-
また、上部のフィルターオプションを使用して、ユーザーのステータス、役割、組織、および現在の権限でユーザーリストを絞り込むことができます。
チップ新しいユーザーアカウントをすばやく見つけるには、_Status_フィルタを_Not Activated_に設定します。
-
-
オプションメニューをクリックし、Manage Permission を選択します。

Permissions_タブには、権限タイプのカタログが表示されます。

-
新しいユーザーアカウントの場合は、_Administration and IBX Access Services Request_をクリックします。リストには、このユーザーが利用できるすべてのIBXロケーションが表示されます。
-
(オプション)このユーザーにマスターまたはIBXの管理者権限を割り当てるには、[管理者権限]をクリックし、割り当てる管理者ロールを選択します:

管理者ロールについては、カスタマー・ポータルのロール を参照してください。
-
IBX とユーザーのケージ権限を選択します。
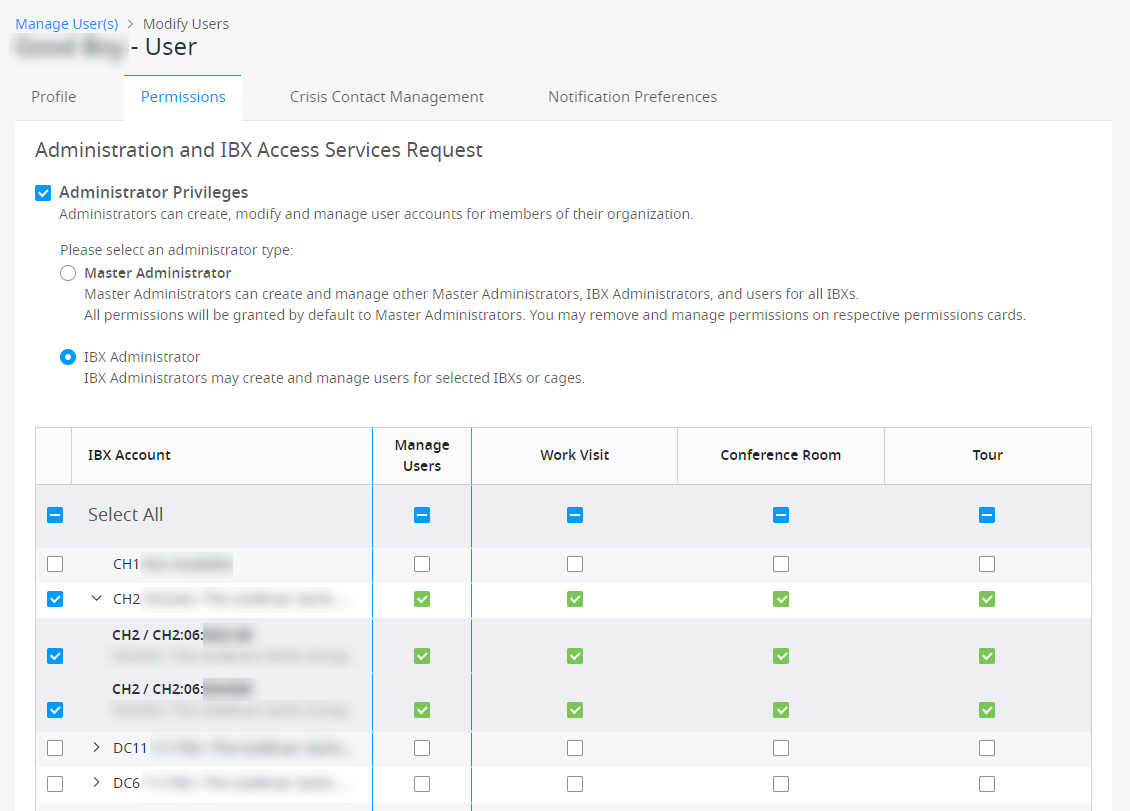
詳細については、IBXアクセス許可を参照してください。
-
-
その他の権限タイプ(注文、請求など)を割り当てるには、[戻る]ボタンを使用して[Permissions]タブに戻ります。必要に応じて追加の権限を割り当てます。
大規模な組織では、権限の変更がシステムに反映されるまでに数分かかることがあります。ユーザーが新しく定義されたパーミッションの使用に問題がある場合、ログアウトして数分待ってから再度ログインするように依頼する。
パーミッションの種類
| Category | Description |
|---|---|
| Administration and IBX Access Services Request | Allows the user to schedule IBX access requests (Work Visits, Conference Rooms, and Data Center Tours). Allows administrators to manage other Customer Portal user accounts. |
| Ordering | Allows the user to place orders in the portal (for Shipments, Cross Connect and Intra-Facility Cables, Network Ports, Smart Hands, Accessories, Power, Trouble Tickets), to view orders by other users, and to view purchase orders for their organization. |
| IBX Data Center Access | Allows the user to access IBX data centers and cages/cabinets, to bring guests, and to remove equipment. |
| Install Base | Allows the user to view details about their organization's products/assets and purchase orders. Controls access to the Install Base screen, Install Base report, Colocation Assets screen, and Purchase Order Management screen. |
| Billing and Payments | Allows the user to view financial records, payment history, and purchase orders for their organization. |
| IBX Services Notifications | Allows the user to subscribe to notifications about IBX incidents, network incidents, unannounced shipments, managed services, and IBX policy violations. Also allows the user to view incidents on the Service Insight Dashboard. Important: At least two administrators in each organization must be configured to receive IBX policy violations (i.e., the Can view and subscribe to IBX Policy Violation Notifications permission). |
| Internet Exchange Portal | Allows the user to access the Internet Exchange (IX) portal. |
| Equinix Internet Access and Equinix Connect | Allows the user to view their Equinix Internet Access and Equinix Connect traffic and network behavior. |
| Equinix Fabric and Network Edge | Allows the user to access the Fabric and Network Edge products. |
| Smart View | Allows the user to order Equinix Smart View for IBXs, and view Smart View data. |
| Remote Network Products | Allows the user to order remote network products for IBXs in a specific region. |
| Smart Hands Support Plan | Allows the user to order a Smart Hands support plan and subscribe to notifications for their support plan. |
| Colocation Ordering | Allows the user to order Secure Cabinet and Private Cage products online. |
| Virtual Asset Notification Permission | Allows the user to view and subscribe to Fabric and Network Edge virtual asset notifications. |
| Managed Services Portal | Allows the user to access the Managed Services portal. |
| Power Consumption Report | Allows the user to run the Power Consumption Report. |
| Support Case Manager | Allows the user to view, manage, and reply to all Support cases submitted by any user within their organization. |
権限を割り当てるテンプレートの作成
テンプレートは、組織全体で頻繁に使用されるパーミッションの同じセットを割り当てるための簡単で効率的な方法を提供します。テンプレートを作成し、同じような役割を果たすために同じ権限を必要とするユーザーに対して適用することができます。
-
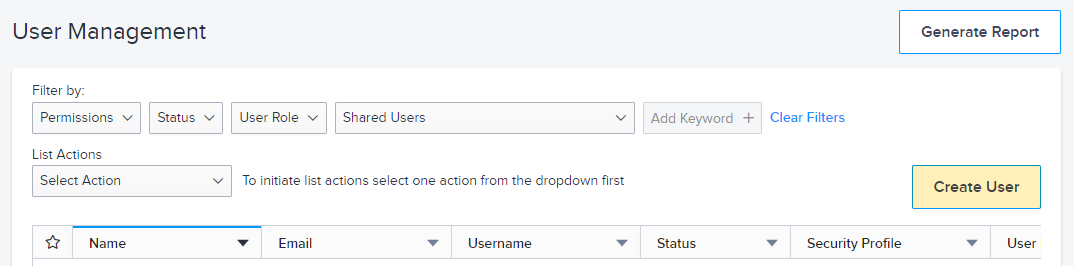
管理]メニューから[ユーザー管理]を選択します。
-
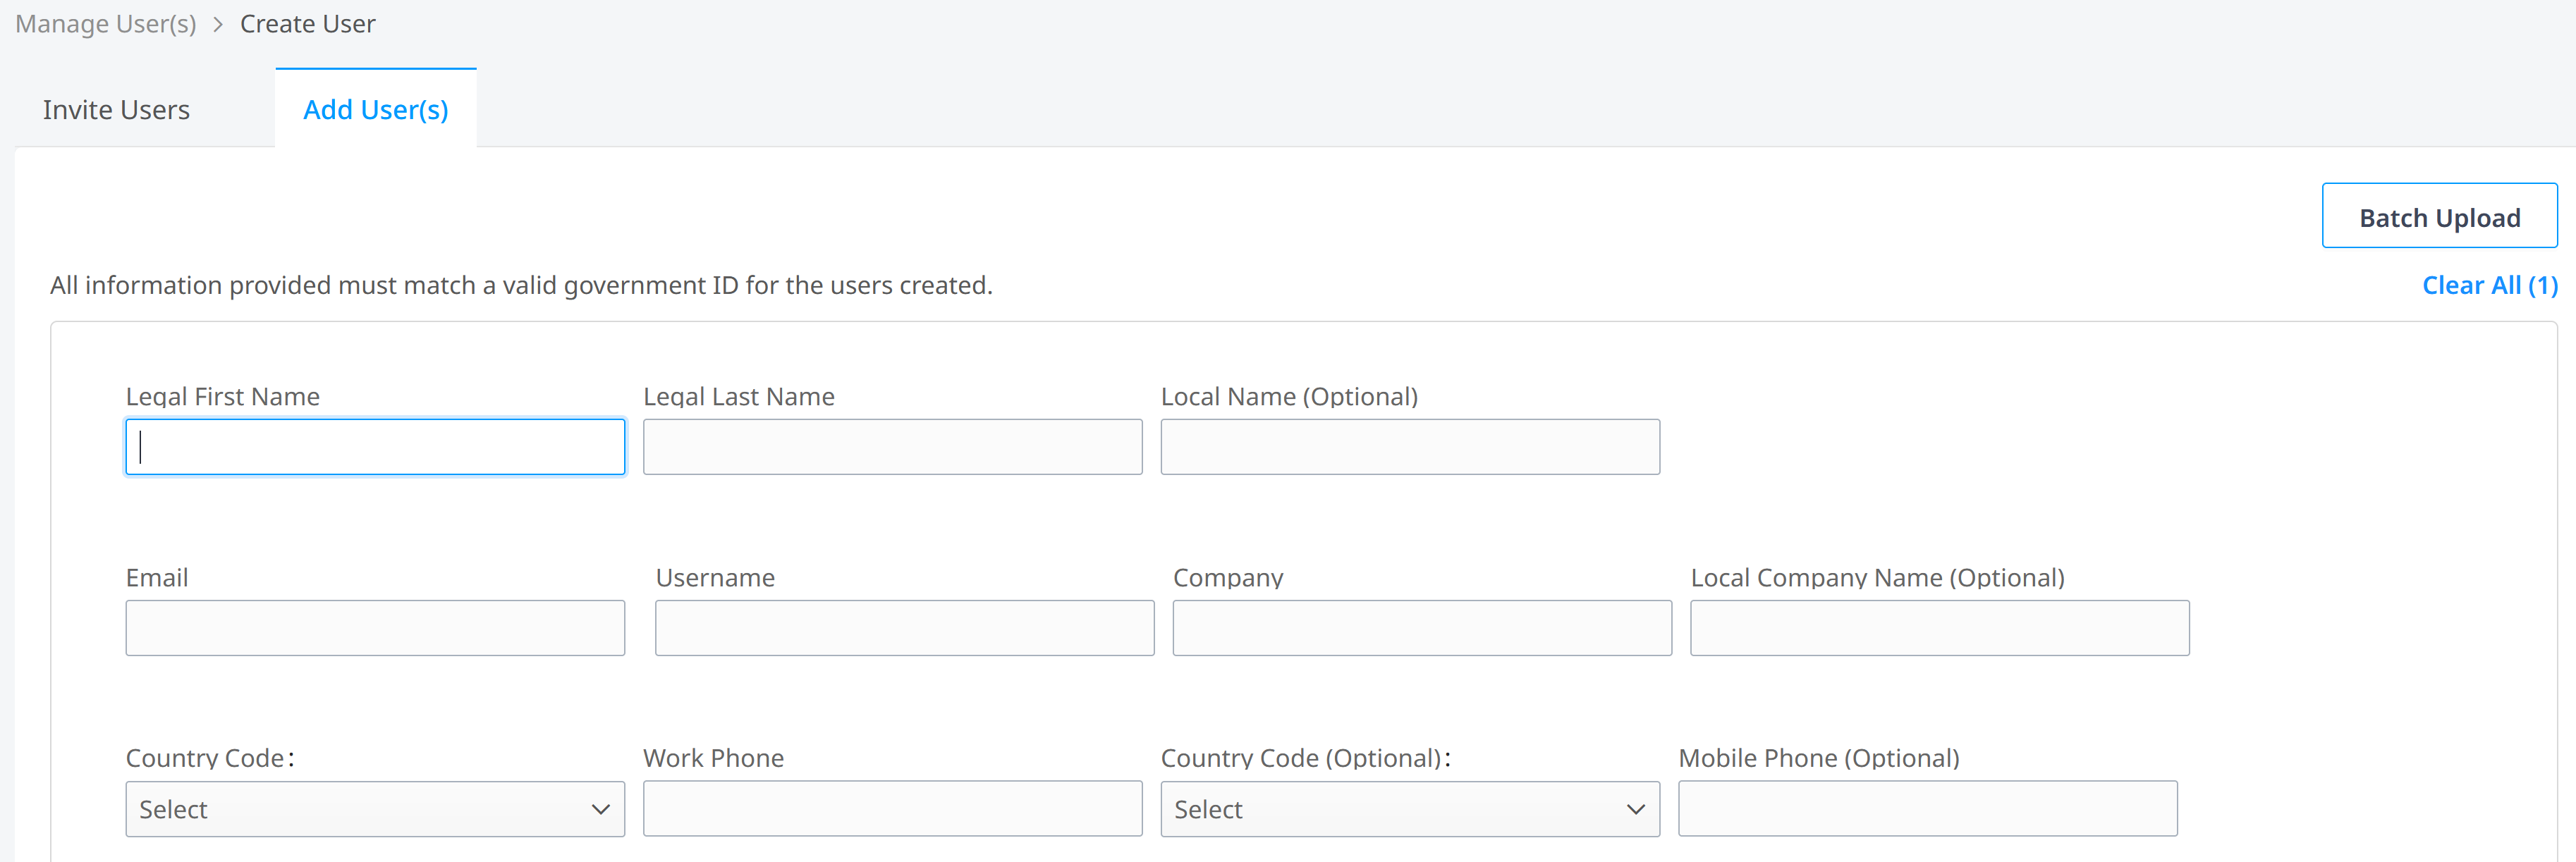
Create User をクリックします。
-
Add User(s)_タブを選択します。
-
このテンプレートに関する情報を以下のフィールドに入力します。
メモ実際のユーザではなく、一般的なユーザプロファイルの情報を入力しています。このプロファイルはポータルでは有効化されません。他のユーザに権限を適用するためのテンプレートとしてのみ使用されます。
- Given or Legal First Name - このタイプのユーザーの定義。例えばNOCuser
- Surname or Legal Last Name(姓または本籍) - テンプレートを入力(これで後でテンプレートを検索できます)。
- 電子メール - あなたの電子メールアドレス。
- ユーザー名(オプション) - ダッシュボードでこのテンプレートをすばやく識別するための一意の名前です。例:nocusertemplate
- 会社名 - あなたの会社名です。
- 国コード - あなたの国コード。
- 勤務先電話番号 - 勤務先の電話番号。
-
送信 をクリックします。ウィンドウの上部に確認が表示されます。
-
確認ダイアログの[権限の割り当て]リンクをクリックします。ユーザー管理ダッシュボードが表示されます。
-
ダッシュボードでオプションメニューをクリックし、Manage Permission を選択します。
権限]タブには、権限タイプのカタログが表示されます。
-
このテンプレートの権限を選択します。詳細は、権限の手動割り当てを参照してください。
インフォメーション後で、このテンプレートを使って他のユーザーアカウントにパーミッションを割り当てるとき、これらのユーザーに適用されるパーミッションはこれです。
-
クリック送信.
テンプレートから権限を割り当てる
テンプレートから権限を割り当てると、ユーザーに割り当てられていた以前の権限は上書きされます。
-
管理]メニューから[ユーザー管理]を選択します。
-
Filter by_セクションの_Add Keyword_フィールドに
templateと入力します。
お使いのテンプレートが表示されます。
-
ダッシュボードで、オプションメニューをクリックし、_Copy Permissions From_を選択します。利用可能なユーザーが一覧表示されます。
-
ダッシュボード左のチェックボックスをクリックし、テンプレートの権限を適用するユーザーを選択します。
-
ユーザーリストの一番上にある Apply をクリックします:

テンプレートの権限が、選択したユーザーに適用されます。それ以前の権限は、選択したユーザーアカウントから削除されます。