Colt On Demand
The Equinix Fabric and Colt On Demand integration enables customers to quickly and securely connect their physical or virtual infrastructure hosted in Equinix to the Colt On Demand NaaS platform. Using Equinix Fabric and Colt’s automated network services, connections can be provisioned on demand, providing flexible, scalable connectivity to enterprise locations, data centres, cloud providers, and partners from a single access point.
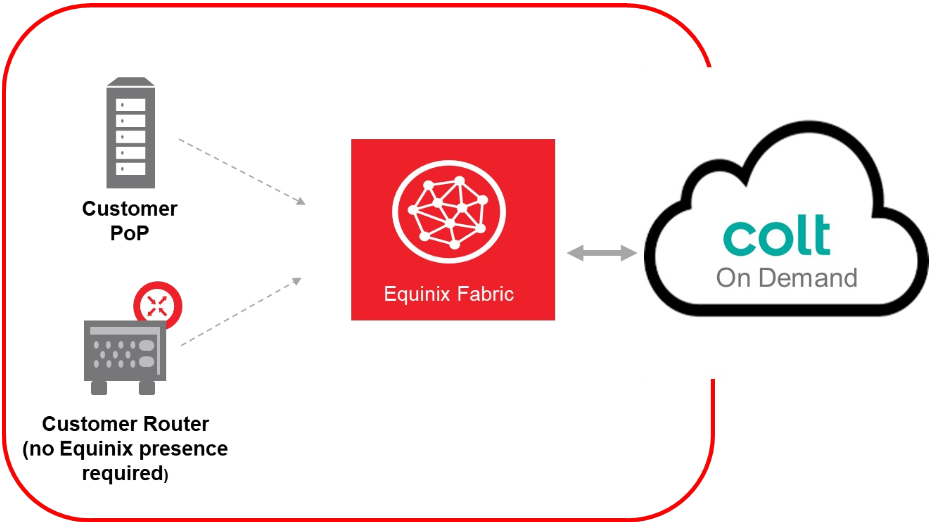
Equinix Fabric supports connecting Colt On Demand through the Colt On Demand Interconnect service profile, which offers local connections in:
| EMEA | APAC |
|---|---|
| Amsterdam Frankfurt London Madrid Milan Paris Stockholm | Hong Kong Osaka Singapore Tokyo |
You can also connect remotely from any Equinix Fabric location.
To establish connectivity between Equinix Fabric and the Colt On Demand NaaS platform, start in the Equinix Customer Portal to:
- Create the virtual connection.
- Generate the connection ID.
Then, sign in to the Colt On Demand platform and:
- Create the Equinix Cloud Port using the connection ID.
- Add the connection to the Cloud Port.
Prerequisites
-
A Colt On Demand account.
-
An Equinix Customer Portal account.
-
A Fabric port, an A-side service token, a Fabric Cloud Router, or a Network Edge virtual device
-
In order to create connections in Fabric, you must have the
Fabric Connections Managerrole.
Creating the Fabric Connection
-
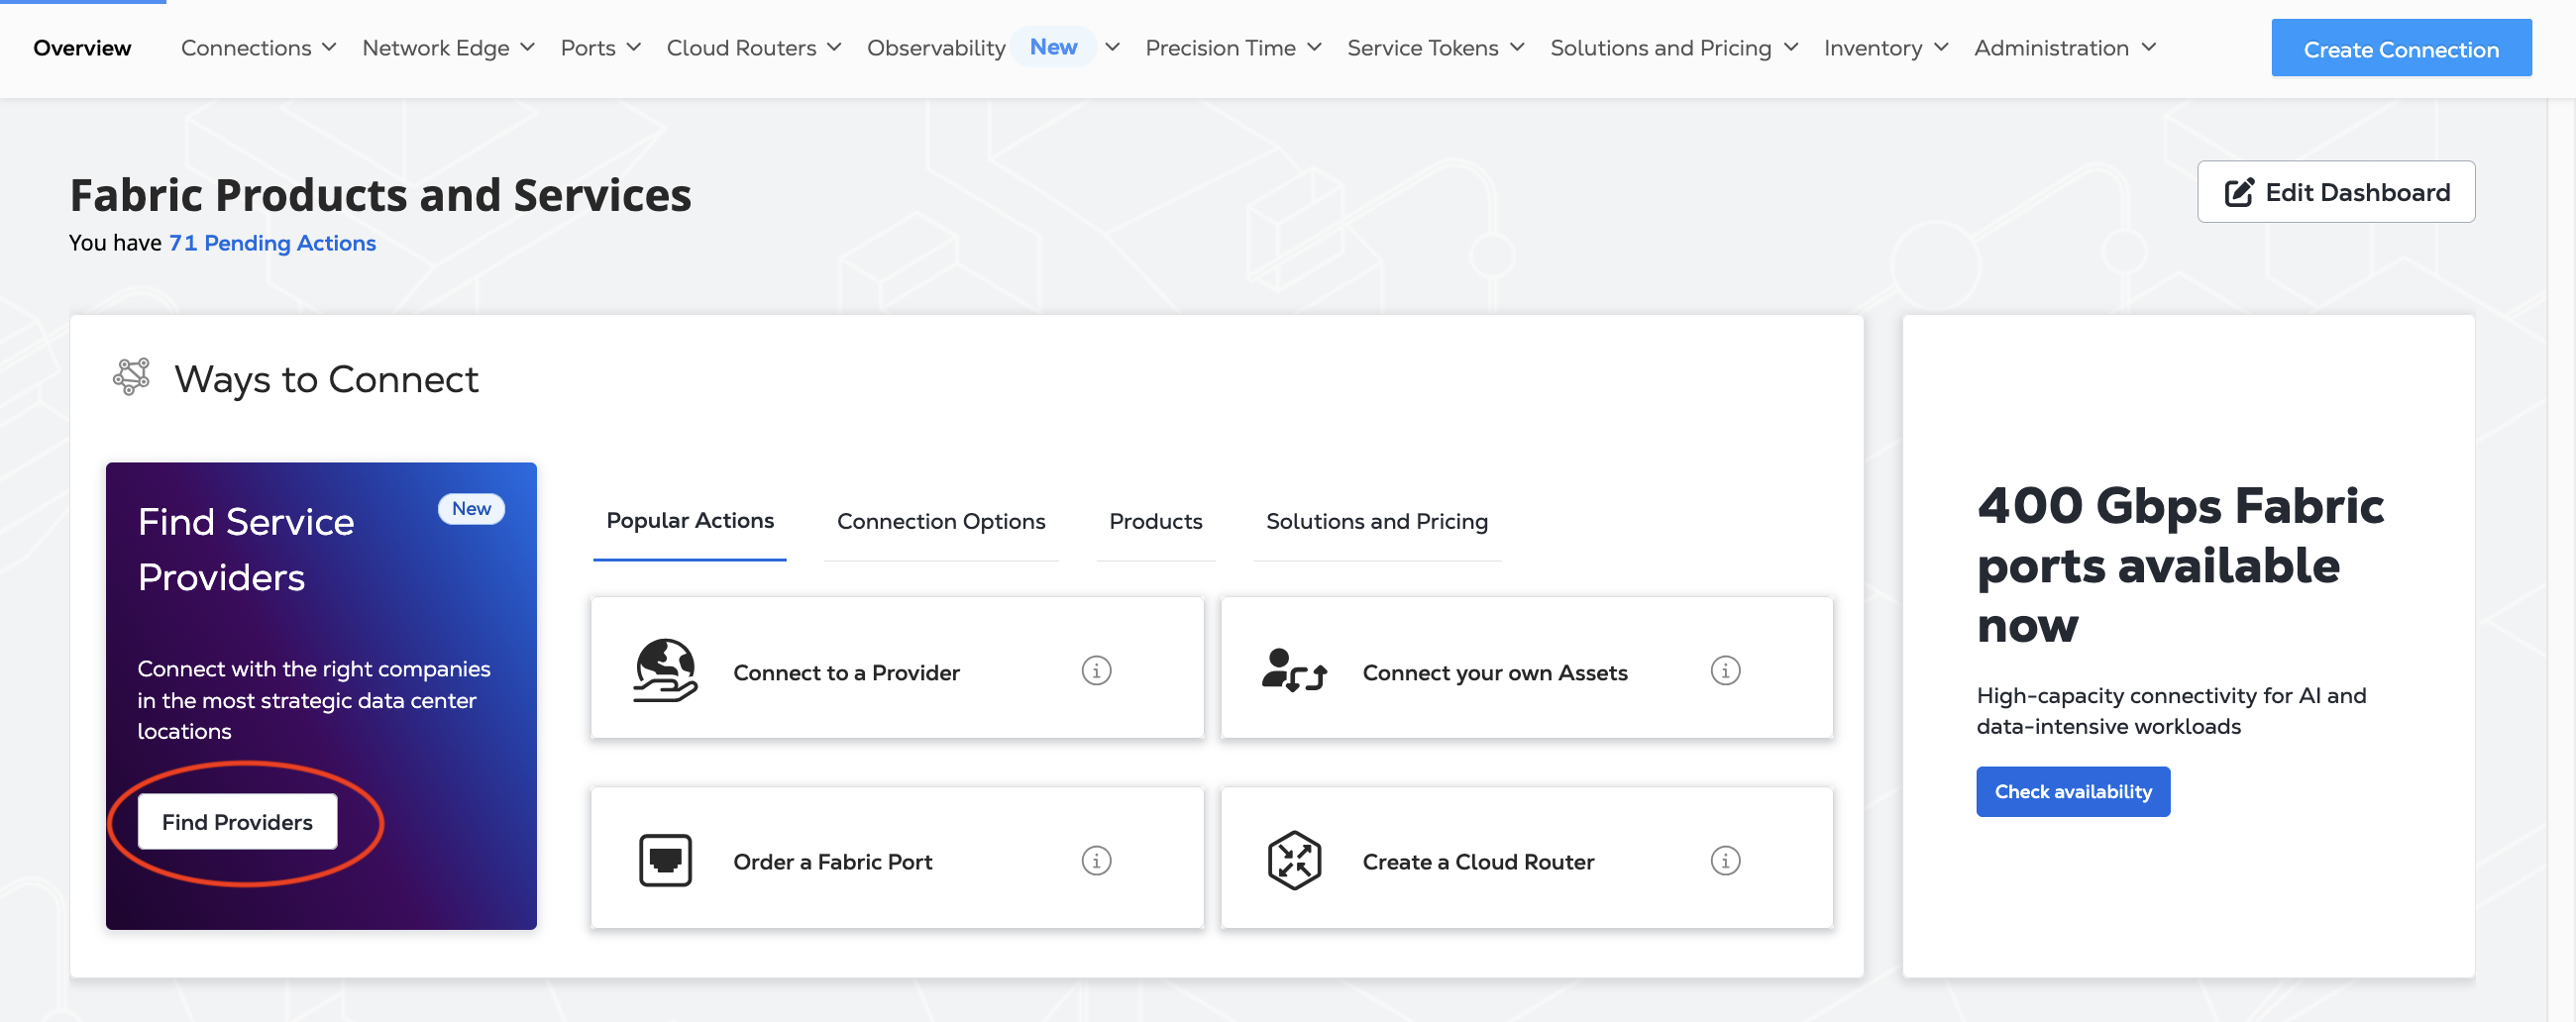
Sign in to the Equinix Customer Portal and navigate to the Fabric Dashboard.
-
In the Fabric Marketplace panel, click Find Providers.
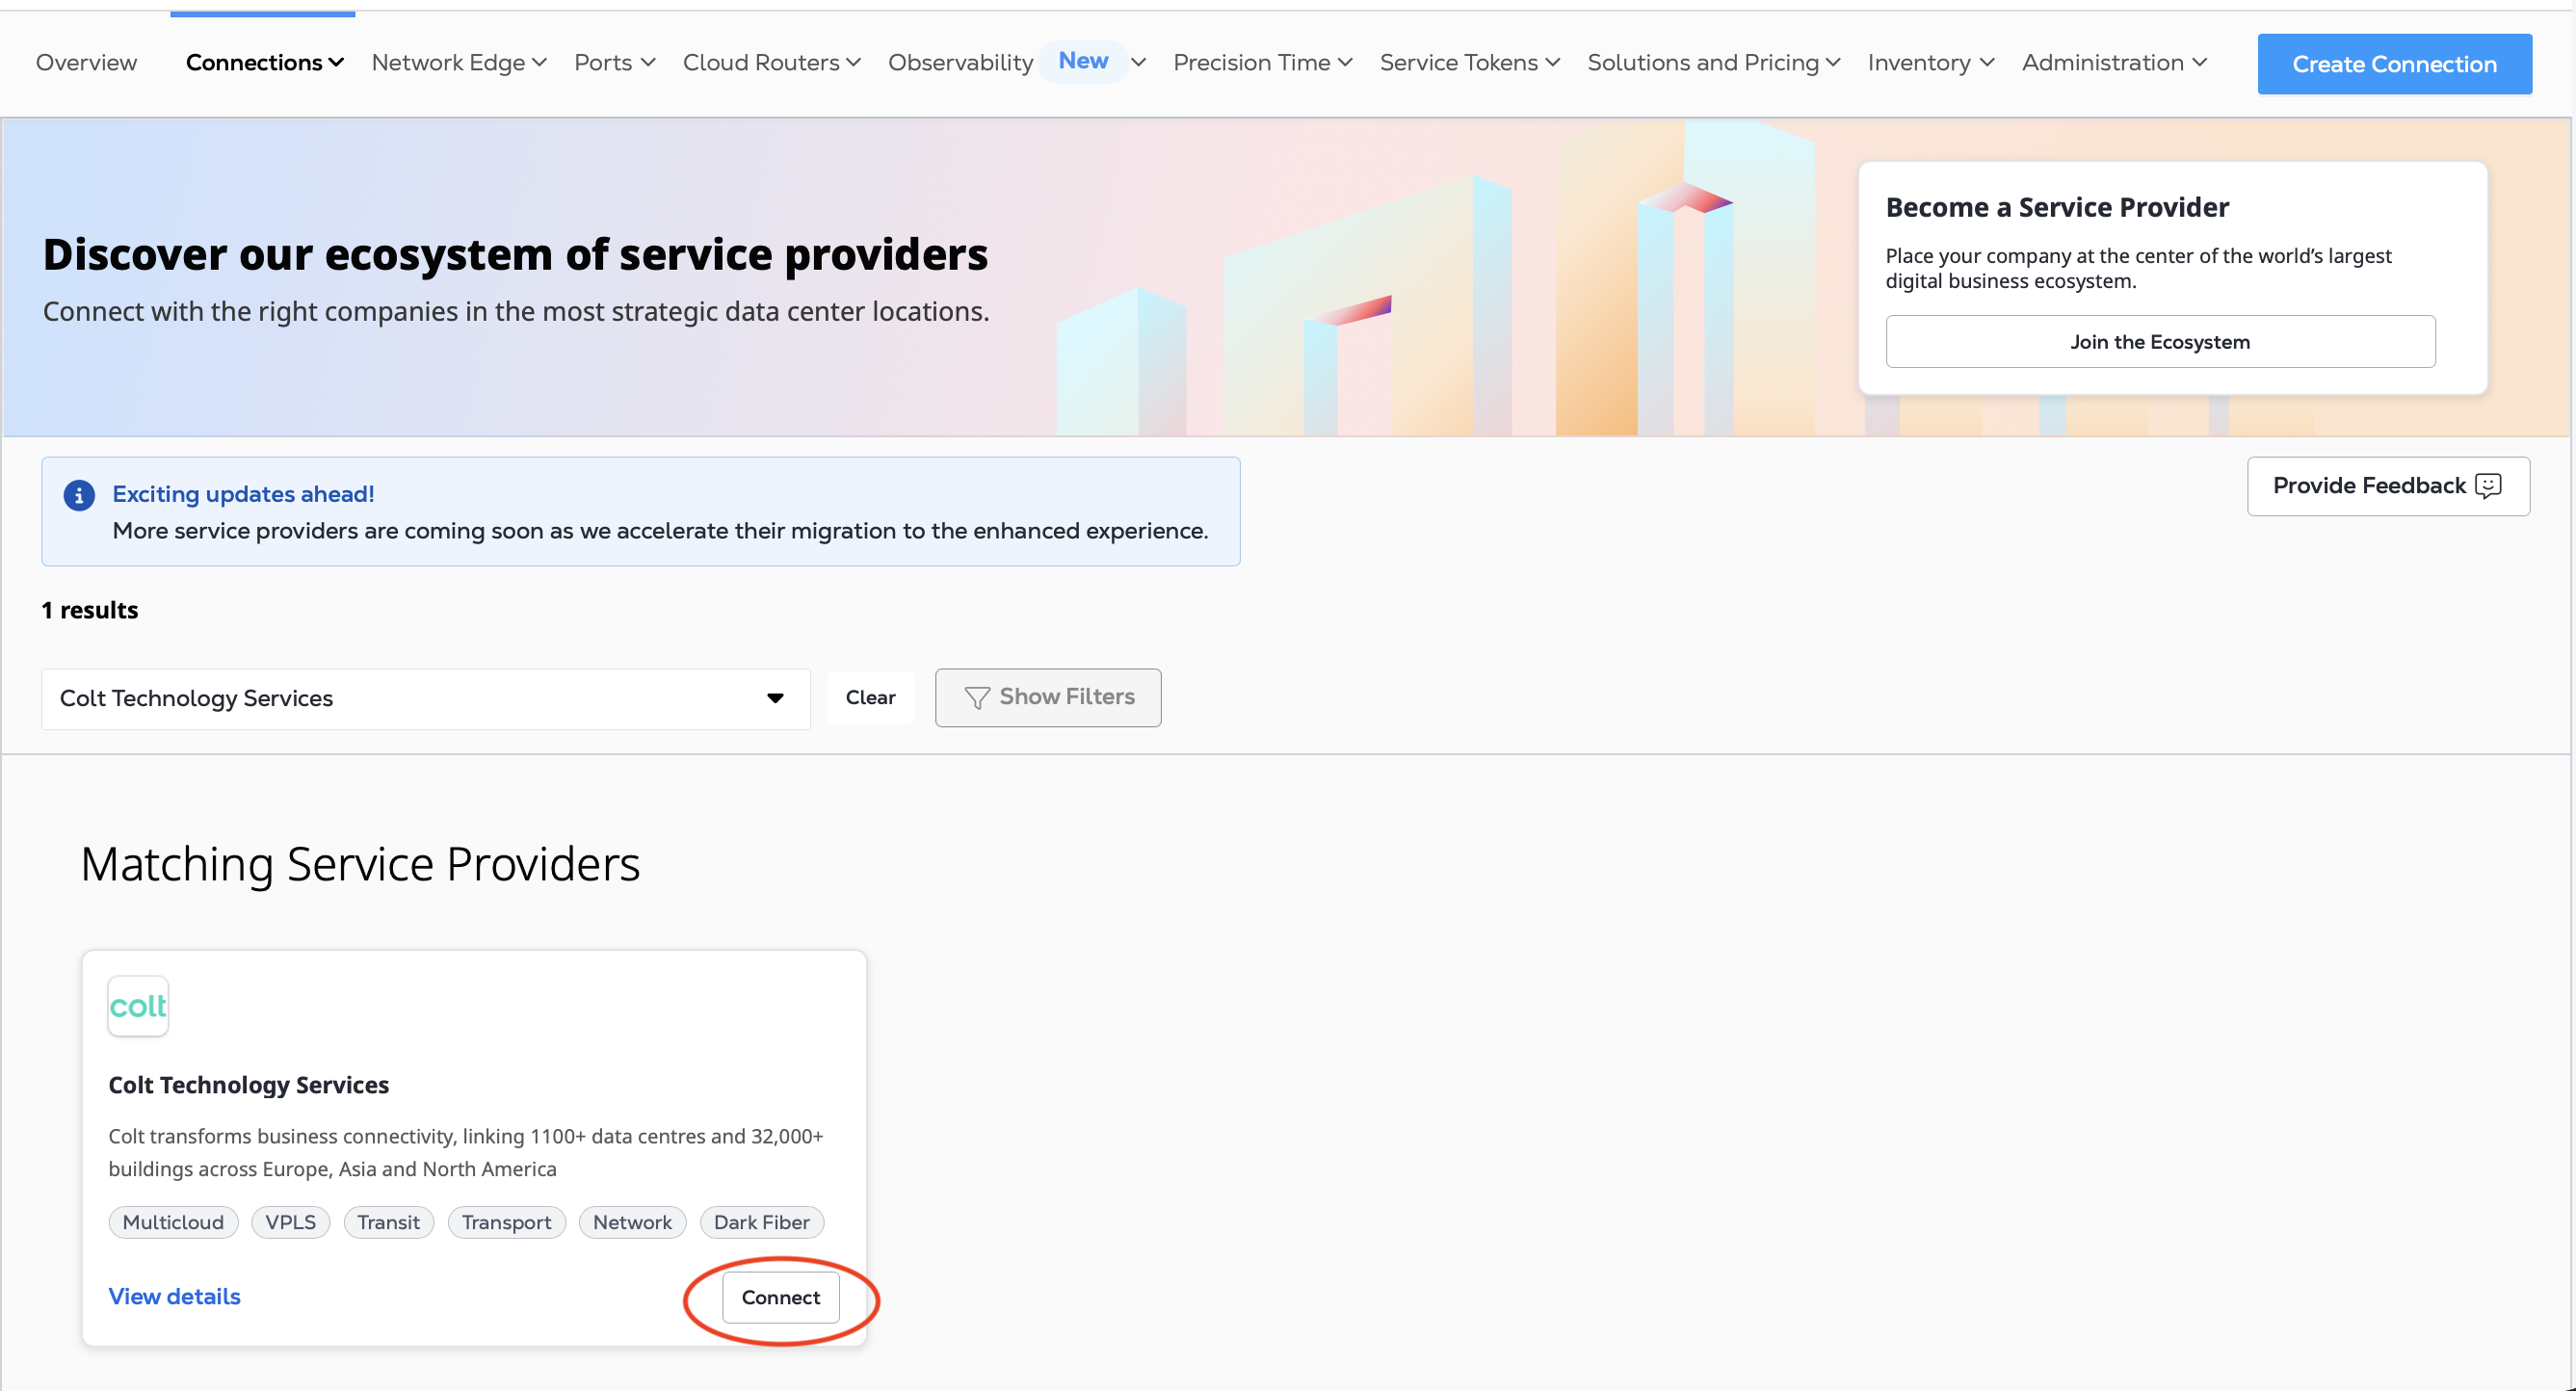
-
Search for "Colt". On the Colt Technology Services card, click Connect.
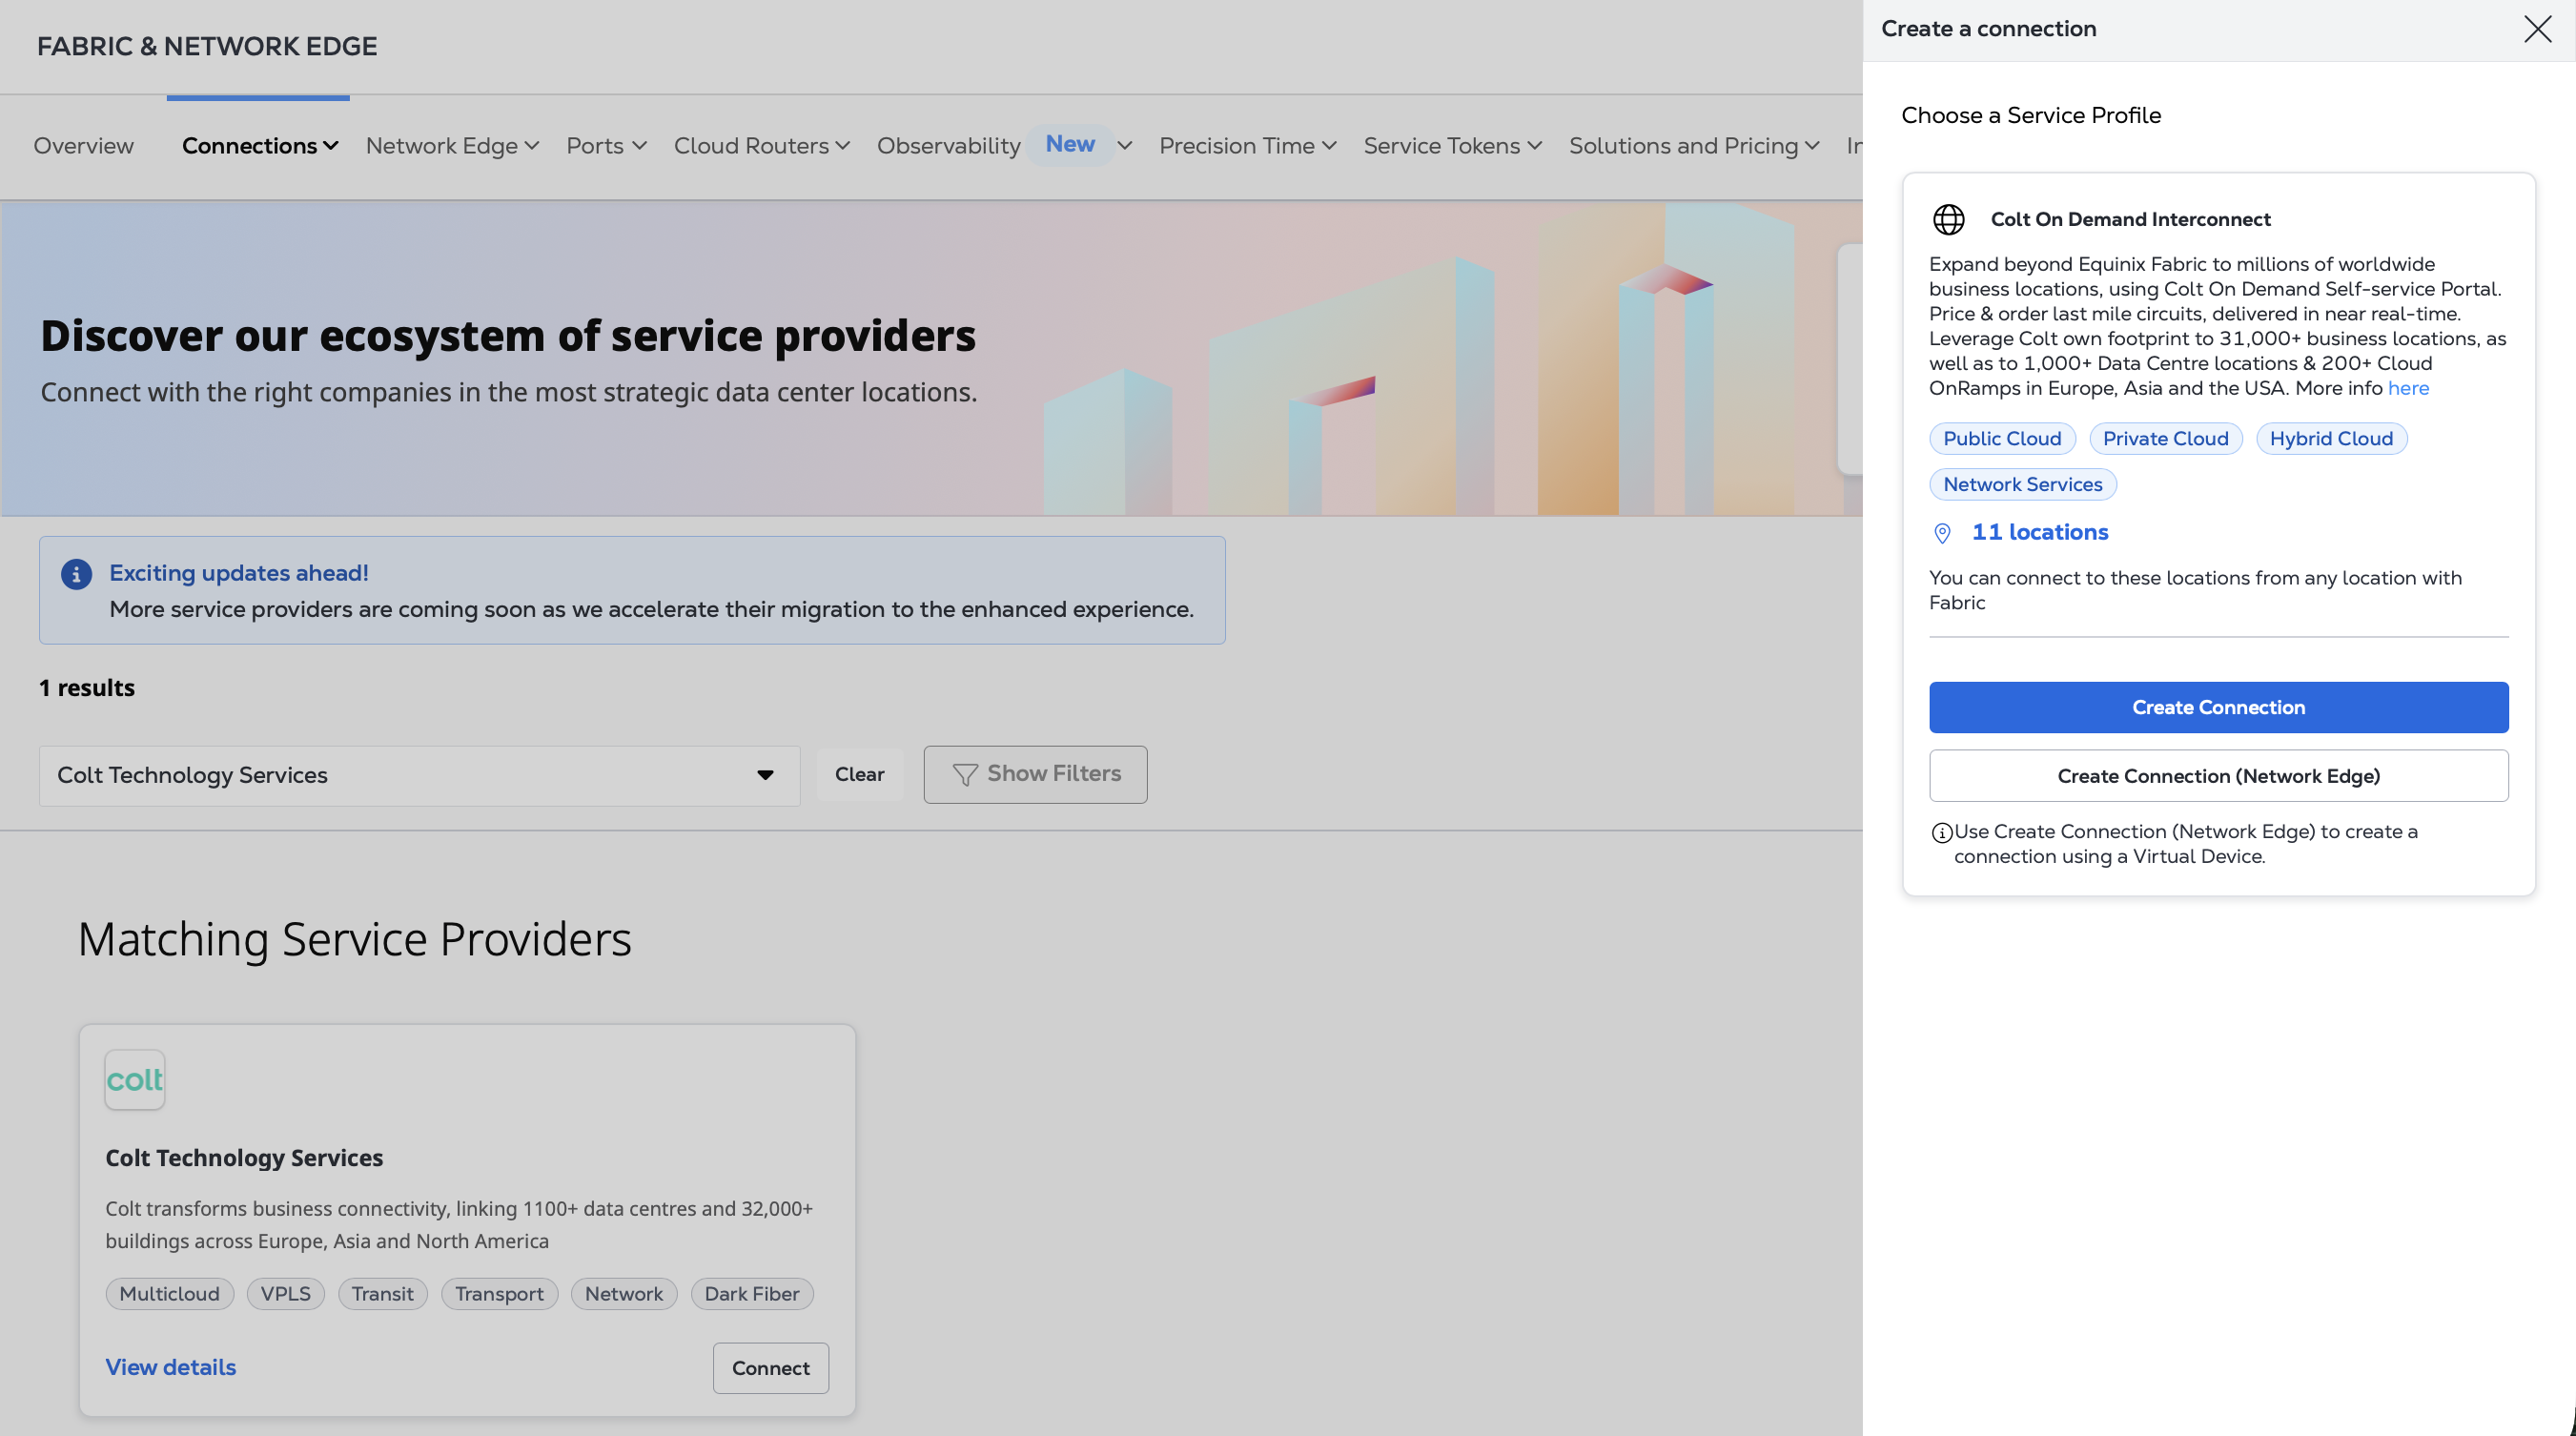
-
From the Colt On Demand Interconnect service profile, choose Create Connection. If you are connecting from a Network Edge virtual device, choose Create Connection (Network Edge) and see Connecting from a Virtual Device.
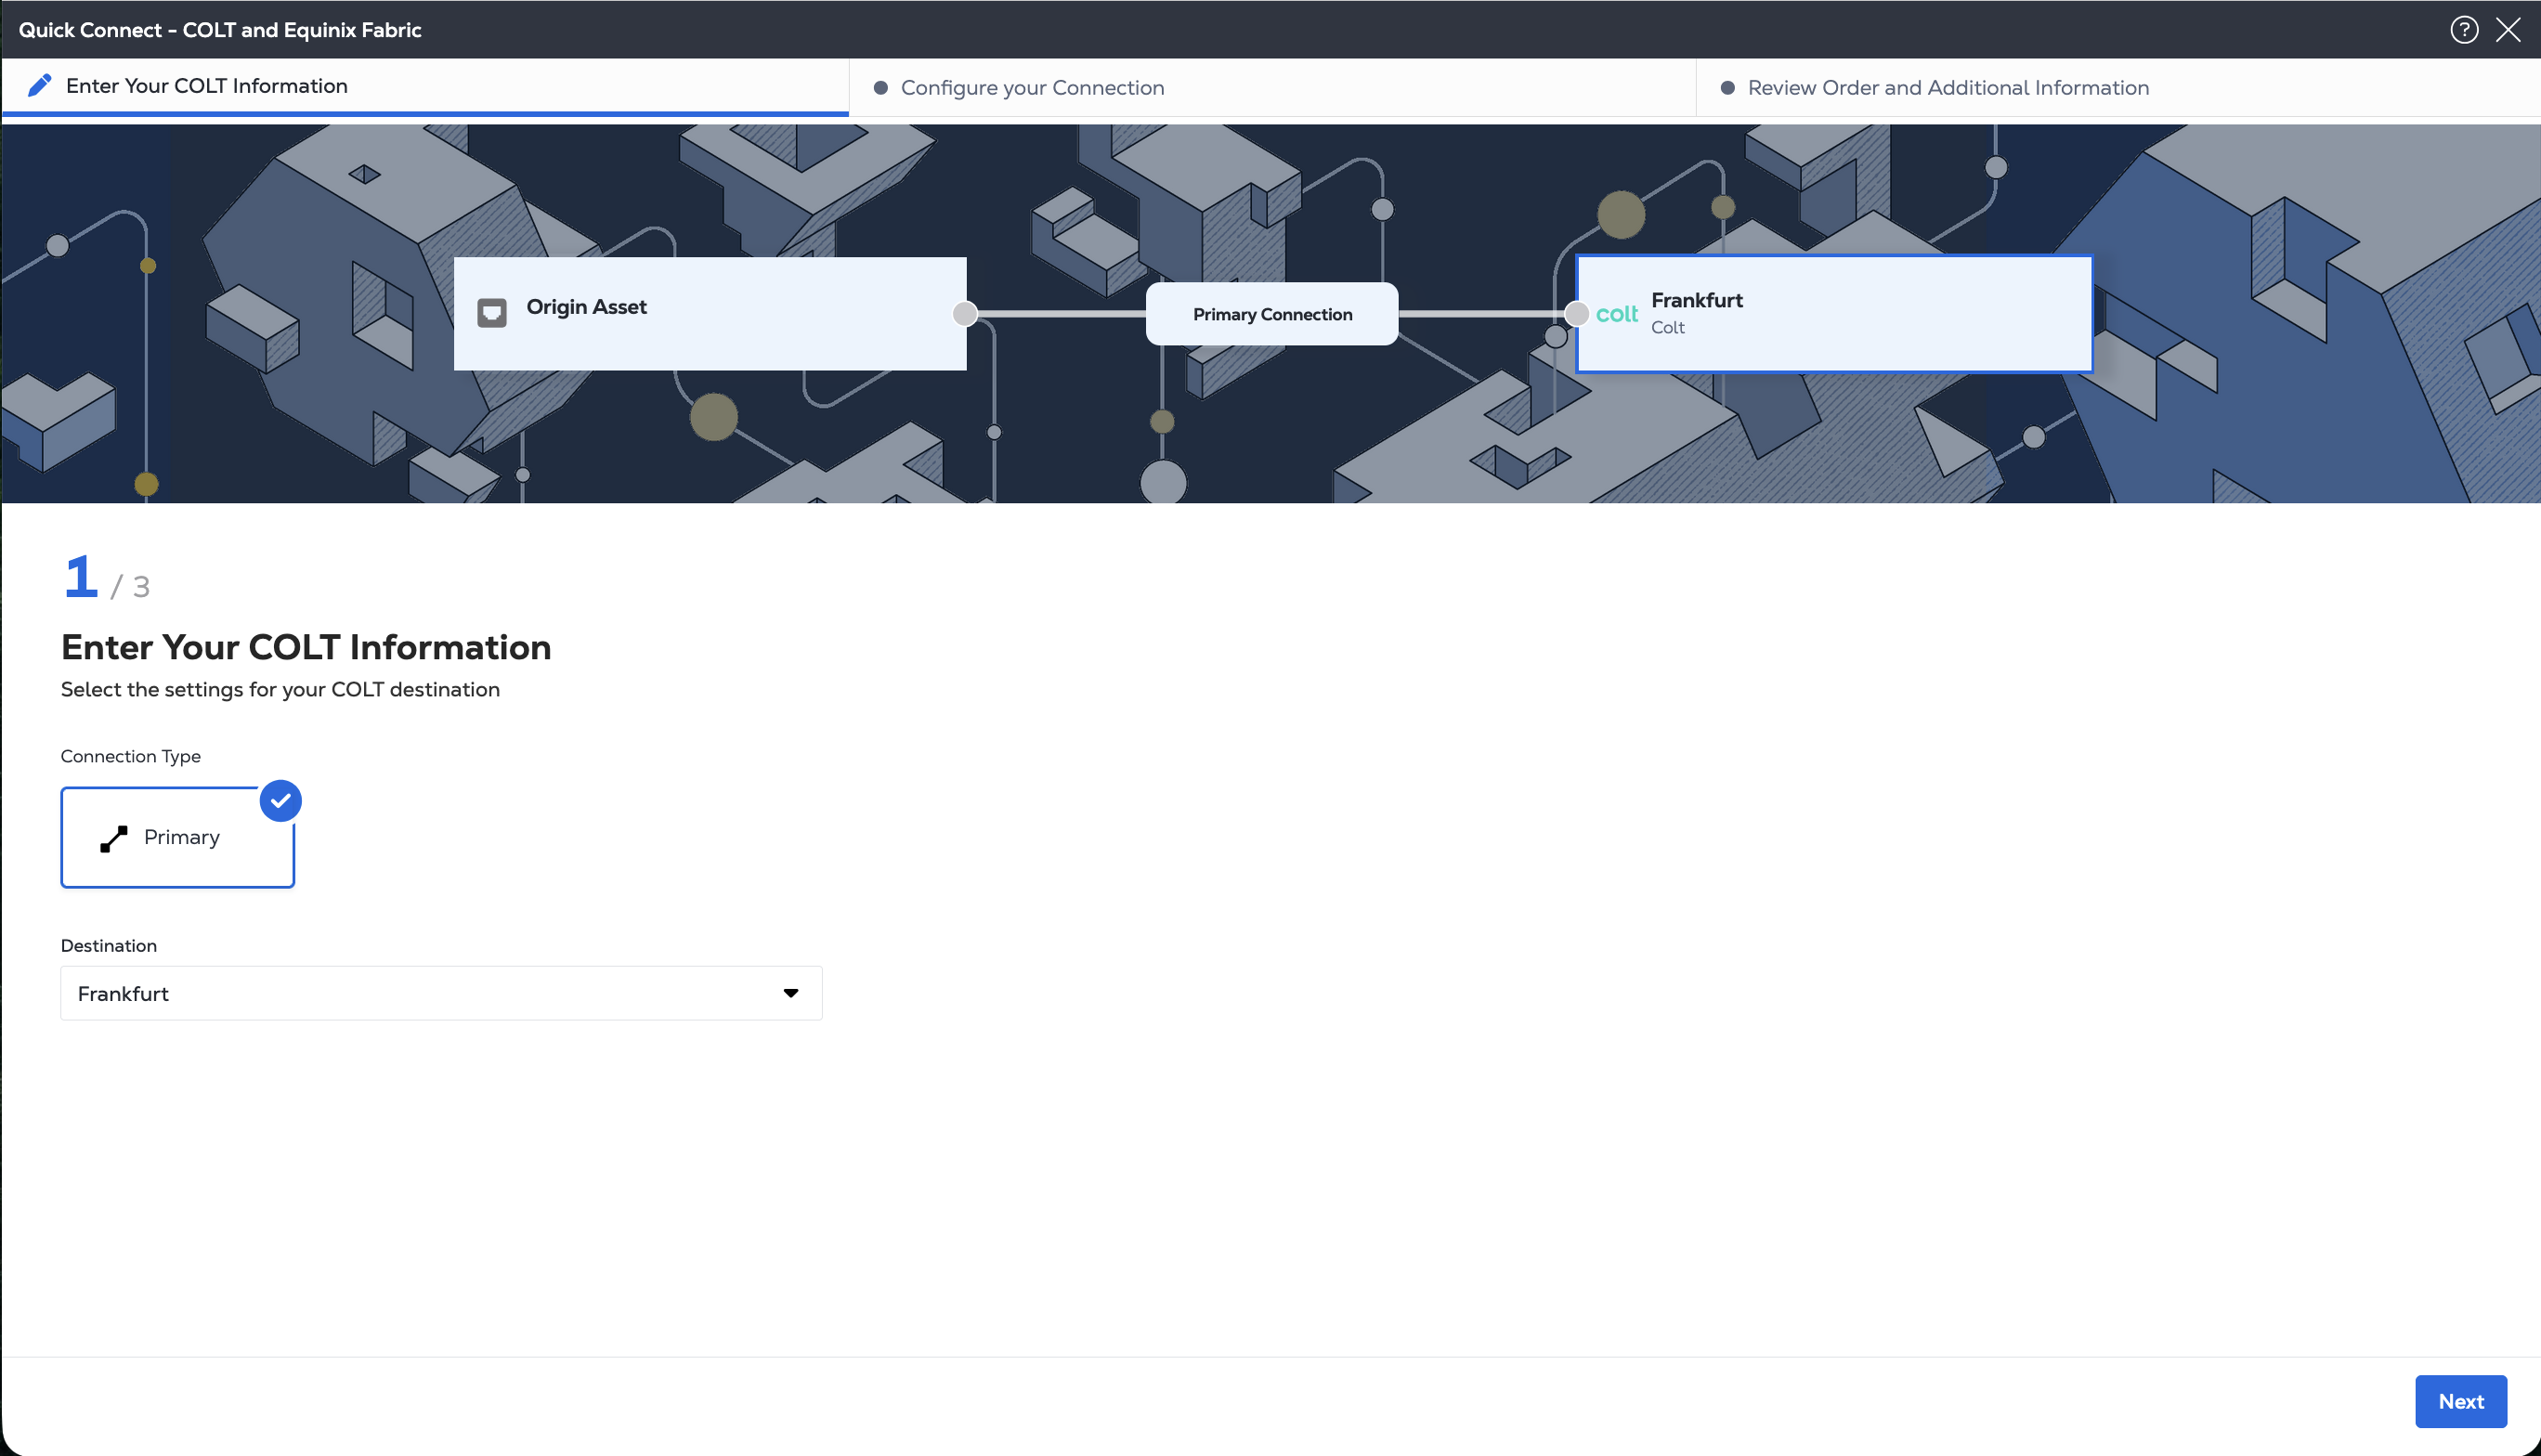
Enter Your Colt Information
-
Under Connection Type, Primary is automatically selected.
-
Select the Metro of the Colt on Demand Destination from the drop-down menu. This is the location of the Colt services that you want to connect to. Only eligible destinations are shown.
-
Click Next.
Your connection configuration options vary by the Origin Asset Type: port, service token, or cloud router.
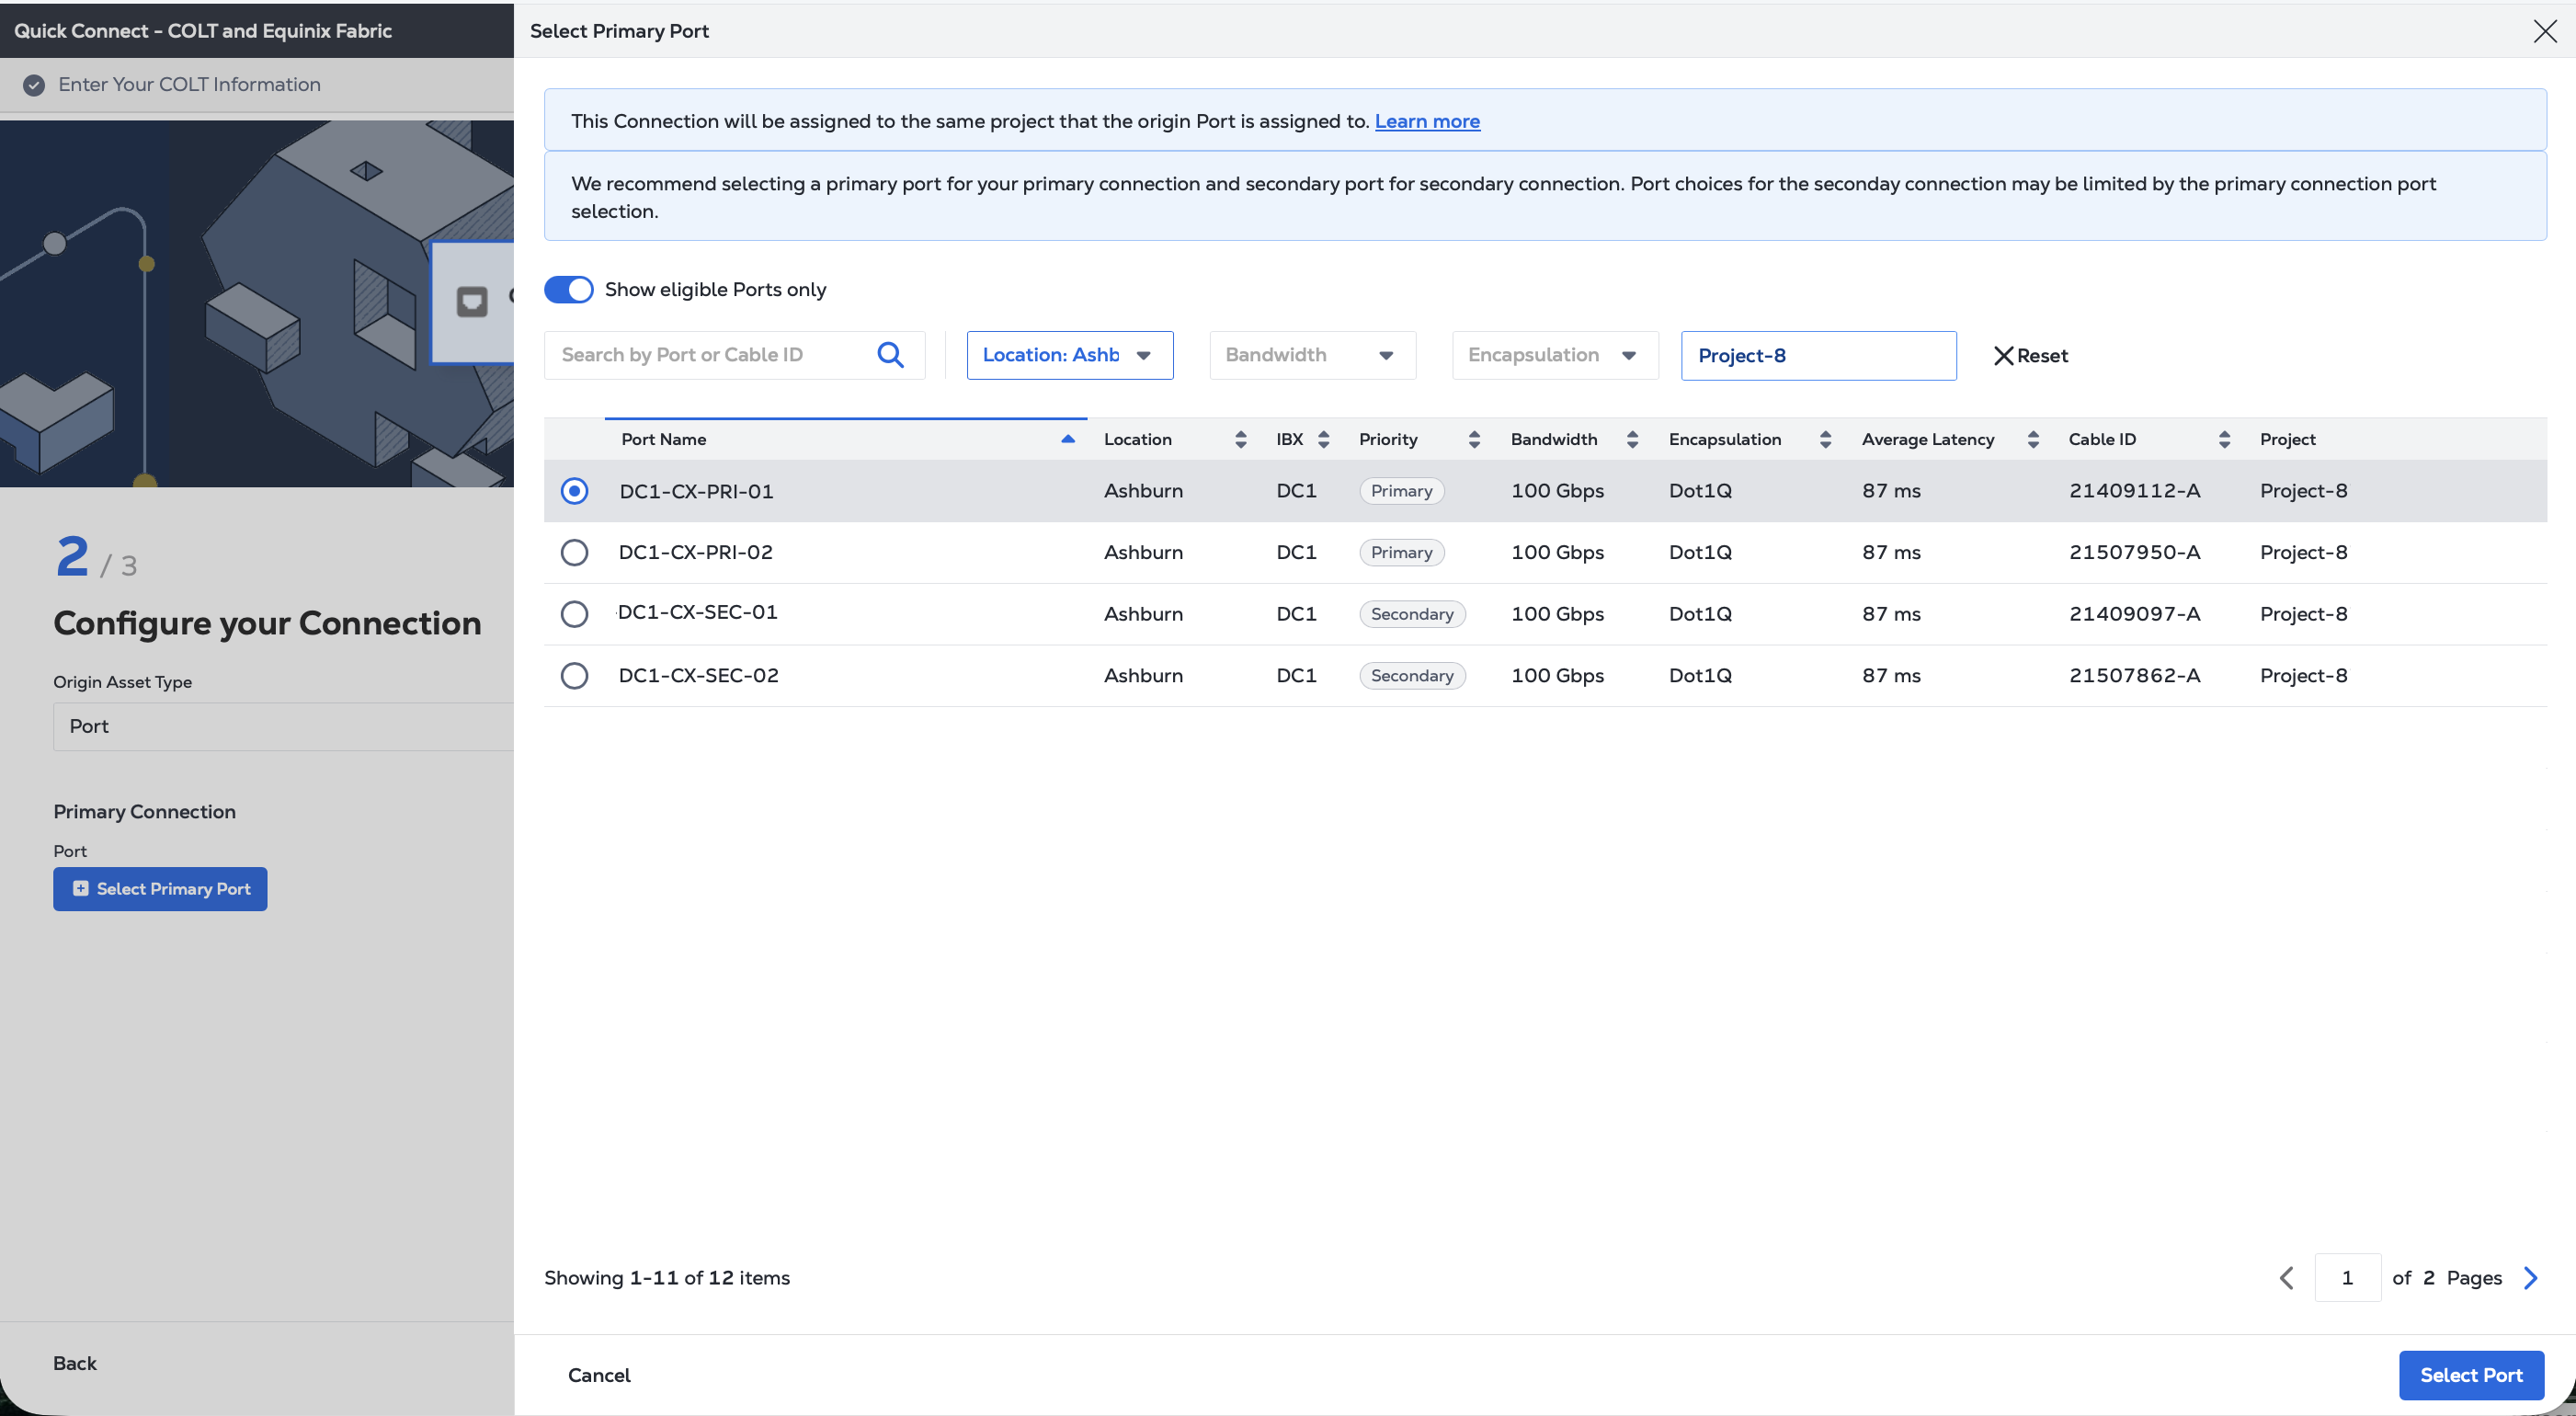
Connecting from a Port
-
From the Origin Asset Type drop-down list, select Port.
-
In the Primary Connection section:
-
Click + Select Primary Port, then select your primary connection port and click Select Port.
-
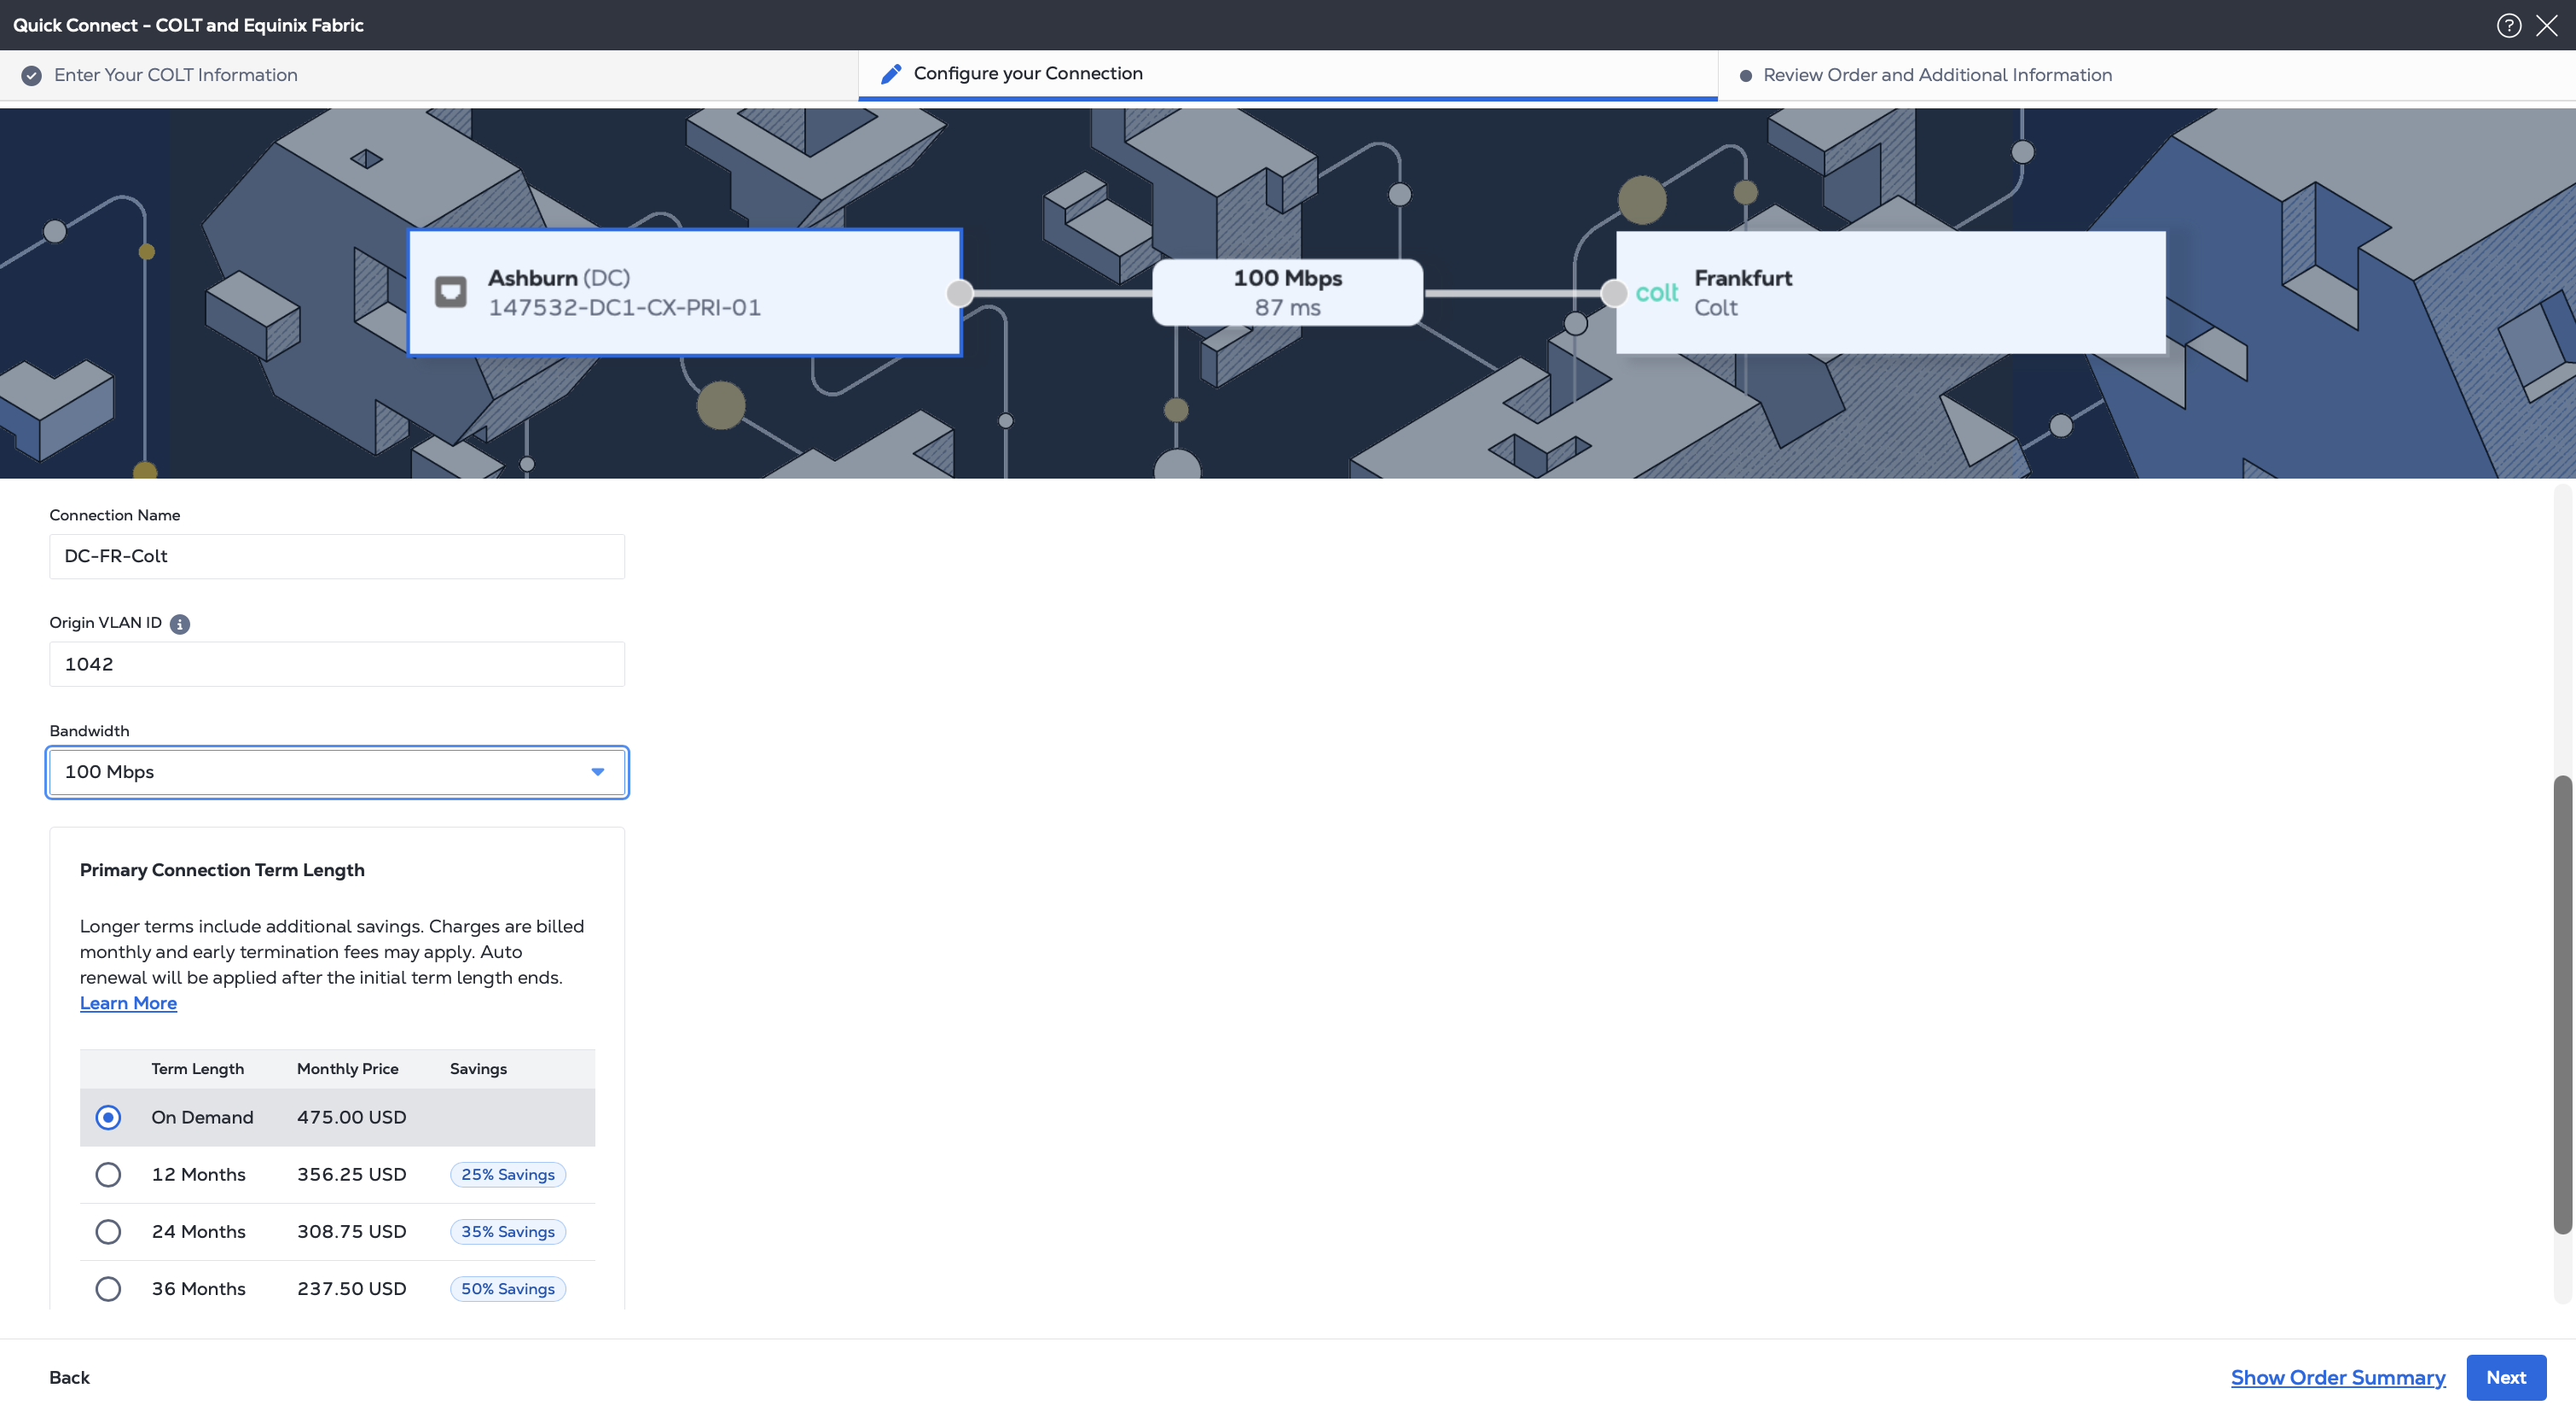
Enter the primary connection name.
-
Select a bandwidth.
-
Enter a VLAN ID.
-
If you are creating a remote connection, where your port is not in the same Metro as the Colt On Demand destination, you can choose a Term Length.
-
-
Click Next, to review and create the connection.
Connecting from a Service Token
-
From the Origin Asset Type drop-down list, select Service Token.
-
In the Primary Connection section:
- Click + Enter Primary Service Token, provide the service token, then click Redeem Service Token.
- Enter the primary connection name.
- Select a bandwidth.
- If you are creating a remote connection, where your port is not in the same Metro as the Colt destination, you can choose a Term Length.
-
Click Next, to review and create the connection.
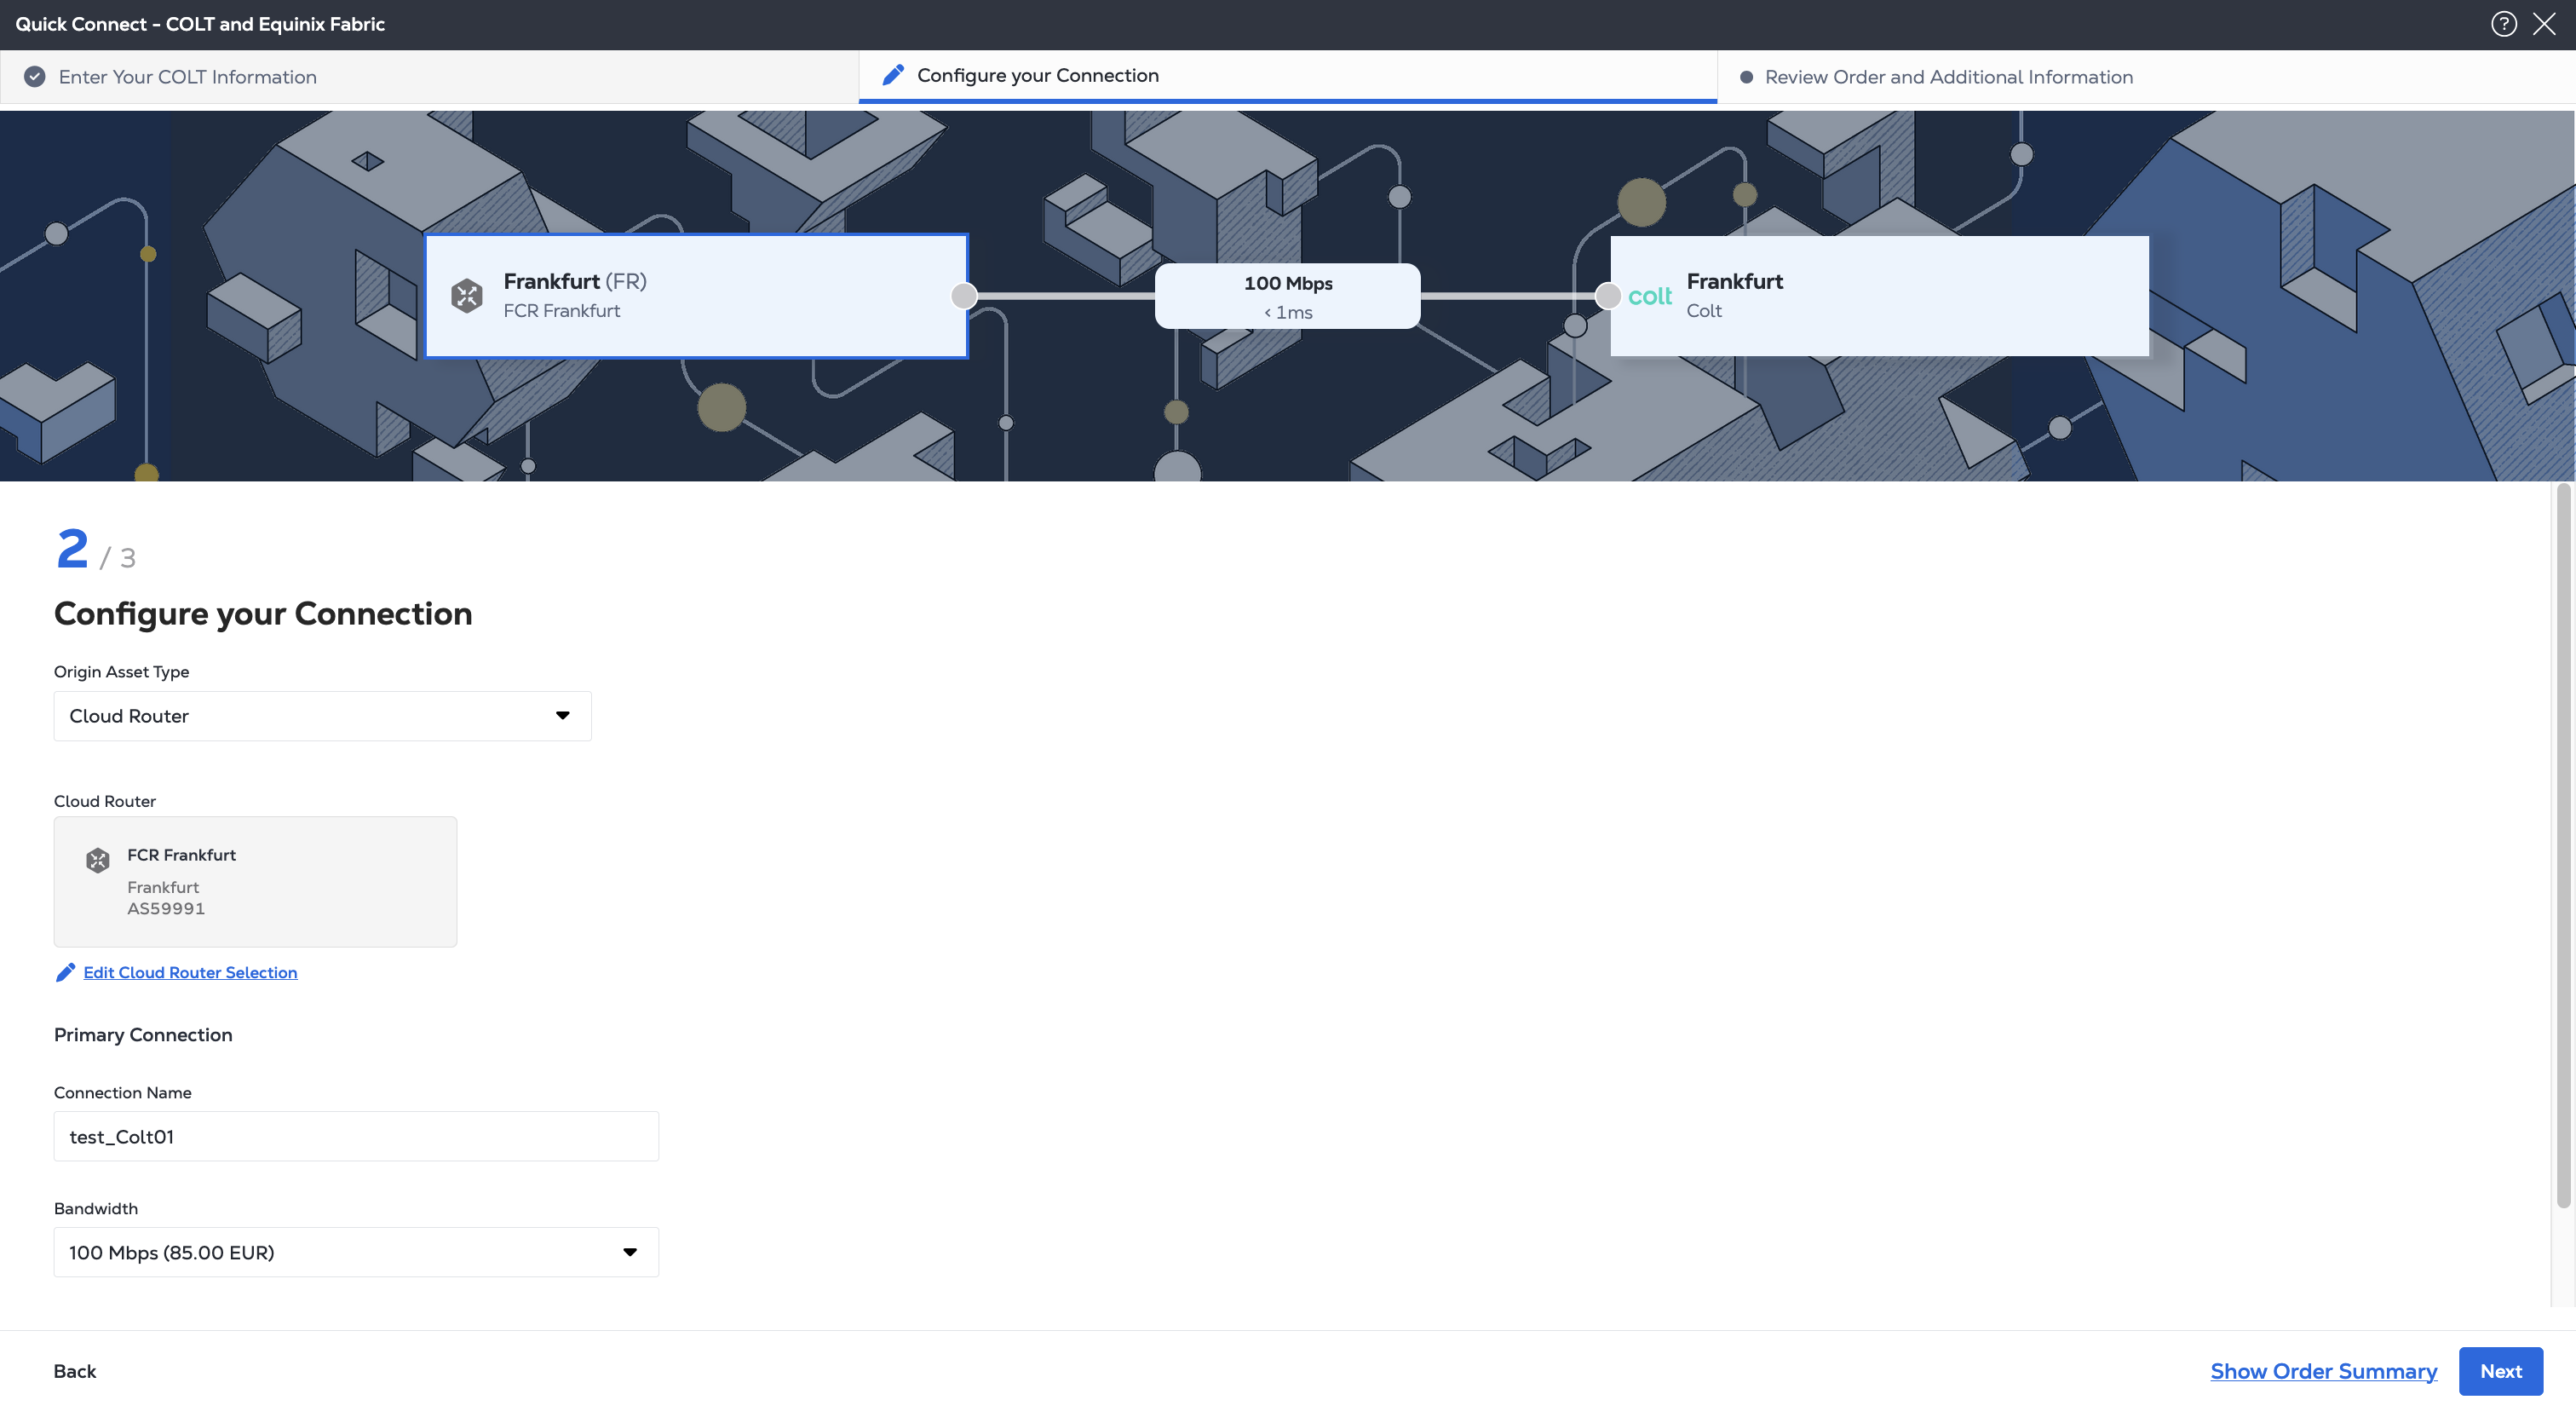
Connecting from a Fabric Cloud Router
-
From the Origin Asset Type drop-down list, select Cloud Router.
-
Click + Select Cloud Router, select a cloud router instance, then click Select Cloud Router.
-
In the Primary Connection section:
- Enter the primary connection name.
- Select a bandwidth.
-
Click Next, to review and create the connection.
Review and Submit
-
On the Review Order and Additional Information page, review the information in the Connection Configuration sections.
-
Use the Notifications field to provide the email addresses of the recipients to be notified about the connection's status. You can add up to 12 email addresses.
-
(Optional) Enter or add order information in the Purchase Order section.
-
Provide a customer reference identifier that will help you identify this order on your invoice.
-
Click Show Order Summary to see order details and connection pricing information.
When you are ready, click Create Connection.
On the order confirmation screen, copy the connection's Unique ID. You need this ID when you enable the service in the Colt On Demand platform.
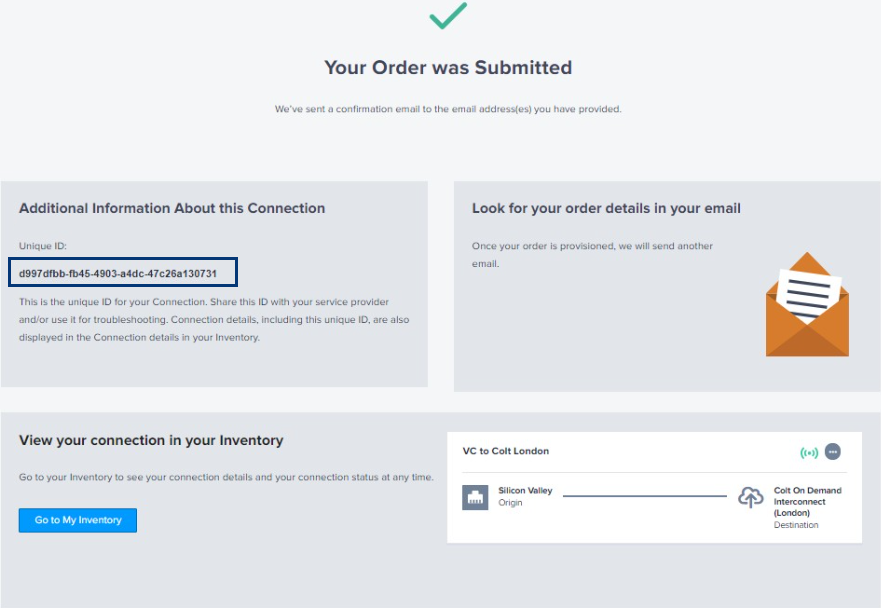
You can also find the connection ID and other details in your Connections Inventory
Connecting from a Virtual Device
After clicking Create Connection (Network Edge):
-
Choose your locations and virtual device on the Select Locations page.
-
In the Origin section, click Virtual Device. If the Virtual Device option is disabled, there are no virtual devices available in the selected project. Choose a different project, that has virtual devices assigned to it, or create a new virtual device in this project.
-
Select a Metro to connect from.
-
Choose virtual device type, select connection type, then select a virtual device instance.
-
In the Destination section select the Colt On Demand Metro where you want to terminate your connection.
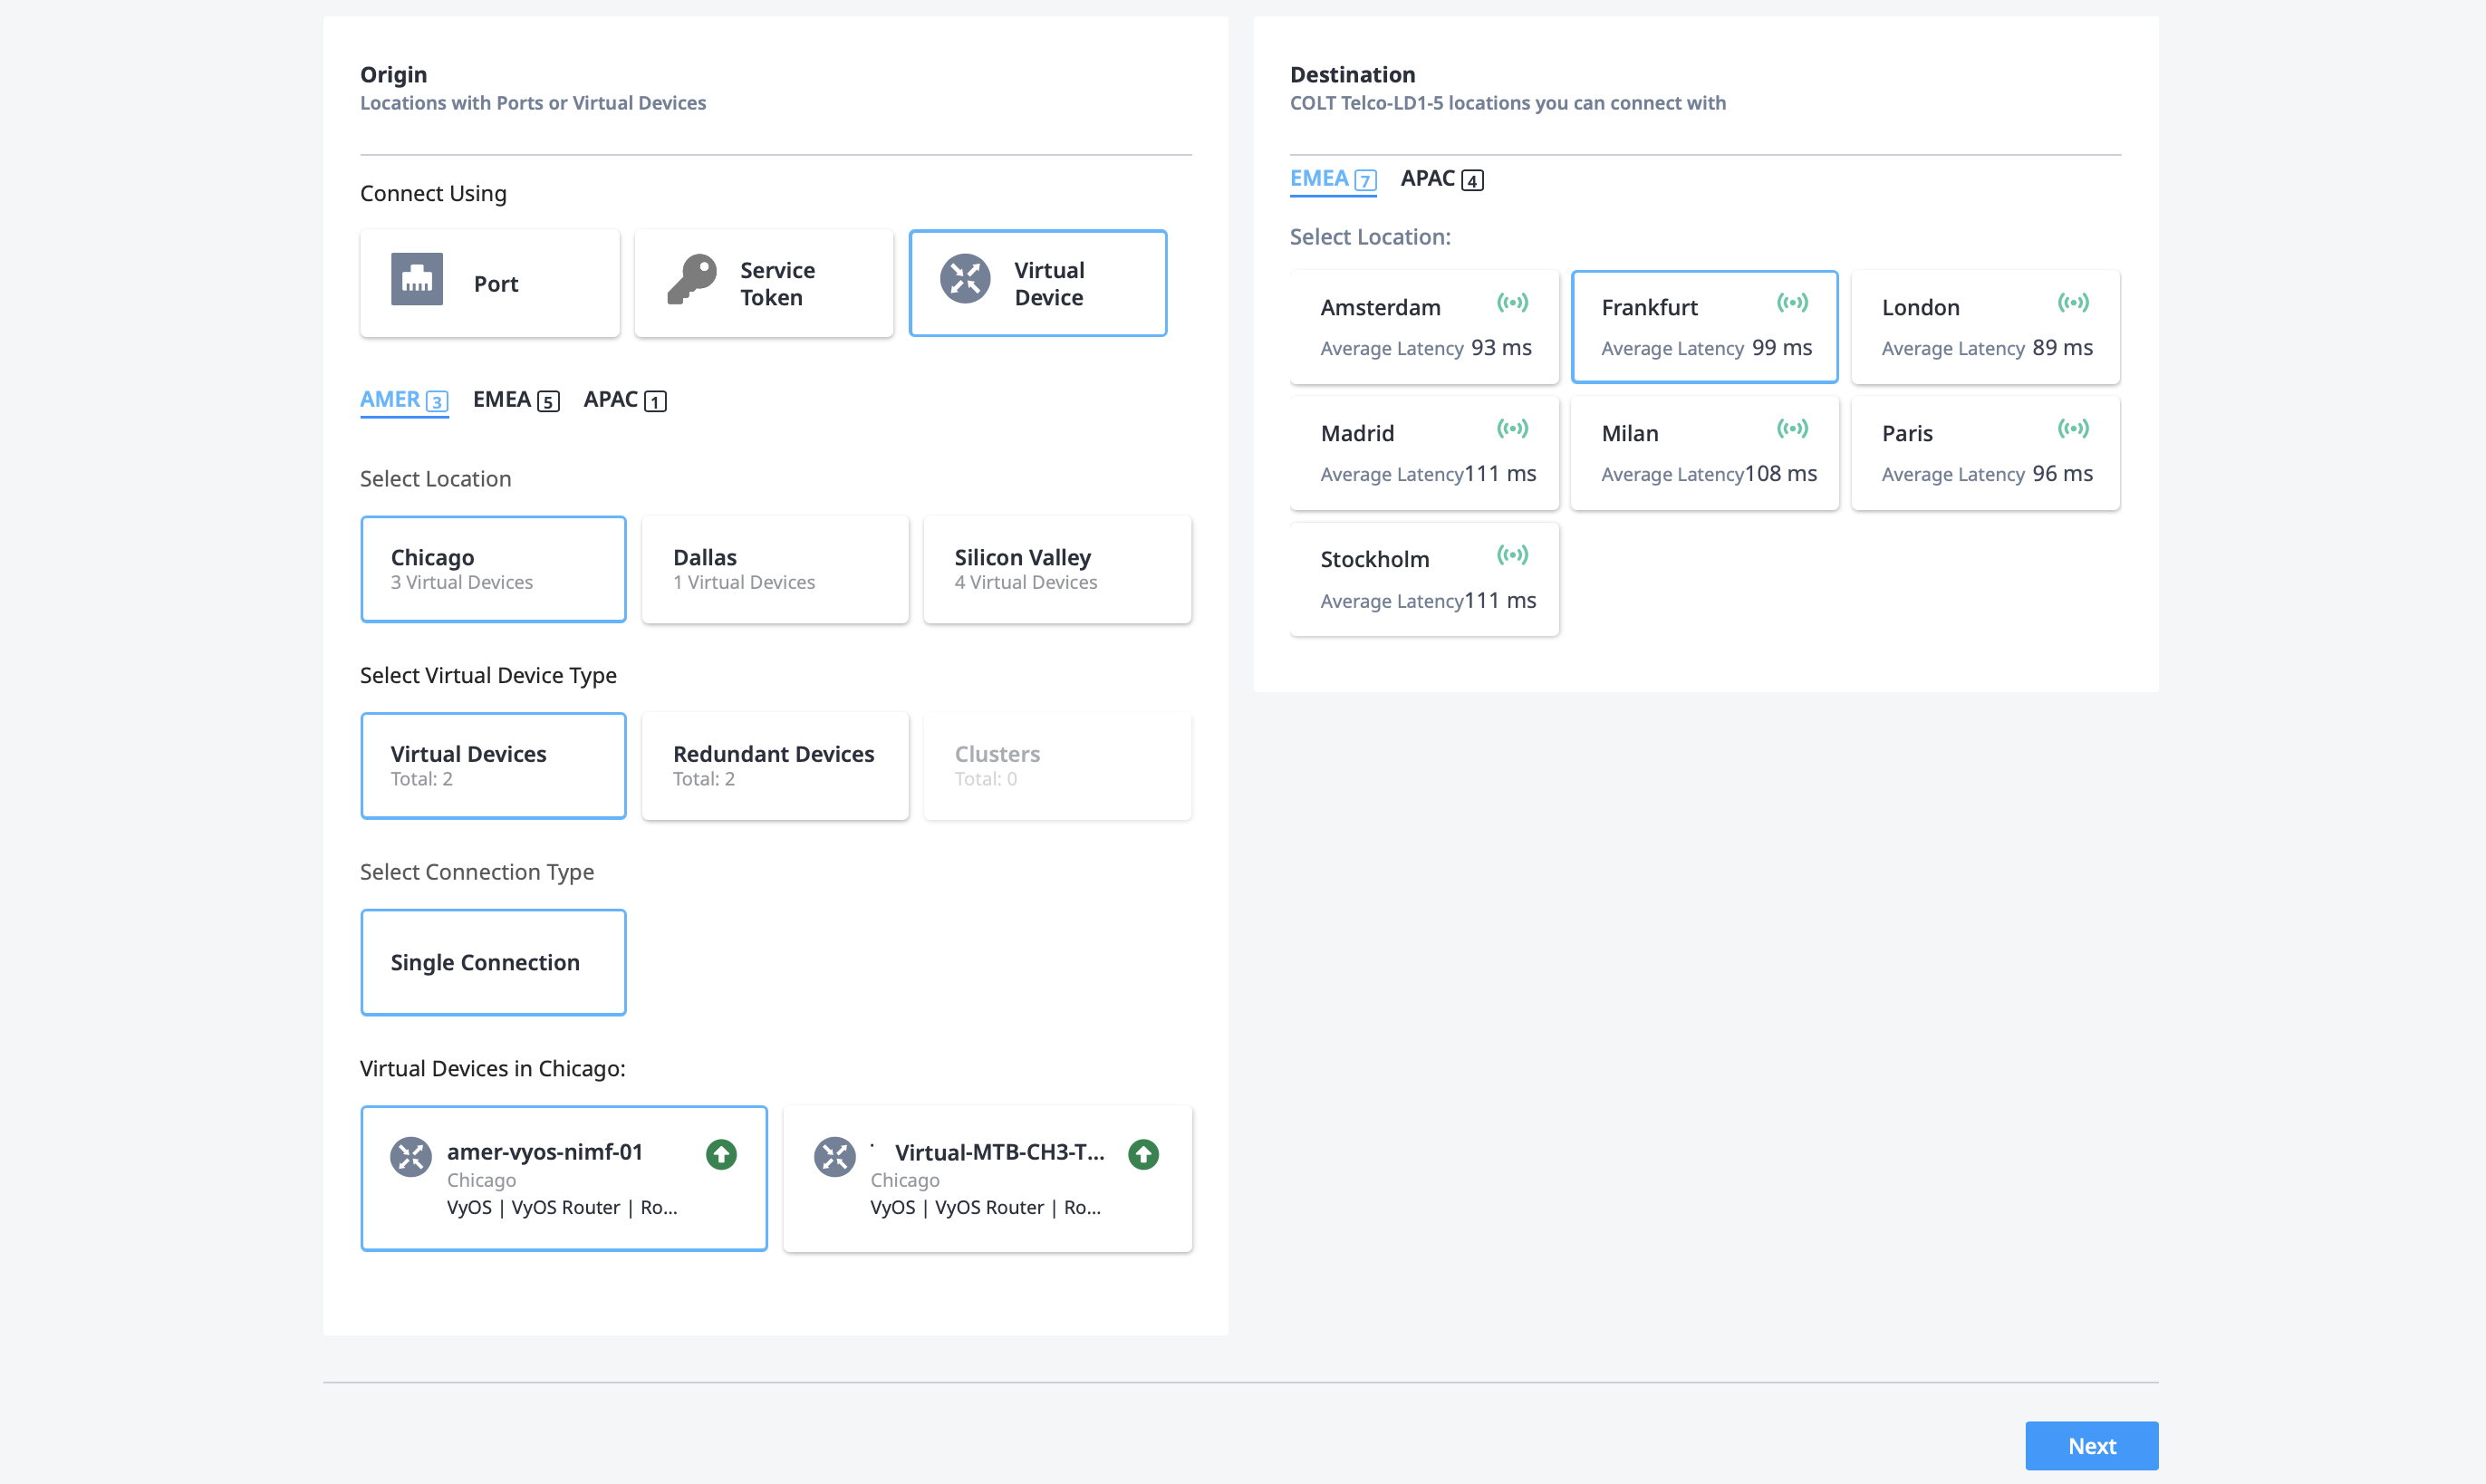
- Click Next.
-
-
On the Connection Details page, configure the connection.
- Enter a connection name in the Connection Information box.
- Choose to either Automatically select the next available interface on my devices or I will select the interface on my device.
- Enter a Purchase Order number (optional).

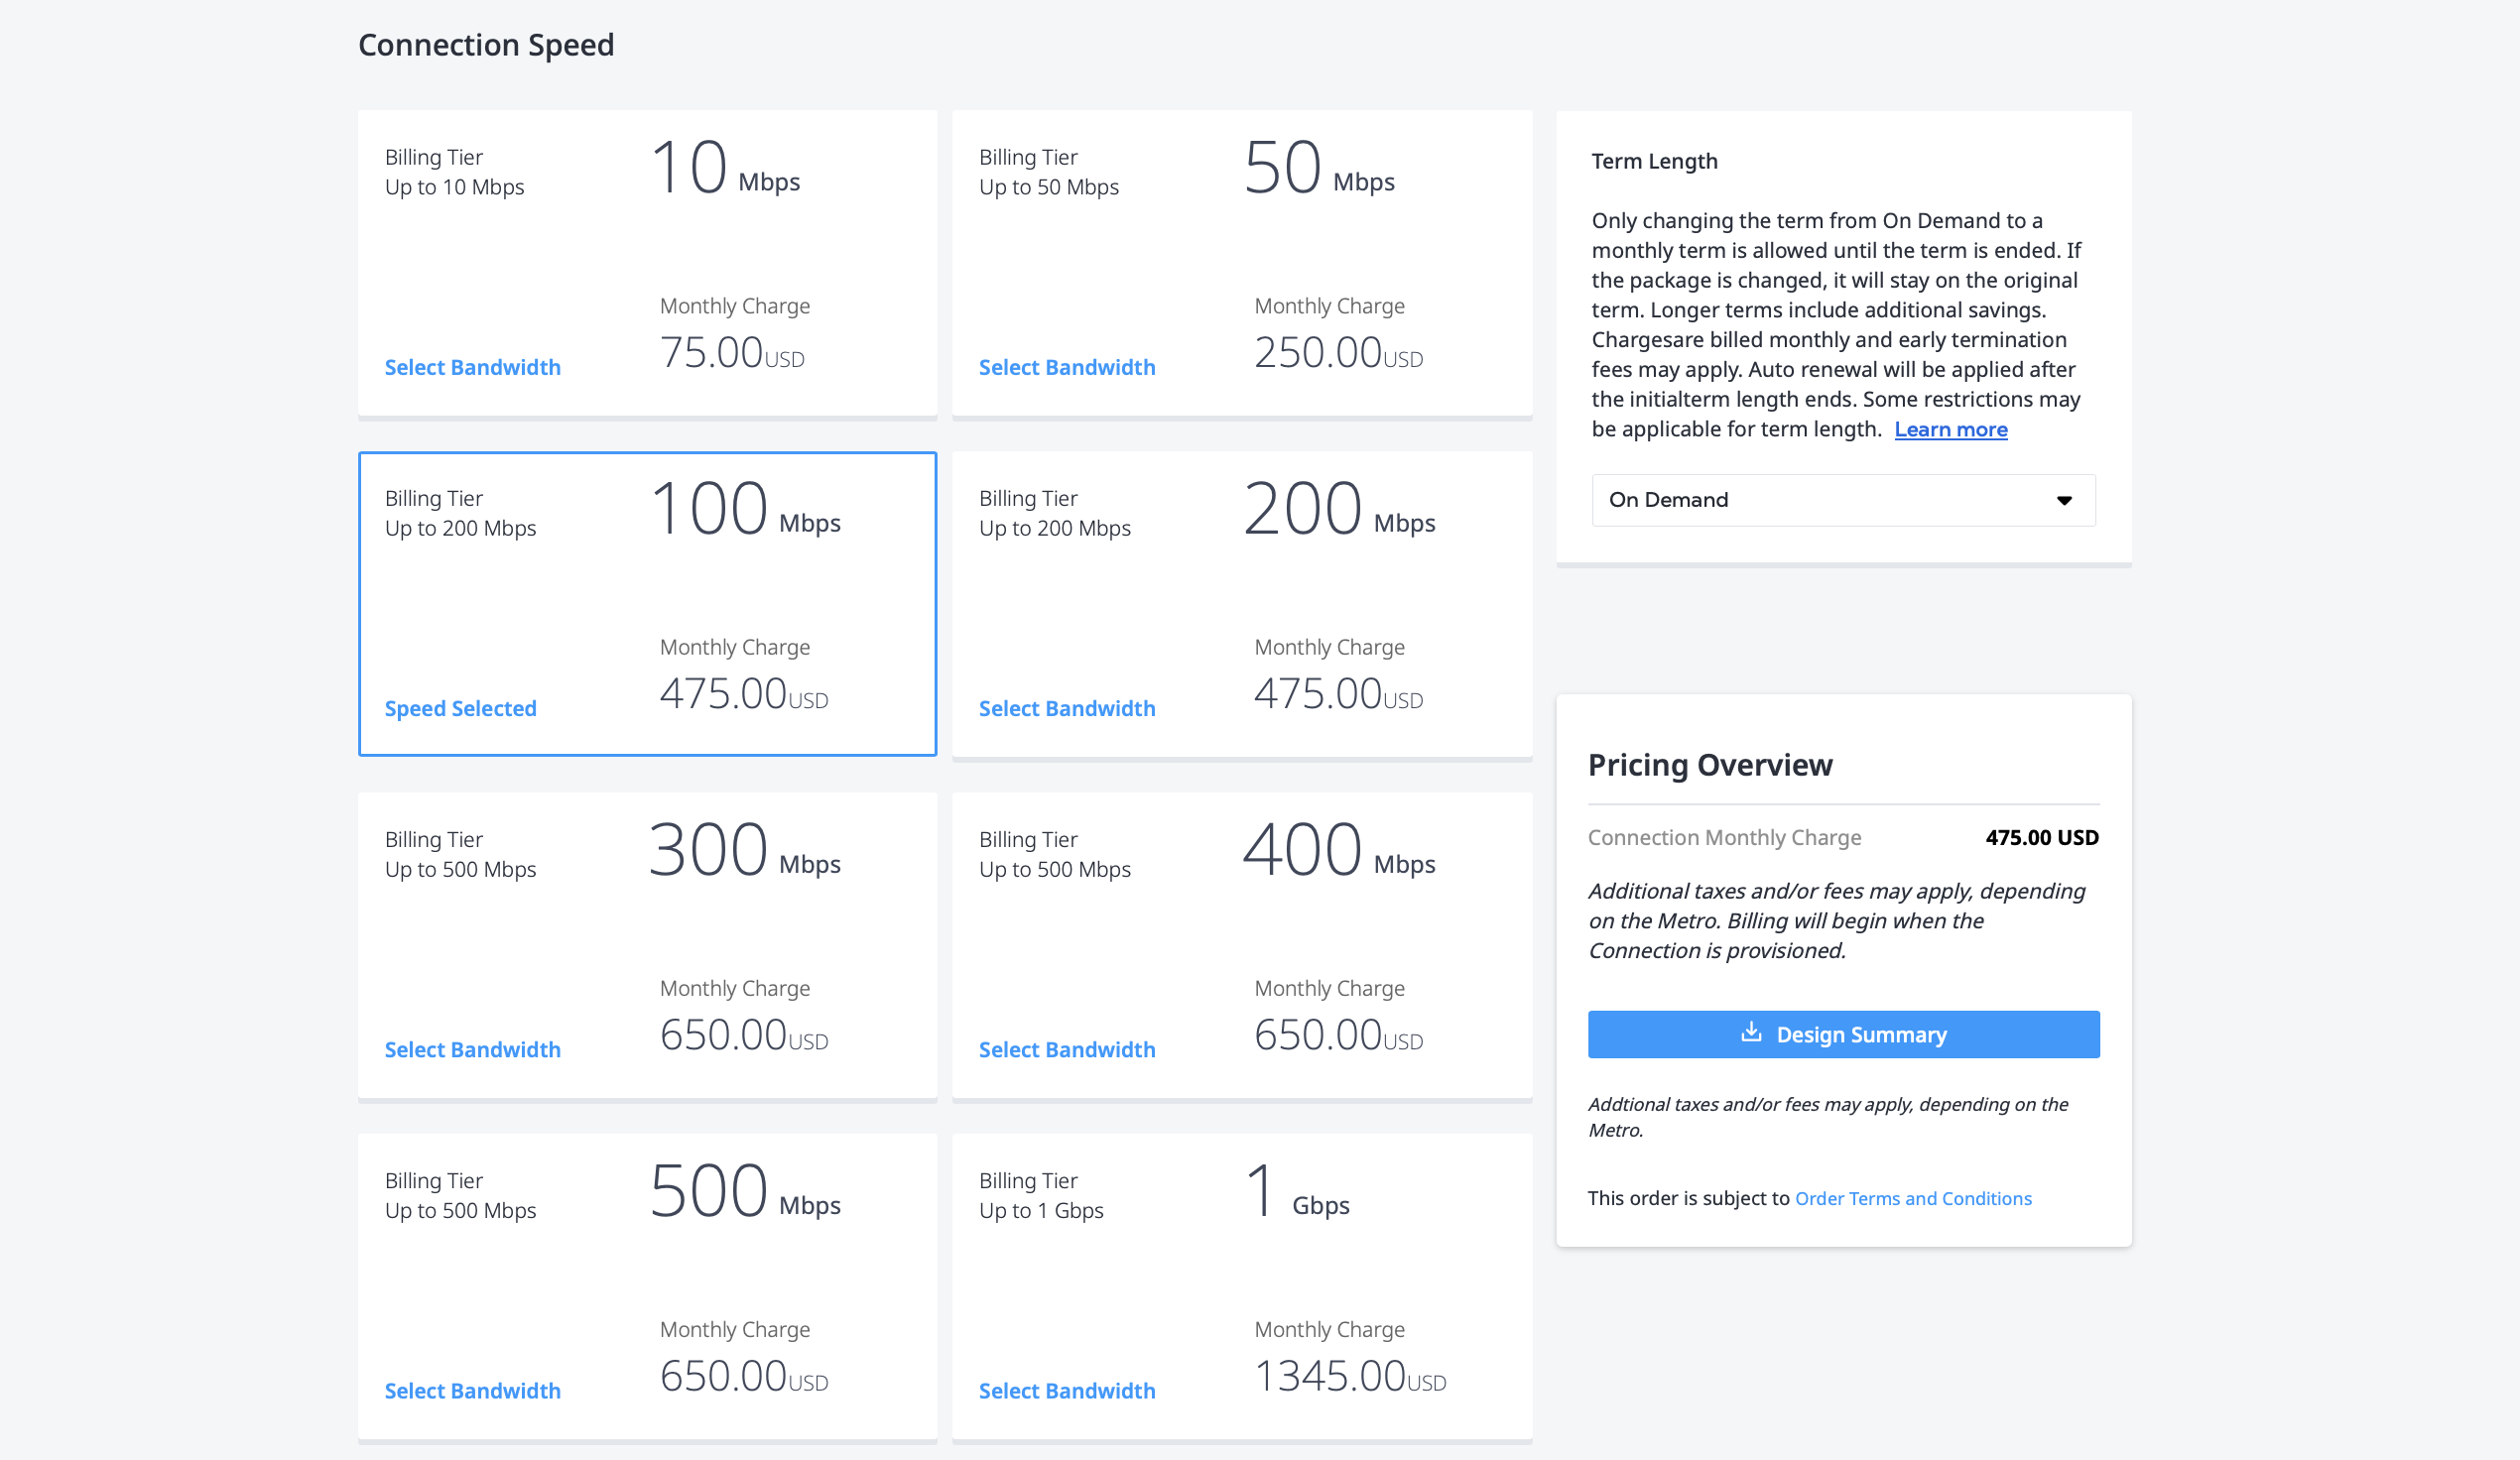
- Choose the Connection Speed. - If you are creating a remote connection, where your virtual device is not in the same Metro as the Colt destination, you can choose a Term Length.
- Click Next.
-
On the Review page:
- Review the information in the Connection Summary.
- Review the Pricing Overview. Click Design Summary to download a PDF summary of your order.
- Use the Notifications field to provide the email addresses of the recipients to be notified about the connection's status. You can add up to 12 email addresses.

When you are ready, click Submit Order.
On the order confirmation screen, copy the connection's Unique ID. You need this ID when you enable the service in the Colt On Demand platform.
You can also find the connection ID and other details in your Connections Inventory
Adding a Cloud Port to Colt On Demand
After you create the connection in the Equinix Customer Portal, access the Colt On Demand platform to add a cloud port to Equinix Fabric. You need the connection ID from creating the virtual connection.
-
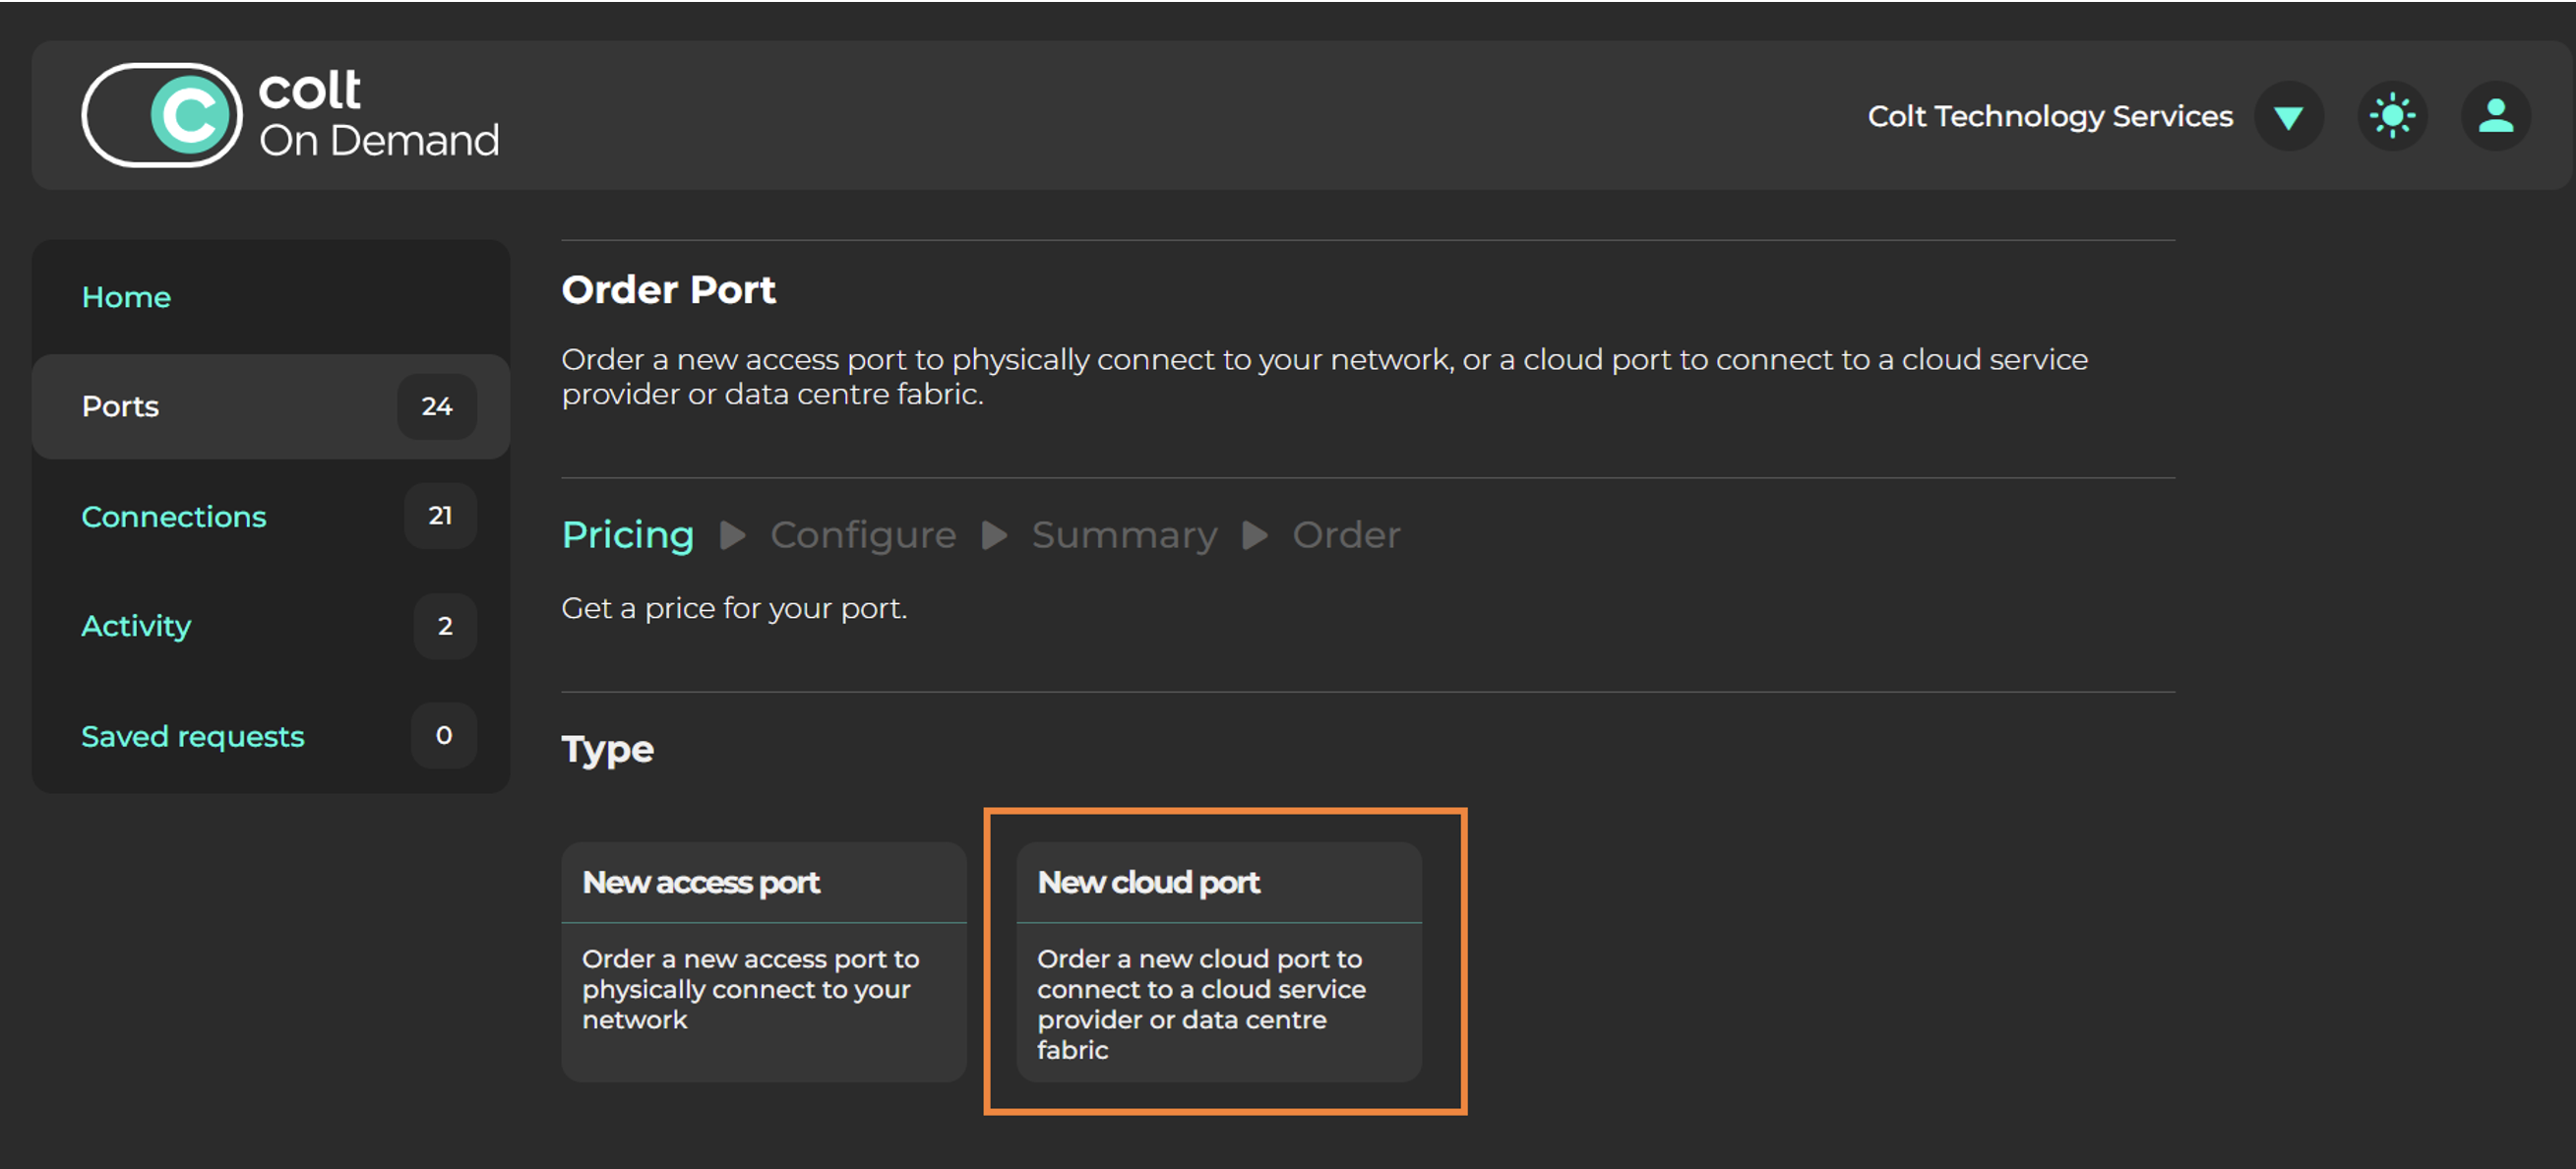
Log in to Colt On Demand.
-
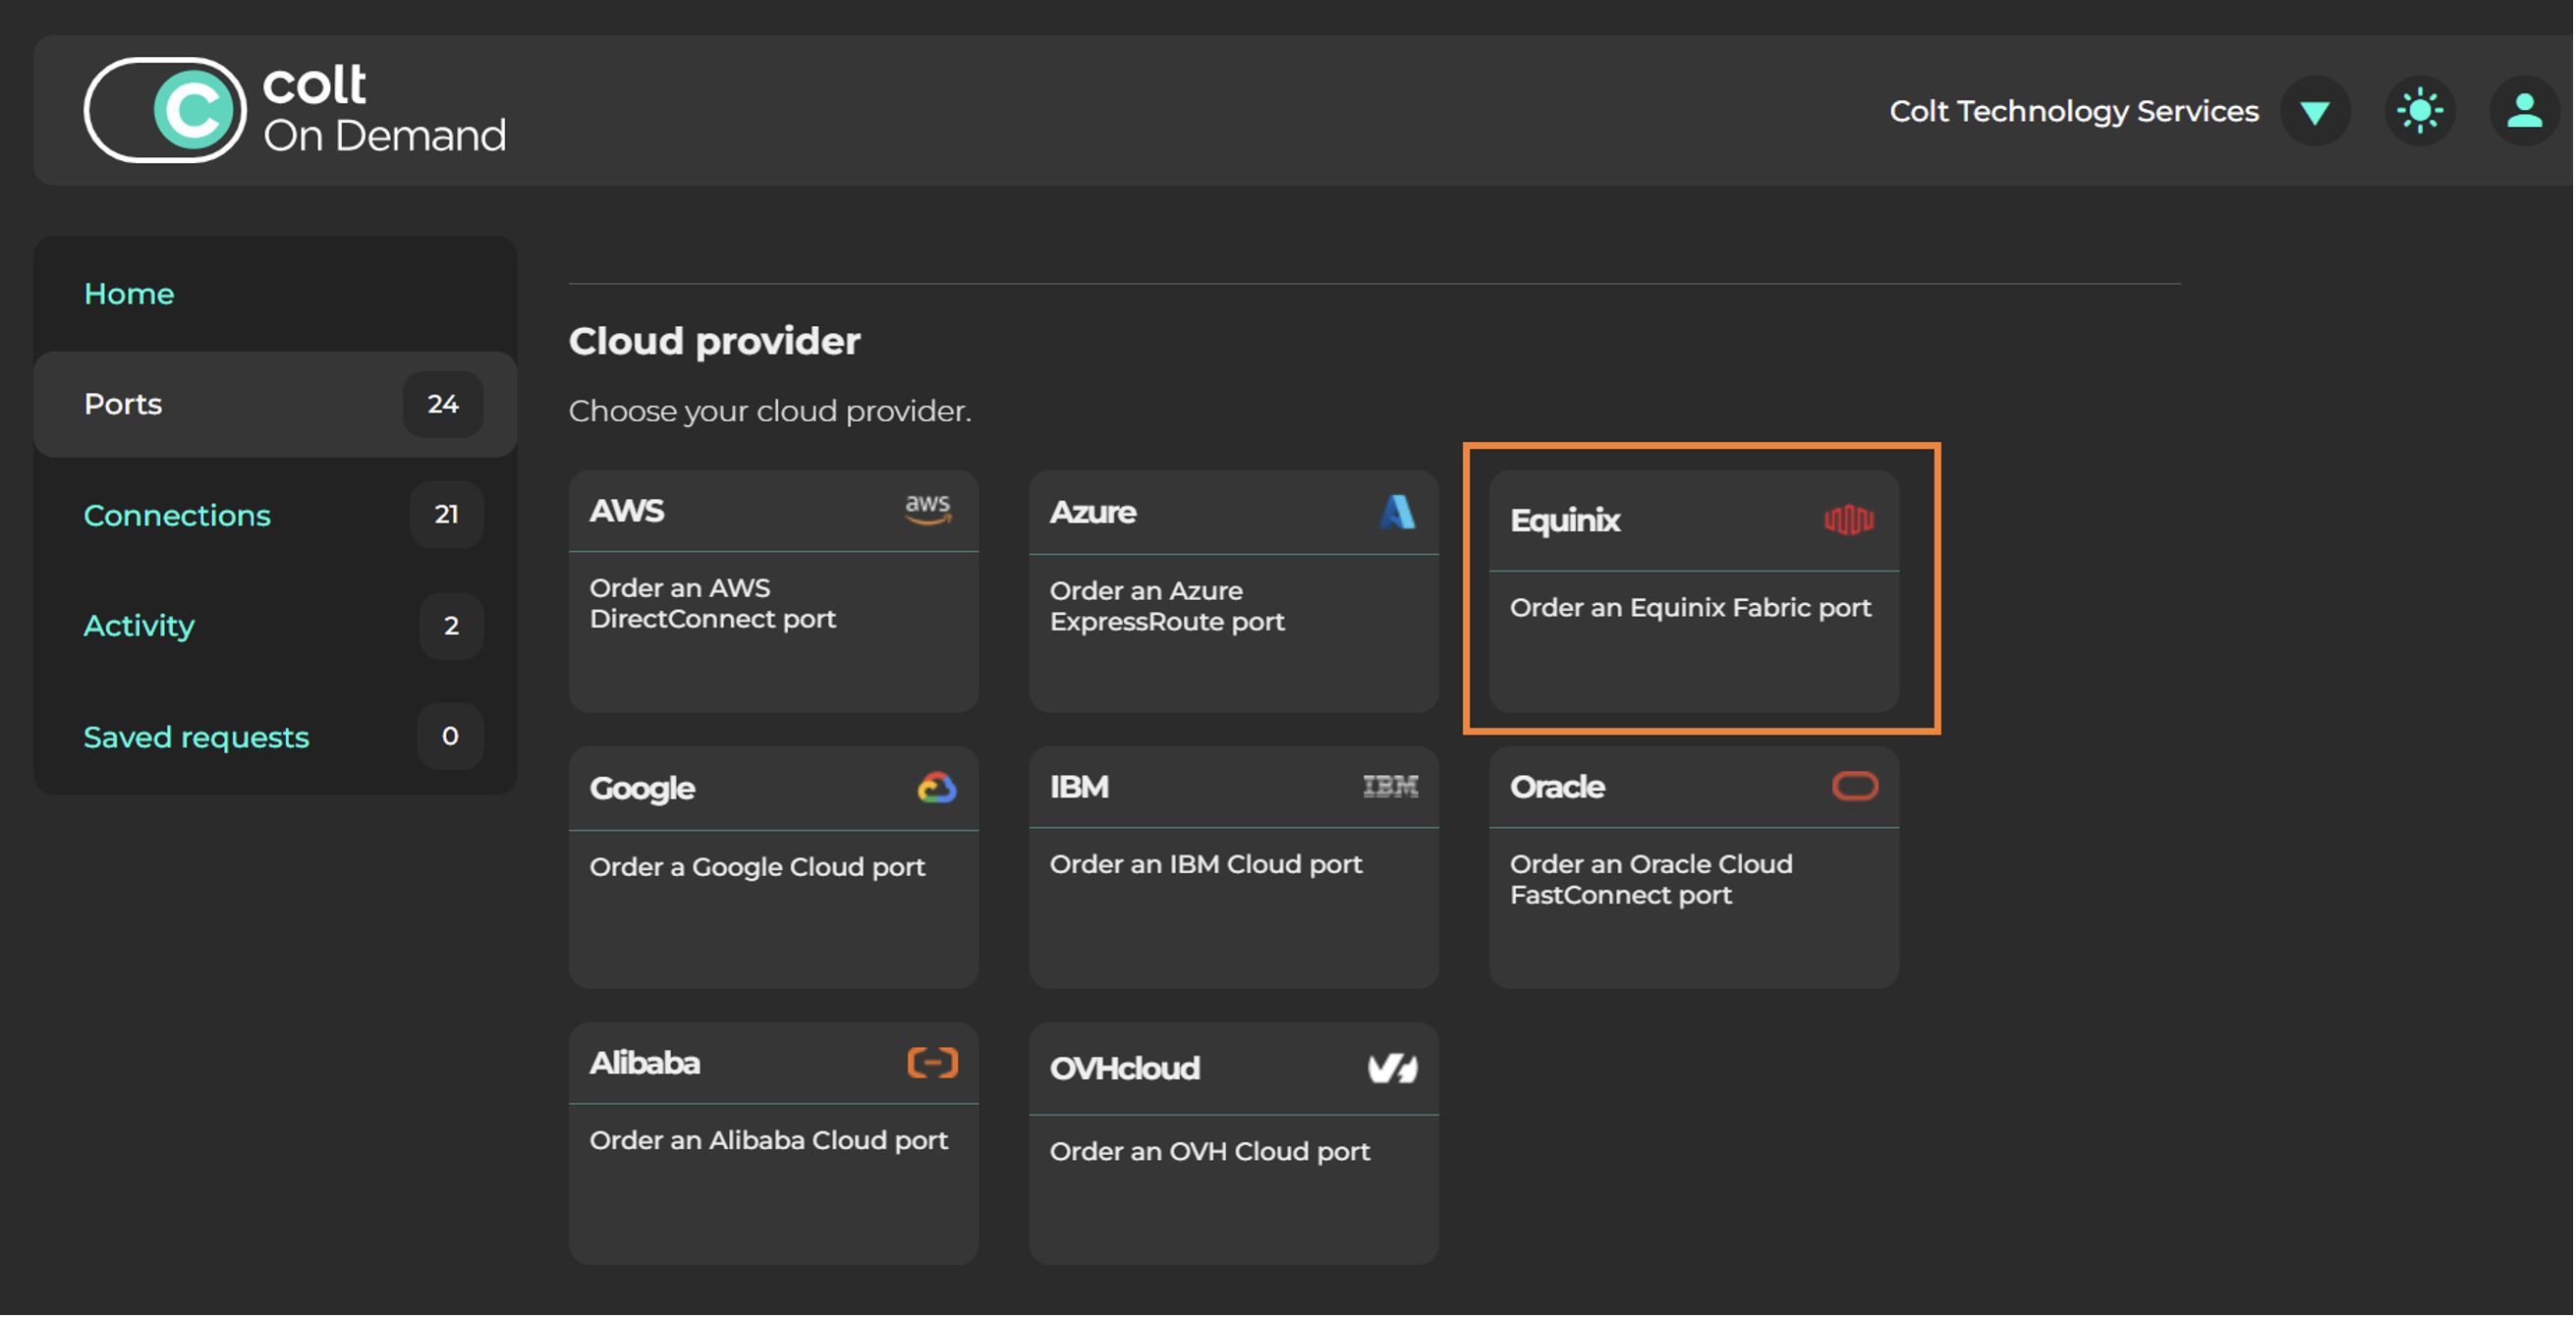
Select Ports, click New Port, then New cloud port.
-
On the list of cloud providers, select Equinix.
-
Choose the Region - select the same metro region used when creating the connection in Equinix Fabric.
-
Choose the Location - the specific location within the metro region.
-
Choose the Port bandwidth.
-
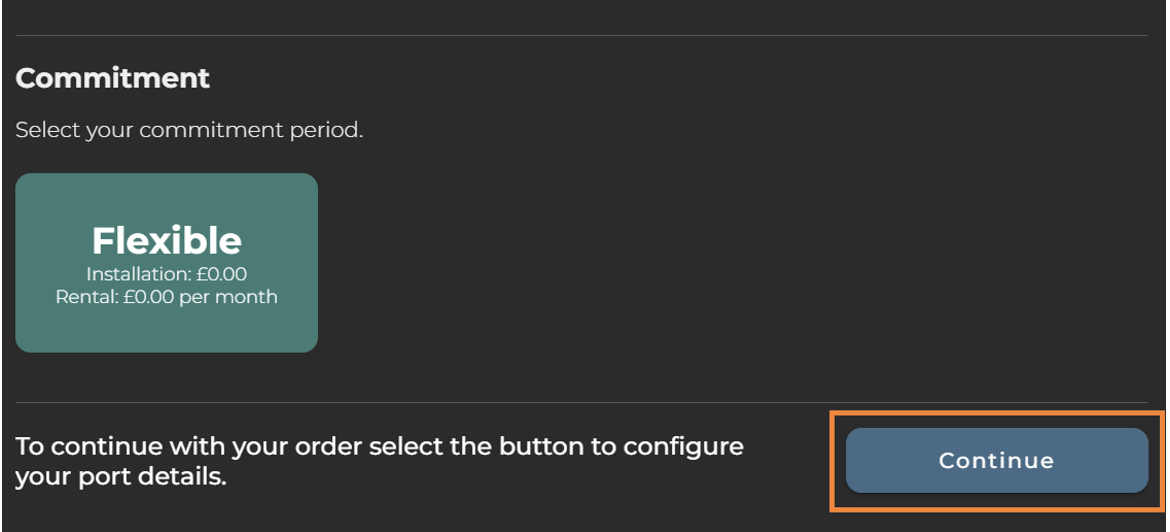
The Commitment option is always "Flexible".
-
Click Continue to configure your port details.
-
-
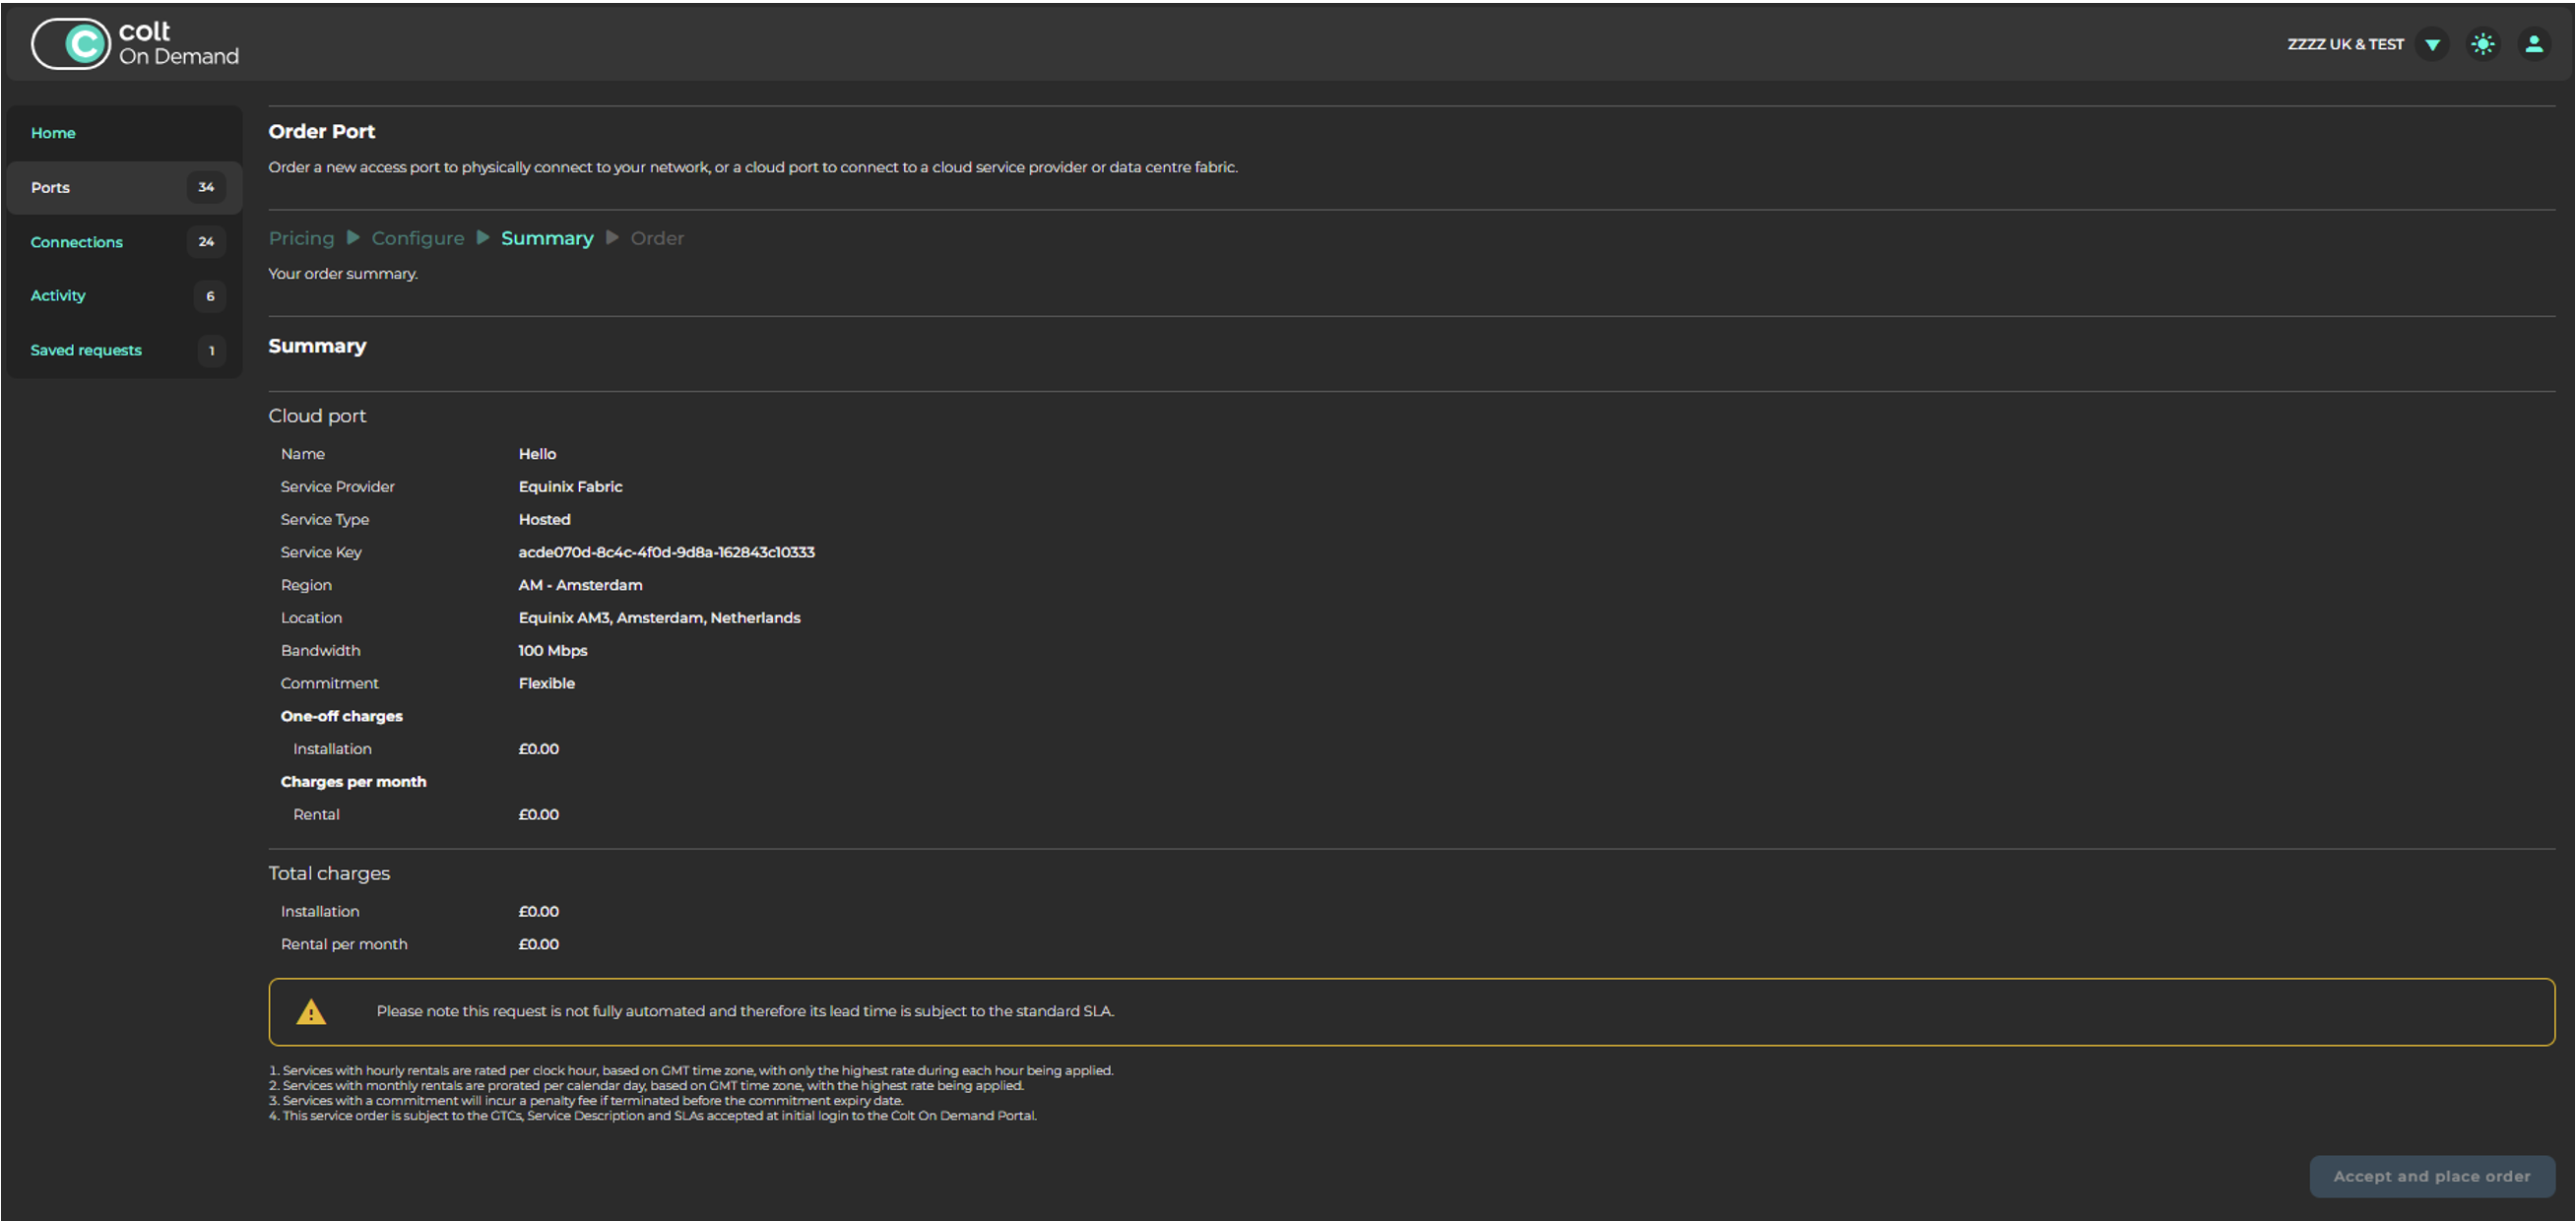
In the Configure window, configure your port:
— In the Service Key field, enter your connection ID from Equinix Fabric.
- In the Name field, assign a unique name to the port.
- Click Continue.
-
Review your order, when you are ready, click Accept and place order.
Once the order is completed, the cloud port is displayed under Equinix.
Adding the Connection to the Cloud Port
-
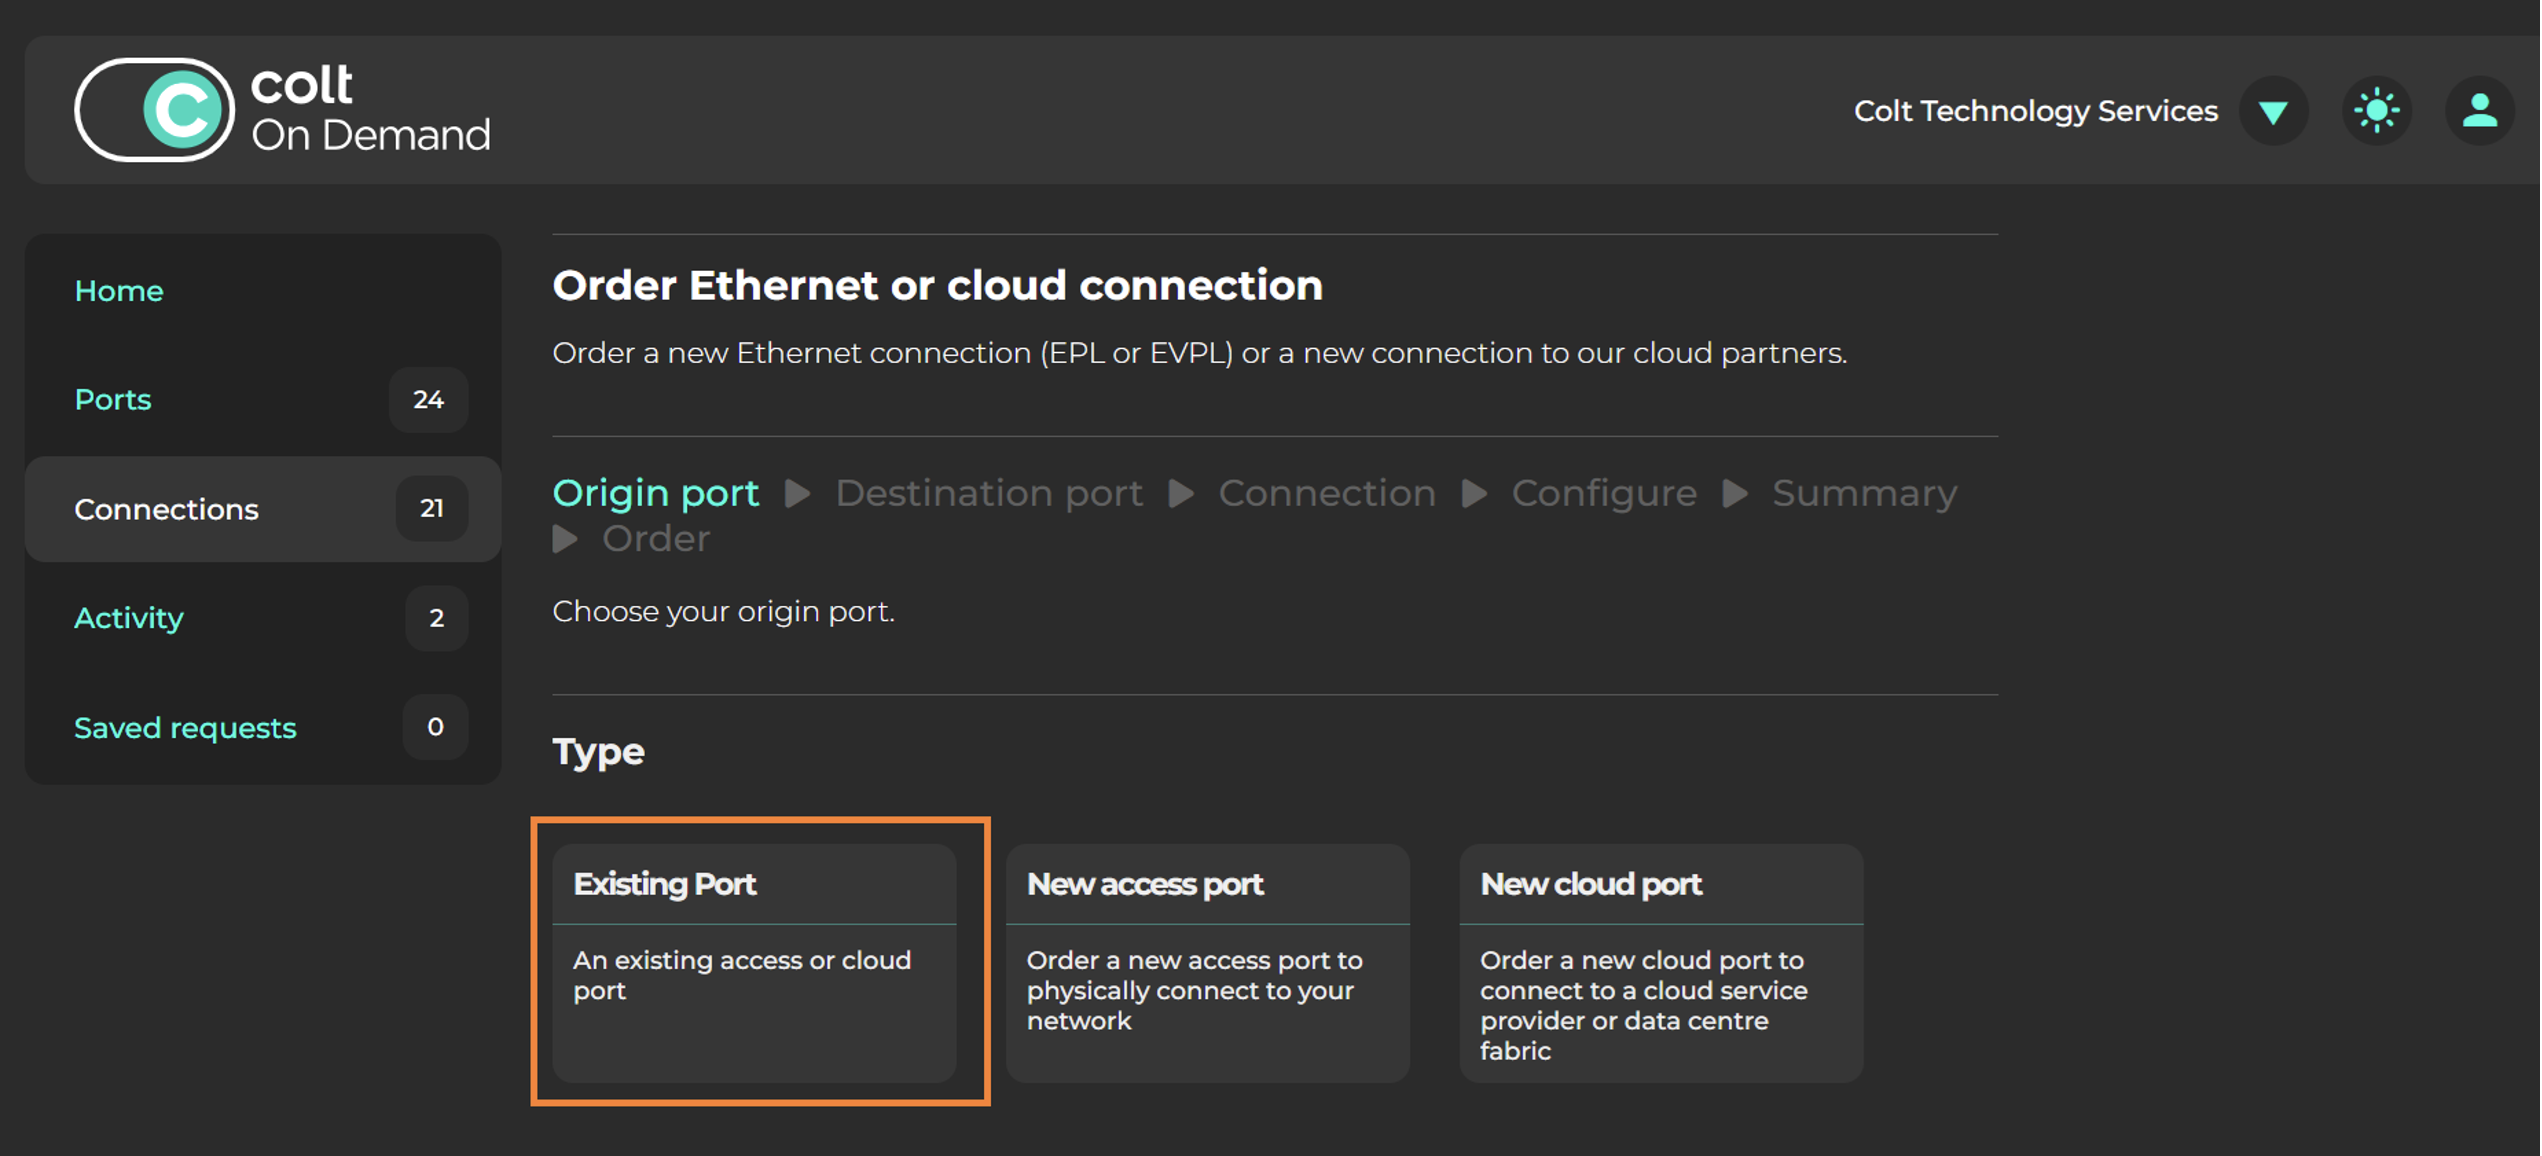
To add the cloud connection to your network, select Connections and click New Connection.

-
To add the connection to your Equinix cloud port, select Exiting Port.
-
Under Choose Port, select the Equinix cloud port.
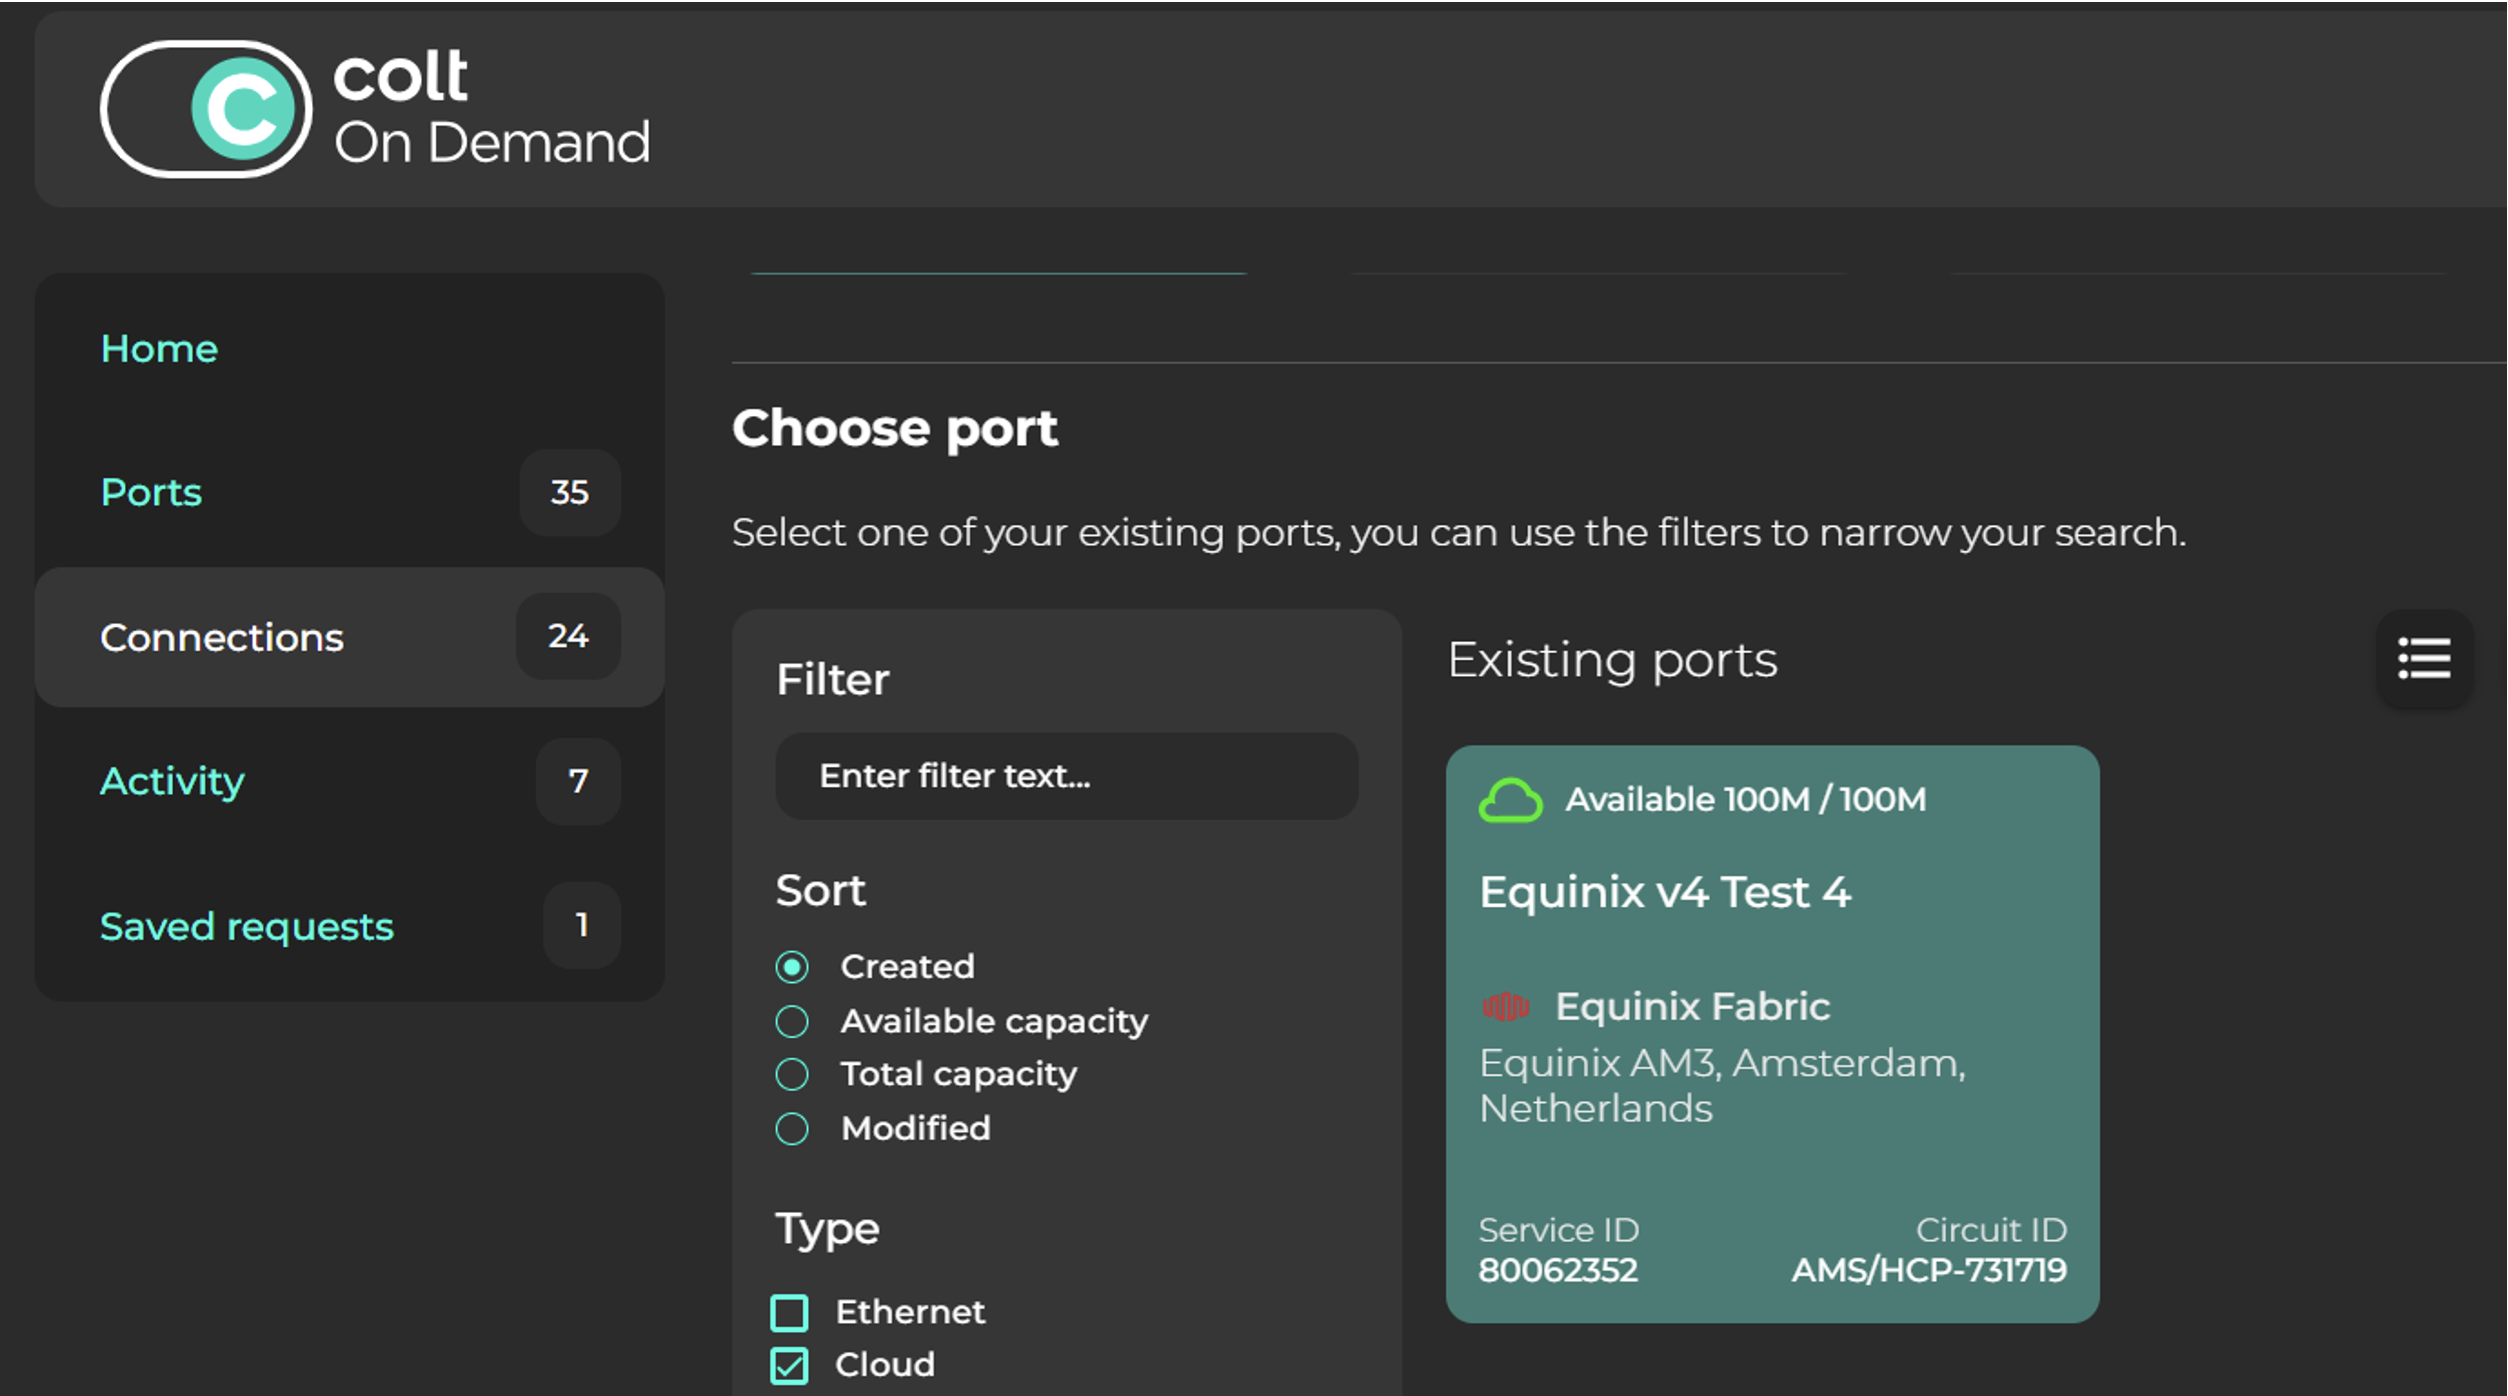
-
Configure the connection.
- Enter a name for the connection.
- Select a circuit bandwidth, then a contract duration between 1 hour and 36 months.
- Select VLAN configuration on destination port.
- Click Continue.
-
Review your order and click Accept changes & submit.
The connection is provisioned automatically within a few minutes.