Order Internet Exchange
You can order an Internet Exchange port and service in an Equinix IBX data center where you already have a cage or a cabinet. Options for ordering additional features, such as a LAG, VLANs, and BGP configurations are available.
Prerequisites
To order Internet Exchange services you need both the Ordering permission for Network Ports AND a role with the fabric.internetexchangeservice.create permission, such as the Fabric Manager role.
The Roles and updated ordering features are rolling out to all accounts in mid-October 2026. See Internet Exchange Permissions for more details on the changes. If your account hasn't been updated, you can still order Internet Exchange ports using the legacy process.
-
Sign in to the Customer Portal and navigate to Internet Exchange Services.
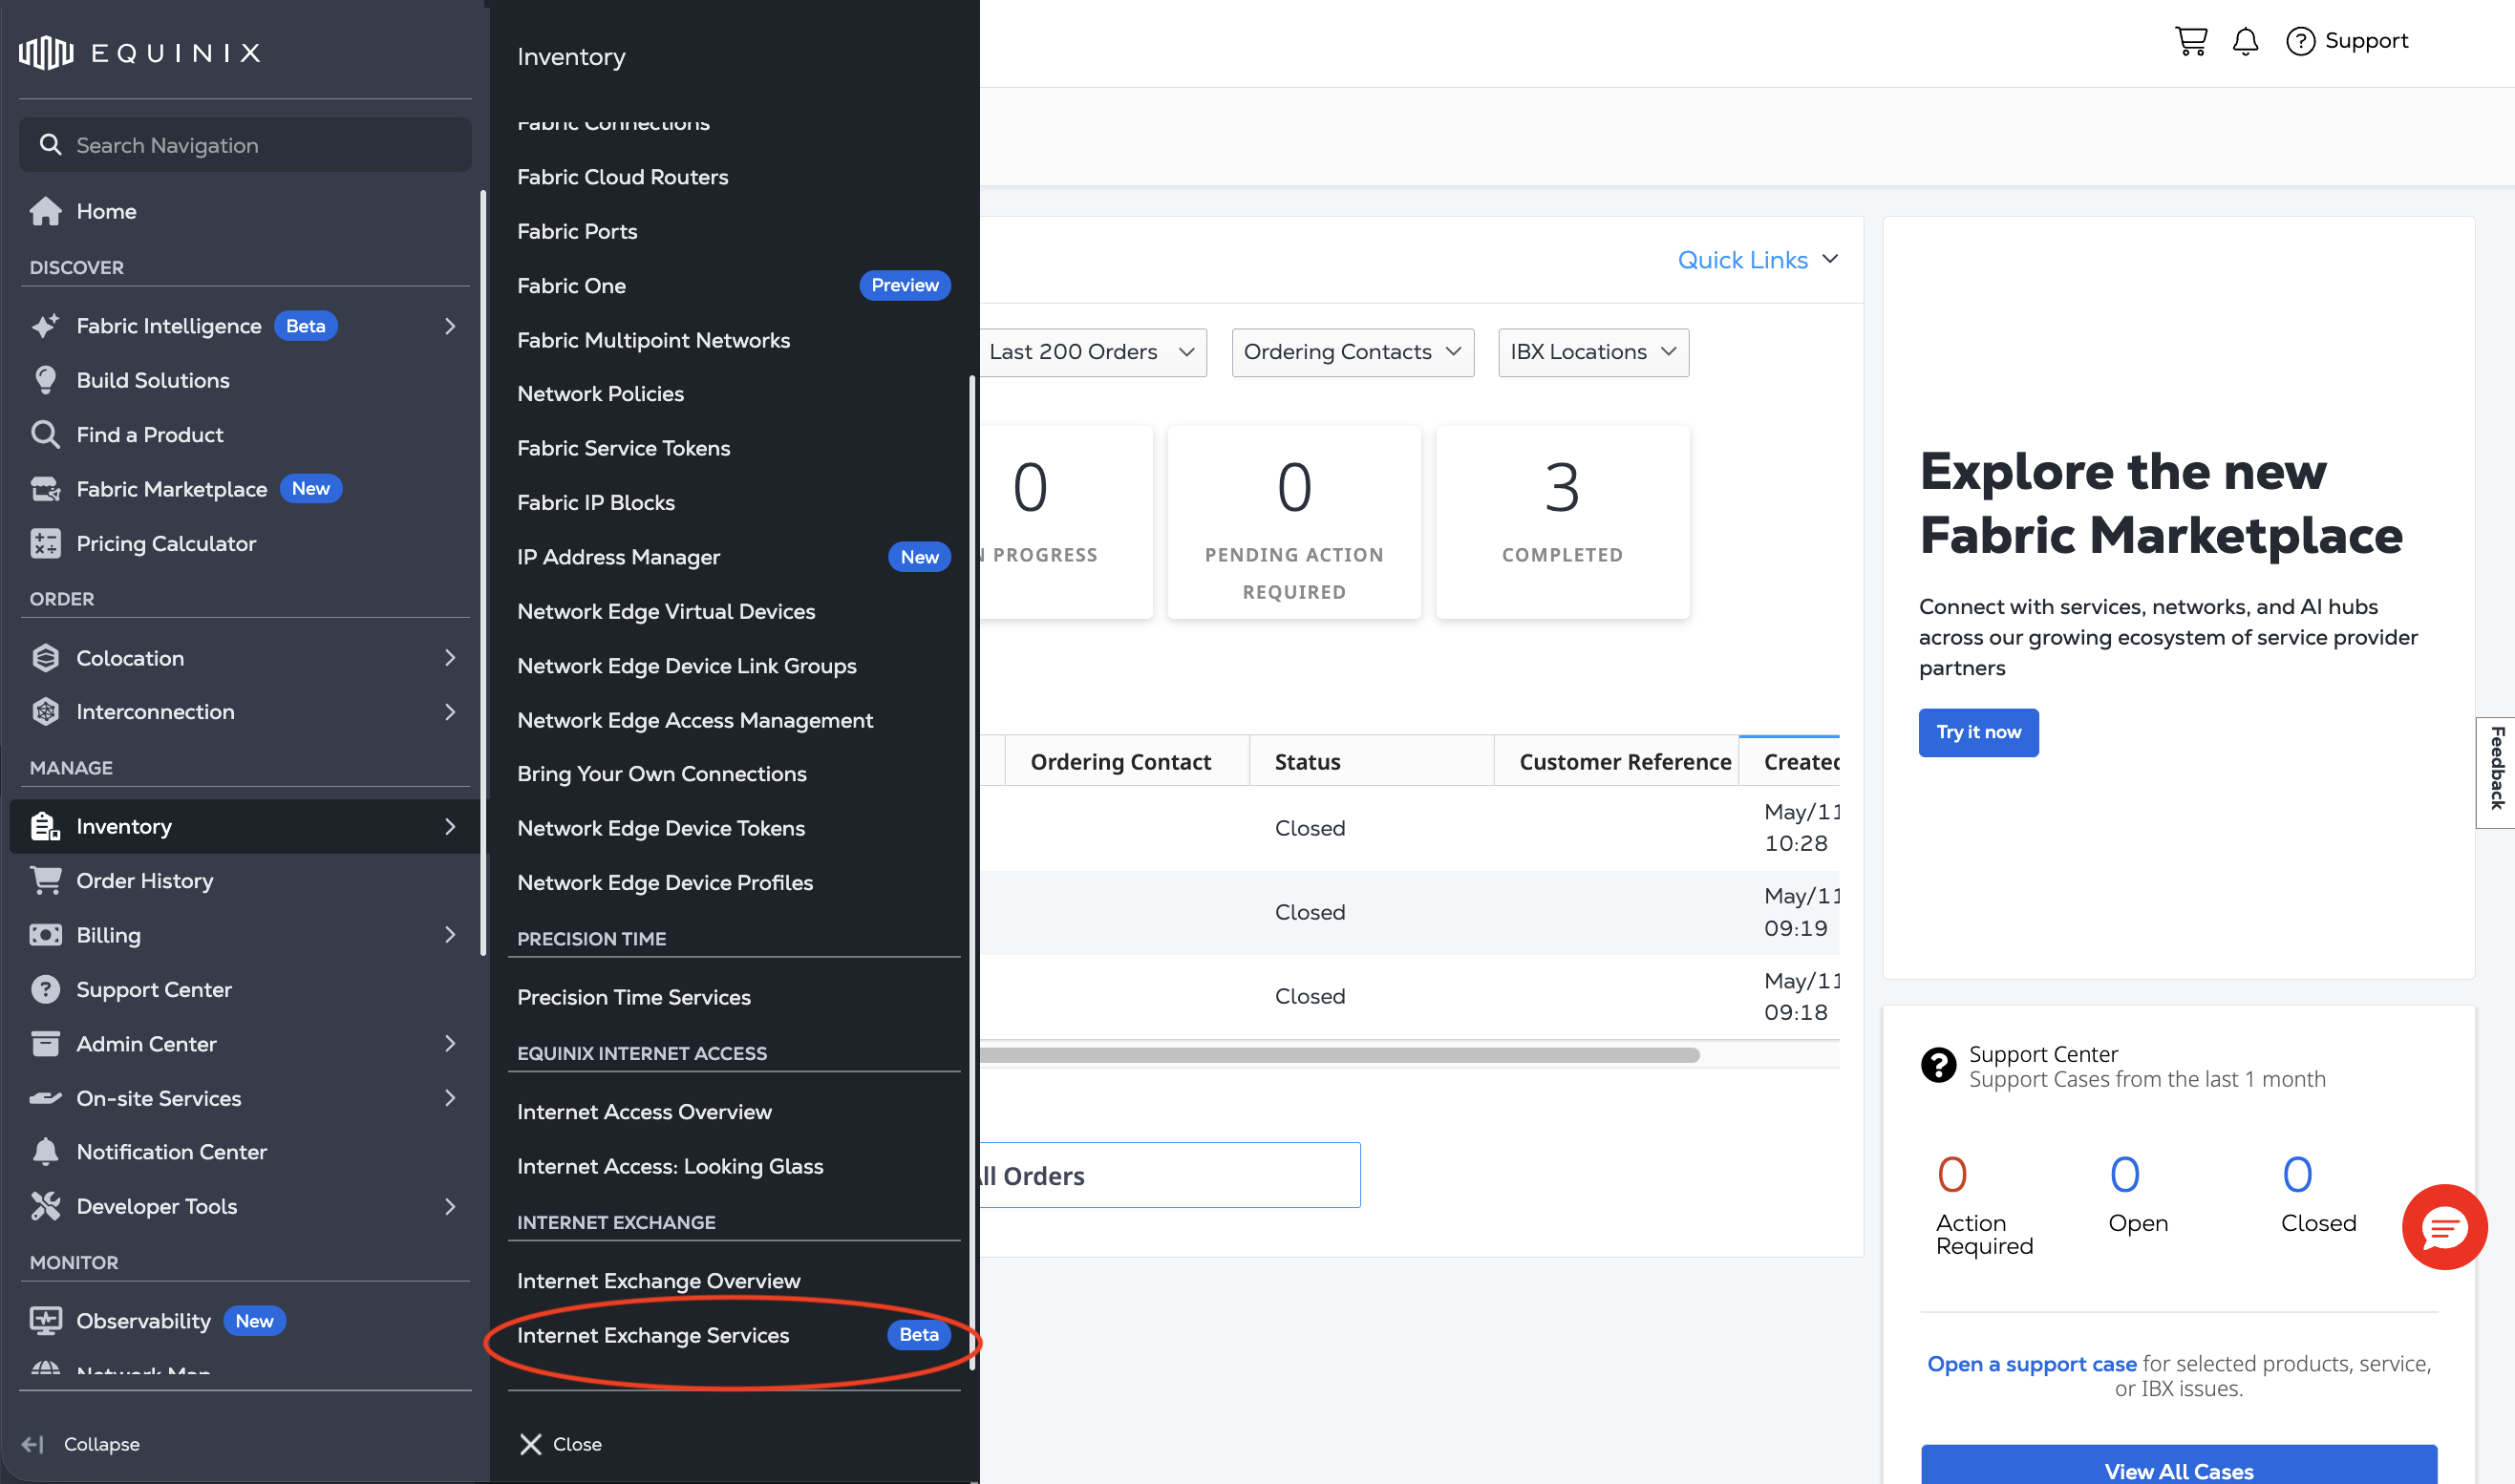
-
Select the Project to create your service in from the Project Switcher.
-
Click Create an Internet Exchange Service.
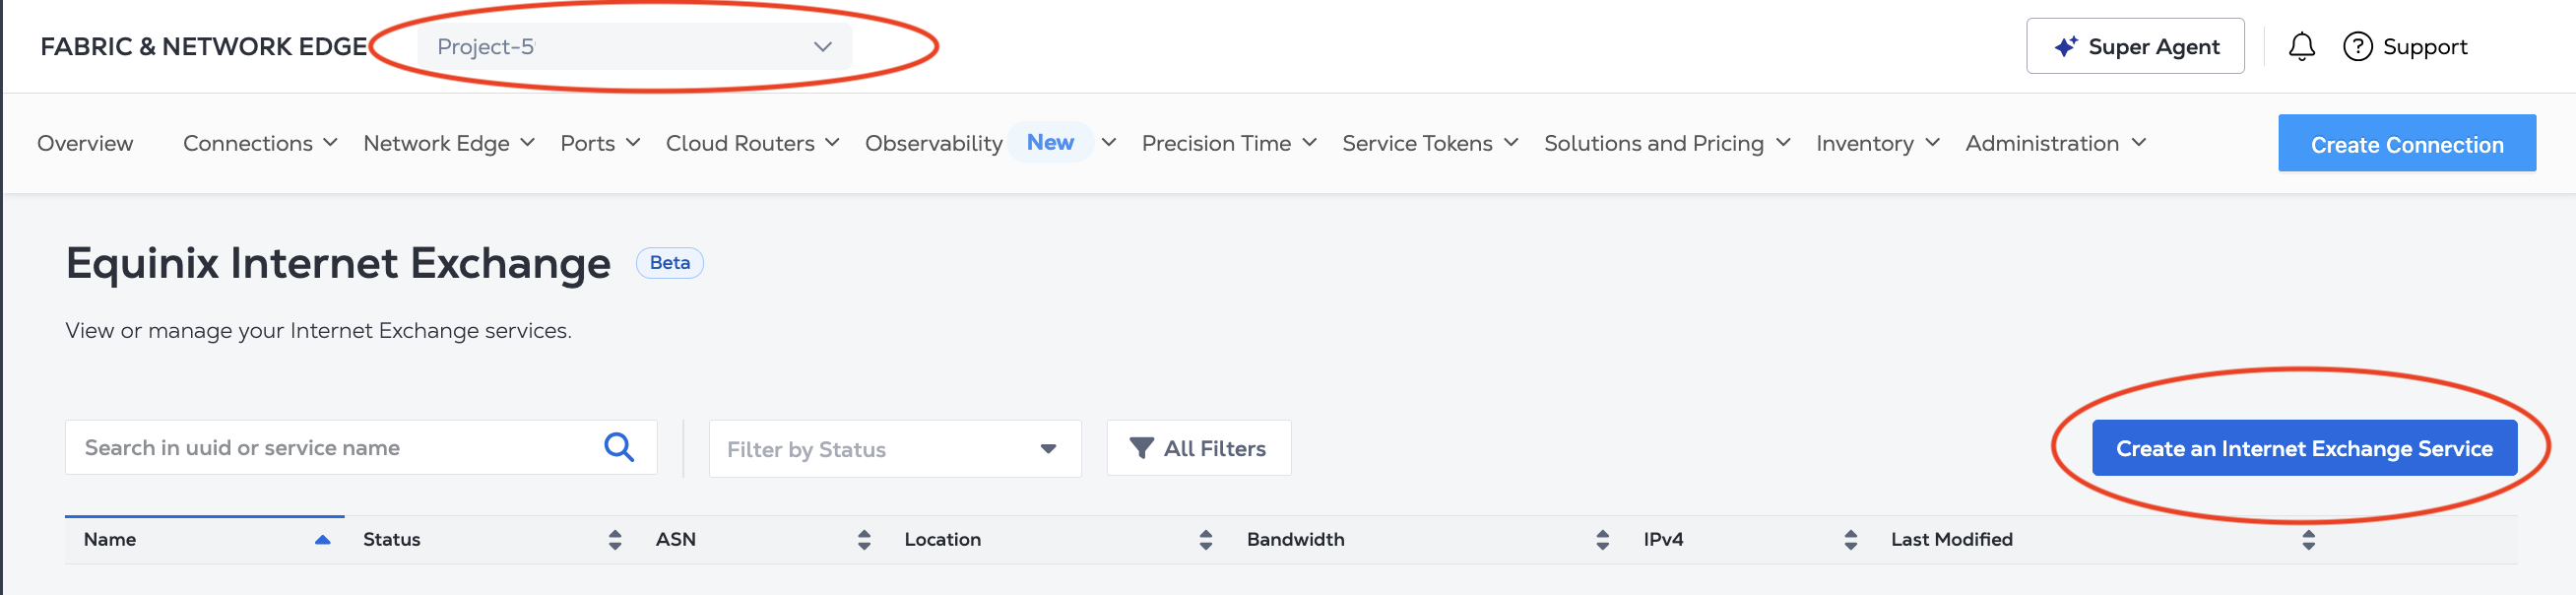
Configure Your Service
-
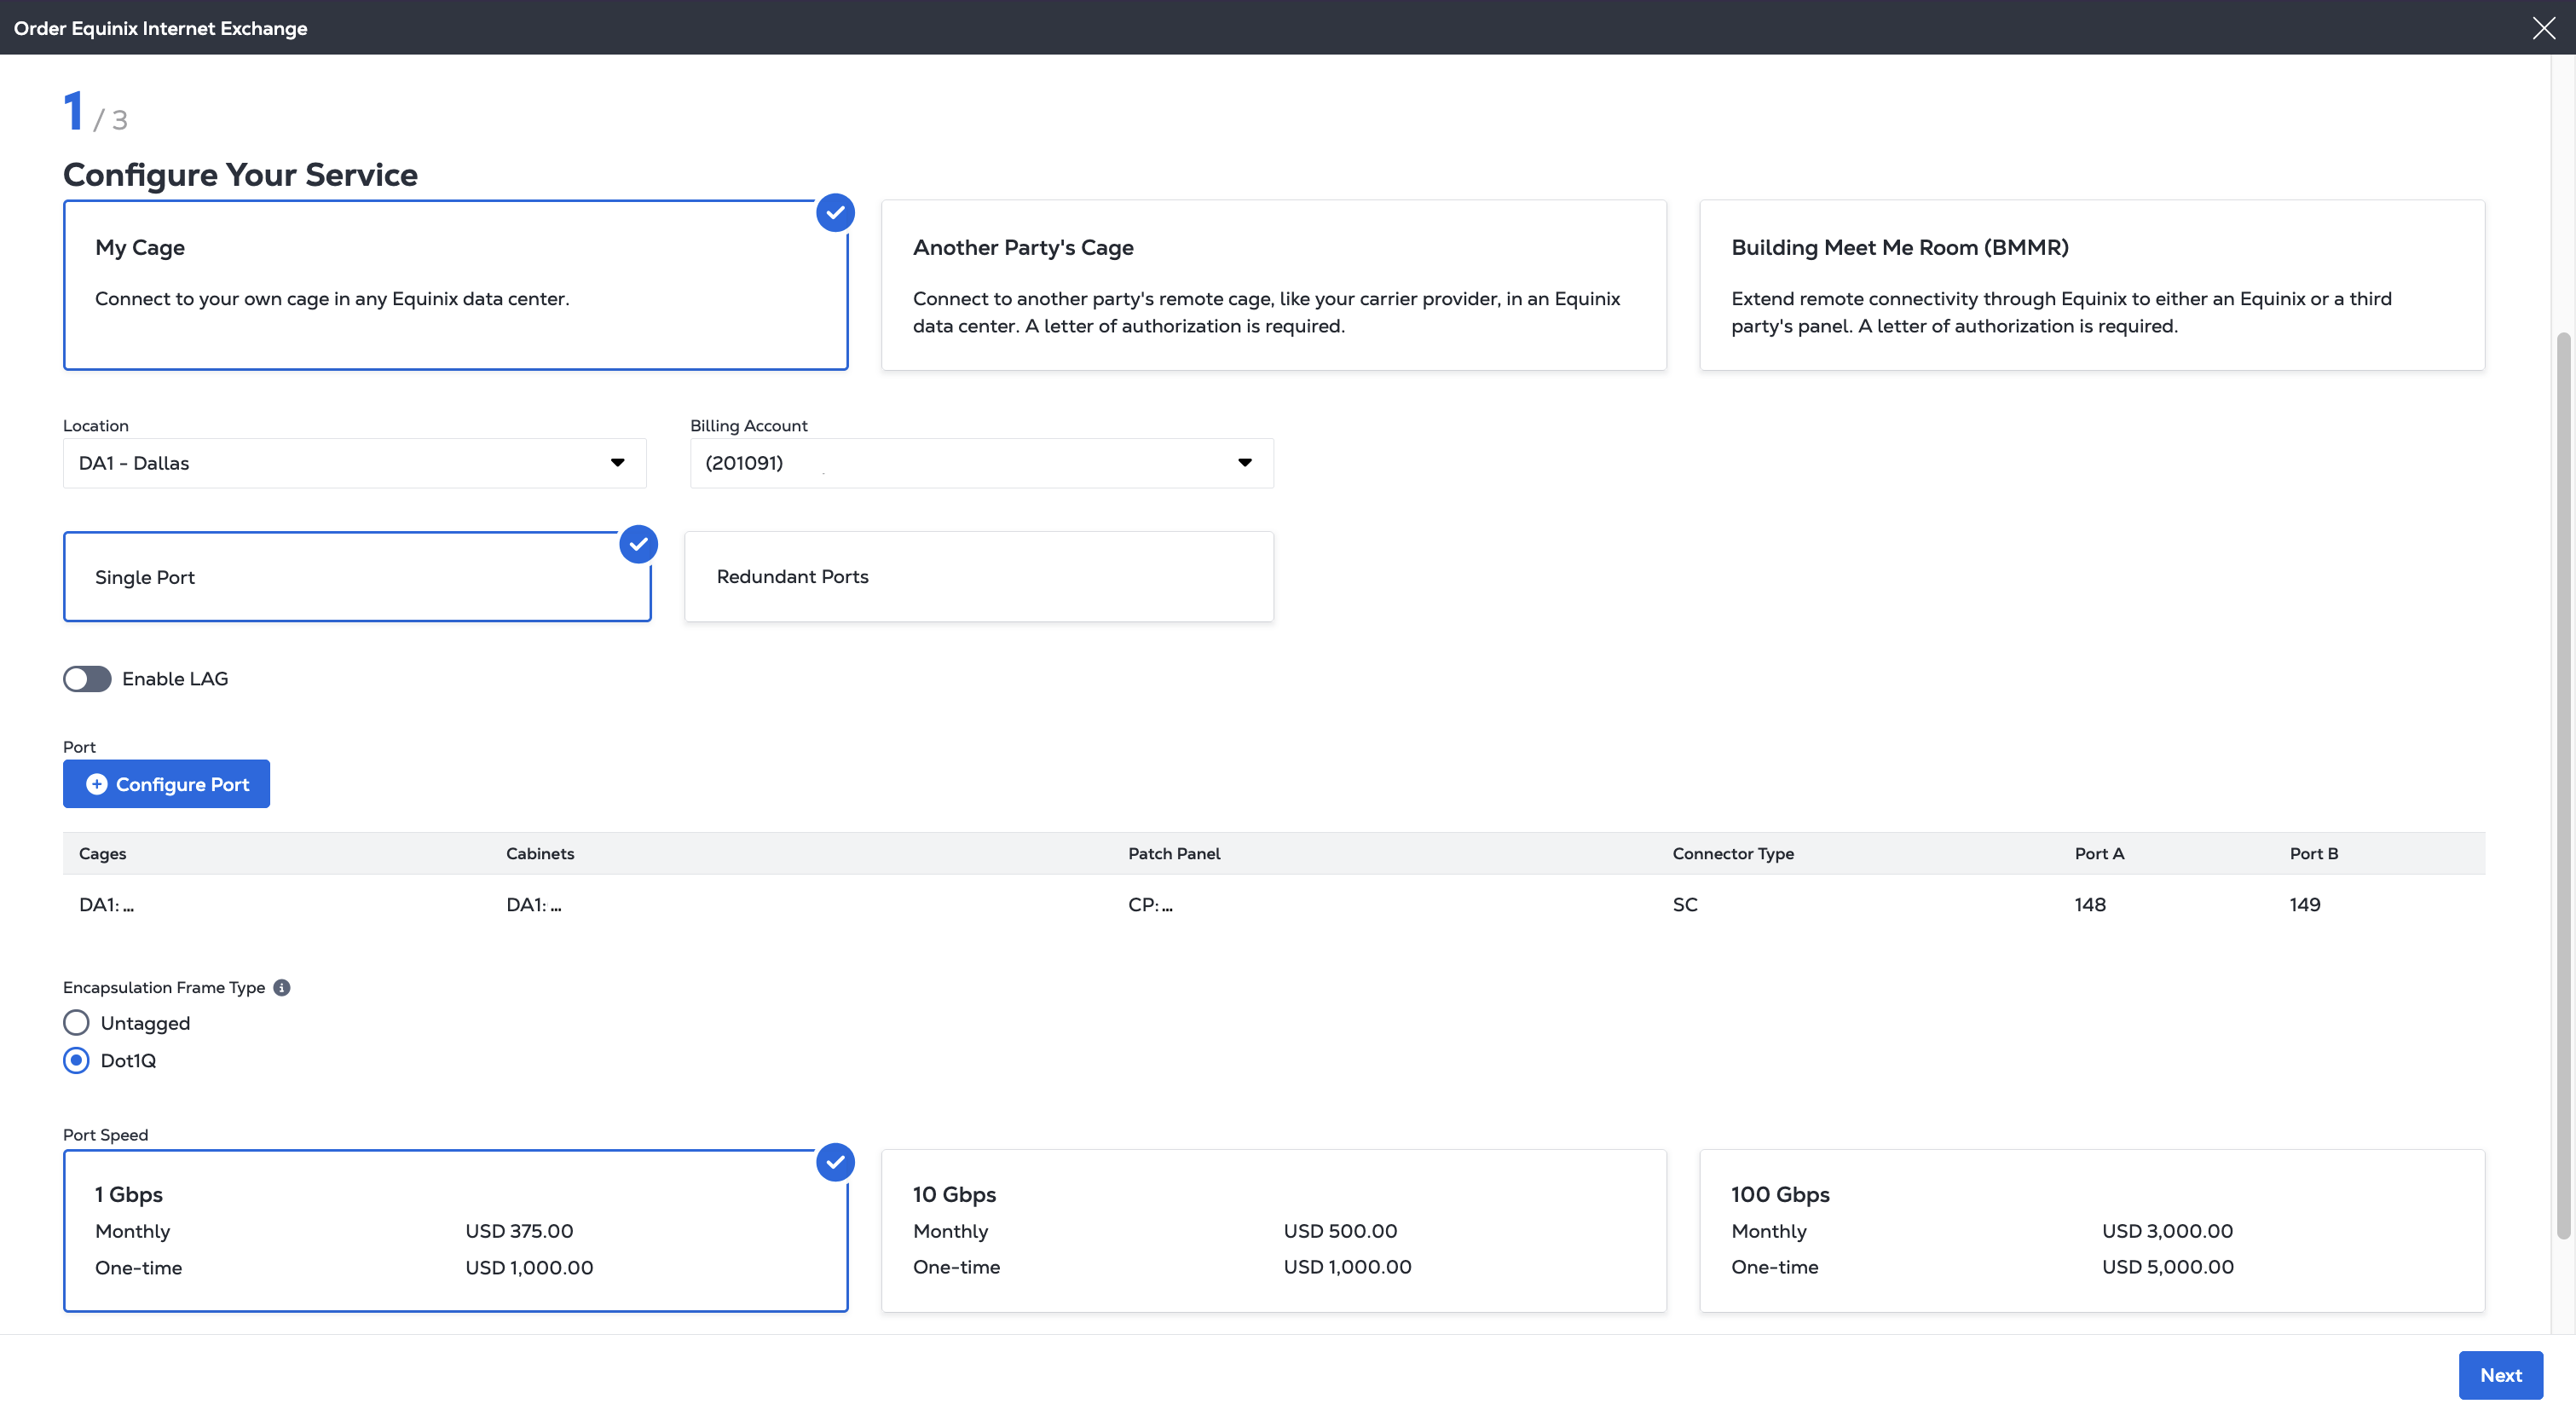
Select the origin where you are connecting from.
- My Cage - Connect to your own cage in any Equinix data center.
- Another Party's Cage - Connect to another party's remote cage, like your carrier provider, in an Equinix data center. A letter of authorization is required.
- Building Meet Me Room (BMMR) - Extend remote connectivity through Equinix to either an Equinix or a third party's panel. A letter of authorization is required.
-
In the Location drop-down, select the IBX location for your service.
-
In the Billing Account drop-down, select the billing account to use.
-
Port Configuration
-
If you are connecting from My Cage:
Choose whether to order a Single Port or a Redundant Port.
- If you choose a single port, you can also choose whether to Enable LAG. If enable LAG, choose the number of ports in the new LAG.
- Currently, redundancy can only be added to an existing port. Select Redundant Port and click +Select an Existing Port. Choose the Primary Port from the list of eligible ports. Click Submit.
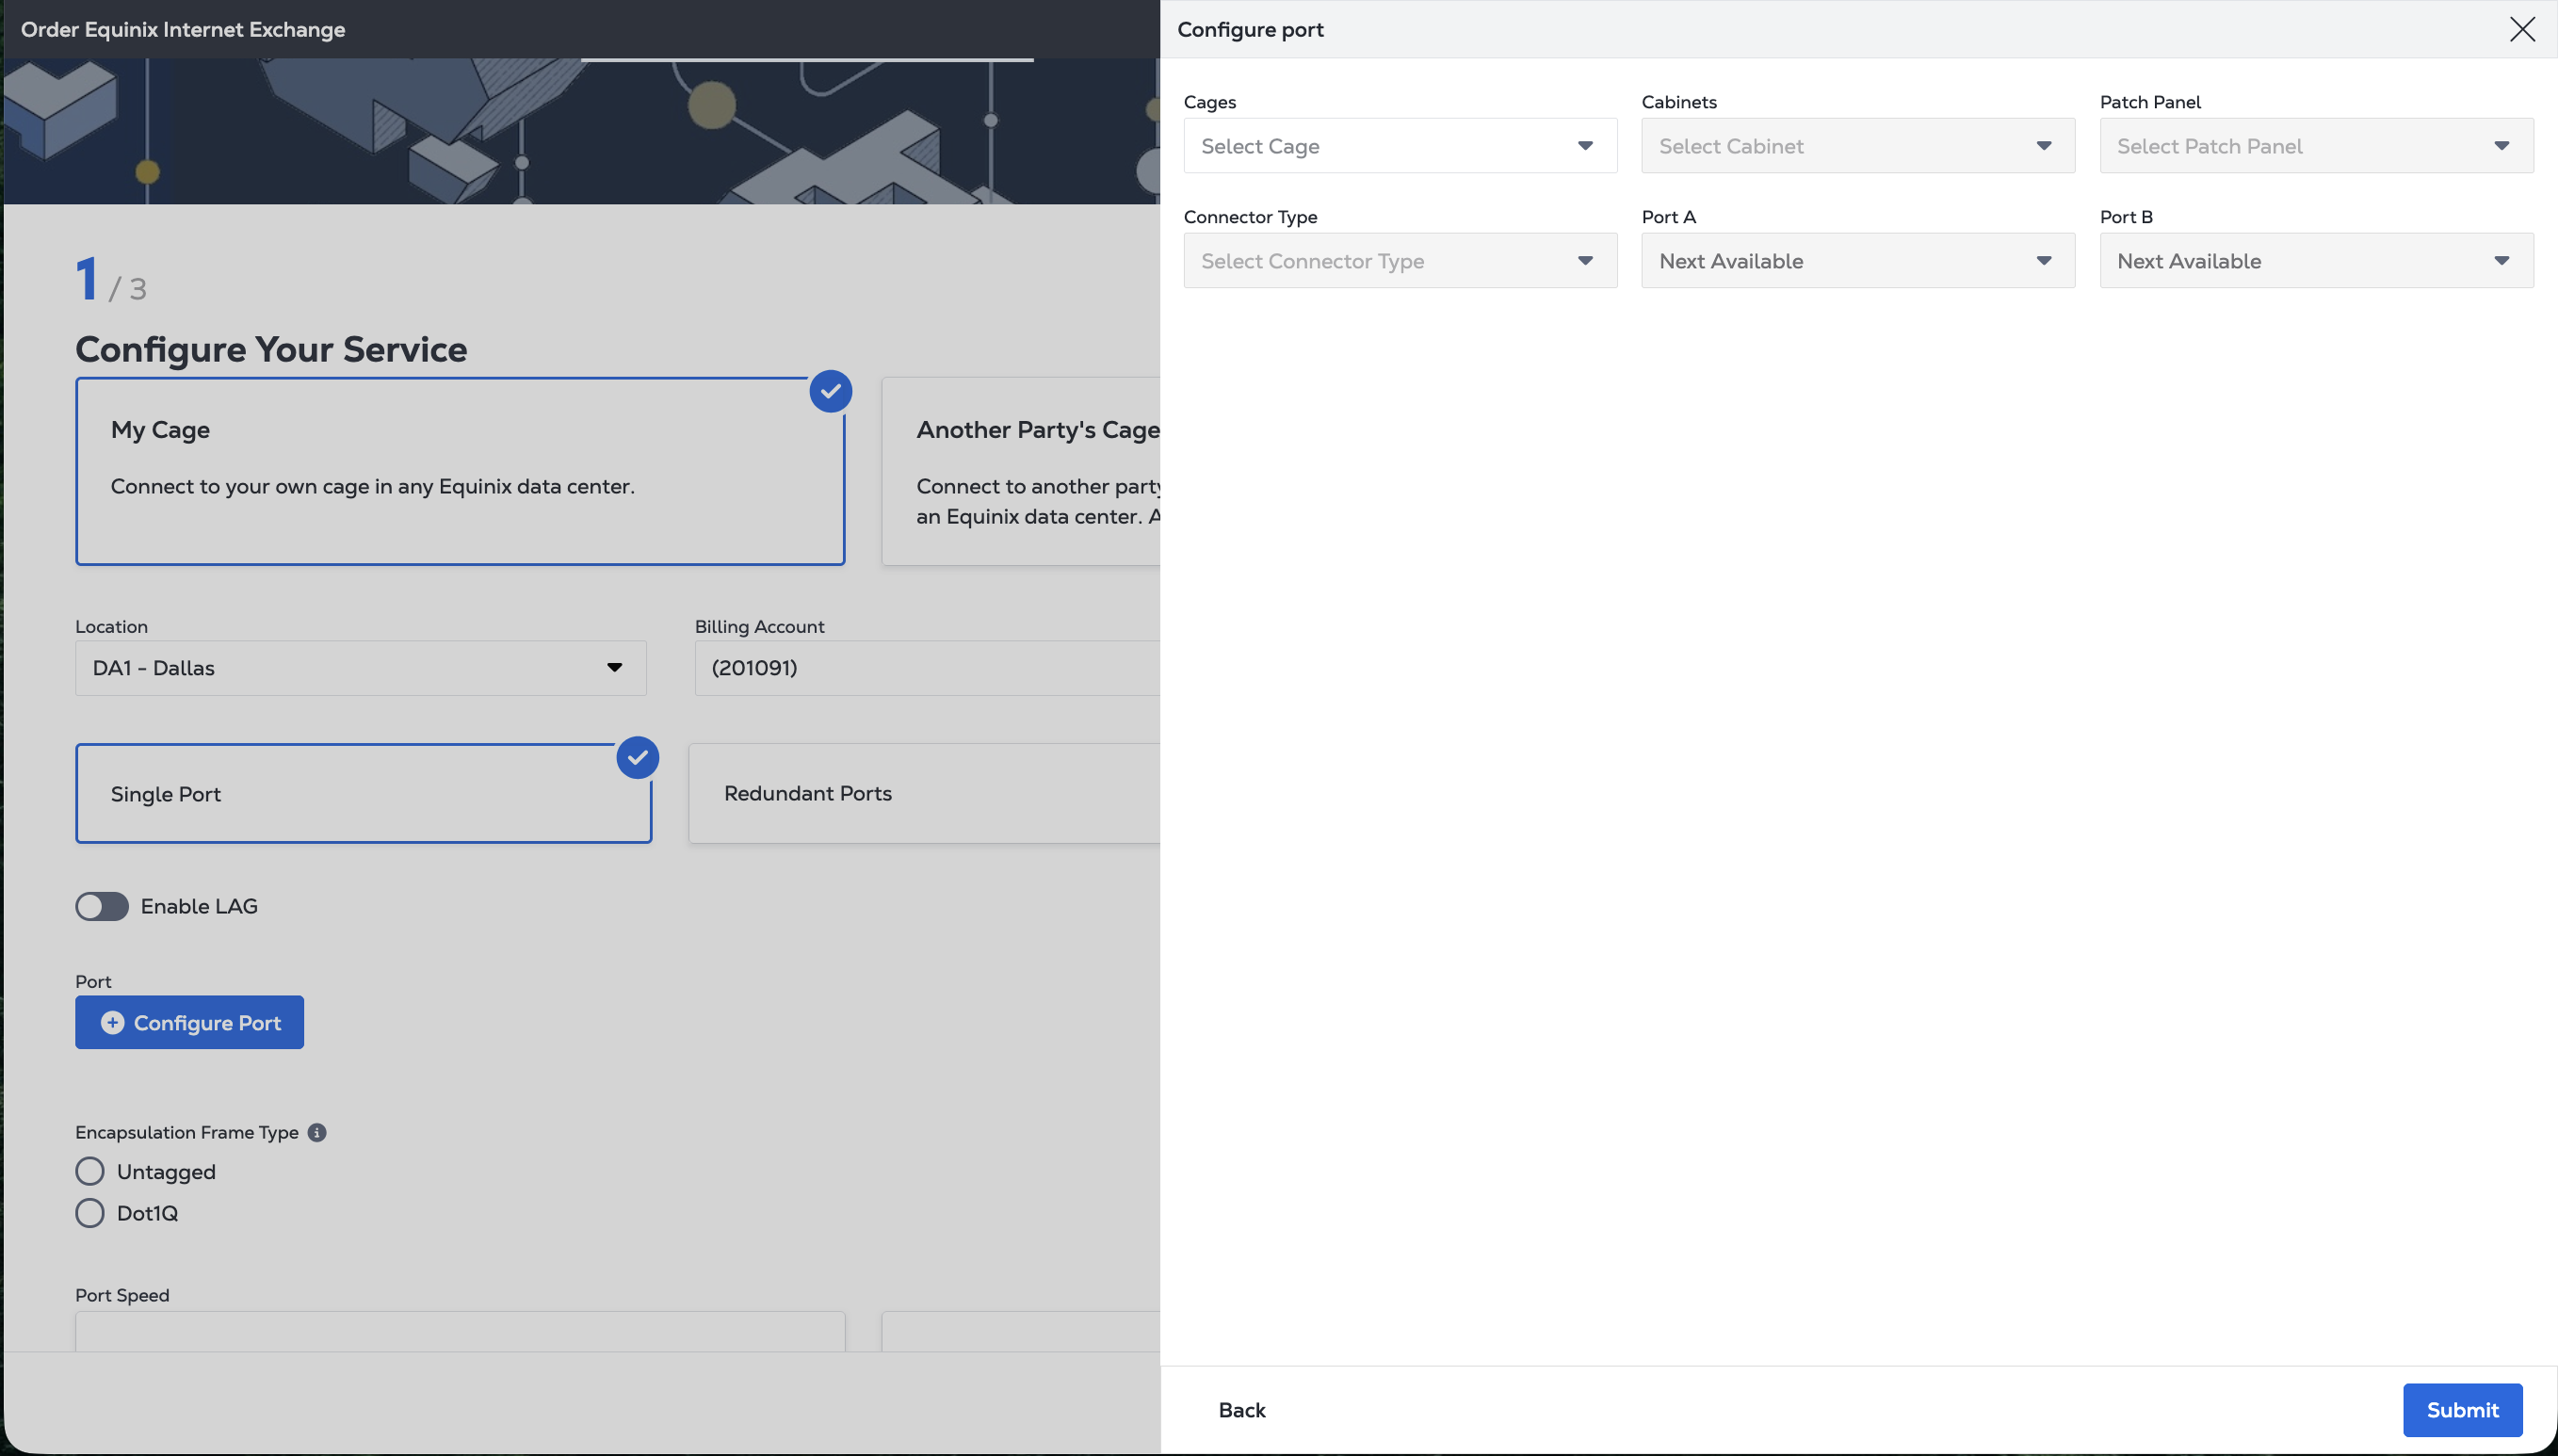
Click + Configure Port
For each new port:
- Select a Cage/Suite.
- Select a Cabinet.
- Select a Patch Panel.
- Select a Connector Type.
- Choose the port numbers for Port A and Port B from the drop-down lists.
-
If you are connecting from Another Party's Cage , upload the LOA containing the other party's port details. You can also choose whether to Enable LAG. If enable LAG, choose the number of ports in the new LAG.
-
If you are connecting from a Building Meet Me Room (BMMR), choose who will install the final connection: Equinix or Self (you). If Equinix is performing the installation, upload the LOA.
-
-
Choose the Encapsulation Frame Type - To support passing traffic for multiple VLANs, select Dot1Q. To pass untagged traffic, select Untagged.
-
Select a Port Speed and Interface Type. The port speed options vary from 1Gb to 100Gb per second, depending on the IBX location.
- 1 Gbps - 1G LX
- 10 Gbps - 10 SMF
- 100 Gbps - 100G LR4
Click Next.
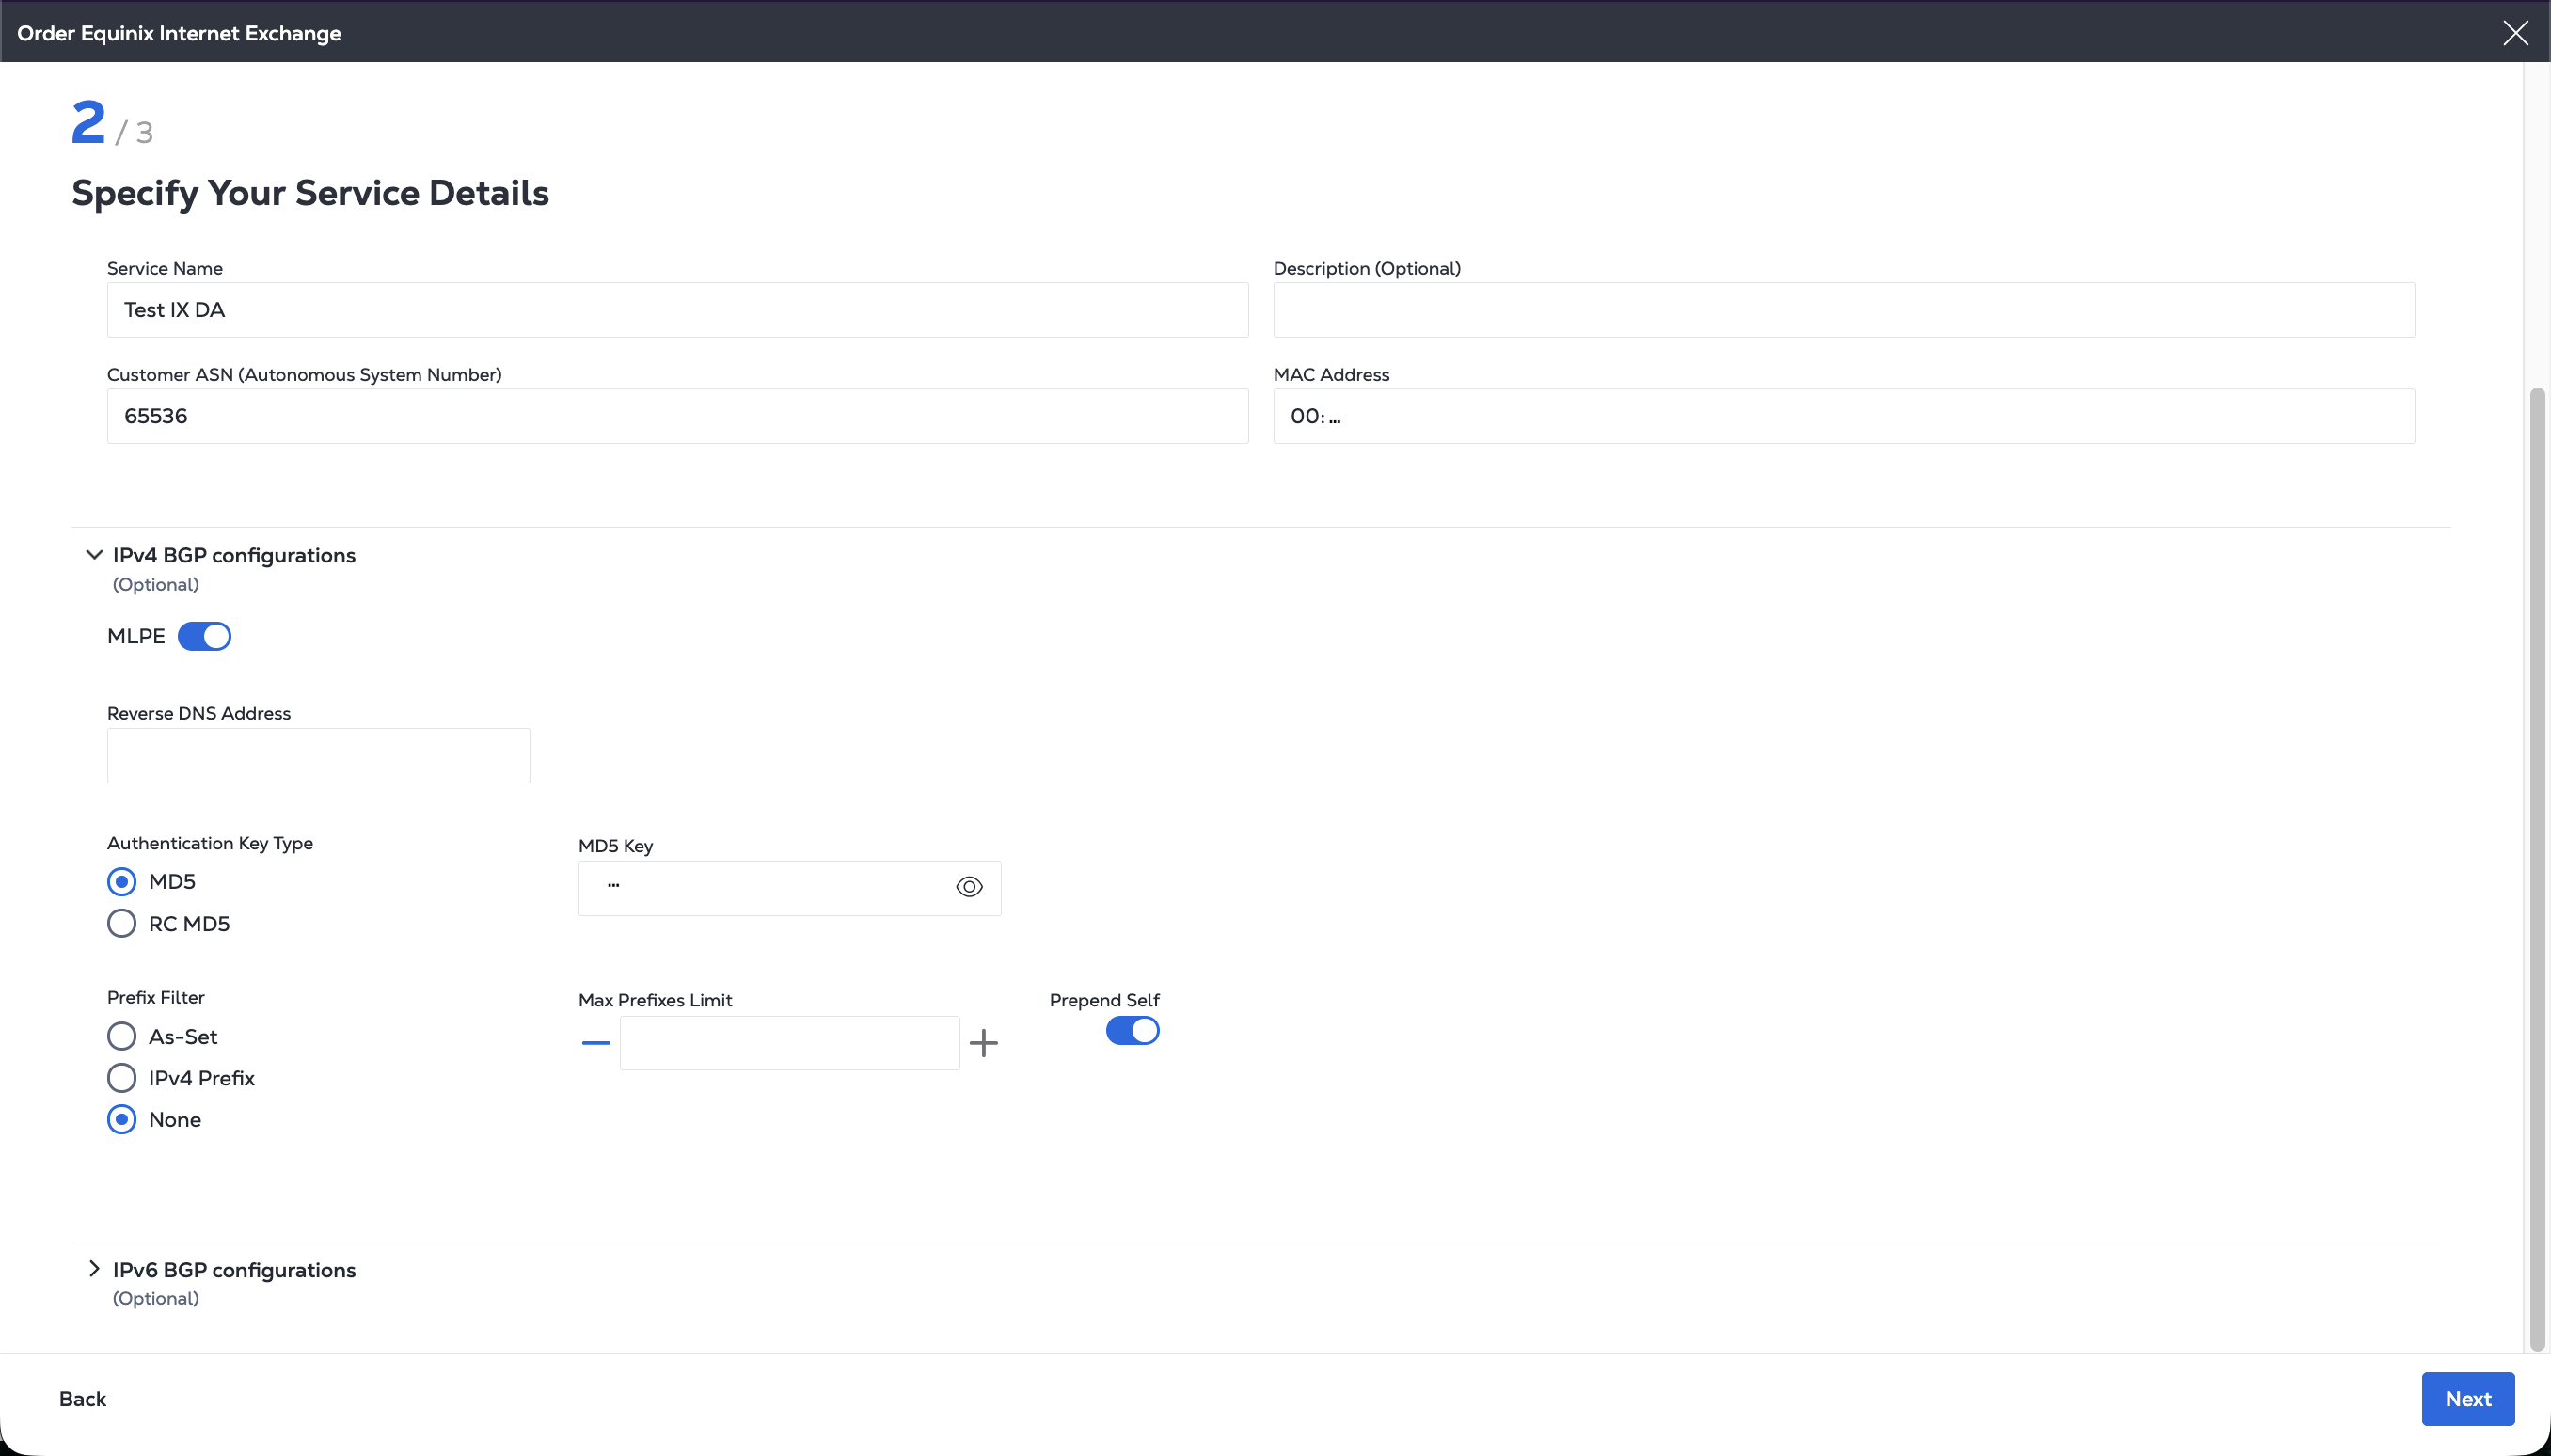
Specify Your Service Details
-
Enter a Service Name. Entering a Description is optional.
-
Enter an autonomous system number (ASN) in the Customer ASN field. If you are ordering a Redundant Port, this value is already provided.
-
Enter a Port MAC Address.
-
(Optional) Provide your IPv4 and IPv6 BGP configurations for Multi-Lateral Peering Exchange (MLPE). Click MPLE and configure the following:
- Reverse DNS Address
- Enable Authentication, choose the key type, and enter the key.
- Prefix filter: AS-Set, IPv4 Prefix, or None.
- Max Prefixes Limit
- Prepend Self
Click Next.
Review Information
-
Review the Pricing Information section and select I agree.
-
Review the Port Details and Service Details for your order.
-
Review the information in the Contact Information section.
- Review the Technical Contact, Notification Contact, Escalation Contact, and Peering Contact information.
- To change a contact, click the edit icon and select a new contact from the list. Click Select Contact.
-
(Optional ) Add a Purchase Order Number. Click Select Purchase Order Number, choose a PO number from the list, and click Select Purchase Order.
-
Once you have finished reviewing, click Create Internet Exchange Service.
Monitoring Your Service Status
You can monitor the status of your new service in the Internet Exchange Inventory.
Initially the status is PROVISIONING. When provisioning completes, the status moves to PENDING ACTIVATION and then you can Activate Your Service.