Order Internet Access Using Virtual Devices
If you have a Network Edge device, you can use Network Edge to order Equinix Internet Access services. To review the conditions that apply, see Prerequisites.
Equinix Internet Access supports single and dual connections on Network Edge devices, including a single independent connection for each device in a cluster pair or a redundant pair, and end-to-end resilient secondary (redundant) connections for clusters and redundant devices.
To order Equinix Internet Access:
-
Sign in to the Customer Portal and navigate to Internet Access.
-
On the Equinix Internet Access screen, click Configure New Internet Access, and select Using a Virtual Device.

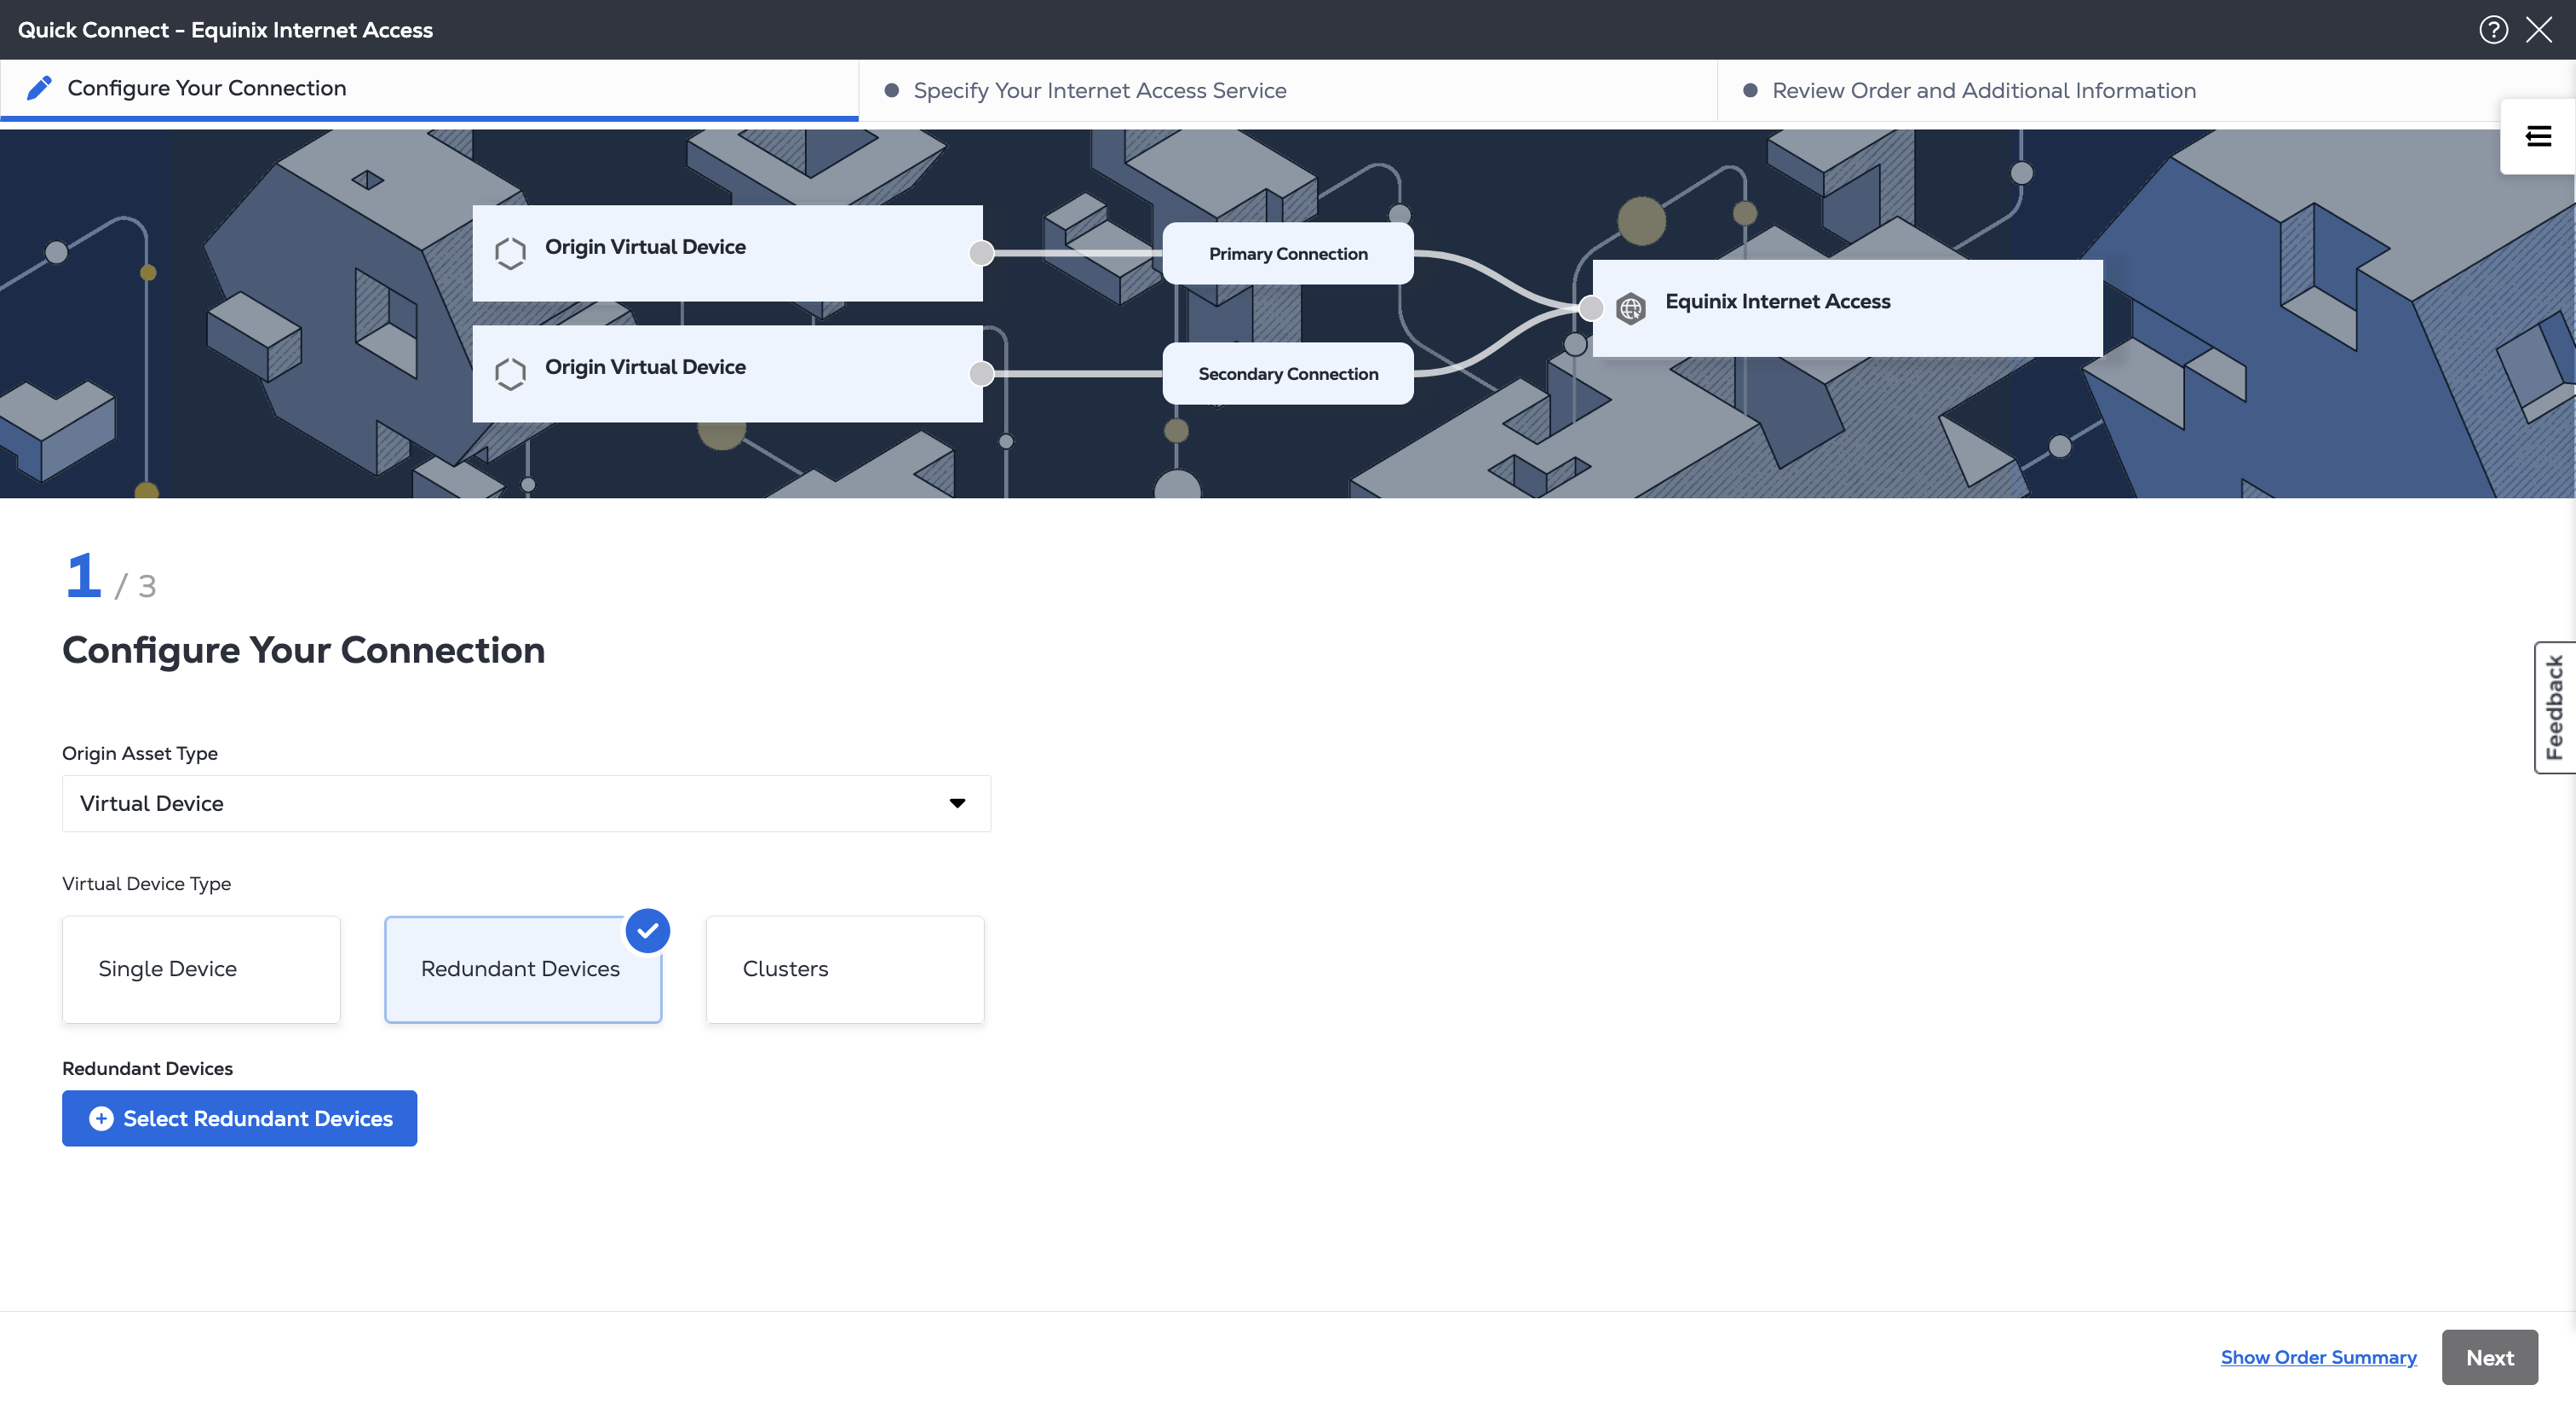
Configure Your Connection
-
Under Origin Asset Type, ensure Virtual Device is selected.
-
Under Virtual Device Type, choose Single Device, Redundant Devices, or Clusters.
-
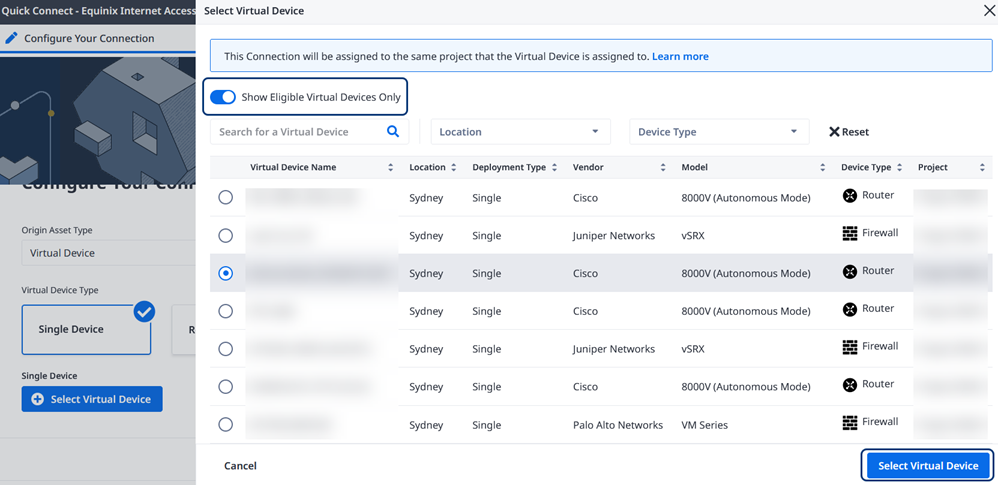
Select the specific device, redundant device, or cluster for the connection.
tipClick the Show Eligible Virtual Devices Only toggle to filter the list of devices so that it displays only those that are available to you. Tool tips are included to explain why some devices are excluded, including specific IBX data centers, available interfaces, and so on.
-
Click + Select Virtual Device.
-
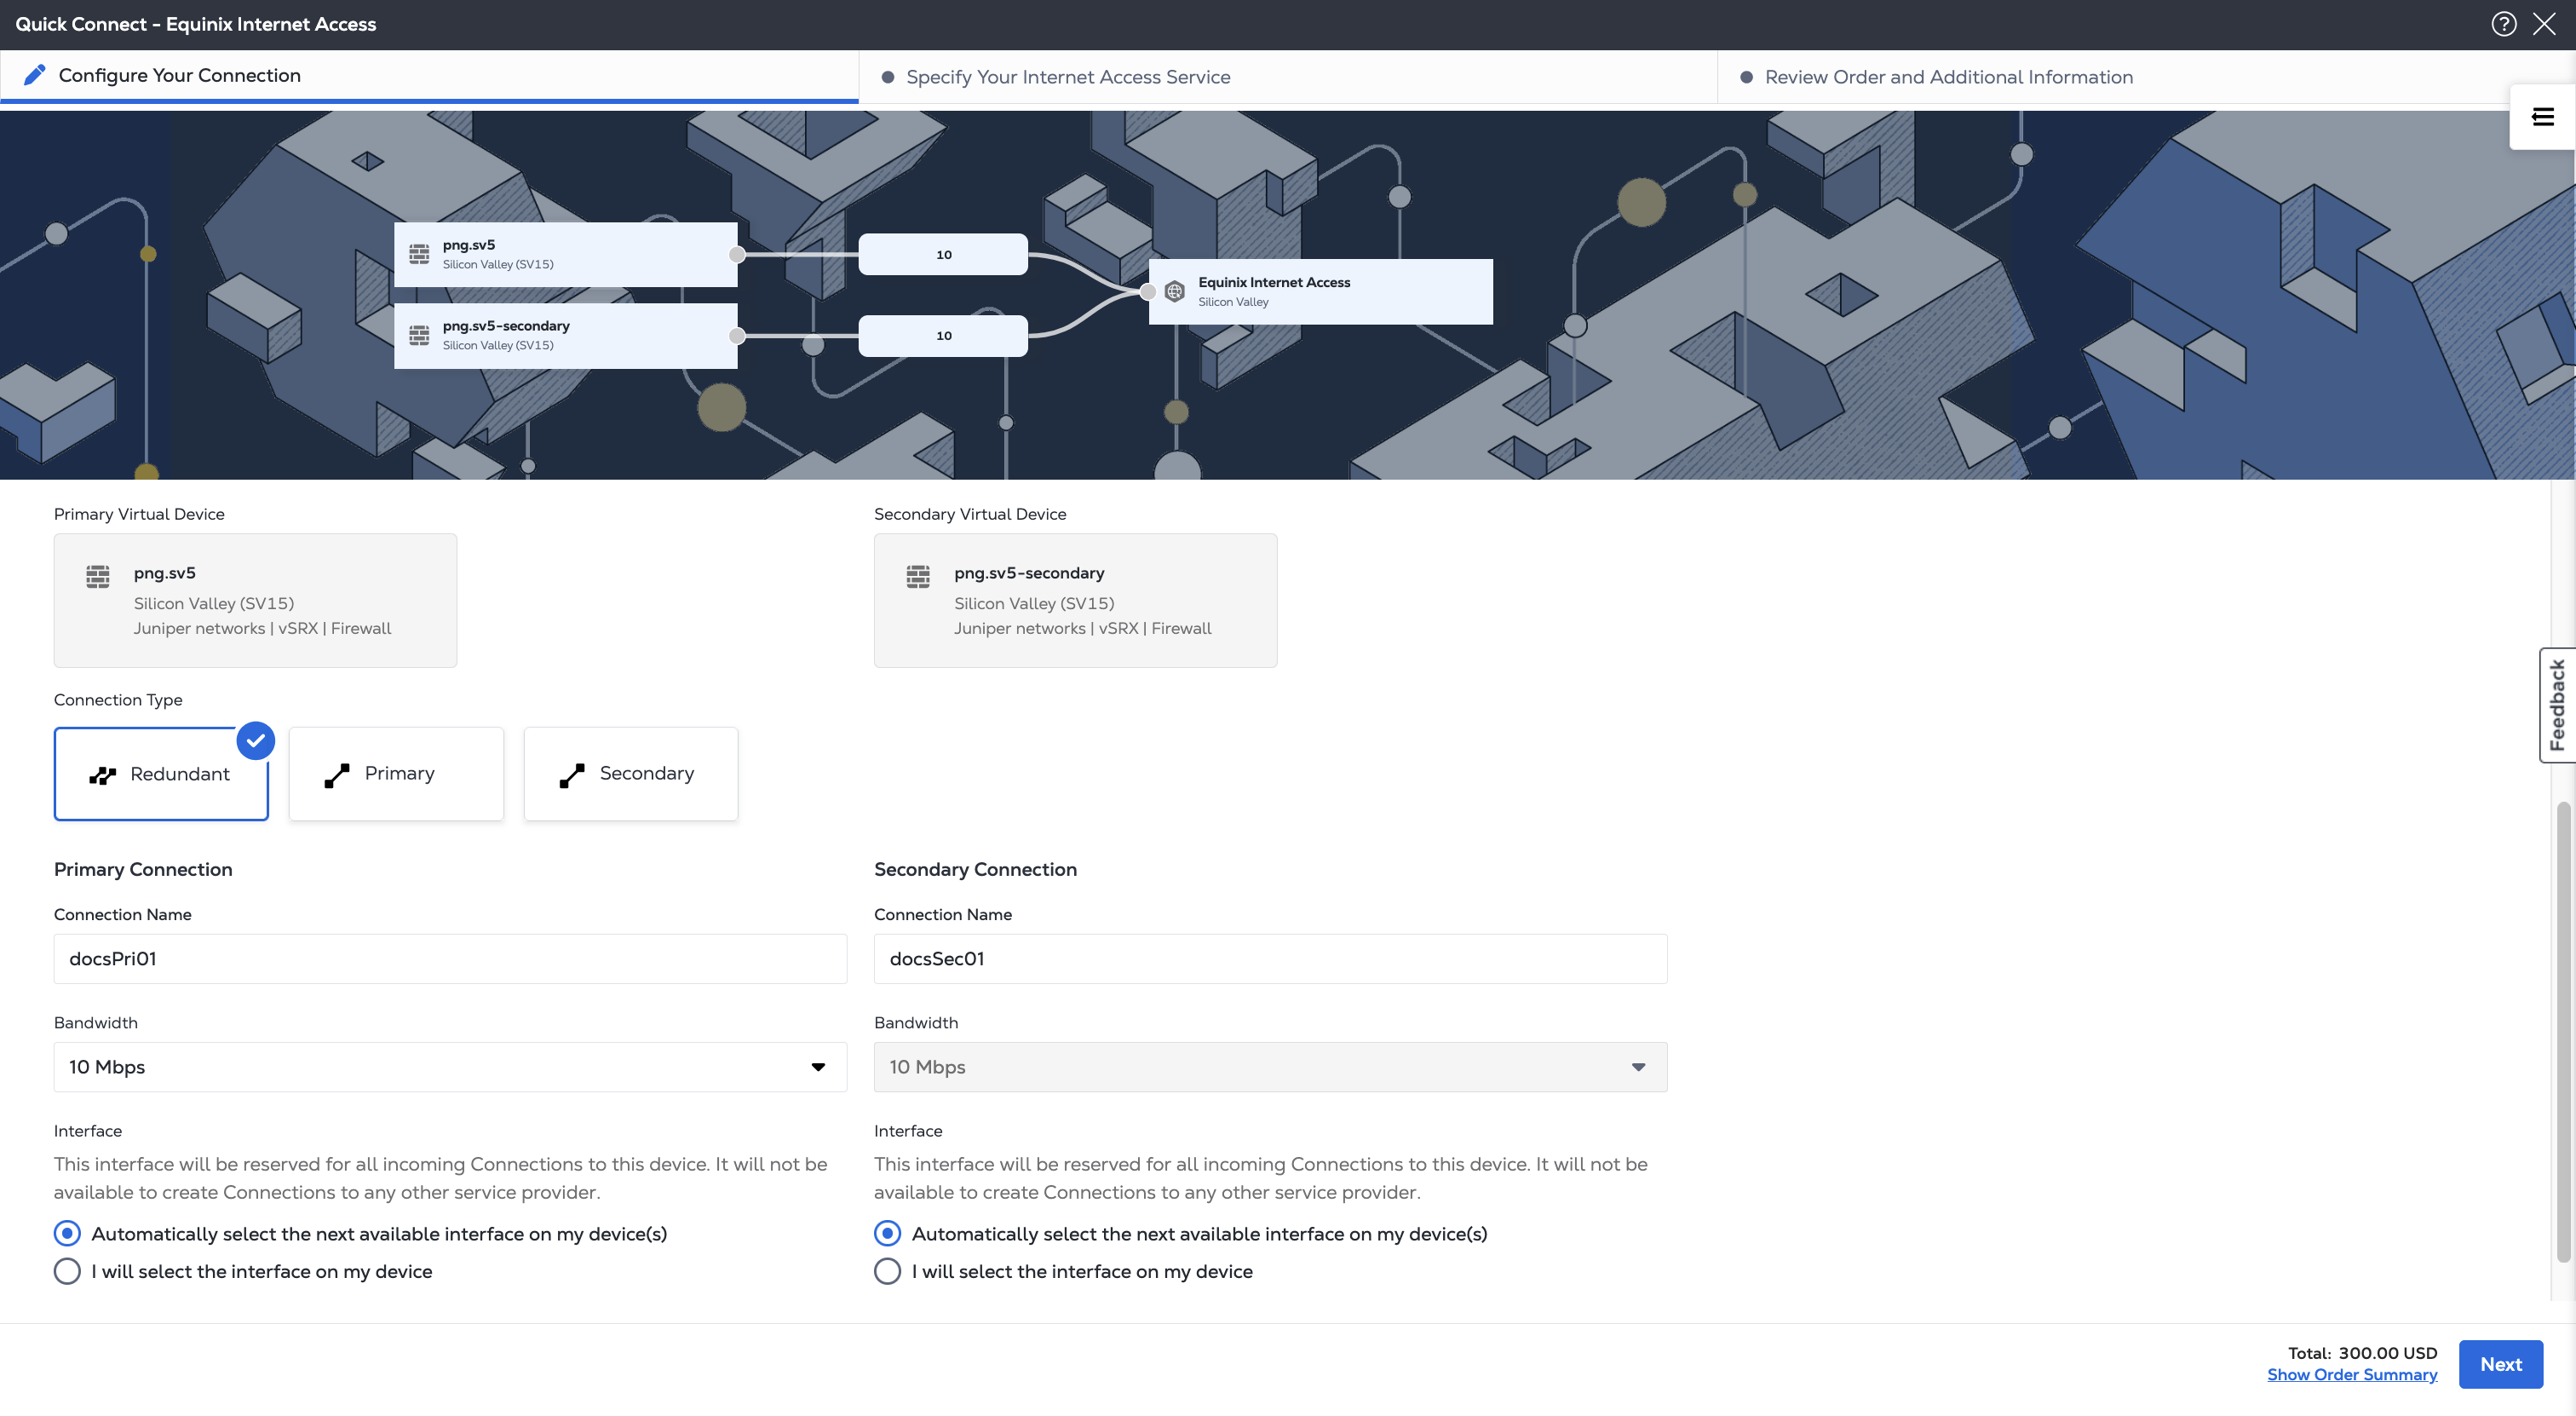
If you selected Redundant or Cluster devices, choose the Connection Type.
- Redundant - Creates the Internet Access service for both devices in the redundant pair, or Node 0 and Node 1 in the cluster.
- Primary – Creates the Internet Access service for the primary device in the redundant pair, or Node 0 in the cluster.
- Secondary – Creates the service for the secondary device in the redundant pair, or Node 1 in the cluster.
-
Give your Connection(s) a name, a VLAN ID, and choose the bandwidth for your service. If you are ordering a redundant connection, the bandwidth is the same for both the Primary and the Secondary connection.
-
Select an Interface for your new internet connection:
- Automatically select the next available interface on my device(s)
- I will select the interface on my device – Choose an interface from the drop-down list.
-
Click Next.
To view the price update for each configuration selection, click Order Summary in the upper right of the form. Click it again to hide the summary.
Specify Your Internet Access Service
-
Enter a Name for your new Internet Access service.
-
Select a Routing Configuration.
noteYour Virtual Device Type (Single, Redundant, or Cluster) and your Connection Type (Redundant, Primary, or Secondary) choices determine which Routing Configurations are available.
- Static
- Direct
- BGP – These policies are available: Default Route, Full Routing Table, or both Default Route and Full Routing Table. Also choose if you want to use BGP Authentication. Select your private ASN range: 32-Bit or 16-Bit. The 16-bit option is only for older types of nodes that don't support 32-bit.
For each of these routing options, you can select the provider of the IP addresses for the subnet behind your device.
For more details, see IP Allocation. Equinix-provided IP addresses are referred to as provider-assigned IP space, and customer-provided IP addresses are referred to as provider-independent IP space.
-
Select an IP Address Provider from the following options:
noteYour IP address options are filtered by the type of routing you choose.
-
Equinix-provided IP Addresses – Lease assigned IP addresses from Equinix. Select your IP address version and subnet size.
-
Your Own IP Addresses – To supply your own public IP address, enter an IPv4 LAN Subnet or an IPv6 LAN Subnet. Provide your subnet details.
-
Mixed IP Addresses - Use both Equinix-owned and your own IP addresses. Select the IP address version and subnet size of the Equinix IP addresses and provide the subnet details for your IP addresses.
-
-
Click Next.
Review Order and Additional Information
To make changes in a previous section, mouse over the progress bar at the top of the page. Click a completed section to make changes.
-
Review the Connection Configuration and Equinix Internet Access information.
-
Review the email addresses in the Notifications section. You can enter up to 12 addresses to receive updates about this order.
-
To add a Purchase Order (PO) to this order, click Select Purchase Order in the Purchase Order section. Choose a PO from the list of valid numbers.
noteIf your billing account requires a PO (also known as a PO bearing account), you must complete this step.
-
Click Review Terms and Conditions, accept the terms and conditions in the form displayed on the right, and click Accept.
-
Select the checkbox to accept the Pricing Information.
-
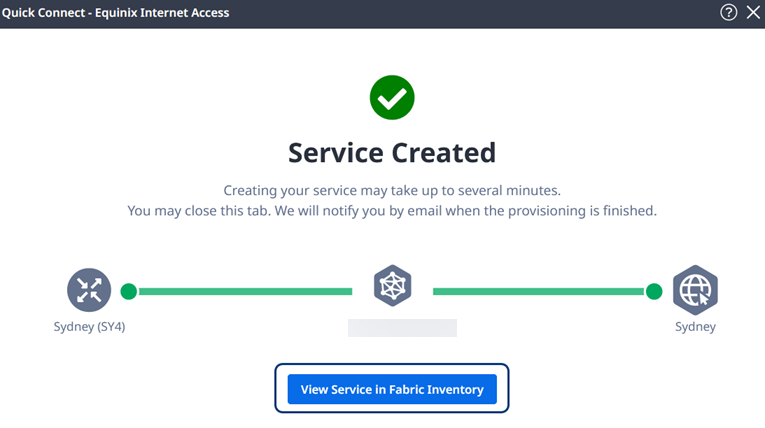
Click Create Service. A status message shows the progress of your new connection.
Once the Service Created message is displayed, you can view your order status in the dashboard by clicking View Service in Fabric Inventory. Your order details include the PO that was used to place this order.
Internet Access over Network Edge Using the API
You can use Equinix Internet Access API to automate this procedure and integrate it with your internal systems. For details, see Order Equinix Internet Access with Network Edge.