Manage Subnets (Add / Delete)
The subnets on your active Internet Access service can be changed. These updates allow you to manage both Equinix-assigned (Provider Assigned - PA) and customer-owned (Provider Independent - PI) address space. Changes may be made if:
- You need to request additional IP addresses from Equinix.
- You are expanding your network and need to advertise new PI address blocks.
- You are decommissioning parts of your network and need to remove existing routes.
Updating subnets on an existing service updates the routing filters and does not require terminating the service.
Prerequisites
To add or delete subnets on an existing Internet Access service:
- Routing Protocol: The service must be configured with BGP or Static routing protocols. This feature is not available for services using the Direct routing protocol.
- IAM Access: Your organization must be onboarded to an Equinix CRH/AM Identity and Access Management (IAM) platform.
- User Role: The Fabric Manager role must be assigned to the account used to send requests.
- Service Status: The Internet Access service must currently exist and not be in the process of being deleted or undergoing another configuration change.
- Service Type: The service must be provided to a Fabric port or Network Edge virtual device.
Validations
When updating subnets, the following validations must be satisfied:
- Total Subnet Limit: The total number of subnets must not exceed 100.
- IP Address Check: Subnets must consist of valid and unique IPv4 and/or IPv6 addresses in CIDR notation.
- Subnet Removal Check: All subnets requested for removal must already exist in the service.
- Duplicate Subnet Check: New PI subnets cannot already exist in the service.
- Retention Check: At least one subnet must remain; you cannot remove all subnets.
- Ownership Validation: All new customer-provided (PI) subnets must be validated to ensure you have the proper ownership and authorization to use them.
Changing Subnets
To add or remove subnets on the existing Equinix Internet Access service:
- Sign in to the Customer Portal and navigate to Internet Access.
- In the Equinix Internet Access Inventory, click the service instance you want to modify.
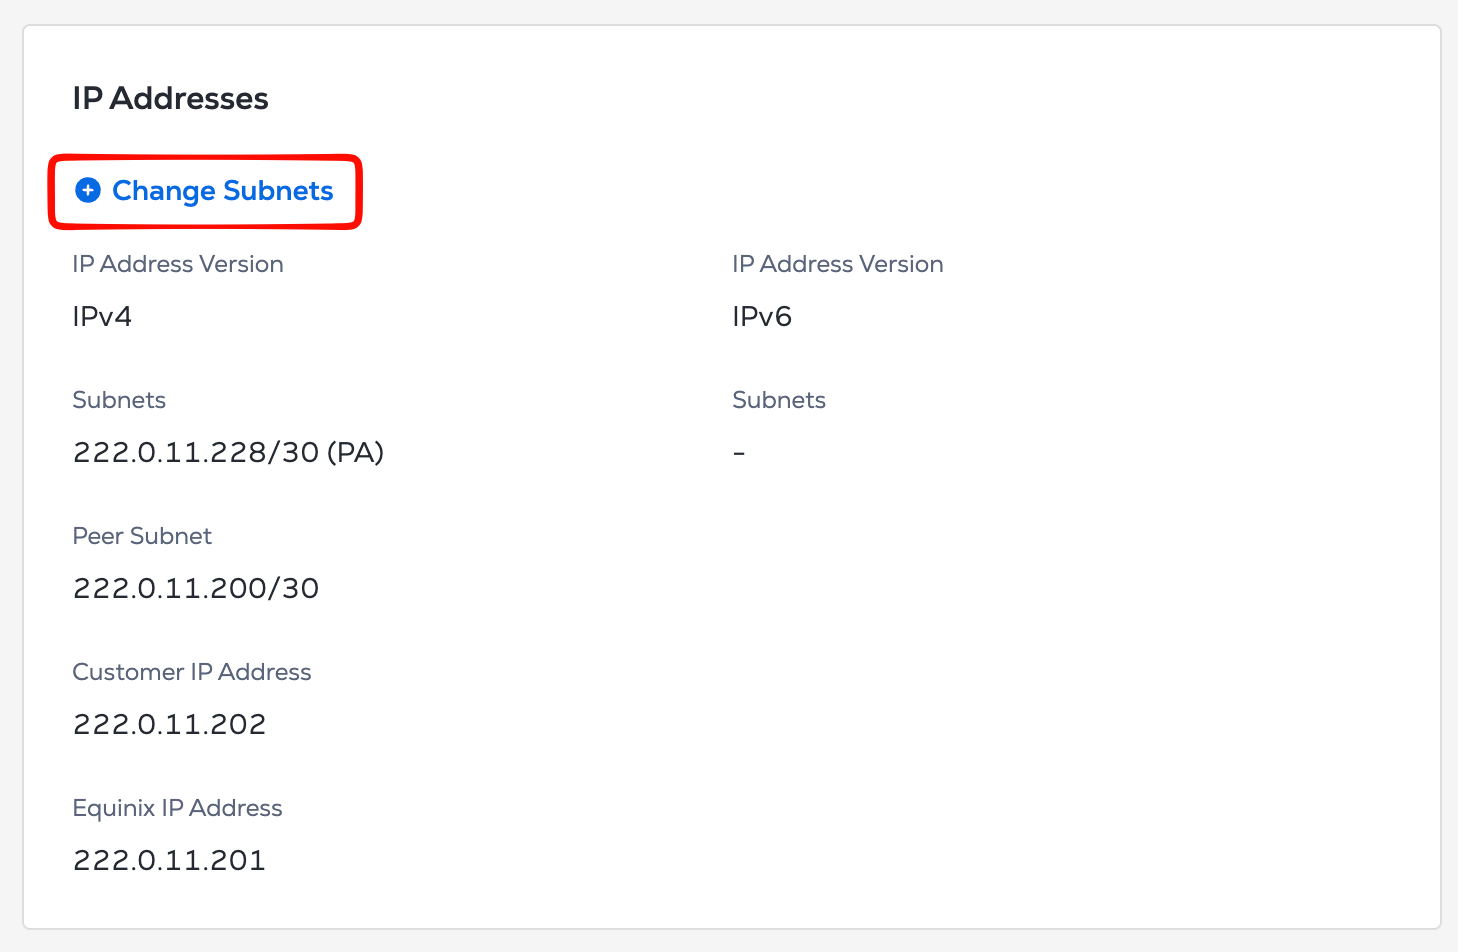
- In the IP Addresses section, click Change Subnets. A configuration window is displayed.
- Configure Subnets:
- To Add: Click + Add Another Subnet. Select whether the subnet is Equinix-provided (PA) or Customer-provided (PI), choose the IP version, and enter the CIDR or desired prefix length.
- To Delete: Click the trash icon next to the subnet you wish to remove.
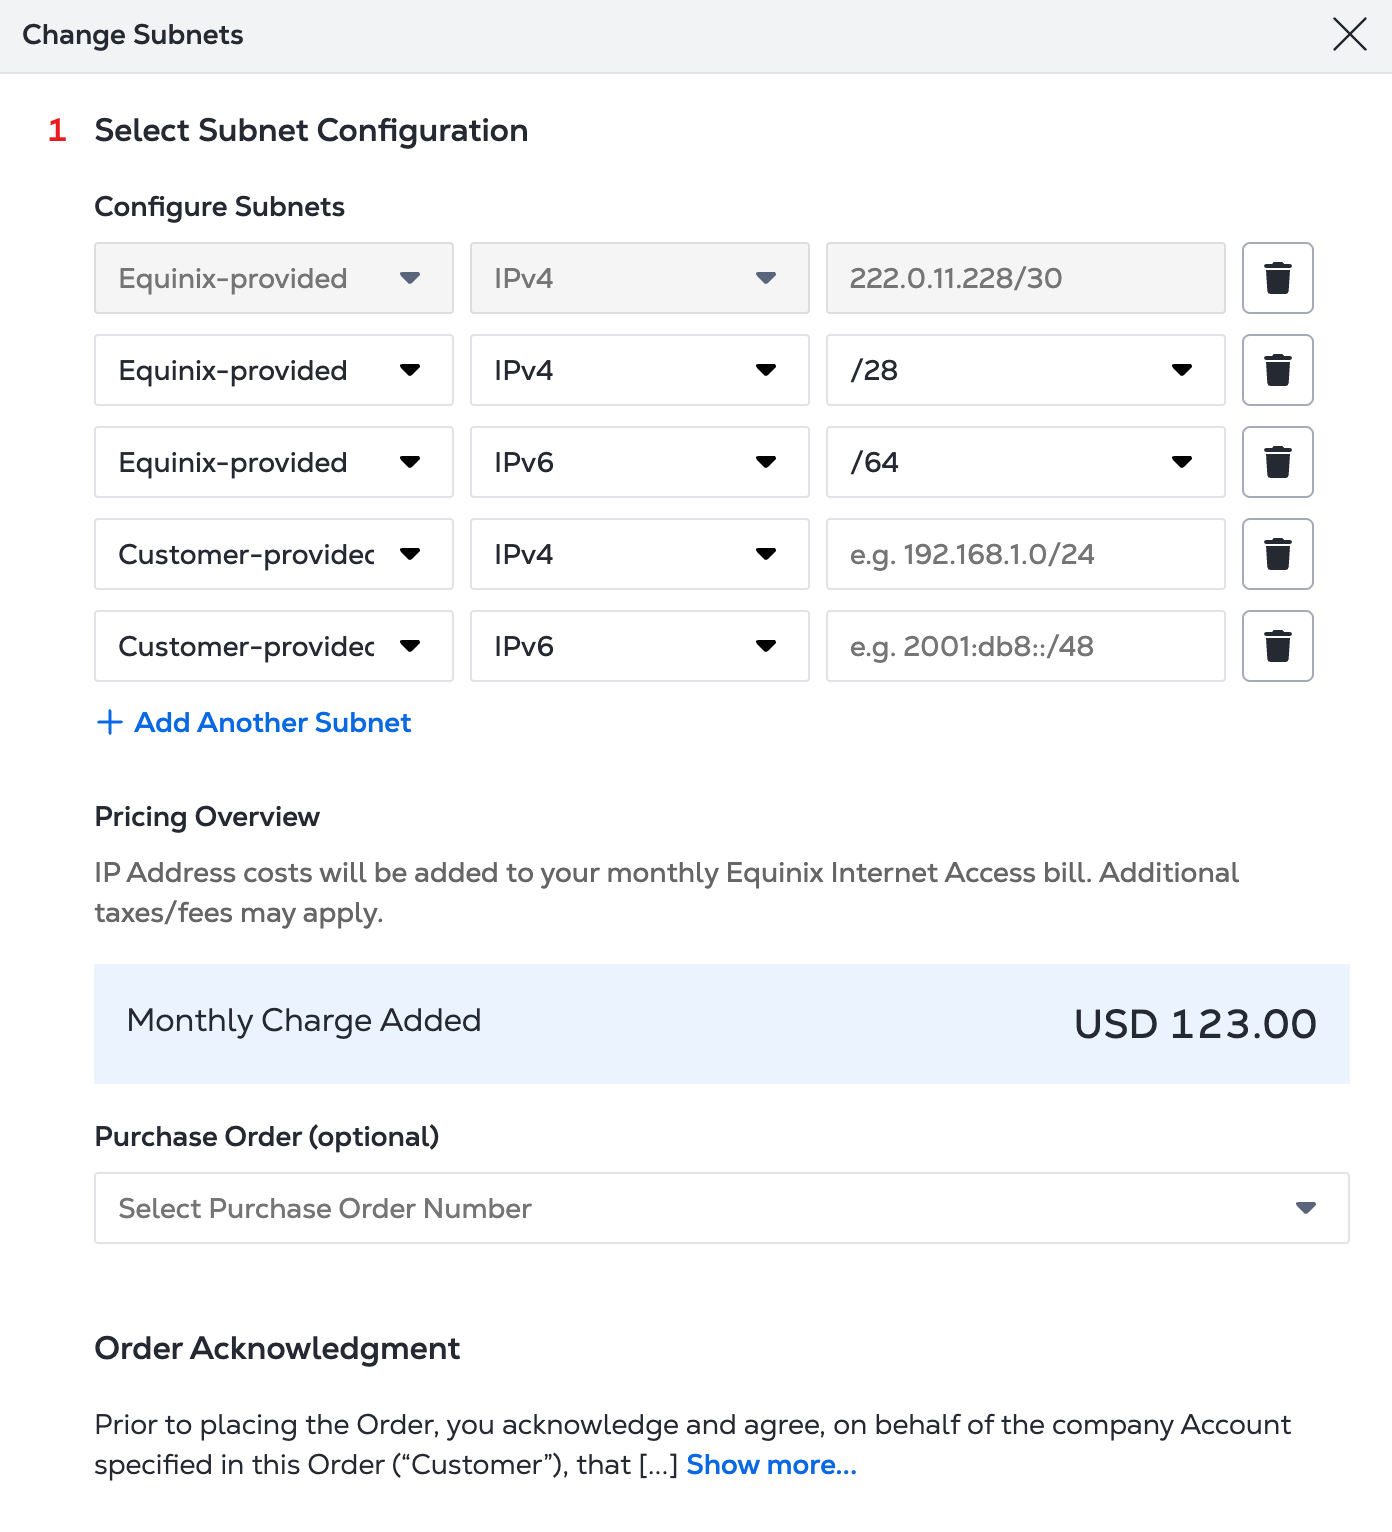
- Pricing & PO:
- Review the Monthly Charge Added section for any changes to your bill.
- In the Purchase Order drop-down, select the required PO (this is mandatory if your account is PO bearing).
-
Order Acknowledgment: Review the terms and click Confirm.
noteDue to regional regulations, APAC customers must provide Addressing Plans.
It takes approximately 10 minutes to apply the changes. Once successful, the routing filters will be updated to reflect the new subnet configuration.