Change IP Blocks
The subnets on your active Internet Access service can be changed. These updates allow you to manage both Equinix-owned (Provider Assigned - PA) and customer-owned (Provider Independent - PI) IP Blocks. You can make changes if:
- You need to request additional IP addresses from Equinix.
- You are expanding your network and need to advertise new address blocks.
- You are decommissioning parts of your network and need to remove existing routes.
Updating subnets on an existing service updates the routing filters and does not require terminating the service.
Prerequisites
To manage IP address blocks on an existing Internet Access service:
- The Internet Access service must be provided to a Fabric port or Network Edge virtual device.
- The Internet Access service must currently exist and not be in the process of being deleted or undergoing another configuration change.
- The service must be configured with BGP or Static routing protocols. This feature is not available for services using the Direct routing protocol.
- You need the
Fabric Managerrole to manage IP address blocks for an Internet Access service.
Updating Your Service
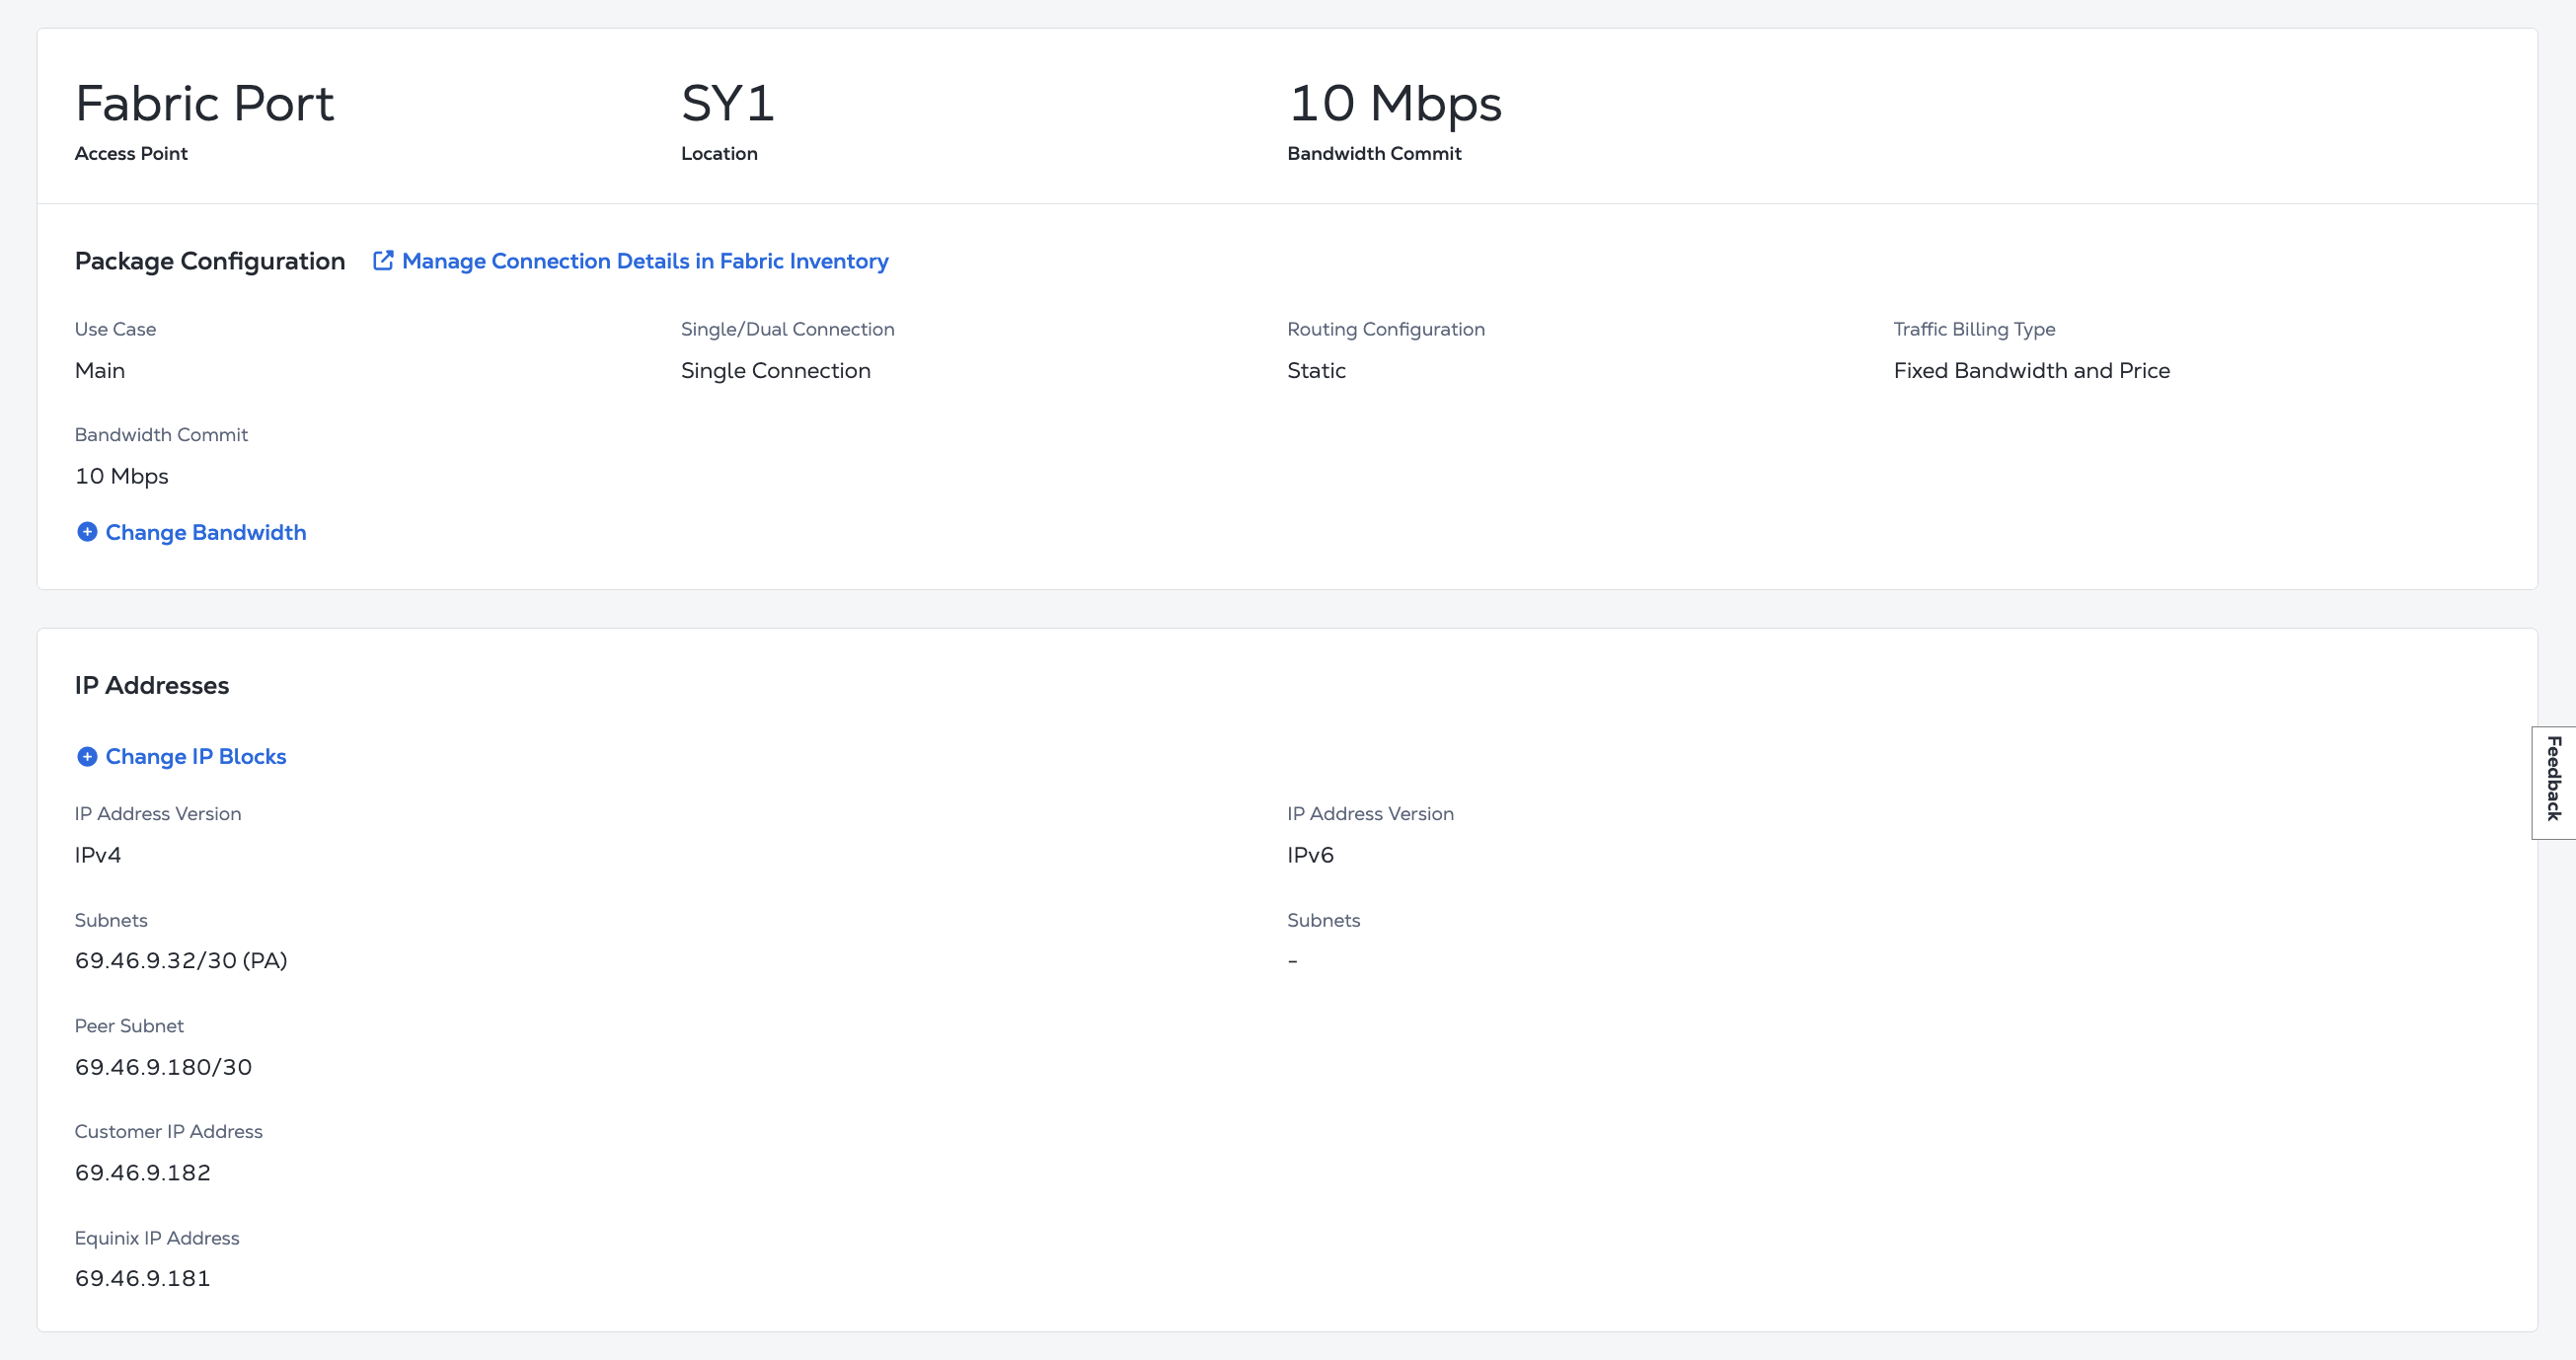
You can manage the IP address blocks for your service from your Internet Access Inventory.
- Sign in to the Customer Portal and navigate to Internet Access.
- In the Internet Access Inventory, click the service instance you want to modify.
- In the IP Addresses section, click + Change IP Blocks.
Adding an IP Block
To add IP address blocks, your service must meet the following conditions:
- The total number of subnets must not exceed 100.
- Subnets must consist of valid and unique IPv4 and/or IPv6 addresses in CIDR notation.
- If you are adding IP address blocks that you own, they cannot already exist in the service and they must be validated to ensure you have the proper ownership and authorization to use them.
-
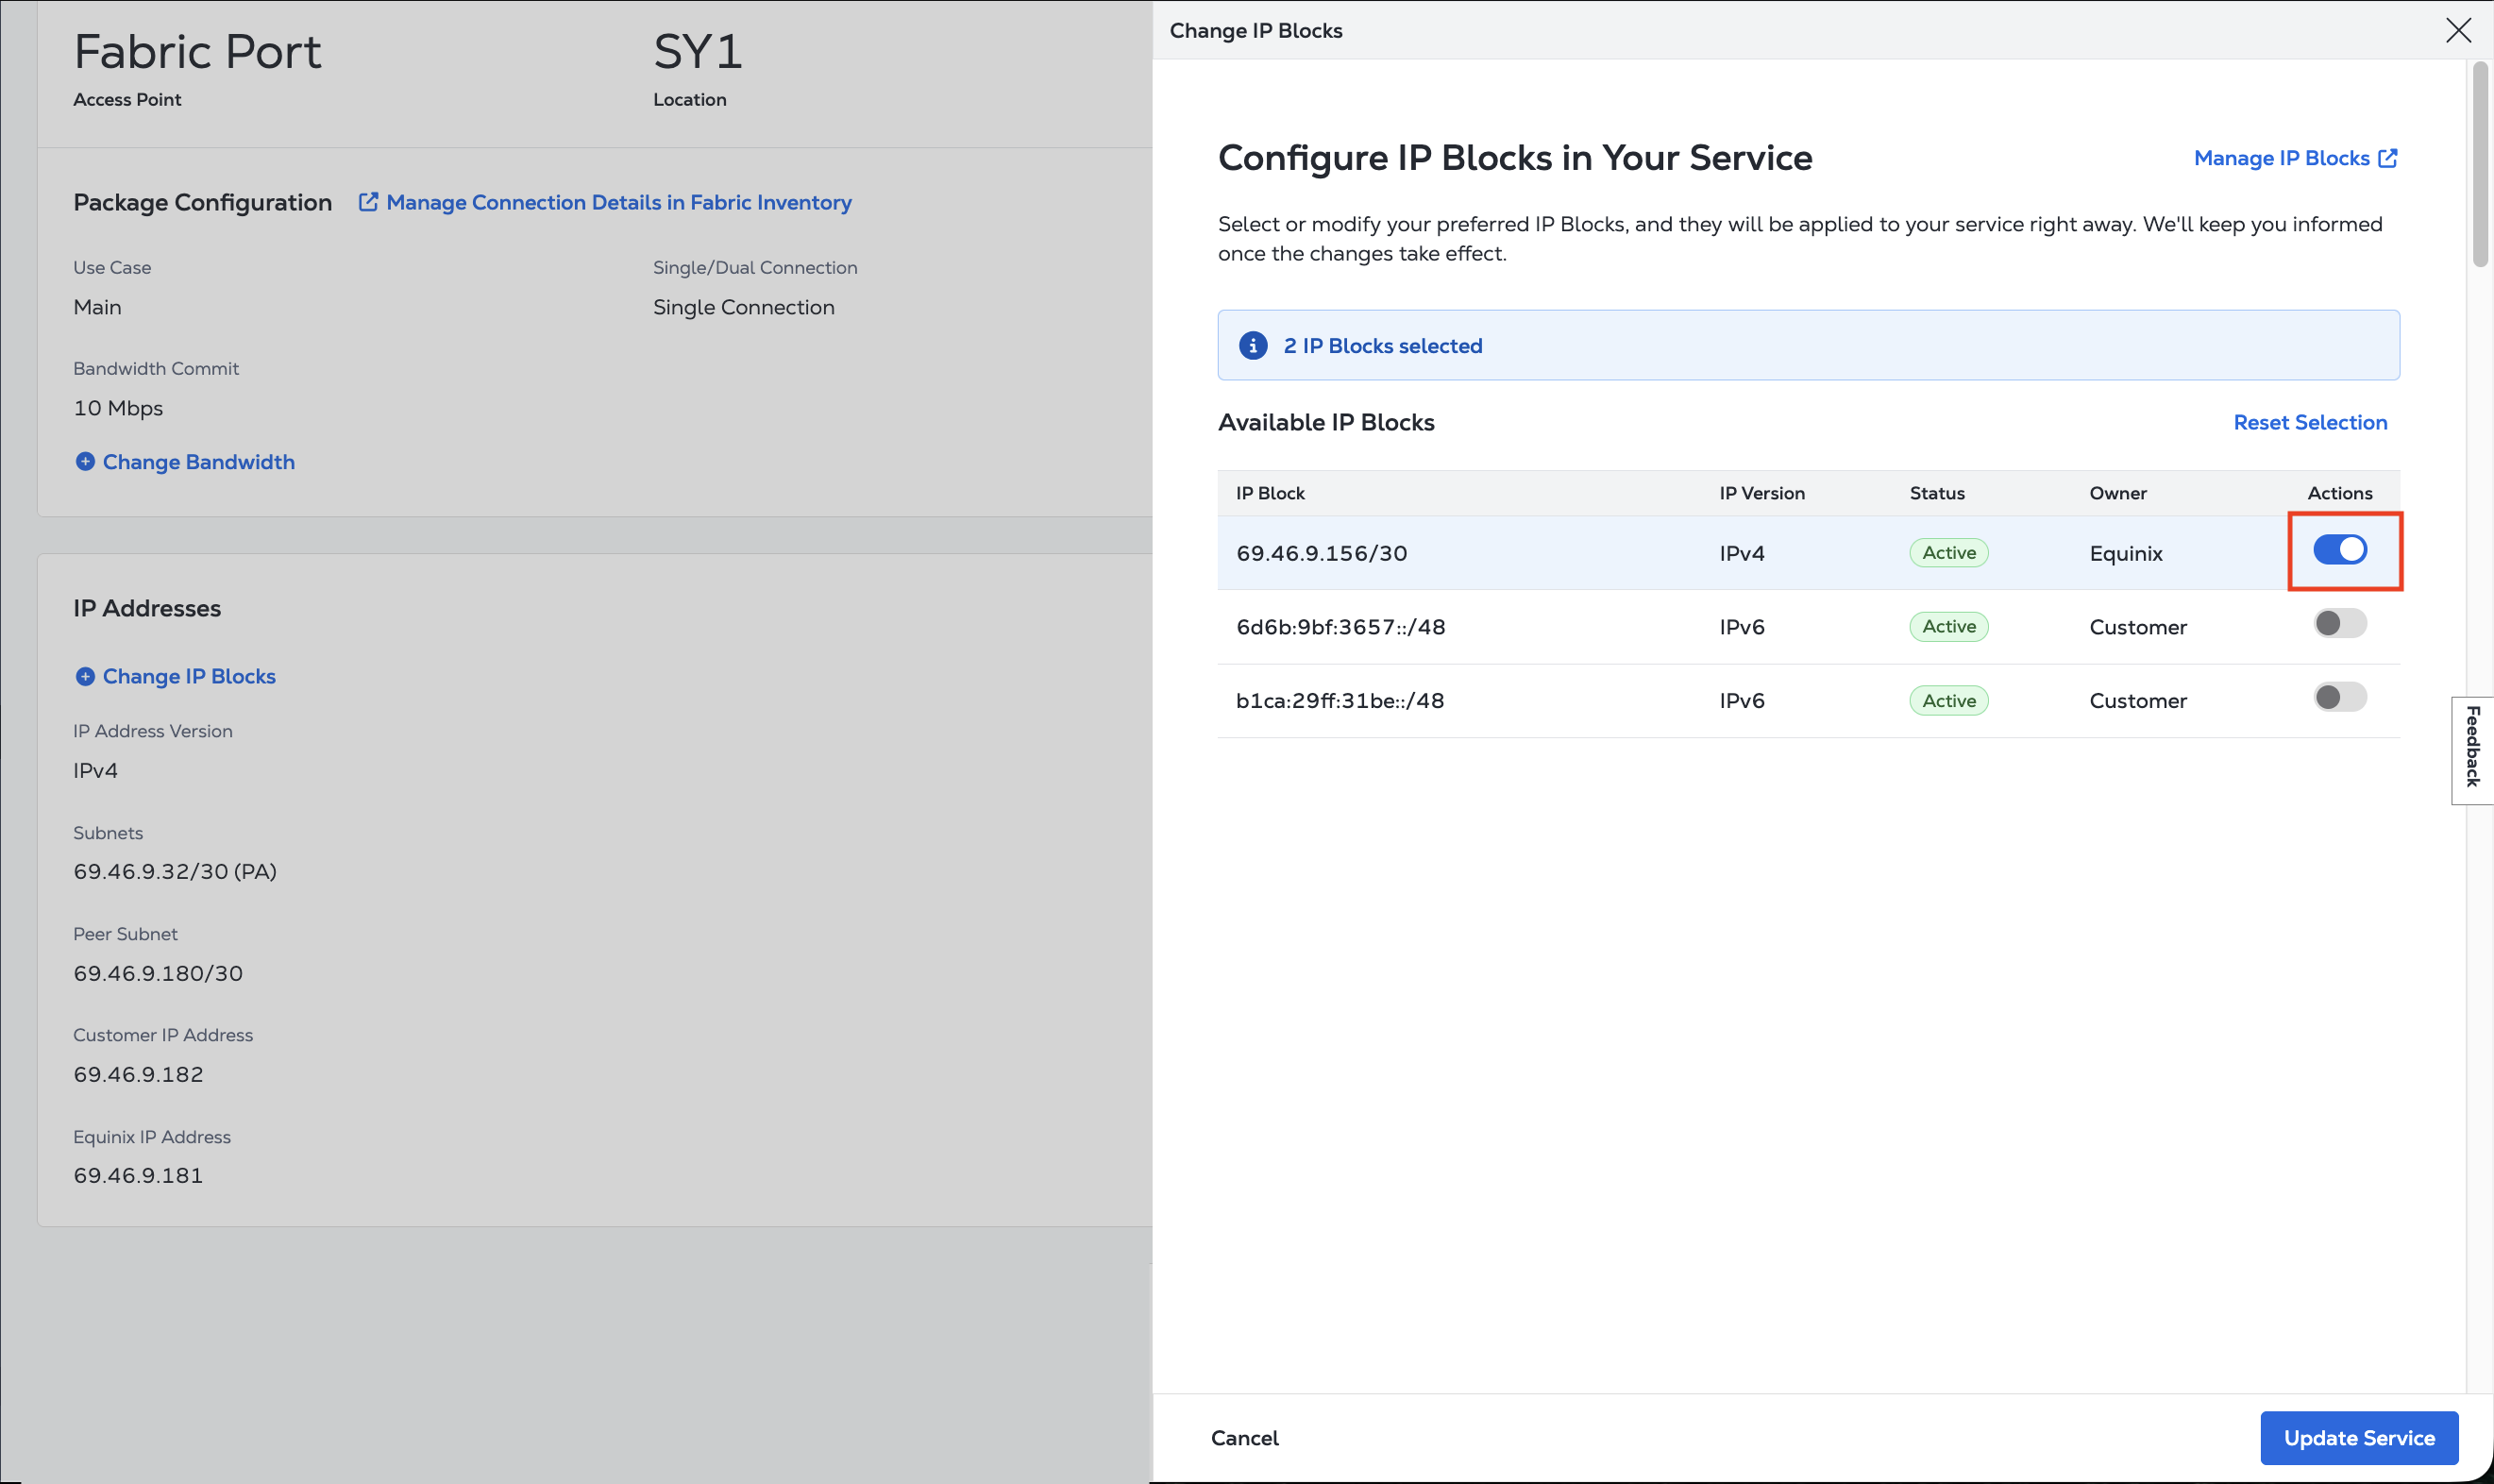
From your service's Overview, click + Change IP Blocks.
noteIf you do not see your desired IP address block, or you need to add an IP address block, click Manage IP Blocks to view, add, or manage your IP Blocks.
-
Click the toggle in the Actions column. Only active IP address blocks that are not in use by another service can be added.
-
Click Update Service.
It takes approximately 10 minutes to apply the changes. Once successful, the routing filters are updated to reflect the new subnet configuration.
Removing an IP Block
To remove IP address blocks, your service must meet the following conditions:
- At least one subnet must remain; you cannot remove all subnets.
- All subnets requested for removal must already exist in the service.
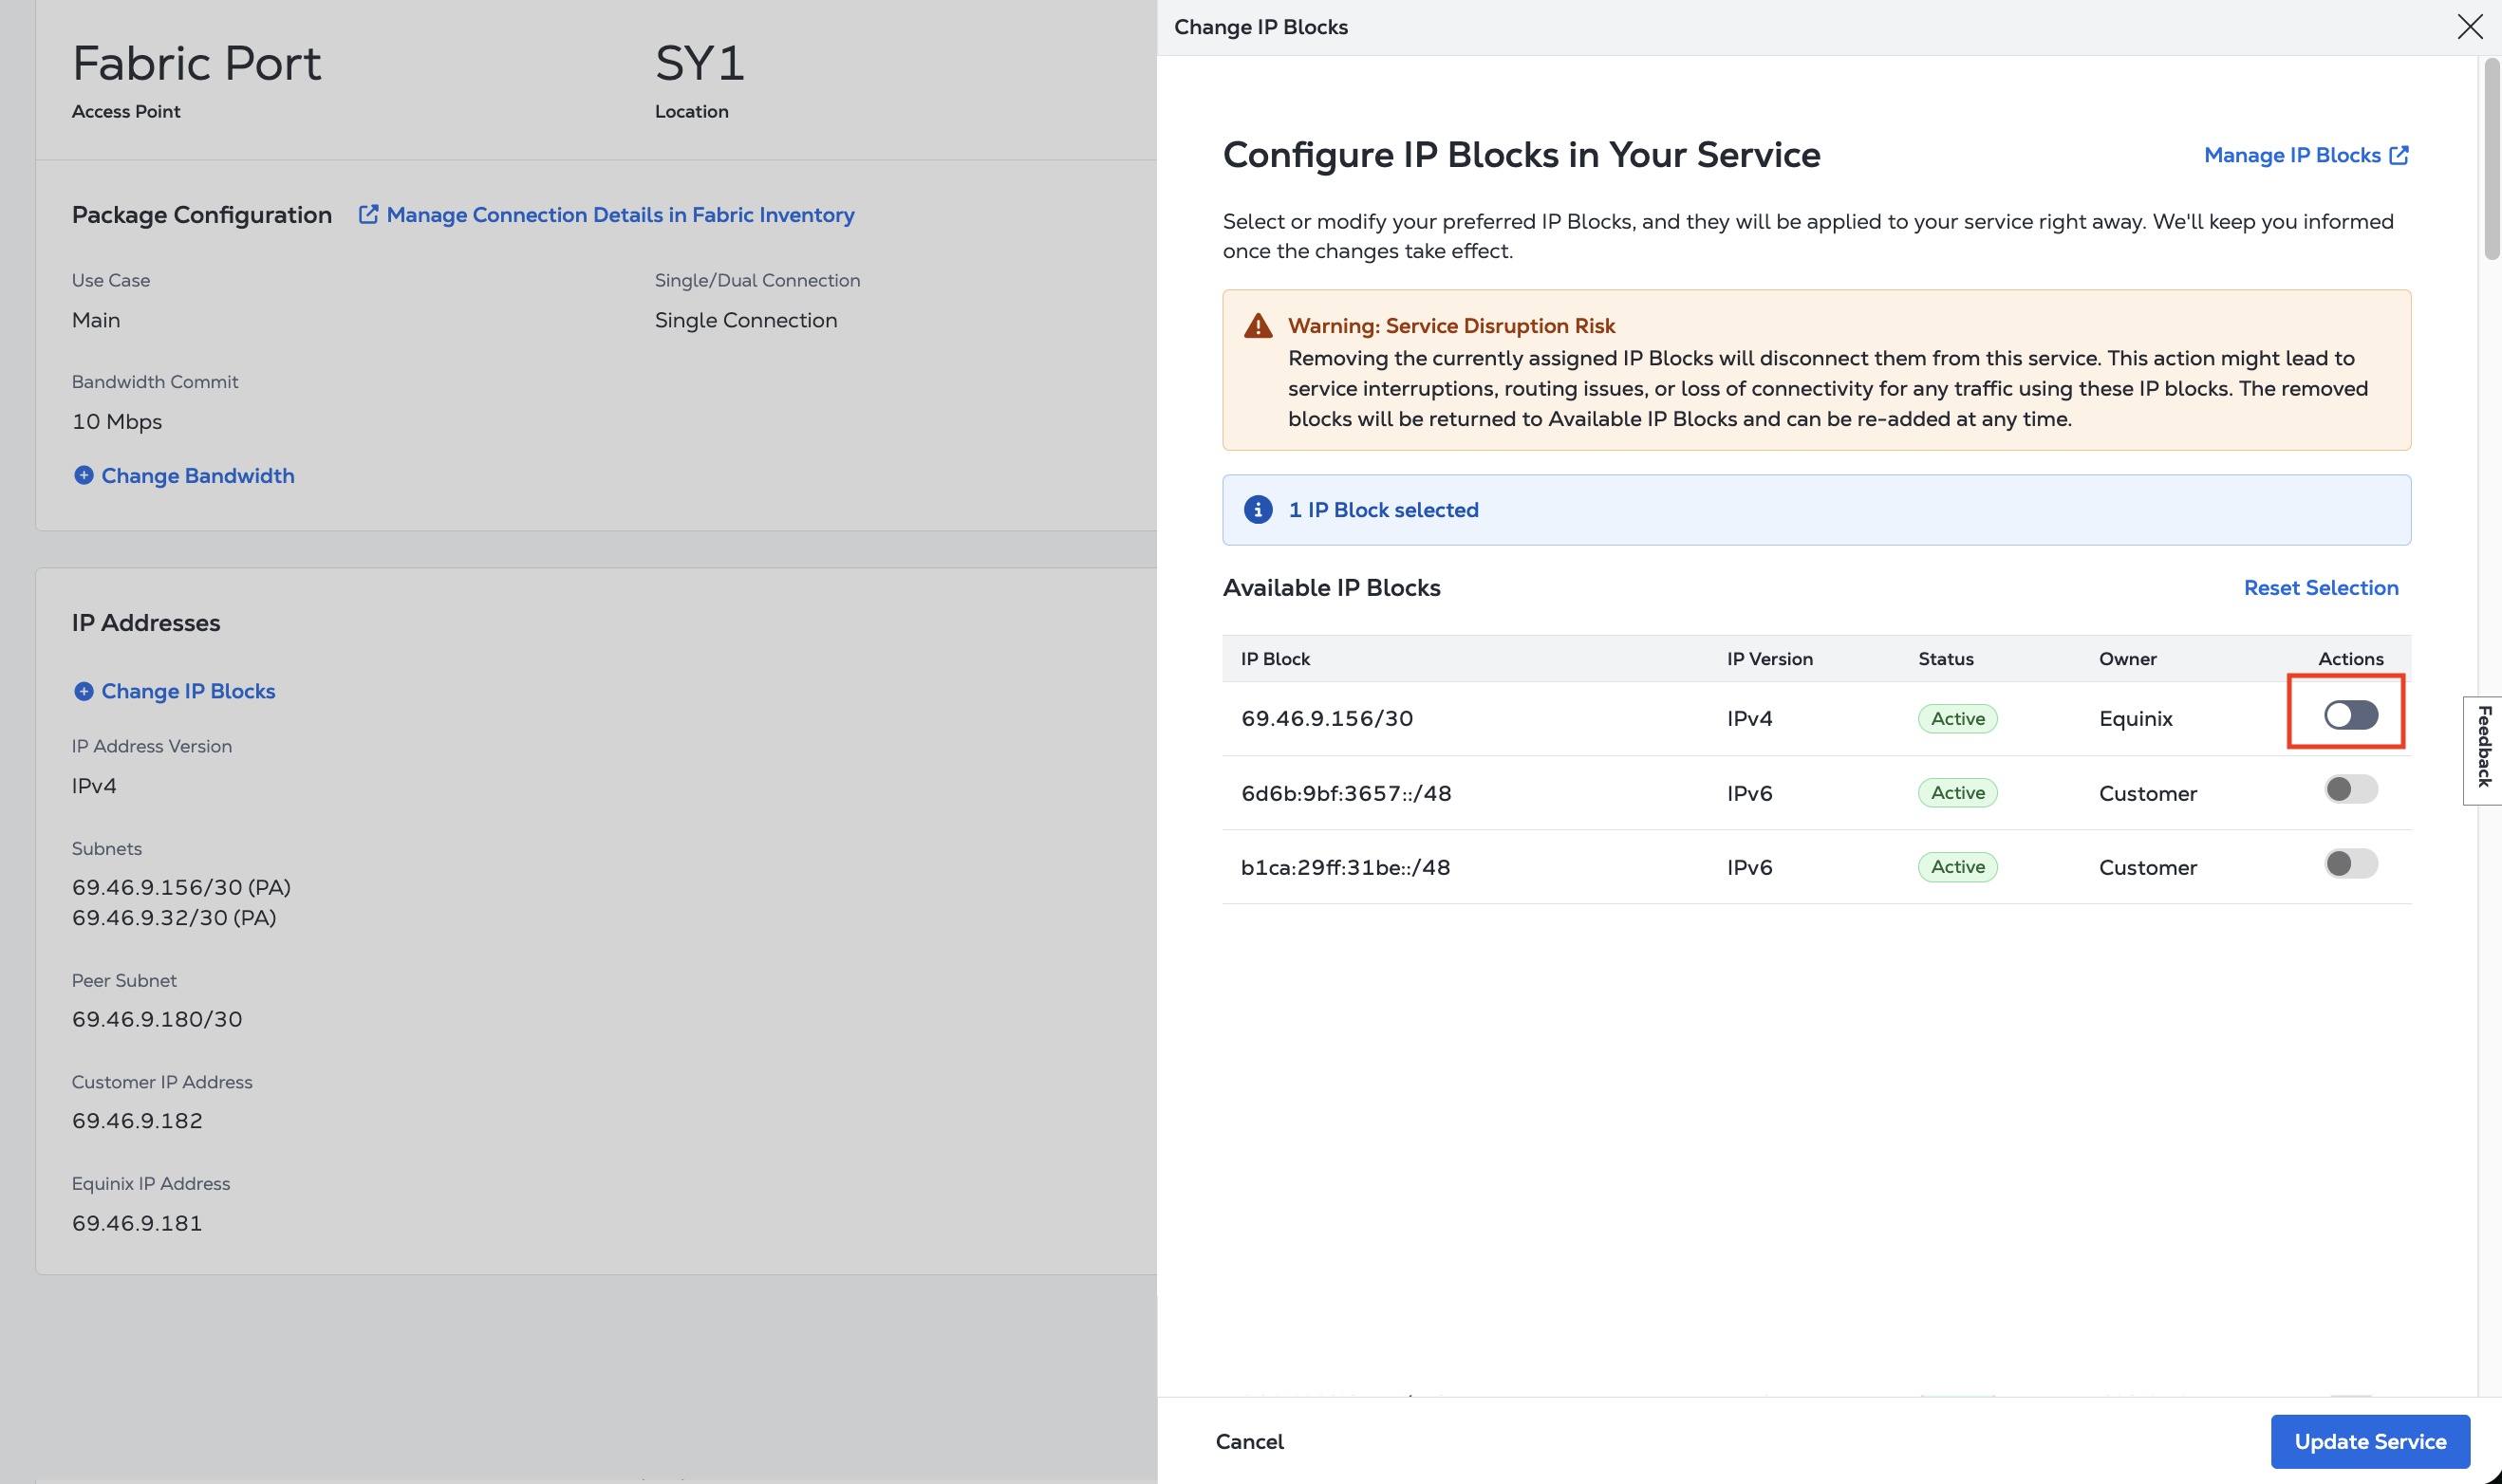
Removing the currently assigned IP address blocks will disconnect them from this service. This action might lead to service interruptions, routing issues, or loss of connectivity for any traffic using these IP blocks.
-
From your service's Overview, click + Change IP Blocks.
-
From the Available IP Blocks list, locate the IP address block you want to remove from your service.
-
Click Update Service.
-
You must confirm removing IP address blocks from your service. Ensure your selection is correct and click Yes, Proceed.
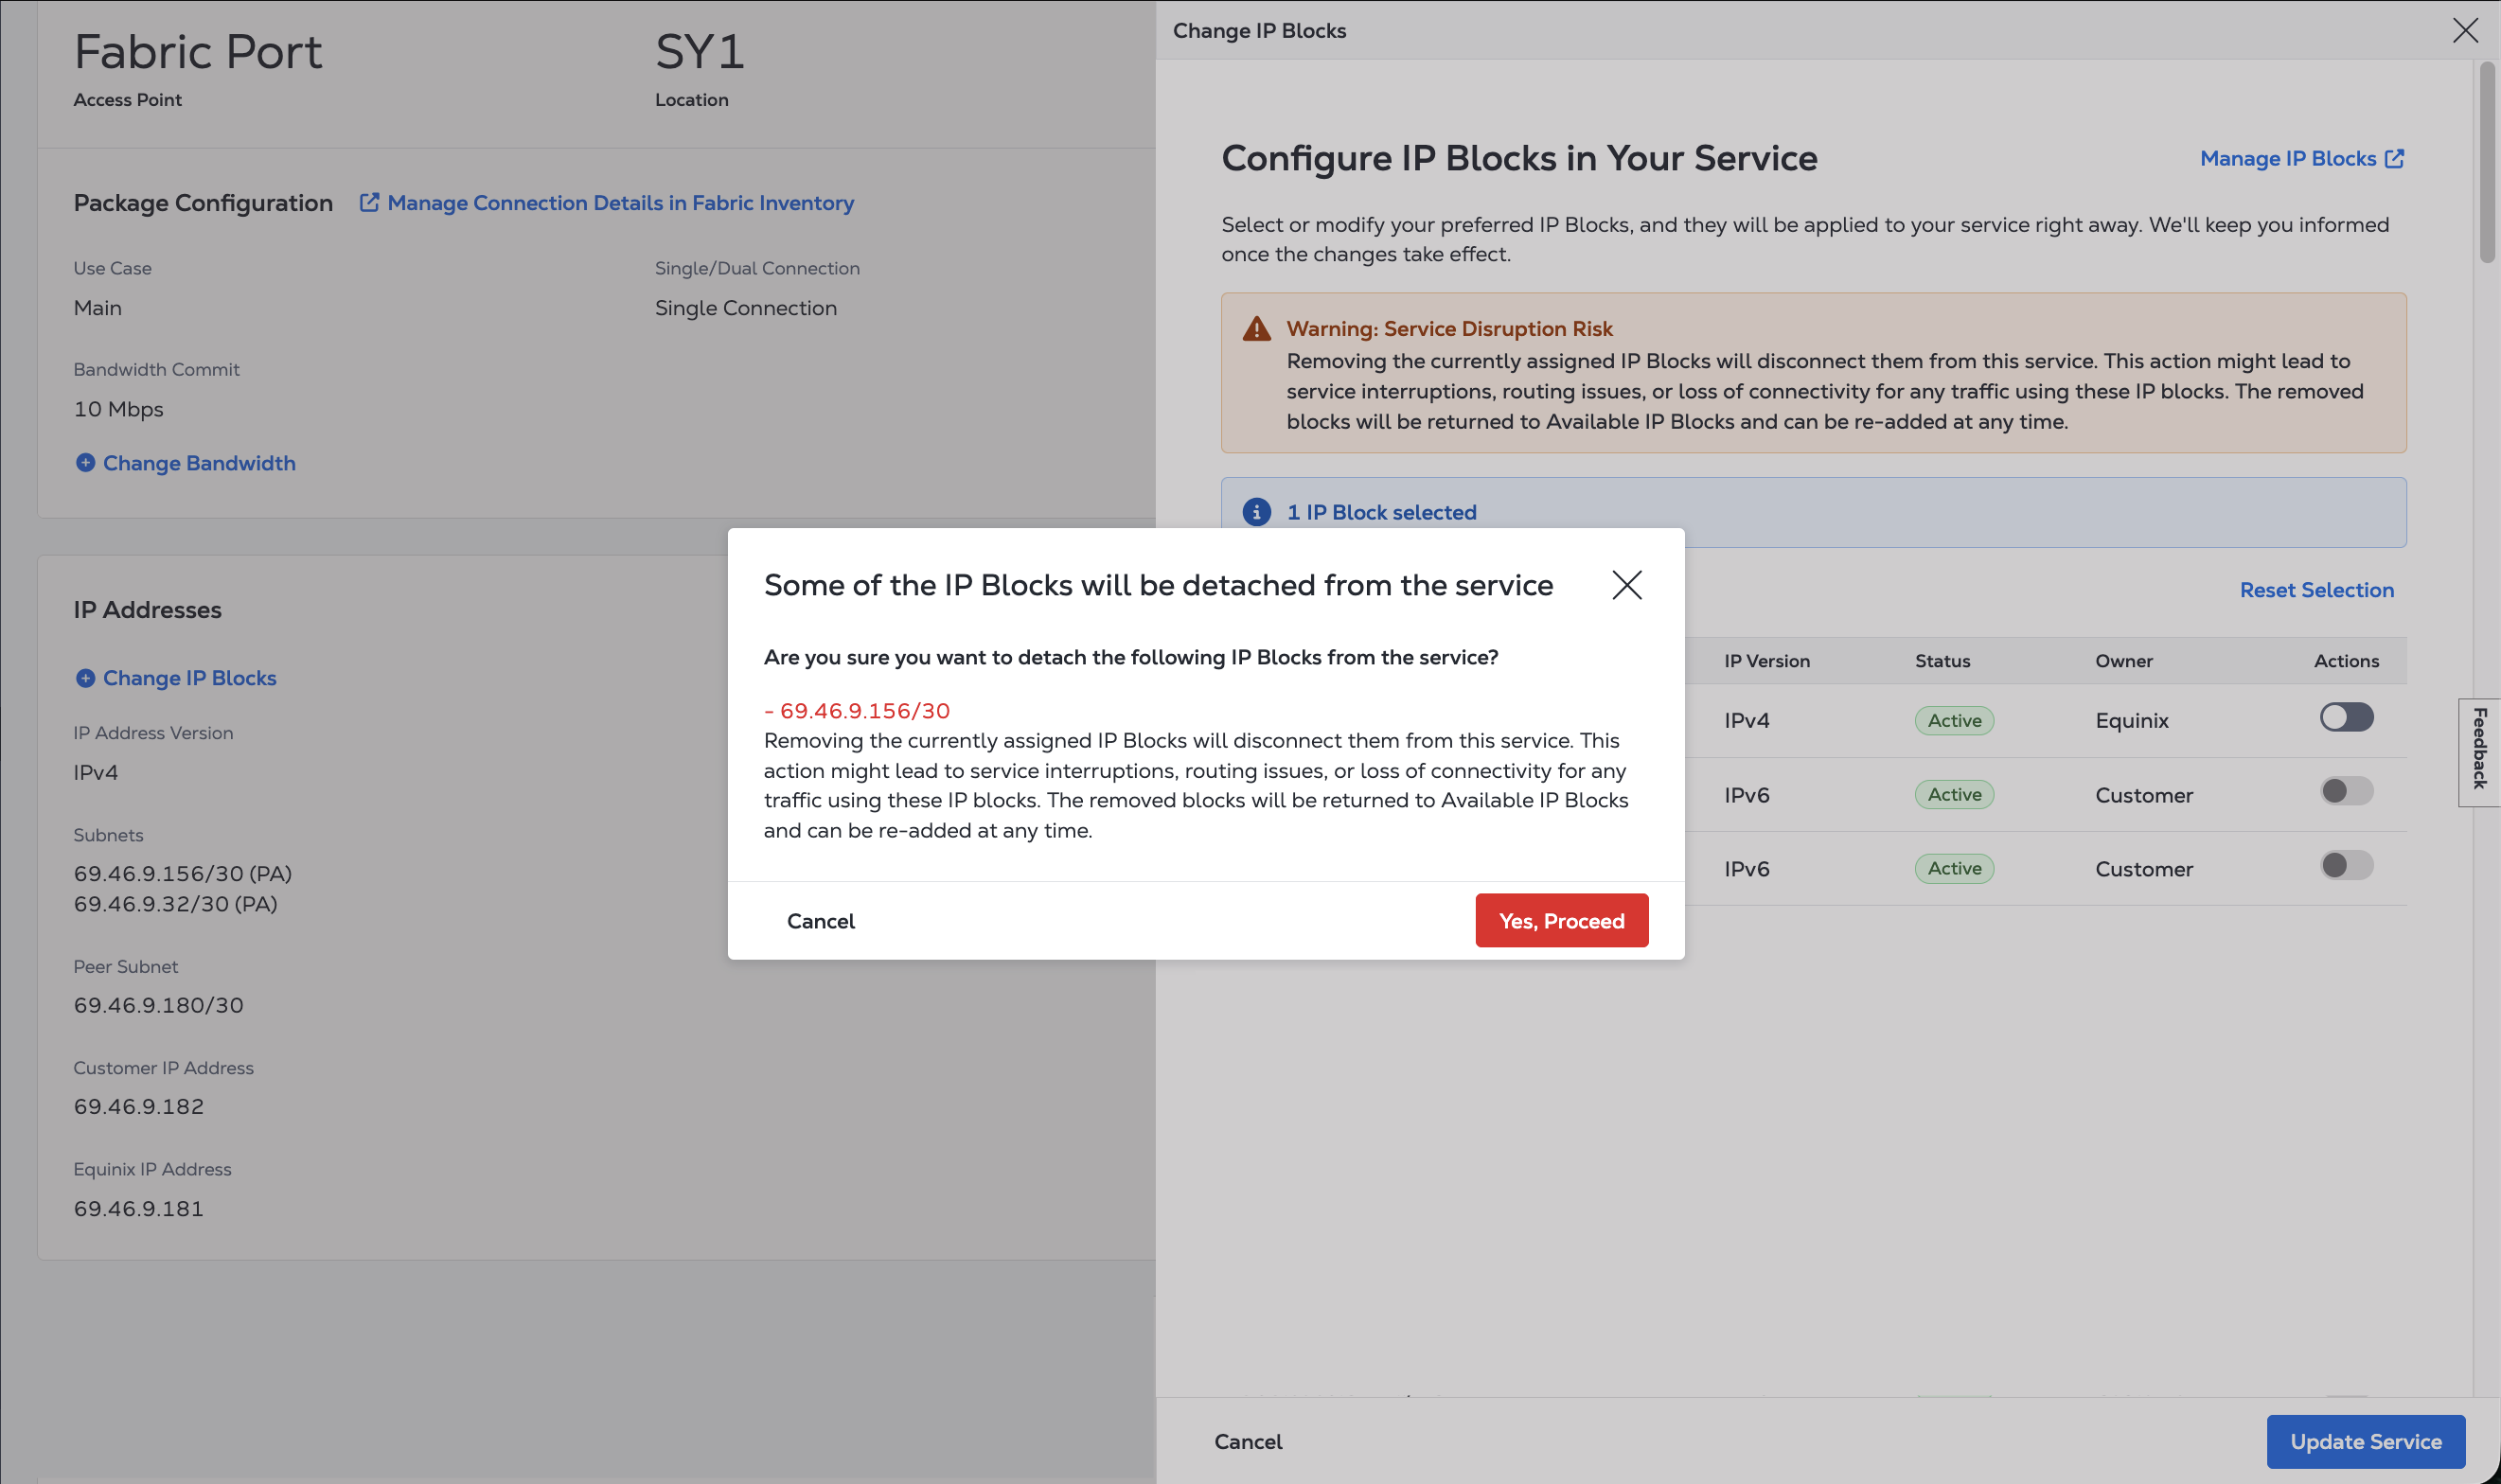
It takes approximately 10 minutes to apply the changes. Once successful, the routing filters will be updated to reflect the new subnet configuration. The removed IP address blocks will be returned to your IP Blocks and can be re-added at any time.