Managing User Permissions
For assets and products that haven't been onboarded to Identity and Access Management, use the permissions available in the Administration section of the Colocation Dashboard in the Customer Portal.
This feature is currently available for Administration and IBX Access Services Request, Ordering, Install Base, Billing and Payments, IBX Services Notifications, Smart Hands Support Plan, Colocation Ordering, Virtual Asset Notification Permissions, Power Consumption Report permission, Sustainability Report permission.
To grant physical access to IBXs, cages, and cabinets, see IBX Access Permissions.
To grant access and manage users' roles for assets and products that have been onboarded in to Identity and Access Management, see Managing Users' Access and Roles
Assigning Permissions to a User Manually
-
From the Administration menu, choose User Management.

-
Find the user account you want to manage.
-
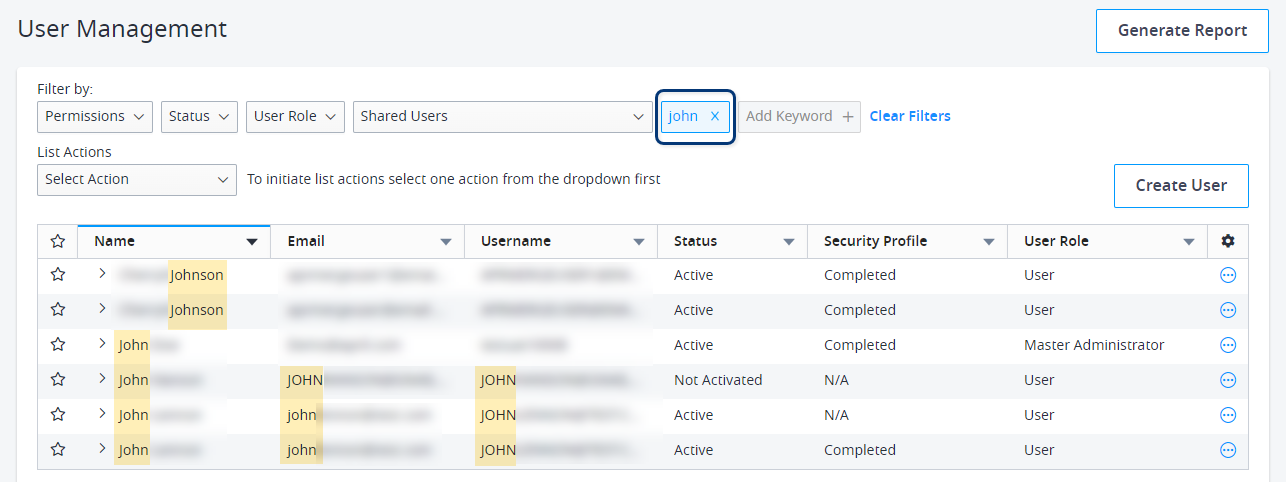
To search for a specific user, type a first name, last name, username, or email address in the Add Keyword field:
-
You can also use the filter options at the top to refine the user list by user status, role, organization, and current permissions.
tipTo quickly locate new user accounts, set the Status filter to Not Activated.
-
-
Click the options menu and choose Manage Permission.
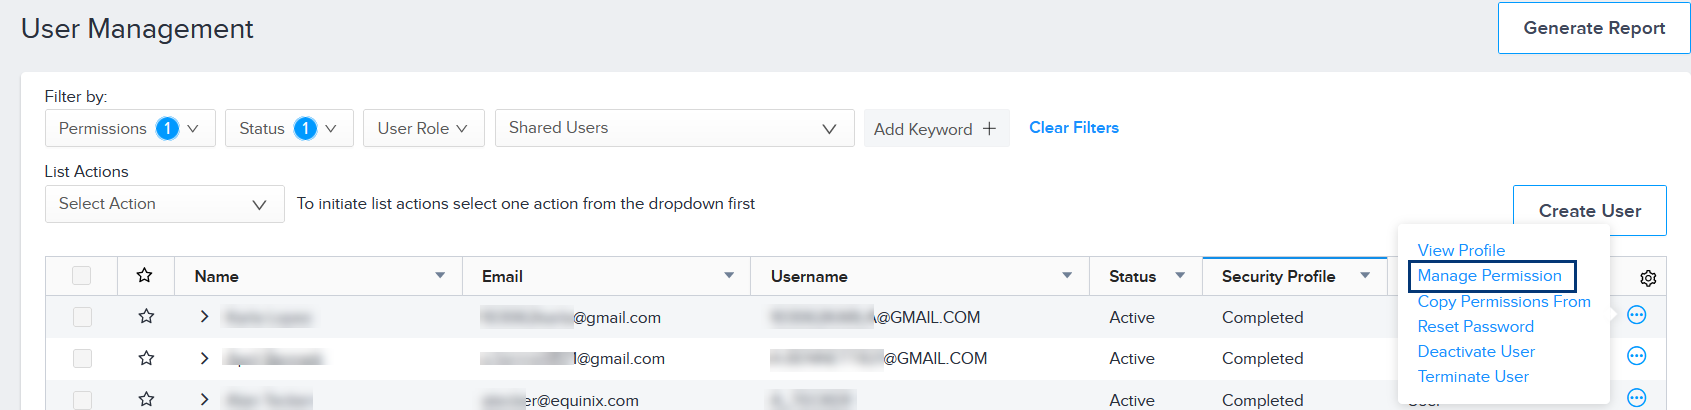
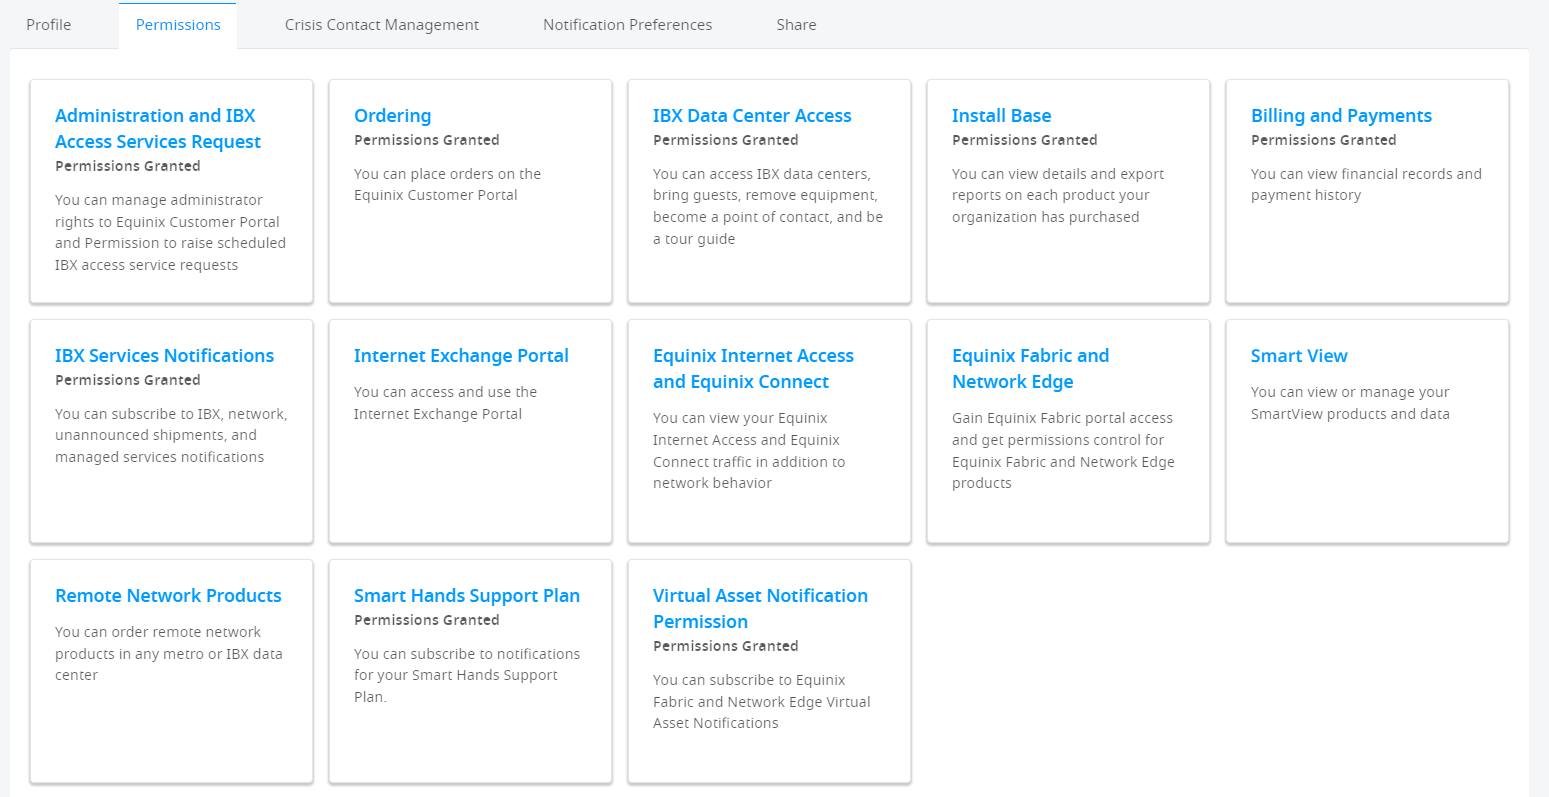
The Permissions tab displays a catalog of permission types.
-
If this is a new user account, click Administration and IBX Access Services Request. A list shows all the IBX locations available for this user.
-
(Optional) To assign master or IBX administrator privileges to this user, click Administrator Privileges, then select the administrator role to assign:
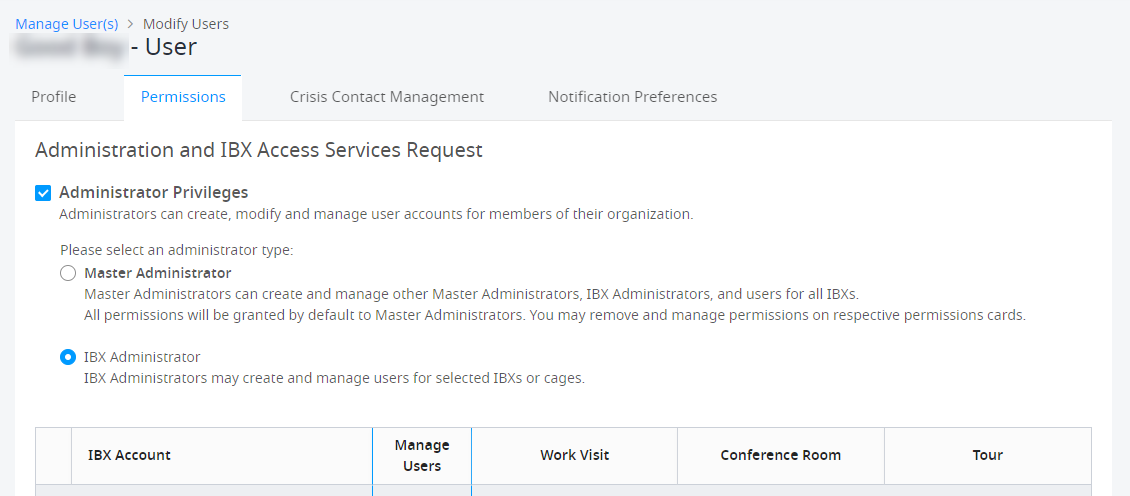
For information about admin roles, see Roles in the Customer Portal.
-
Select the IBX and cage permissions for the user.
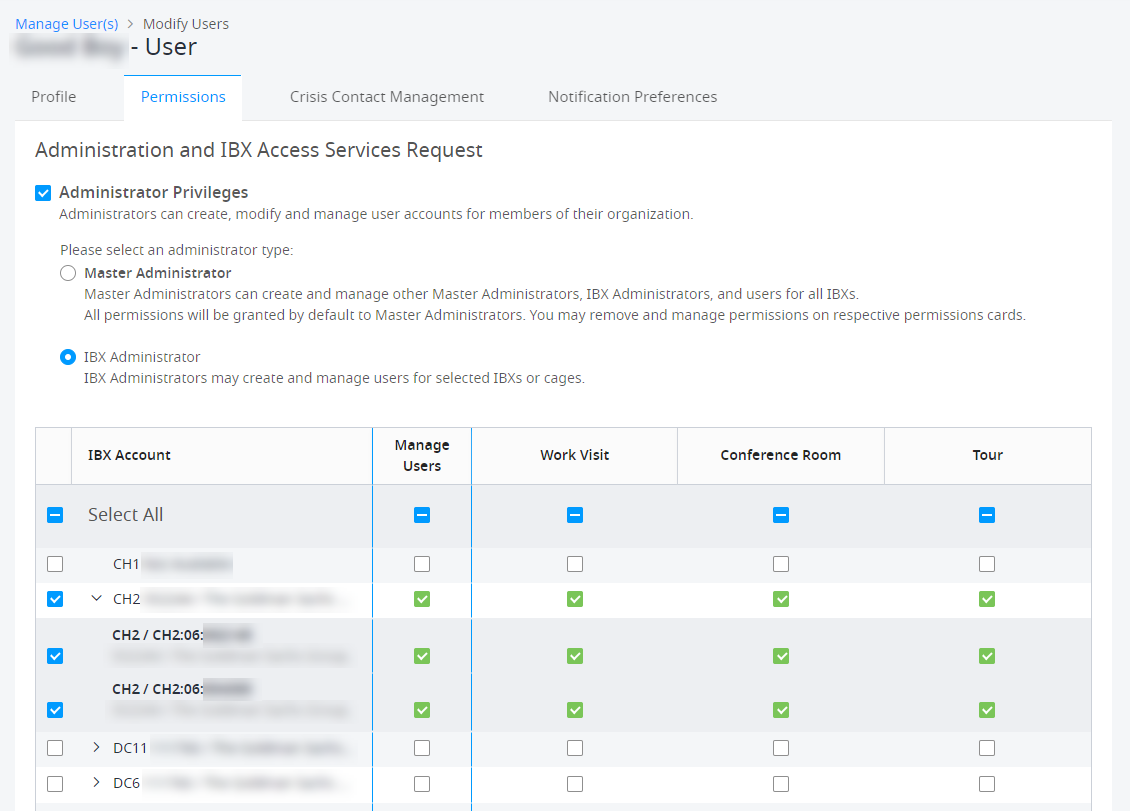
For more details, see IBX Access Permissions.
-
-
To assign more permission types (such as Ordering, Billing, etc.), use the Back button to return to the Permissions tab. Assign additional permissions as needed.
In large organizations, permission changes might take a few minutes to propagate through the system. If a user has trouble using their newly defined permissions, ask them to log out, wait a few minutes, then log in again.
Permission Types
| Category | Description |
|---|---|
| Administration and IBX Access Services Request | Allows the user to schedule IBX access requests (Work Visits, Conference Rooms, and Data Center Tours). Allows administrators to manage other Customer Portal user accounts. |
| Ordering | Allows the user to place orders in the portal (for Shipments, Cross Connect and Intra-Facility Cables, Network Ports, Smart Hands, Accessories, Power, Trouble Tickets), to view orders by other users, and to view purchase orders for their organization. |
| IBX Data Center Access | Allows the user to access IBX data centers and cages/cabinets, to bring guests, and to remove equipment. |
| Install Base | Allows the user to view details about their organization's products/assets and purchase orders. Controls access to the Install Base screen, Install Base report, Colocation Assets screen, and Purchase Order Management screen. |
| Billing and Payments | Allows the user to view financial records, payment history, and purchase orders for their organization. |
| IBX Services Notifications | Allows the user to subscribe to notifications about IBX incidents, network incidents, unannounced shipments, managed services, and IBX policy violations. Also allows the user to view incidents on the Service Insight Dashboard. Important: At least two administrators in each organization must be configured to receive IBX policy violations (i.e., the Can view and subscribe to IBX Policy Violation Notifications permission). |
| Internet Exchange Portal | Allows the user to access the Internet Exchange (IX) portal. |
| Equinix Internet Access and Equinix Connect | Allows the user to view their Equinix Internet Access and Equinix Connect traffic and network behavior. |
| Equinix Fabric and Network Edge | Allows the user to access the Fabric and Network Edge products. |
| Smart View | Allows the user to order Equinix Smart View for IBXs, and view Smart View data. |
| Remote Network Products | Allows the user to order remote network products for IBXs in a specific region. |
| Smart Hands Support Plan | Allows the user to order a Smart Hands support plan and subscribe to notifications for their support plan. |
| Colocation Ordering | Allows the user to order Secure Cabinet and Private Cage products online. |
| Virtual Asset Notification Permission | Allows the user to view and subscribe to Fabric and Network Edge virtual asset notifications. |
| Managed Services Portal | Allows the user to access the Managed Services portal. |
| Power Consumption Report | Allows the user to run the Power Consumption Report. |
| Support Case Manager | Allows the user to view, manage, and reply to all Support cases submitted by any user within their organization. |
Creating a Template to Assign Permissions
A template provides an easy, efficient way to assign the same set of frequently used permissions across your organization. You can create templates and apply them to users who need the same permissions to perform similar roles.
-
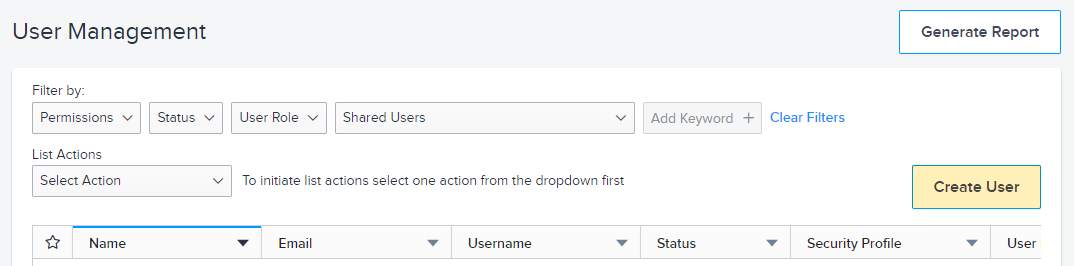
From the Administration menu, choose User Management.
-
Click Create User.
-
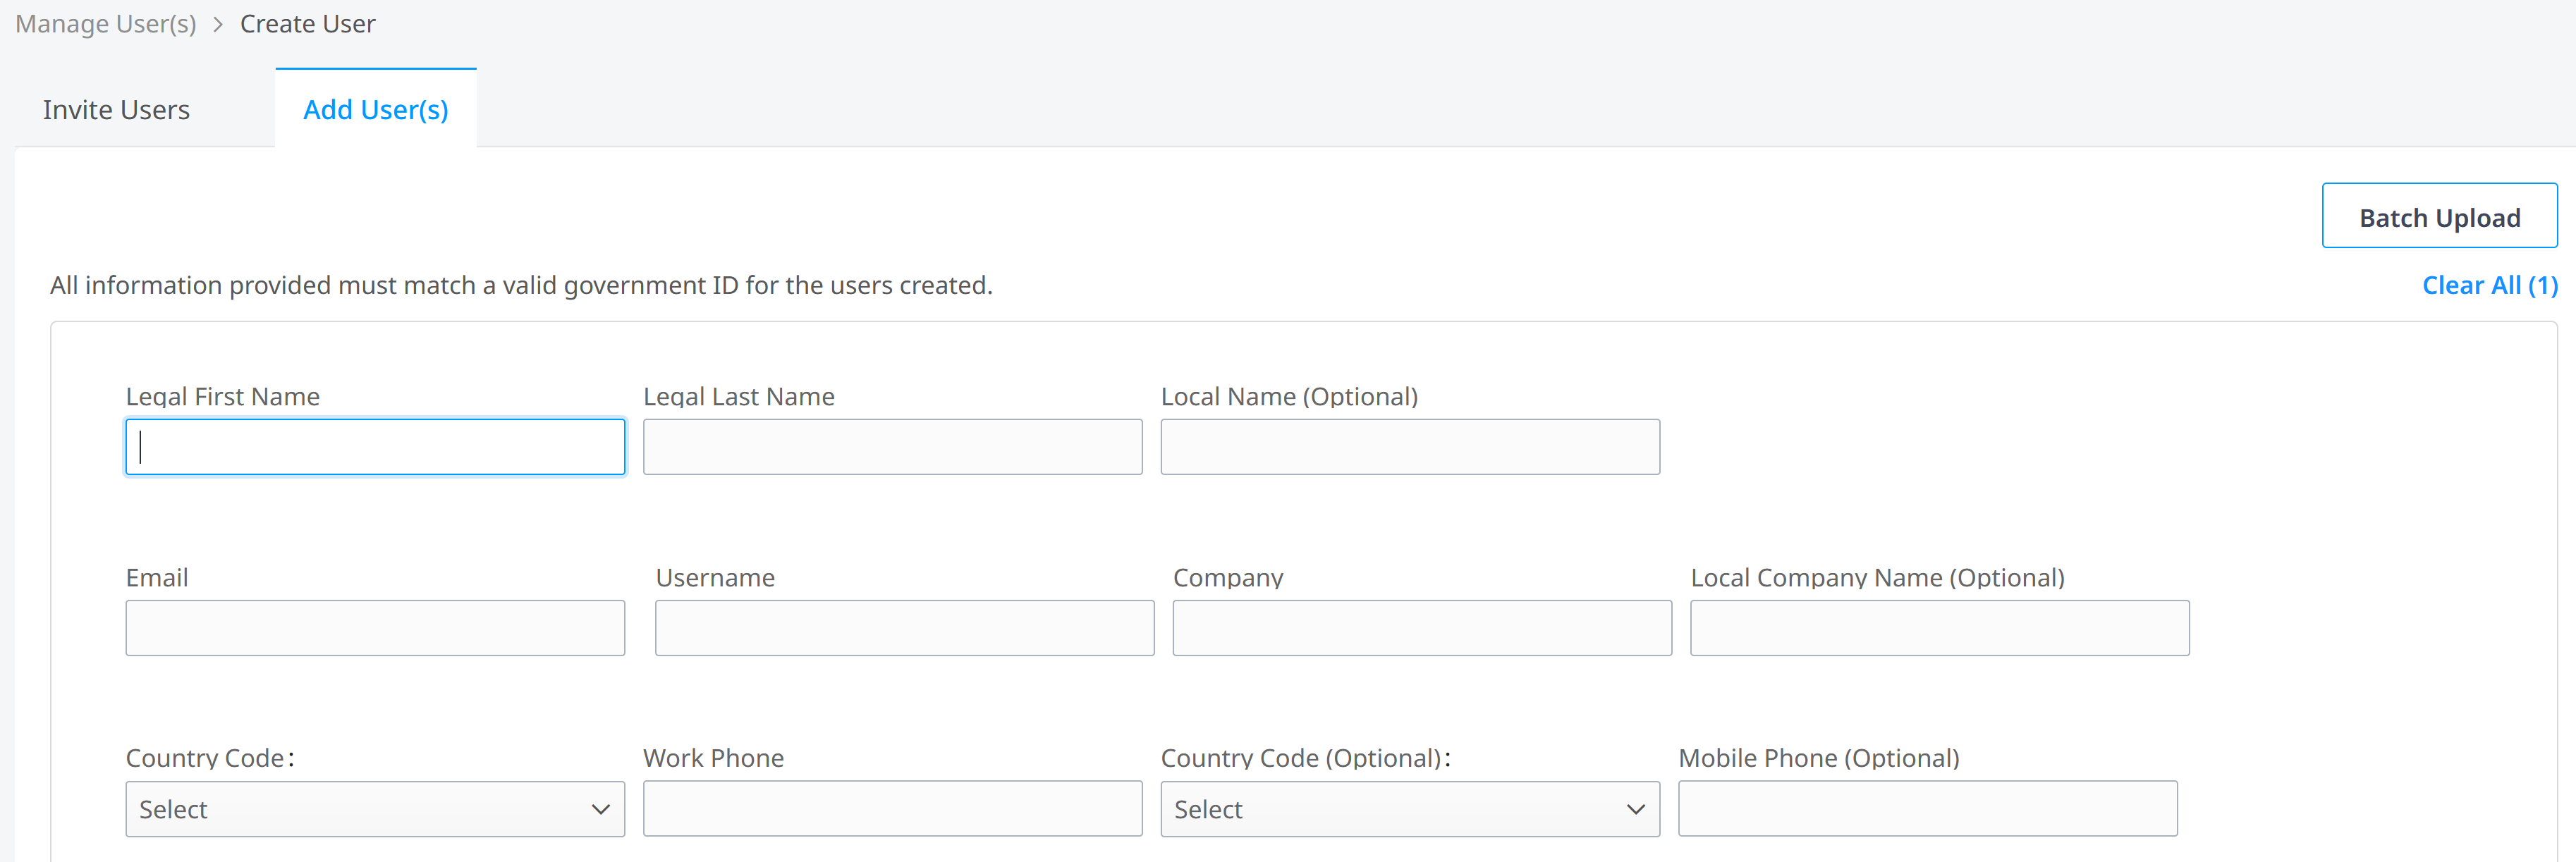
Choose the Add User(s) tab.
-
Enter information about this template into the following fields.
noteYou are entering information for a generic user profile, not an actual user. This profile is not activated in the portal; it is only used as a template to apply permissions to other users.
- Given or Legal First Name – Definition for this type of user. For example: NOCuser
- Surname or Legal Last Name – Enter template (this allows you to search for templates later).
- Email – Your email address.
- Username (Optional) – Unique name that helps identify this template quickly in the dashboard. For example: nocusertemplate
- Company – Your company name.
- Country Code – Your country code.
- Work Phone – Your work phone number.
-
Click Submit. A confirmation is displayed at the top of the window.
-
Click the Assign Permissions link in the confirmation. The User Management dashboard is displayed.
-
On the dashboard, click the options menu and choose Manage Permission.
The Permissions tab displays a catalog of permission types.
-
Select the permissions for this template. For details, see Assign Permissions Manually.
infoLater, when you use this template to assign permissions to other user accounts, these are the permissions that will be applied to those users.
-
Click Submit.
Assigning Permissions from a Template
Assigning permissions from a template overwrites any previous permissions that were assigned to the user.
-
From the Administration menu, choose User Management.
-
In the Filter by section, type
templatein the Add Keyword field.
Your templates are listed.
-
On the dashboard, click the options menu choose Copy Permissions From. The available users are listed.
-
Click the checkboxes on the left of the dashboard to select the users to whom you want to apply the template permissions.
-
Click Apply at the top of the user list:

The permissions from the template are applied to the selected users. Any other prior permissions are removed from the selected user accounts.