Inviting New Users
Organization Administrators, Identity and Access Management (IAM) Administrators, and IBX Admin can invite new users to an Organization. Users are invited by email, and are prompted to make an account if they do not already have one. You can optionally assign Roles to your users when you create the invitation.
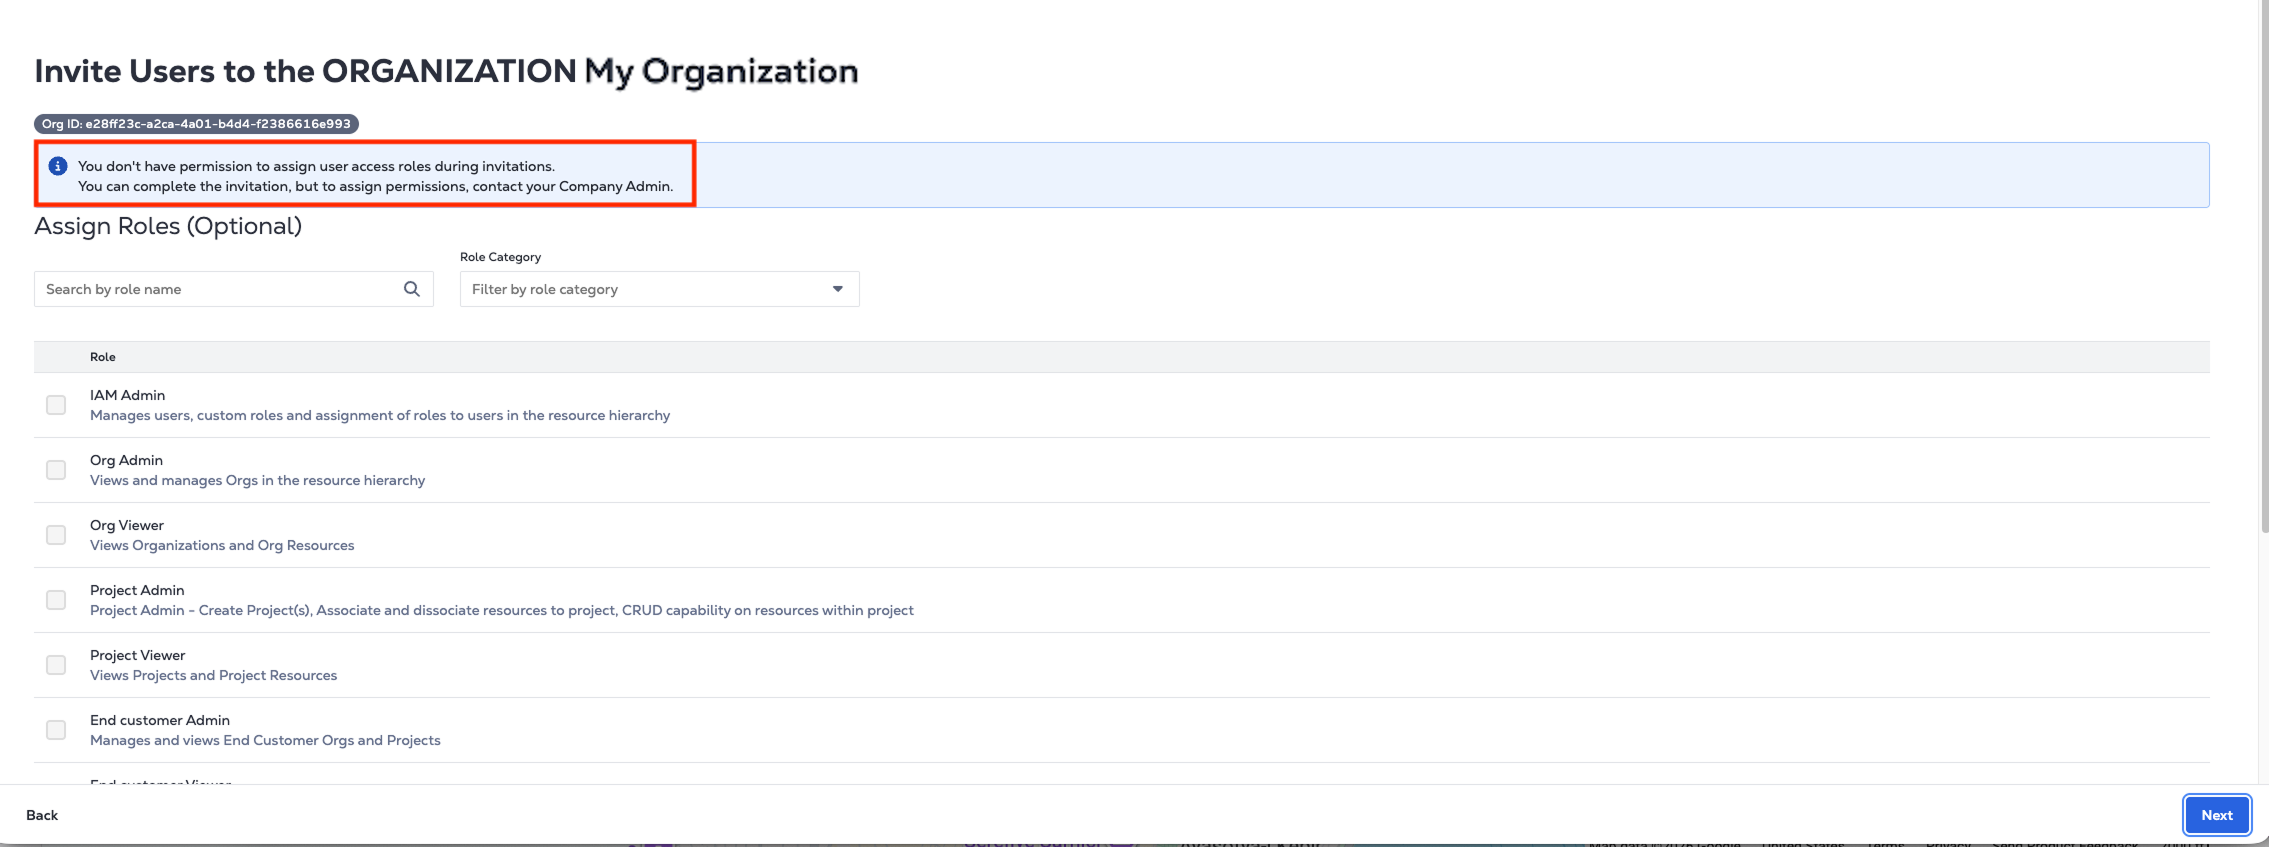
Users with the IBX Admin role can access the IAM portal and invite users to the organization. However, IBX Admins cannot assign roles or permissions during the invitation process. Only IAM Administrators and Equinix Company Administrators can assign roles when creating invitations.
Creating an Invitation
-
Sign in to the Customer Portal as an IAM Admin, IBX Admin, or Equinix Company Admin and access IAM.
-
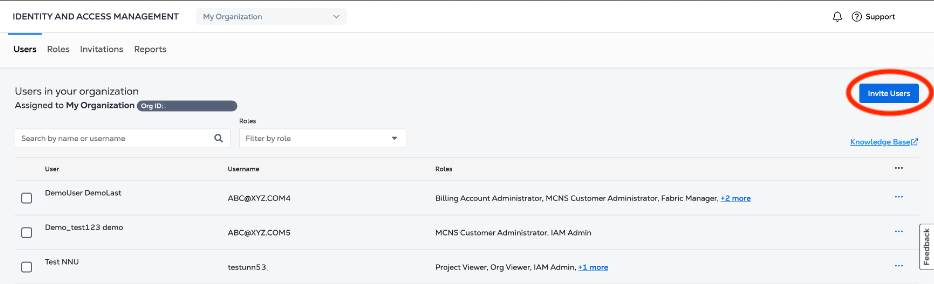
On the Users or Invitations tab click Invite Users.
-
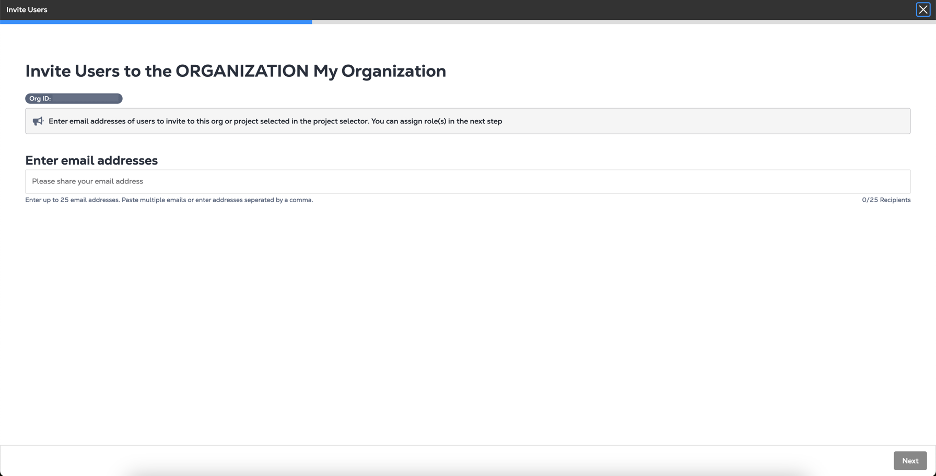
Enter the email address of the user you are inviting to the Organization and click Next.
 note
noteYou can invite up to 25 users.
-
(Optional) Assign Roles to your users and click Next.
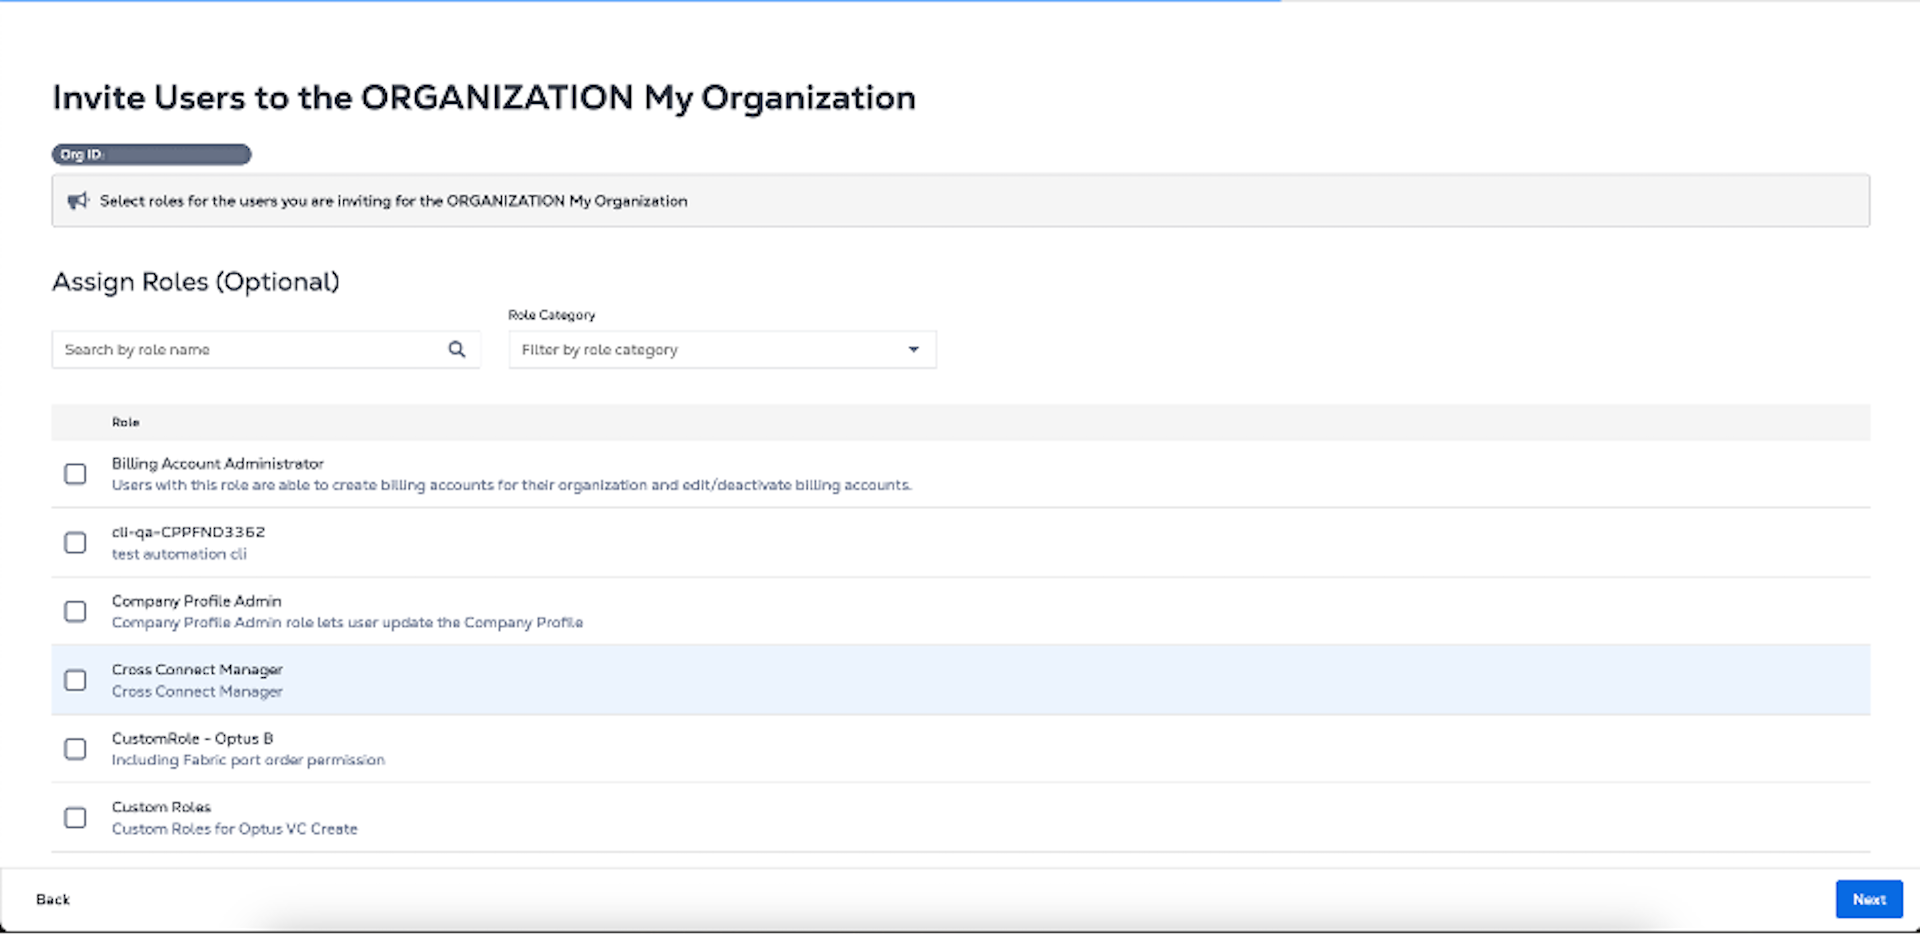
- If you are signed in as an IBX Admin, you can invite users but you cannot assign roles during the invitation process. Roles must be assigned later by an IAM Administrator or Equinix Company Administrator.
-
Review the users, email addresses, and roles (if assigned) and click Submit.
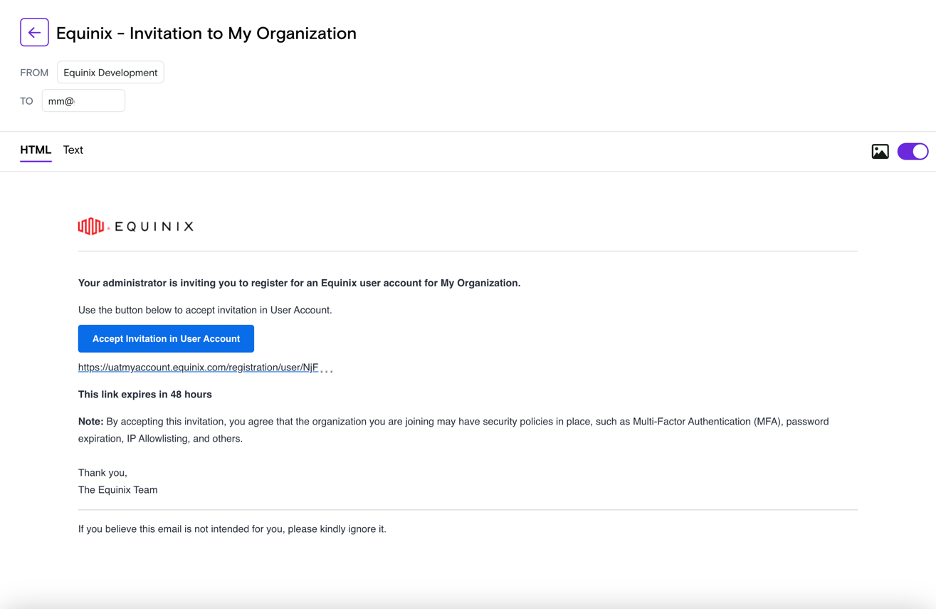
- The user will receive an email with the link to accept the invitation in their User Account.
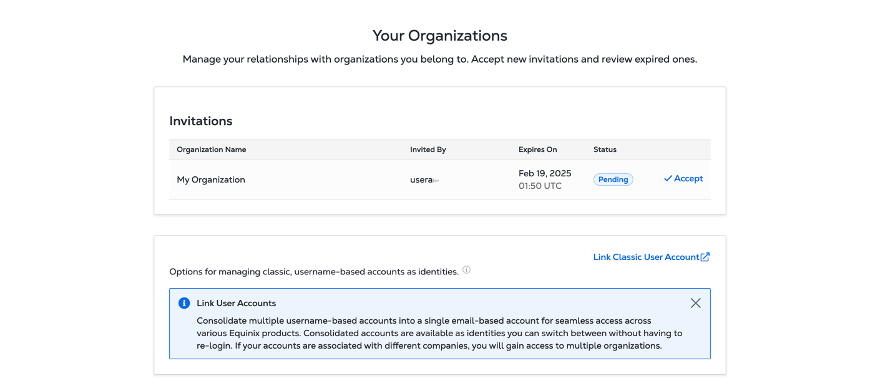
- If the user does not already have an Equinix user account, they must create one. After creating their account, they can sign in and accept the invitation from their account page.
- Once the user accepts the invitation, they can sign in to the Customer Portal and perform operations based on their assigned roles.
Managing Invitations
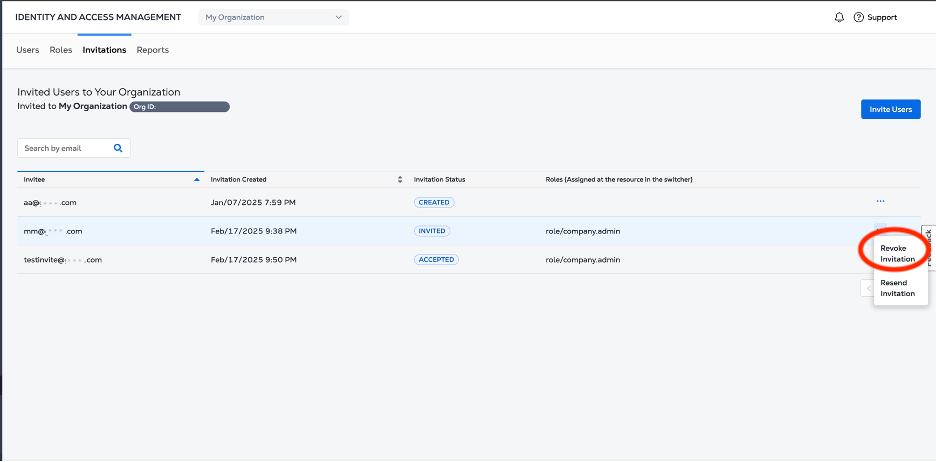
You can manage your invitations from the Invitations tab in the IAM portal. It shows all your invited users, their assigned Roles (if any), and the status of the invitation.
Possible invitation statues are:
- Created
- Invited - the email has been sent to the user inviting them to the Organization.
- Accepted - the user has accepted the invitation to the Organization.
- Expired - If a user does not accept the invitation within 48 hours, the invitation expires. You can reinvite the user.
To resend an invitation, click the options menu next to the user's email address. Click Resend Invitation.
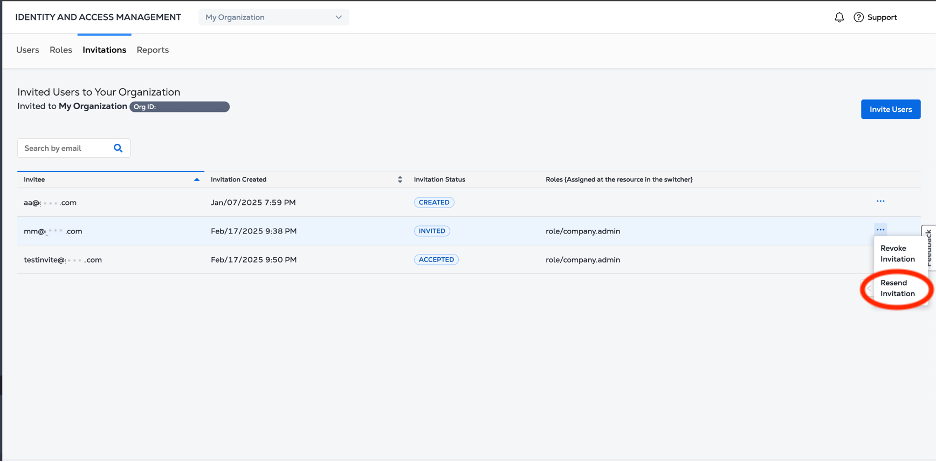
To cancel an invitation, click the options menu next to the user's email address. Click Revoke Invitation.