New User Accounts
Company Administrators still have the ability to create and invite users through the Colocation Dashboard. However, using this process will immediately prompt your user to migrate their account to an email-based IAM account. We recommend using the process on Inviting New Users to avoid the migration step.
Inviting a User to Create an Account
Administrators can create new user accounts by sending email invitations. Users can click the invitation link in their email, and activate their accounts by setting up a password, PIN, and other details. An administrator approves the user account and assigns it permissions. Users can then sign into the Customer Portal and other portals using their credentials.
To invite a user to create an account:
-
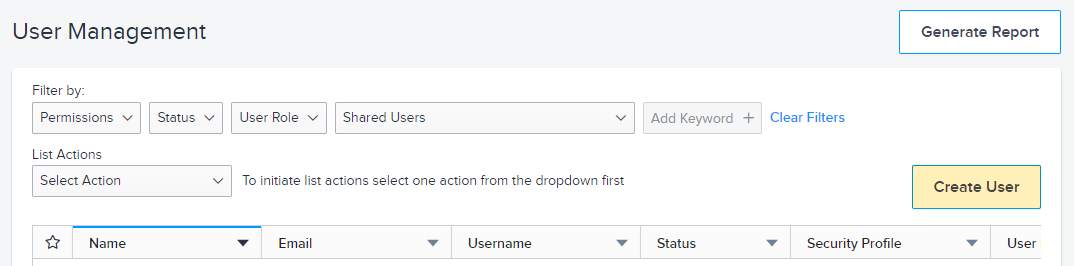
From the Administration menu, choose User Management.

-
Click Create User.
-
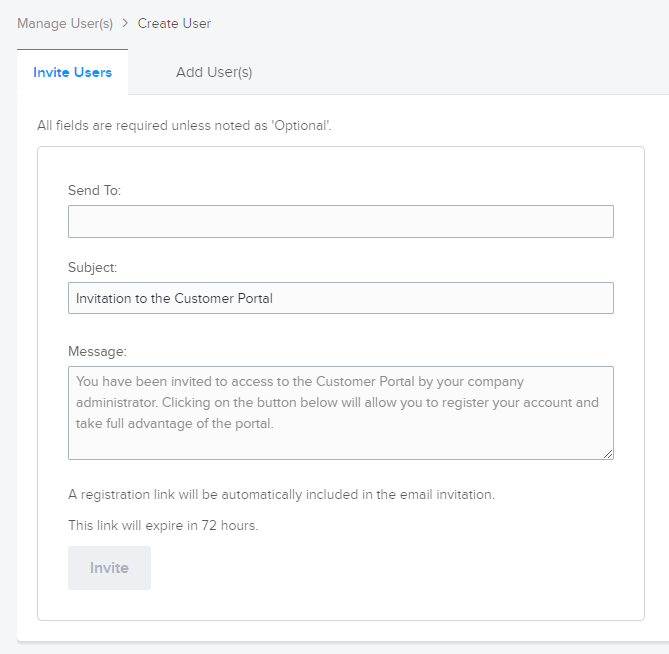
Select the Invite Users tab.
-
Enter the user's email address, and if needed, edit the Subject and Message fields.
-
Click Invite. An email is sent to the user, with a link that allows them to activate their new account.
To save time when inviting users to create their own accounts, you can add multiple email addresses to the Invite User form. Each user receives an email invitation that contains their unique registration link.
After each user creates an account, you must approve the new account and add permissions.
Approve or Reject New User Registrations
After you invite a user to the portal, you'll receive an email when they submit their user registration. You must then approve their registration before they can access the portal.
-
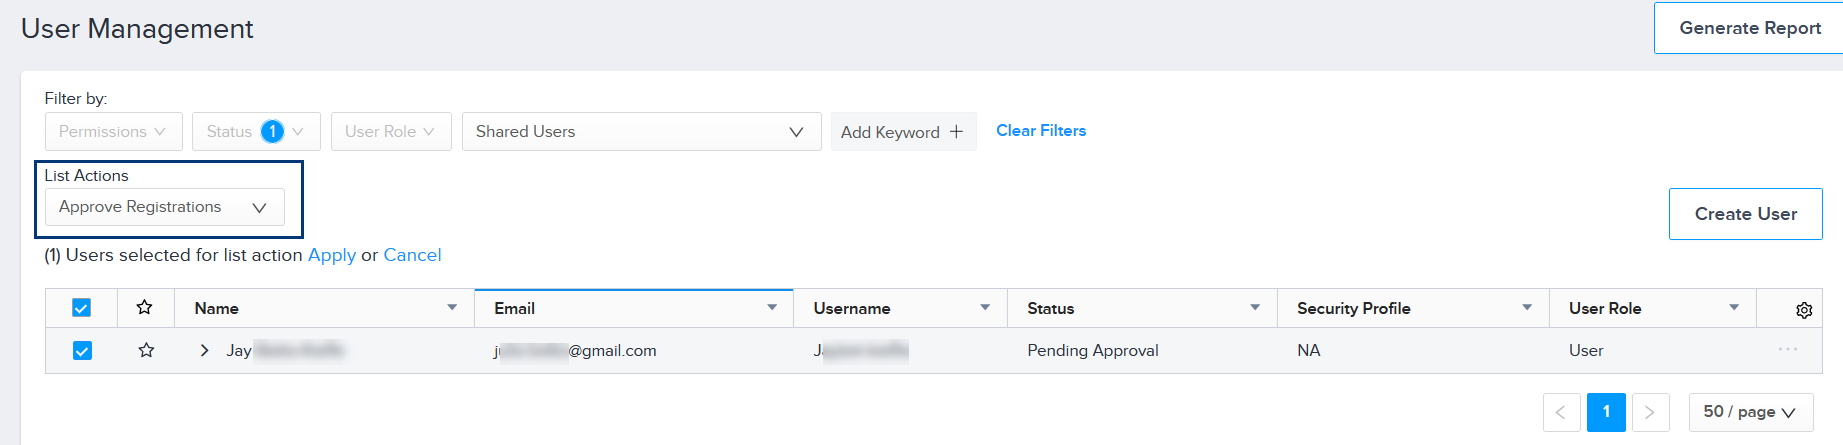
In the Message Center of your Customer Portal dashboard, click USER REGISTRATIONS on the Pending tab.
tipYou can also access USER REGISTRATIONS by clicking the notification icon of any portal screen. Or, you can find users awaiting approval on the User Management screen by setting the Status filter to Pending Approval.
-
Click the link to the new user account. The User Management window is displayed, listing one or more user accounts.
To approve or reject a single user:
- Click the options menu at the end of the row.
- Choose Approve Registration or Reject Registration.
- Click Submit.
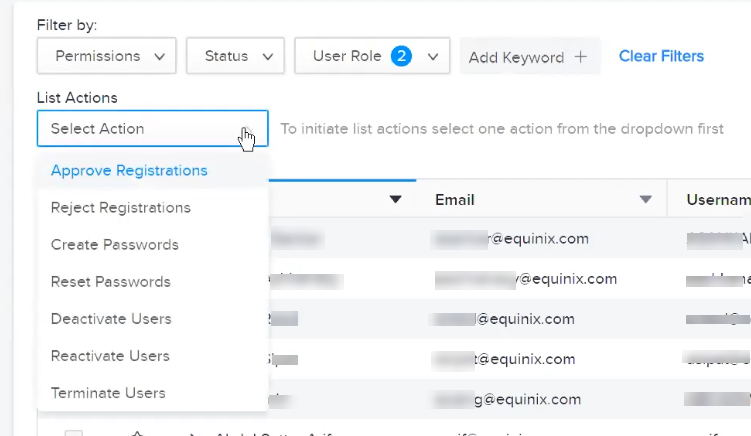
To approve or reject multiple users at once:
-
Choose Approve Registrations or Reject Registrations from the List Actions drop-down menu.
-
Select the users all the users you are approving or rejecting.
-
Click Apply. The Approve Registration window is displayed.
-
Click Submit.
For newly approved users, their status on the User Management screen changes from Pending Approval to Not Activated. To finish activating their account, see Assign Permissions to a User.
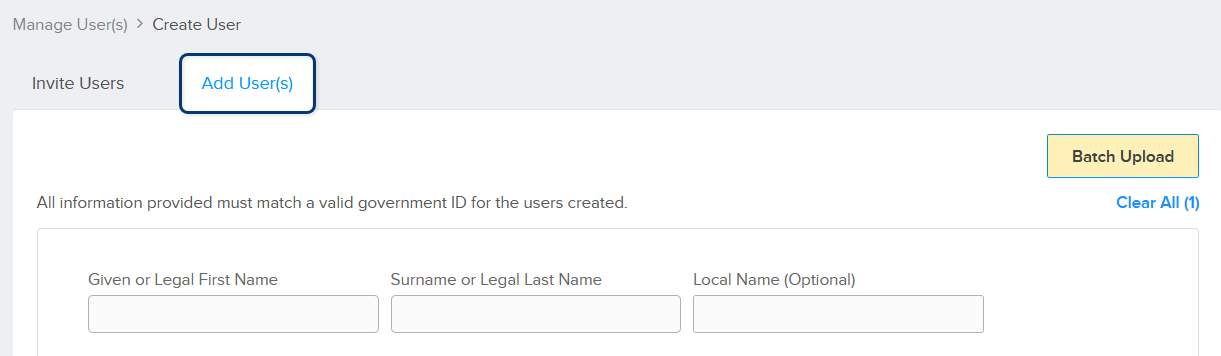
Creating User Accounts
Alternatively, you can create accounts for your users instead of inviting them to create their own account.
Do not use shared logins.
Username requirements:
- Must be between 8 and 100 characters long
- Must not include these special characters: # ? ! $ ^ * ; < > [ ] { } % ' "
- Must not include spaces
-
From the Administration menu, choose User Management.
-
Click Create User.
-
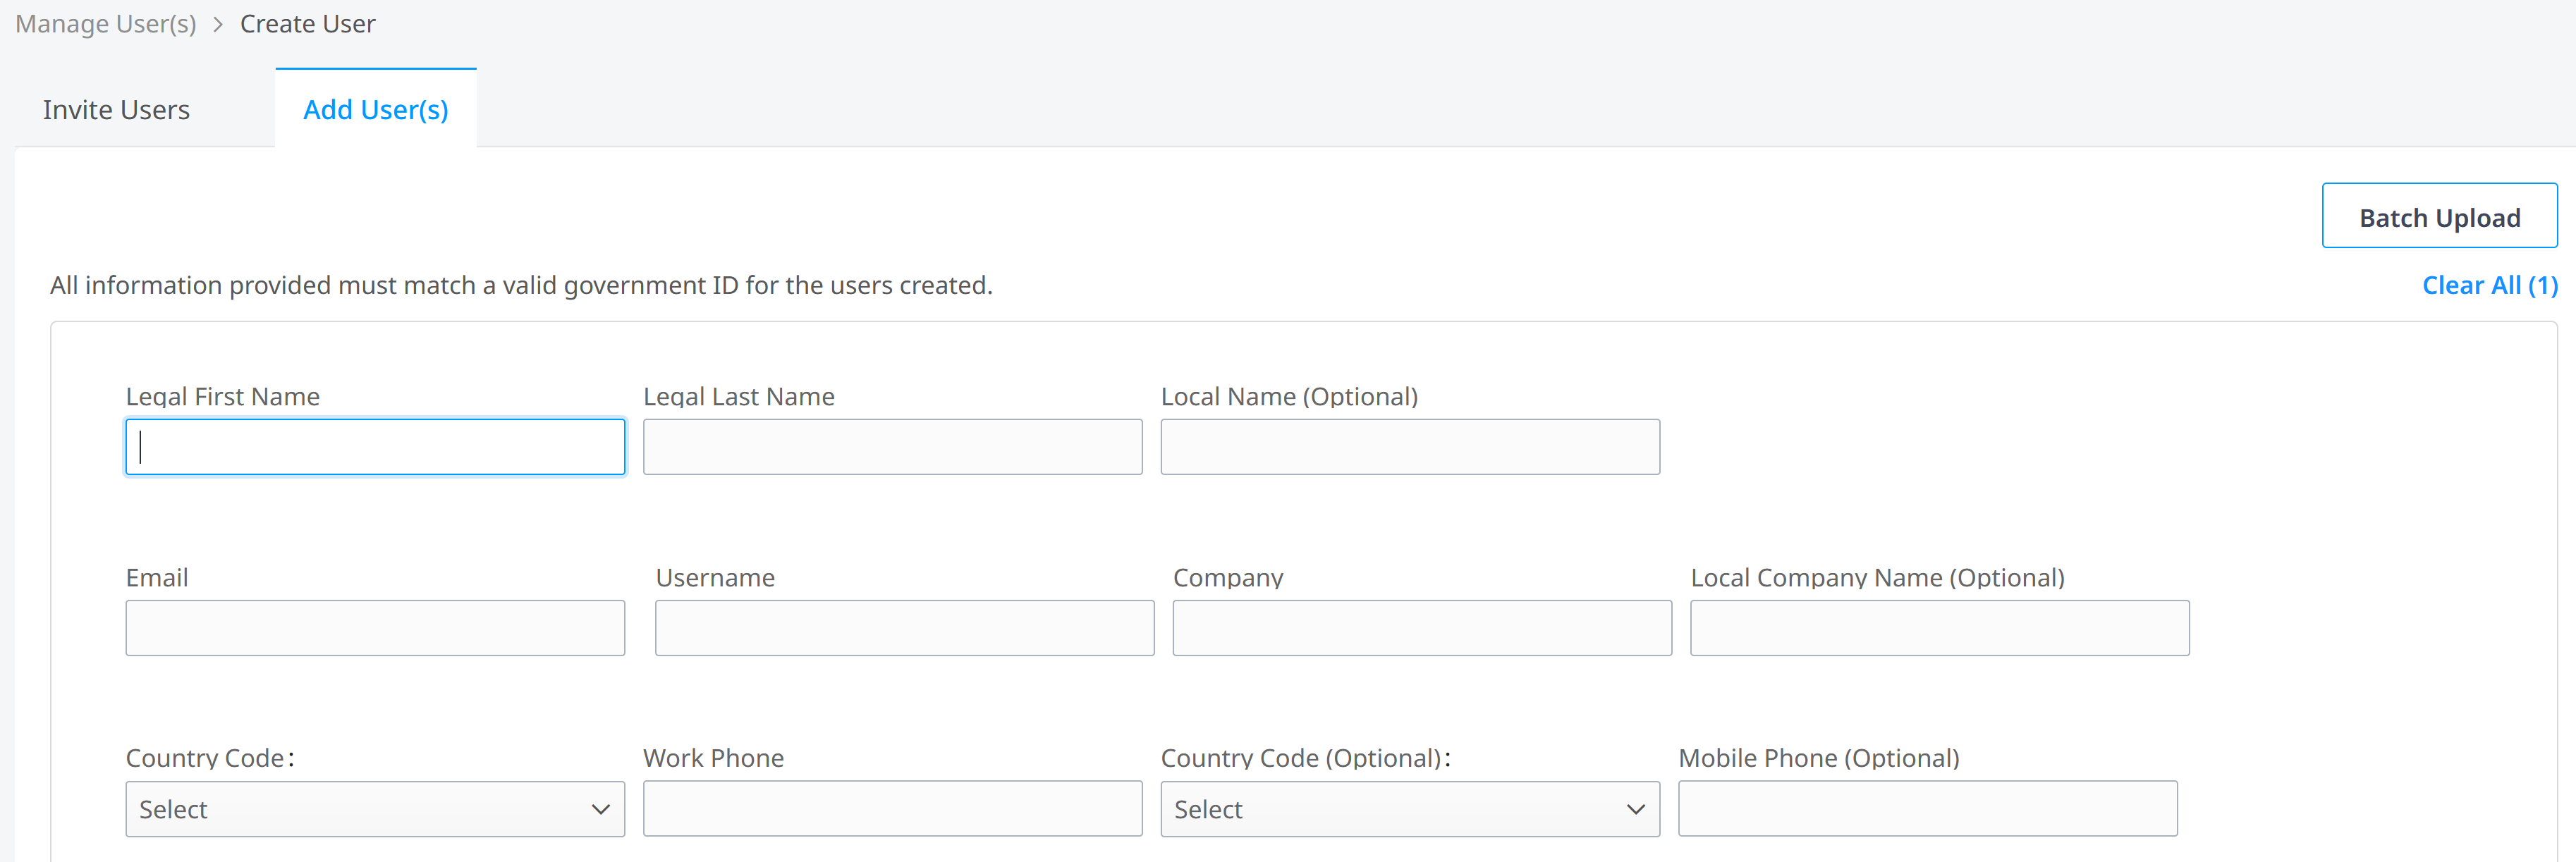
Choose the Add User(s) tab.
-
Specify whether you're adding an Equinix employee or an external vendor.
-
Enter the user's information (email address, name, company, etc.).
-
If the user's access to the portal should expire on a specific date:
- Select an expiration date from the calendar under Deactivation Date.
- Click select time to specify the expiration time of day, then click OK.
-
To specify a language for the new user, choose from the Language drop-down list. English (United States) is the default.
-
Select the user's local time zone.
-
Click Submit.
To activate the new account, you must assign permissions. See Assign Permissions to a User.
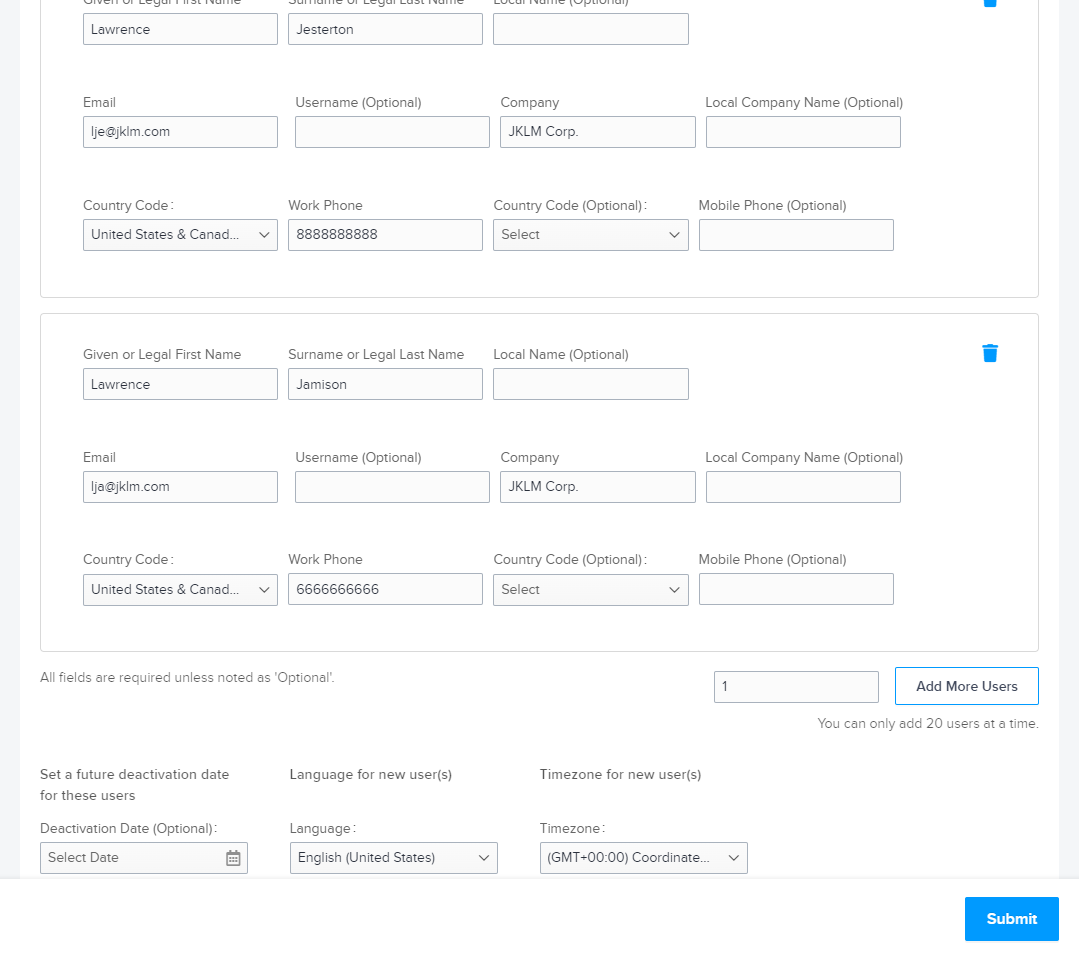
Creating Multiple User Accounts
When adding multiple users, you can use the Batch Upload process to enter information for up to 20 users at a time.
The Batch Upload process assigns the same time zone and portal language (and optionally, a deactivation date) to all users included in the batch.
-
From the Administration menu, choose User Management.
-
Click Create User.
-
Choose the Add User(s) tab.
-
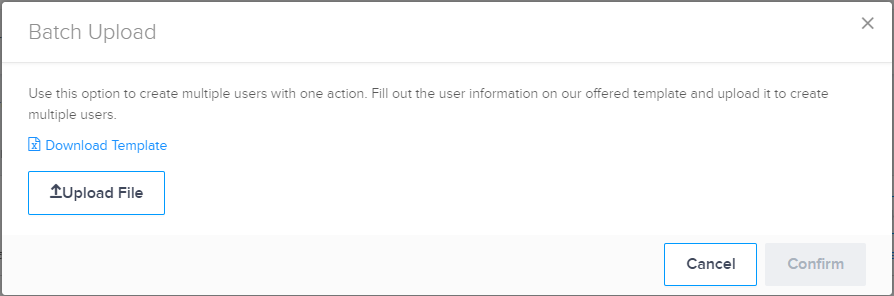
Click Batch Upload (upper right corner).
-
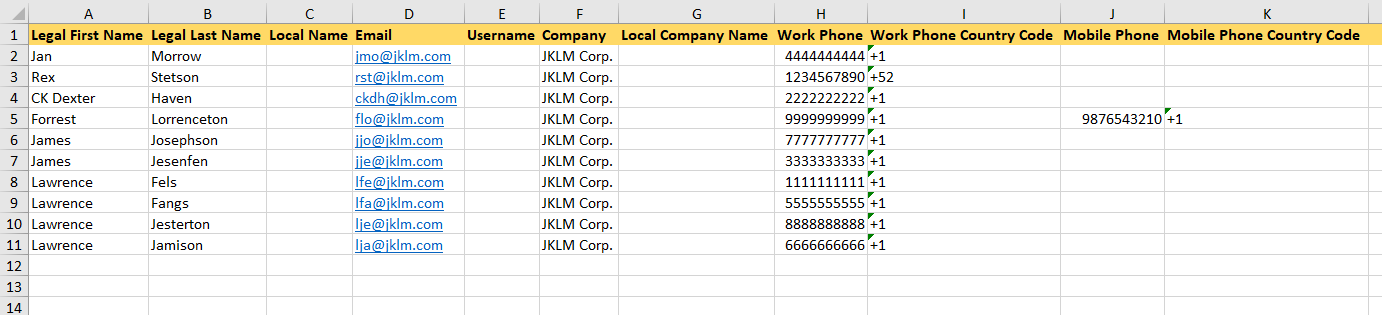
Click Download Template to download the Microsoft Excel template.
-
Complete the template with information for up to 20 users, save it, and close the file.
infoDo not change the column names or formatting of the file.
-
Click Upload File(s). Browse to find your completed template and click Open.
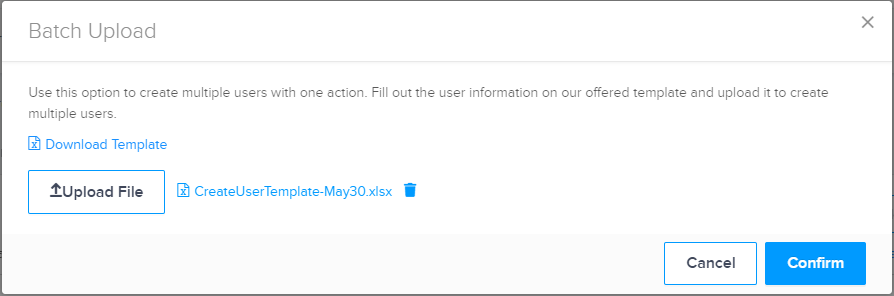
-
Click Confirm. The fields on the Add User(s) tab are filled with the information from your import file.
-
Select the portal language, time zone, and (optionally) a deactivation date for these users.
-
Click Submit.
To activate the new accounts, you must assign permissions. See Assign Permissions to a User.
Inviting Users to Create Passwords
You can create user passwords individually from inside each user's account, or you can send email to users notifying them to create their passwords.
The User Management dashboard enables you to identify a list of users who haven't yet created their passwords, then send a batch email notification reminding them to complete the password process.
-
From the Administration menu, choose User Management.
-
Choose Create Passwords from the List Actions drop-down menu.
The list is filtered to display the user accounts with no assigned password, or with expiring passwords.
-
Select one or more user accounts, and click Apply.
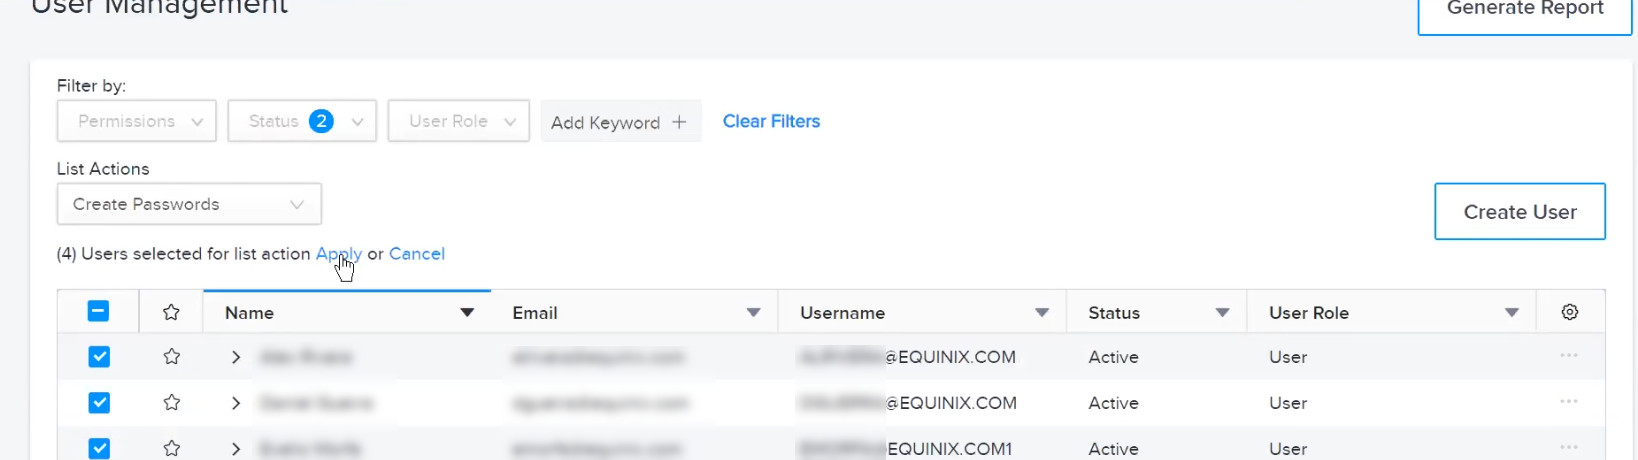
The users receive an email link to complete the process of creating or resetting their password.
Creating User Passwords
-
From the Administration menu, choose User Management.
-
Choose Create Passwords from the List Actions drop-down menu.
The list is filtered to display the user accounts with no assigned password, or with expiring passwords.
-
Click the options menu to the right of the user name, and choose Create Password.
-
Enter the new password for the user account. Password requirements:
- Must be at least 14 characters long
- Must contain at least one lower-case letter (from a-z)
- Must contain at least one upper-case letter (from A-Z)
- Must contain at least one numeral (from 0-9)
- Must contain at least one special character: # ! $ ^ & * @
- Must not include any of these special characters: ; < > [ ] { } % ' "
- Must not include spaces
- Must not contain two identical characters consecutively
-
Click Submit.
Reactivating Users with Invalid Email Addresses
Users with invalid email addresses pose a security threat. To address this risk, these users are prompted to update their email addresses. If they do not, their accounts are deactivated.
Once the user's account is deactivated, only the company administrator can reactivate the account and update their email address.
To identify users with invalid email addresses:
-
From the Administration menu, choose User Management.
-
Look for an alert icon displayed next to the user name.
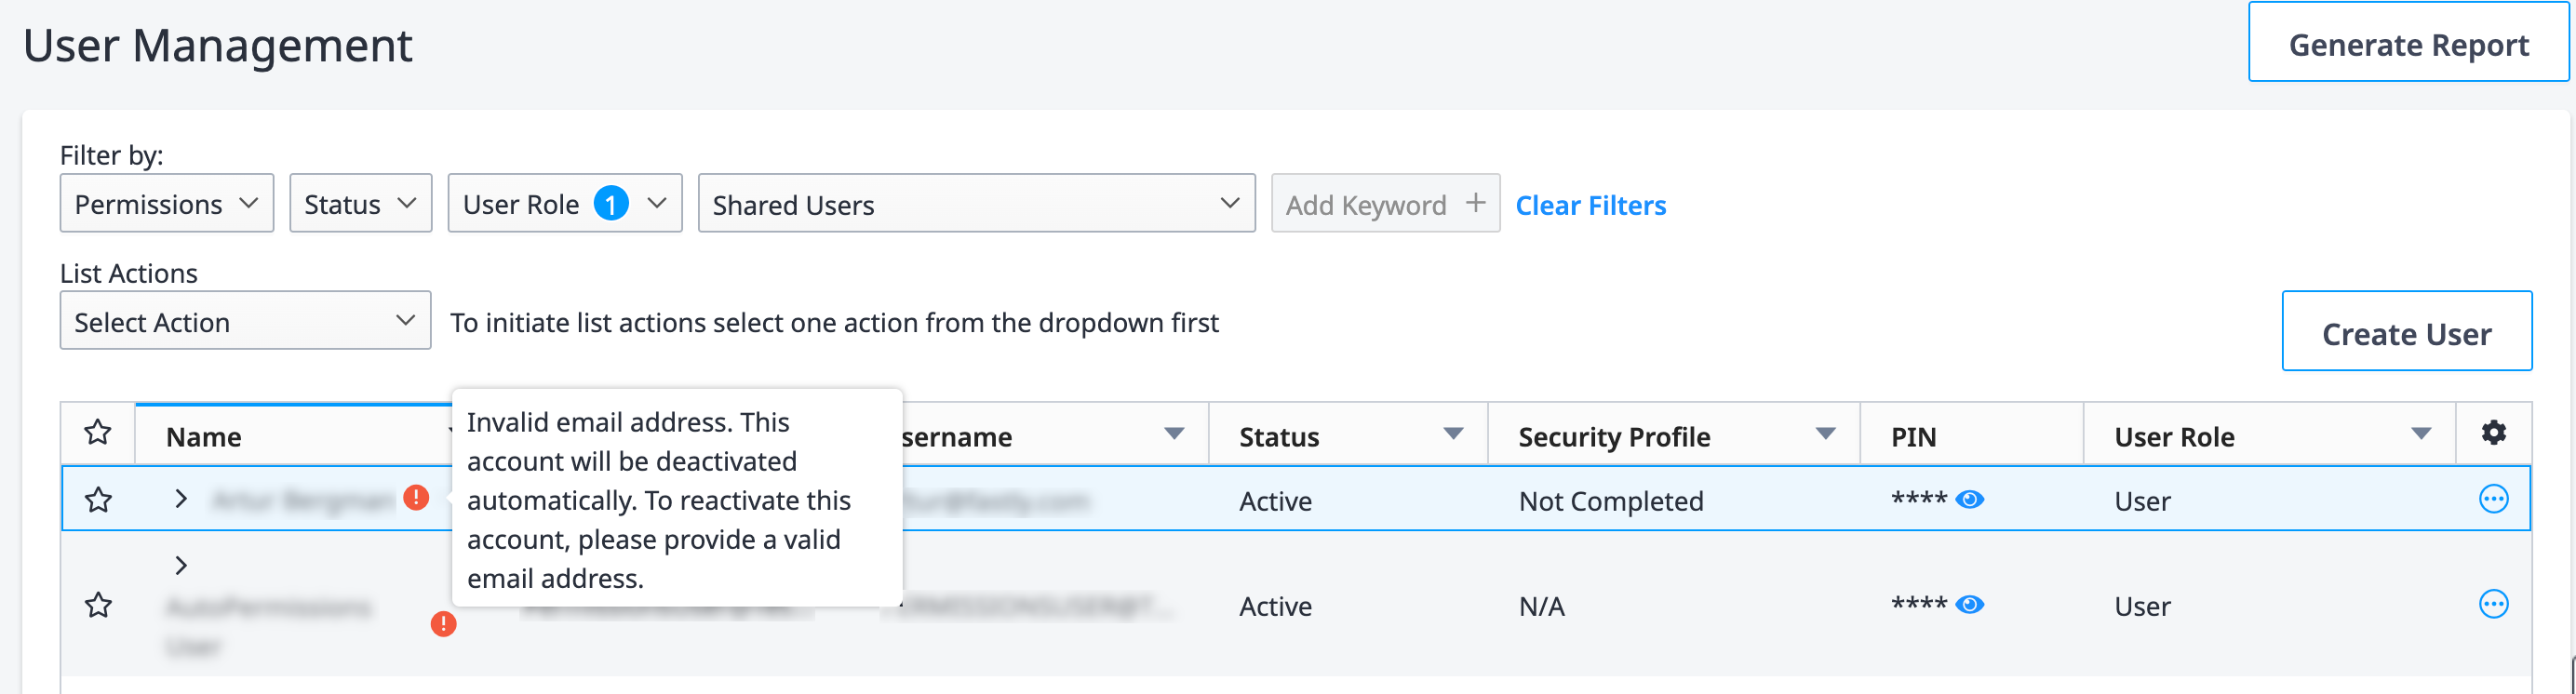
-
Update the Primary Email field for this user. The alert icon and the deactivation date assigned to the user are removed.