Administrator Accounts and Responsibilities
These processes are for administrators creating and managing user accounts and permissions for products and services that have not been on-boarded to Identity and Access Management and are managed through the Colocation Dashboard.
Administrator Roles
There are two types of administrators: Company Administrators and IBX Administrators.
Company Administrator:
-
Can manage all users and services for all accounts and locations across their entire organization.
-
Can manage other administrator accounts (including IBX administrators and company administrators).
-
Can access all options under the Administration menu in the Customer Portal.
IBX Administrator:
-
Can manage user accounts in the organization.
-
Can only grant users IBX-based permissions for which they have Manage Users permission.
-
Can manage permissions for other IBX administrators, restricted to the IBX that they have Manage User permission.
-
Cannot manage Company Administrators.
-
Can manage accounts and services only for the locations assigned by Company Administrators.
-
Cannot manage Account & Security Management or Reseller Customer Management for their organization.
-
Cannot grant or revoke administrator privileges.
-
Cannot grant any non-IBX based or broad-based permissions like:
- Billing
- SmartHands Support Plan
- Equinix Digital Products (Equinix Fabric and Network Edge, Remote Network, Internet Exchange, Equinix Internet Access and Equinix Connect, Virtual Asset Notifications, Managed Solutions)
To ensure that administrator support is always available, be sure to designate one or more backup administrators. Consider including additional administrators to cover all the regions of your organization.
Resellers can be assigned roles as company administrators and IBX administrators.
Access the User Management Dashboard
The User Management dashboard in the Customer Portal provides the ability to add new users and make changes to user accounts. To access the dashboard:
-
Sign into the Customer Portal.
-
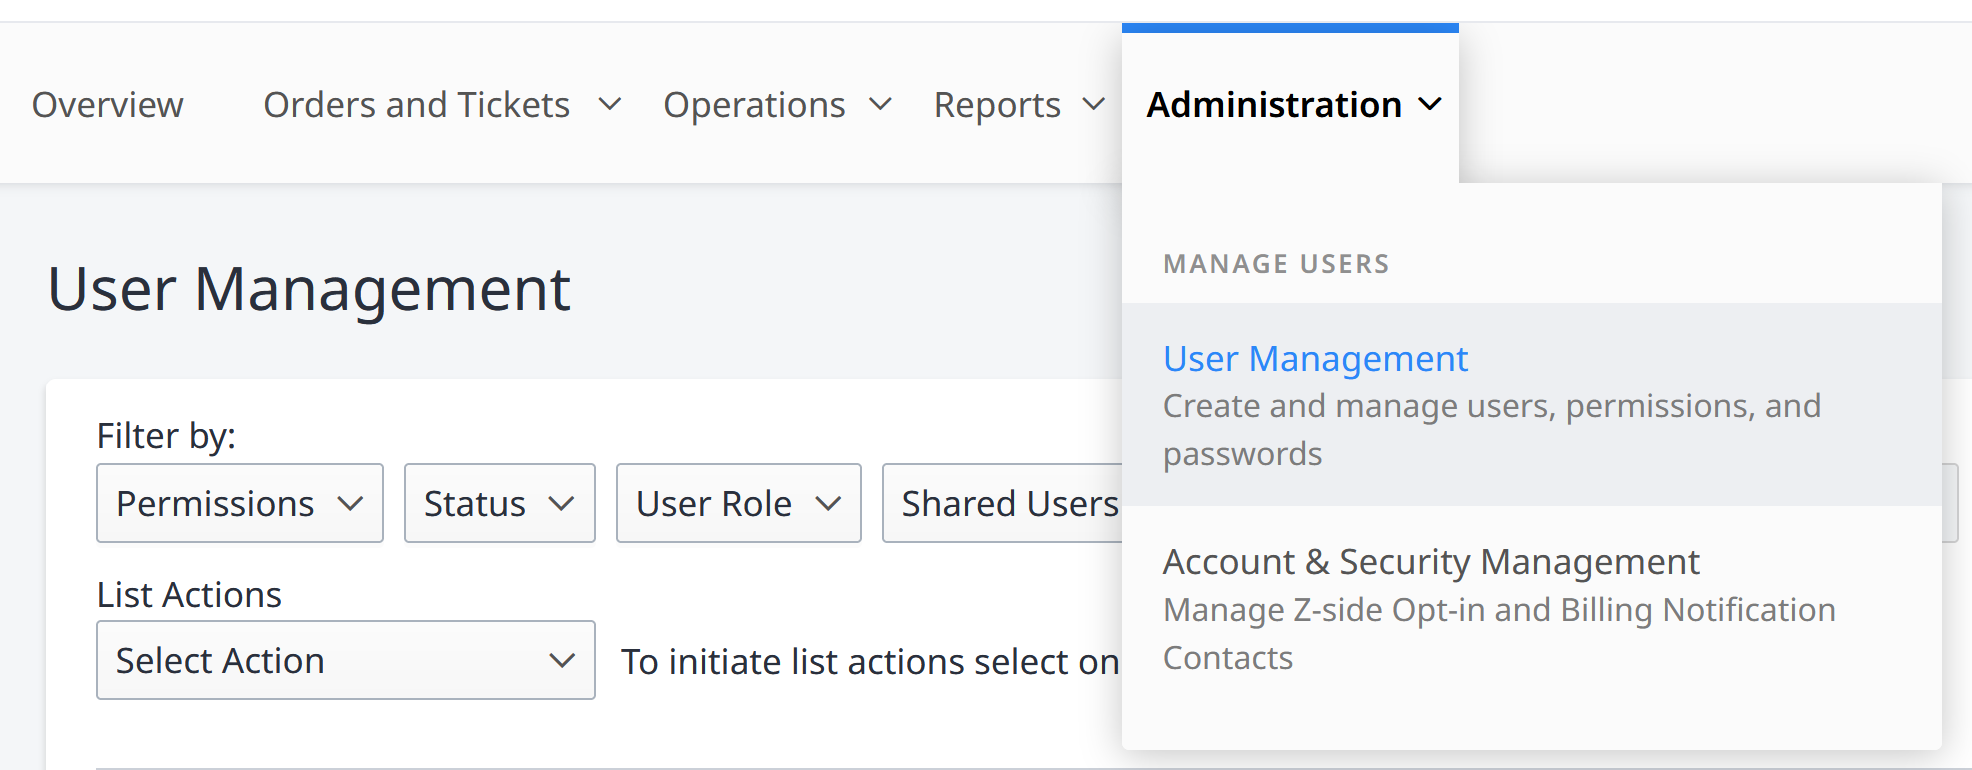
From the Administration menu, choose User Management.
noteThe Administration menu is visible only to Administrators.

The User Management dashboard is displayed. On this screen, you can filter and access user accounts, run the User Details report, and perform other administrative tasks.
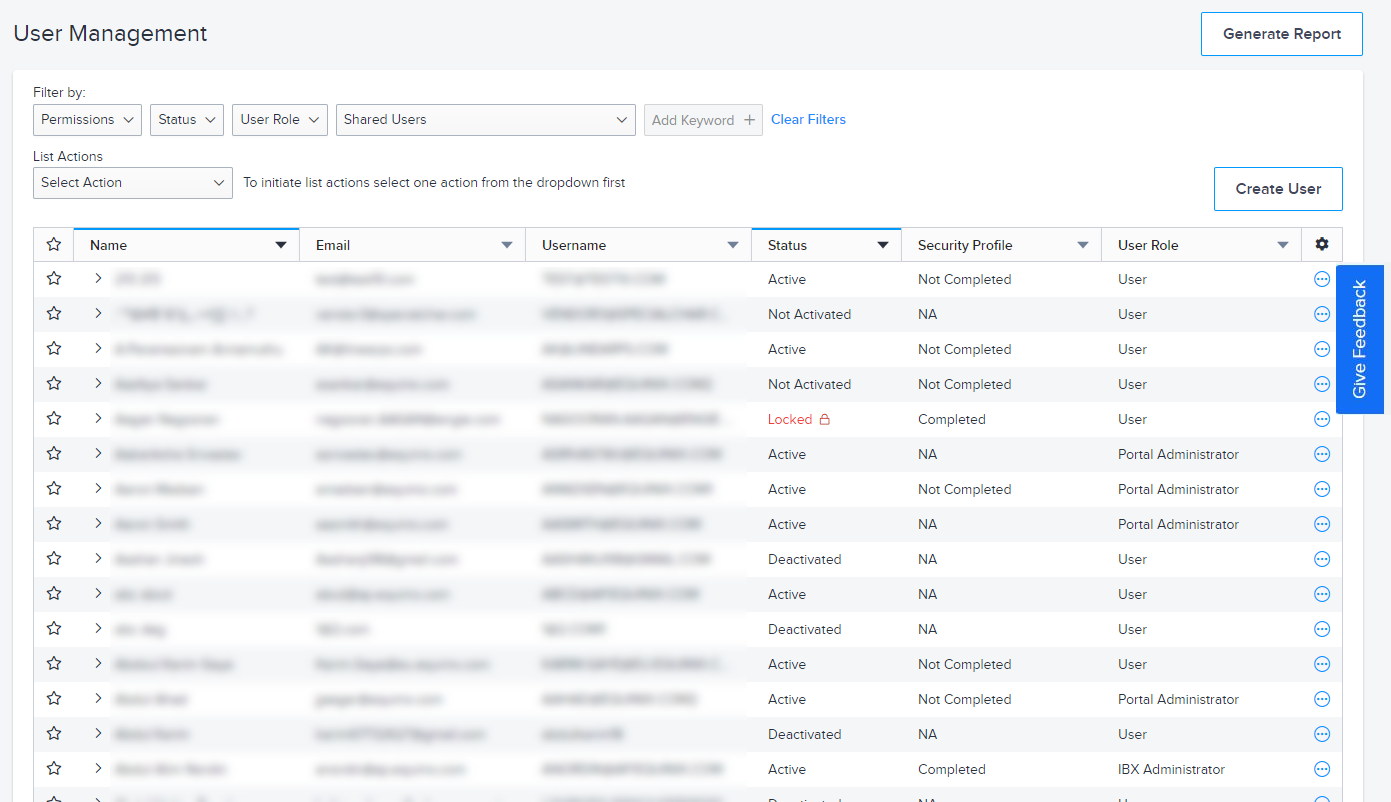
Search for Users
You can search for users by navigating to Administration, select User Management.
Filter the users according to the following criteria:
- Permissions – Search by allowed user actions.
- Status – Search by the state of user (active, inactive, etc...).
- User Role – Search by a predefined set of user permissions.

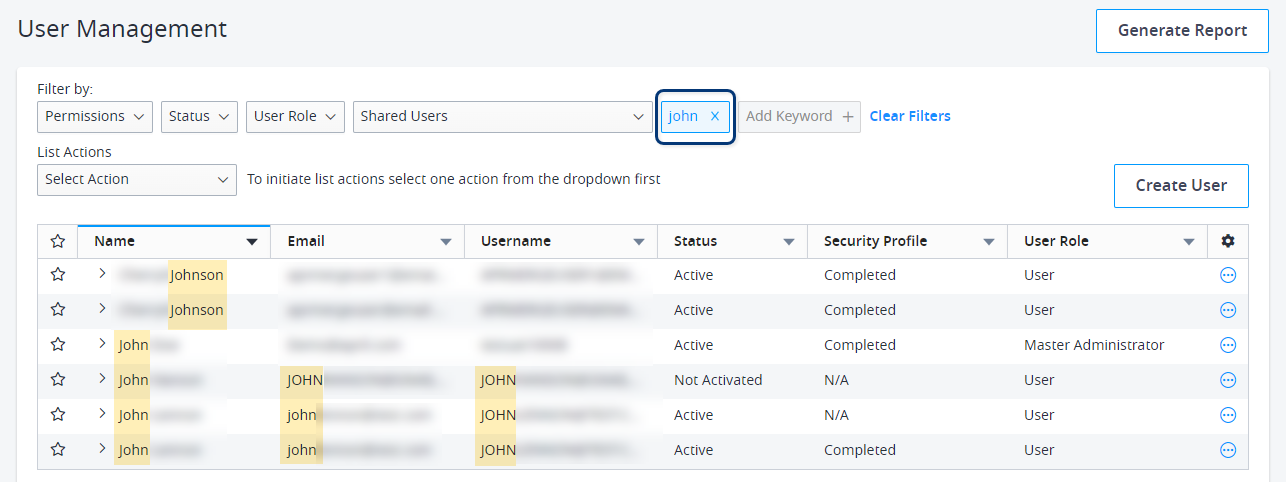
You can also search by adding Keywords such as:
- Legal First Name
- Legal Last Name
- Username
For many of these, you can use a partial word match; for example, to find all users with a specific email domain, you could enter the domain suffix (such as @xyz.com) as the search term.
Click Clear Filters to reset all search criteria.
Set Up Crisis Management Contacts
In times of crisis, Equinix provides information and instructions to users who are identified as Crisis Management Contacts. You can assign these crisis management and security roles to the users who need to receive and respond to emergency notifications.
Equinix recommends that you provide the phone number of your operations center and/or staff members who are familiar with your licensed colocation space and equipment.
Review your crisis contacts periodically to ensure we can reach the right people in a time-sensitive situation.
To verify that crisis contacts are assigned, generate the Crisis Contact Report.
-
From the Administration menu, choose User Management.
-
Find the user to identify as a crisis management contact or a security contact.
-
To search for a specific user, type a first name, last name, username, or email address in the Add Keyword field:
-
You can also use the filter options at the top to refine the user list by user status, role, organization, and current permissions.
-
-
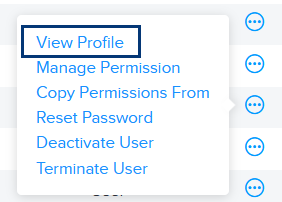
Click the options menu to the right of the user name, and choose View Profile.
The user profile is displayed.
-
Select the Crisis Contact Management tab.

-
For each Account that is available, select the role to assign:
- Crisis Management Contact – The user will be contacted if a natural disaster, a major event on a worldwide scale, or a disruptive and unexpected event threatens the organization or its stakeholders (for example, a terrorist attack or a pandemic).
- Physical Security Contact – The user will be contacted if a serious issue affects physical equipment, or if a crisis occurs at the IBX (for example, a hurricane, or IBX-specific issues).
- Information Security Contact – The user will be contacted in the event of a cyber threat or an information security issue (for example, a ransomware attack or a data breach).
-
Click Submit.
If a crisis or a security event occurs, the assigned Crisis Management Contacts will receive an email notification.
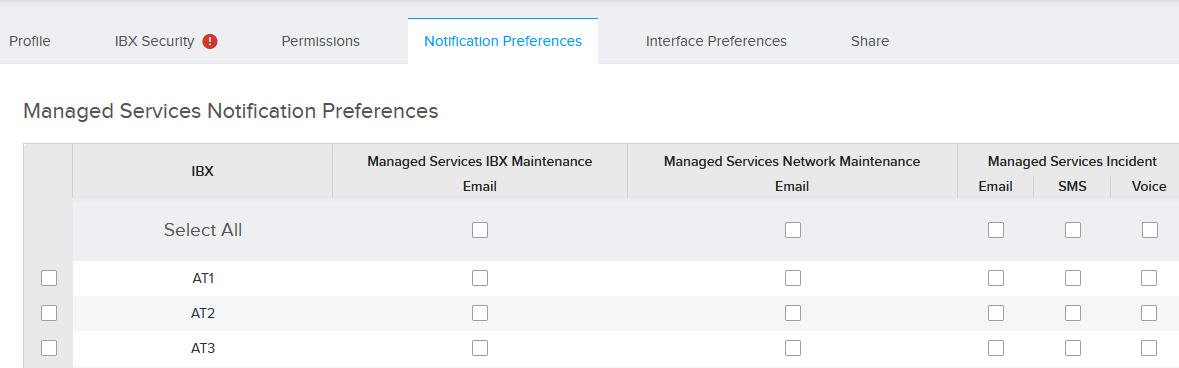
Set Up User Notifications
Once you've assigned permissions and roles to a user, you can set up notification preferences for the user. Users can also configure their own preferences. For details, see Notification Preferences.
-
From the Administration menu, choose User Management.
-
Find the user to identify as a crisis management contact or a security contact.
-
To search for a specific user, type a first name, last name, username, or email address in the Add Keyword field:
-
You can also use the filter options at the top to refine the user list by user status, role, organization, and current permissions.
-
-
Click the options menu to the right of the user name, and choose View Profile.
The user profile is displayed.
-
Select the Notification Preferences tab. The notification cards that are available for this user are displayed.
-
Click the notification card, and select the type of notifications that the user should receive. For some notifications, you can select email, SMS (text messaging), or voice notifications. For example:
-
Click Submit.
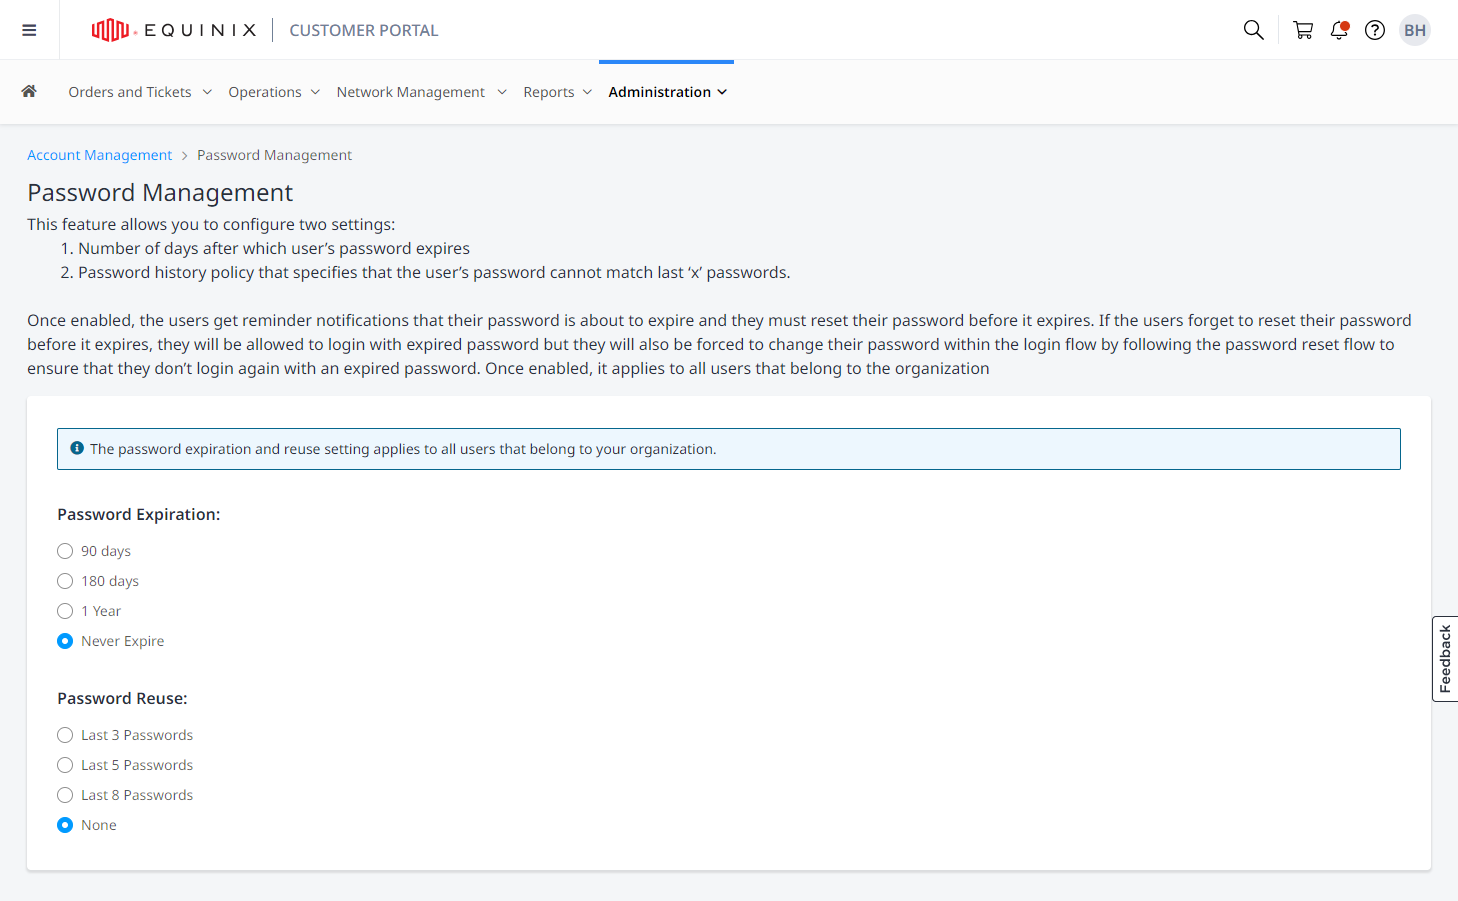
Set User Password Policies
To increase security of user accounts in your organization, you can enable password expiration and reuse options.
To change password expiration or password reuse settings:
-
Log in to the Equinix portal.
-
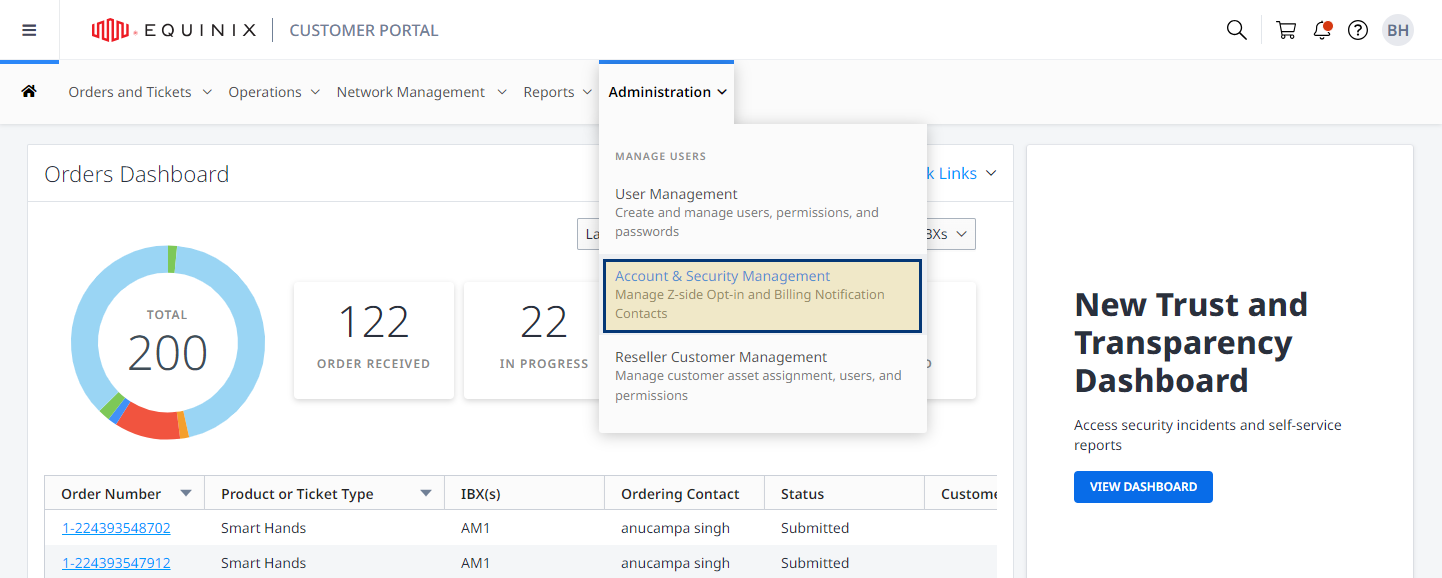
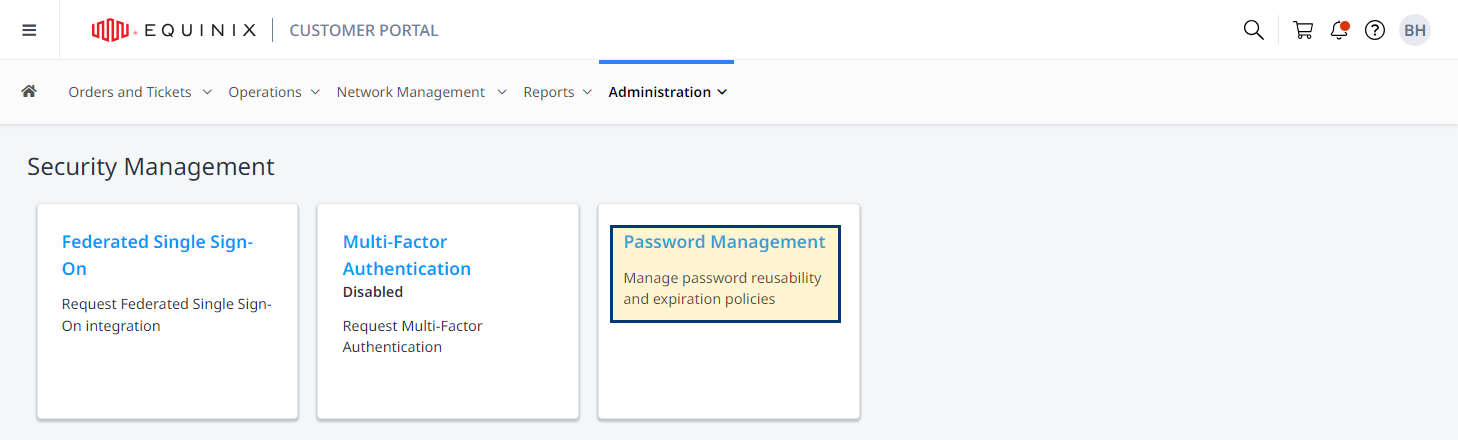
From the top menu, select Administration > Account and Security Management.
-
Click Password Management.
-
Select desired password expiration and password reuse options, and click Submit.
 info
infoFor users with email-based login enabled, the password reuse will be set to 24.
Account Lockout Threshold
To protect against brute-force attacks, we block an IP address from logging in as a given user after 10 failed log in attempts.
To unlock access to your account, click Reset Password on the login page and follow the password reset procedure.
Breached Password Detection
In case your username and password combination has been compromised we:
- Block new sign ups with compromised credentials.
- Block compromised user accounts and require password reset to re-enable access.
- Send email notification to the account owner in case of a log in attempt.
Turn On Multi-Factor Authentication for Your Organization
Multi-Factor Authentication (MFA) adds another layer of security to the Equinix portals. MFA increases security with an additional verification step that requires a one-time passcode (OTP) sent to or generated by a registered trusted device.
Equinix strongly recommends that you enable MFA for your organization.
When you enable MFA, all users within your organization must register a secondary authentication method using an alternate mechanism (such as a cell phone or email address). This is used to receive the OTP for all subsequent sign-ins to the portal.
-
Sign into the Customer Portal.
-
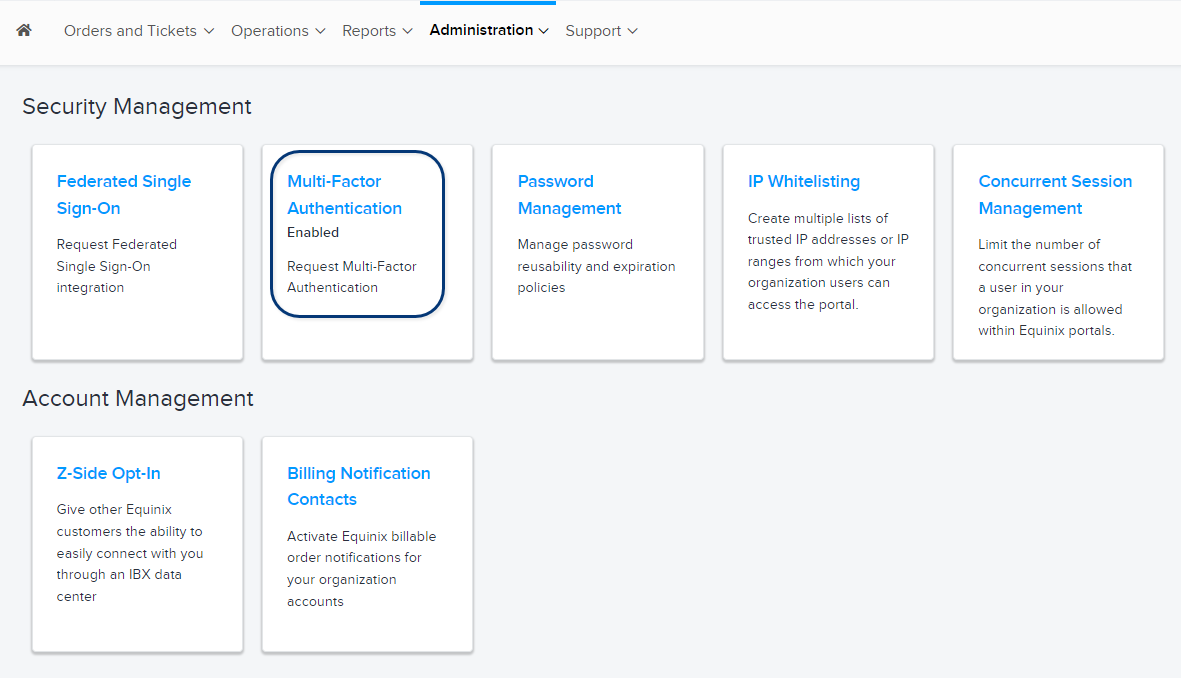
Click Administration, and select Account and Security Management.
-
Select Multi-Factor Authentication.
A message is displayed:
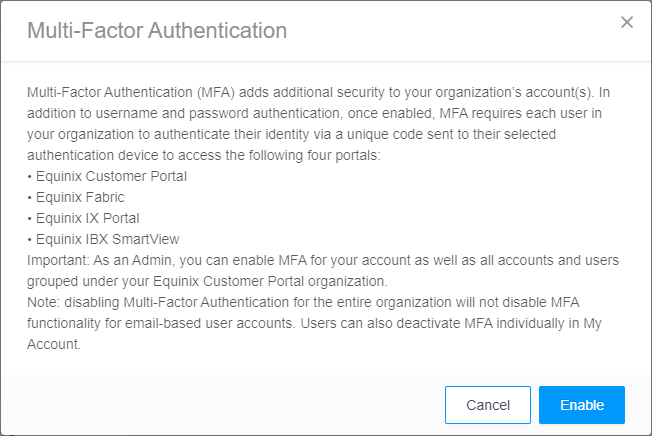
-
Read the information carefully, then click Enable. An email notification is sent to the company administrator. Once MFA is enabled, users are asked to register for MFA during their next login.
Disabling MFA for your entire organization does not disable MFA for email-based user accounts. IAM users can enable MFA individually or deactivate MFA individually for their user account.
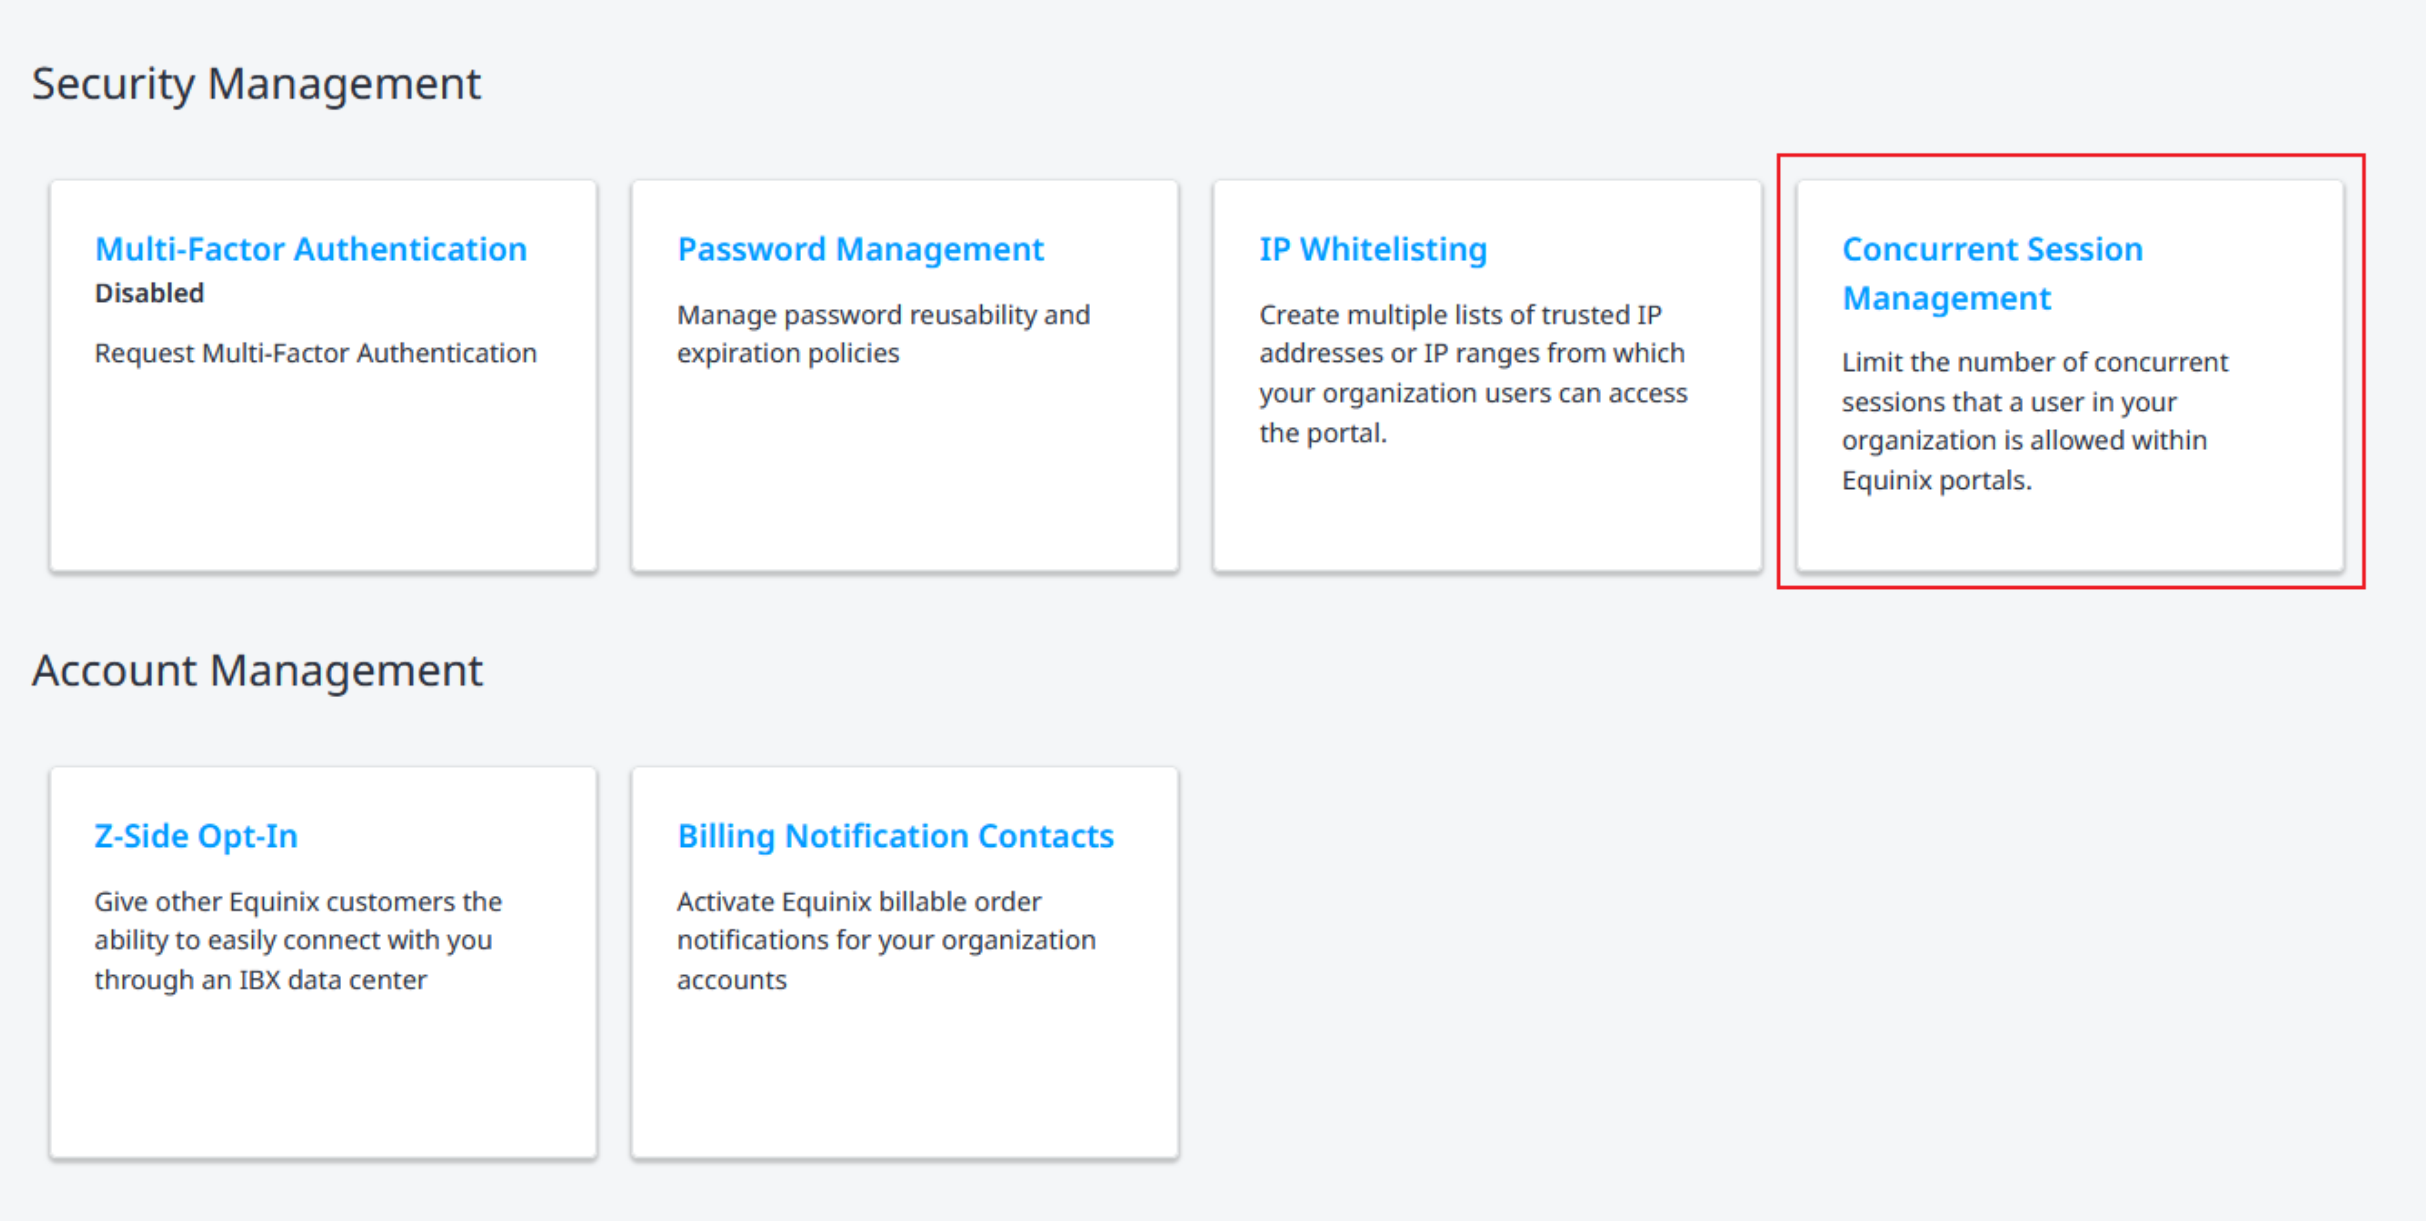
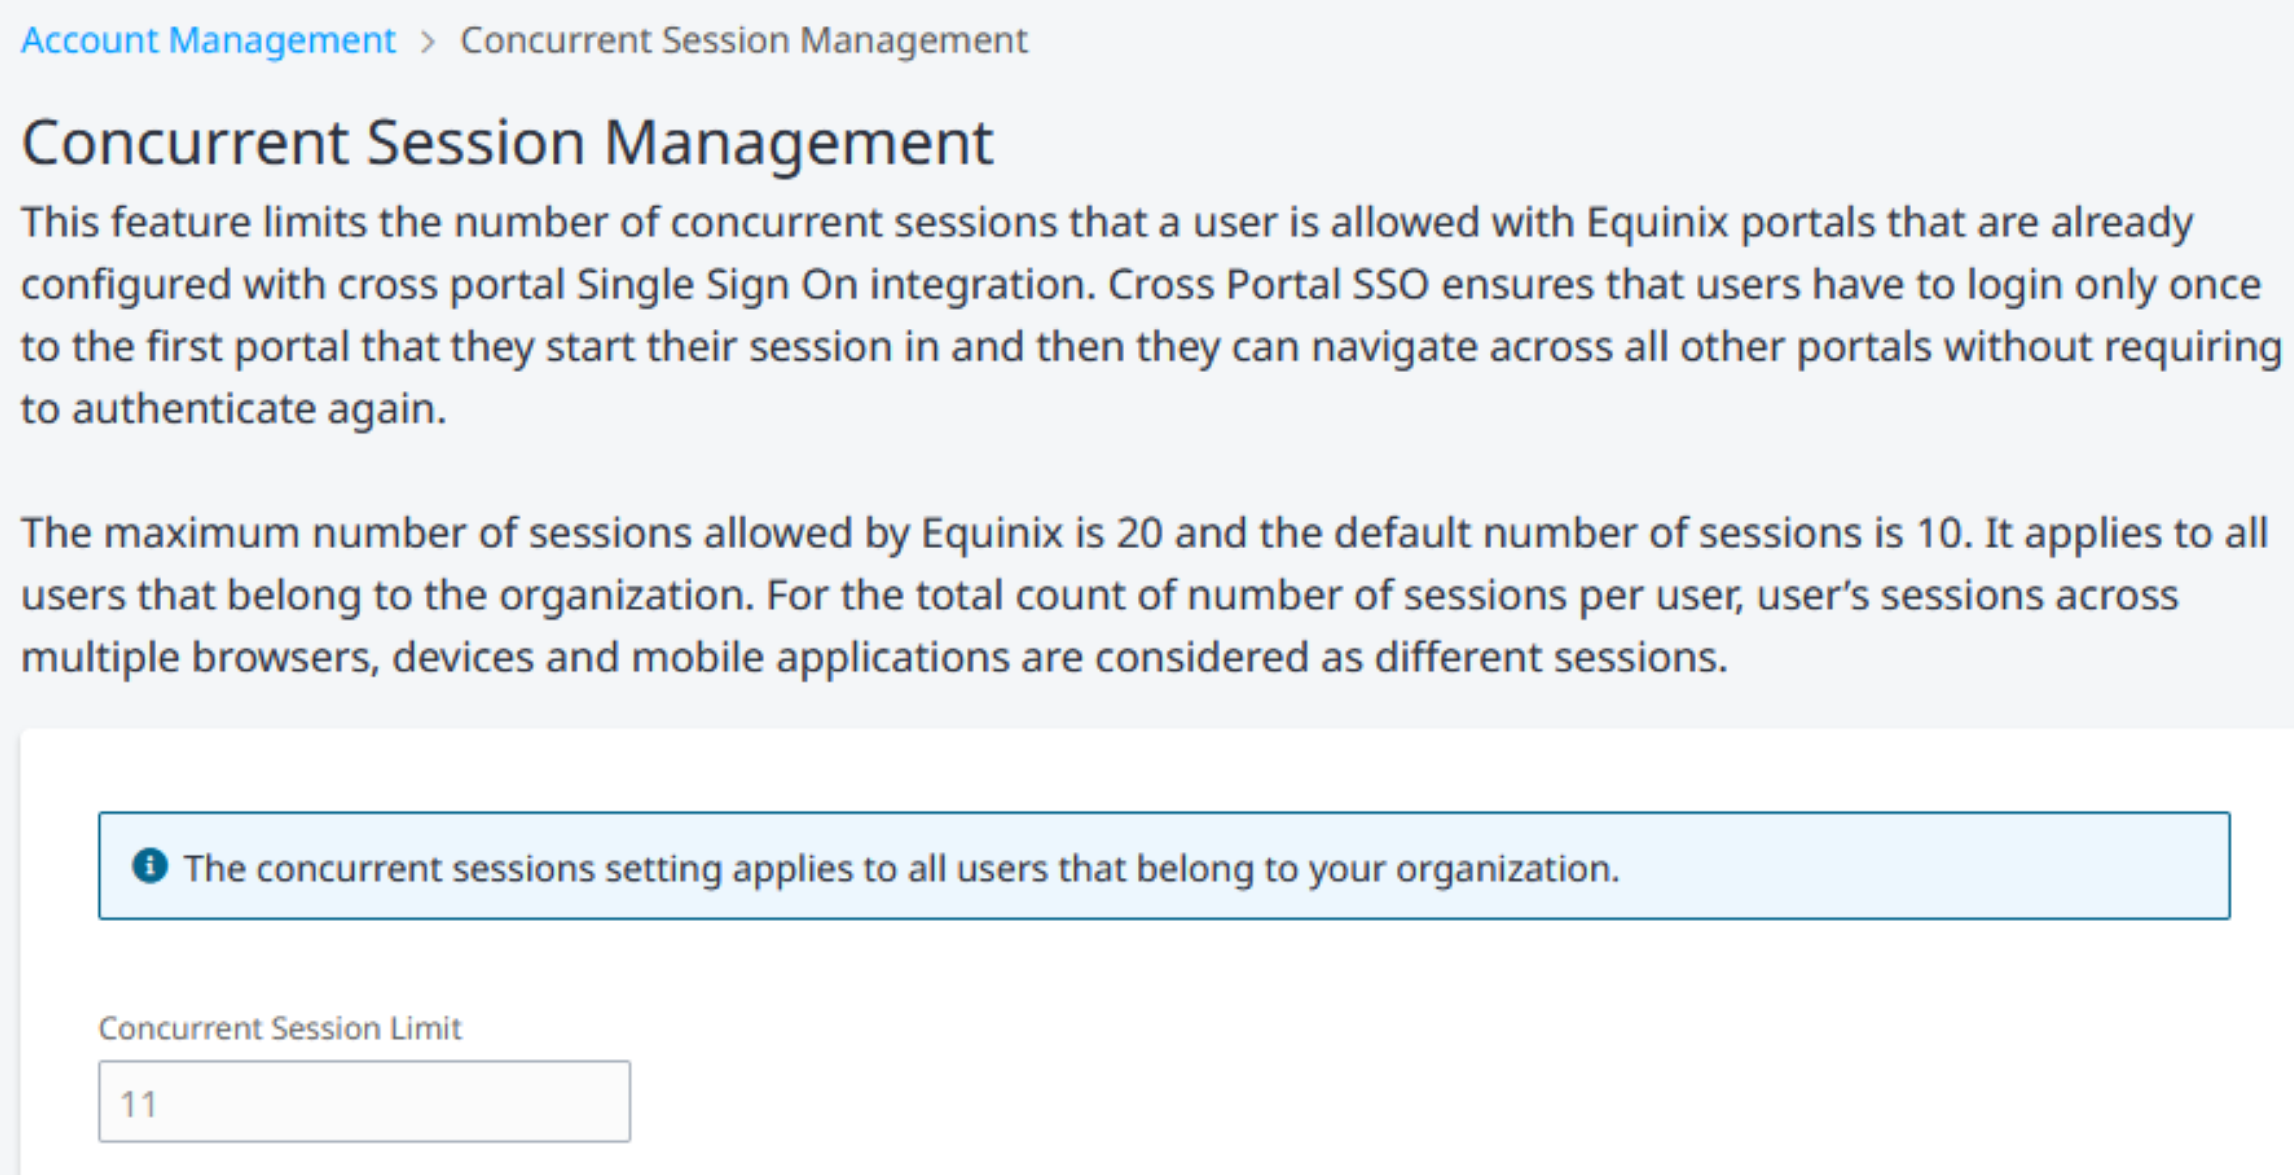
Manage Concurrent Customer Portal Sessions
Concurrent sessions configuration controls how many sessions you can be logged in to a single account at the same time. Organization Administrators can decide if only one session can be active for an account at a time, or if multiple sessions can be active simultaneously (on multiple devices).
-
From the Administration menu, choose Account and Security Management.
-
Select Concurrent Sessions Configuration.
-
Enter the number of concurrent sessions you want to allow. Click Submit.
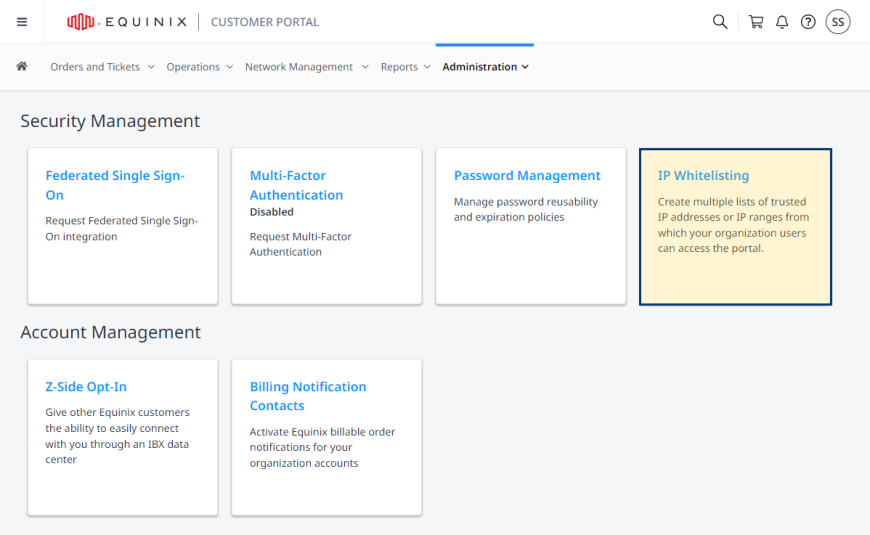
Restricting Customer Portal Access
IP allowlist enables restricting access to the Equinix portal by allowing users to log in only from specified IP addresses.
To view and manage your IP allowlist:
-
Log in to the Equinix portal.
-
From the top menu, select Administration > Account & Security Management.
-
Click IP Whitelisting.
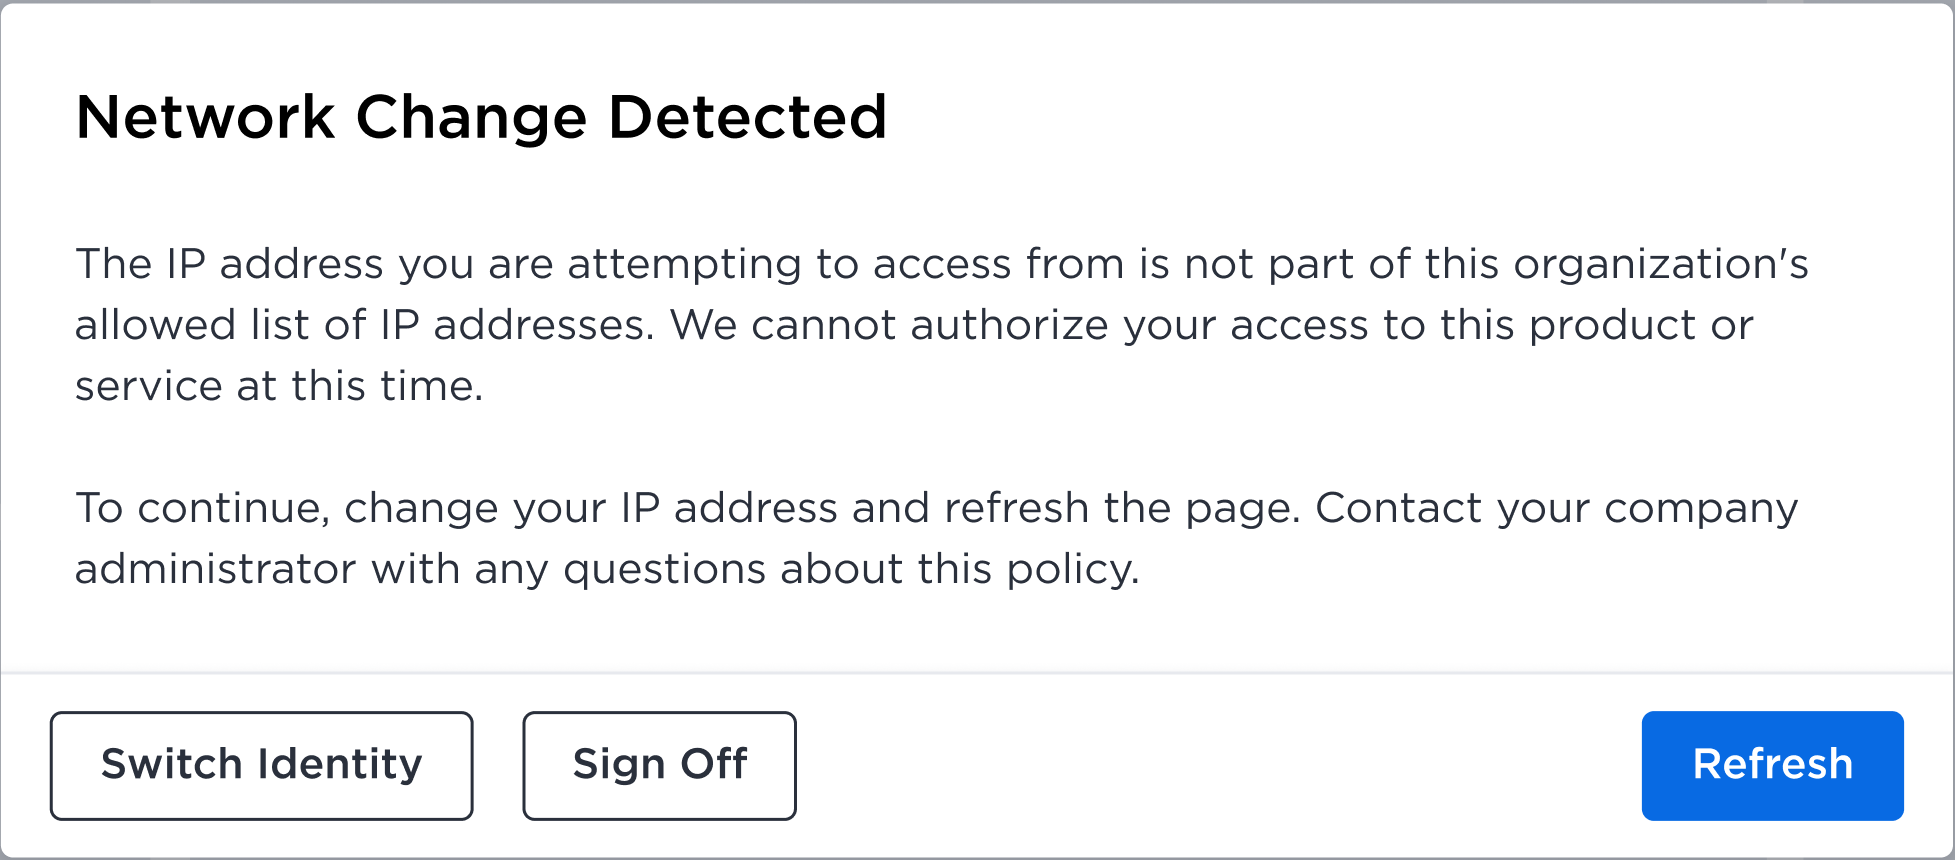
If you attempt to access Equinix Customer Portal from an IP address that is not on your organization's allows list, the following error message will be displayed.
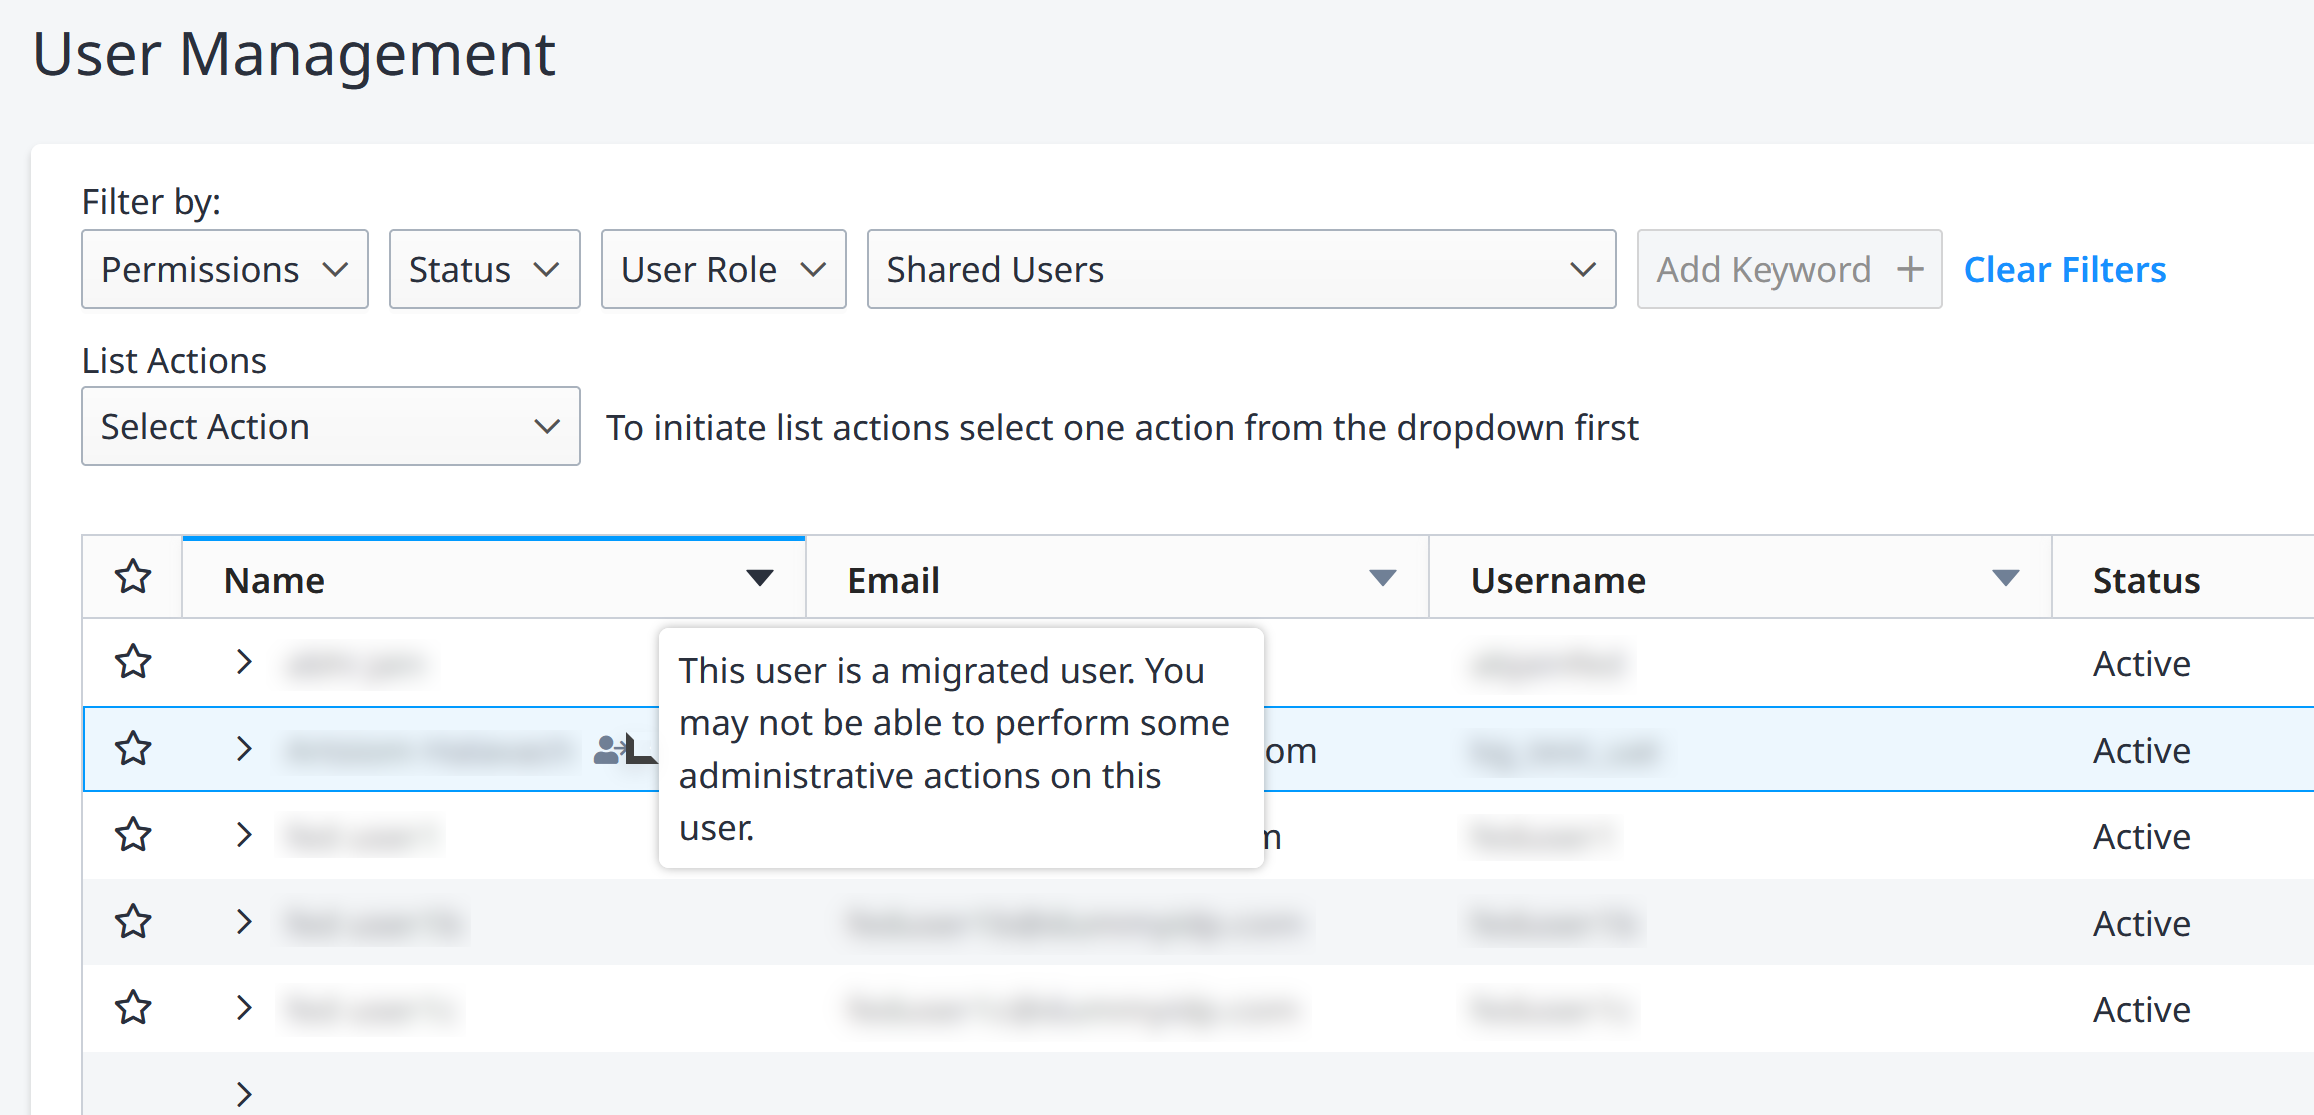
Identifying Migrated Users
Users who have been migrated to email-based authentication and Identity Management can be identified by the migrated user icon.
- From the Administration menu, choose User Management.
- Users who have been migrated to Identity Management will show the migrated user icon. Hover over the icon for more details.
Terminating or Deactivating User Accounts
Deactivating or terminating a user account also deactivates the users's IBX access enrollment. This removes the user's ability to physically access the IBXs.
Equinix recommends that you terminate or deactivate a user account according to these guidelines:
-
Terminate a user account – Use this option if the user leaves the company or changes to a job role that does not require Customer Portal access. Terminations take effect immediately. A terminated user account cannot be reactivated; it must be recreated as a new account, and the user's permissions must be configured again.
-
Deactivate a user account – Use this option for a user who goes on an extended leave (and will need to be reactivated later), or for a departing contractor who is expected to return at a later date. Deactivations can take effect immediately, or can be scheduled for a future date. Use the Reactivate User action to restore a deactivated user account, including the associated permissions.
Users can be terminated/deactivated by a company administrator or an IBX administrator; but administrators can only be terminated/deactivated by a company administrator.
From the Administration menu, choose User Management.
To terminate or deactivate a single user:
-
Click the options menu.
-
Choose Deactivate User or Terminate User.
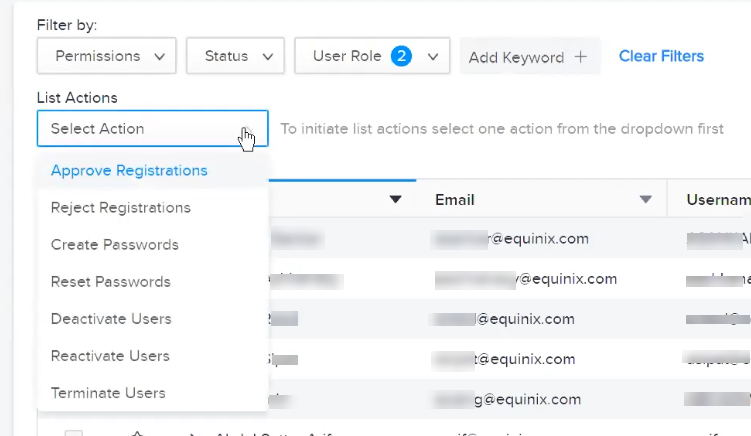
To terminate or deactivate multiple users at once:
-
Choose Deactivate Users or Terminate Users from the List Actions drop-down menu.
-
Select the users you want to deactivate or terminate.
-
Click Apply.
For terminations, enter a reason for the termination, then click Yes, Terminate User.
For deactivations, specify whether the account should be deactivated immediately or at a specified future date/time, then click Deactivate.
When you add a user account manually, you can schedule an automatic deactivation date for that account. This is recommended if you know that the user's access to the portal should expire on a specific date. See Add a User for more information.