Managing Assets
View Assets and Asset Details
View asset's identifier, project, location and the billing account information.
- Sign in to the Identity & Access Management portal.
- Click Resources.
- Locate the desired project, to view a list of its assets.
- Locate the desired asset and from the options menu, select View Details.
Moving Assets
Users can transfer eligible assets between projects within the same organization. This capability is subject to predefined rules and permissions, and only certain asset types can be moved within the Customer Resource Management.
Eligibility Requirements
To move an asset, the following conditions must be met:
- Product Team Approval: Only assets marked as Move Allowed by the product team can be transferred.
- Same Organization: Assets can only be moved between projects that belong to the same organization, except for EPT resources which can also be moved between projects from Reseller to Sub-Customer organization.
Before moving an asset, ensure it meets the eligibility requirements and that your account has the necessary permissions. Moving assets requires asset-specific management permissions, so make sure that your role includes the necessary permissions.
The following assets can be moved
Only roles containing the listed permission codes will be allowed to move these assets.
| Application | Asset Type | Remarks | Permission Required for Moving |
|---|---|---|---|
| Fabric | SERVICE_PROFILE | fabric.serviceprofile.read | |
| Fabric | PORT | All assets under this will also get moved | fabric.port.read |
| Fabric | NETWORK | fabric.network.read | |
| Network | VIRTUAL_DEVICE | networkedge.virtualdevice.view | |
| Network | VSOC_PROFILE | All assets under this will also get moved | networkedge.vsocprofile.view |
| Equinix Internet Access (Fabric) | EIA_SERVICE | All assets under this will also get moved | internetAccess.service.modify |
| Fabric | EPT_SERVICE | EPT_SERVICE assets can move between projects within the same organization, but not across organizations; Other assets such as ports, virtual devices (VD), FCR, and connections can move independently | ept.service.admin |
How to move an asset to a different project
-
Sign in to Identity & Access Management.
-
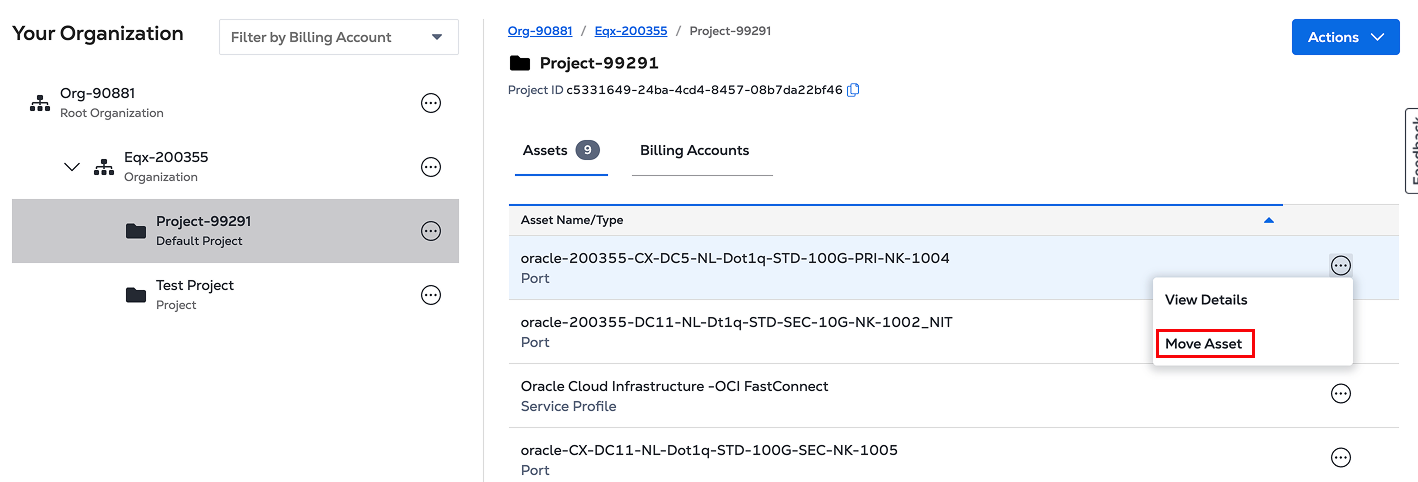
Navigate to the project that contains the asset you want to move.
-
Locate the asset and click the ellipsis (...) to check if it’s eligible. If the option Move Asset appears, the asset can be moved.
-
If eligible, click Move Asset.
-
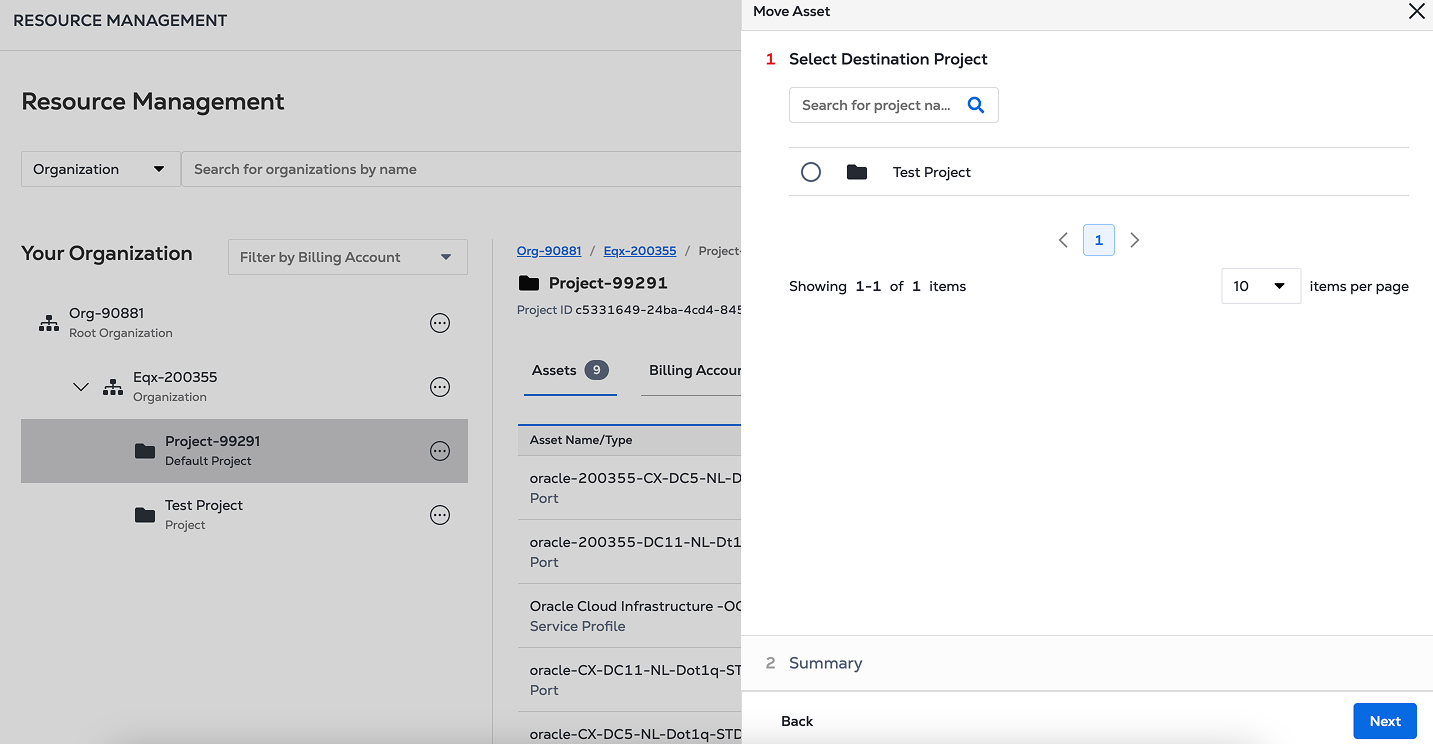
Available destination projects from the same organization will be shown.
-
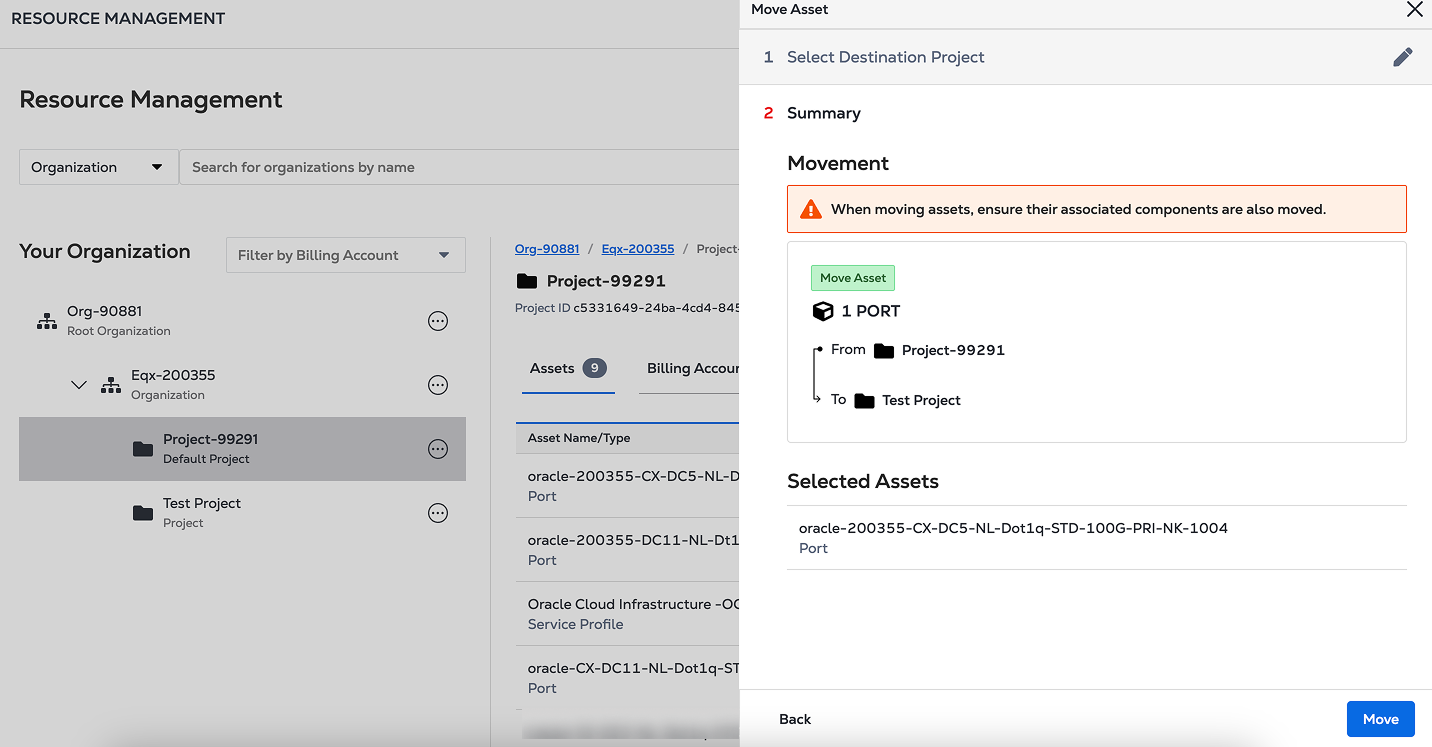
Review the move details:
- Asset name
- Current project
- Destination project
-
Click Move to confirm.
-
A notification will confirm that the asset has been successfully moved.
If you encounter any issues or have questions regarding asset movement, contact your organization's support team for assistance.
Sharing Assets
Asset sharing allows users (e.g., resellers) to share eligible assets with associated end customers. This feature supports collaboration and streamlines engagement across organizations.
Eligibility Requirements
To share an asset, the following conditions must be met:
- Customer Association: The end customer must be linked to the reseller’s account.
- Asset Type: Only specific asset types are eligible for sharing.
Always verify asset eligibility and ensure your role includes the required permissions before sharing.
The following assets can be shared
Only roles containing the listed permission codes will be allowed to share these assets.
| Application | Asset Type | Remarks | Permission Required for Sharing |
|---|---|---|---|
| Fabric | PORT | Share with end customers only | fabric.asset.assign |
How to share an asset with an end customer
-
Sign in to your reseller account.
-
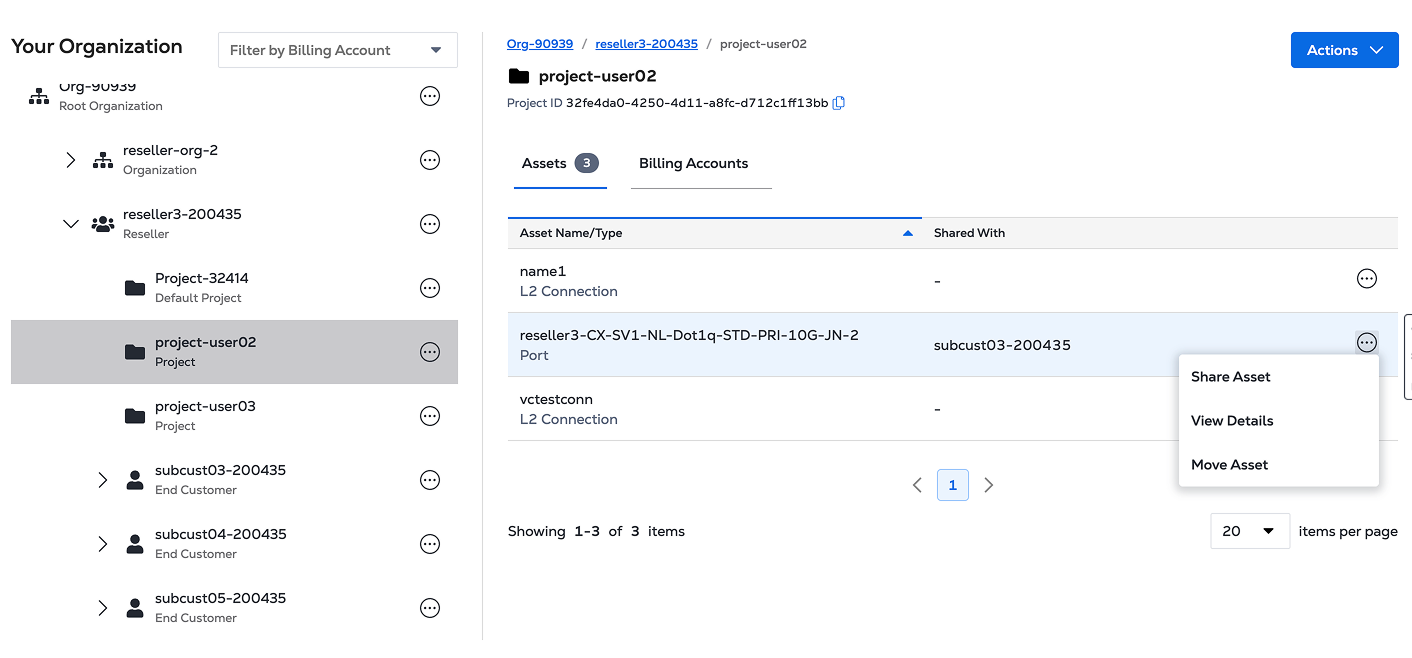
Navigate to your asset list and locate the asset you want to share.
-
Click the ellipsis (...) next to the asset. If the Share Asset option appears, the asset is eligible to be shared with an end customer.
-
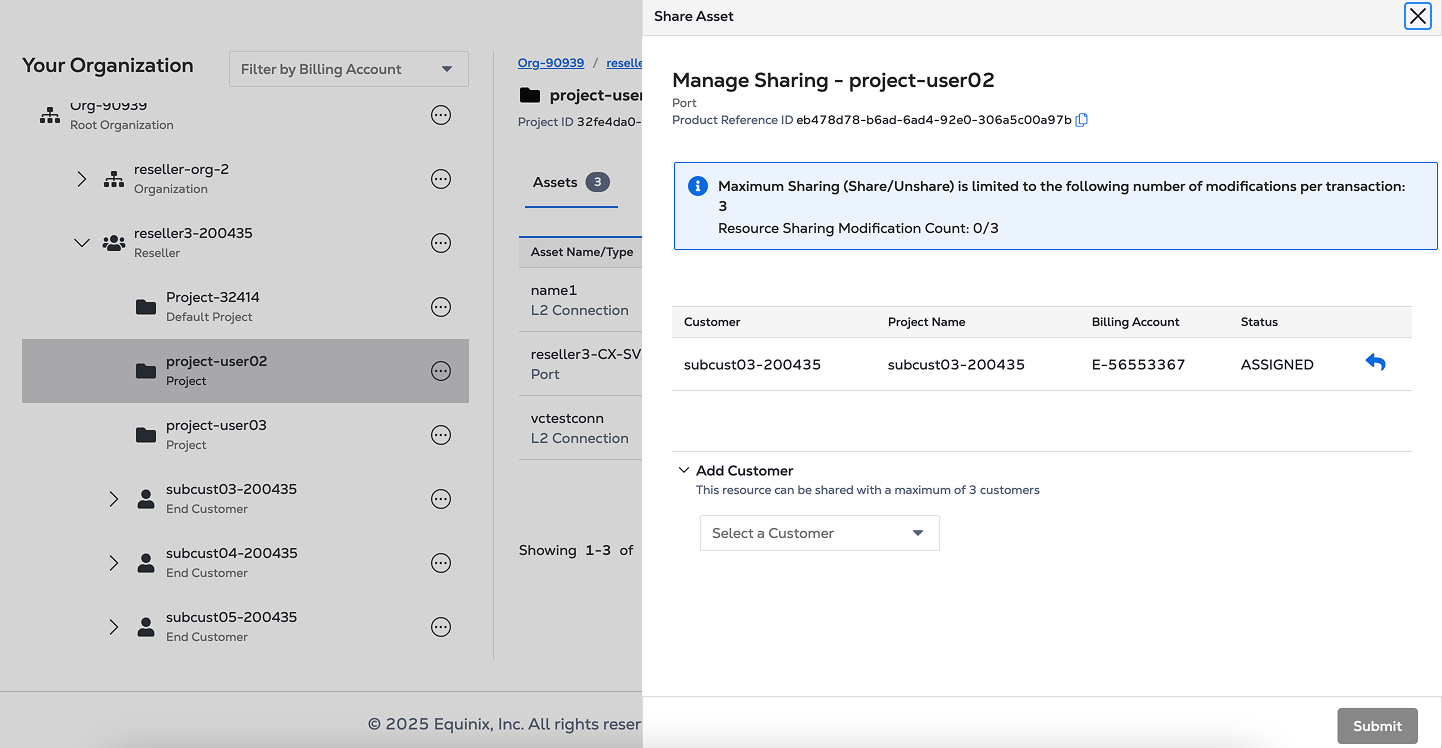
Click Share Asset to open a window displaying currently shared assets.
-
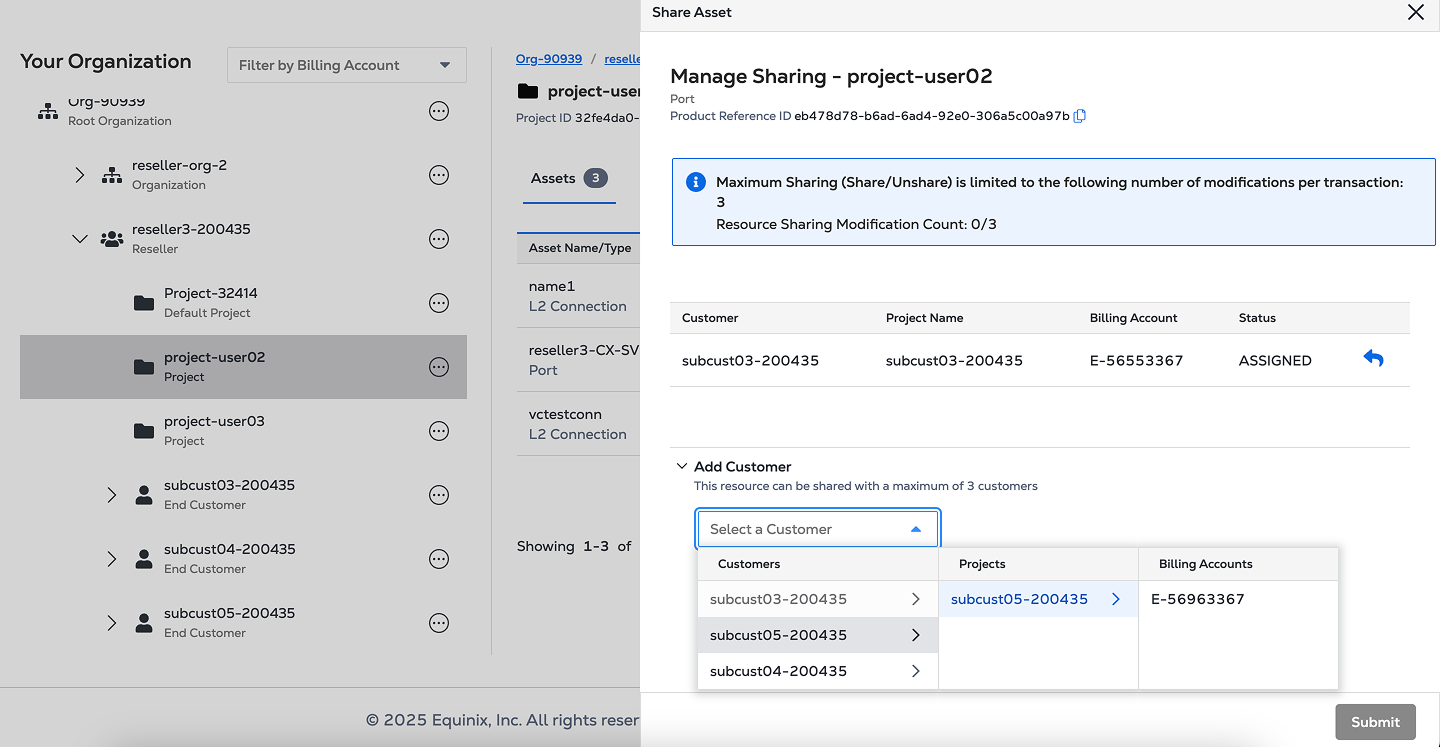
In the Add Customer section:
- Select the end customer’s organization.
- Choose the relevant project.
- Select an applicable billing account.
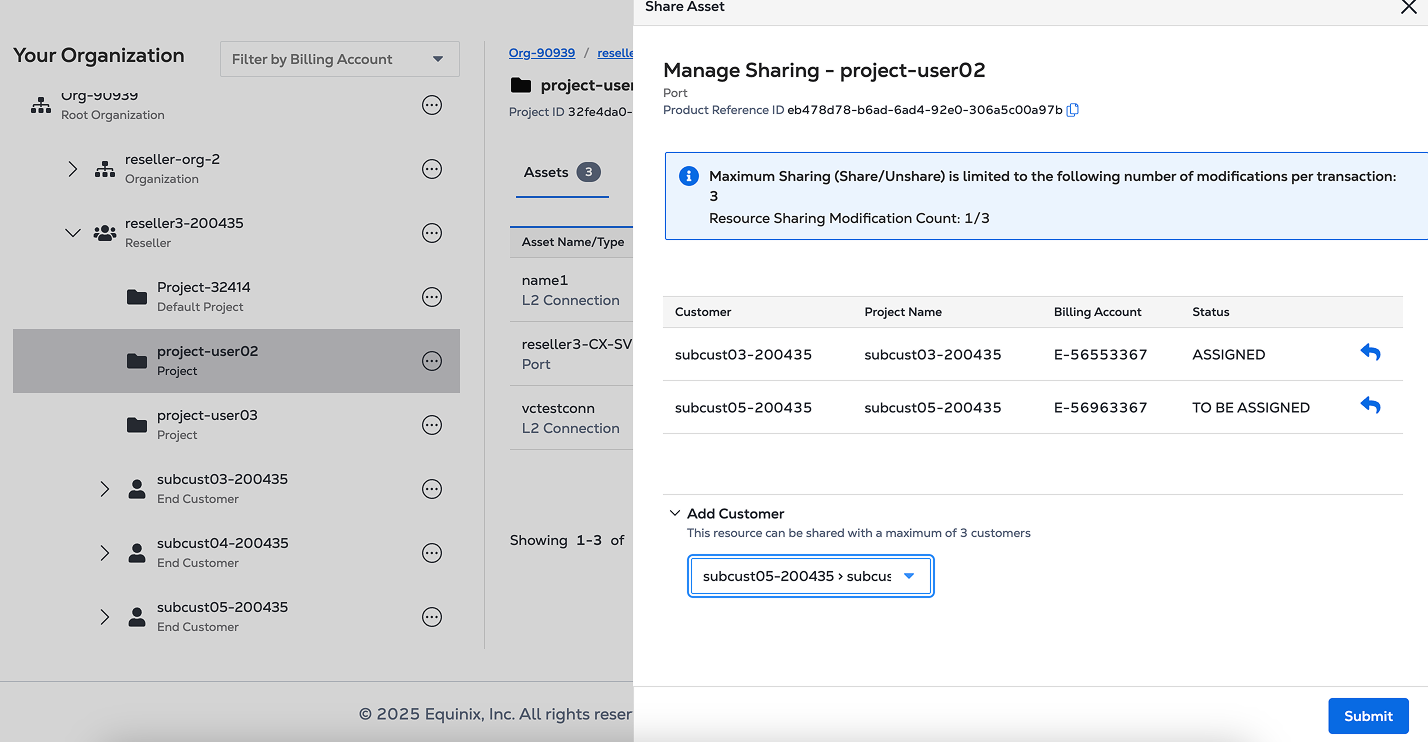
-
Once the customer, project, and billing account are selected, the shared information will be updated automatically. Review for accuracy.
-
Click Submit to confirm.
-
A notification will confirm that the asset has been successfully shared.
If you encounter any issues or have questions regarding asset sharing, contact your organization's support team for assistance.
Assign Unassigned Assets
Depending on your organization configuration, assets ordered offline or using legacy, not Identity and Access Management enabled tools, are listed on the Resources page under the Unassigned Assets tab or they are assigned automatically to the default project.
If your organization is set up to assign offline-ordered assets to the default project, but the default project was deleted, the newly ordered assets won't be assigned automatically and will be available under the Unassigned Assets tab.

- The unassigned assets inventory is a separate organization and only Primary Admin users have access to it by default.
- Resources in the inventory can’t be modified.
- Resources can only be assigned in one direction, from the inventory to the root structure.
- End-customers and Resellers can have their own separate inventories.
To assign assets to a project:
- Sign in to the Identity and Access Management portal as a Primary Admin user.
- Click Resources, then click Unassigned Assets.
- Locate the asset you want to assign and from the options menu select Assign Asset.
- Select the project and click Submit.