Configuring Okta for Equinix Federated SSO
Integrating services with Identity Providers (IdPs) is an established best practice for improving security and simplifying user access management. Equinix supports SAML-based single sign‑on (SSO) enabling organizations to authenticate users through their own IdP when accessing Equinix. In addition, the identity platform now includes support for SCIM‑based user provisioning and deprovisioning. With this capability, the IdP is used not only for authentication, but also for automatically creating and removing Equinix user accounts.
Automating user management provides several benefits, including a more streamlined user experience, reduced administrative overhead, fewer manual errors, and improved enforcement of security policies. Use Okta with the SCIM protocol to automate user provisioning in Equinix and centralize identity management within the identity provider.
Prerequisites
Complete SSO onboarding at the Equinix Federated SSO site. The onboarding process provides an integration URL and token which are used in the procedure.
Creating the Application
The provisioner is configured using an Okta Application. To configure this, open the Okta admin console and select Applications in the sidebar. Select Browse App Catalog. Search for Governance with SCIM and select (OAuth Bearer Token) Governance with SCIM 2.0, then select Add Integration.
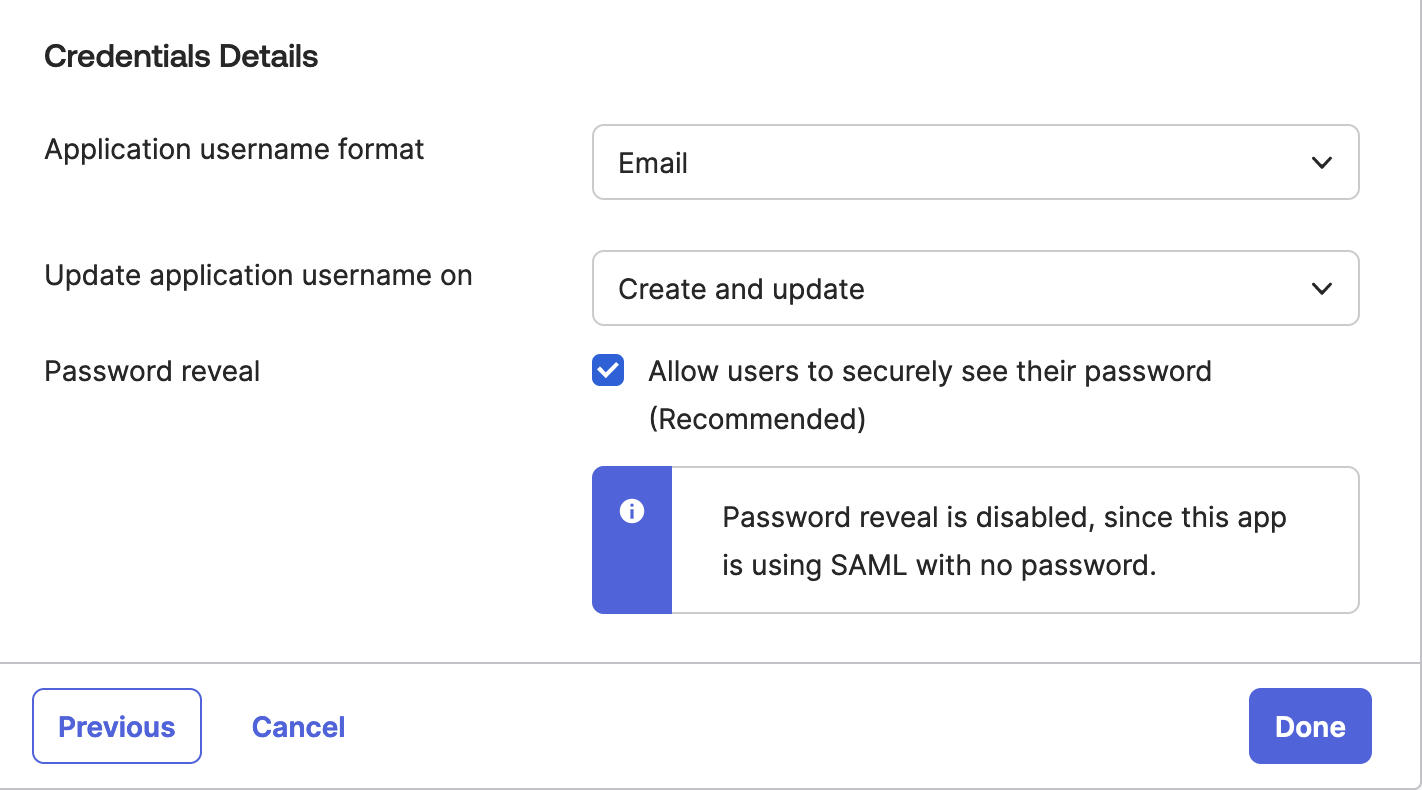
Provide an application name that identifies its purpose, such as "Equinix" or "Equinix Provisioning." Under Sign-On Options, the SAML fields for this SCIM application may be configured if the application is also used for the login flow. The Application username format under Credentials Details must be set to Email (and if a different Okta application is used for SAML SSO to Equinix, that application must also be set to Email). Select Done to create the application.
Ensure NameID is sent in lowercase
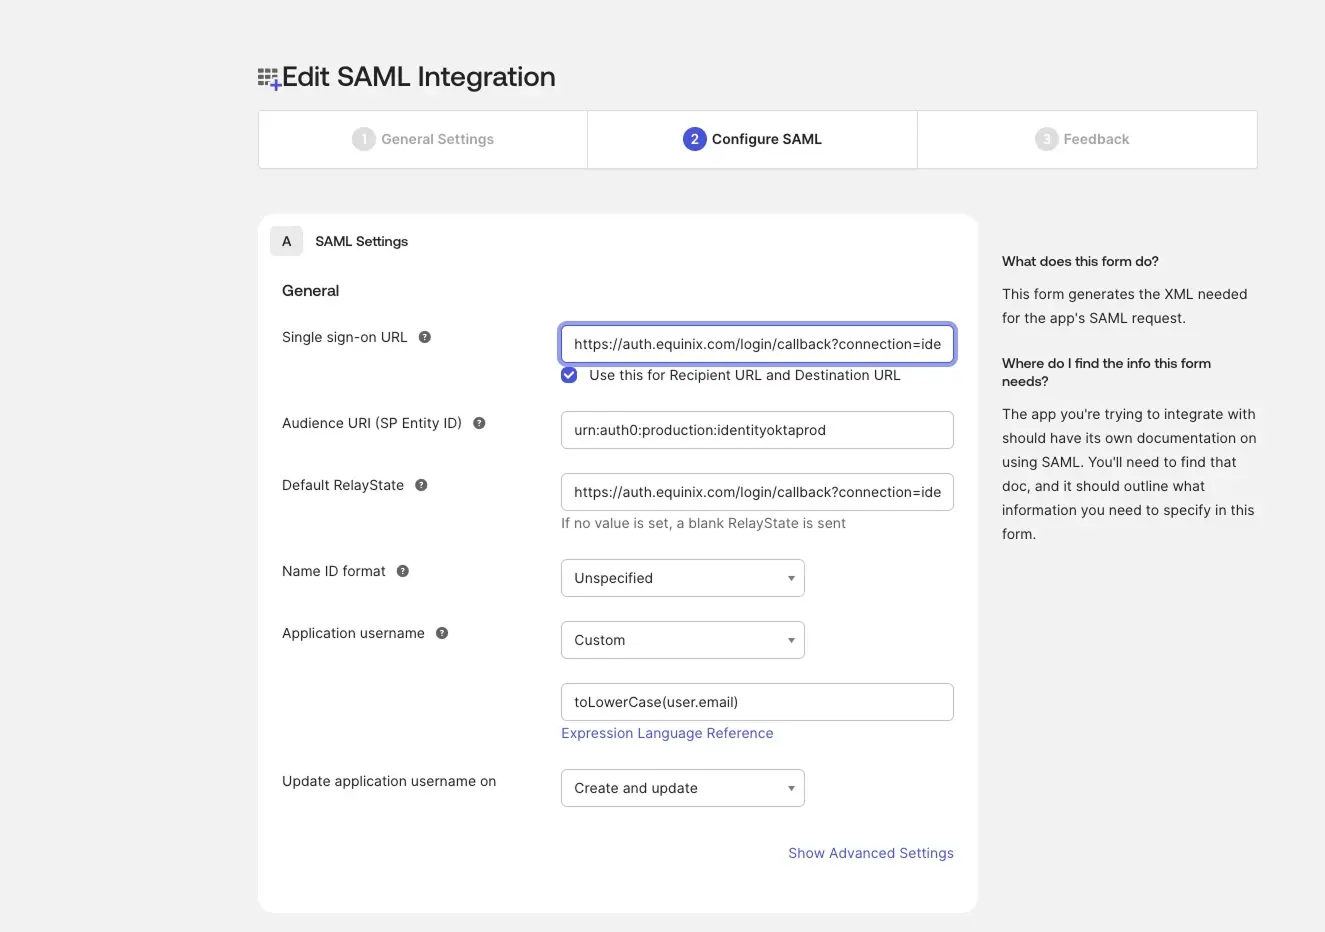
To prevent provisioning and authentication issues, ensure the SAML assertion attribute used as the NameID is in lowercase format. Equinix treats user identifiers as case-sensitive across SAML authentication and SCIM provisioning. If the same identifier is sent with different casing (for example, User@Example.com and user@example.com), it can result in duplicate accounts, failed logins, or synchronization errors. To avoid these issues, ensure the Unique User Identifier (Name ID) is normalized to lowercase before being sent.
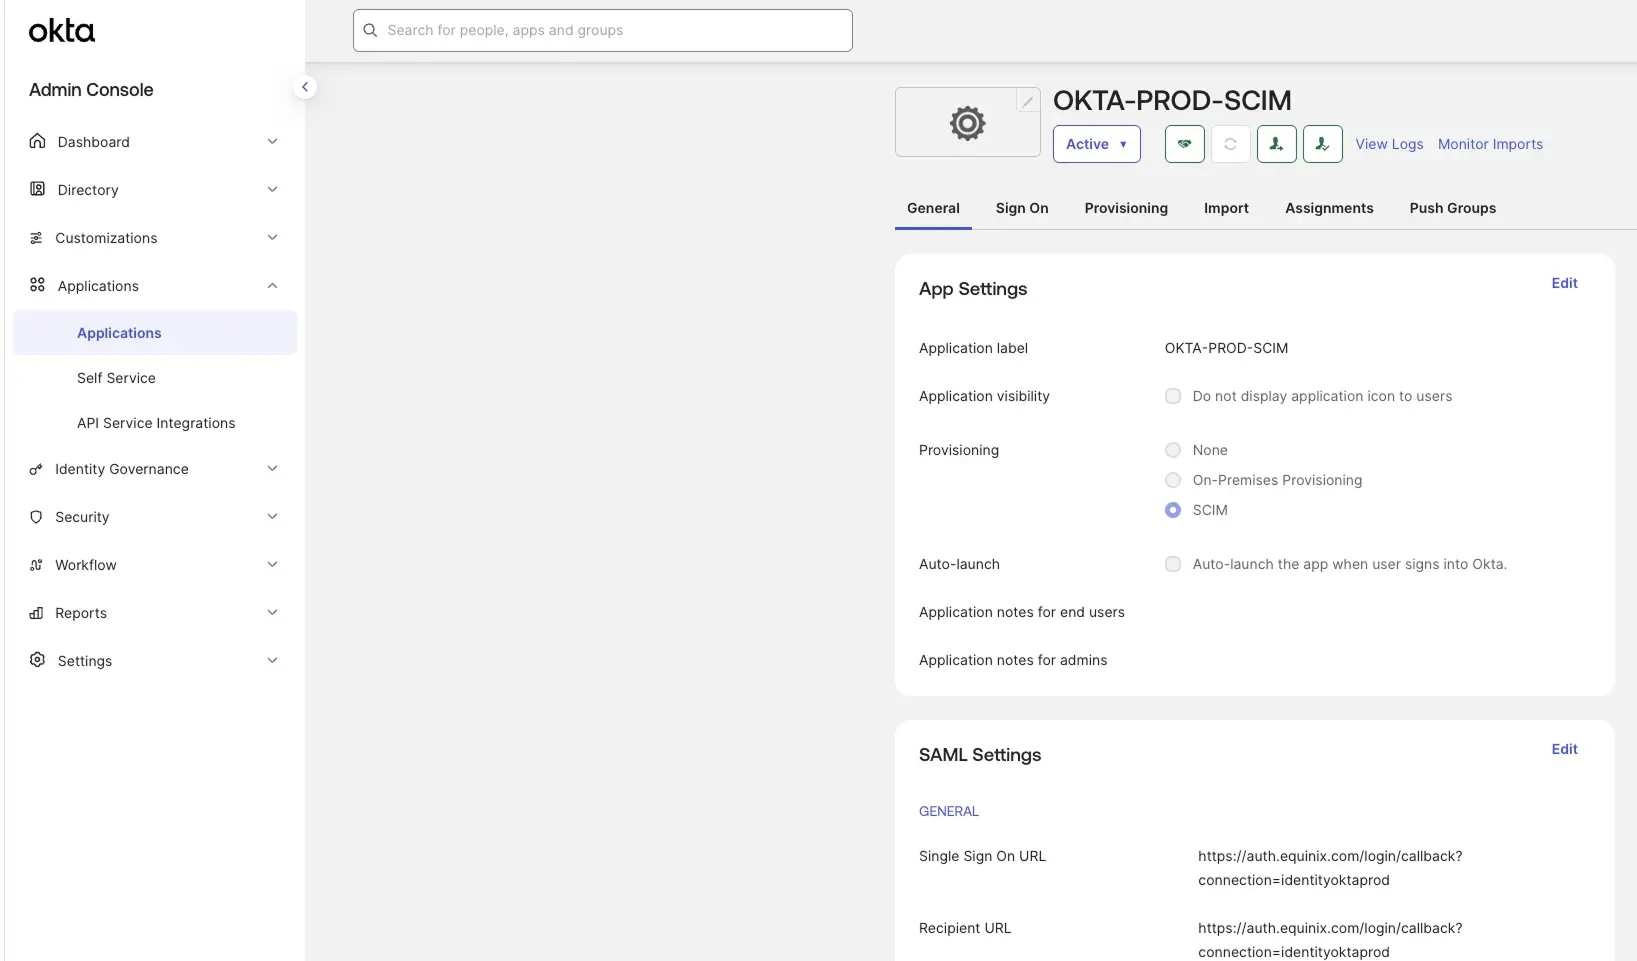
- In the Okta Admin Console, go to Applications.
- In the SAML Settings section, click Edit to configure SAML.
- Set Application username to Custom, and enter a lowercase expression.
Configuring Provisioning
After the application is created, the application's management panel is displayed. Open the Provisioning section bar and select Configure API Integration. Enter the URL and token provided by federation.equinix.com, and test the credentials. Save the changes.
To reflect Equinix groups in Okta, enable the Import Groups option.

Enabling Provisioning
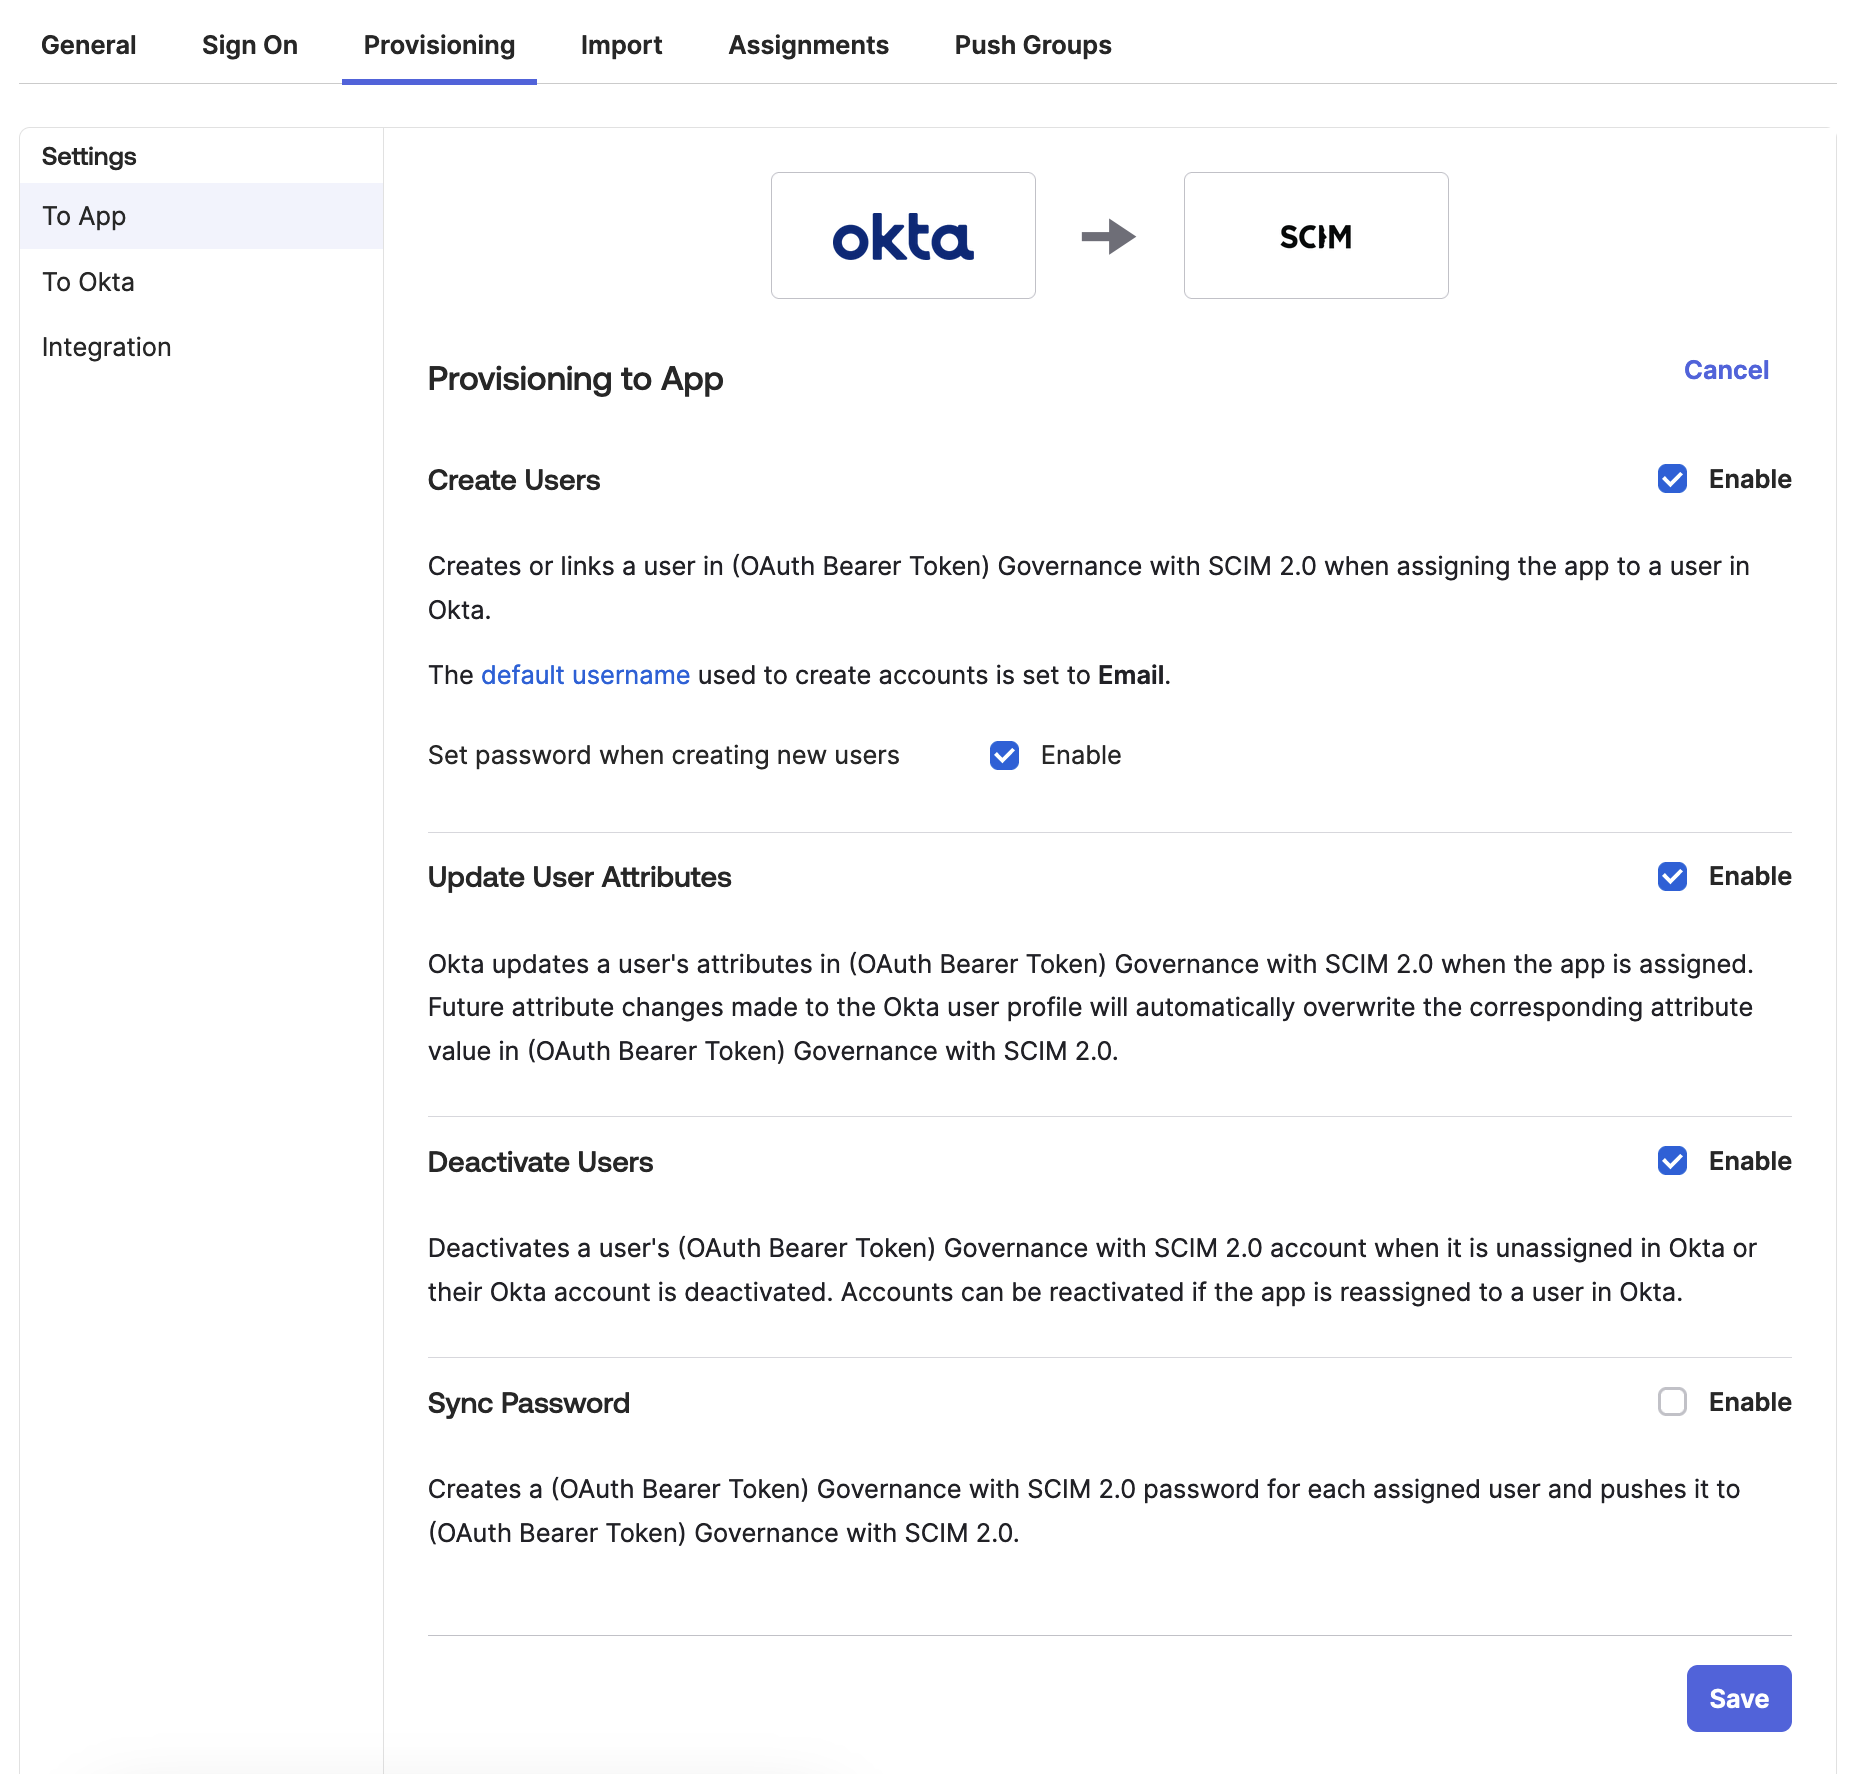
With the credentials configured, return to the Provisioning tab, and select To App. Select Edit to enable the checkboxes. Enable Create Users, Update User Attributes, and Deactivate Users. Ensure the default username is set to Email.
Configuring Attribute Mappings
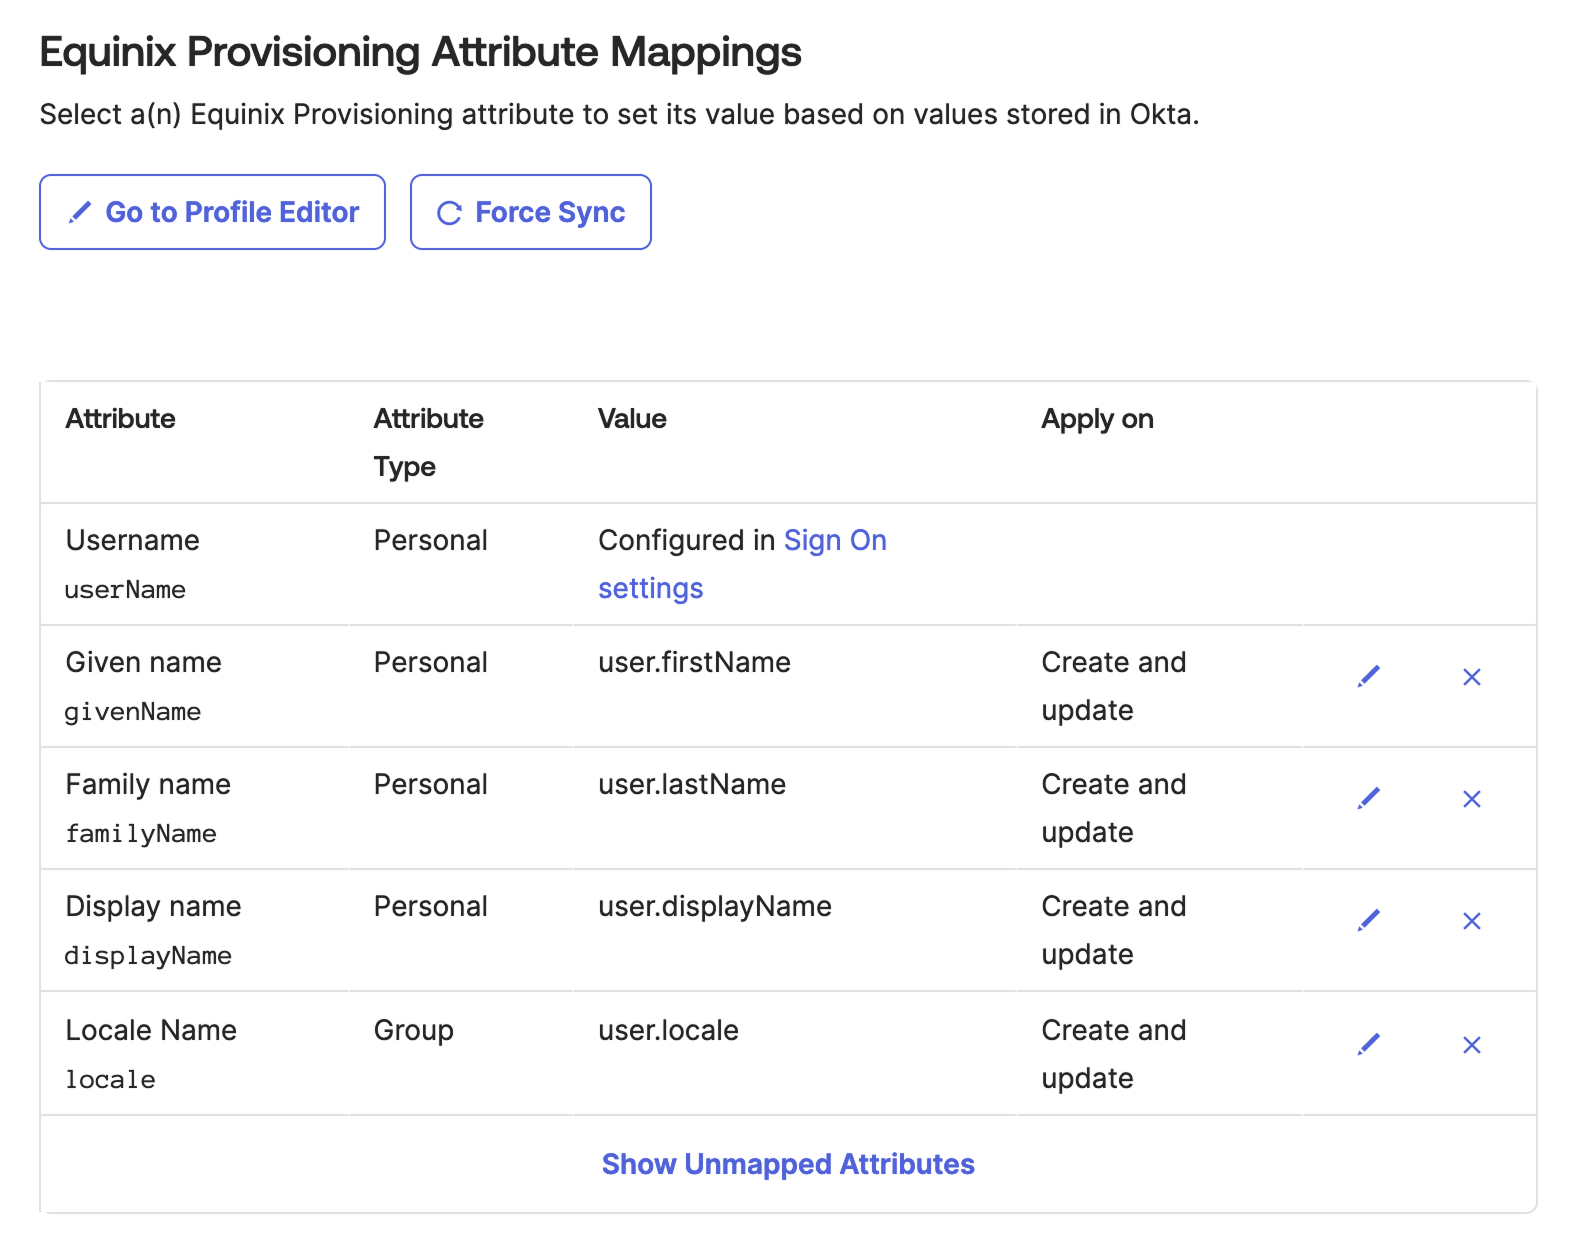
Under the To App section, configure the mappings of Okta attributes to Equinix user attributes. Configure the mappings as shown:
| Attribute | Attribute Type | Value | Apply on |
|---|---|---|---|
| userName | Personal | Configured in Sign On settings | |
| givenName | Personal | user.firstName | Create and Update |
| familyName | Personal | user.lastName | Create and Update |
| displayName | Personal | user.displayName | Create and Update |
| locale | Group | user.locale | Create and Update |
Additional default mappings should be deleted or unmapped.
Adding Users and Groups For Provisioning
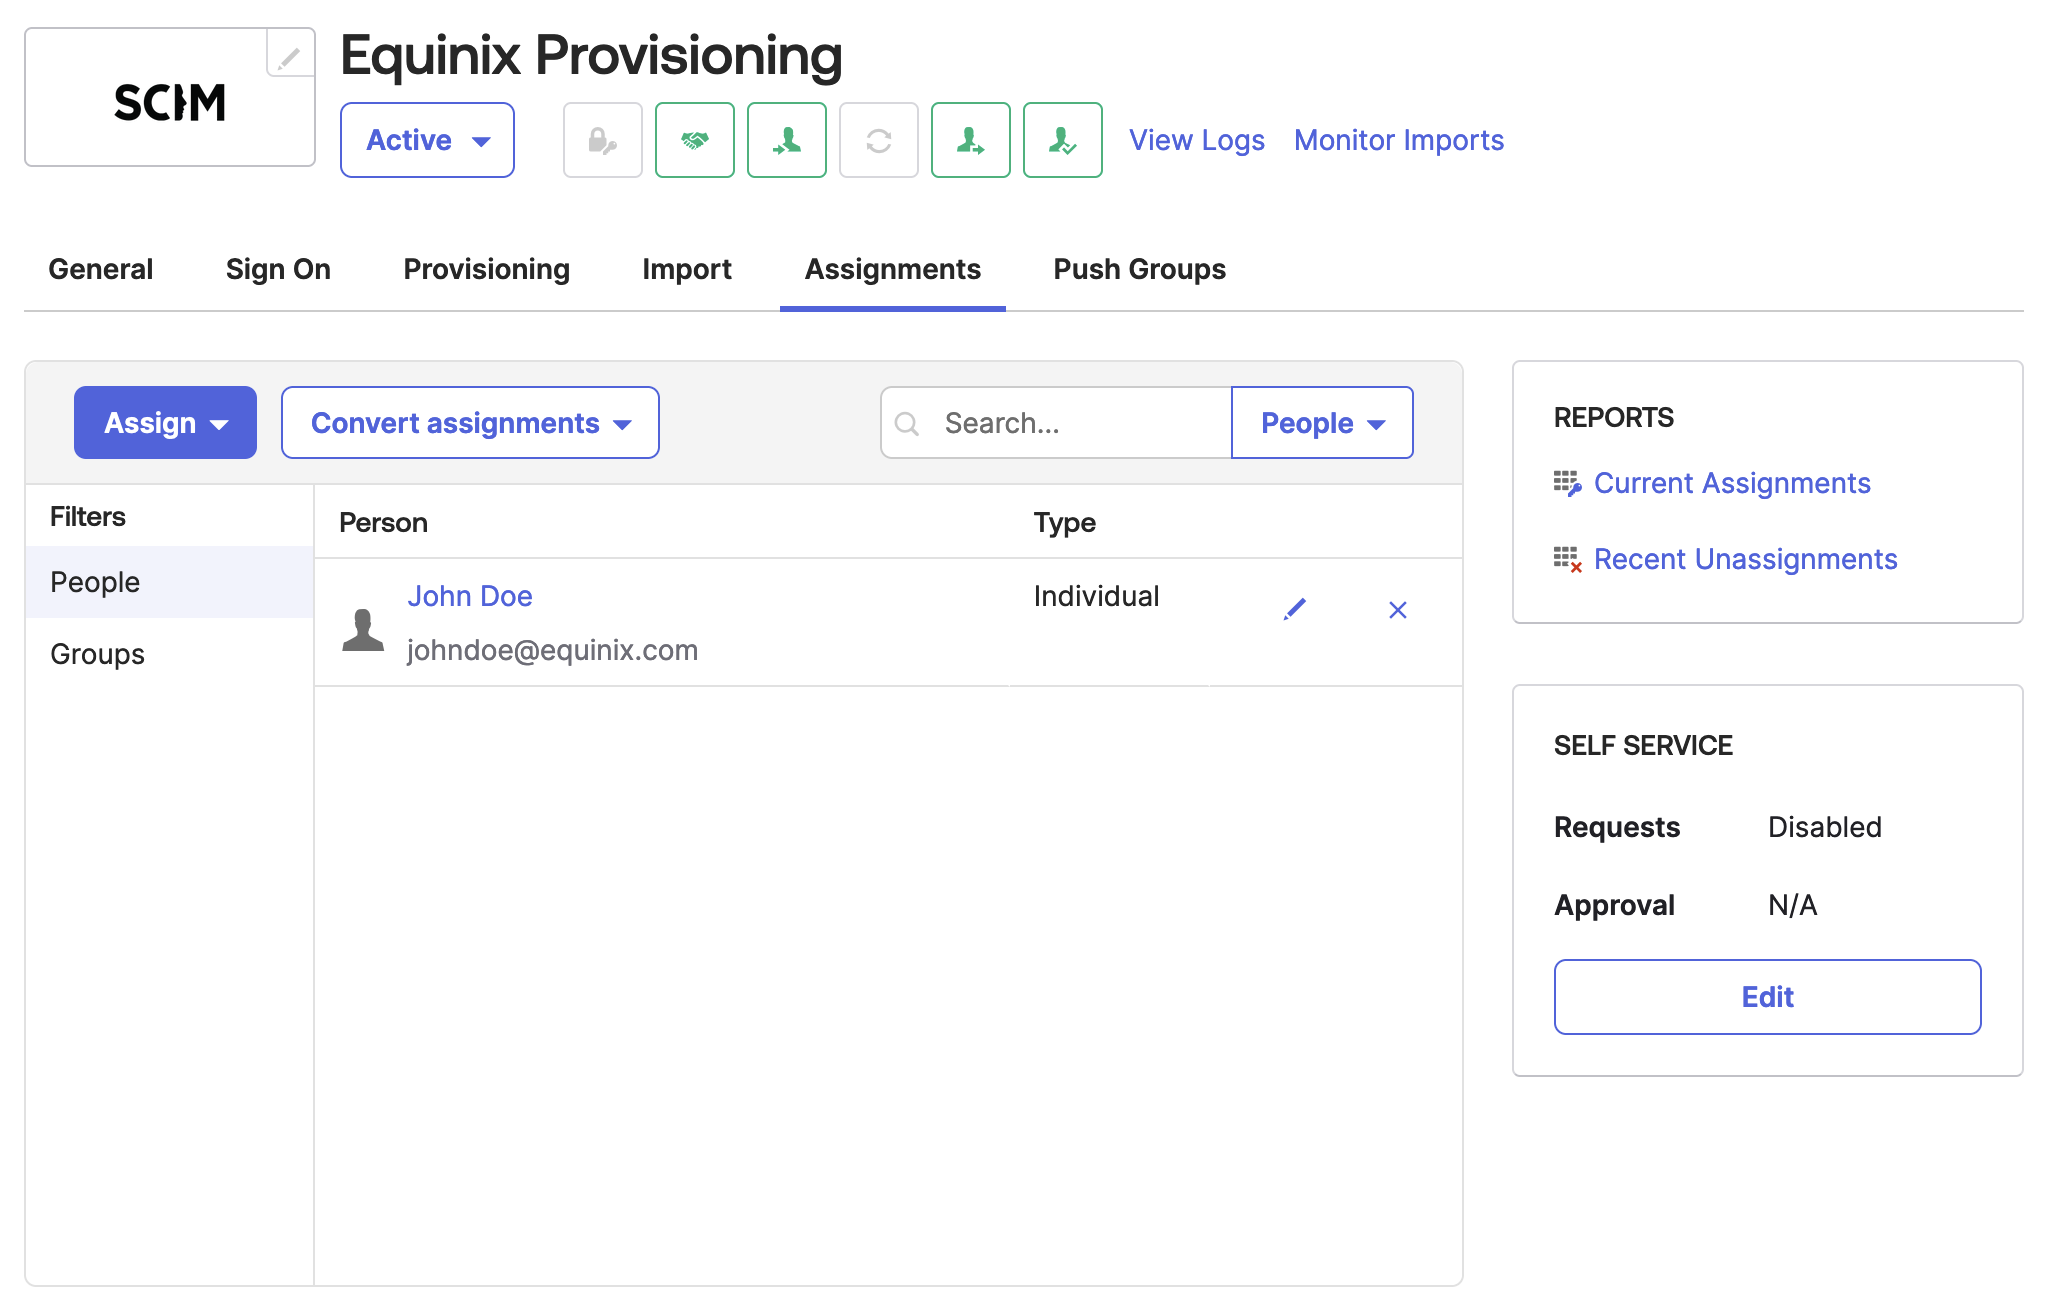
Assign users to the application individually or by group. Open the Assignments tab and select Assign to add users. Okta provisions the users in Equinix automatically.
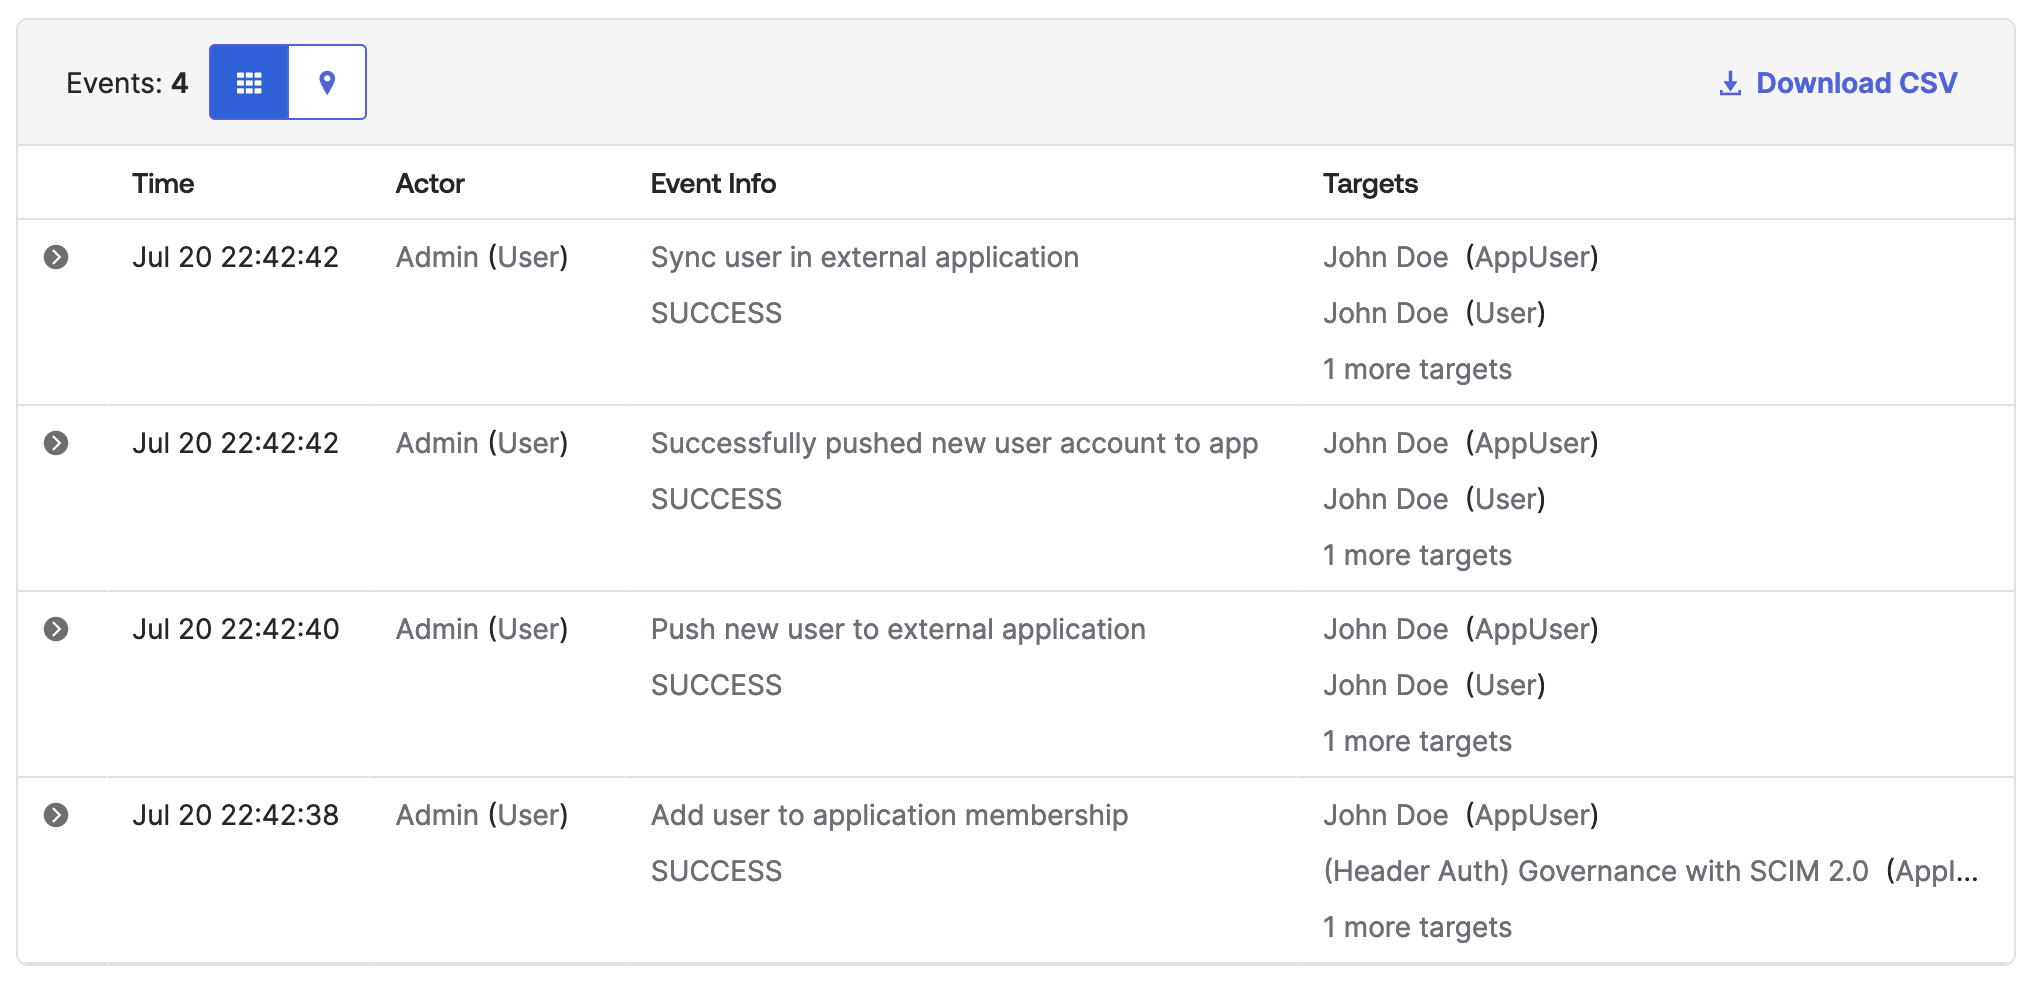
Verifying Successful Provisioning
At this point, Okta has the required configuration to provision and deprovision users in Equinix. Select View Logs next to the application's name in the header, or navigate to Reports > System Log to see provisioning events. Monitor the initial provisioning cycle to confirm the connection is working as expected.