Configuring Microsoft Entra ID for Equinix Federated SSO
Integrating services with Identity Providers (IdPs) is an established best practice for improving security and simplifying user access management. Equinix supports SAML-based single sign‑on (SSO) enabling organizations to authenticate users through their own IdP when accessing Equinix. In addition, the identity platform now includes support for SCIM‑based user provisioning and deprovisioning. With this capability, the IdP is used not only for authentication, but also for automatically creating and removing Equinix user accounts.
Automating user management provides several benefits, including a more streamlined user experience, reduced administrative overhead, fewer manual errors, and improved enforcement of security policies. Use Microsoft Entra ID (formerly Azure Active Directory) with the SCIM protocol to automate user provisioning in Equinix and centralize identity management within the identity provider.
Prerequisites
Complete SSO onboarding at the Equinix Federated SSO site. The onboarding process provides an integration URL and token which are used in the procedure.
If an existing Entra ID Enterprise Application is used to log in to Equinix with SAML, it should use the user.mail attribute as its Unique User Identifier.
Creating the Enterprise Application
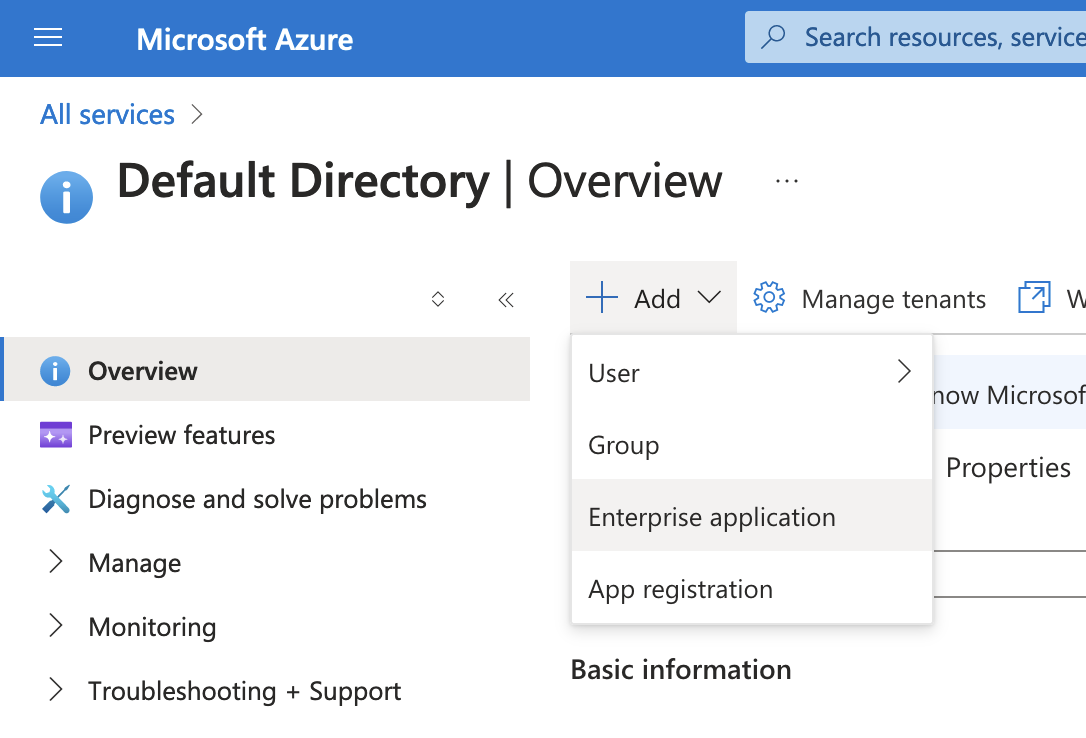
The provisioner is configured using an Entra ID Enterprise application. To configure this application, open the Azure portal and navigate to Microsoft Entra ID. Expand All Services. Select Add, then choose Enterprise application from the dropdown.
The portal displays the application gallery. Because the Equinix SCIM service is currently in beta and is not integrated with the Equinix Federation App gallery application, select Create your own application, and then select Non-gallery in the modal dialog.
Provide an application name that distinguishes its purpose, such as "Equinix SCIM" or "Equinix Provisioning." Select the option to create the application.
Configuring Single Sign-On Attributes
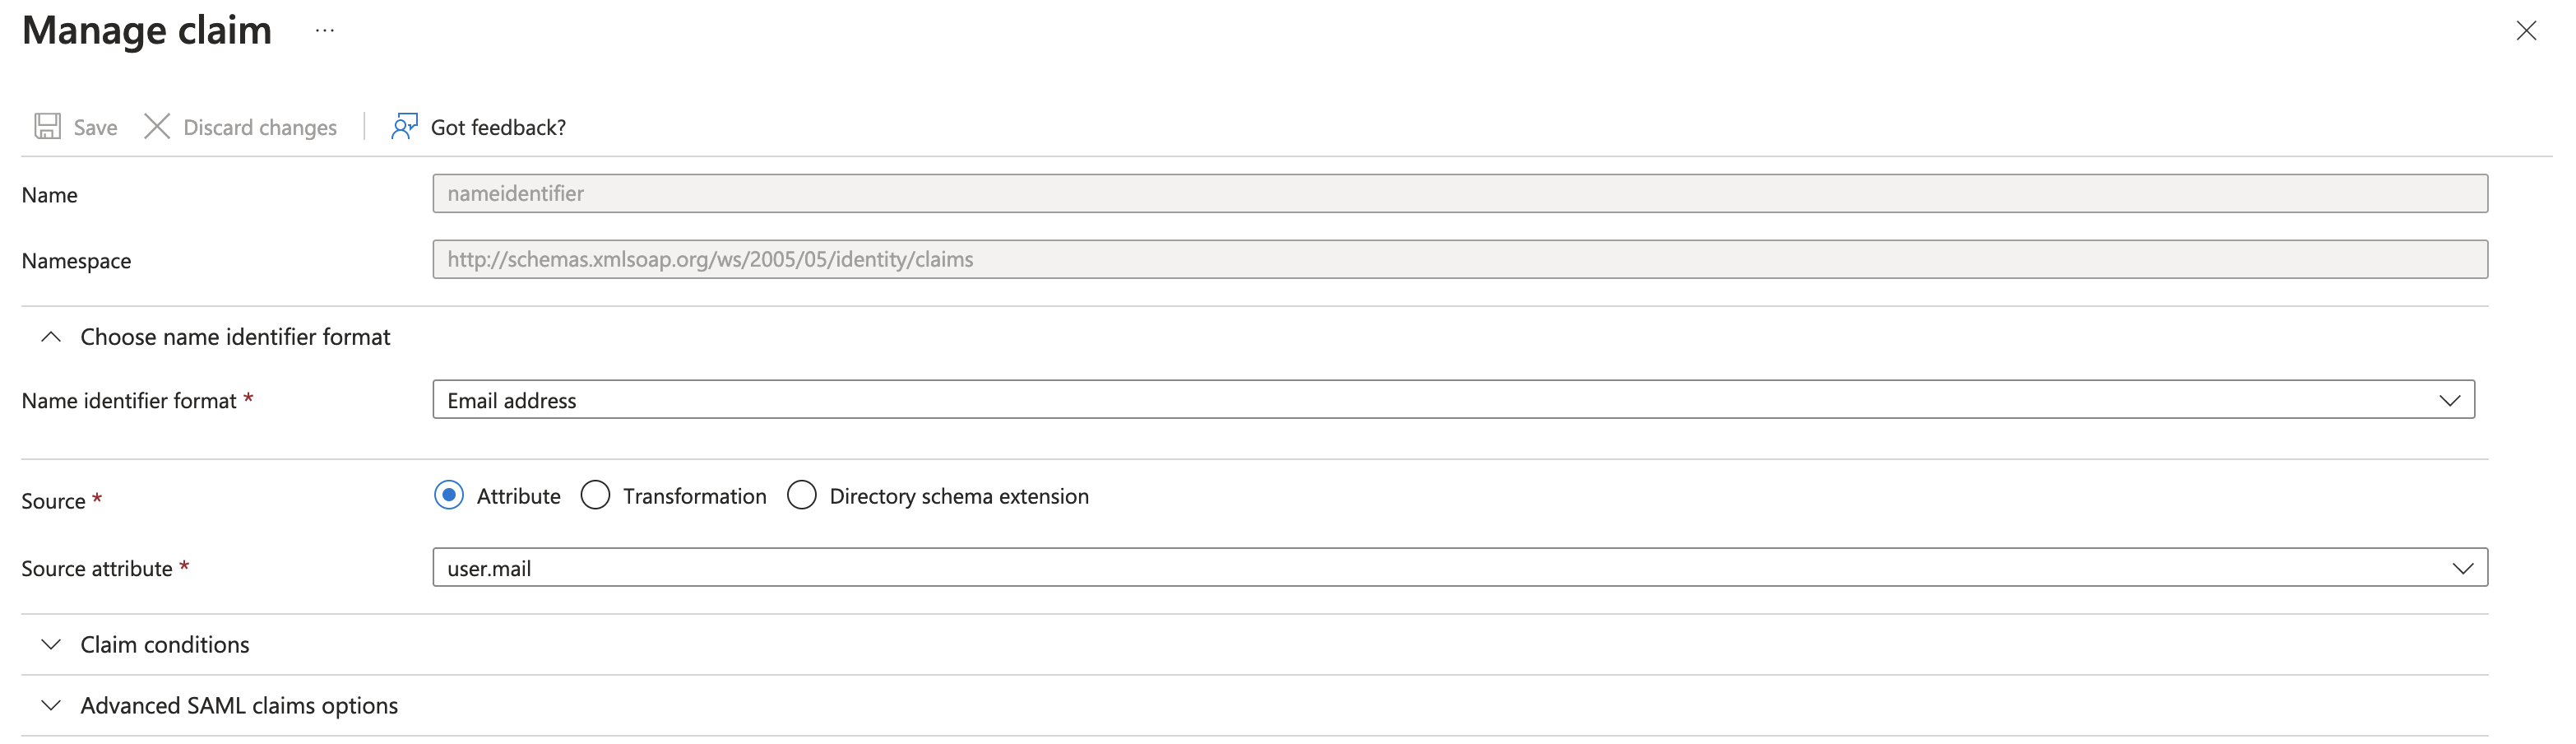
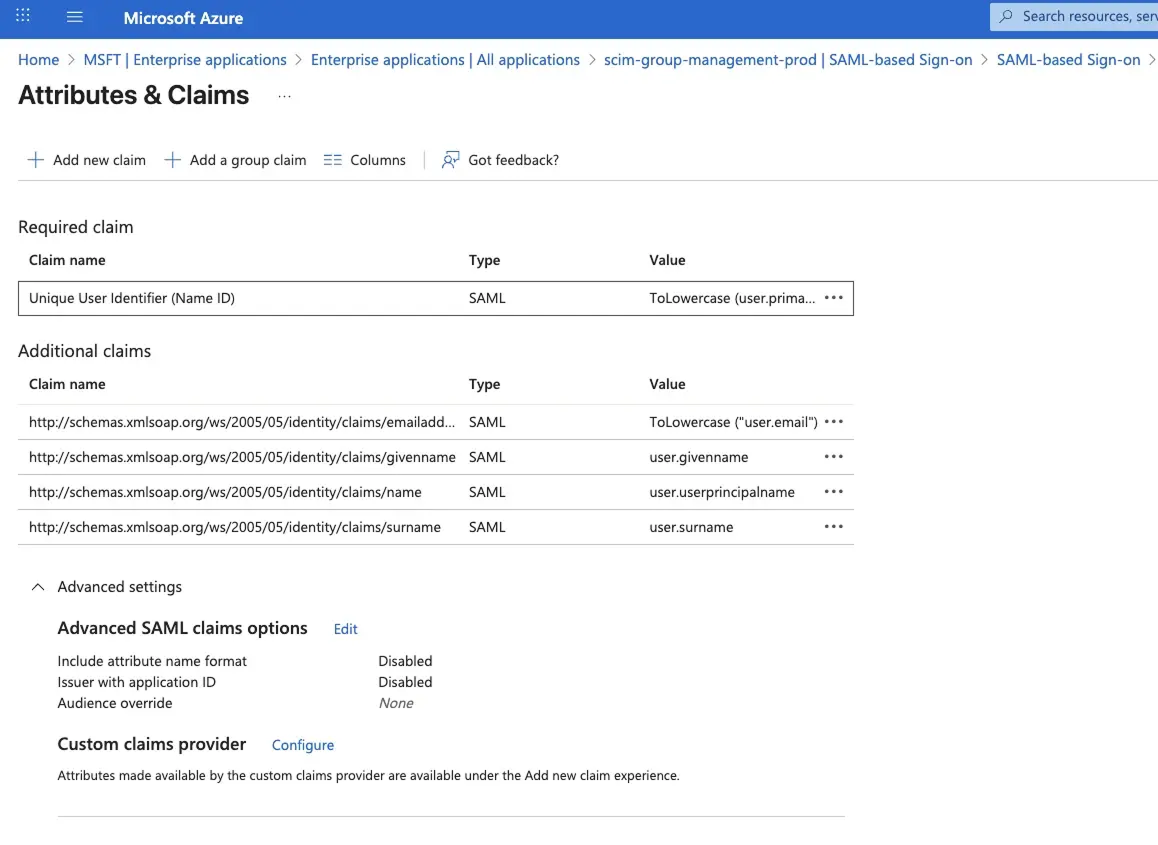
Any identity provider that integrates with Equinix using SAML must pass the user's email address as the SAML NameID value. This can be configured in Entra ID by navigating to Manage > Single Sign-On and selecting Edit in the Attributes & Claims section. Set the Unique User Identifier (Name ID) field to user.mail with a Name identifier format of Email address.
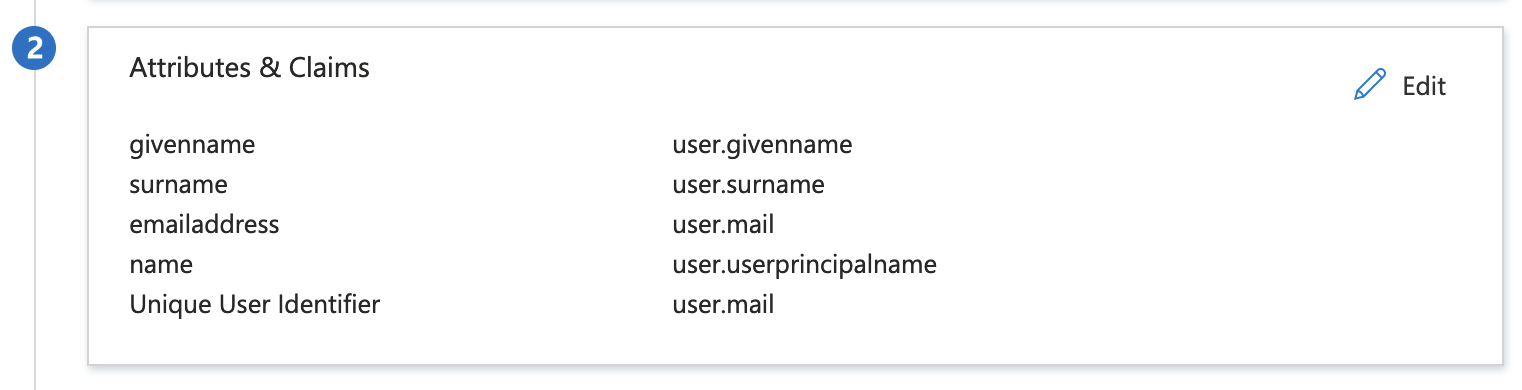
The Attributes & Claims section of the Single Sign-On panel should match the following example.
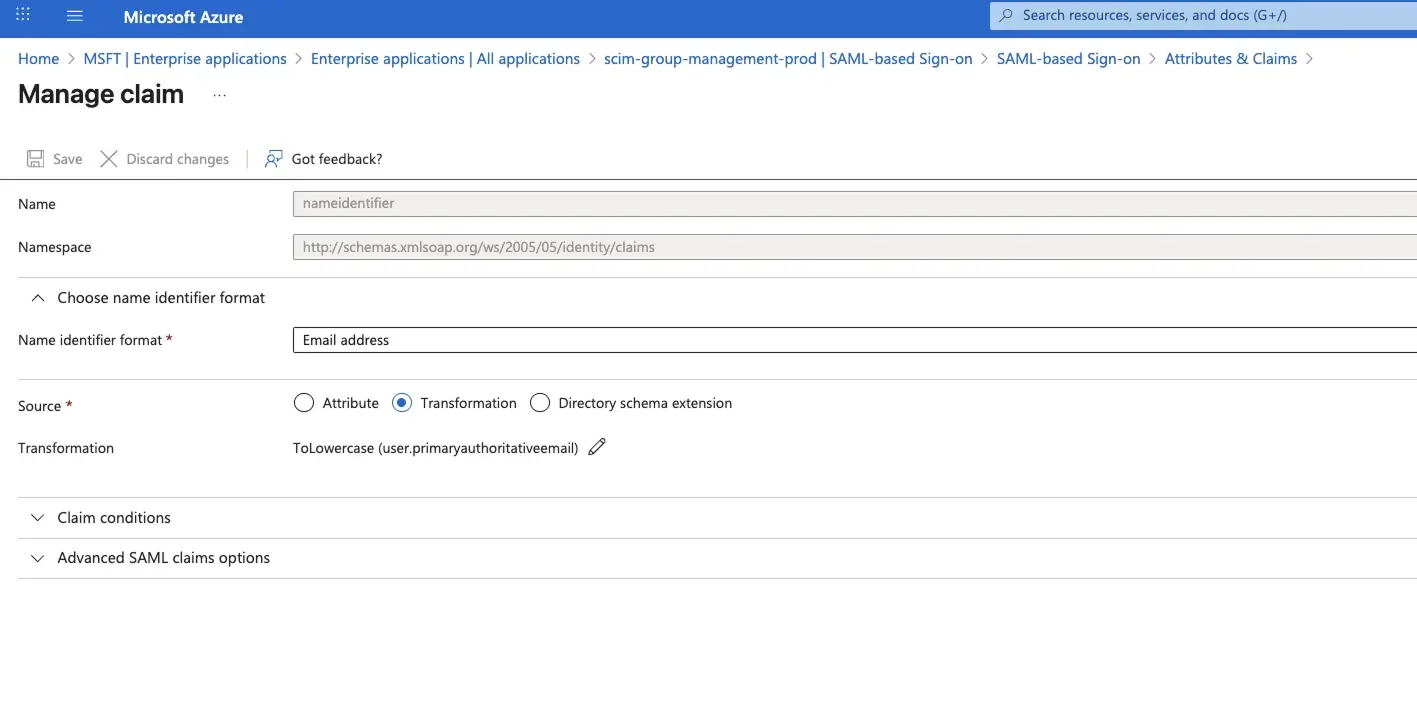
Ensure NameID is sent in lowercase
To prevent provisioning and authentication issues, ensure the SAML assertion attribute used as the NameID is in lowercase format. Equinix treats user identifiers as case-sensitive across SAML authentication and SCIM provisioning. If the same identifier is sent with different casing (for example, User@Example.com and user@example.com), it can result in duplicate accounts, failed logins, or synchronization errors. To avoid these issues, ensure the Unique User Identifier (Name ID) is normalized to lowercase before being sent.
- In the Entra ID application, select Single Sign-On and Attributes & Claims.
- Under Required claim, select Unique User Identifier (Name ID).
- On Manage claim, under Source, select Transformation, then set the transformation to a lowercase value, and save the claim.
Enabling Provisioning
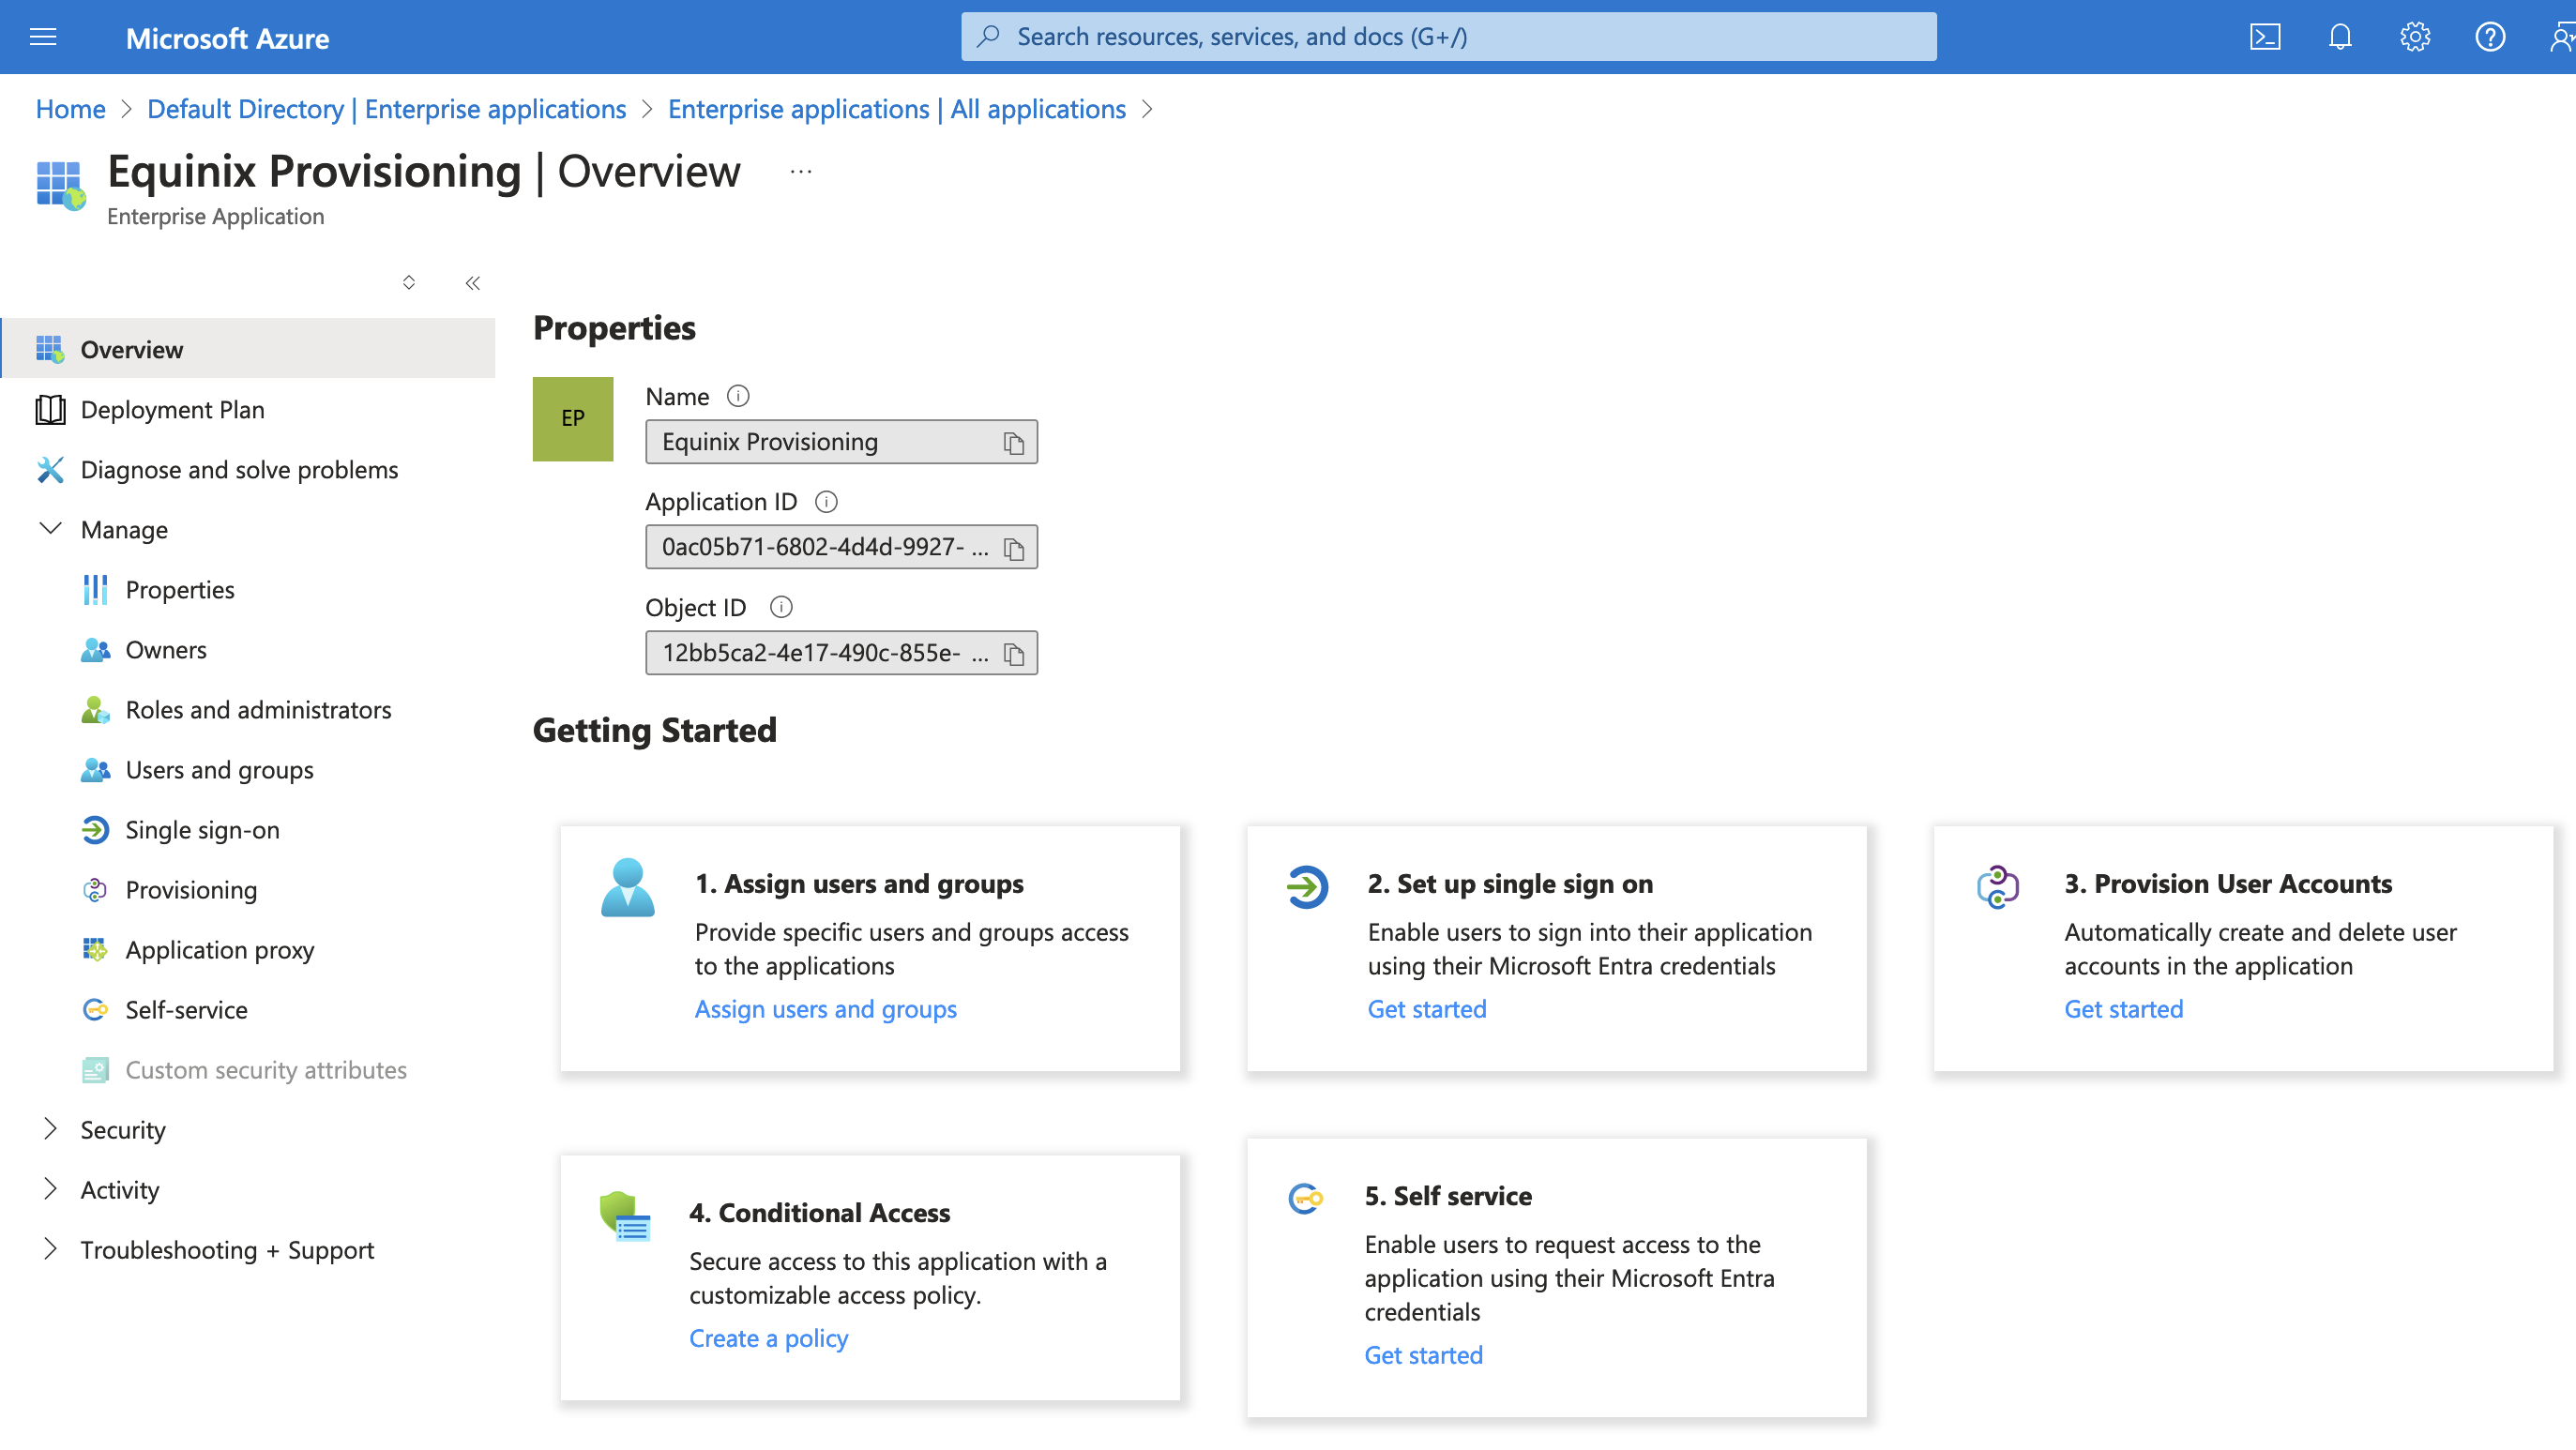
After creating the application, the Overview page is displayed, with several options available in a navigation sidebar. Expand the Manage dropdown, select Provisioning, and select Get Started.
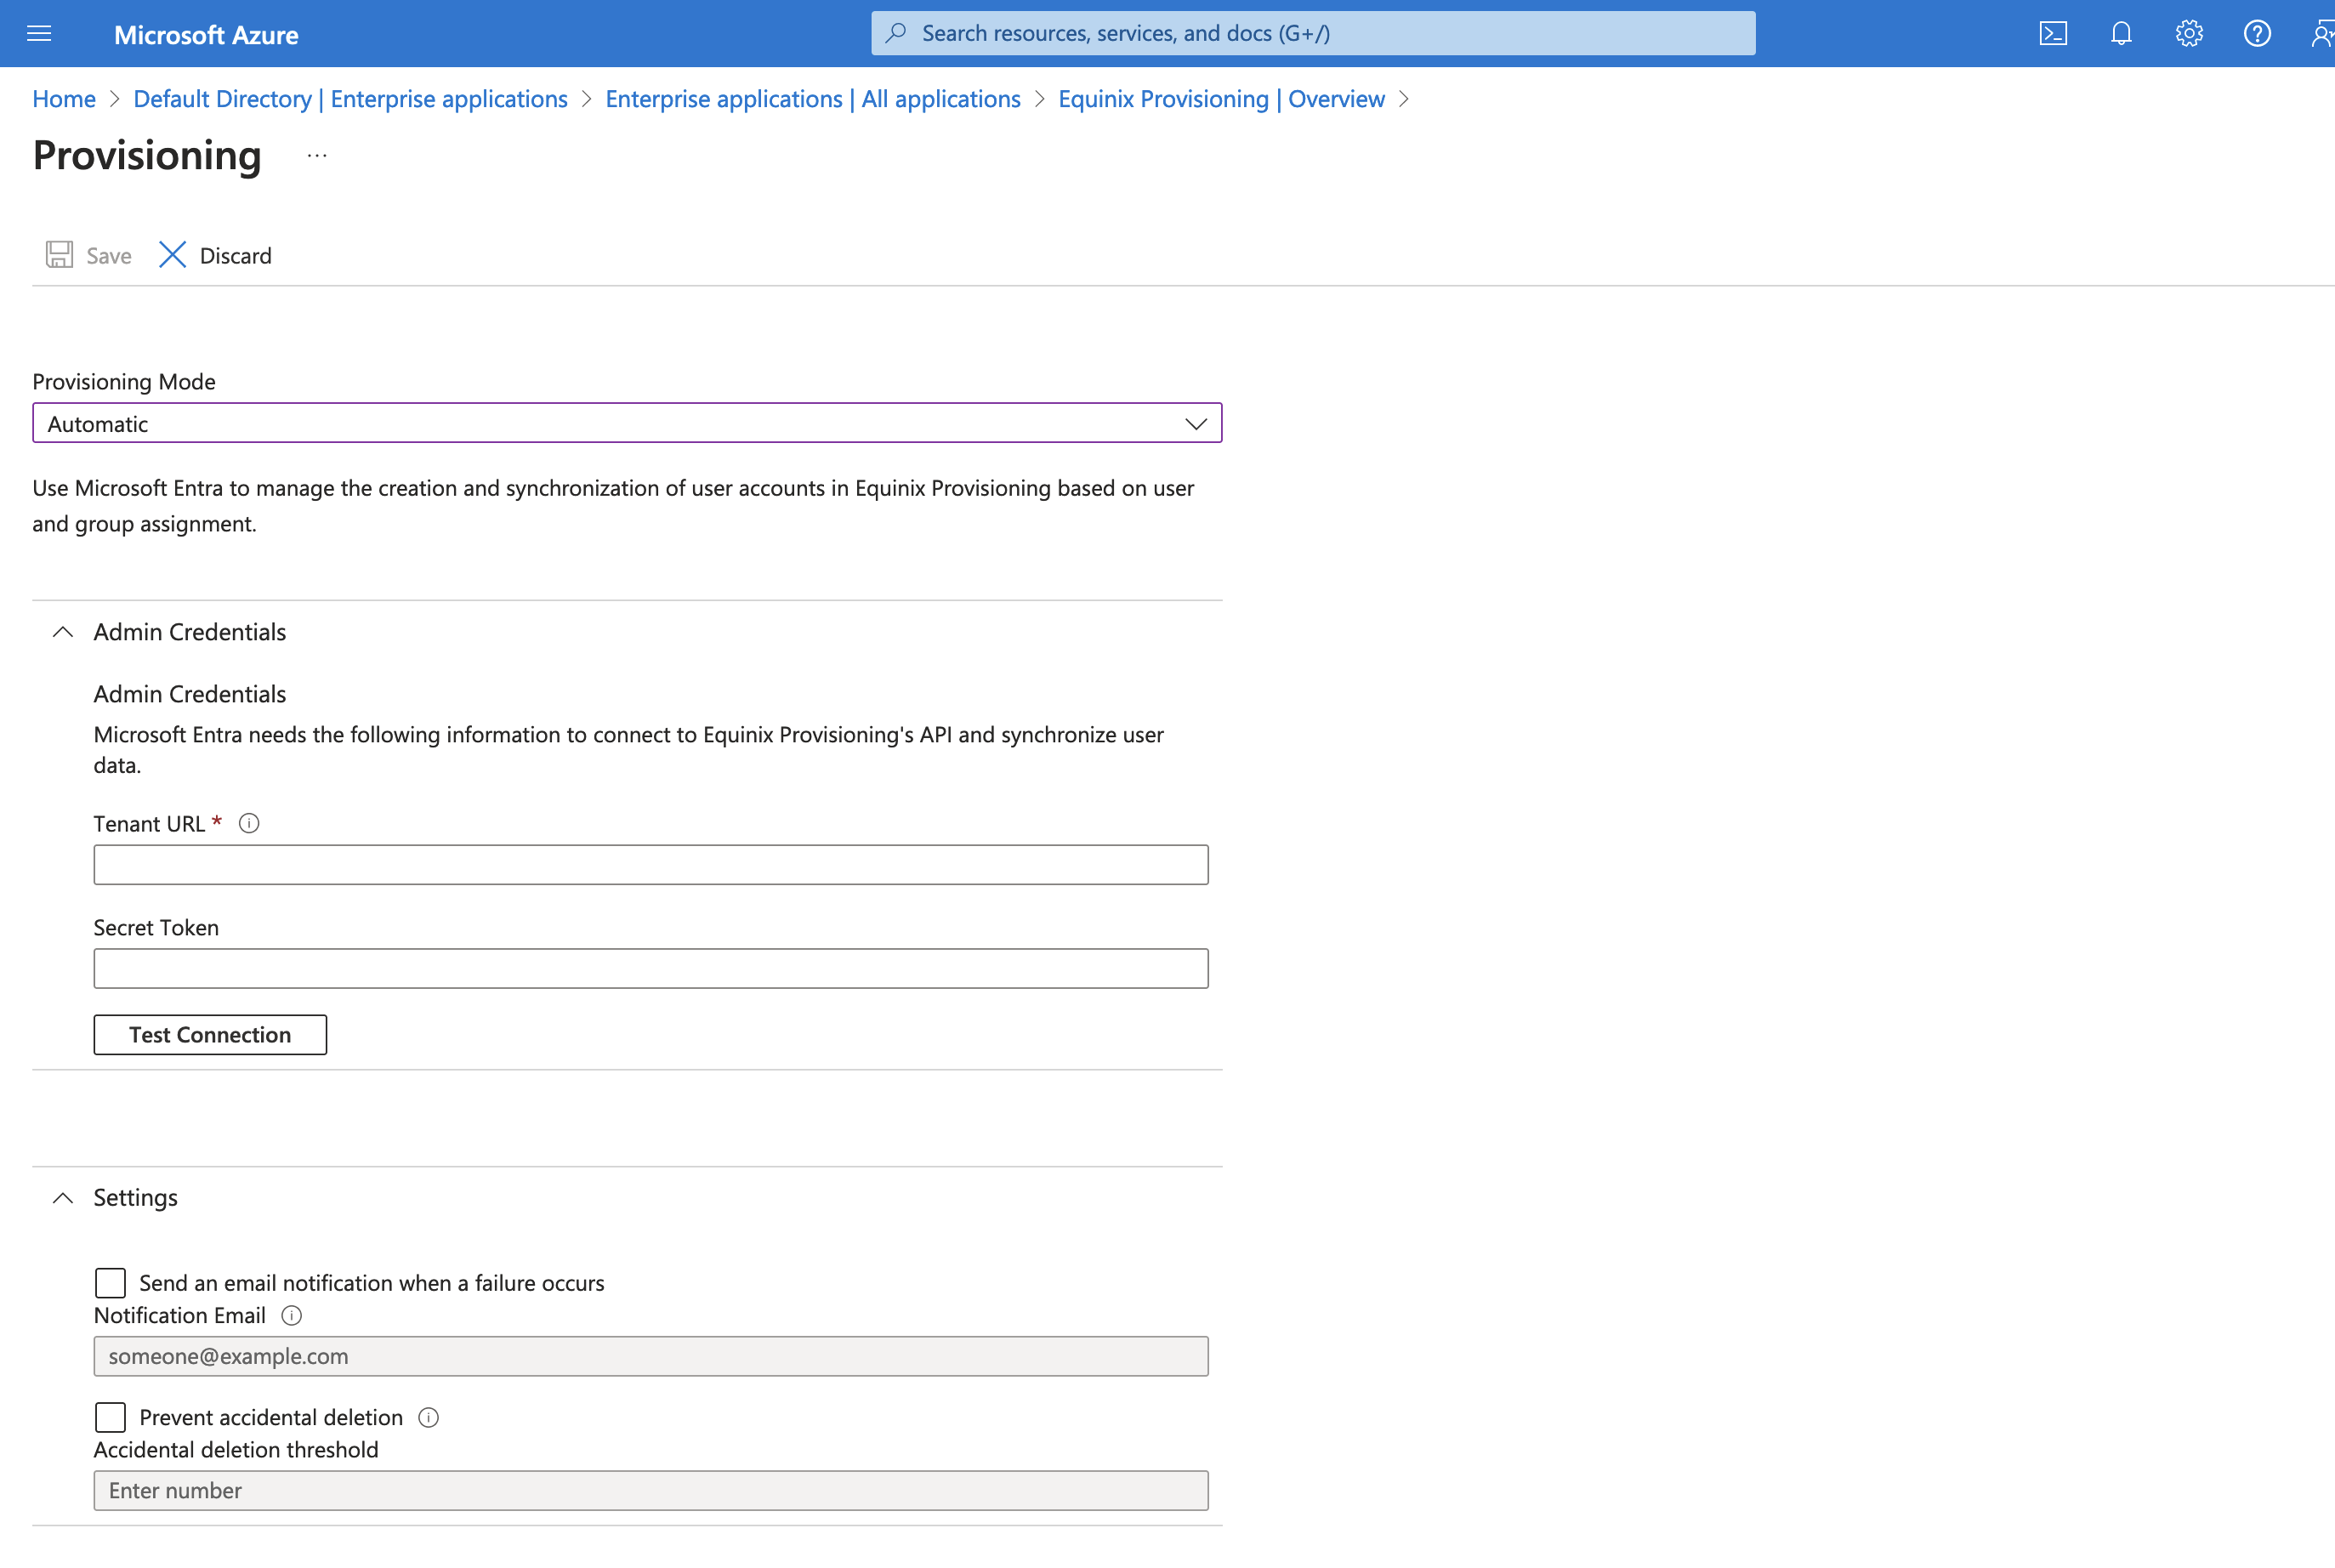
When prompted for a provisioning mode, change the default value from Manual to Automatic.
Expand the Admin Credentials panel and enter the URL and token provided by federation.equinix.com. Use Test Connection to verify that the connection between Entra ID and Equinix is configured correctly. Optionally, expand the Settings panel on the same page to configure email alerts for provisioning issues or enable Entra ID's accidental deletion prevention. Save the settings and return to the applications's Overview page.
Configuring Attribute Mappings
In the sidebar, select Manage, then Provisioning. A Mappings panel is displayed. Open Provision Microsoft Entra ID Groups, turn off the Enabled toggle, and save the settings. Open Provision Microsoft Entra ID Users, and configure the mappings as shown:
| Custom App Attribute | Microsoft Entra ID Attribute | Matching precedence |
|---|---|---|
| userName | 1 | |
| active | Switch([IsSoftDeleted], , "False", "True", "True", "False") | |
| displayName | displayName | |
| externalId | mailNickname | |
| name.familyName | surname | |
| name.givenName | givenName | |
| phoneNumbers[type eq "work"].value | telephoneNumber (or 'mobile', depending on your environment) | |
| locale | preferredLanguage |
Additional default mappings should be deleted.
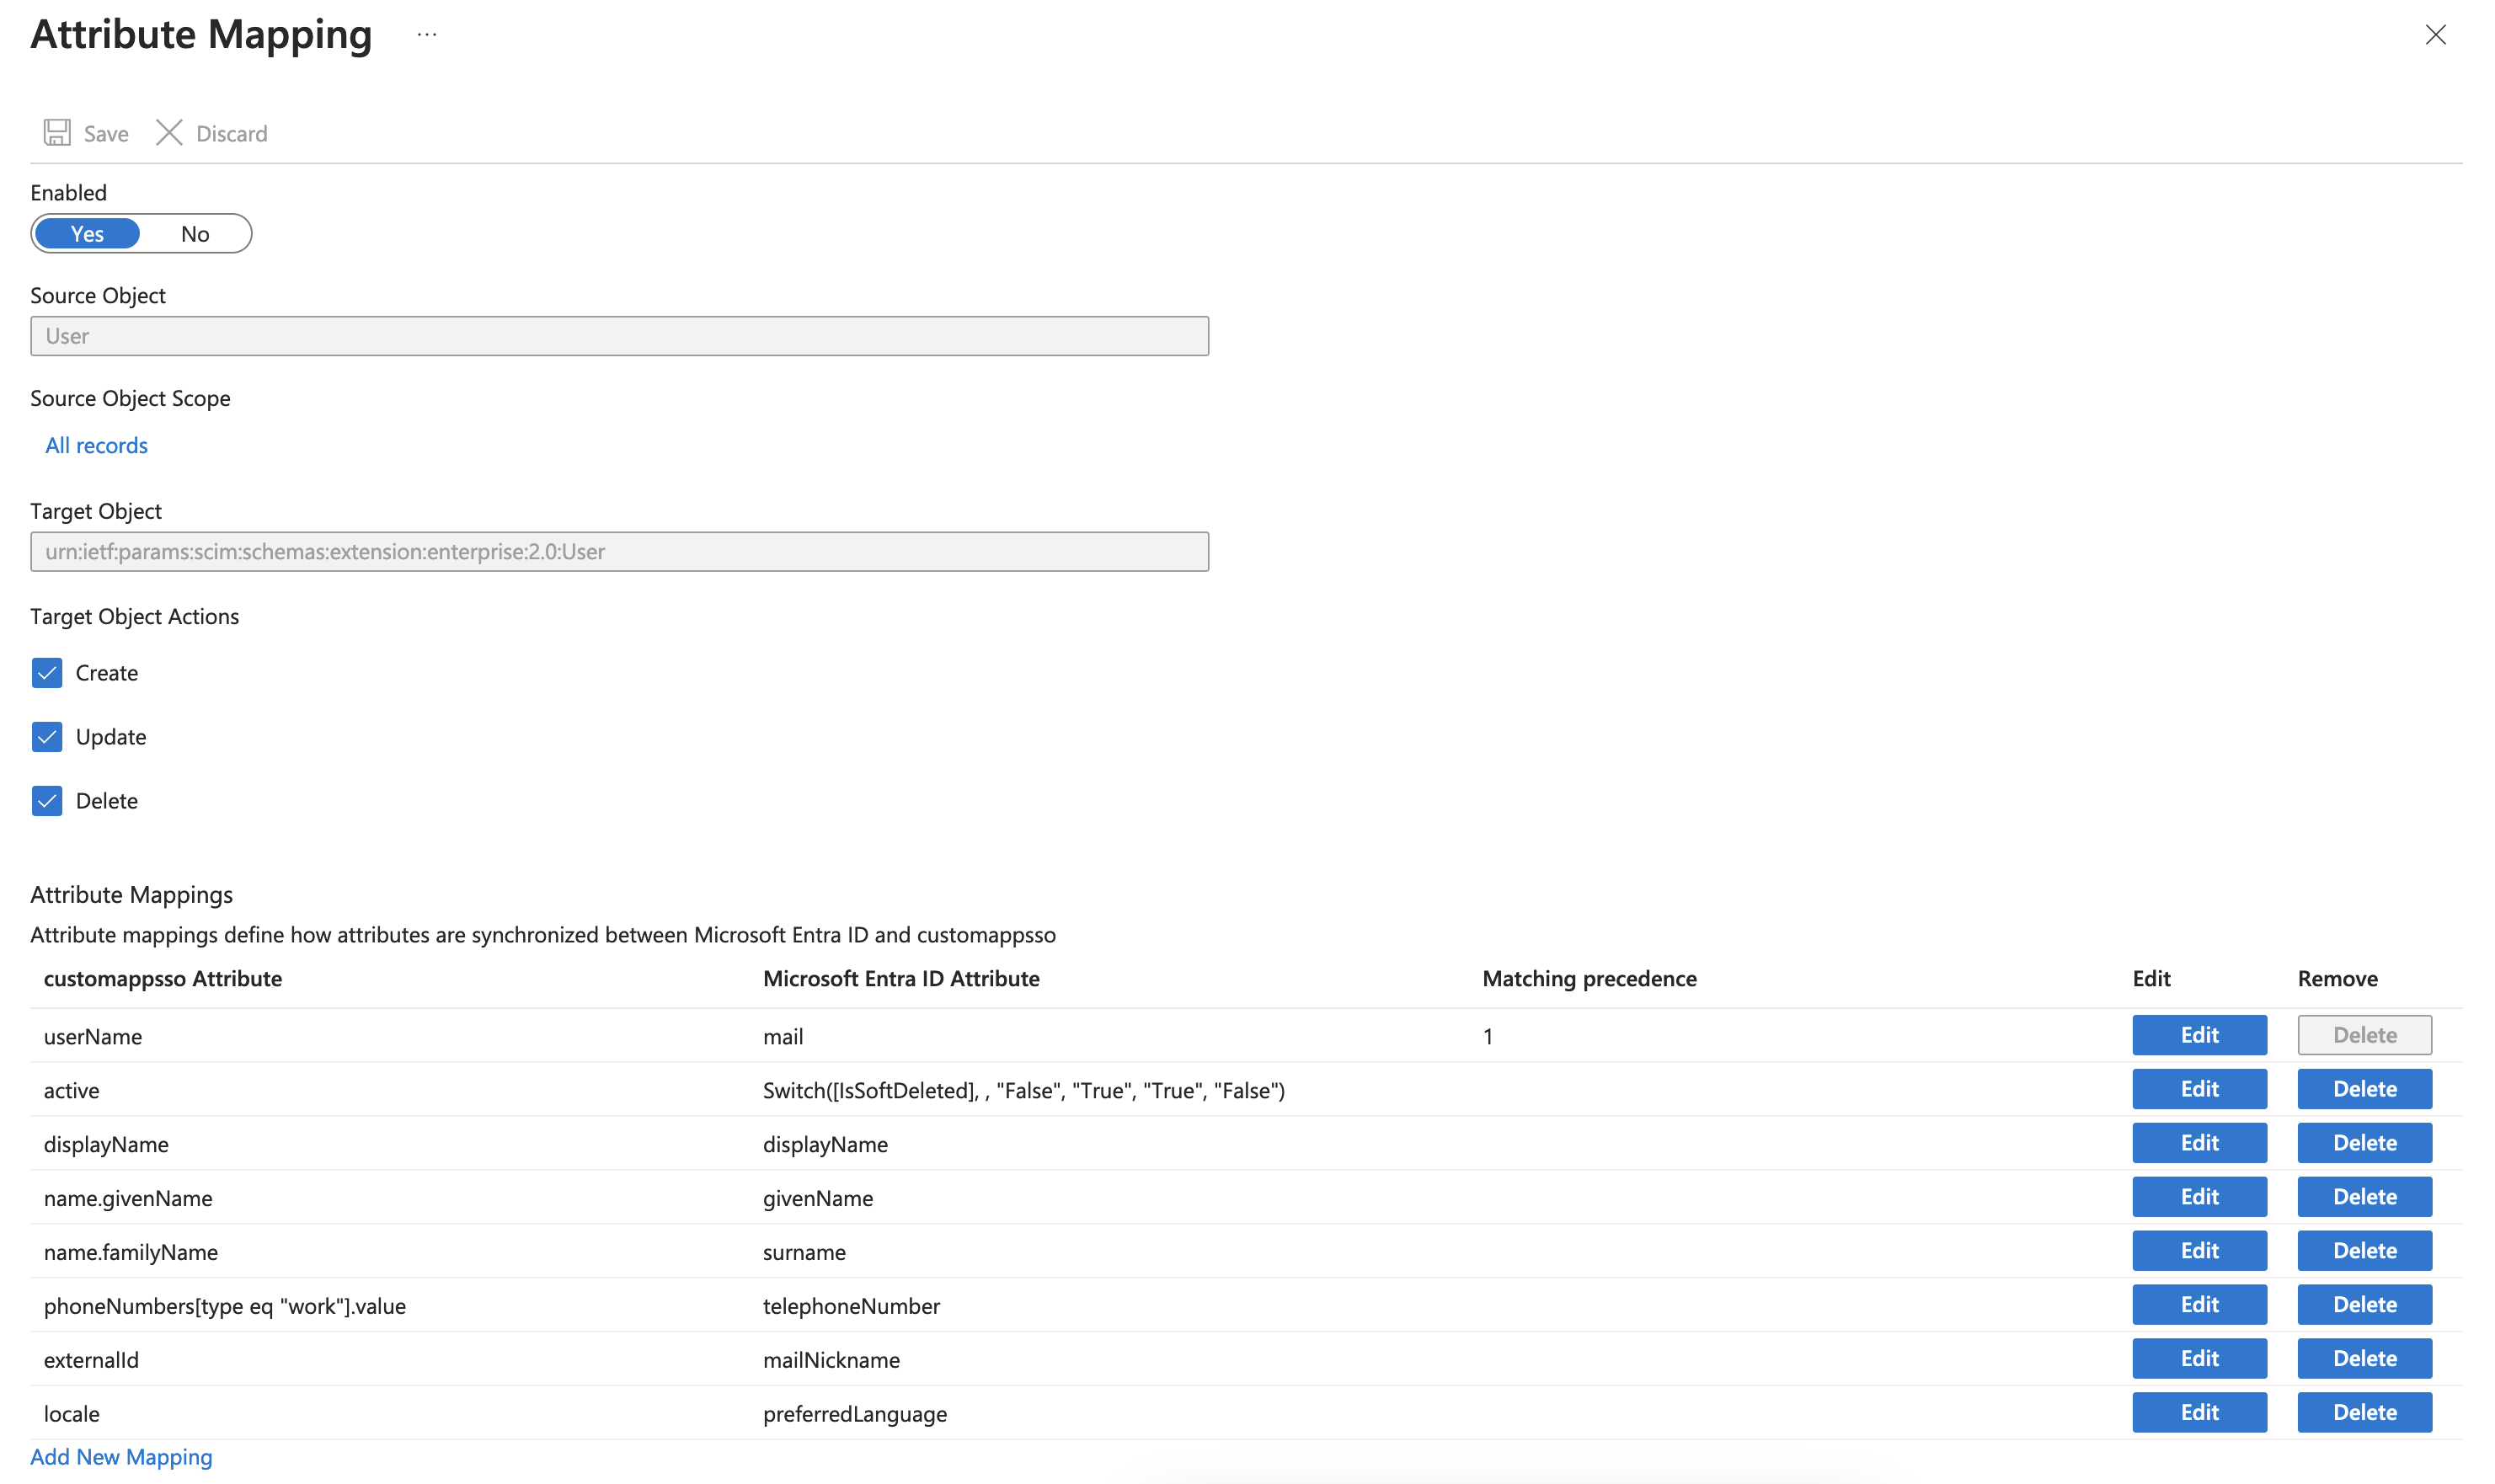
Unselect Create, Update, or Delete if Entra ID should not perform all actions on Equinix users automatically. For example, to provision users without automatically deprovisioning them. Save the changes.
With the connection established and the attribute mappings configured, return to Manage > Provisioning and set Provisioning Status to On.
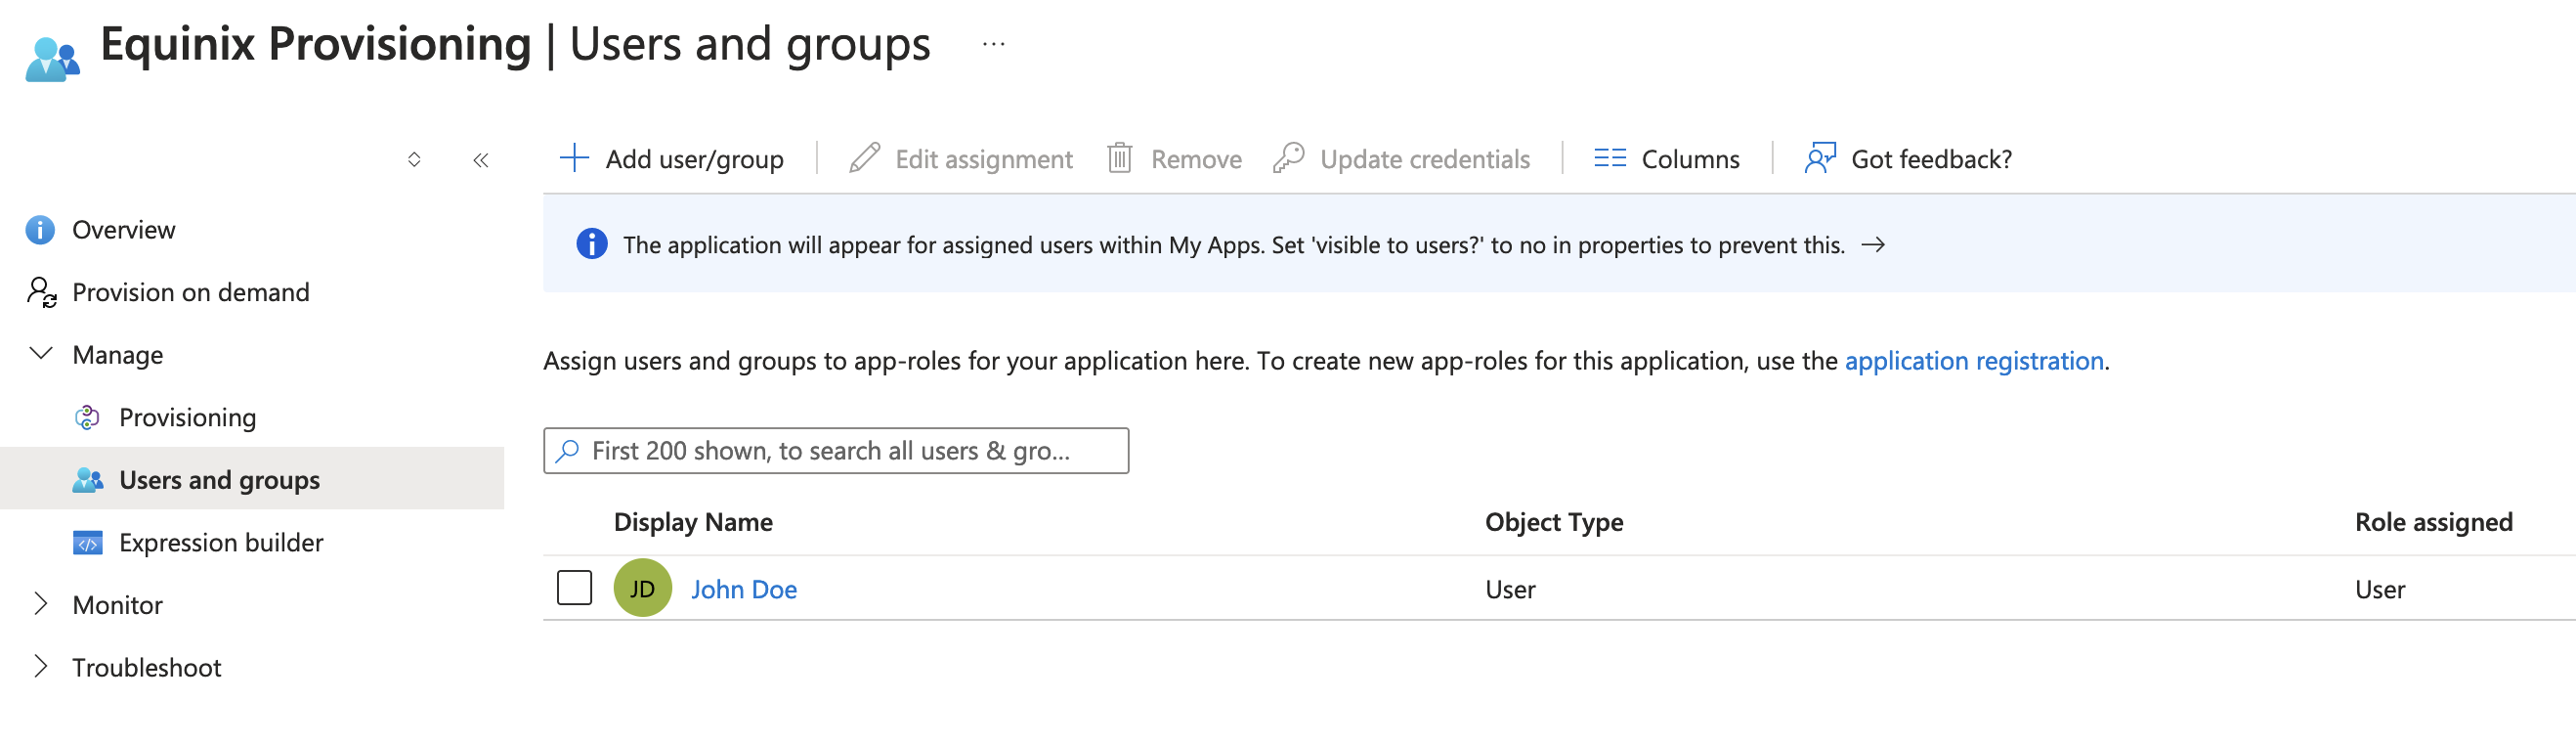
Adding Users and Groups for Provisioning
Unless all directory users are configured to sync through an advanced application setting, users must be assigned to the application before they can be provisioned in Equinix. Make this assignment in Manage > Users and groups. Users can be assigned individually or by group (depending on the Azure subscription tier).
Verifying Successful Provisioning
At this point, Entra ID has the required configuration to provision and deprovision users in Equinix. Return to the Overview page. After some time, Entra ID attempts to provision assigned users. During the initial provisioning cycle, review the logs to confirm the process completed as expected.
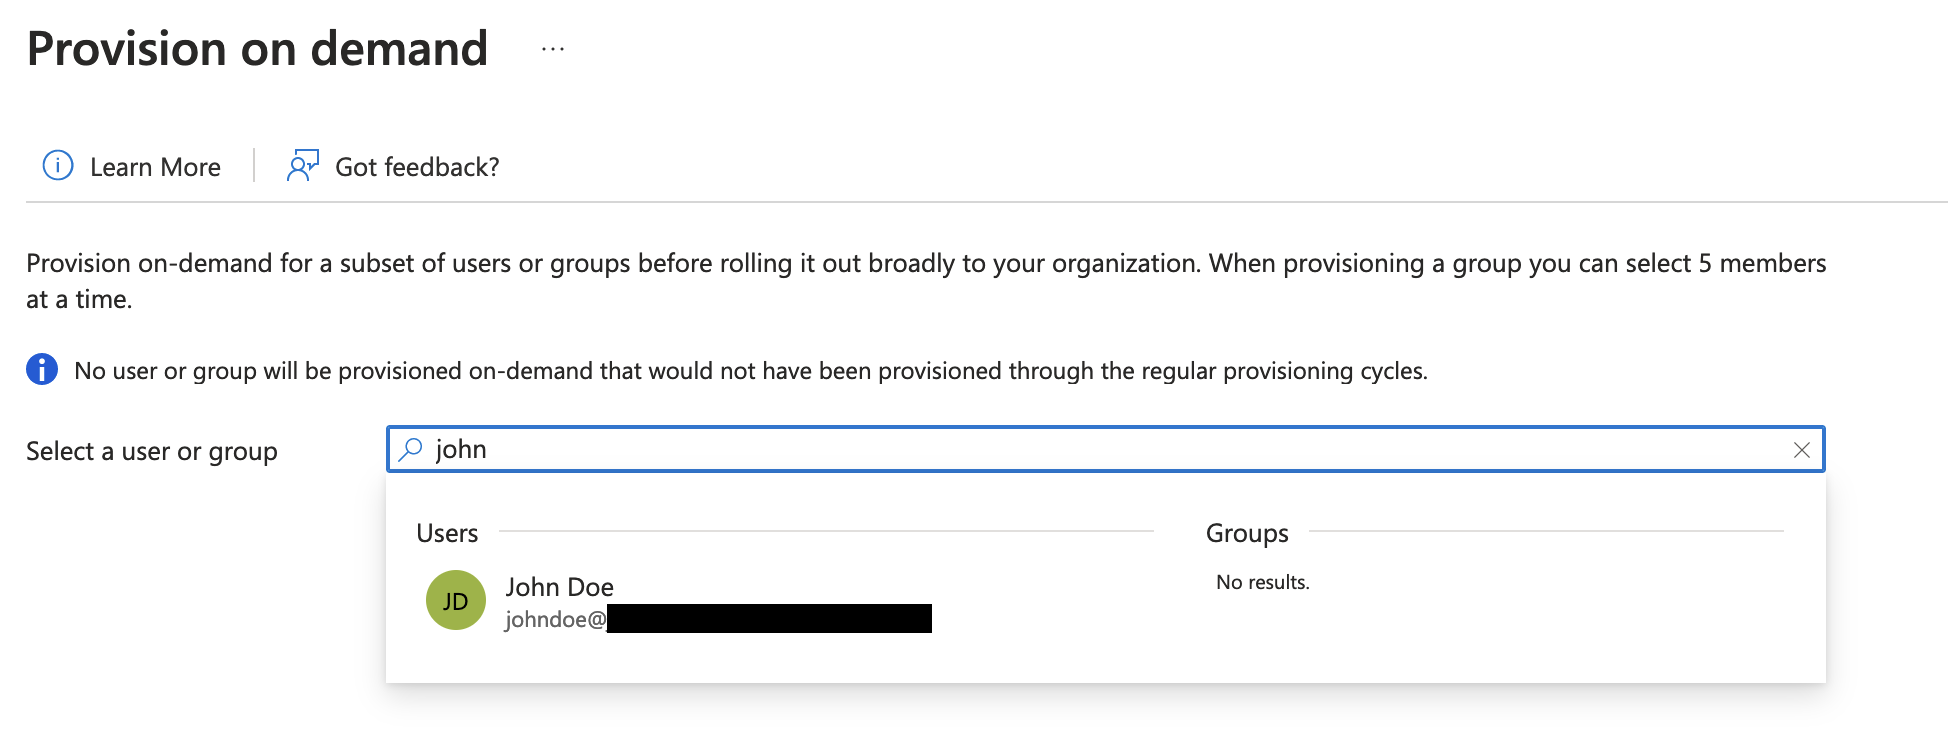
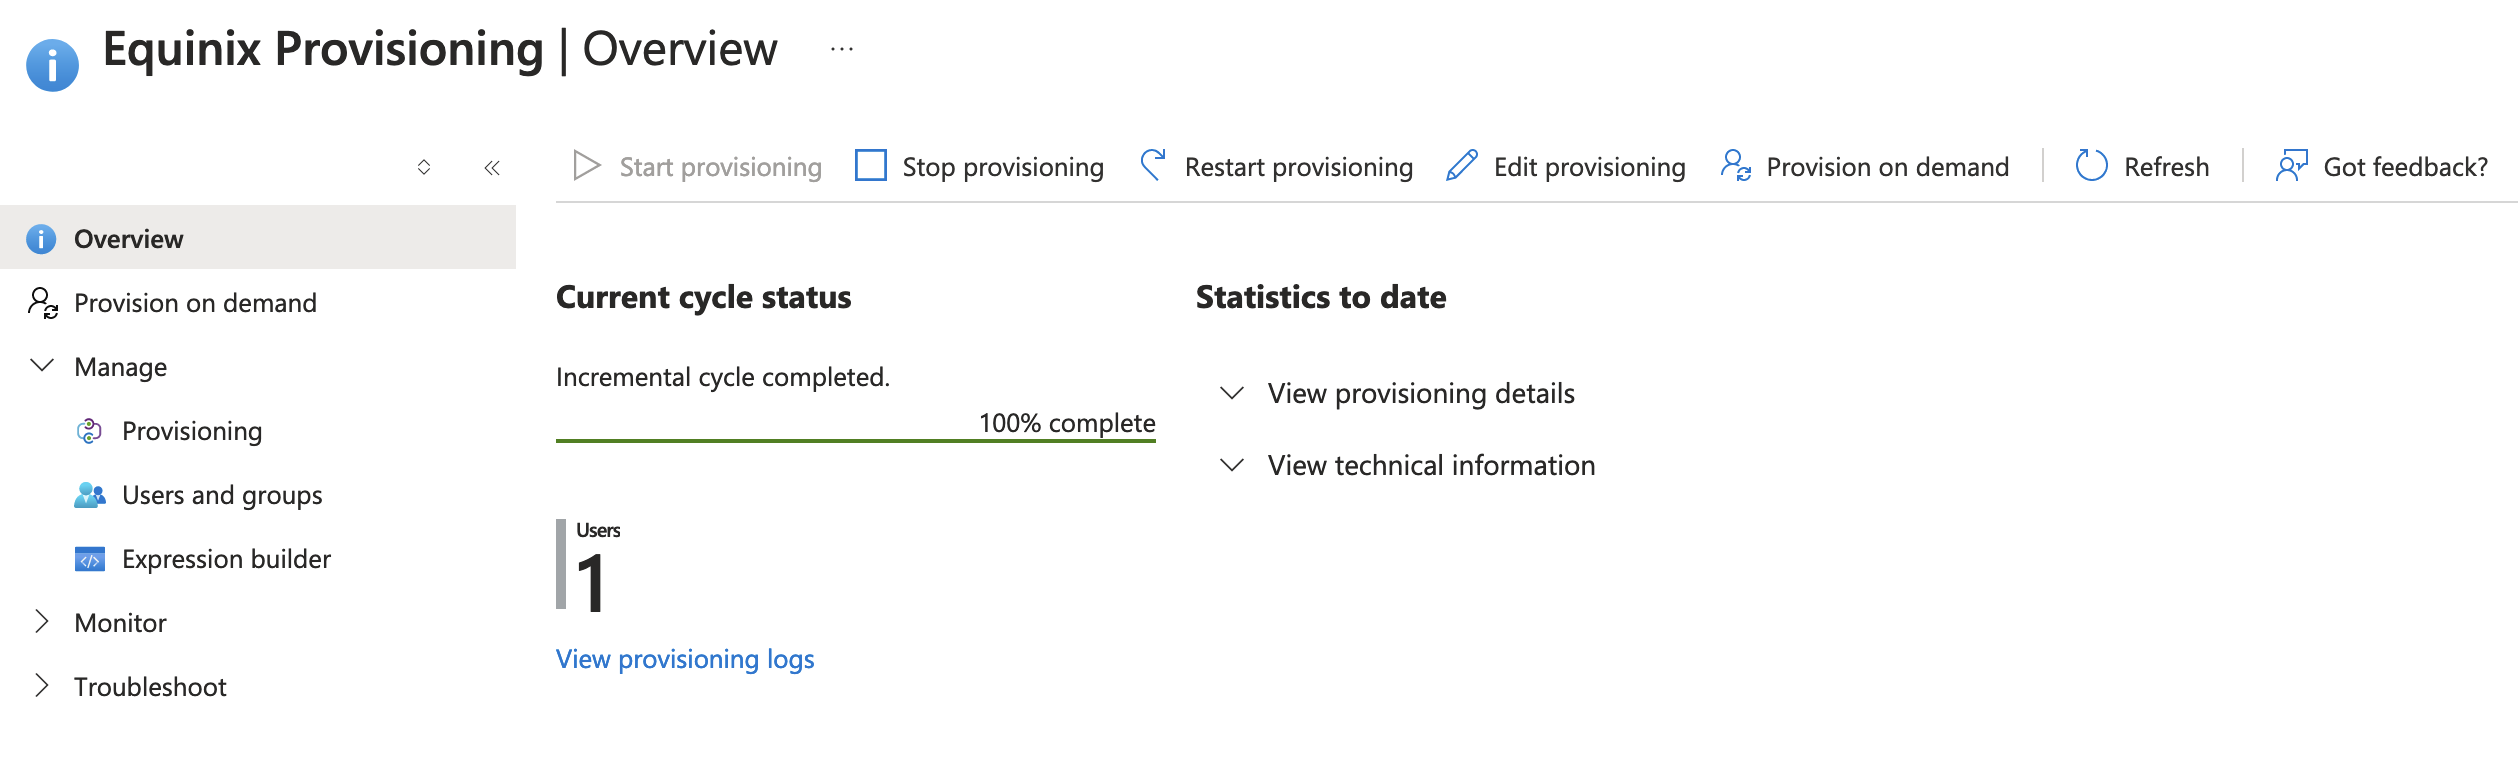 Entra ID does not synchronize users immediately but runs as a periodic job (every 20-40 minutes, depending on the number of users and groups in the application, according to Microsoft). This interval is not configurable by Equinix.
To run provisioning outside the scheduled interval or apply changes immediately, use Entra ID's Provision on demand feature from the application's Overview page. Provision on demand runs provisioning or deprovisioning actions for a selected user and provides details about the actions performed and their outcomes.