Cisco Meraki vMX SD-WAN (Beta)
Licensing Options
Deployment Types
- Single Device
- Redundant Devices
Connectivity Options
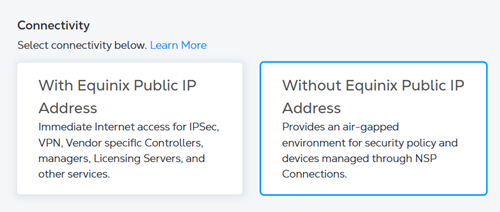
- With a Public IP Address
- Without a Public IP Address
Device Details
| 2 Cores | 4 Cores | |
|---|---|---|
| Memory | 4 GB | 16 GB |
| Software Package | vMX - Medium vMX - Large | |
| Virtual Data Interfaces Supported (Default) | 2 | |
| System Reserved Interfaces |
| Access Methods | SSH (CLI)
HTTPS (Web Console) | |
| Image Version | See Available Image Versions | |
| Restricted CLI Commands | None | |
Prerequisites
Before beginning the device deployment process in Network Edge:
-
Create an account in the Meraki Dashboard.
-
Sign in to the dashboard and create a new Organization and Network, selecting Security appliance as the network type.
-
Choose the required Meraki vMX device size.
-
On the device page, select Generate authentication token to create the Day-0 configuration file.
Configuring a Cisco Meraki vMX Without an IP Address
If you create your Meraki vMX Without an Equinix Public IP Address, the VNF is provisioned without any public IP addresses on the WAN or Management interface.
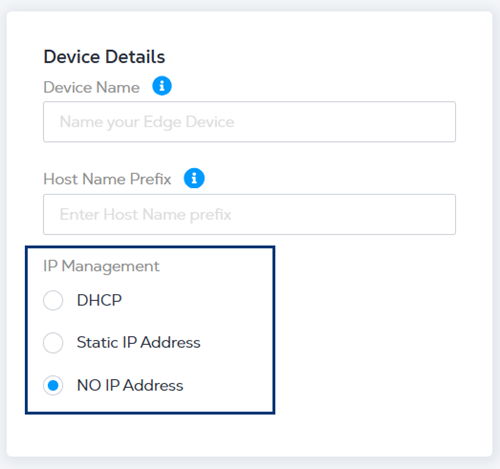
When entering the Device Details, select one of the following IP address options:
- DHCP - a network management protocol that automatically assigns IP addresses.
- Static IP Address - enter the IP address, subnet mask, and default gateway.
- NO IP Address - an IP address will not be assigned.
Bring Your Own License
If you are Bringing Your Own License (BYOL), the following device creation steps will apply:
-
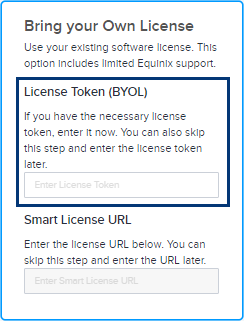
You can enter your License Token during the device creation process. Once you enter the license token, your virtual device will be provisioned with the license based on the token provided. If you do not provide token information, your virtual device will still be provisioned but you will need to manually register your license with the smart server using your license token after the virtual device is provisioned.
-
Alternatively, you can enter your Smart License URL. You must have a valid Cisco account to complete this process. To get a Cisco Smart License token, follow the instructions in the Cisco documentation.
To get a Cisco Smart License token:
- Sign in to the Cisco Smart Software Manager (CSSM) with your Cisco.com account credentials.
- Locate the Virtual Accounts > Inventory section to create a new token.
- Your newly created token will appear in the token list. Click the token to see the details and copy the token string.
To register the new token on your device, access the device CLI and enter a command to register your token.
license smart register idtoken <your_token_string>To verify your token registration enter a command such as:
show license statusIf you encounter any issues or need more detailed steps, see Cisco DNA Center Administrator Guide or contact Cisco support.
-
You are responsible for obtaining support from Cisco or their partners. If you are subscribing with a license from Equinix Network Edge, you can open a support case with Cisco Technical Assistant Center (TAC) to troubleshoot Cisco IOX-XE software issues or ask Cisco IOX-XE configuration questions from the Network Edge portal. See Cisco Catalyst 8000V Subscriptions for more information.