Create a Layer 2 Service Profile
To make your services (such as SaaS and IaaS) available on Equinix Fabric you must have a Fabric service profile and a company profile. Your Equinix Fabric service profiles describes your offered service and how others may connect to that service. Your company profile contains information about your company. One or more service profiles may be attached to a company profile.
A service profile can be associated with one or many Equinix Fabric ports. It is recommended that you have one service profile (for example, AWS Direct Connect) representing a single service in all metros where it is available.
Conversely, a single port can also be associated with multiple service profiles. If you are offering multiple services on Fabric (for example, MPLS and Ethernet), we recommend you have at least one service profile for each service. Multiple service profiles make it easier for customers to find and connect to the appropriate service.
Ports associated with a single service profile must use either the Dot1q or QinQ encapsulation type. You can’t combine ports with different encapsulation types on the same service profile.
To create a Layer 2 service profile:
-
Sign in to the Customer Portal > Fabric Dashboard.
-
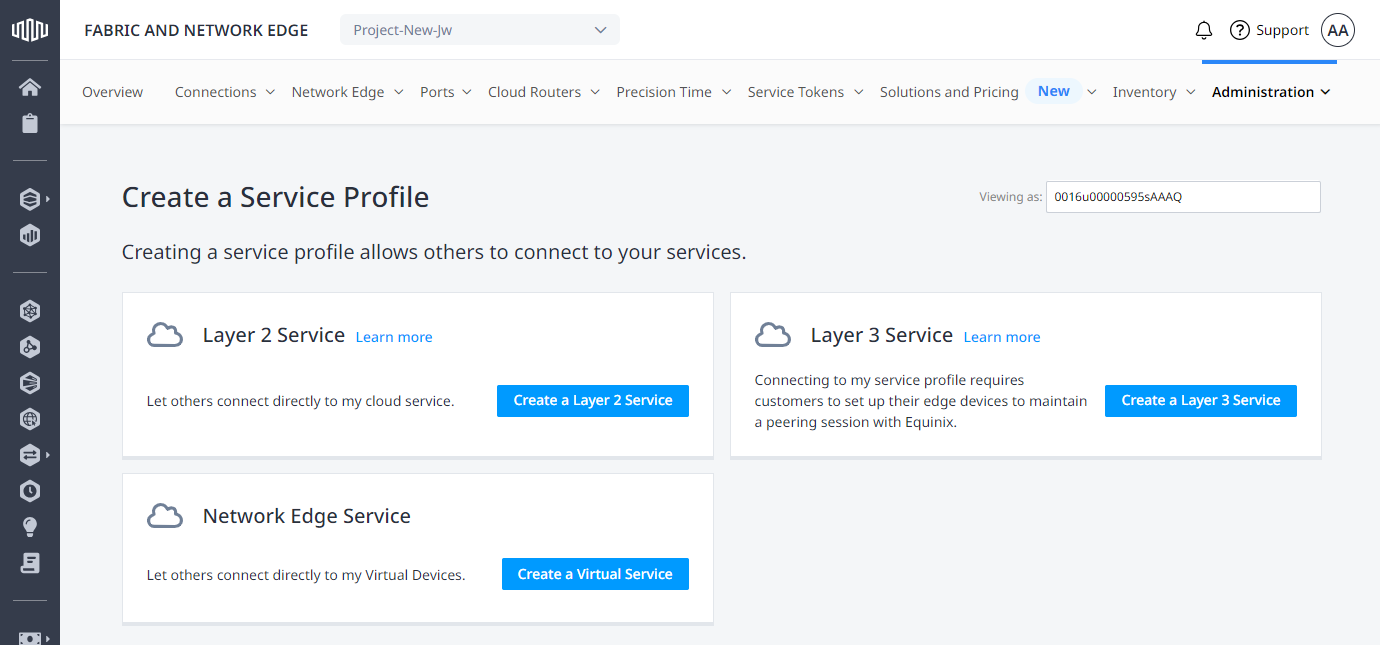
Click Administration and select Create a Service Profile.
-
In the Layer 2 Service card, select Create a Layer 2 Service.
Details
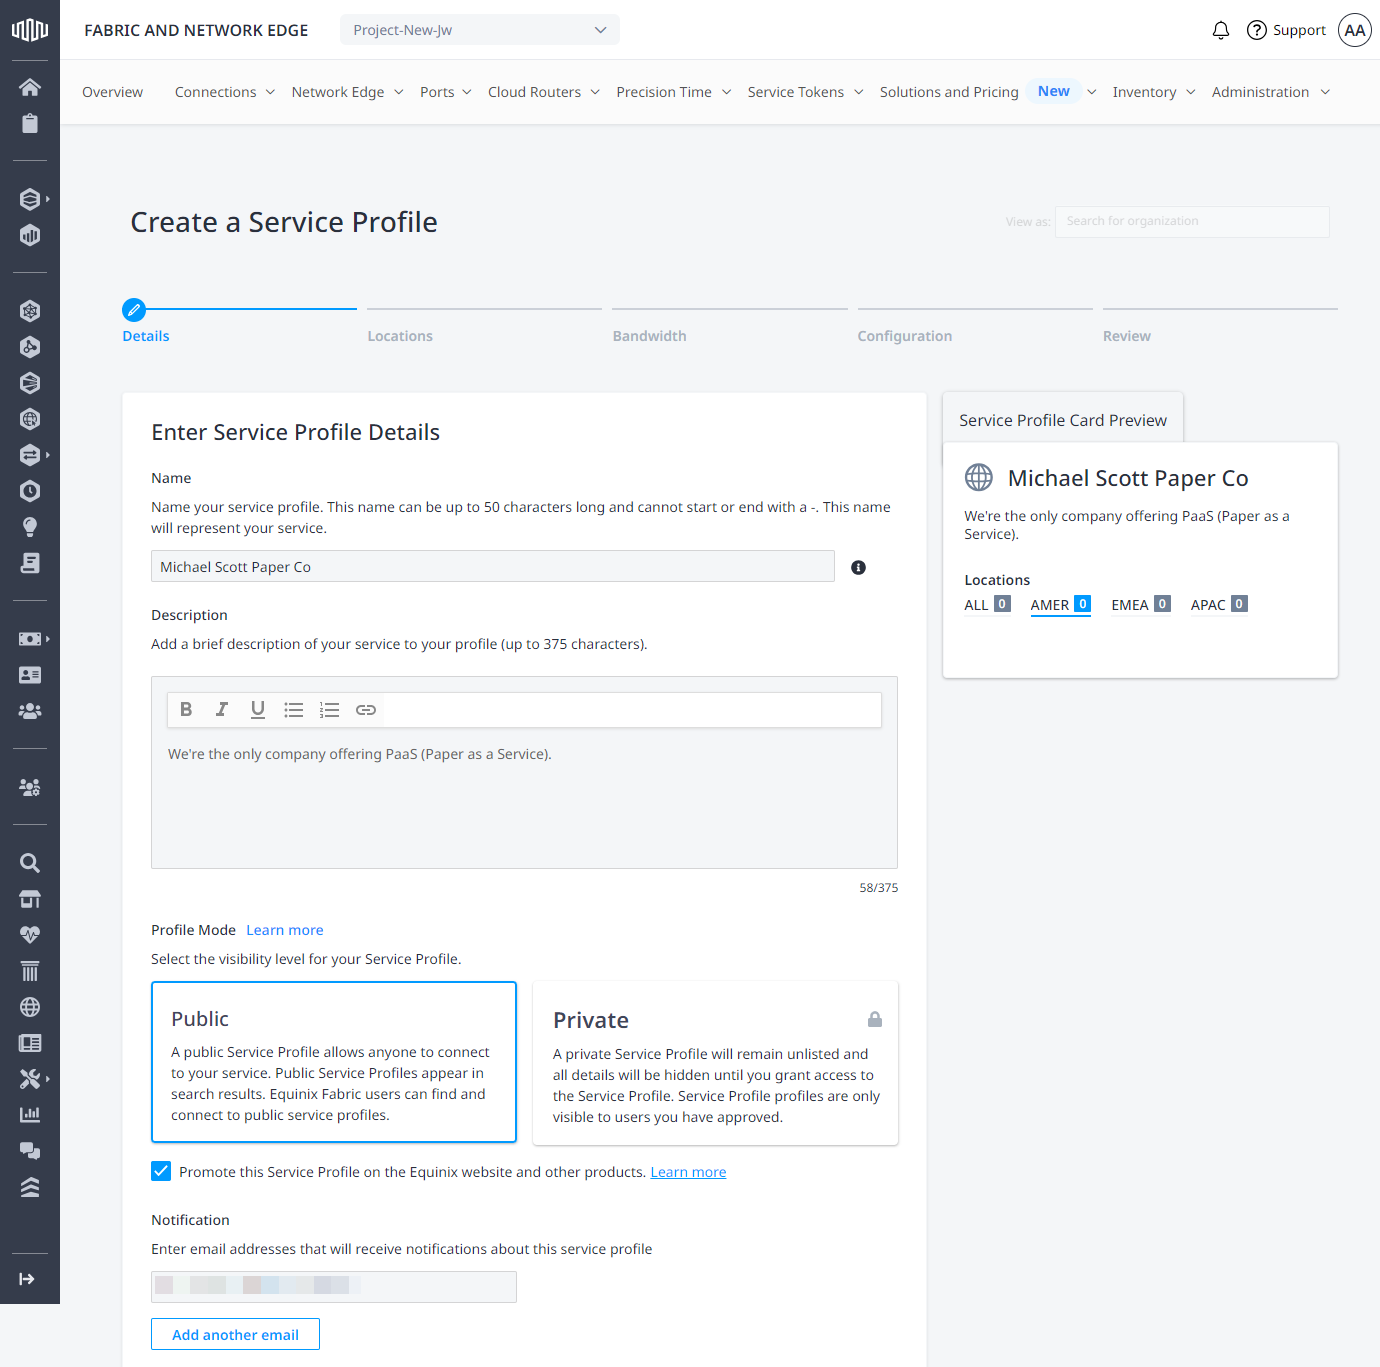
Enter your Service Profile Details.
-
Name – Enter a name for your service profile. This name should be easily recognizable by your customers and should be a combination of your company and the service being offered (for example, Akamai DDoS Mitigation Services). This name can be up to 50 characters long and cannot start or end with a
-. This name will represent your service. -
Description – Enter a description of your service (limit 375 characters). The text editor allows you to format your text and add hyperlinks to your description. Hyperlinks to a page that describes your service are helpful. To add a hyperlink, highlight the text, click the hyperlink icon, and enter the URL.
-
Profile Mode – Specify whether your profile will be
PublicorPrivate. For more information about Private and Public Service Profiles, see Service Profile Visibility Settings. If the service profile isPrivate, add one or more email addresses to grant permission to connect to this service profile. -
Notification – Enter the email address(es) of anyone who should receive notifications about this service profile. Notifications can include threshold or port down notifications as well as connection requests to your service profile that require approval.
-
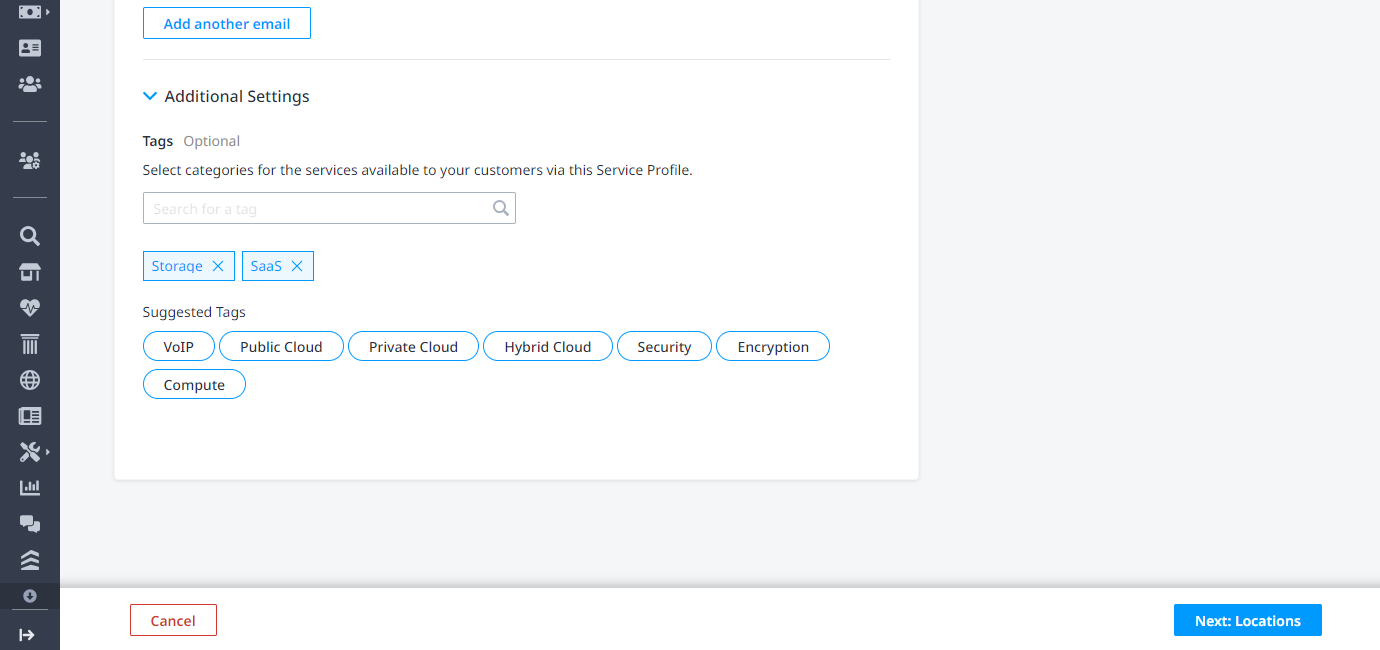
In the Additional Settings section, add tags to your service profile. Either click on the suggested tags listed, or click in the Tag field and select from the list of pre-defined tags. Tags are used to offer better search options to customers looking for a particular service type offered on Equinix Fabric.
Click Next: Locations.
Locations and Ports
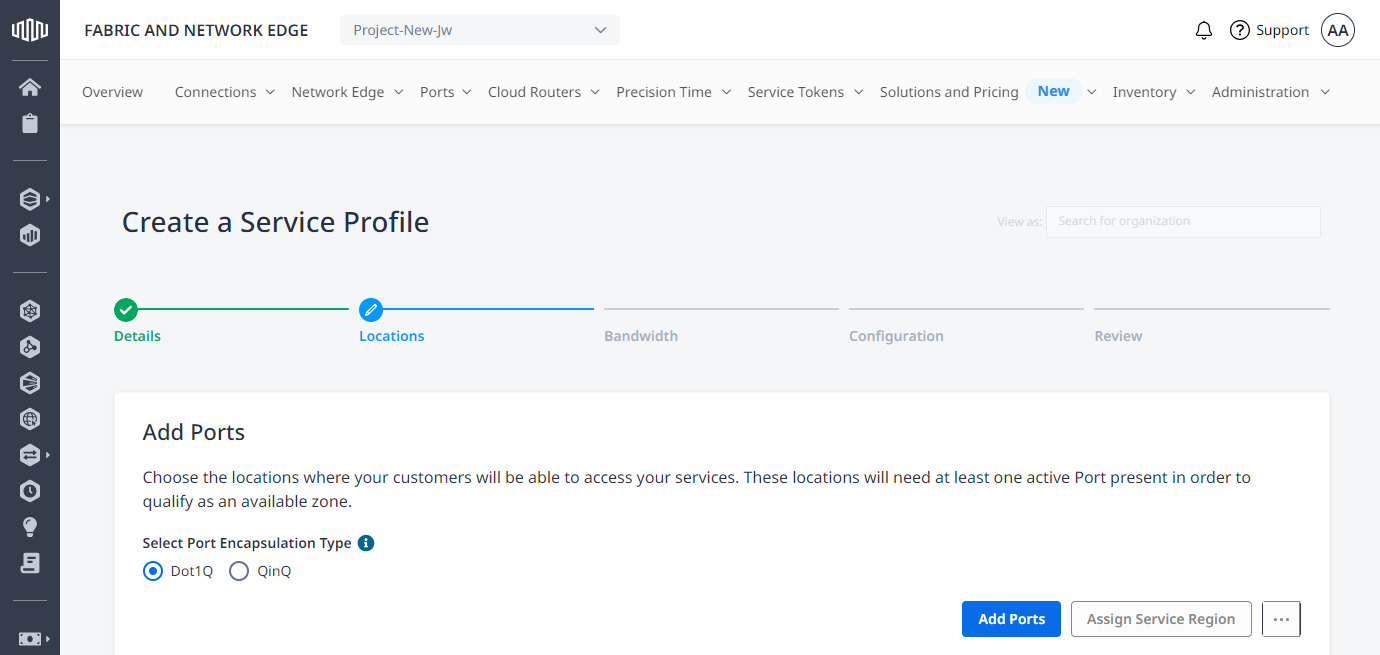
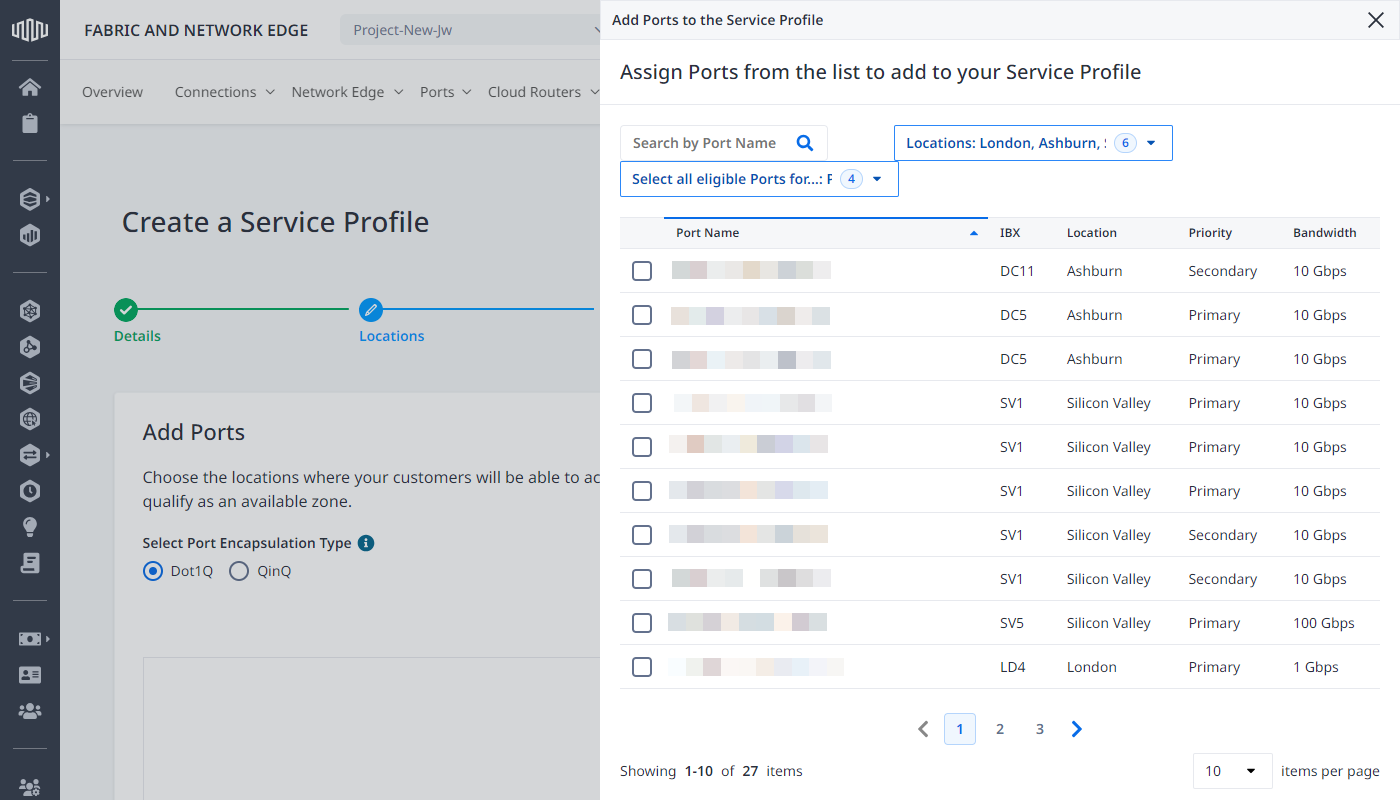
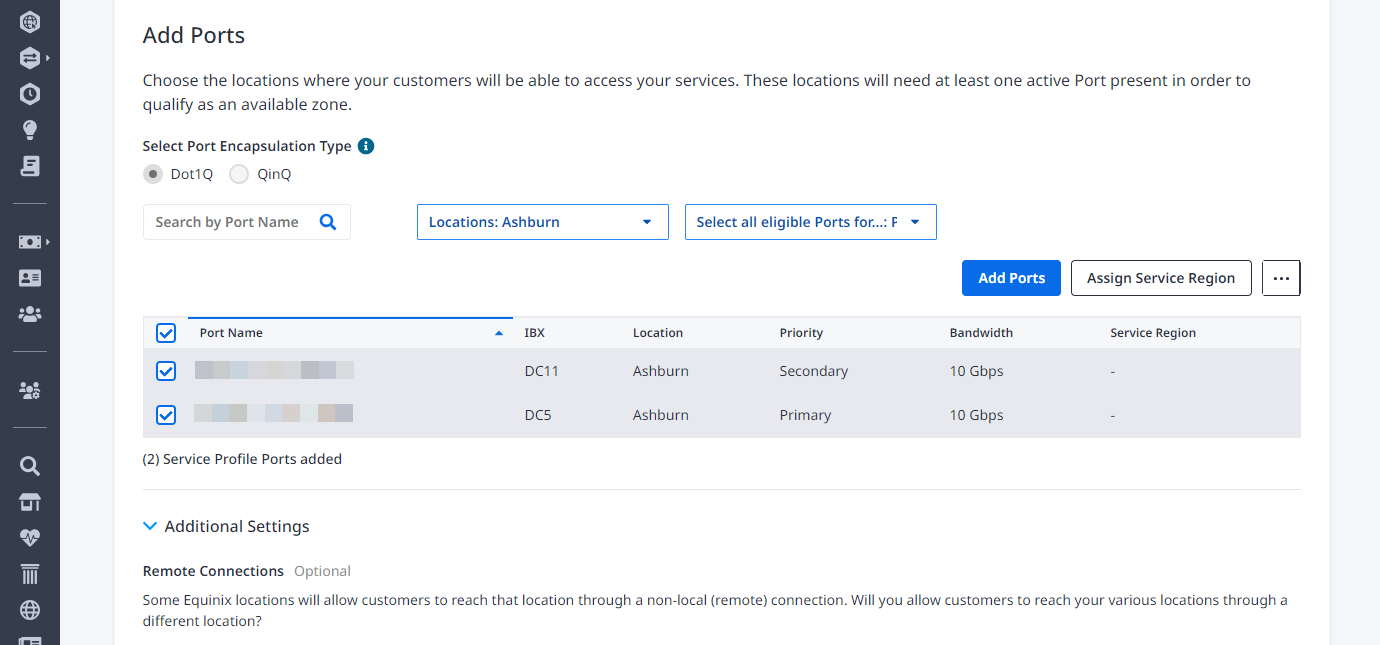
In the Add Ports section, specify one or more locations where your customers will access your services by adding ports in that location. Each location must include at least one active port.
-
Select Dot1Q or QinQ for Port Encapsulation Type.
-
Click Add Ports. From the Add Ports to the Service Profile form, select one or more ports from the Port Names list. To filter the list by metro location, use the Locations drop-down menu.
 tip
tipYou will need to add 100GE ports to your Service Profile if you plan to offer bandwidth options over 10 Gbps.
-
Click Add Ports. The ports that you selected are listed on the Add Ports page.
-
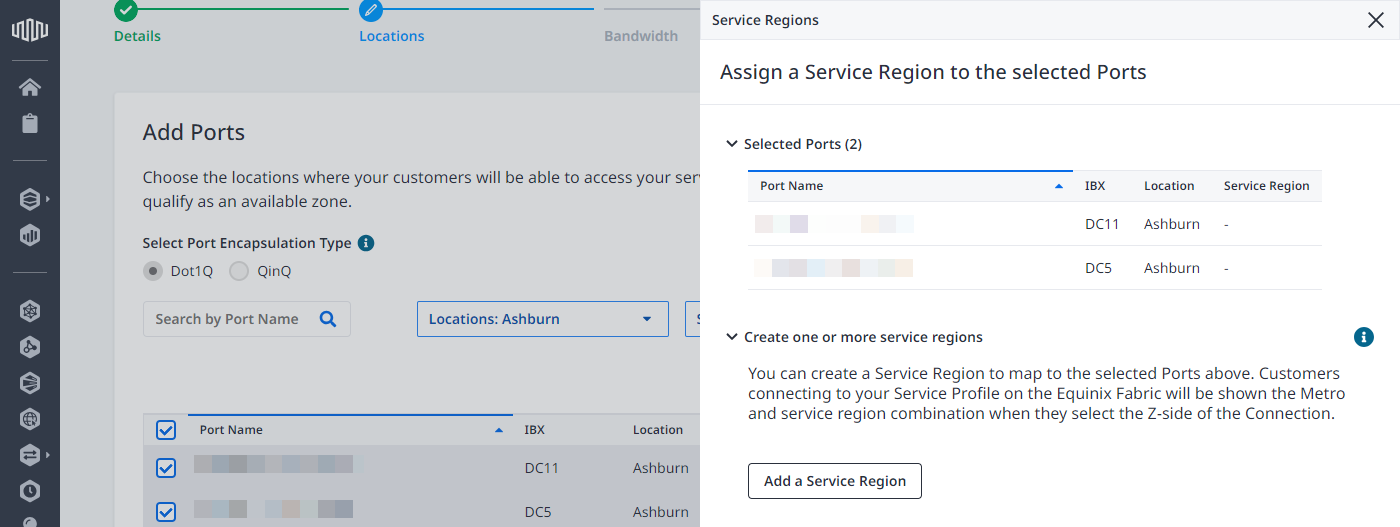
(Optional) If you want to describe the locations where your service is available as a region or other location identifier, select one or more ports from the Port Name list and click Assign Service Region.
-
Click Selected Port(s) to expand the list of ports that you selected. Once you create a service region, these ports are added to that region.
-
Click Add a Service Region, enter a name, and click Add. The new service region is listed. To add additional service regions, repeat this step.
-
Click the service region that you want to assign to your selected ports, then click Submit.
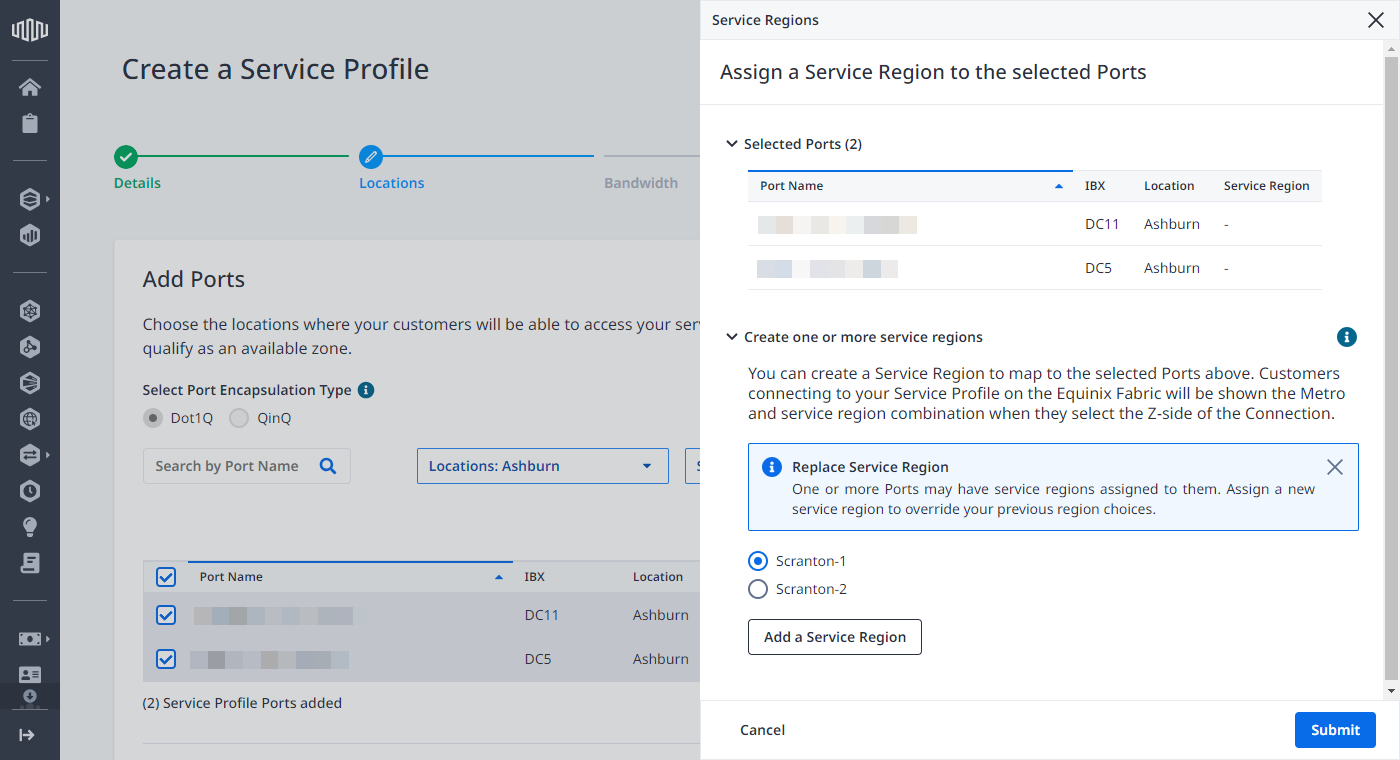
The list of ports in the Add Ports form shows the assigned service region.
Repeat this step to create additional service regions, and to assign or re-assign ports to them.
-
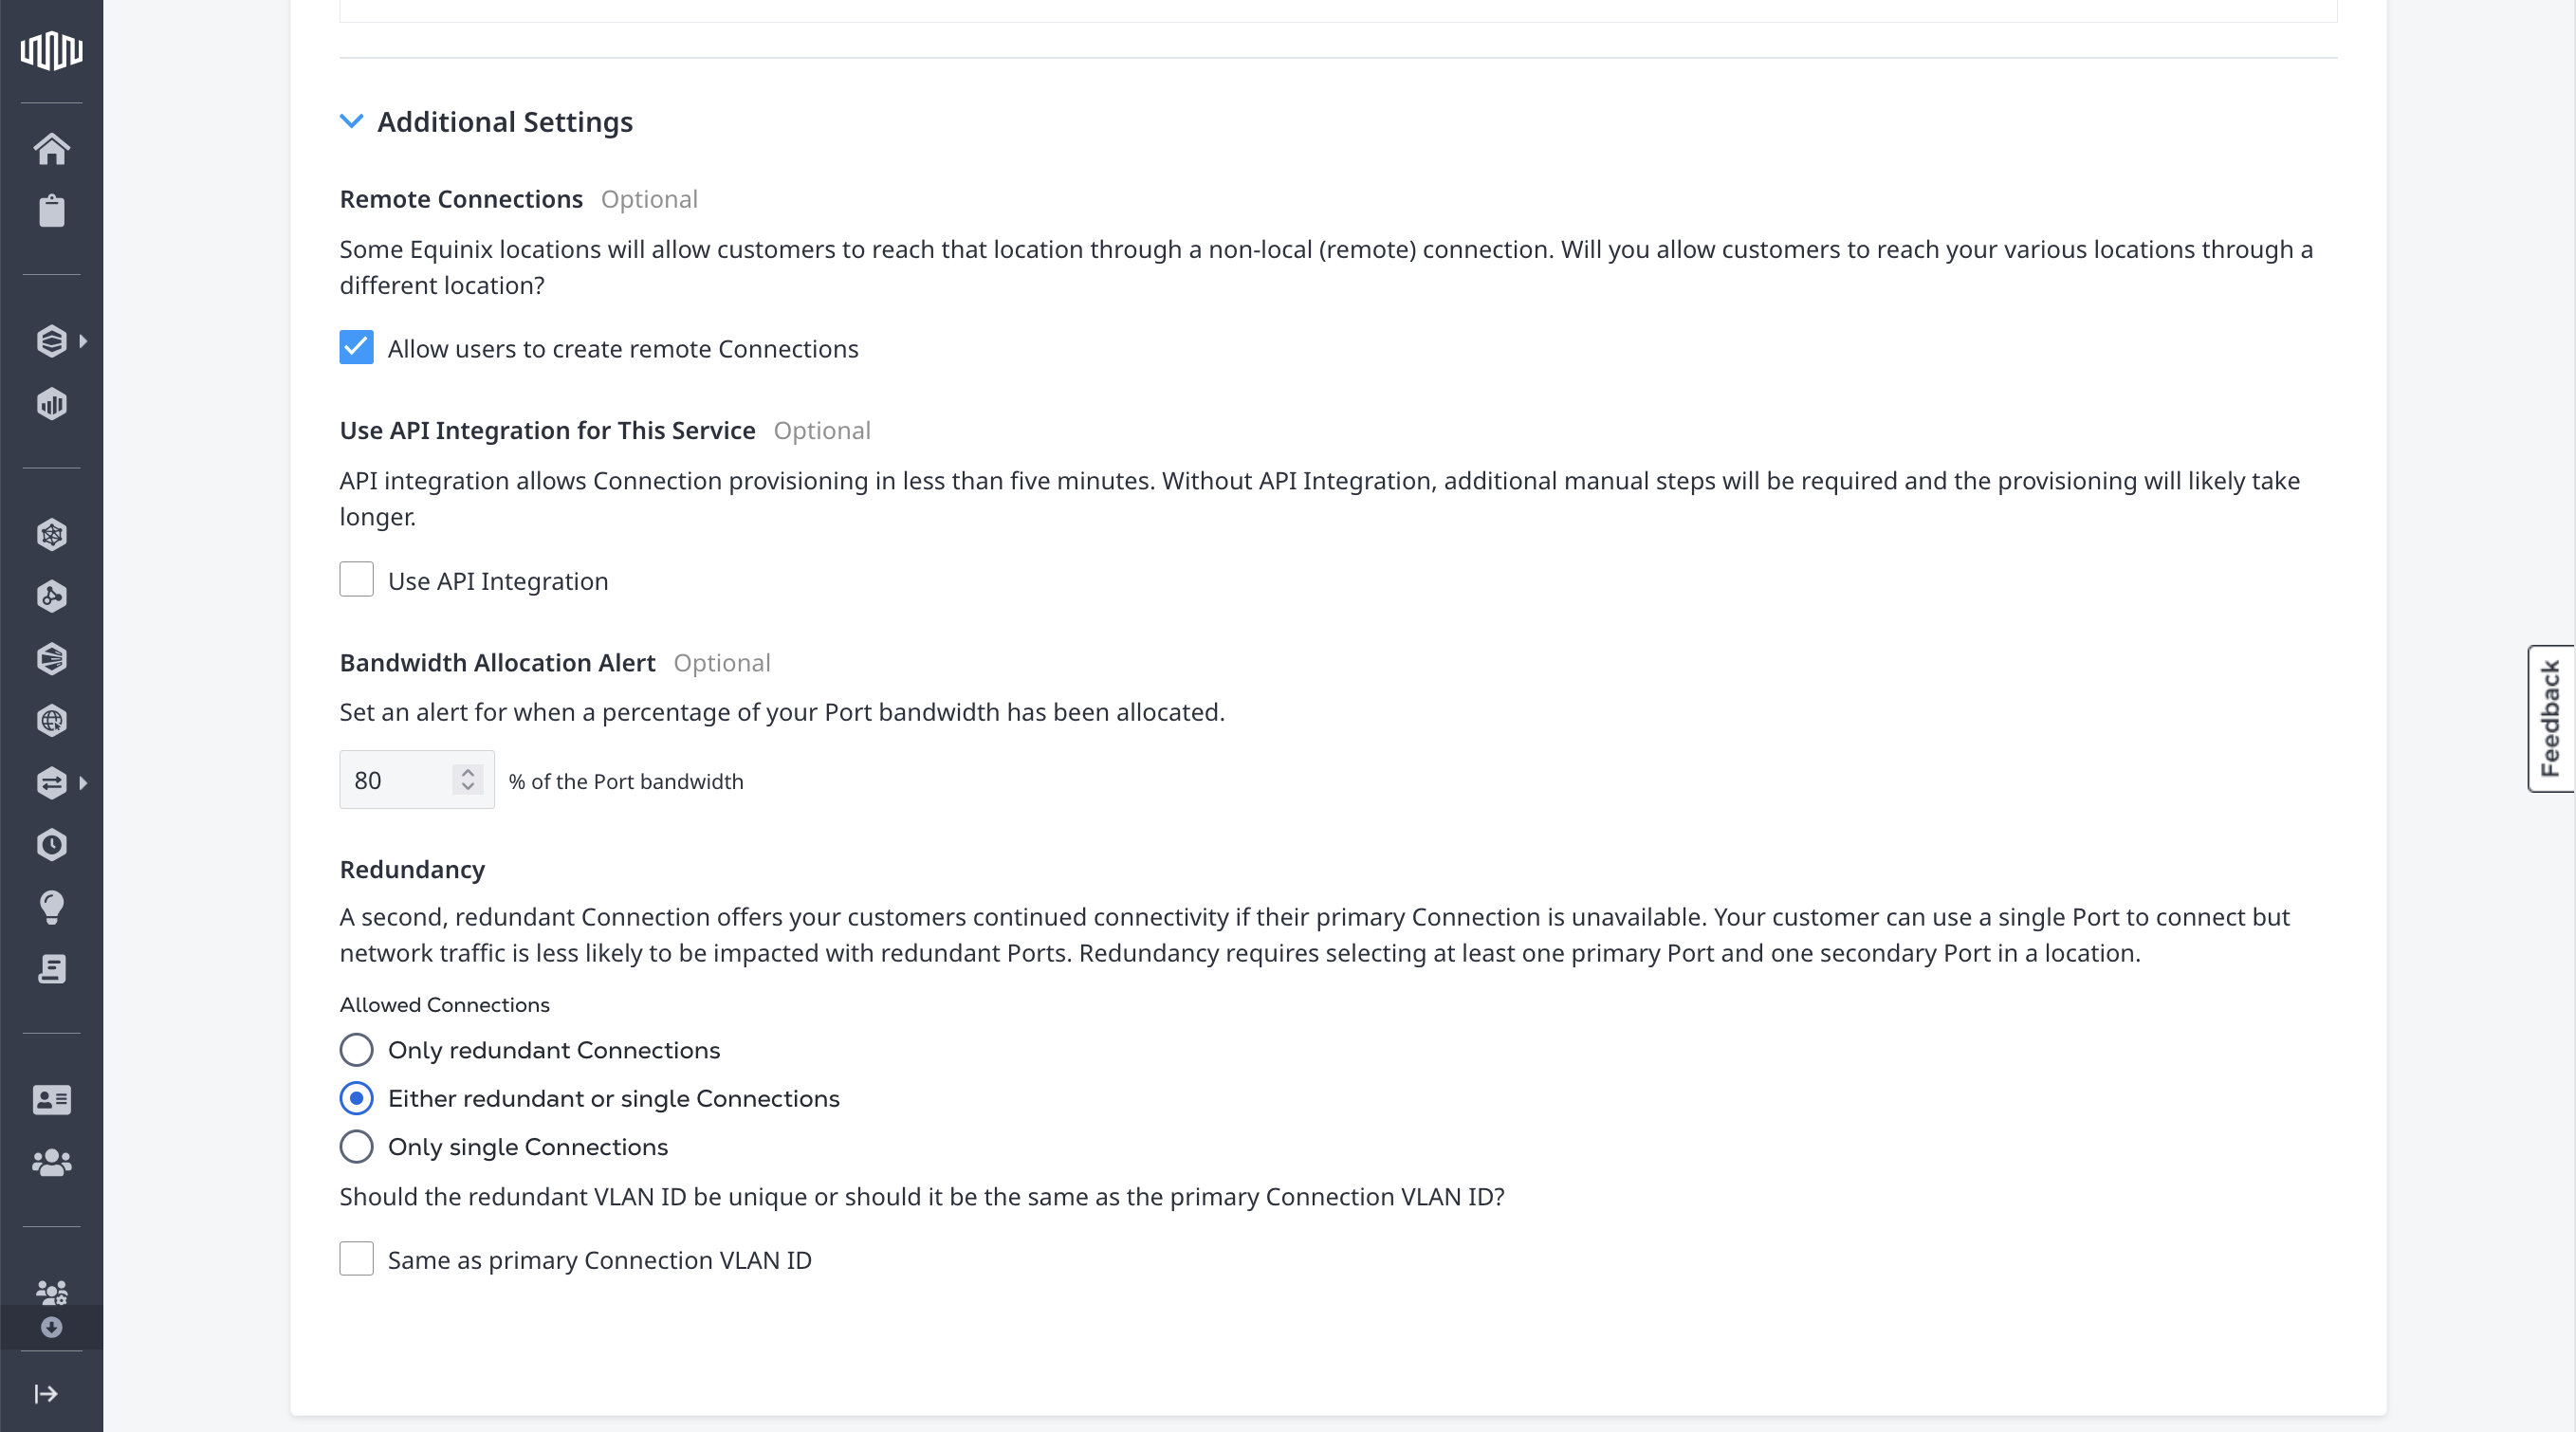
Additional Location and Port Settings
-
Remote Connections – Select this option to allow users to create inter-metro connections to your services. There is no additional charge to the service provider when inter-metro connections are created to your service. The initiator of the connection will be charged.
-
Use API Integration for This Service – Select this option only if you have worked with our development teams to integrate with your APIs. If you selected this option and you are eligible, enter the Integration ID and select Auto-assign Port and VLAN (if desired).
-
Bandwidth Allocation Alert – Enter a bandwidth percentage to trigger an alert when the committed (sold) connection bandwidth reaches the percentage specified. For example, if you have a 10G port and you enter 80%, you will start to get bandwidth notifications when you have sold 8G total bandwidth of virtual connections to your port.
-
Redundancy – Select which redundancy options customers have when creating connections to your Service Profile. Redundancy requires selecting at least one primary Port and one secondary Port in a location.
- Only Redundant Connections – If you select this option, Equinix Fabric enforces redundancy and requires all customers to create redundant connections to your service.
- Either Redundant or Single Connections – When customers create a connection to your Service Profile have the option to create a single connection or a redundant connection.
- Only Single Connections – Customers are only be able to create a single connection to your Service Profile. A single connection can either be a primary or secondary connection.
Click Next: Bandwidth.
Bandwidth
Select as many bandwidth options as you want to make available to customers connecting to your services. You can also enter custom bandwidths.
Maximum supported bandwidth is 50 Gbps.
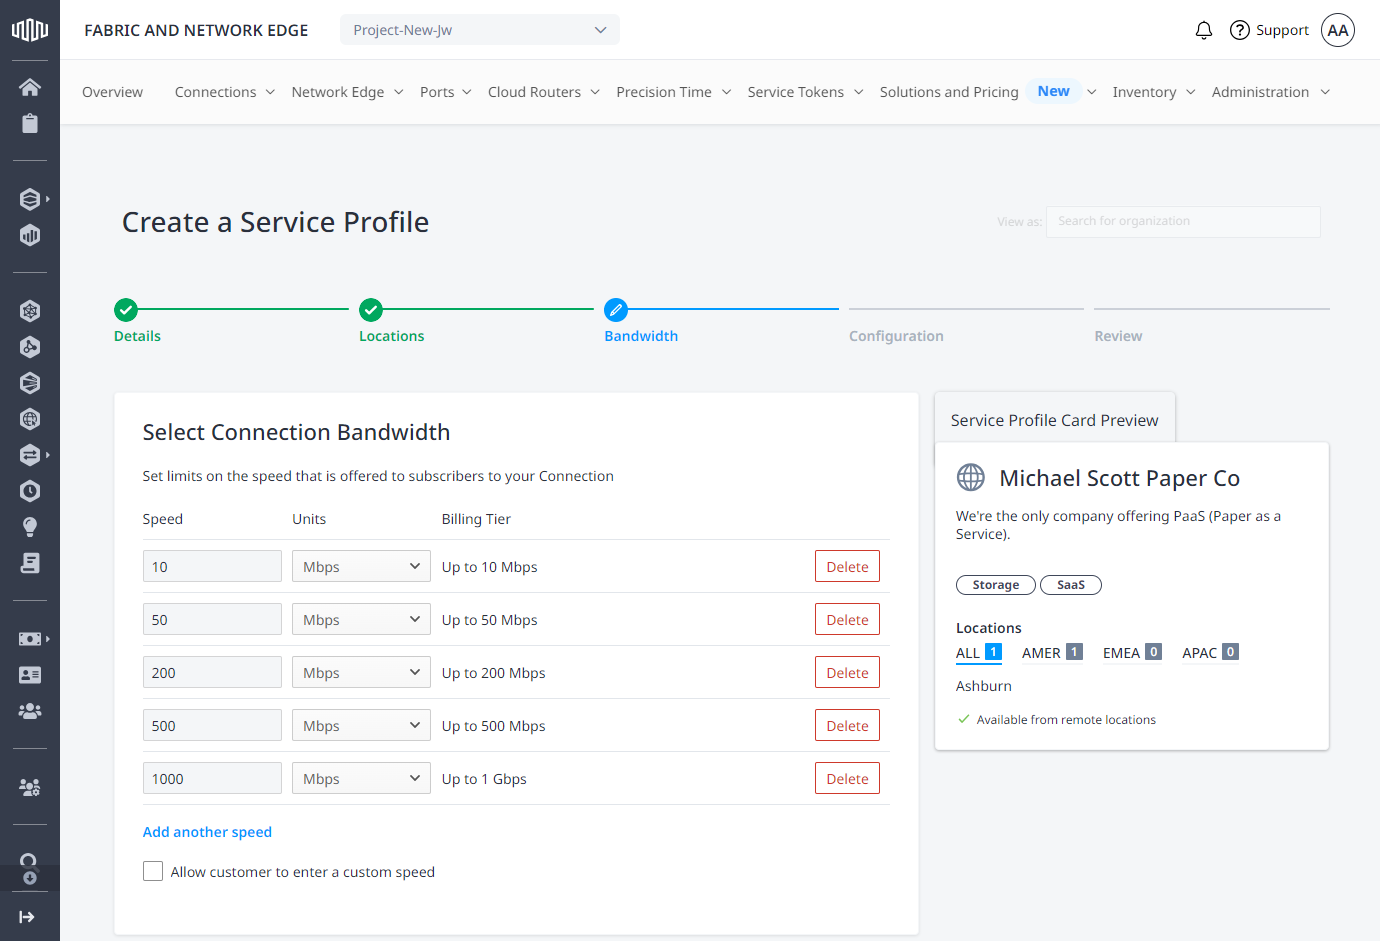
Click Next: Configuration.
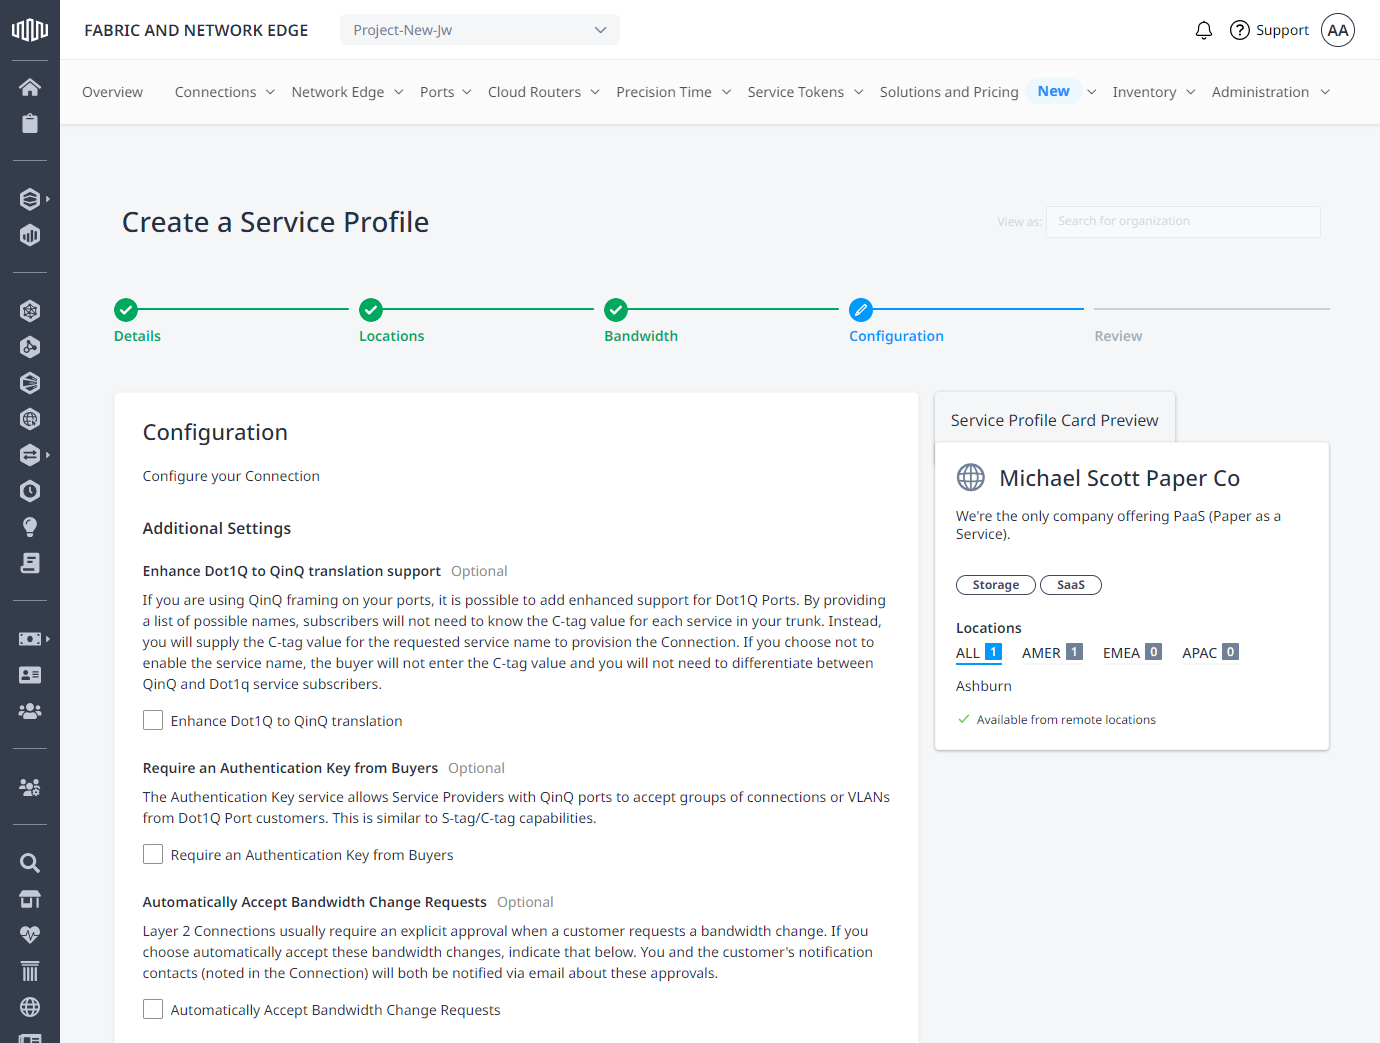
Configuration
Configure any additional settings for the connections to your service.
-
Enhance Dot1q to QinQ translation support (Optional) – Select to add enhanced support for subscribers with Dot1q ports if you are using QinQ framing on your ports. By providing a list of possible names, subscribers don't need a C-Tag value for each service in your trunk. Instead, you need to supply a C-Tag value for the requested service name to provision the connection. If you choose to disable the service name, the buyer does not enter the C-Tag value, and you don't need to differentiate between QinQ and Dot1q service subscribers.
-
Require an Authentication Key from Buyers (Optional) – Select if you have QinQ ports and want to accept groups of connections or VLANs from Dot1q port customers. This is like S-Tag and C-Tag capabilities. If enabled, each connection (by the same user) to your service profile will be assigned an authentication key that can be reused for subsequent connections to that same profile. All connections must have the same bandwidth and only the first connection will be chargeable.
-
Automatically Accept Bandwidth Change Requests (Optional) – Select to automatically accept bandwidth modifications to your service profile without the need to approve manually. The default option is set to no auto approval.
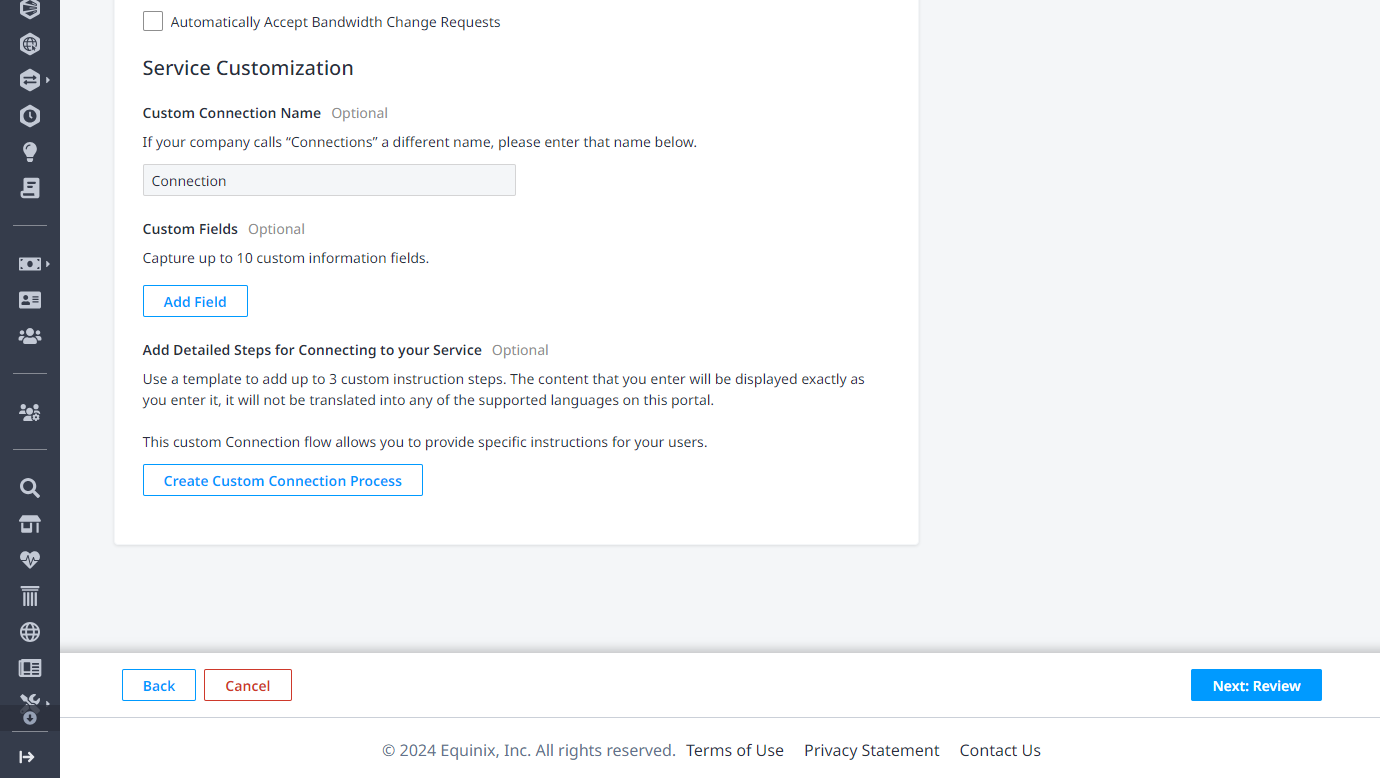
Service Customization
Use these optional settings to customize your service information in the portal.
-
Custom Name for Connection – If your company uses another name for “connection”, enter it and this custom name will be provided when customers are creating a connection request to your service.
-
Custom Fields – Add up to 10 custom information fields. These are metadata fields that can be mandatory or optional and will be included in the notification email when a connection request is made to your service profile. Add any additional information you want to collect from your customers ,such as BGP information or account IDs.
-
Add Detailed Steps for Connecting to Your Service – Add up to three custom instruction steps.
- Click Create Custom Connection Process.
- Click Edit to edit the steps.
- Click Save.
Click Next: Review.
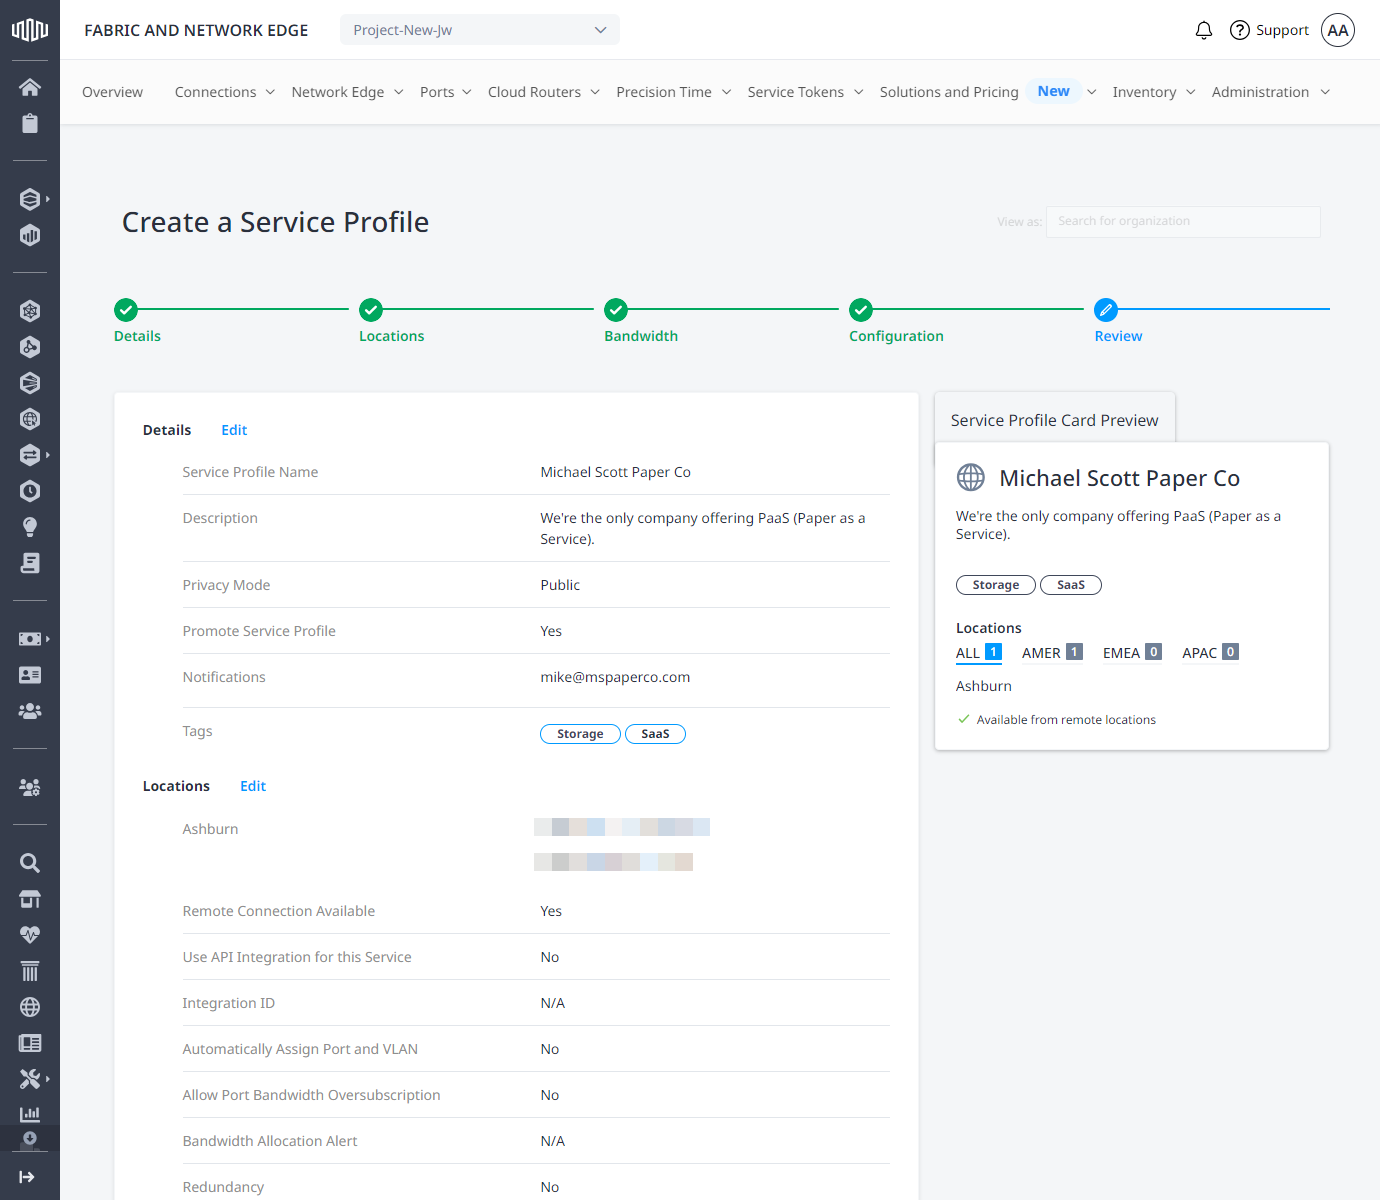
Review and Create
Review the information for your Service Profile's Details, Locations, Bandwidth, and Configuration.
The Service Profile Card Preview shows how your service profile appears in the Equinix Customer portal.
Review the details and click Create Service Profile.
The confirmation message indicates that your service profile is being reviewed by an Equinix Admin. If your profile is public, your profile is not be visible in the Equinix Customer portal until it has been approved. You will receive an email notification when the profile is approved.
You can edit or view your new service profile from the Administration menu by selecting My Service Profiles in the Equinix Customer portal.
Adding Your Logo
Logos can now be added to your company profile that is created in the Fabric portal. Creating a Company Profile.