Migrate Virtual Connections to a New Port
Equinix Fabric users can migrate their own port-based virtual connections without needing to open a support ticket. To migrate a connection, you need the Fabric Connection Manager or Fabric Manager role.
Connection and Port Requirements
In order to qualify for self-service connection migration, the connection and ports must meet the following requirements:
-
The connection must be an EVPL connection.
-
Both origin and destination for the connection must be ports.
-
The new origin or destination port must be in the same billing account as the existing port.
-
The new port must have the same port priority (primary or secondary) as the existing port.
noteThis requirement is relaxed if the virtual connection has a mismatch of priority (primary/secondary) between origin (A-side) and destination (Z-side) ports. A port of a different priority is eligible for migration to correct the mismatch. See Connection Resilience and Redundancy for more details.
-
The new port must have the same encapsulation as the existing port (Dot1Q, QinQ).
-
The new port must be in the same metro as the existing port.
-
The new port must have the appropriate capacity and VLAN availability.
Connections created with Service Tokens, Fabric Cloud Routers, Service Providers, or networks cannot be migrated. If you need to migrate such connections, you must create a new one and delete the existing one.
Prerequisites
- Portal
- API
-
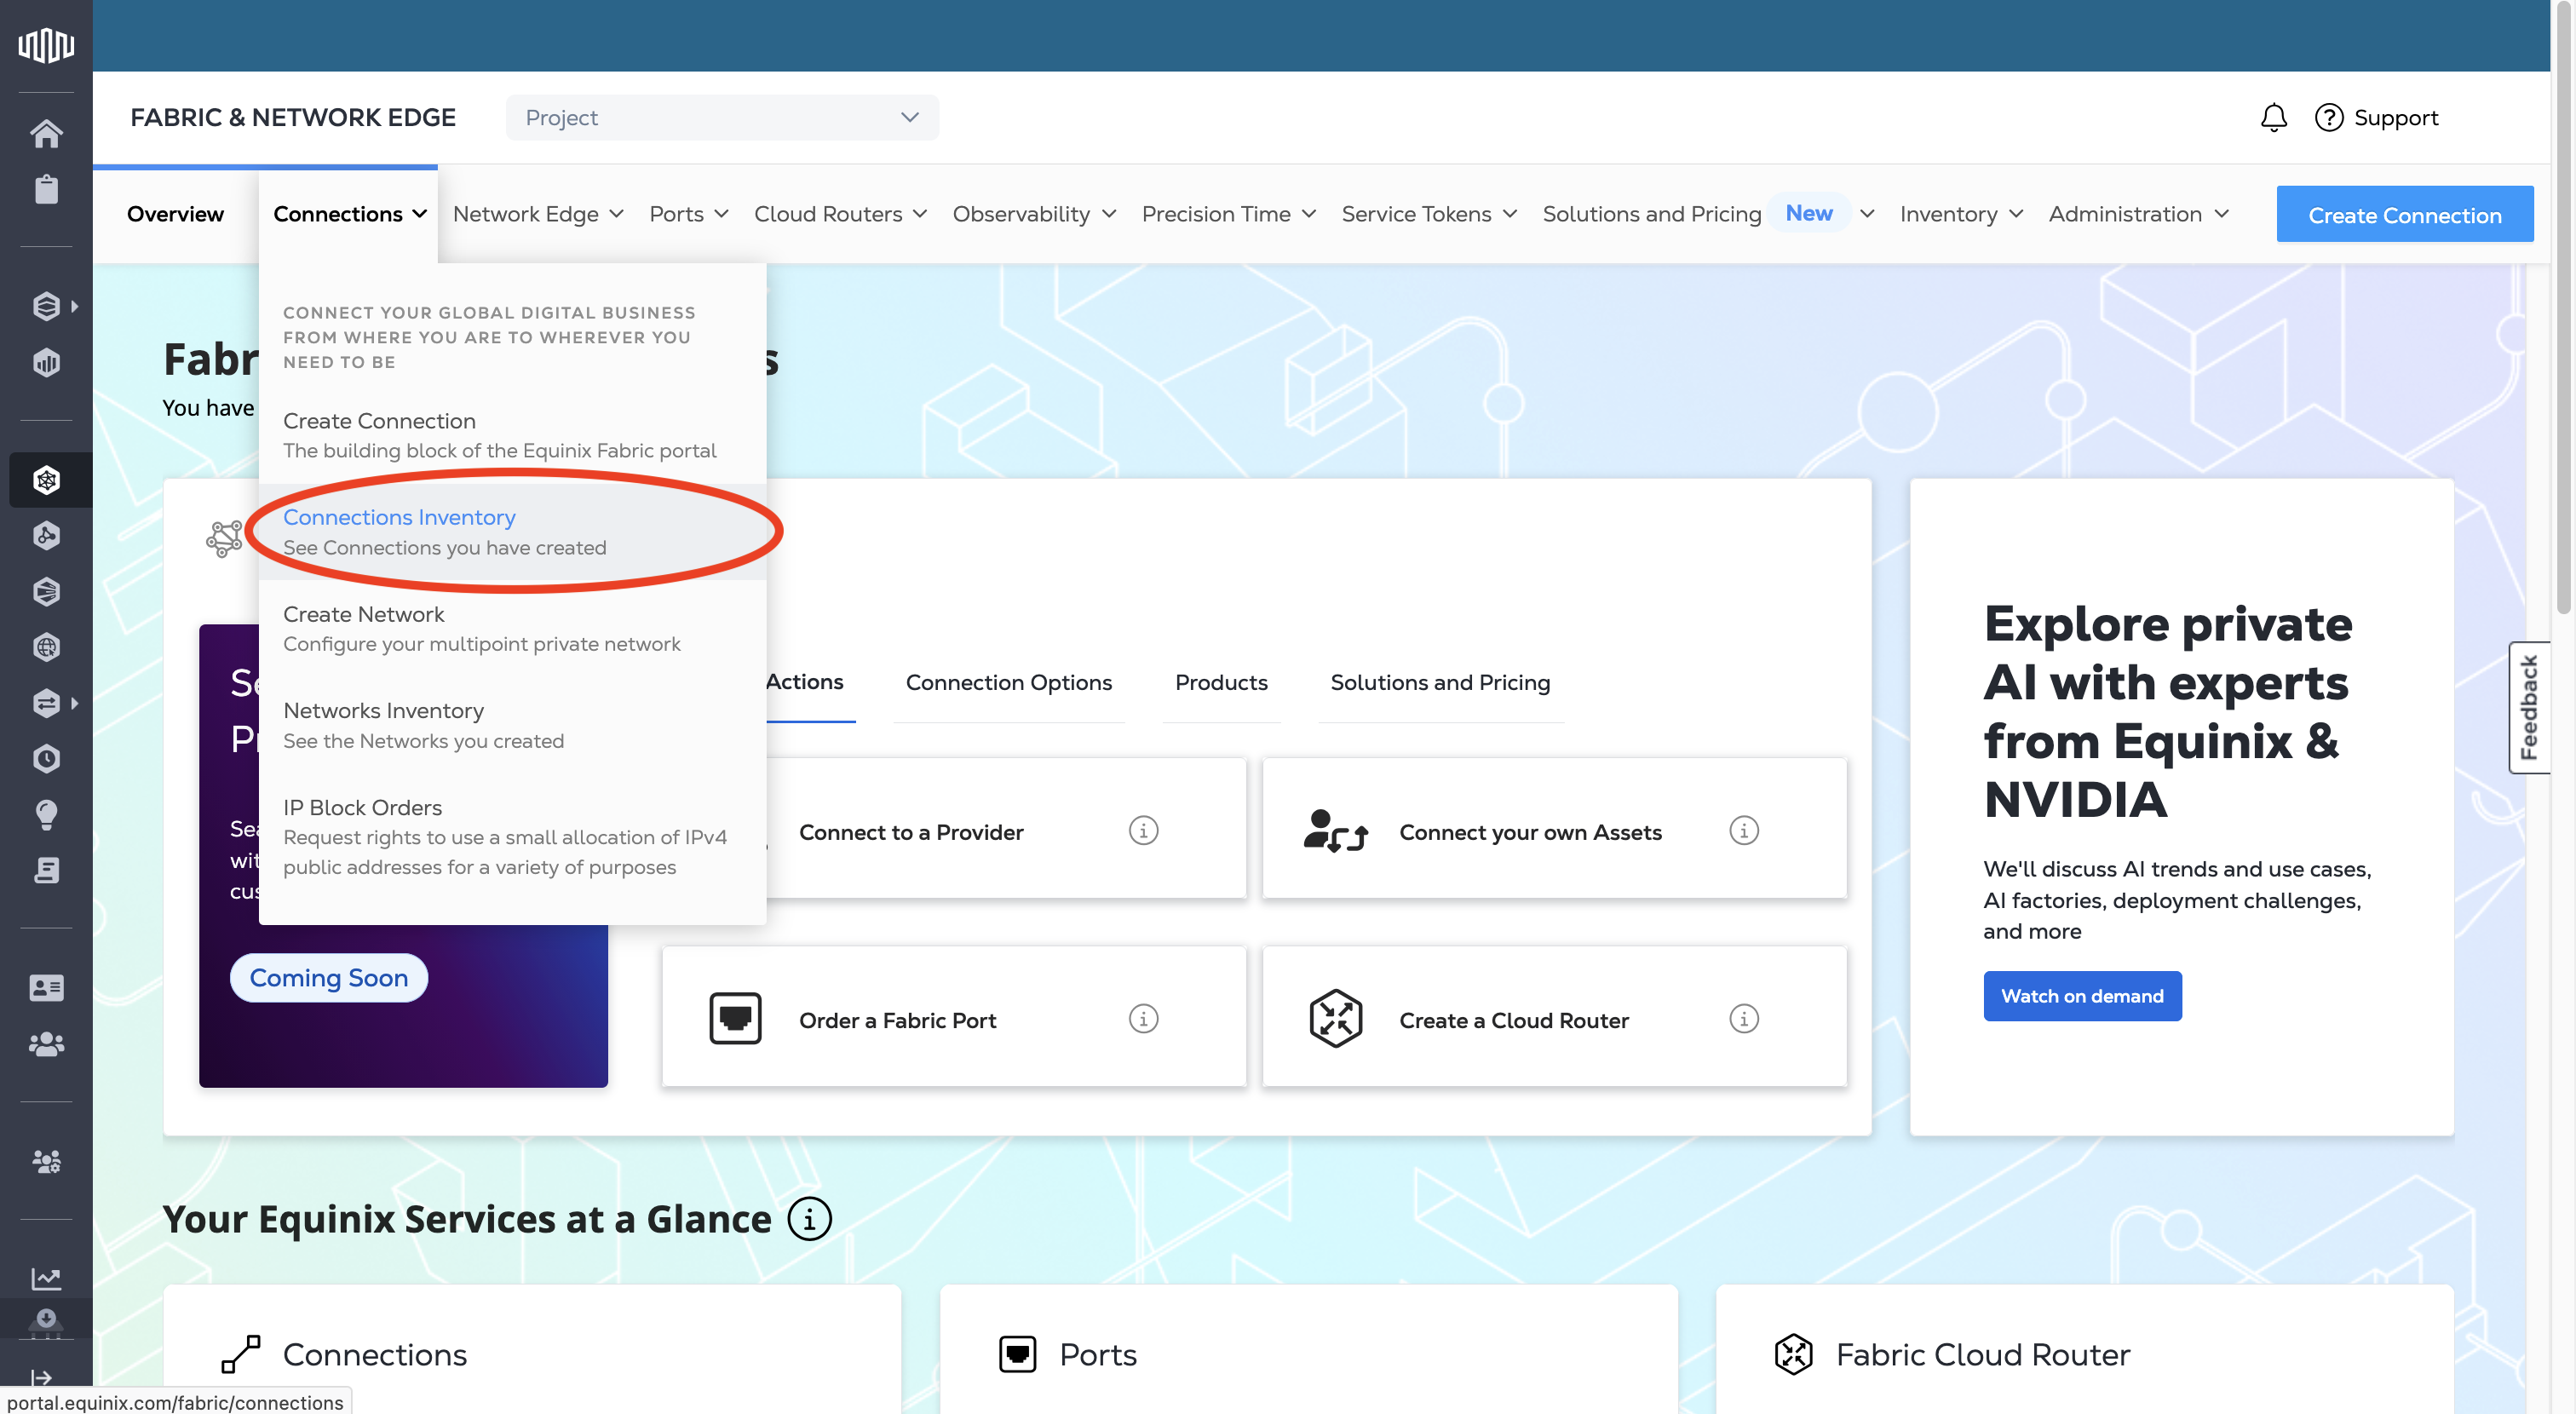
Sign in to the Customer Portal and navigate to the Fabric Dashboard.
-
From the Connections menu, select Connections Inventory.
-
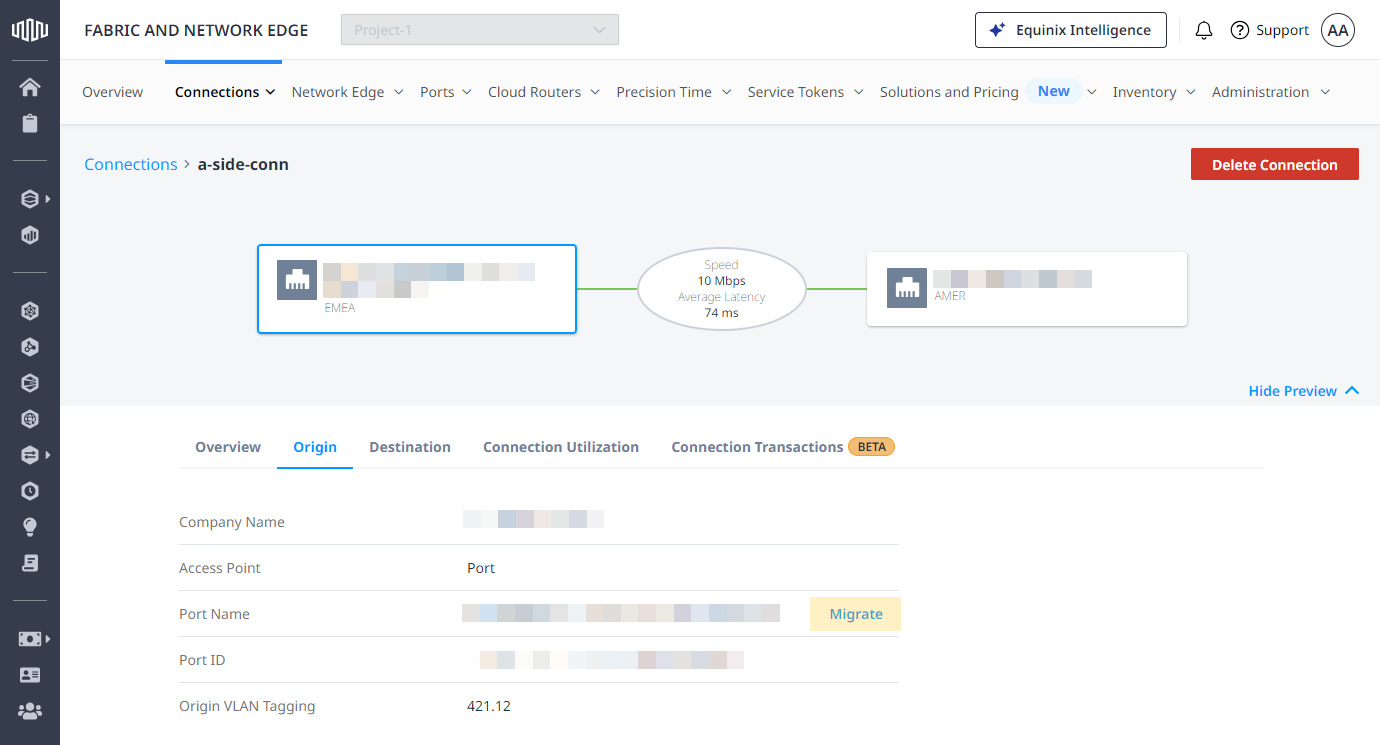
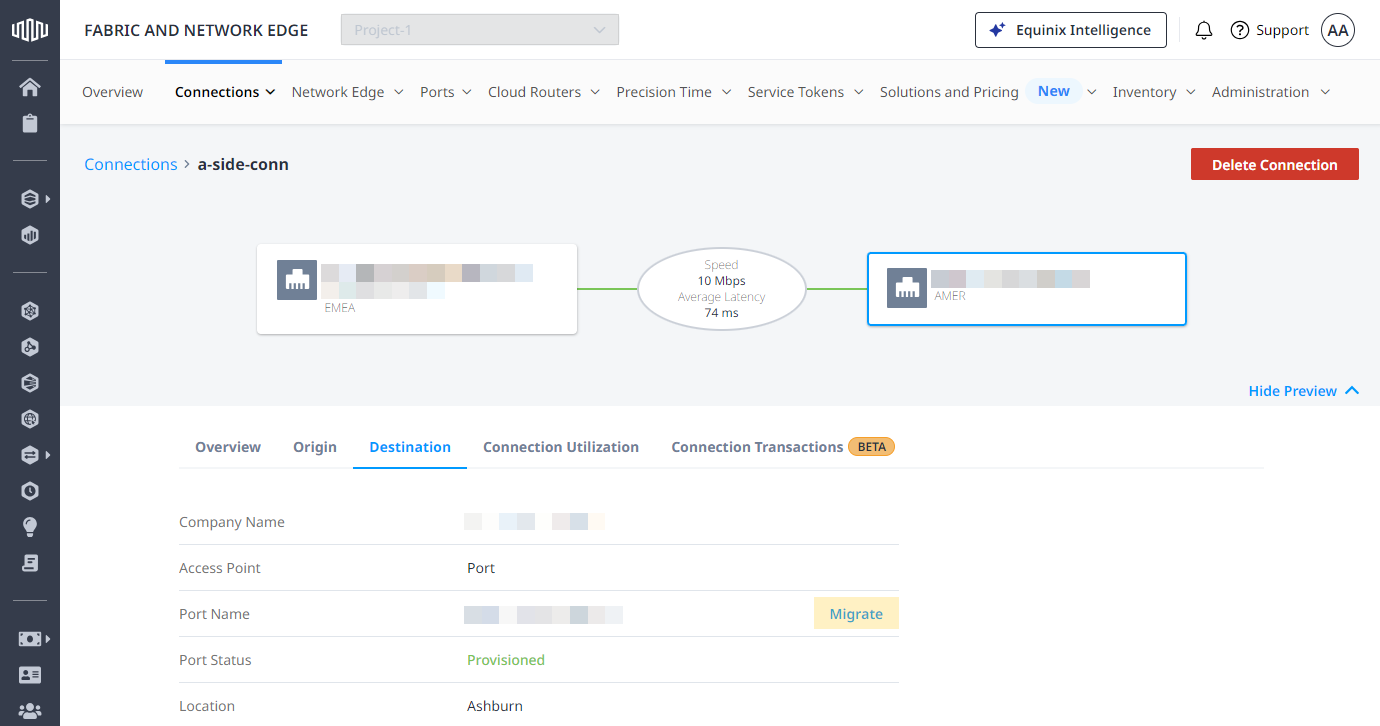
Click the connection you want to migrate to open its Connection Details.
-
Authenticate - Submit your user credentials, Client ID, and Client Secret for OAuth2 authentication. Refer to API Authentication for instructions on how to call the OAuth API to validate and authenticate your credentials.
-
Determine the existing connection ID. Use the
/fabric/v4/connections/searchendpoint to retrieve a list of connections and determine the ID of the connection that you want to migrate to a different port. -
Get the port information using the
/fabric/v4/portsendpoint for the ID of the port that you want to migrate your connection to.
A-Side Migrations
- Portal
- API
To migrate the A-side of your connection to a different port:
-
From the Connection Details, click Origin.
-
In the Port Name section, click Migrate.
-
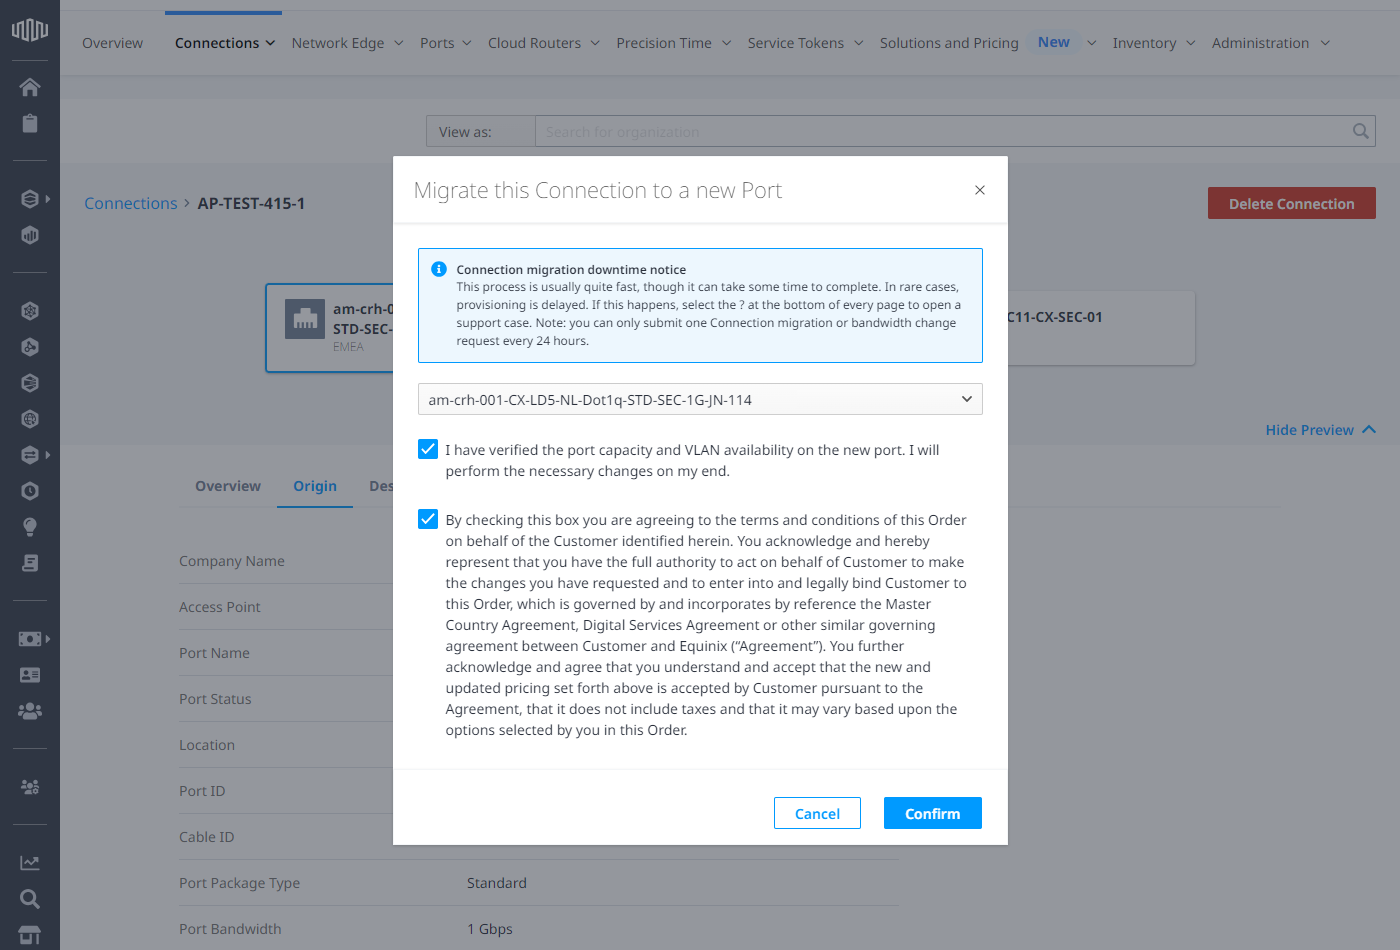
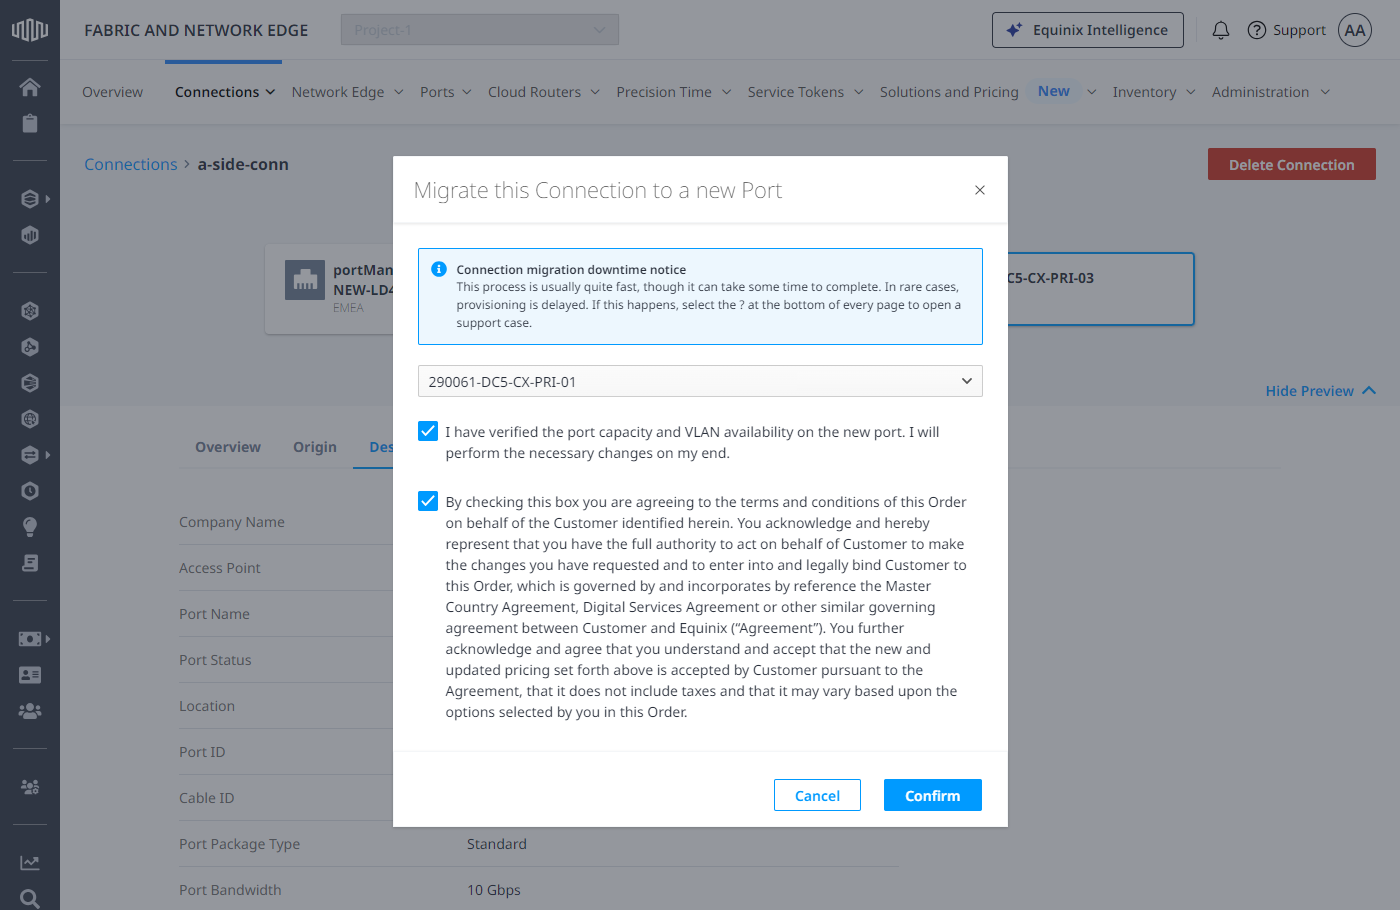
In the Migrate this Connection to a new Port section, select a port from the drop-down list. Only eligible ports are available in the drop-down list.
noteIf the port you select is not the same type as the original port, you get a message indicating that charges for the connection will change. The Pricing Overview section will indicate the new charges.
-
In the Migrate this Connection to a new Port dialog:
- Check I have verified the port capacity and VLAN availability on the new port. I will perform the necessary changes on my end.
- Check to agree to the terms and conditions.
-
Click Confirm.
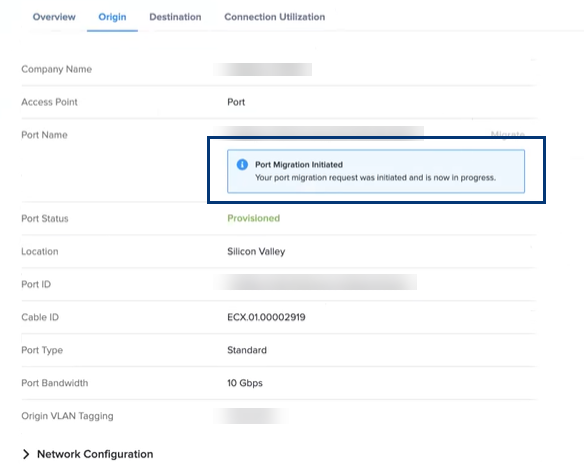
The Connection Details indicates that the migration has been initiated.
To migrate the A-side of your connection to a different port, send a PATCH request to the /fabric/v4/connections/{id} endpoint.
In the body of the request, specify:
- The
opasreplace - The
pathas/aSide/accessPoint/port/uuid - The
valueas the UUID of the port that is the new A-side of the connection.
Sample cURL Request:
curl -X PATCH 'https://api.equinix.com/fabric/v4/connections/{connection_id}' \
-H 'content-type: application/json' \
-H 'authorization: Bearer <token>' \
-d '[{
"op": "replace",
"path": "/aSide/accessPoint/port/uuid",
"value": "<new_port_uuid>"
}]'
To safely validate this request in production without changing any connections, see Testing in Production (API Dry Run).
Once the migration is successful, the same connection cannot be migrated again within a 24 hour period. This restriction exists because of how Equinix updates connection billing and invoicing; each migration triggers a billing update, and the system requires a 24-hour interval before allowing another migration for the same connection.
One exception to the 24-hour limitation is if your connection is local (for example, Seattle to Seattle) and the A-side port migration occurs between ports that are in an Unlimited Connection Package. These connections can be migrated more than once within a 24-hour period because there is no billing change to the connection.
Z-Side Migrations
Z-side migrations are supported for connections that terminate on a port that the user has access to.
If the connection you would like to migrate terminates on a service profile that your organization manages, you can raise a support ticket to request enabling of your service profile for Z-side migrations on those ports.
- Portal
- API
To migrate the Z-side of your connection to a different port:
-
From the Connection Details, click Destination.
-
In the Port Name section, click Migrate.
-
In the Migrate this Connection to a new Port section, select a port from the drop-down list. Only eligible ports are available in the drop-down list.
noteSelecting a port of a different billing type for Z-side migrations does not incur changes in the billing of the connection.
-
In the Migrate this Connection to a new Port dialog:
- Check I have verified the port capacity and VLAN availability on the new port. I will perform the necessary changes on my end.
- Check to agree to the terms and conditions.
-
Click Confirm.
The Connection Details indicates that the migration has been initiated.
To migrate the Z-side of your connection to a different port, send a PATCH request to the /fabric/v4/connections/{id} endpoint.
In the body of the request, specify:
- The
opasreplace - The
pathas/zSide/accessPoint/port/uuid - The
valueas the UUID of the port that is the new Z-side of the connection. Sample cURL Request:
curl -X PATCH 'https://api.equinix.com/fabric/v4/connections/{connection_id}' \
-H 'content-type: application/json' \
-H 'authorization: Bearer <token>' \
-d '[{
"op": "replace",
"path": "/zSide/accessPoint/port/uuid",
"value": "<new_port_uuid>"
}]'
Subsequent Z-side migrations can be performed without any limitations.