Connect My Assets Using E-Line
An E-Line service enables point-to-point connectivity between Equinix Fabric ports, Network Edge virtual devices, or Fabric Cloud Routers. Connections can be VLAN-based between two EVPL (.1q or QinQ) ports or virtual devices, or port-based (highly transparent) between two EPL ports. While EPL is highly transparent, filtering only the pause frames, EVPL is required to either peer or drop most of the Layer 2 control protocols.
This feature can be used by any Fabric customer, including sub-accounts of resellers.
When creating an E-Line connection, make sure that both ends of your connection are terminated on the same redundancy plane (primary/red or secondary/blue).
To connect your own assets using E-line:
-
Log in to the Customer Portal > Fabric Dashboard.
-
From the Connections menu, select Create Connection.
-
On the My Own Assets card, click Connect to My Own Assets.
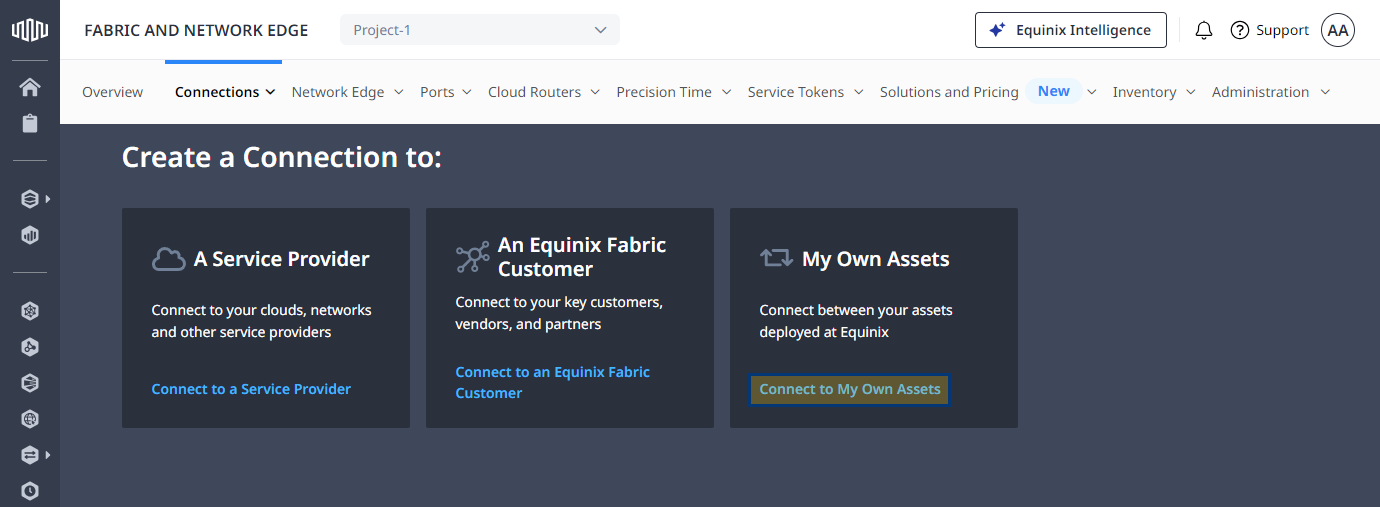
-
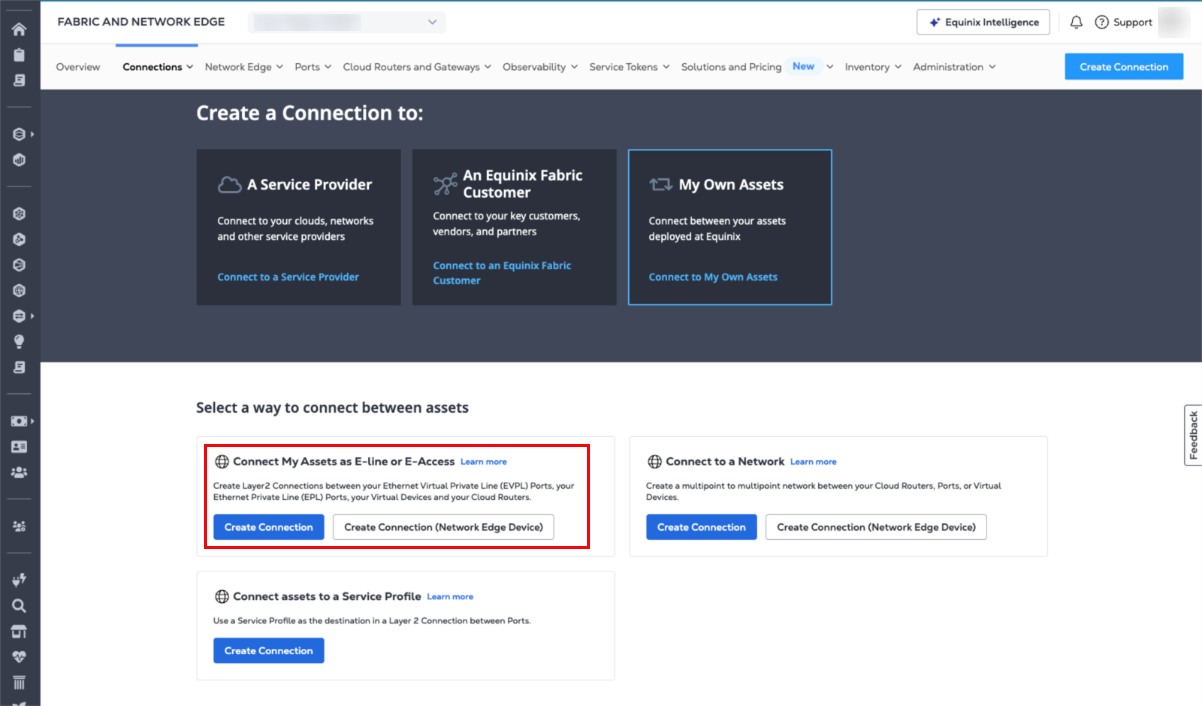
On the Connect My Assets as E-Line or E-Access card, click Create Connection.
Configure Your Origin
On the Configure Your Origin page, configure your connection depending on the origin asset type. Choose between the following origin types (if available):
- Port
- Service Token
- Virtual Device
- Fabric Cloud Router
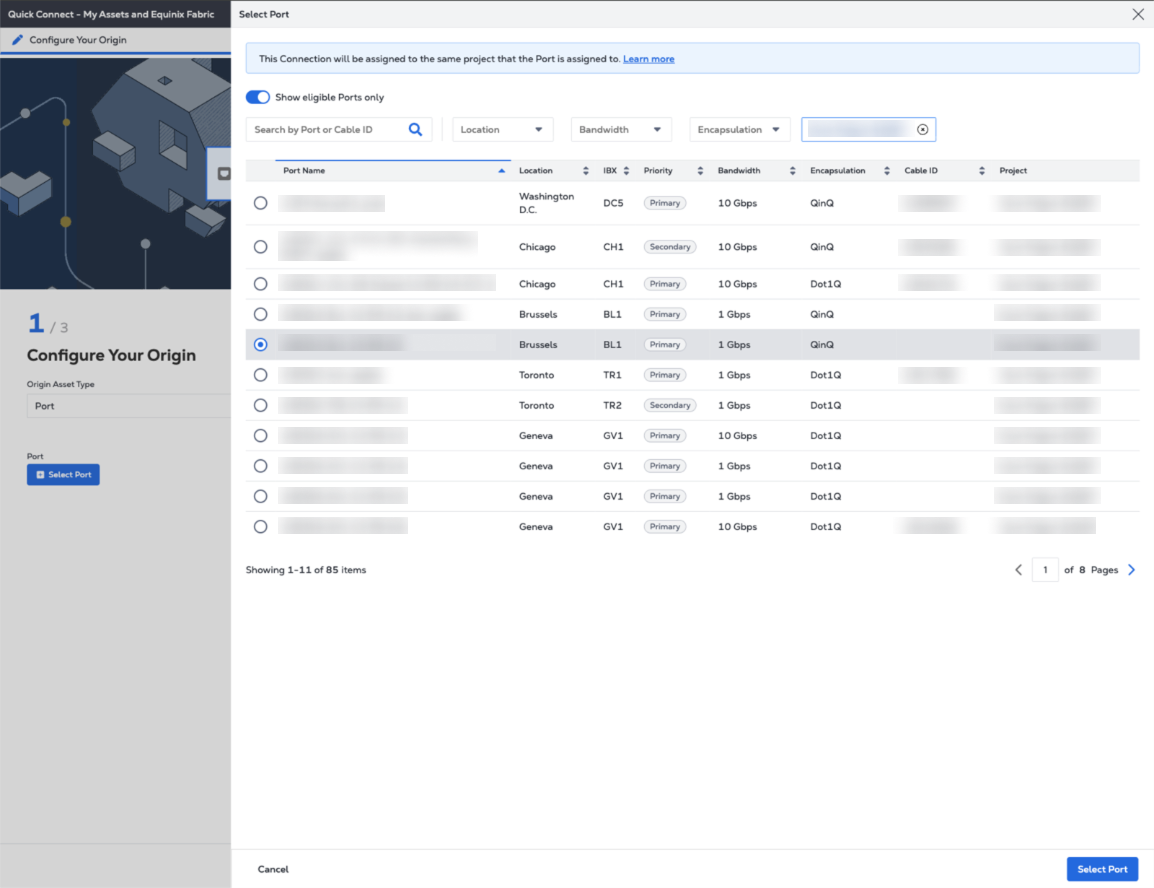
Port
- From the Origin Asset Type dropdown, select Port.
- Click Select Port to select your origin connection port.
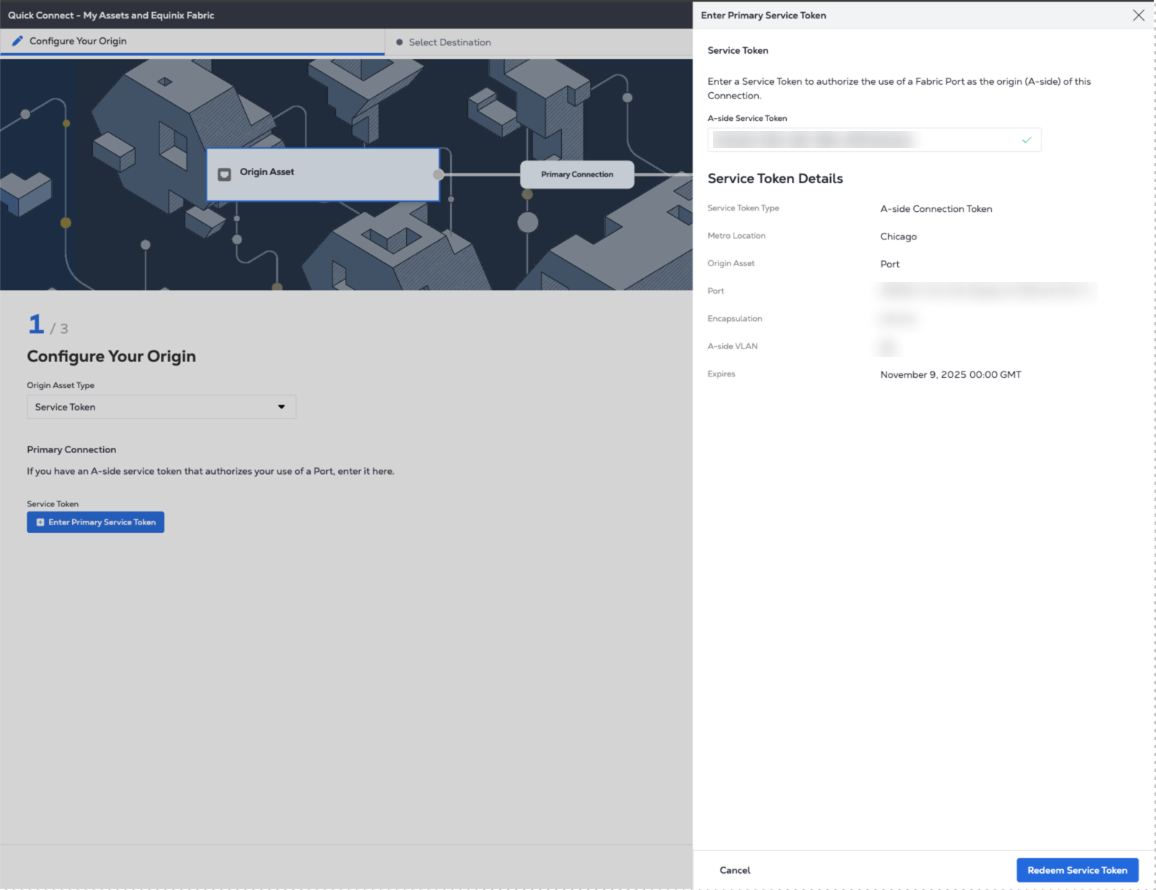
Service Token
- From the Origin Asset Type dropdown, select Service Token.
- Click Enter Primary Service Token, provide the service token, then click Redeem Service Token.
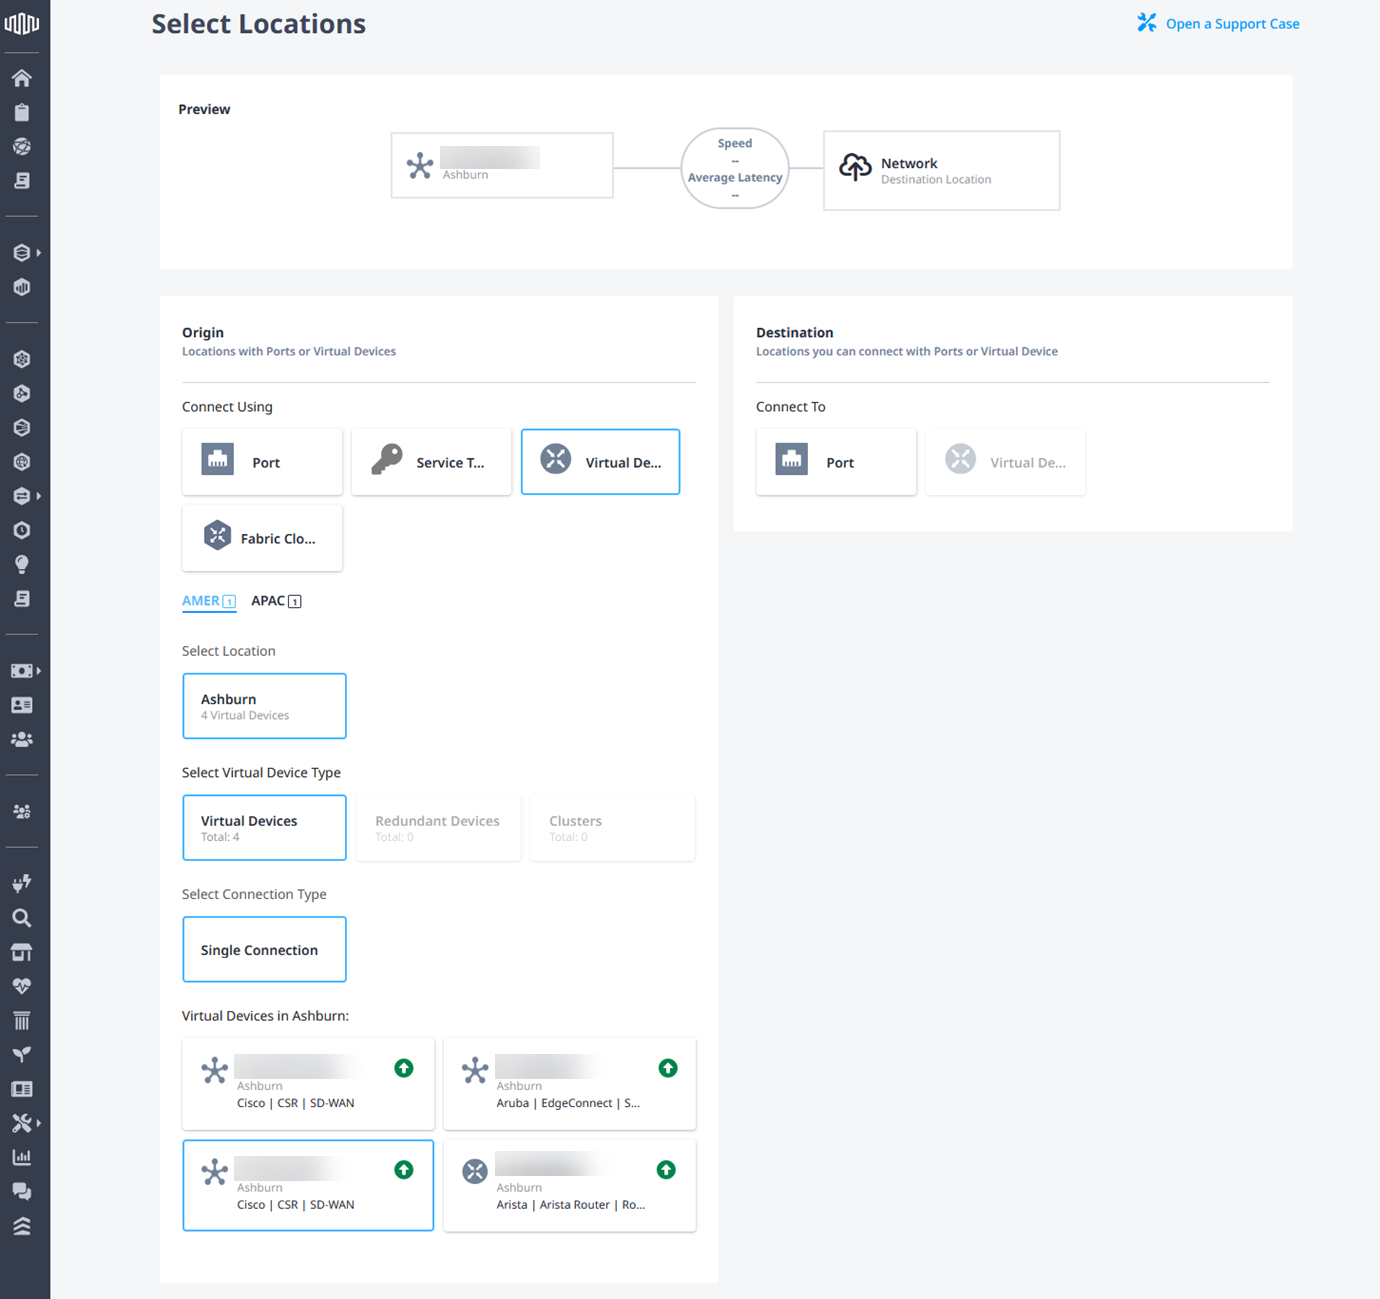
Virtual Device
For Virtual Devices, use the existing flow to create E-Line connections for both A-side and Z-side.
- In the Connect Using section, click Virtual Device.
- Select a location.
- Choose a virtual device type.
- Select a connection type.
- Choose a virtual device instance.
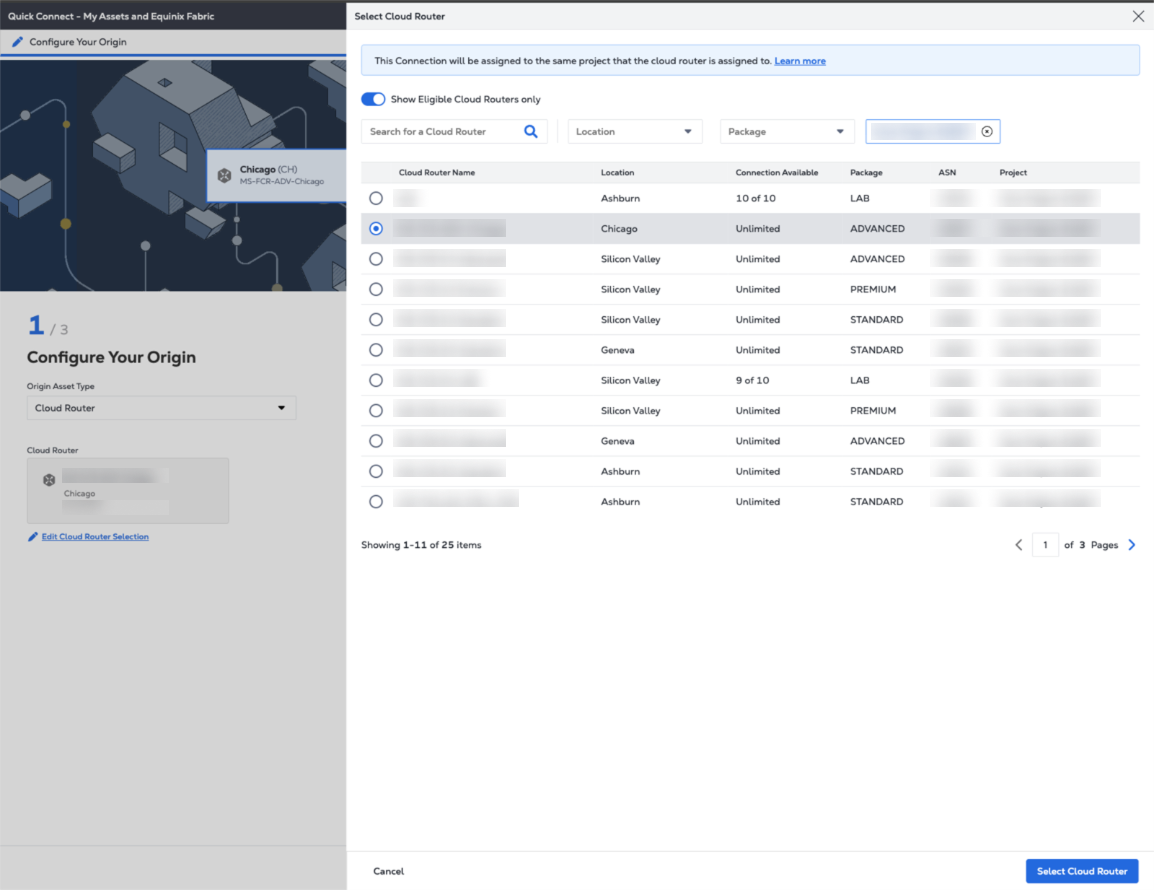
Fabric Cloud Router
- From the Origin Asset Type dropdown, select Fabric Cloud Router.
- Click Select Cloud Router, select a cloud router instance, then click Select Cloud Router.
Select Destination
On the Select Destination page, configure the destination port and asset. Choose Port or Virtual Device as the destination type, if available.
Port
- From the Destination Asset Type dropdown, select Port.
- Click Select Port to select the destination connection port.

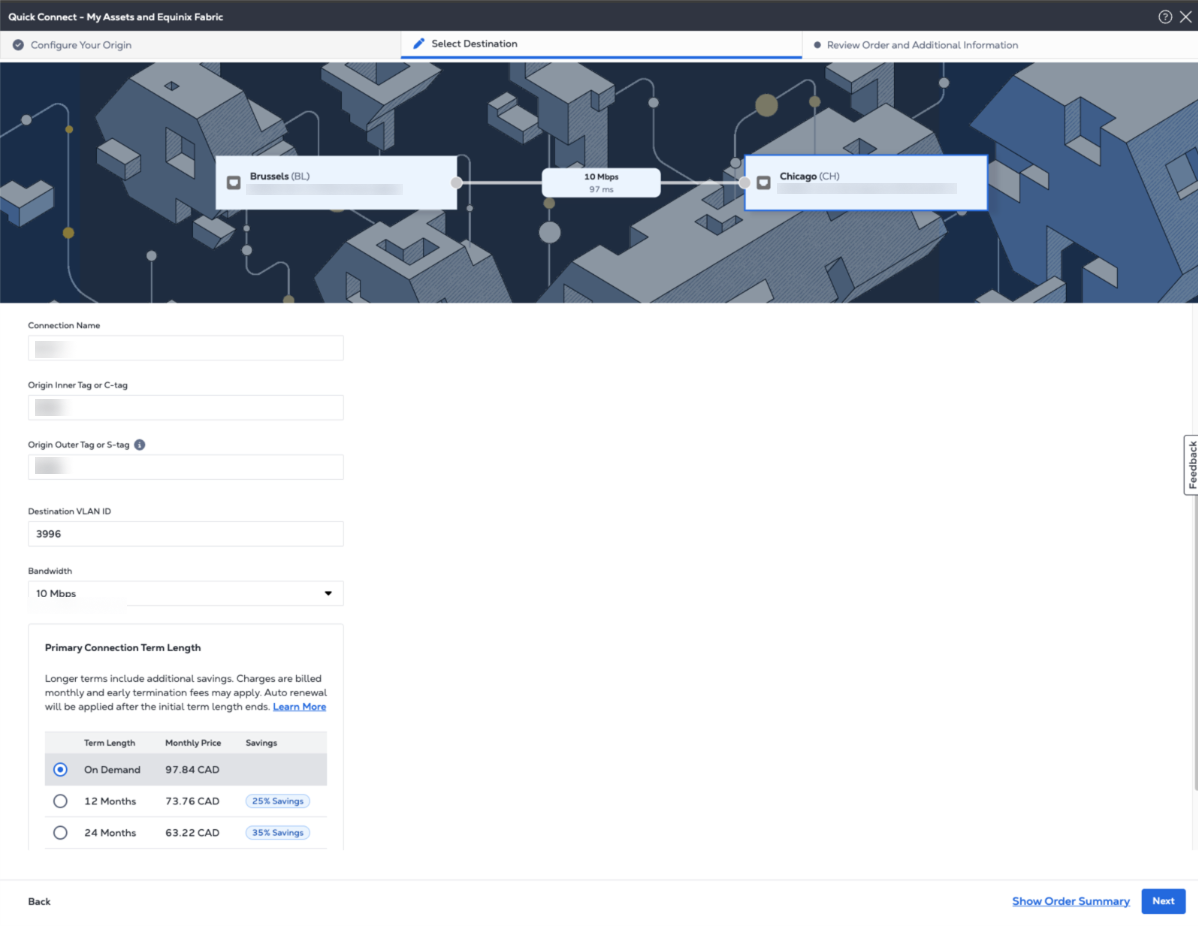
- Enter the connection name.
- For Dot1q ports, enter a VLAN ID. For Qinq ports, enter a Customer VLAN Tag (C-tag) and a Service VLAN Tag (S-tag).
- Enter the Destination VLAN ID.
- Select the connection bandwidth.
- Select the connection Term Length.
- If Enable Geo Zones is turned on, this option ensures that connection traffic remains within the borders of one or more specified countries. See Fabric Geo Zones.
- Click Next.
Virtual Device
The Virtual Device option is available in select metros, for connections originating from a Fabric Cloud Router.
- In the Connect To section, select Virtual Device.
- Select a location.
- Choose a virtual device type.
- Select a connection type.
- Choose a virtual device instance.
- Click Next.
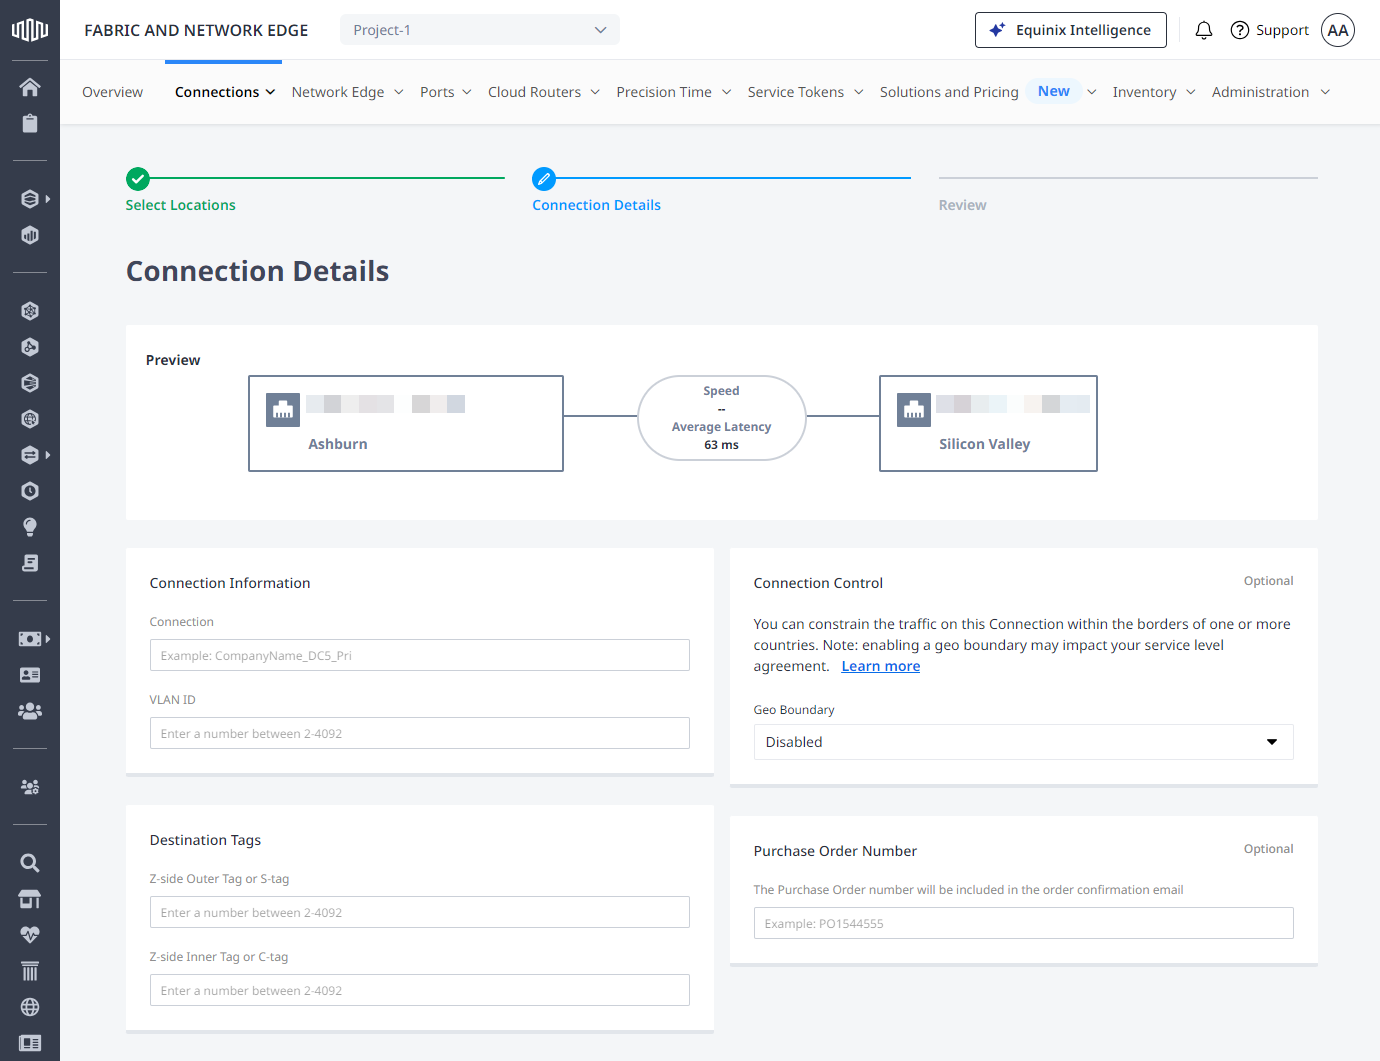
Connection Details
On the Connection Details page:
-
Enter a connection name.
-
Enter origin and destination VLAN identifiers.
-
If Enable Geo Zones is turned on, this option ensures that connection traffic remains within the borders of one or more specified countries. See Fabric Geo Zones.
-
Enter the purchase order number (optional).
-
Select a Connection Speed, then click Next.
Review and Submit
In the Review Order and Additional Information page:
- Review the information in the Origin and Destination sections.
- Use the Notifications field to provide the email addresses of the recipients to be notified about the connection's status. You can add up to 12 email addresses.
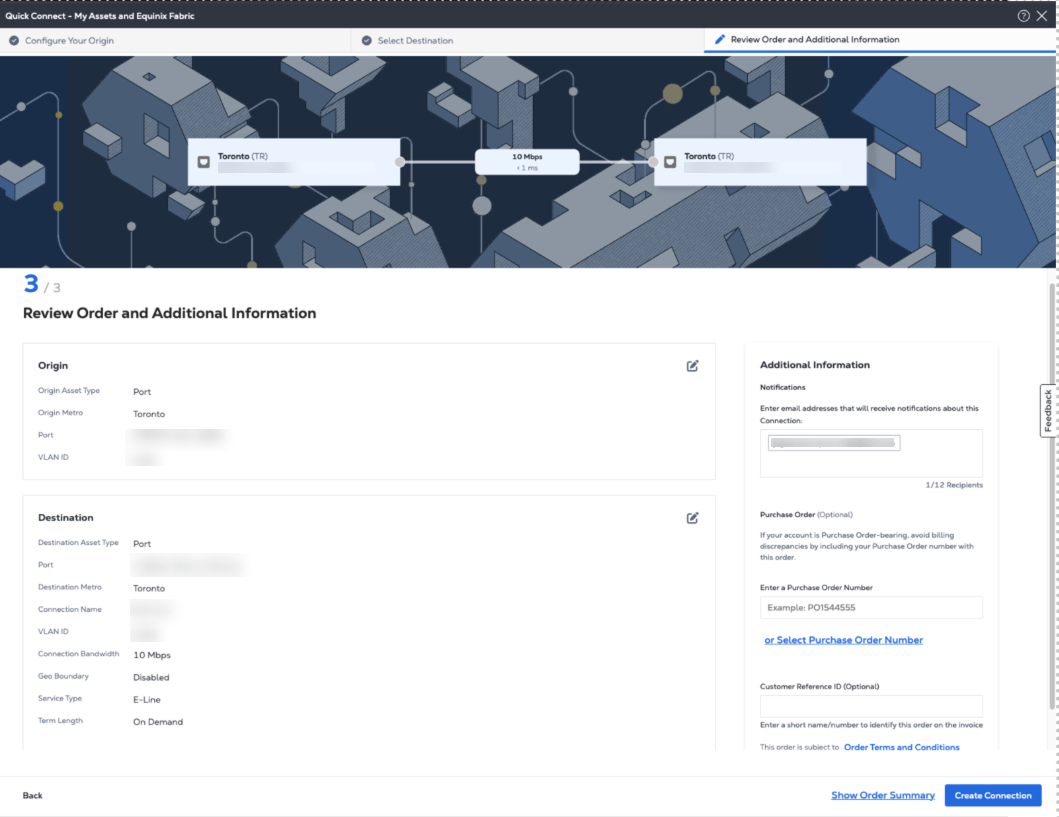
- (Optional) Enter or add order information in the Purchase Order section. Select the Purchase Order number you want to add to your order, then click Done.

- Provide a customer reference identifier that will help you identify this order on your invoice.
- Click Show Order Summary to see order details and connection pricing information.
- When you are ready, click Create Connection.
Navigate to Connections Inventory to monitor your connection's status.