Connect to Microsoft Azure ExpressRoute Metro
ExpressRoute Metro (currently in preview) offers an enhanced resiliency option for Equinix Fabric customers connecting privately to Azure. Using only one service key, customers can provision a circuit with diverse connections to multiple Microsoft Enterprise Edge (MSEE) locations in a Metro. Connecting to Azure cloud through ExpressRoute Metro meets Microsoft’s high resiliency architecture, one of three resilient connectivity frameworks supported by Equinix Fabric.
Availability
Equinix supports ExpressRoute Metro in the following metros:
- Amsterdam
- Singapore
Resiliency Considerations
Microsoft offers their customers three architectures for enabling network resiliency with Azure workloads. Equinix is working with Microsoft to deploy interconnection infrastructure to support all three.
The levels of resiliency are:
- Maximum resiliency – Diverse connections to MSEE routers in multiple locations and metros.
- High resiliency – Diverse connections to MSEE routers in multiple locations within one metro.
- Standard resiliency – Diverse connections to distinct MSEEs in a single location.
The high resiliency architecture makes the underlying diverse elements appear as one connection. This architecture also eliminates the need for multiple Equinix Fabric connections.
For more information, see Design and architect Azure ExpressRoute for resiliency.
Prerequisites
Before creating a connection to Microsoft Azure ExpressRoute, you must have:
- An Azure account with Microsoft.
- An ExpressRoute Metro Service Key created in the Azure Resource Manager (ARM) portal. For more information on how to create an ExpressRoute Service Key, see Quickstart: Create and modify an ExpressRoute circuit.
- An Equinix Fabric account, with the following IAM roles assigned: Fabric Connections Manager.
Create a Connection Using Quick Connect
To create a connection to Microsoft Azure ExpressRoute using Quick Connect:
-
Log in to the Customer Portal > Fabric Dashboard.
-
Use the Context Switcher and select the project under which you want to create the connection. For more information on projects, see Equinix Identity and Access Management: Projects.
-
From the Connections menu, select Create Connection.
-
In the A Service Provider card, click Connect to a Service Provider.

-
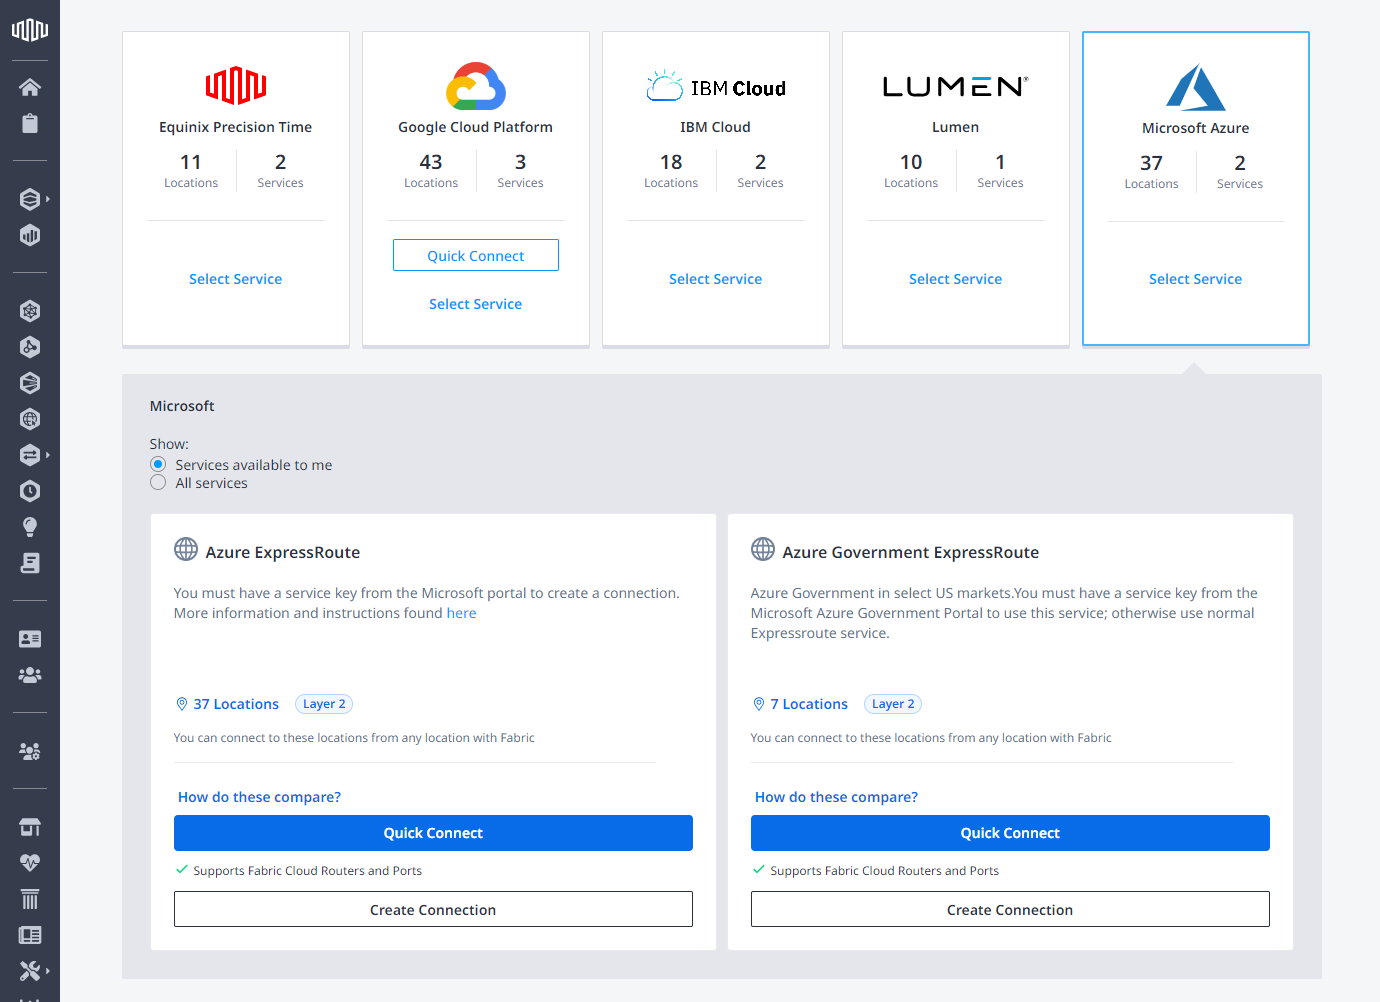
Locate the Microsoft Azure card and click Select Service.
-
On the Azure ExpressRoute card, click Quick Connect.
-
In the Enter Your Azure Information section, enter your ExpressRoute Metro Service Key.
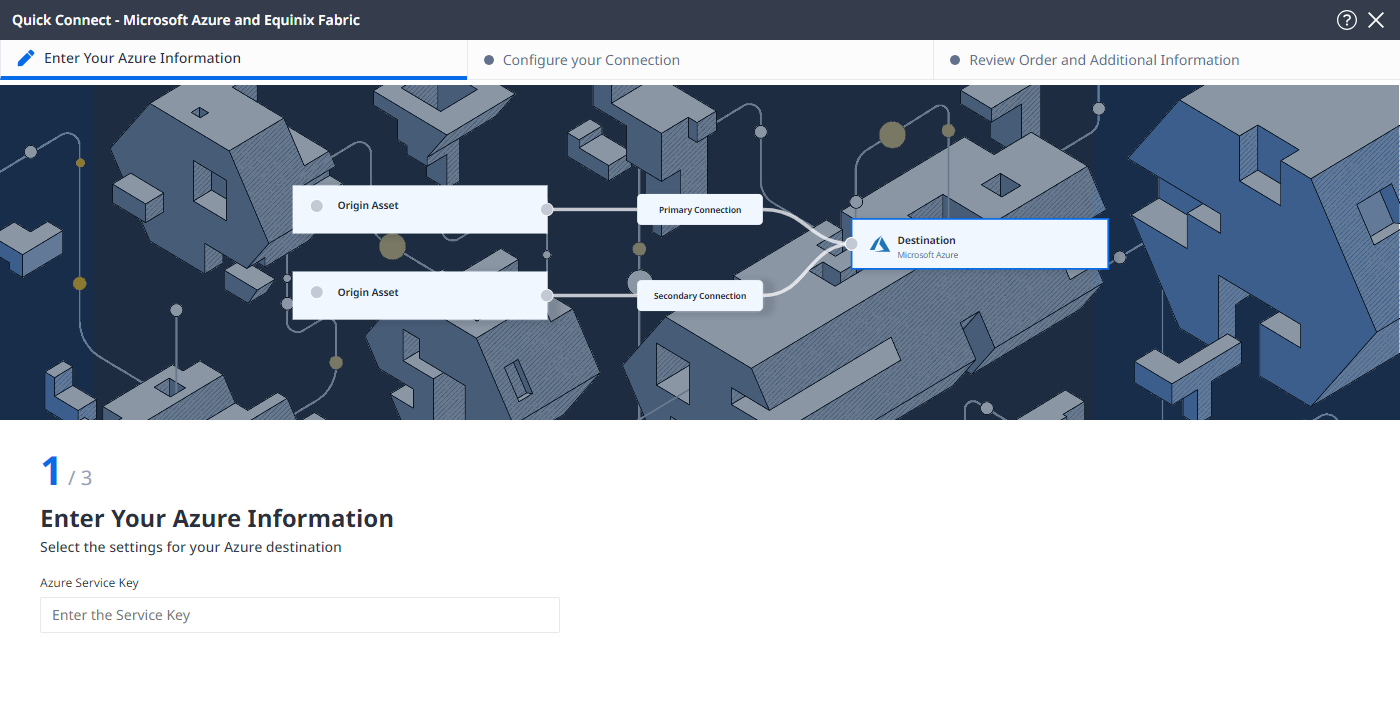 tip
tipThis will pre-populate the speed and peering metro of the ExpressRoute connection.
-
Select connection type:
- Redundant – Create a redundant pair of connections.
- Primary – Create a single, primary connection.
- Secondary – Create a single, secondary connection.
infoRedundant configuration is recommended. If you select a single connection option, no Service Level Agreement (SLA) is provided by Azure.
-
Select peering type:
- Azure Private – Applicable to private virtual networks.
- Microsoft – Applicable to Office 365, Dynamics 365 and public services.
noteYou are not required to use both services (Private and Microsoft).
A single service key will support four virtual connections on dot1.Q ports (a primary and secondary connection for each peering type). However each of the four connections must have unique ExpressRoute peering VLAN IDs. Two virtual connections can be created with a service key on QinQ ports.
-
Click Next.
Configuring the Connection
Configure your connection depending on the origin asset type:
Port
-
From the Origin Asset Type drop-down list, select Port.
-
In the Primary Connection section:
-
Click + Select Primary Port, then select your primary connection port and click Select Port. Only primary ports are available for selection.
-
Enter the primary connection name.
-
Enter a VLAN ID.
-
In the Azure Settings section, enter a Customer VLAN (C-Tag).
infoUse the same VLAN ID when configuring the peering type in the Microsoft Azure portal.
-
-
In the Secondary Connection section:
- Click + Select Secondary Port, then select your secondary connection port and click Select Port. Only secondary ports are available for selection.
- Enter the secondary connection name.
- Enter a VLAN ID.
-
Click Next.

Cloud Router
-
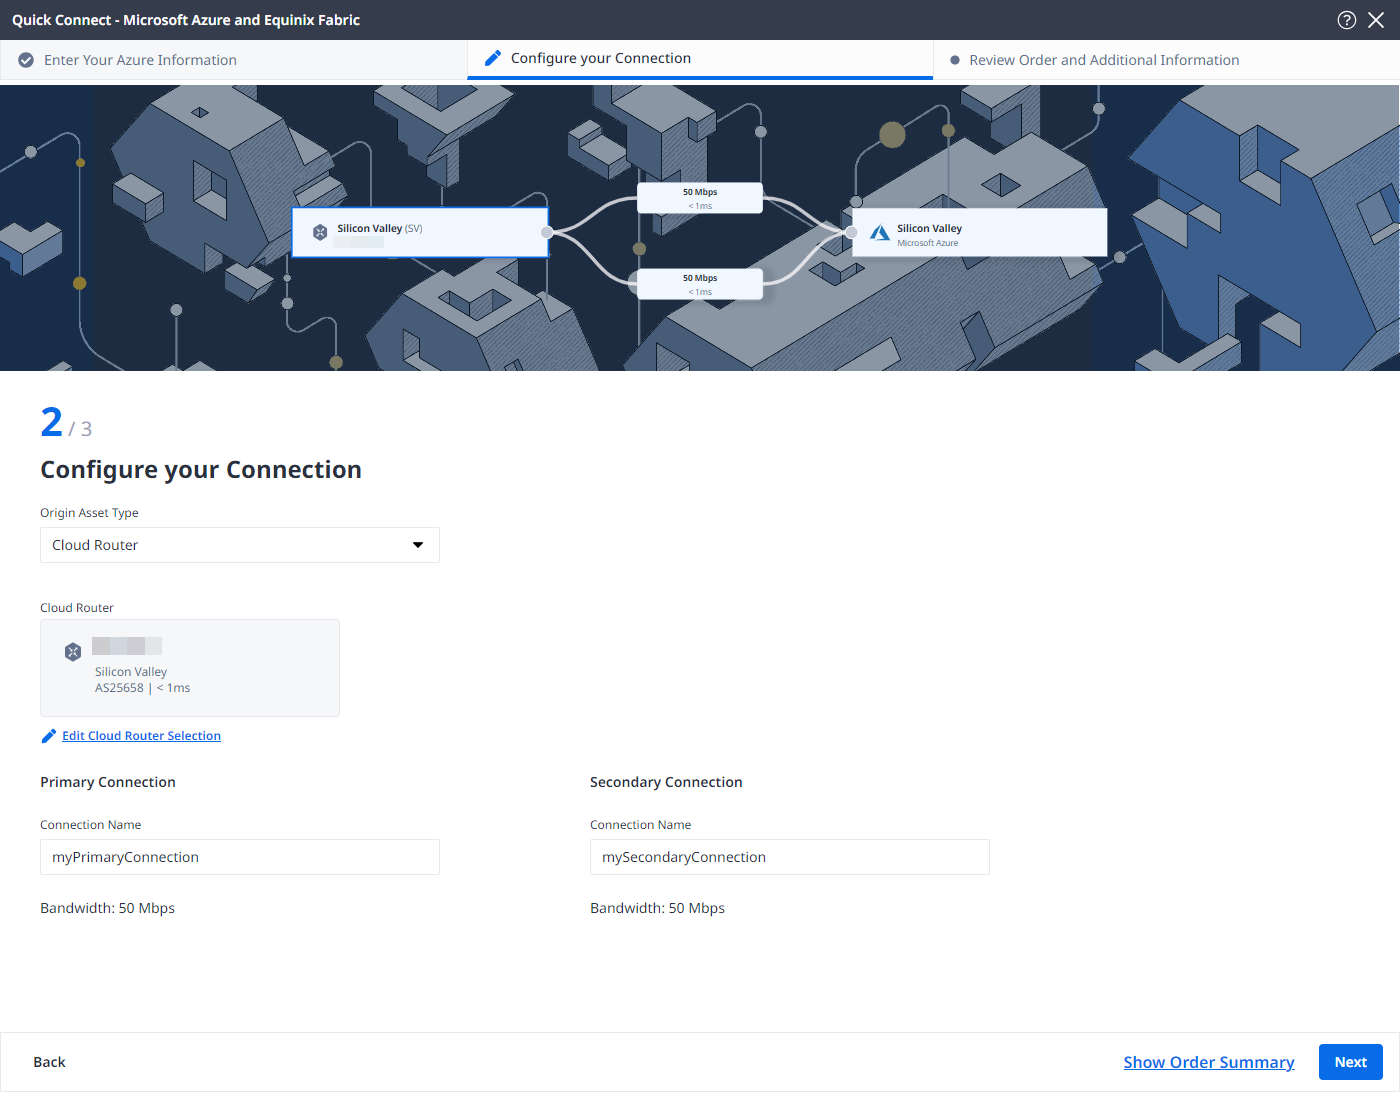
From the Origin Asset Type drop-down list, select Cloud Router.
-
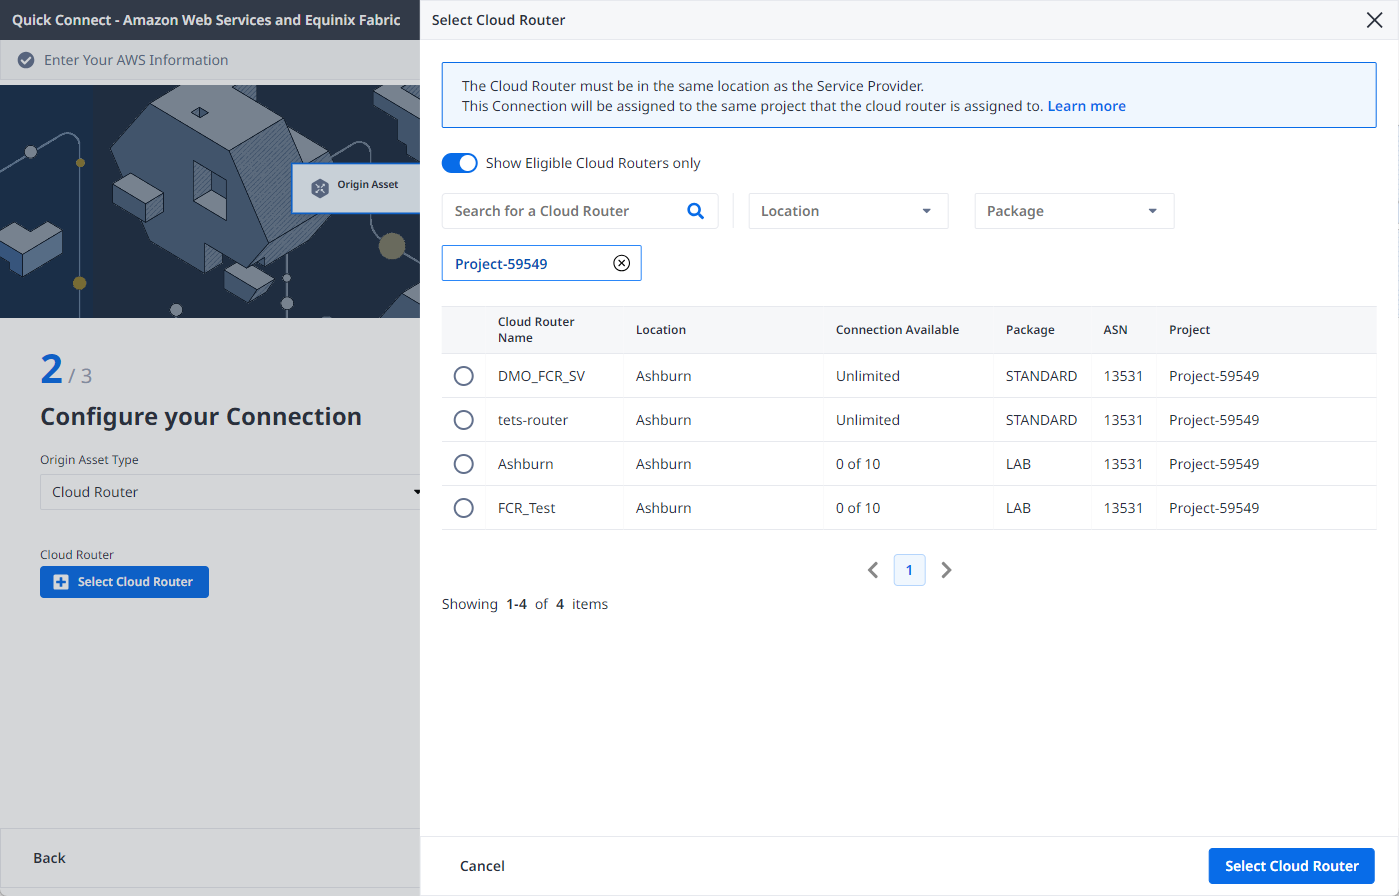
Click + Select Cloud Router, select a cloud router instance, then click Select Cloud Router.
-
In the Primary Connection section:
-
Enter the primary connection name.
-
In the Azure Settings section, enter a Customer VLAN (C-Tag).
infoUse the same VLAN ID when configuring the peering type in the Microsoft Azure portal.
-
-
In the Secondary Connection section, enter your secondary connection name.
-
Click Next.
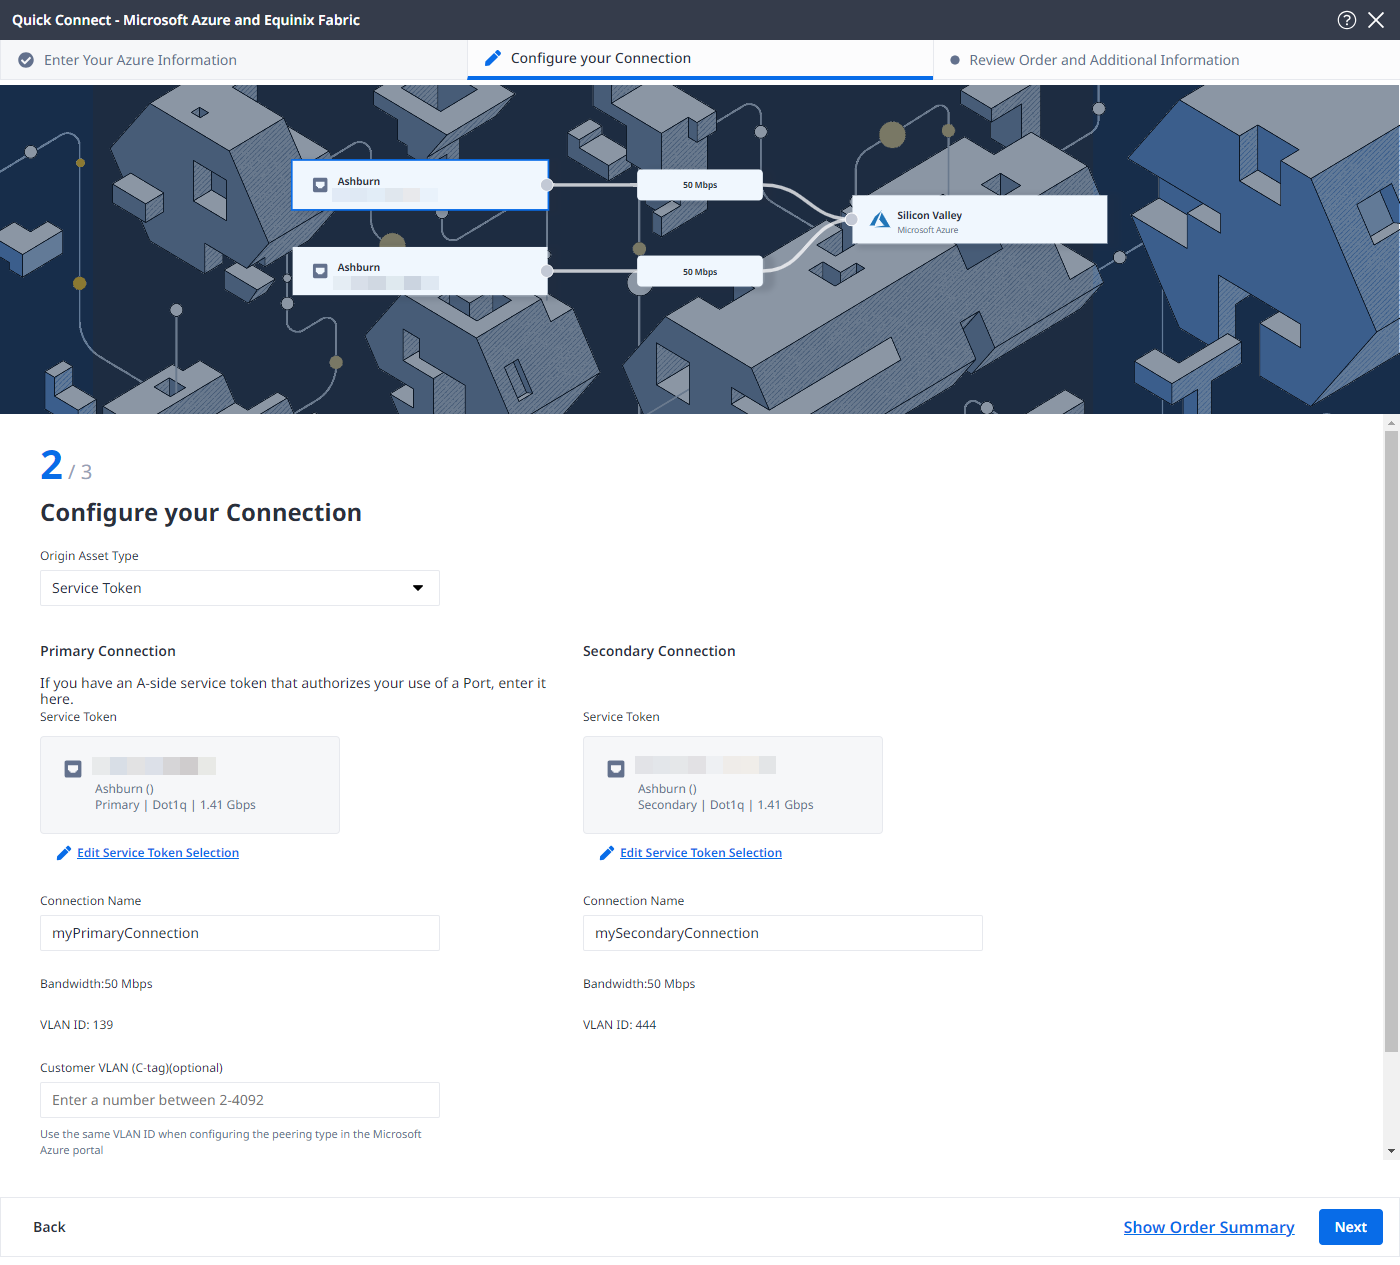
Service Token
-
From the Origin Asset Type drop-down list, select Service Token.
-
In the Primary Connection section:
- Click + Enter Primary Service Token, provide the service token, then click Enter Service Token.
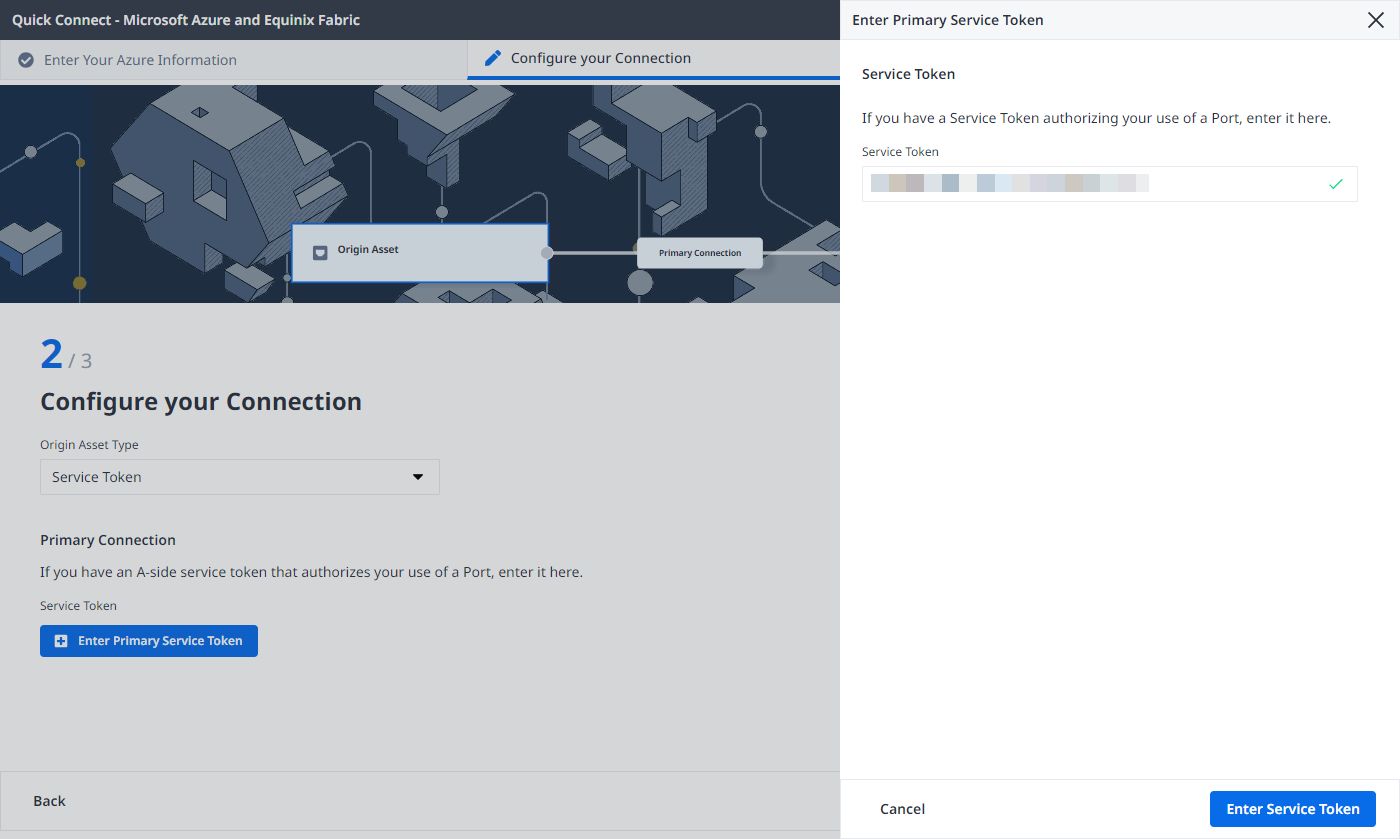
-
Enter the primary connection name.
-
In the Azure Settings section, enter a Customer VLAN (C-Tag).
infoUse the same VLAN ID when configuring the peering type in the Microsoft Azure portal.
-
In the Secondary Connection section:
- Click + Enter Secondary Service Token, provide the service token, then click Enter Service Token.
- Enter the secondary connection name.
-
Click Next.
Review and Submit
On the Review Order and Additional Information page:
-
Review the information in the Connection Configuration section.
-
Use the Notifications field to provide the email addresses of the recipients to be notified about the connection's status. You can add up to 12 email addresses.
-
(Optional) Enter or add order information in the Purchase Order section.
-
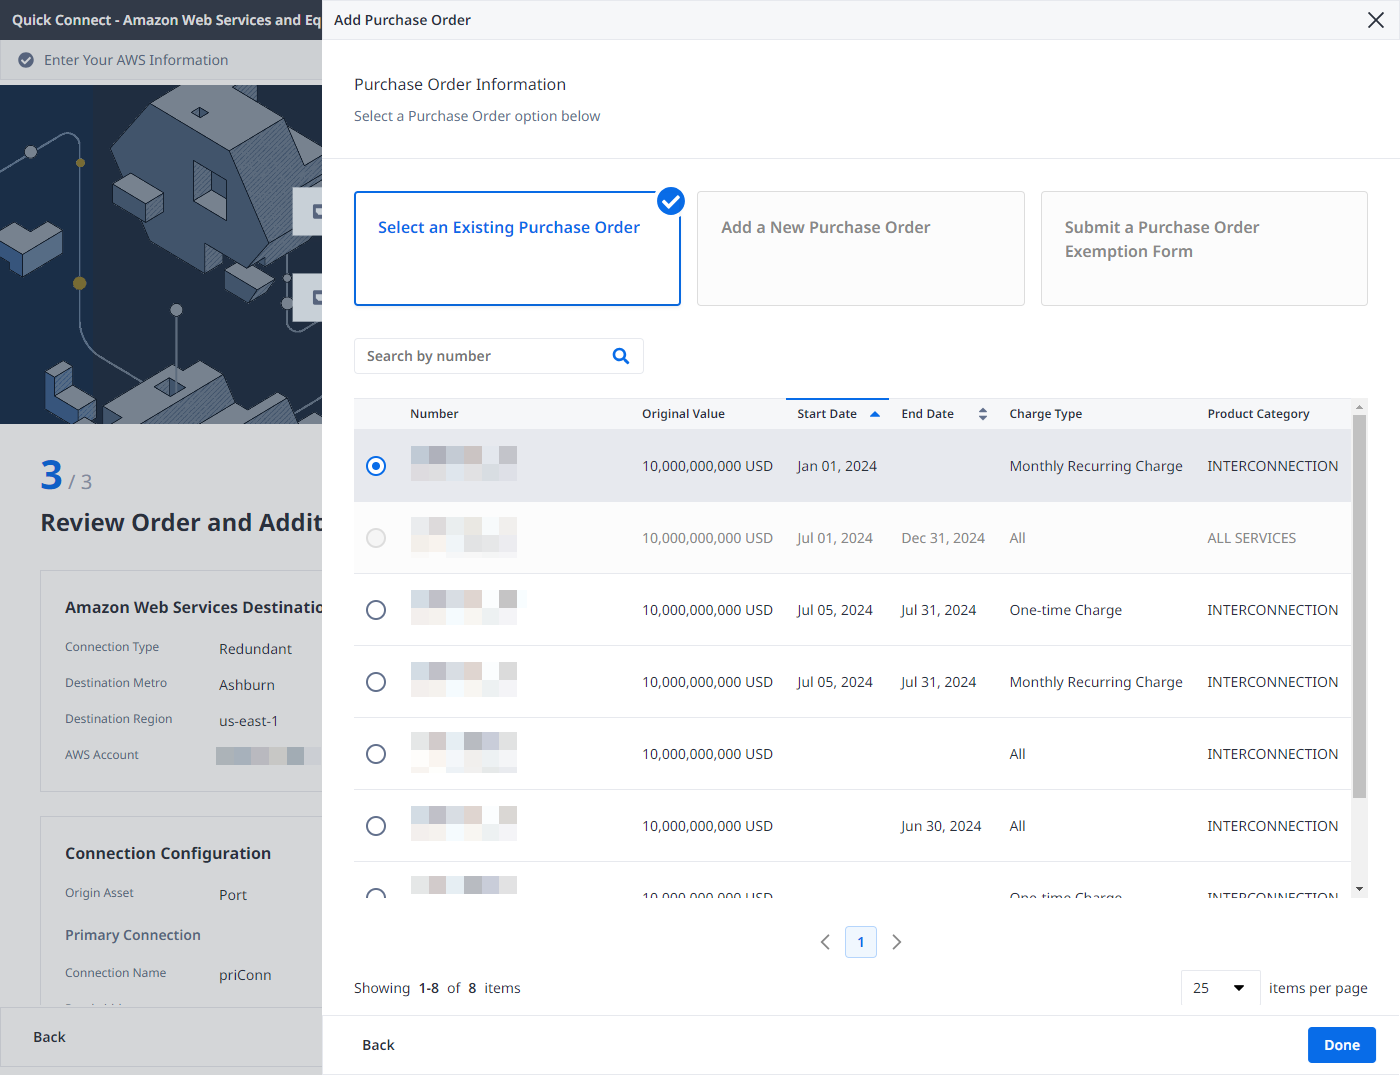
Click Select Purchase Order Number.
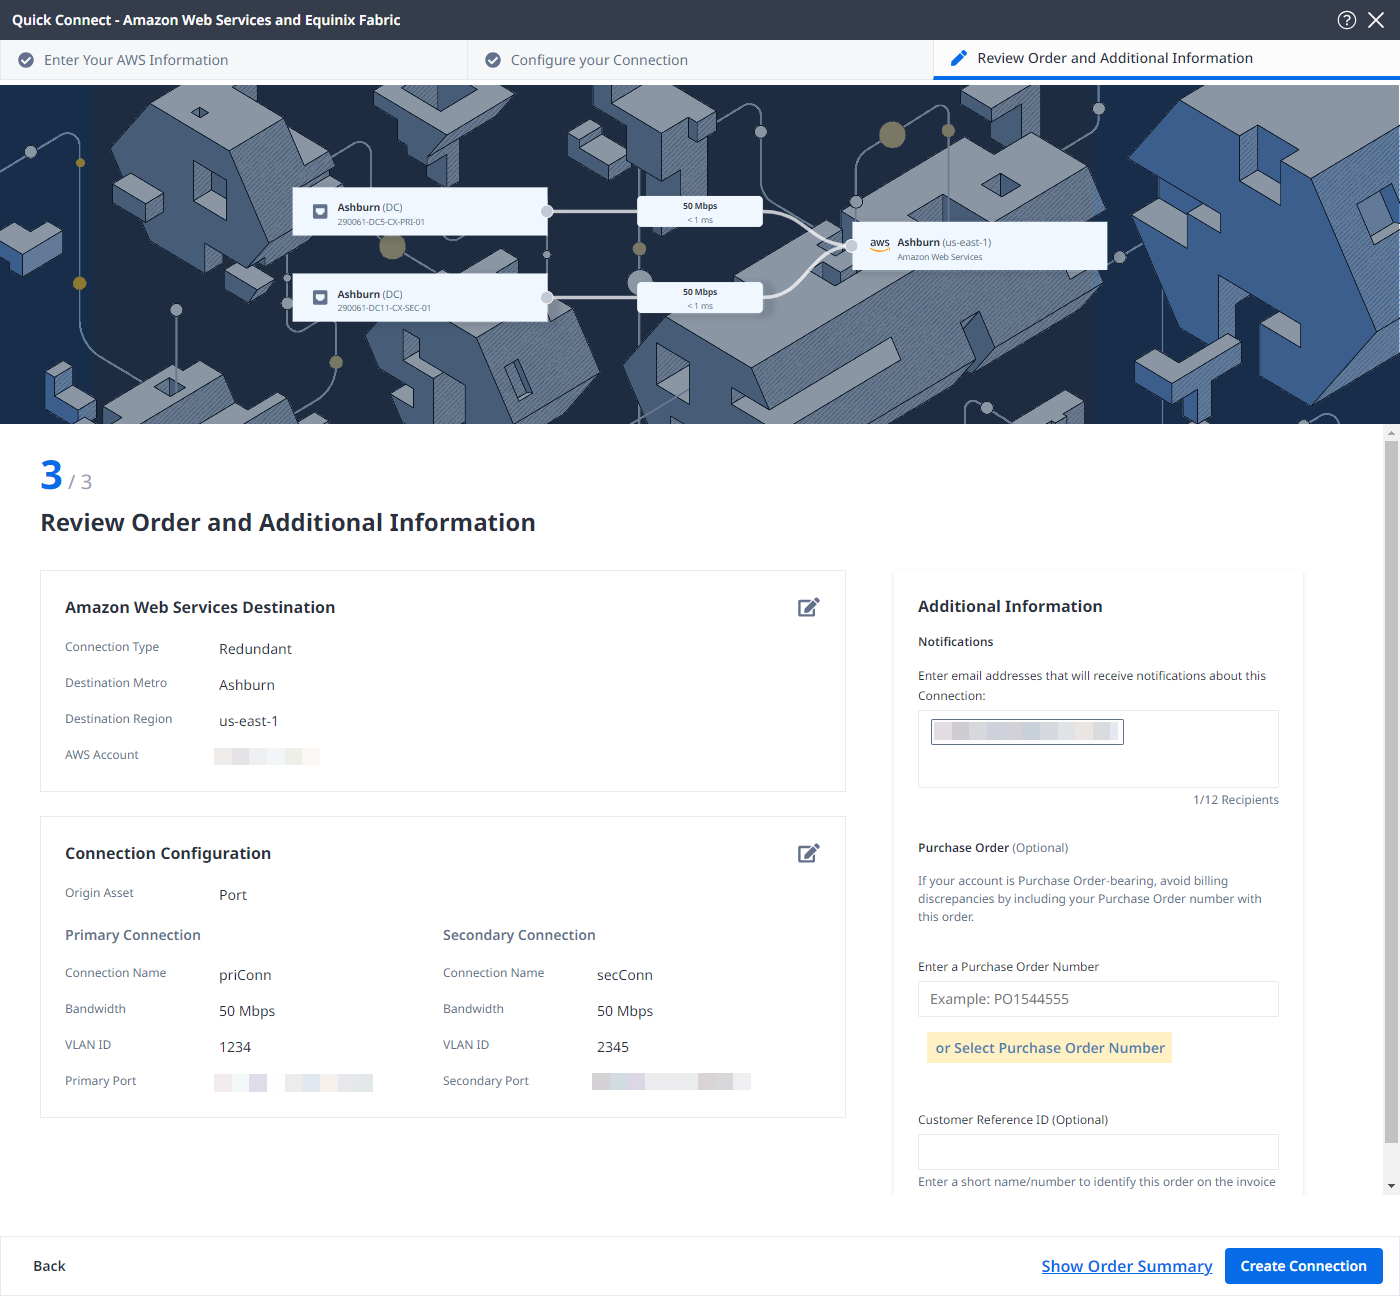
-
Click Select an Existing Purchase Order.
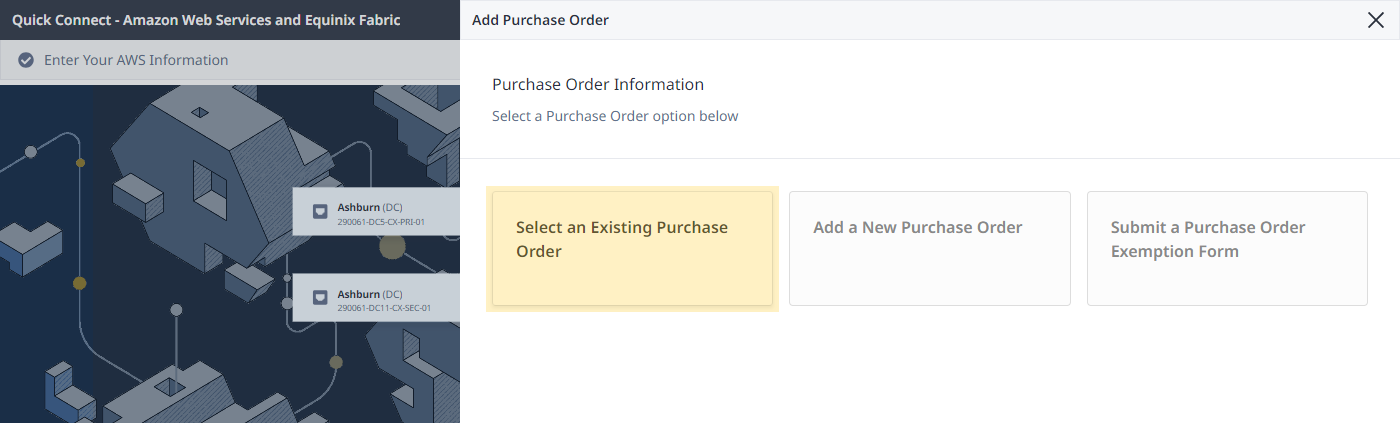
-
Select purchase order number you want to apply to your order, then click Done.
-
-
Provide customer reference identifier, that will help you identify this order on your invoice.
-
Click Show Order Summary to see order details and connection pricing information.
When you are ready, click Create Connection.
On the confirmation page, click View this Connection in your Fabric Inventory to see the connection in your inventory.