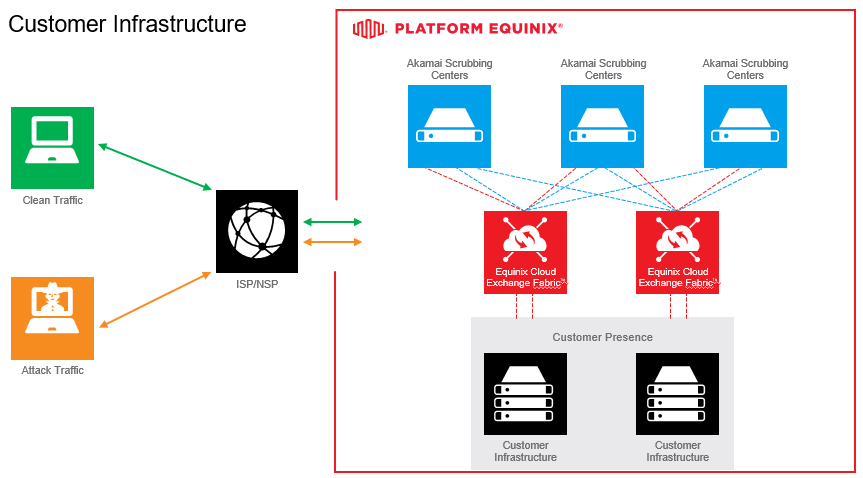
Akamai Prolexic
This article provides step-by-step instructions for connecting to Akamai Prolexic on Equinix Fabric.
Prerequisites
- The order can't be completed until Akamai has provided the configuration template. The order is delivered 2 business days after completing the kickoff call.
- The order must be reviewed with your Akamai integration team prior to submitting.
- Access to the Equinix Customer Portal
- Destination port connections defined during kickoff call
- Connection speeds determined during kickoff call
- Akamai Purchase Order and VLAN provided two days after the kick-off call
Ordering a Connection to Akamai Prolexic
-
Log in to the Customer Portal > Fabric Dashboard.
-
From the Connections menu, select Create Connection.
-
In the A Service Provider card, click Connect to a Service Provider.

-
Enter
Akamaiin the search field. -
On the Akamai card, click Select Service.

-
From the list of available regions, select the GEO Region established during your kickoff call.
Select the Origin and Destination
-
In the Origin section, click Port.
-
Select an origin location. This is the city or location of the port being configured.
-
From the list of available ports in this location, select a port. This is the specific port being used to create the connection.
-
In the Destination section, click a destination. The destination is the Akamai scrubbing center to which you want to connect to. The destination is defined during the kickoff call.
-
Click Next.
Connection Details
-
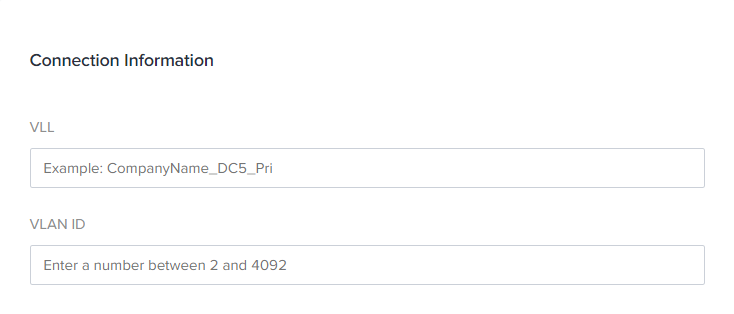
In the Connection Information section, enter:
- VLL – The name of the connection, provided by Akamai as part of the configuration build.
- VLAN ID – The VLAN ID, provided by Akamai as part of the configuration build.
 info
infoThe VLL, VLAN ID, and Purchase Order Number fields require manual input of information provided by Akamai as part of the configuration build. These fields can't be edited, so it is important the order not be submitted until this information is obtained from Akamai.
-
Enter the Purchase Order Number. The PO number is provided by Akamai as part of the configuration build.
-
In the Connection Speed section, select a Billing Tier and Speed combination.
-
Click Next.
Review and Submit
-
Review your order. Click Design Summary to download a PDF summary of the order.
-
Send the design summary to your Akamai Technical Project Manager.
-
Upon confirmation of the from the Akamai Technical Project Manager, click Submit to submit your order.
After the order is submitted, the Akamai Technical Project Manager will accept the order and establish the connection.