# Unitas IP Transit
Connect to Unitas IP Transit for global, dedicated Internet Access from your Equinix Fabric Port or Network Edge virtual device. To get started you need to:
1. [Get a quote](#get-a-quote) from Unitas Global for your location, bandwidth, and terms.
2. [Place an order](#place-an-order) for the service provided in the quote.
3. Receive your network routing, IP address, and BGP configuration details from Unitas Global for your internet service.
Once you have your internet access configuration details from Unitas Global, you can [create the connection](#creating-a-connection) in the Equinix Customer Portal.
## Get a Quote[](#get-a-quote "Direct link to Get a Quote")
1. Sign in to .
2. Click **Get a Quote for Internet**.
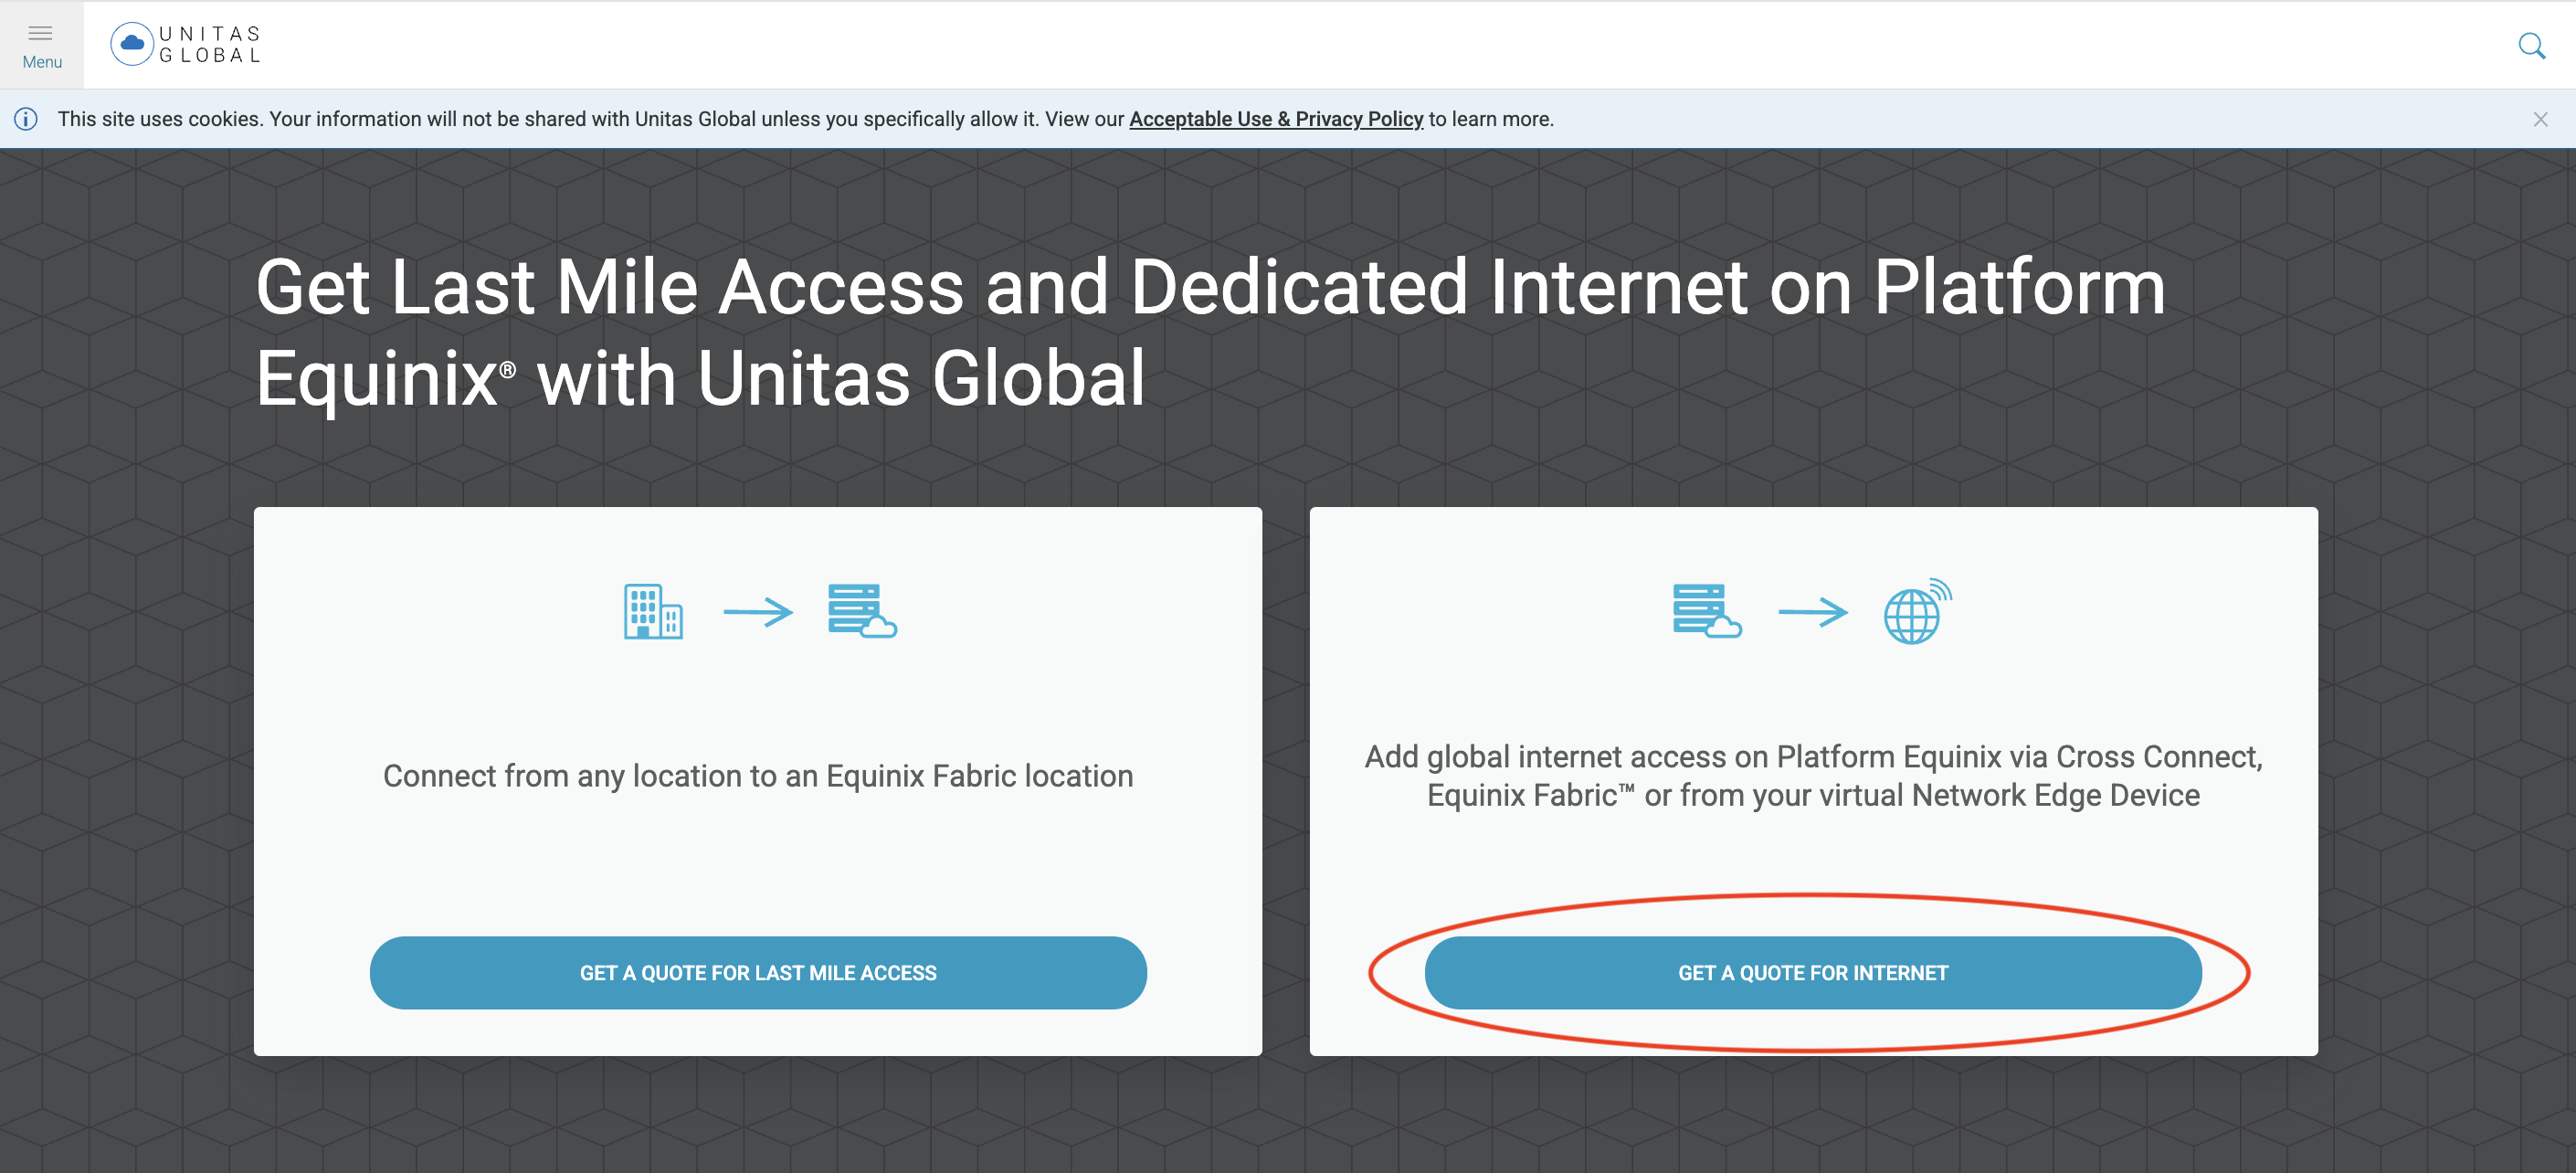
3. In the *Equinix Fabric location* drop-down menu, choose a location.
4. In the *Bandwidth* drop-down menu, choose the required bandwidth.
5. In the *Term* drop-down menu, choose the required service term.
6. In the *IPv4 Addresses* drop-down menu, choose the required IPv4 address.
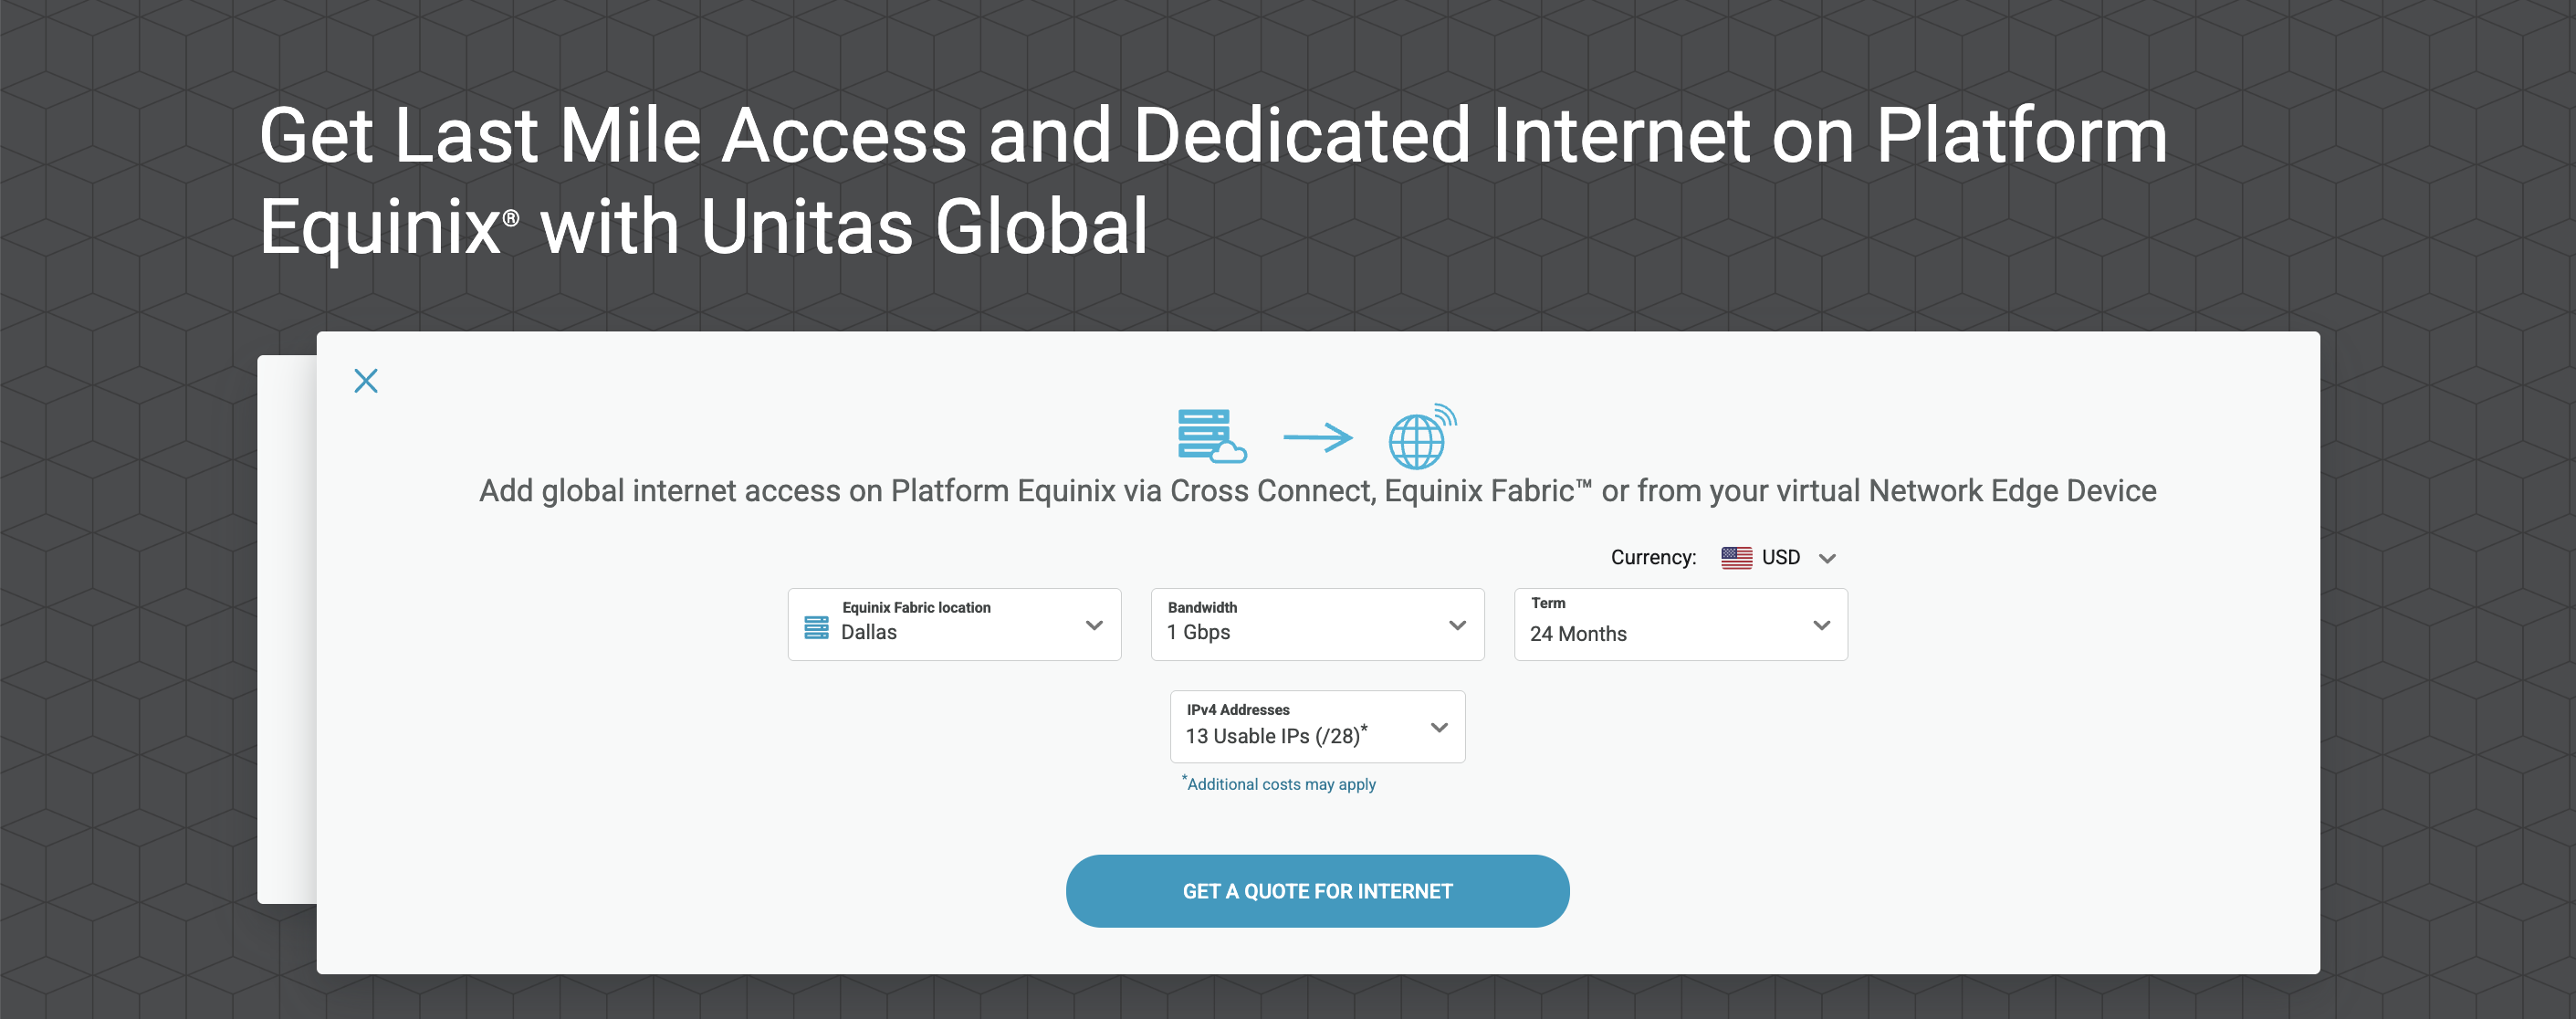
Click **GET A QUOTE FOR INTERNET** to receive an instant quote.
> **Note**
>
> For help with bandwidth, terms, and price options, contact Unitas Global at .
## Place an Order[](#place-an-order "Direct link to Place an Order")
After receiving your quote, you have the option to order right away, or order later. If you choose to order later, at any time you can:
1. Sign in to the [Unitas Global portal](https://myaccount.unitasglobal.com/login).
2. Locate your quote.
3. Click **Order**.

Once your order has been submitted, provisioning starts immediately. Check your email for a message containing your requested IP address and BGP configuration details. Use this information to set up your connection.
## Creating a Connection[](#creating-a-connection "Direct link to Creating a Connection")
1. Sign in to the Equinix [Customer Portal](https://portal.equinix.com/fabric) and go to the *Fabric Dashboard*.
2. Click **Create Connection**.
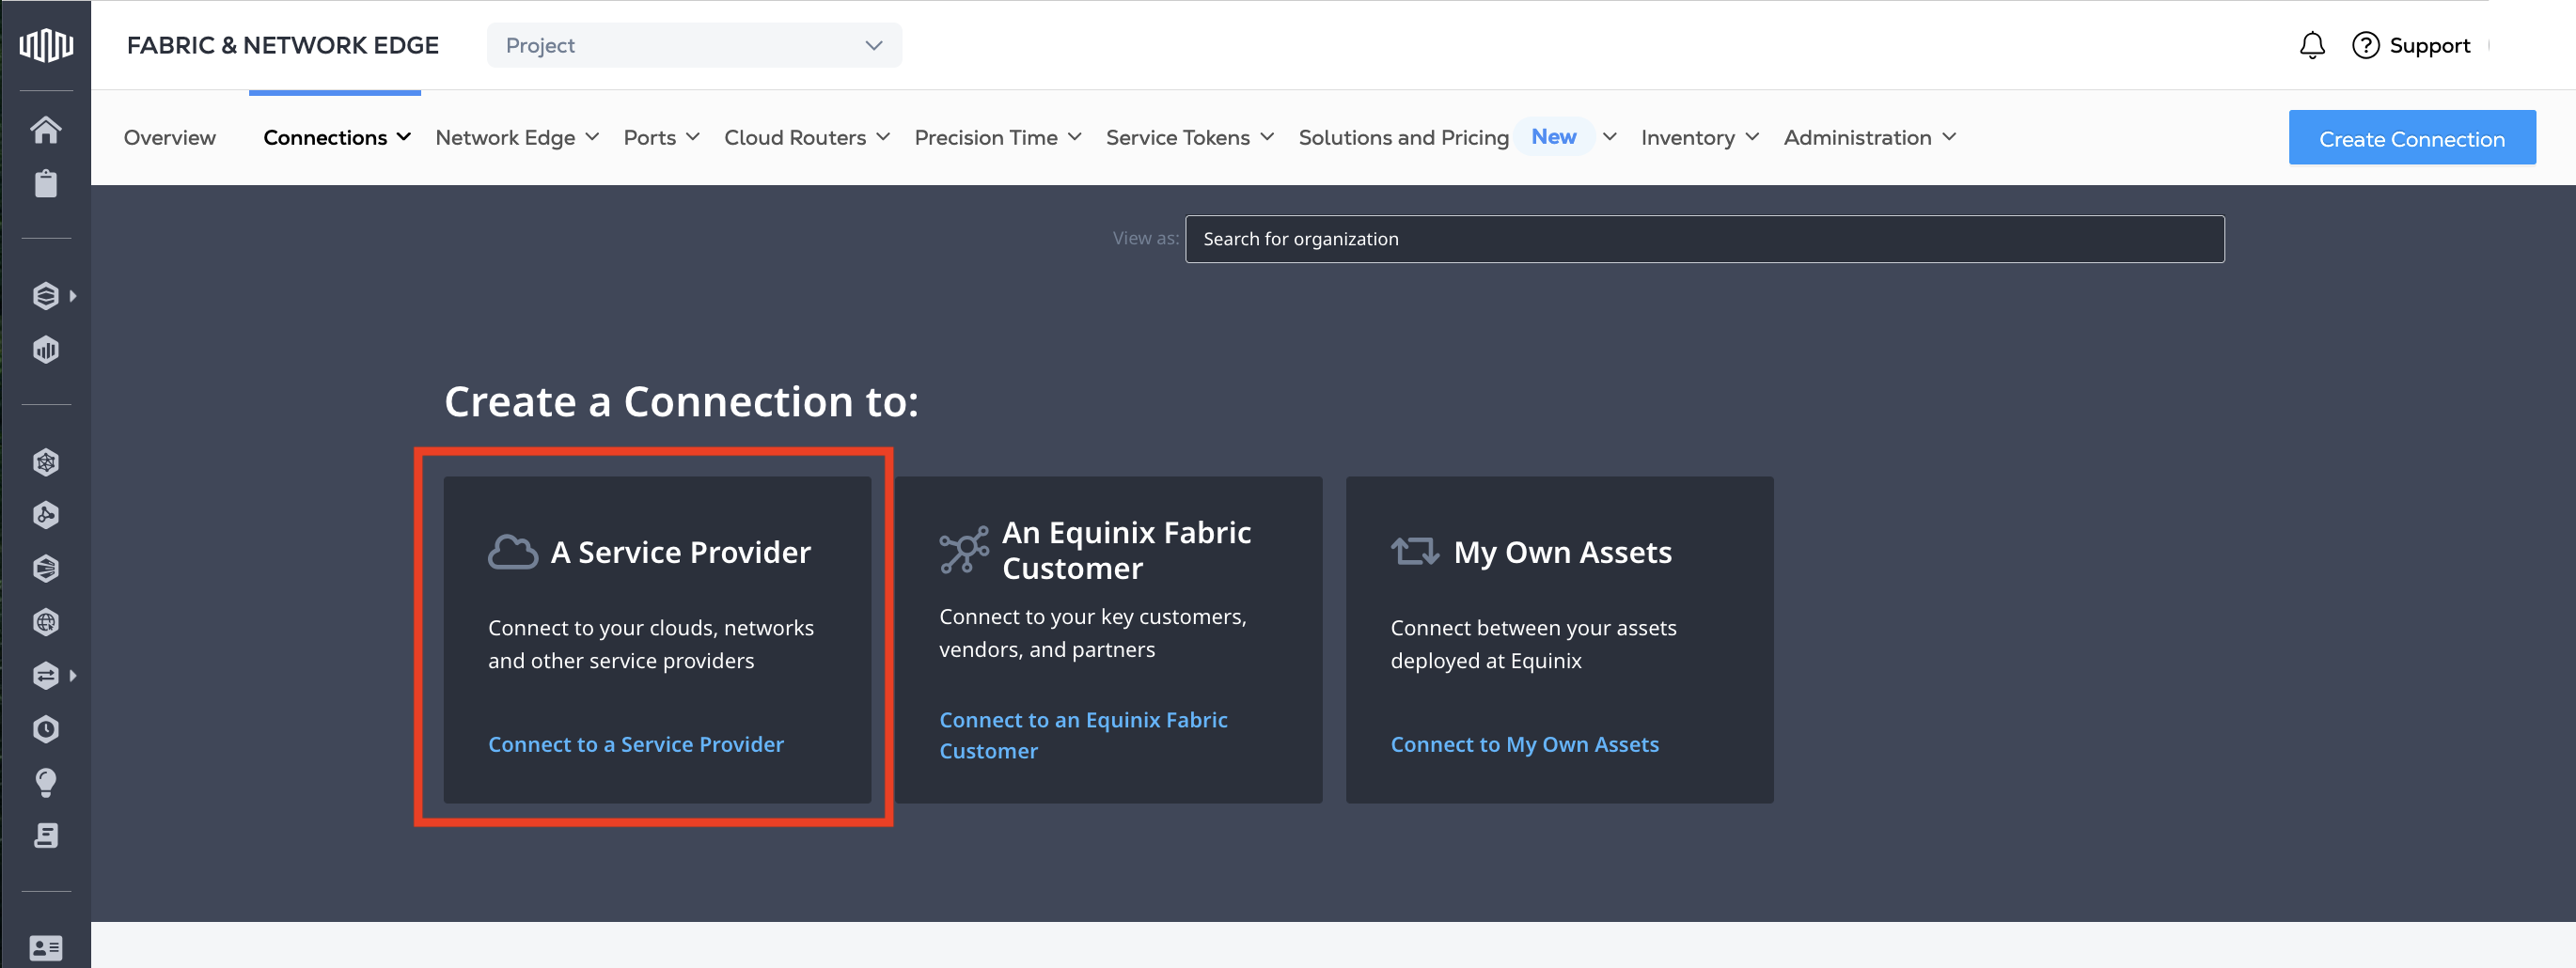
3. In the *Create a Connection to* section, select **A Service Provider**.
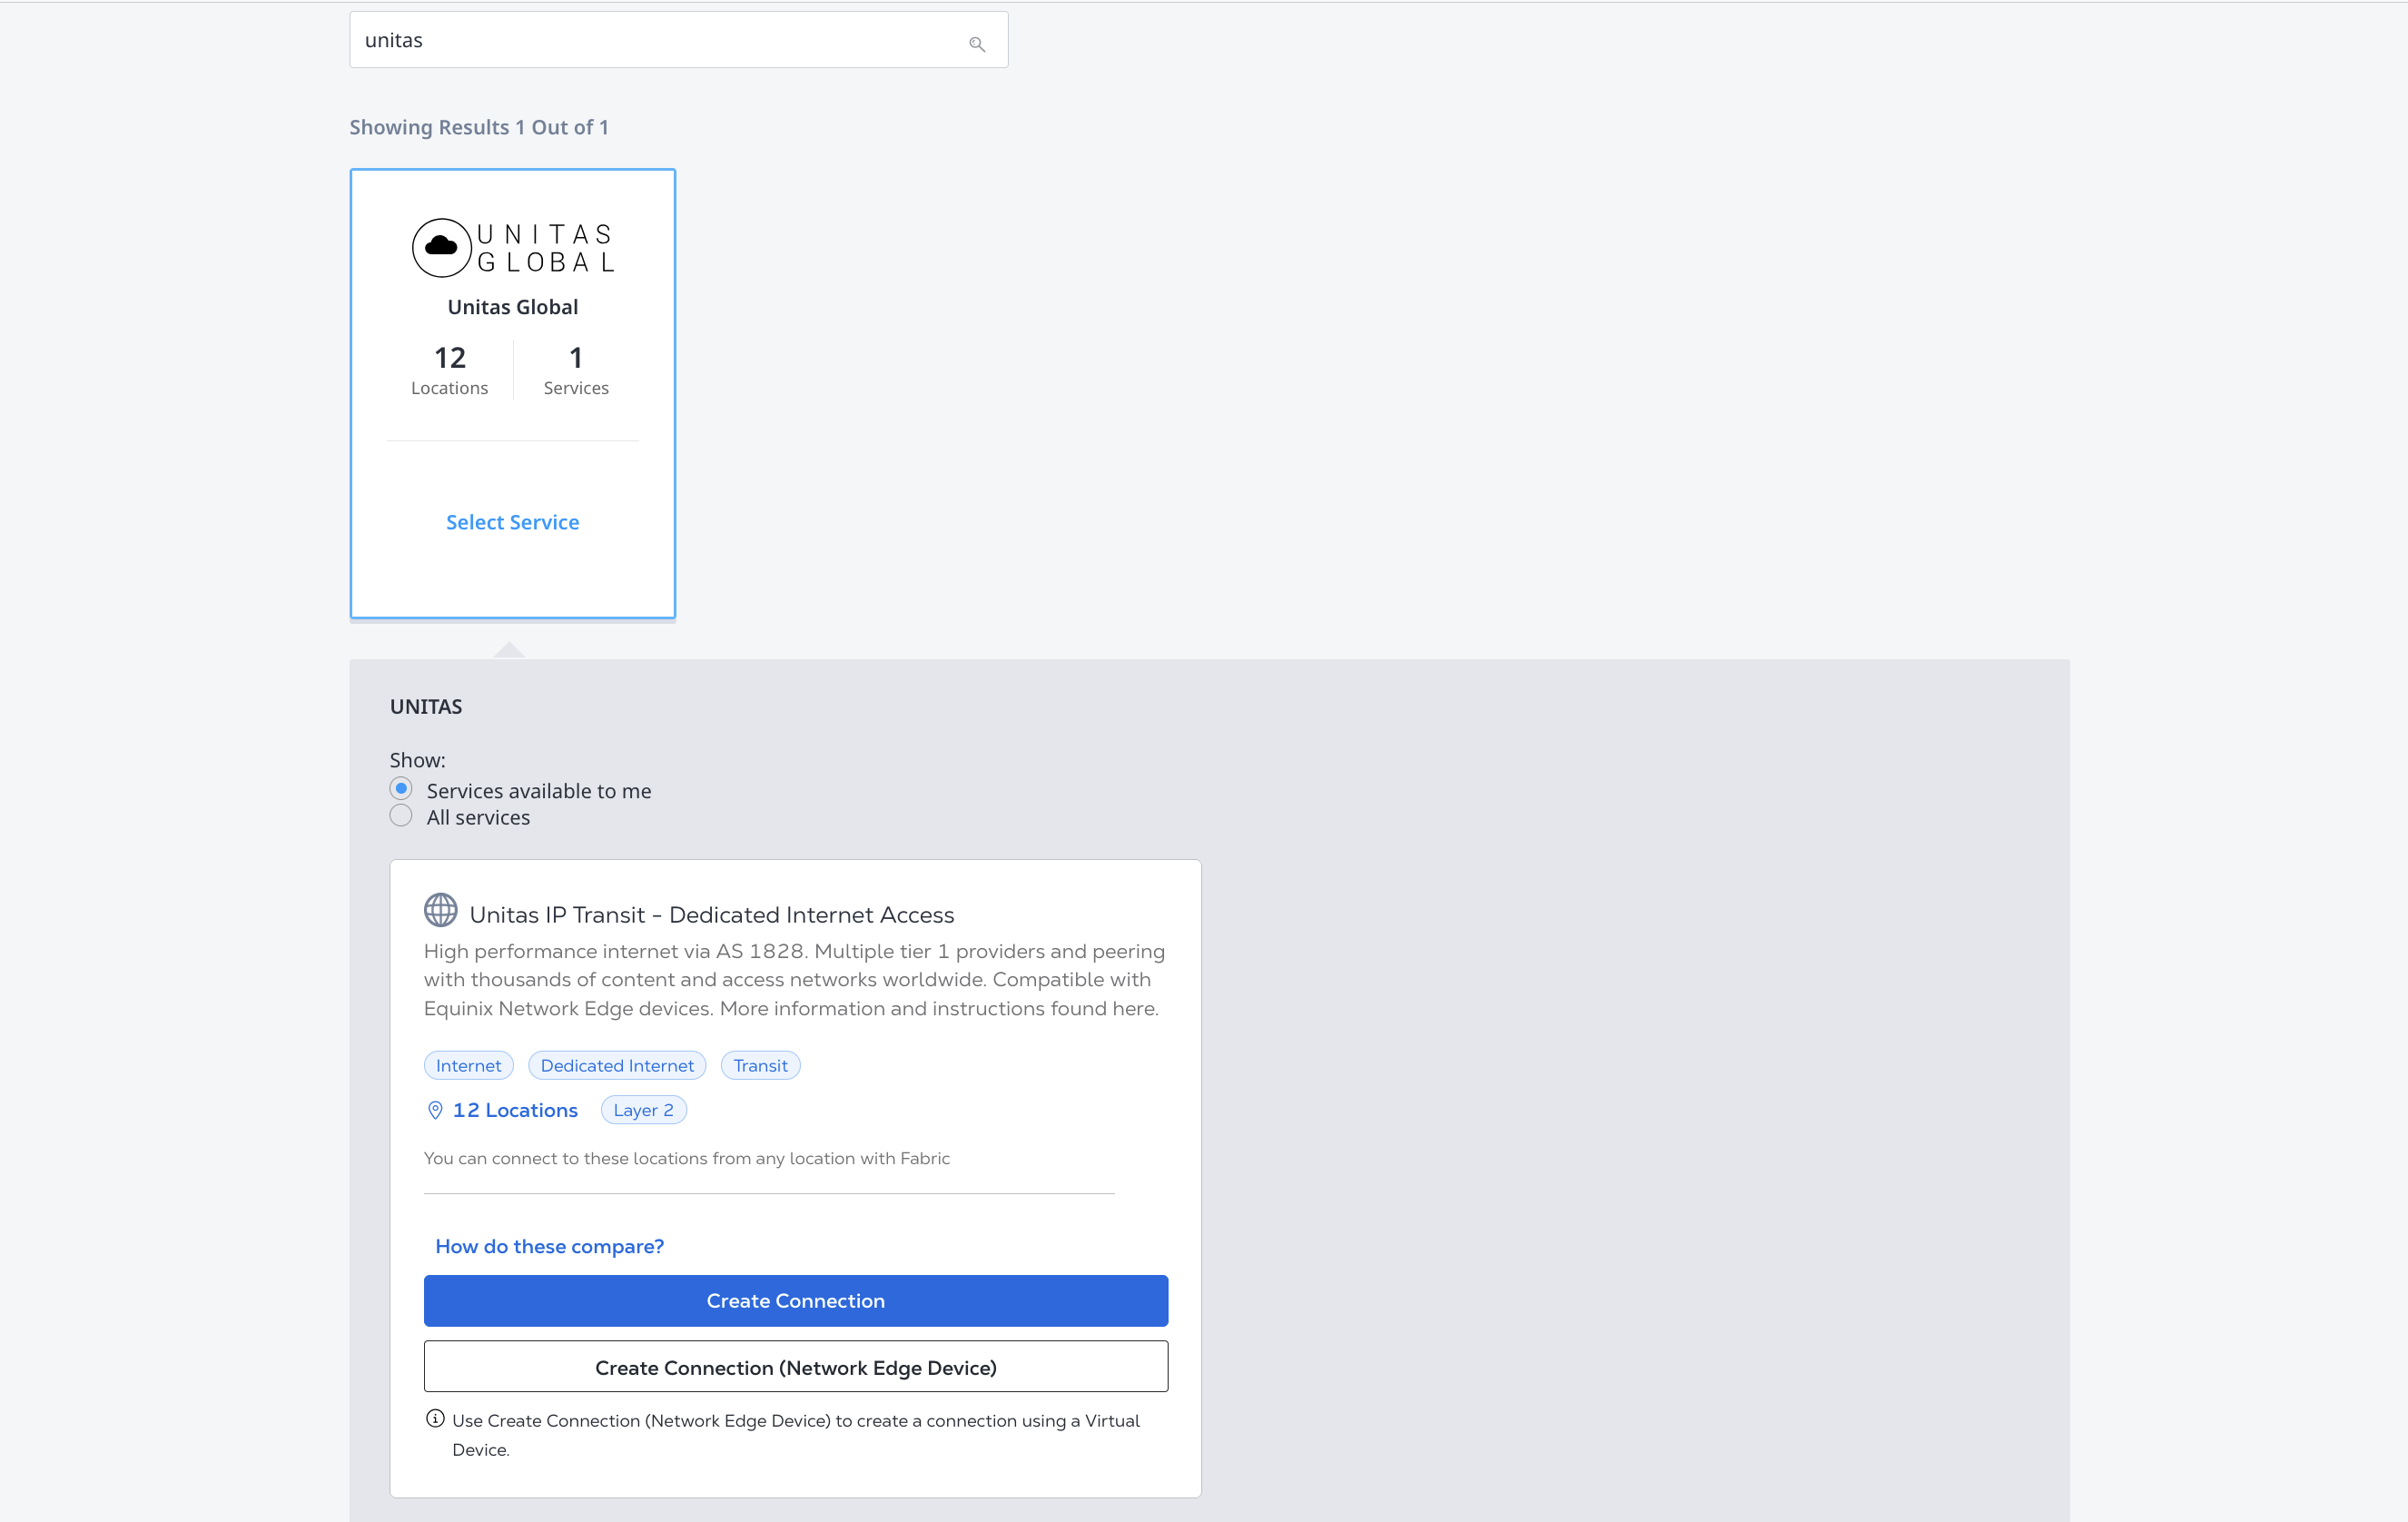
4. In the search field enter `Unitas Global` and then click **Select Services**.
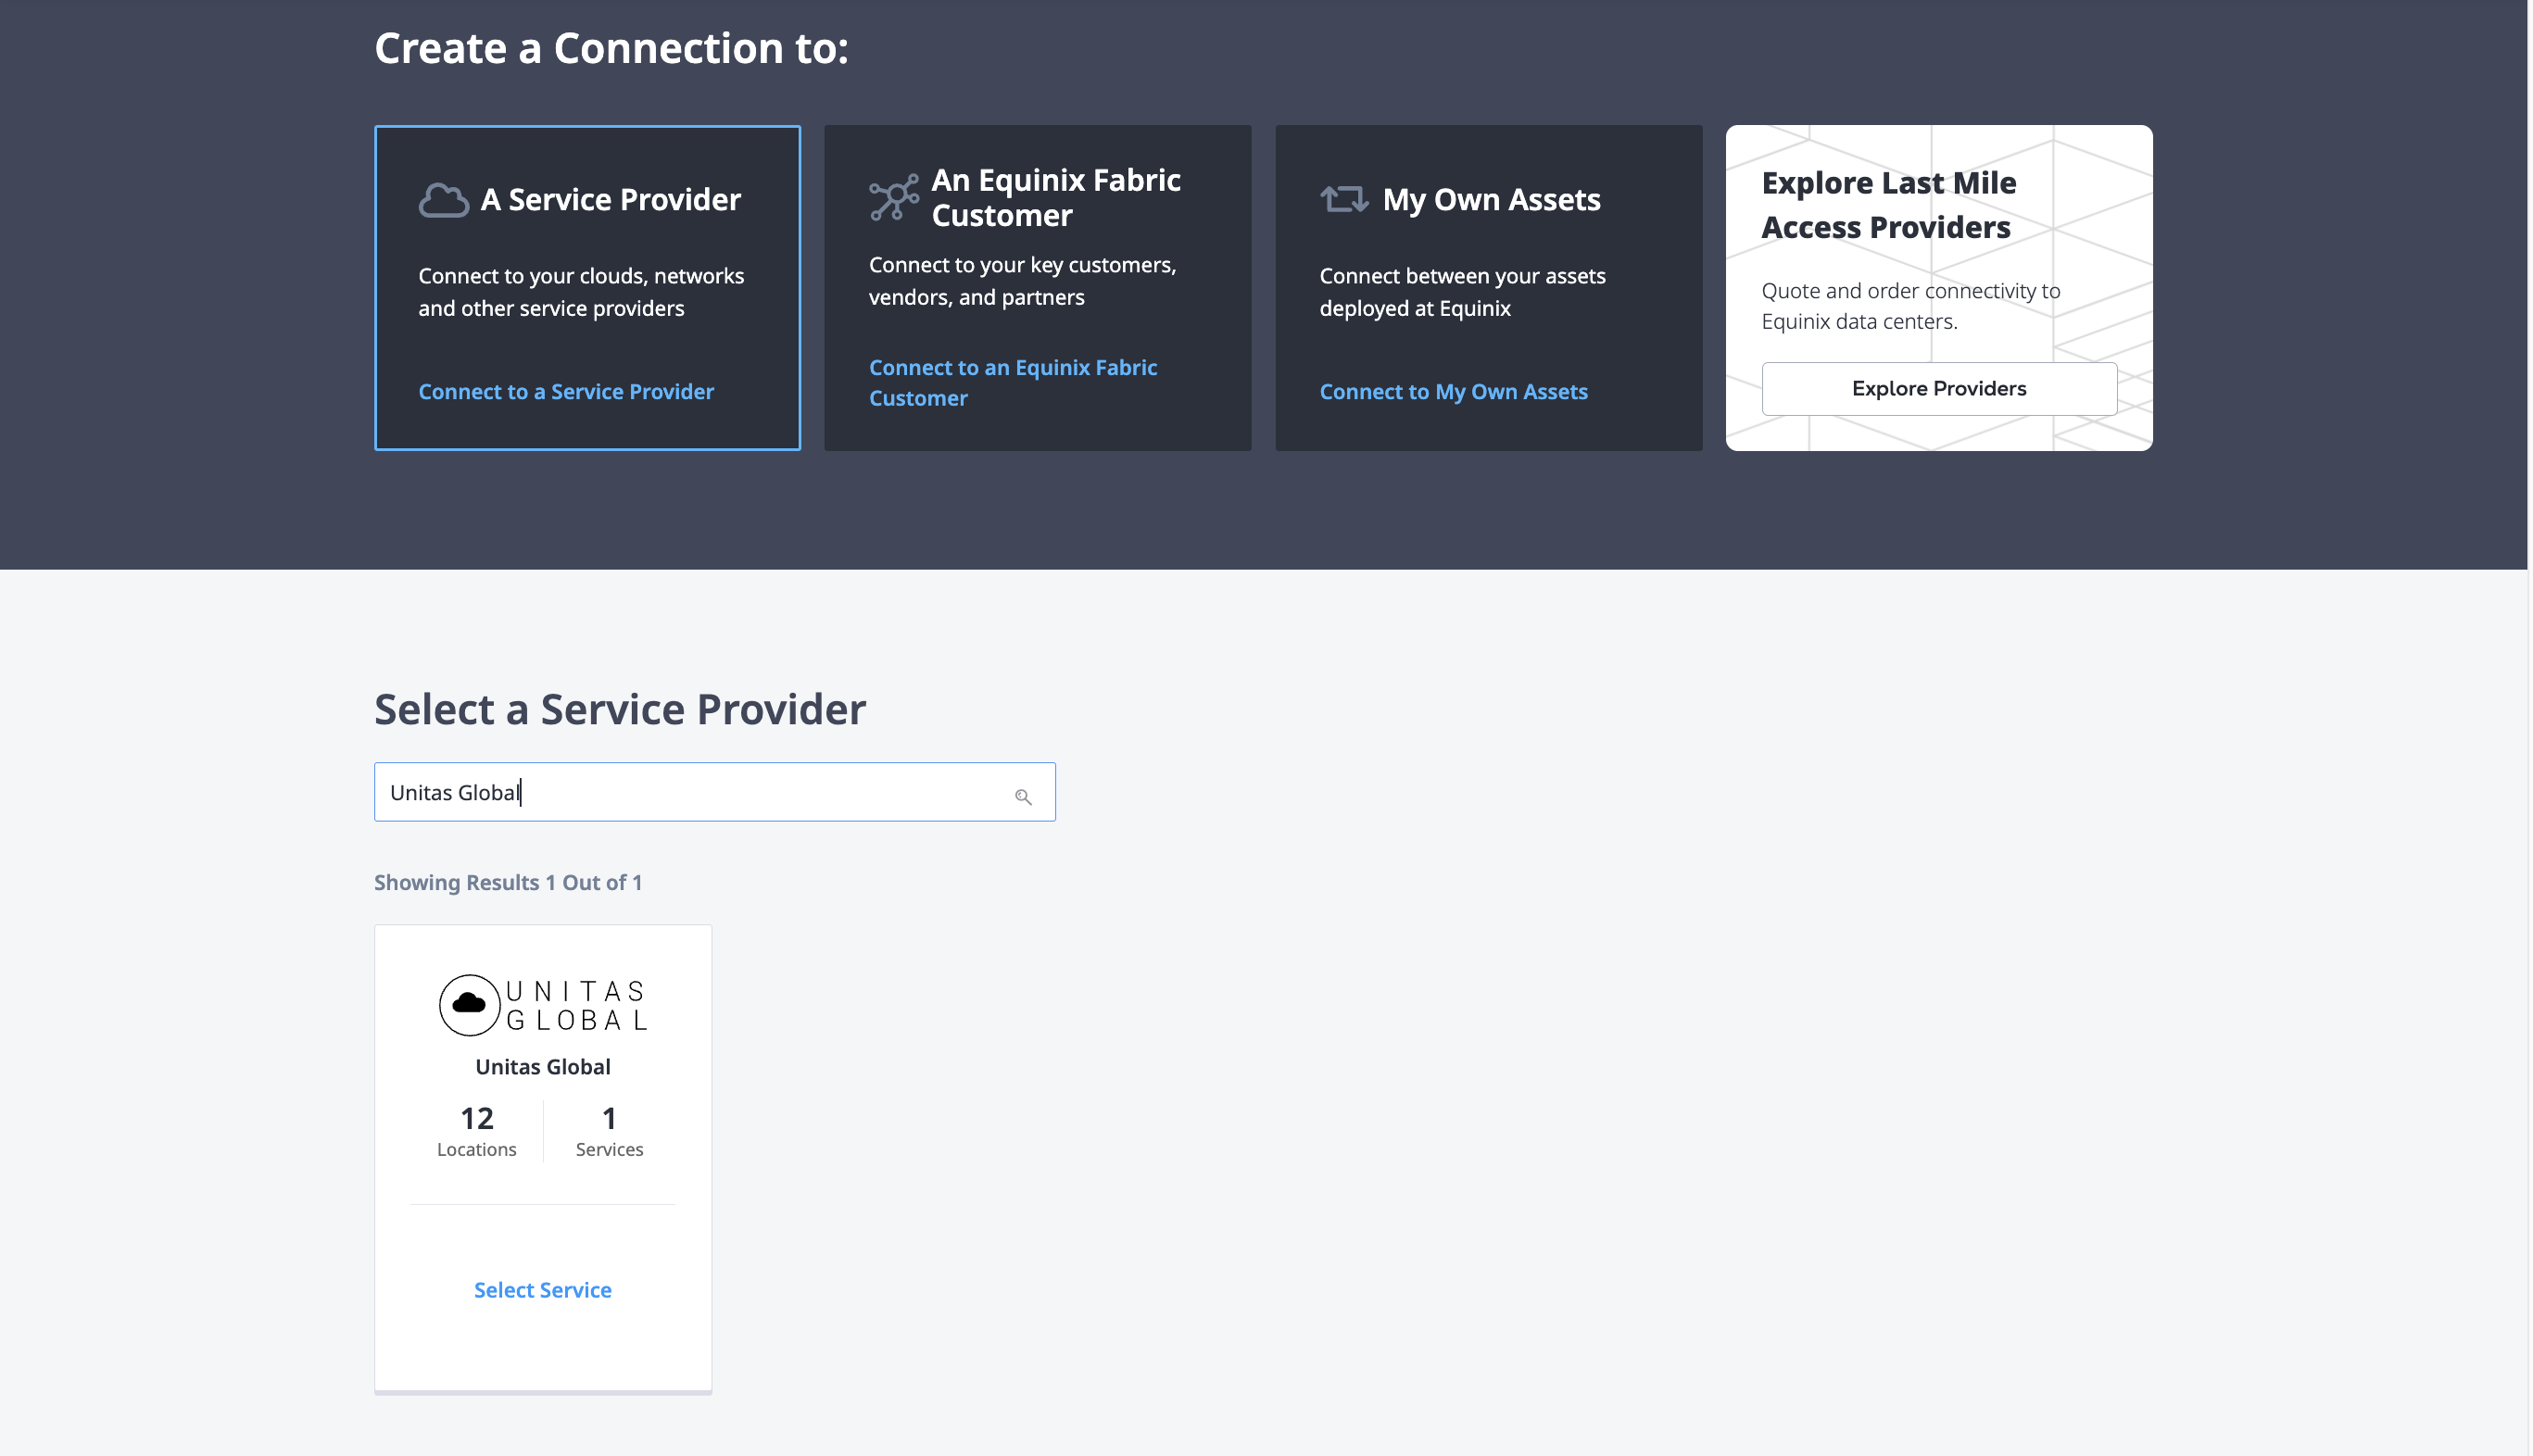
5. In the *Unitas IP Transit* card, either:
* Click **Create Connection** to [create a connection from your port](#connecting-from-a-port), or
* Click **Create Connection (Network Edge Device)** to [create a connection from your virtual device](#connecting-from-a-virtual-device).
## Connecting from a Port[](#connecting-from-a-port "Direct link to Connecting from a Port")
1. Review the connection steps and click **Okay**.
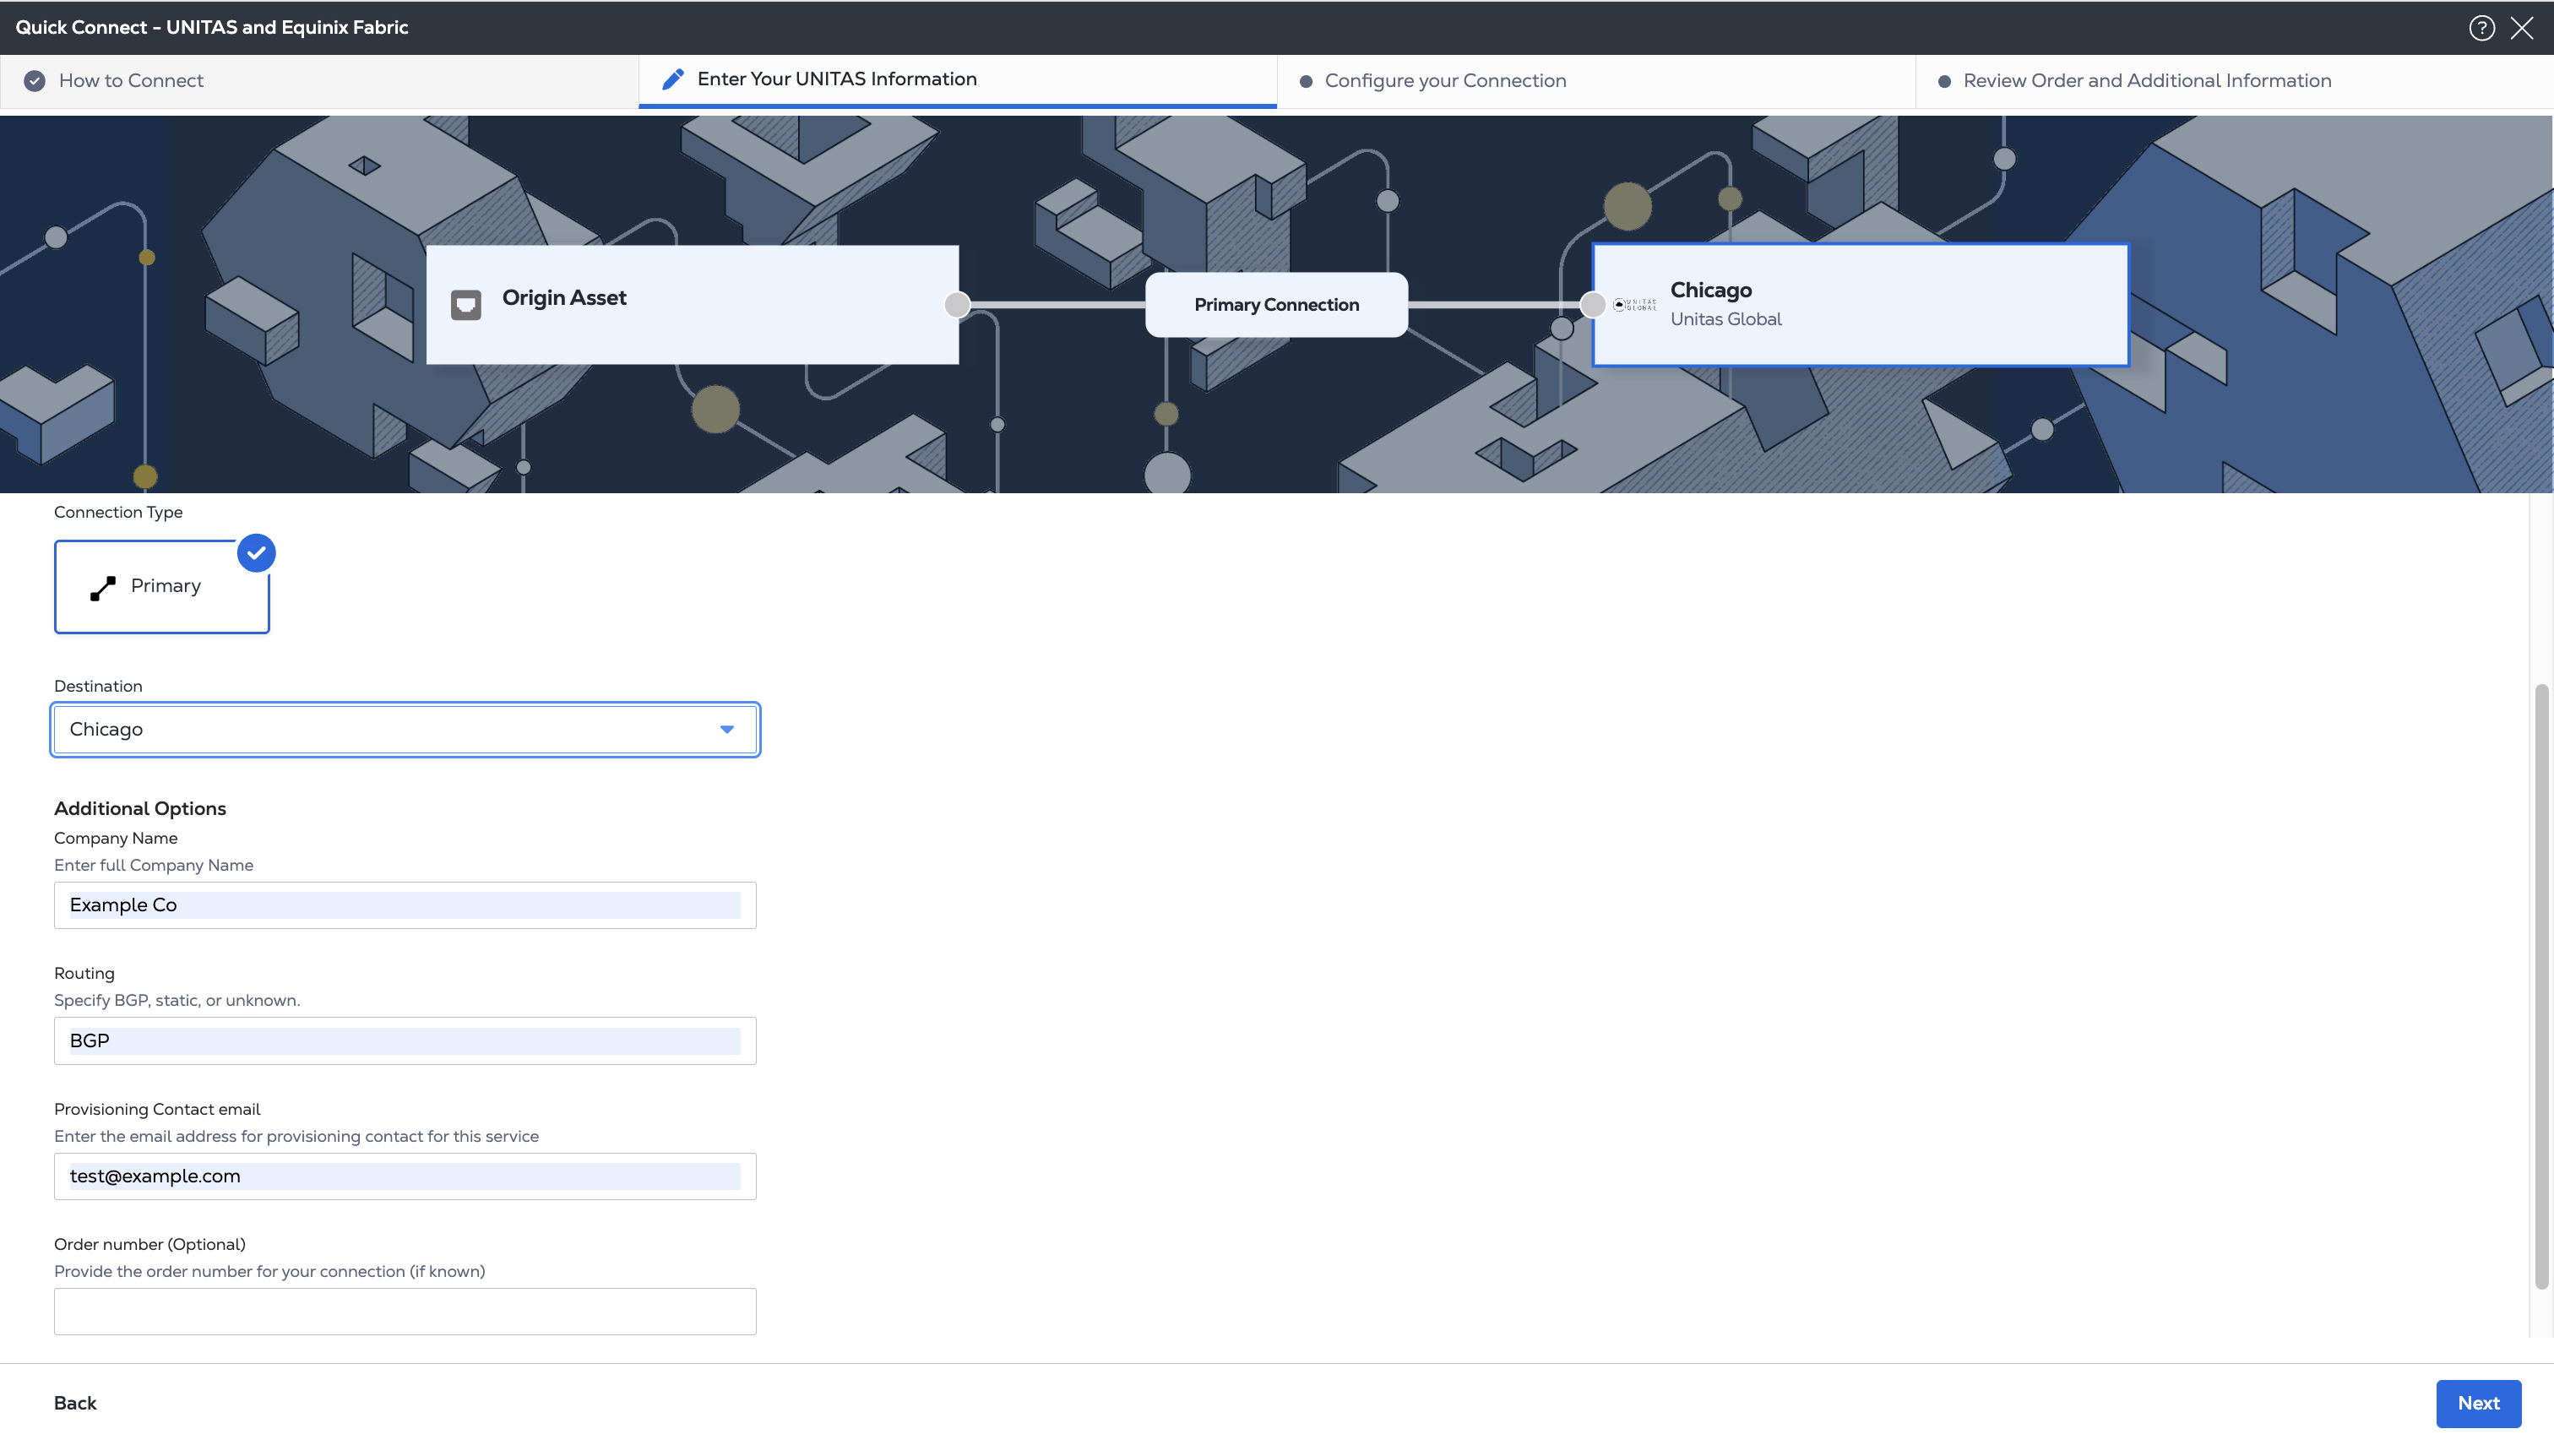
2. Enter your Unitas information.
* The *Connection Type* Primary is automatically selected.
* From the *Destination* drop-down, select the Unitas location that you are connecting to.
* In the *Additional Options* section enter your Company Name, routing configuration, contact information, and order number (optional).
3. Configure Your Connection
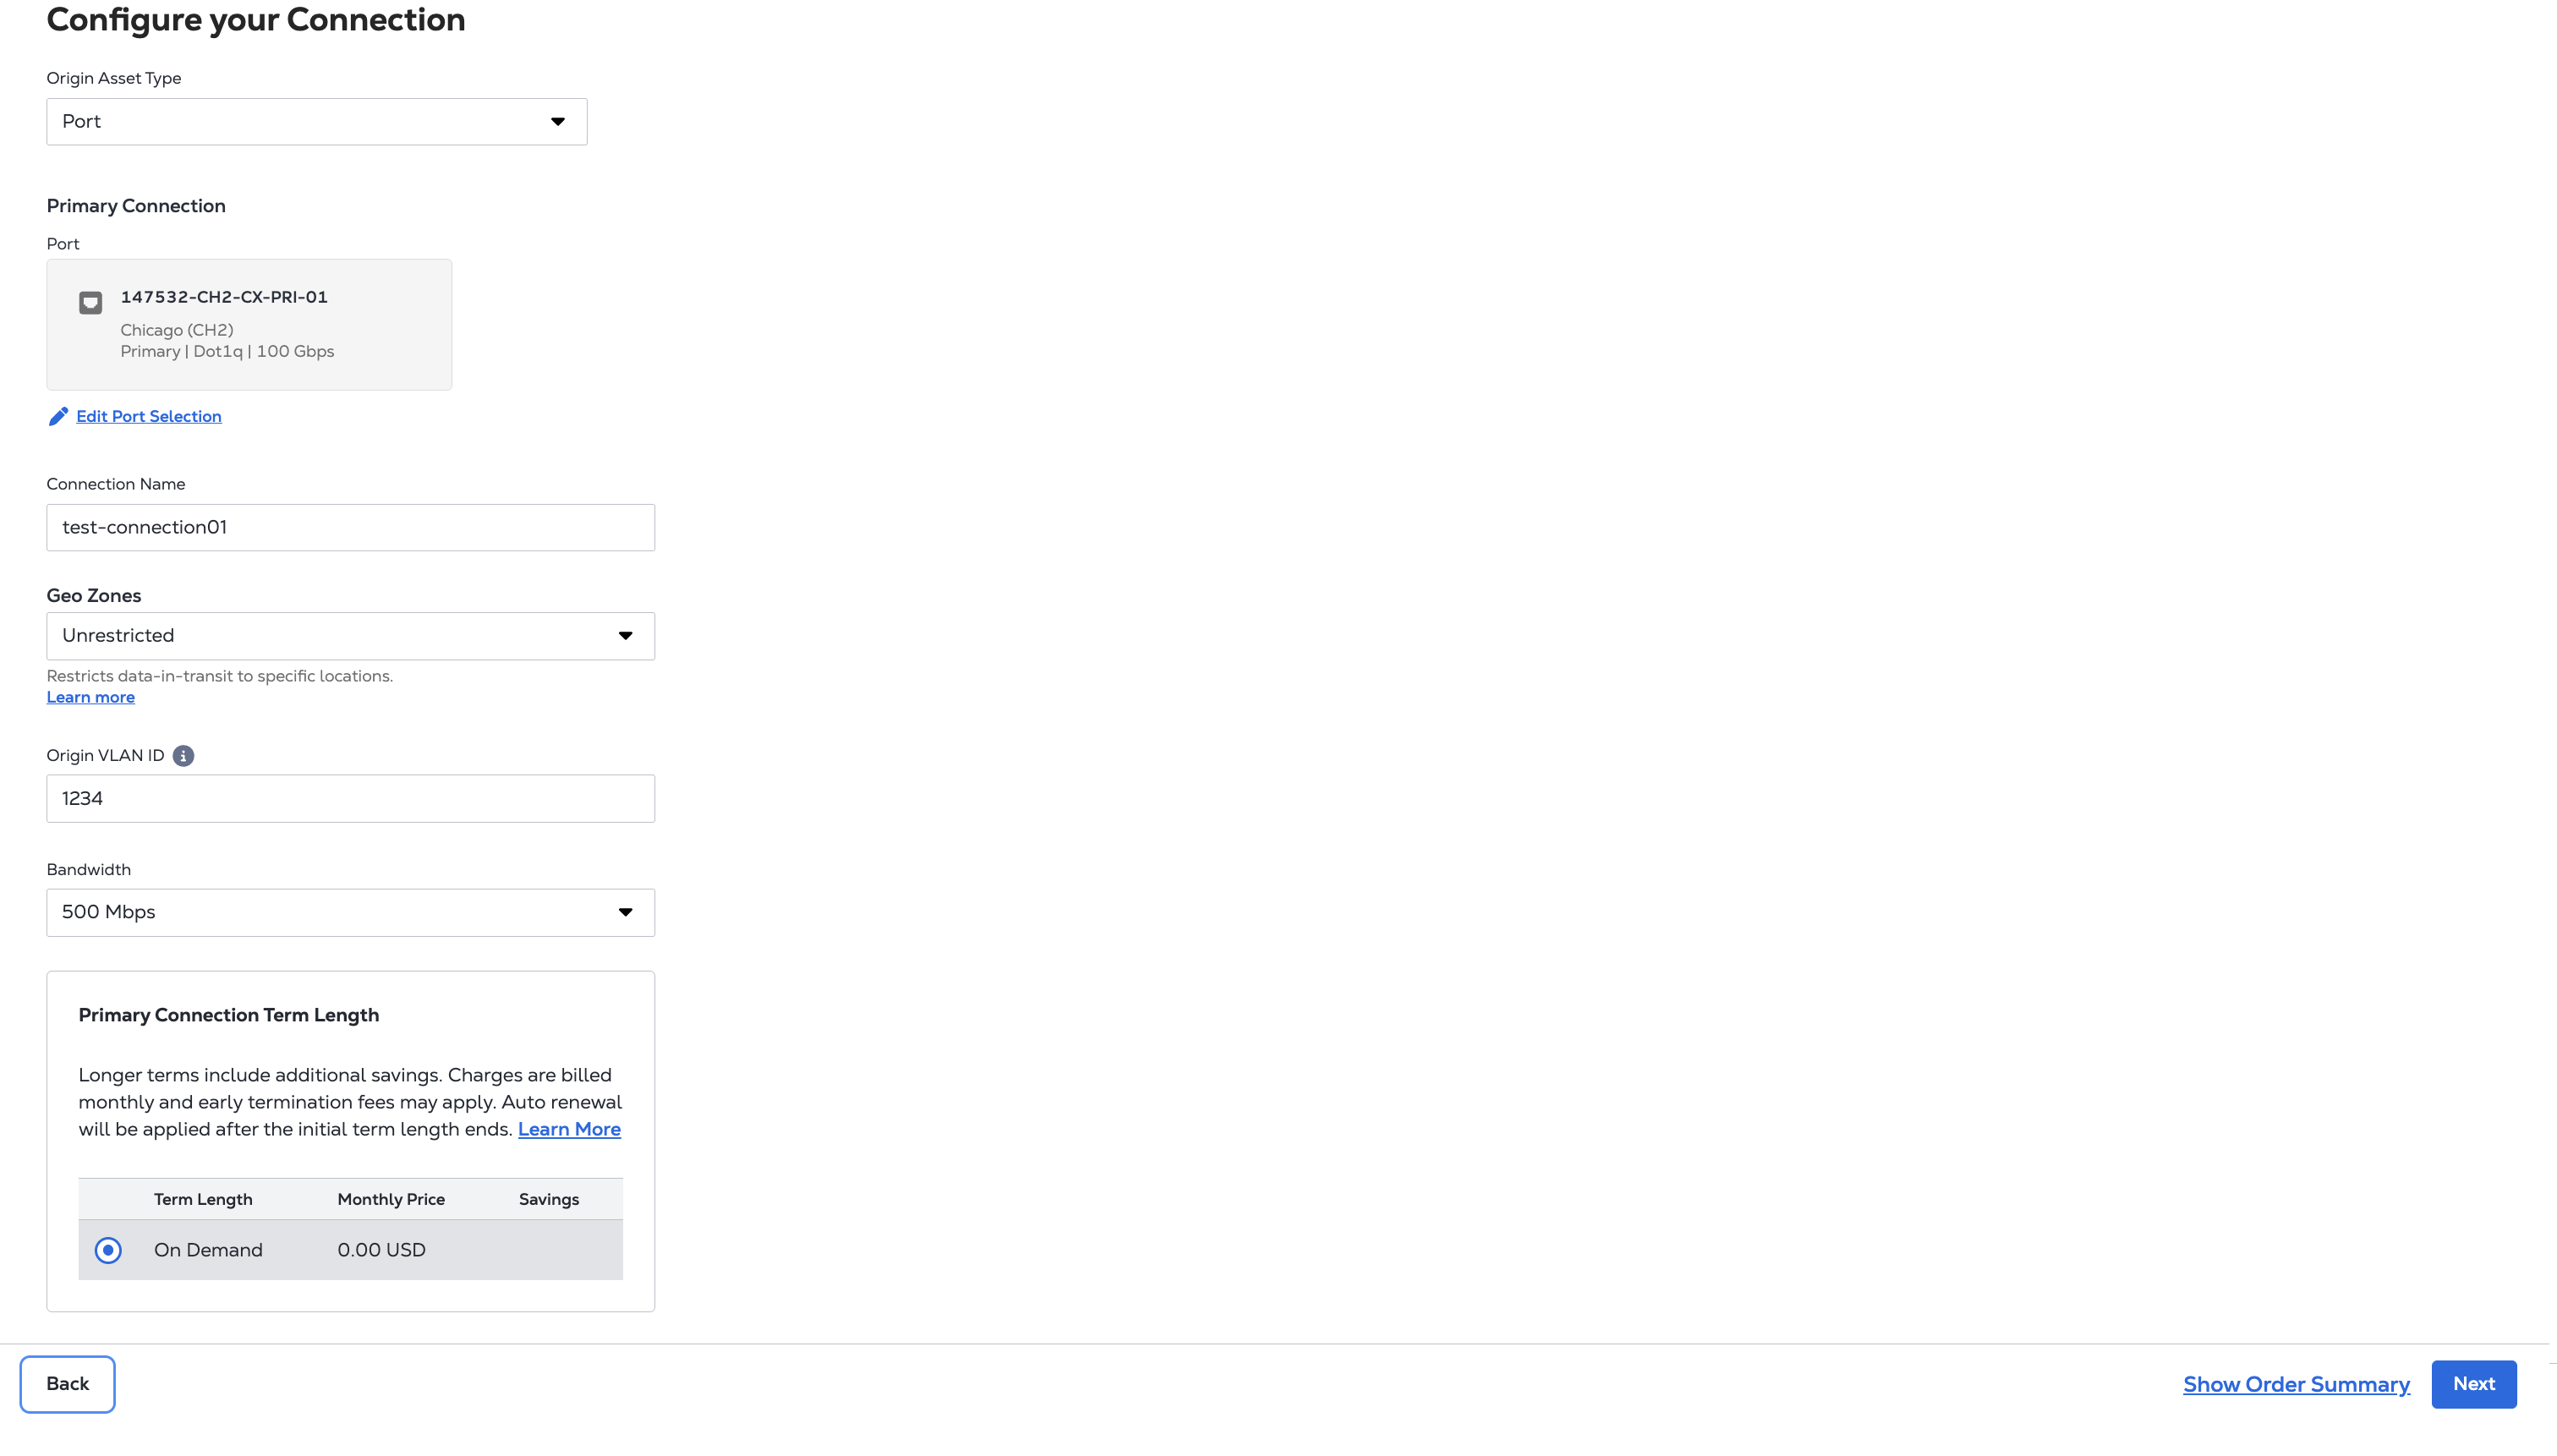
* For *Origin Asset Type*, select **Port**.
* Under *Primary Connection*, click **+Select Primary Port**.
* Choose the port to use for the connection from the list and click **Select Port**. Be sure ICMP is allowed on your Equinix Fabric-connected device as this will allow Unitas Global to ping your connection for testing and monitoring your service.
* Give your connection a name.
* If your port and Unitas destination are in the same region, choose your Geo Zones configuration.
* Enter the VLAN ID in the *Origin VLAN ID* field.
* Choose the connection's bandwidth.
* If your port and Unitas destination are in different Metros, you can choose the Term Length. If they are in the same Metro, the connection is only available On Demand.
4. Click **Next**.
5. Review the information in the *UNITAS Destination* and *Connection Configuration* sections.
6. In the *Additional Information* section:
* Use the *Notifications* field to provide the email addresses of the recipients to be notified about the connection's status. You can add up to 12 email addresses.
* (*Optional*) Enter or add order information in the *Purchase Order* section.
* (*Optional*) Provide a customer reference identifier that will help you identify this order on your invoice.
When you are ready, click **Create Connection**.
## Connecting from a Virtual Device[](#connecting-from-a-virtual-device "Direct link to Connecting from a Virtual Device")
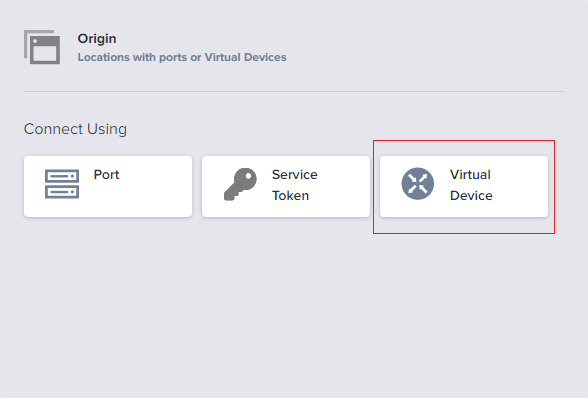
1. In the *Origin* section, click **Virtual Device**.
2. Select a location.
3. Select a Virtual Device Type.
4. Select a Connection Type.
5. Select a device.
> **Note**
>
> Be sure ICMP is allowed on your Equinix Fabric-connected device or virtual Network Edge device as this enables Unitas Global to ping your connection for testing and monitoring your service.
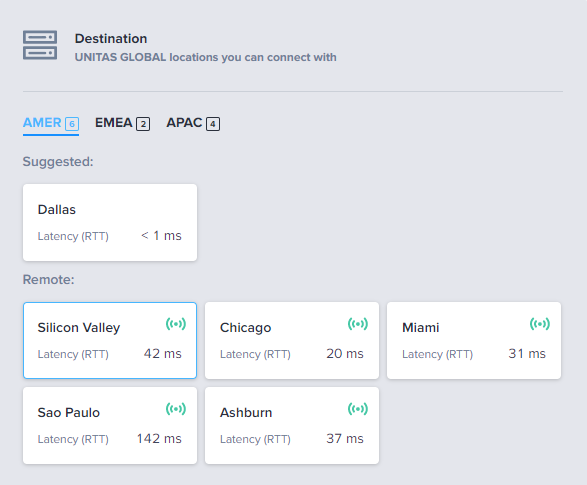
6. In the *Destination* section, select a Unitas Global location to connect to.
7. Click **Next**.
8. In the *Connection Information* section, enter a name for the connection.
9. In the *Interface Selection* section, select either **Automatically select the next available interface on my device(s)** or **I will select the interface on my device**.
10. Finish the connection request and click **Enter**.
11. Click **Submit**.
## Monitoring the Connection Status[](#monitoring-the-connection-status "Direct link to Monitoring the Connection Status")
When the process is completed successfully, the connection status is Not Provisioned until the connection is accepted by Unitas Global. Once the connection is accepted, the connection is automatically provisioned within Equinix Fabric and the connection status changes to Provisioned.
The new connection can now be viewed or modified at any time by selecting the connection in *Connections Inventory*.
If you need help during this process, or would like to schedule a turn-up call with a Unitas Global engineer, contact .