Creating a Fabric Cloud Router
You can configure and provision a new Fabric Cloud Router through the Equinix Customer Portal or API.
To create a cloud router you must have the Fabric Cloud Router Manager role.
Cloud Router Options
When you order a Fabric Cloud Router, choose between the following configuration options:
-
Location - Choose the Metro location of the cloud router. You can only connect a Cloud Router to other endpoints within the same metro location. A list of locations and their ASNs is available in Locations and ASNs
-
Package - The package determines the price per month, as well as the IPv4 and IPv6 route quotas, the maximum number of connections to/from the router, and the maximum bandwidth of connections to/from the router. For more information, see Service Packages.
-
Terms Length - You can choose to commit to term-based billing where longer terms include additional savings. Charges are billed monthly and early termination fees may apply. The Lab tier package is only available on-demand. For more information, see Contracted Terms.
Create a Cloud Router
To create a cloud router:
- Portal
- API
- Terraform
-
Sign into the Equinix Customer Portal and navigate to Fabric.
-
Use the Project Selector drop-down to choose the correct project. For more information, see Managing Projects.
-
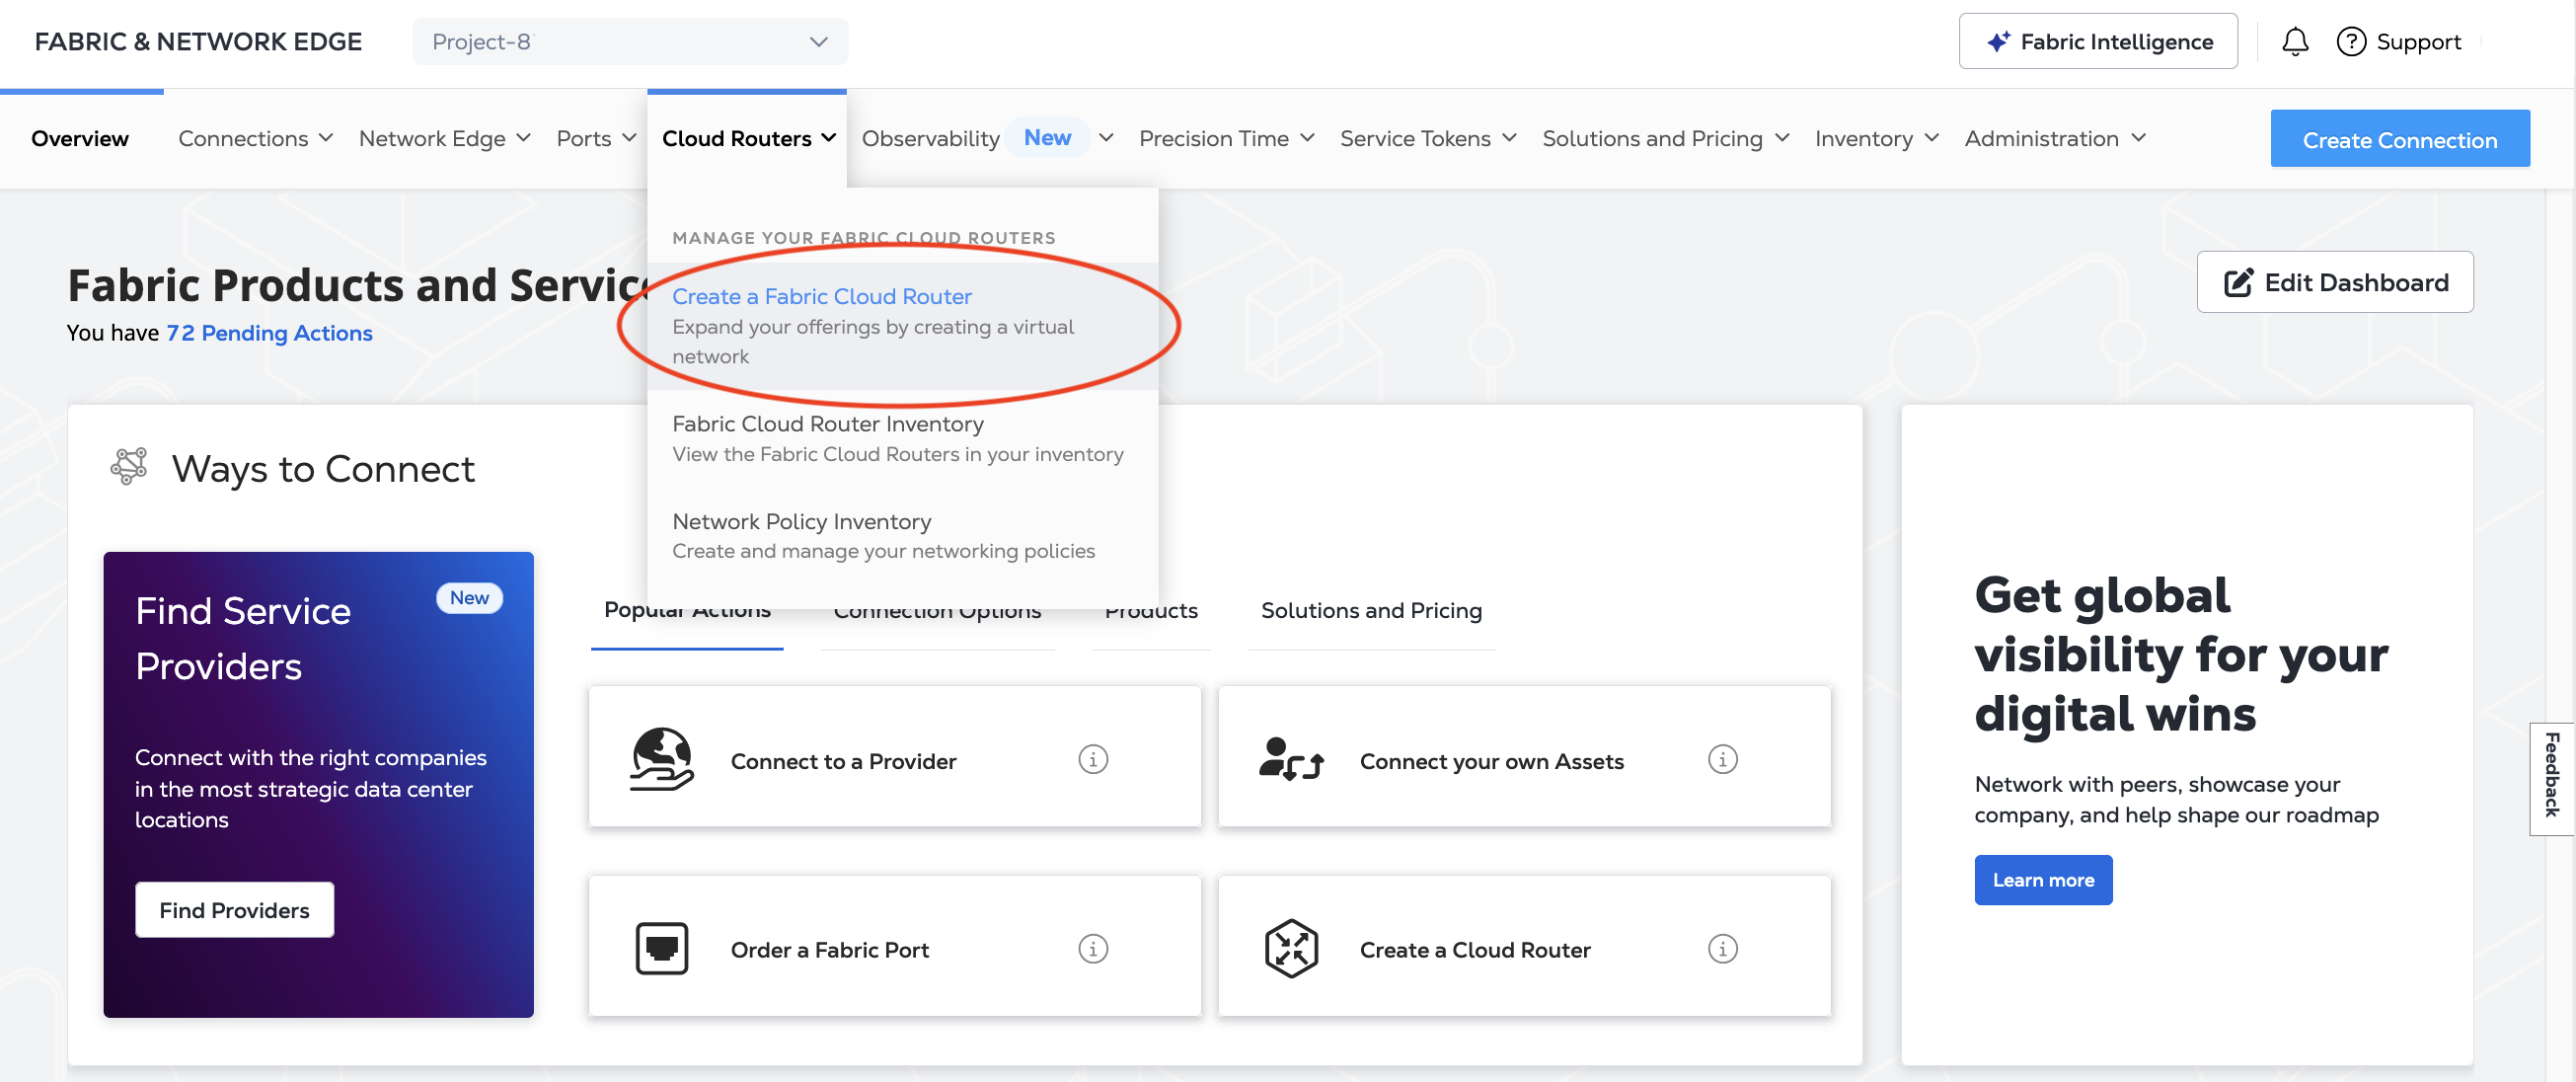
From the Cloud Routers menu, select Create a Fabric Cloud Router.
-
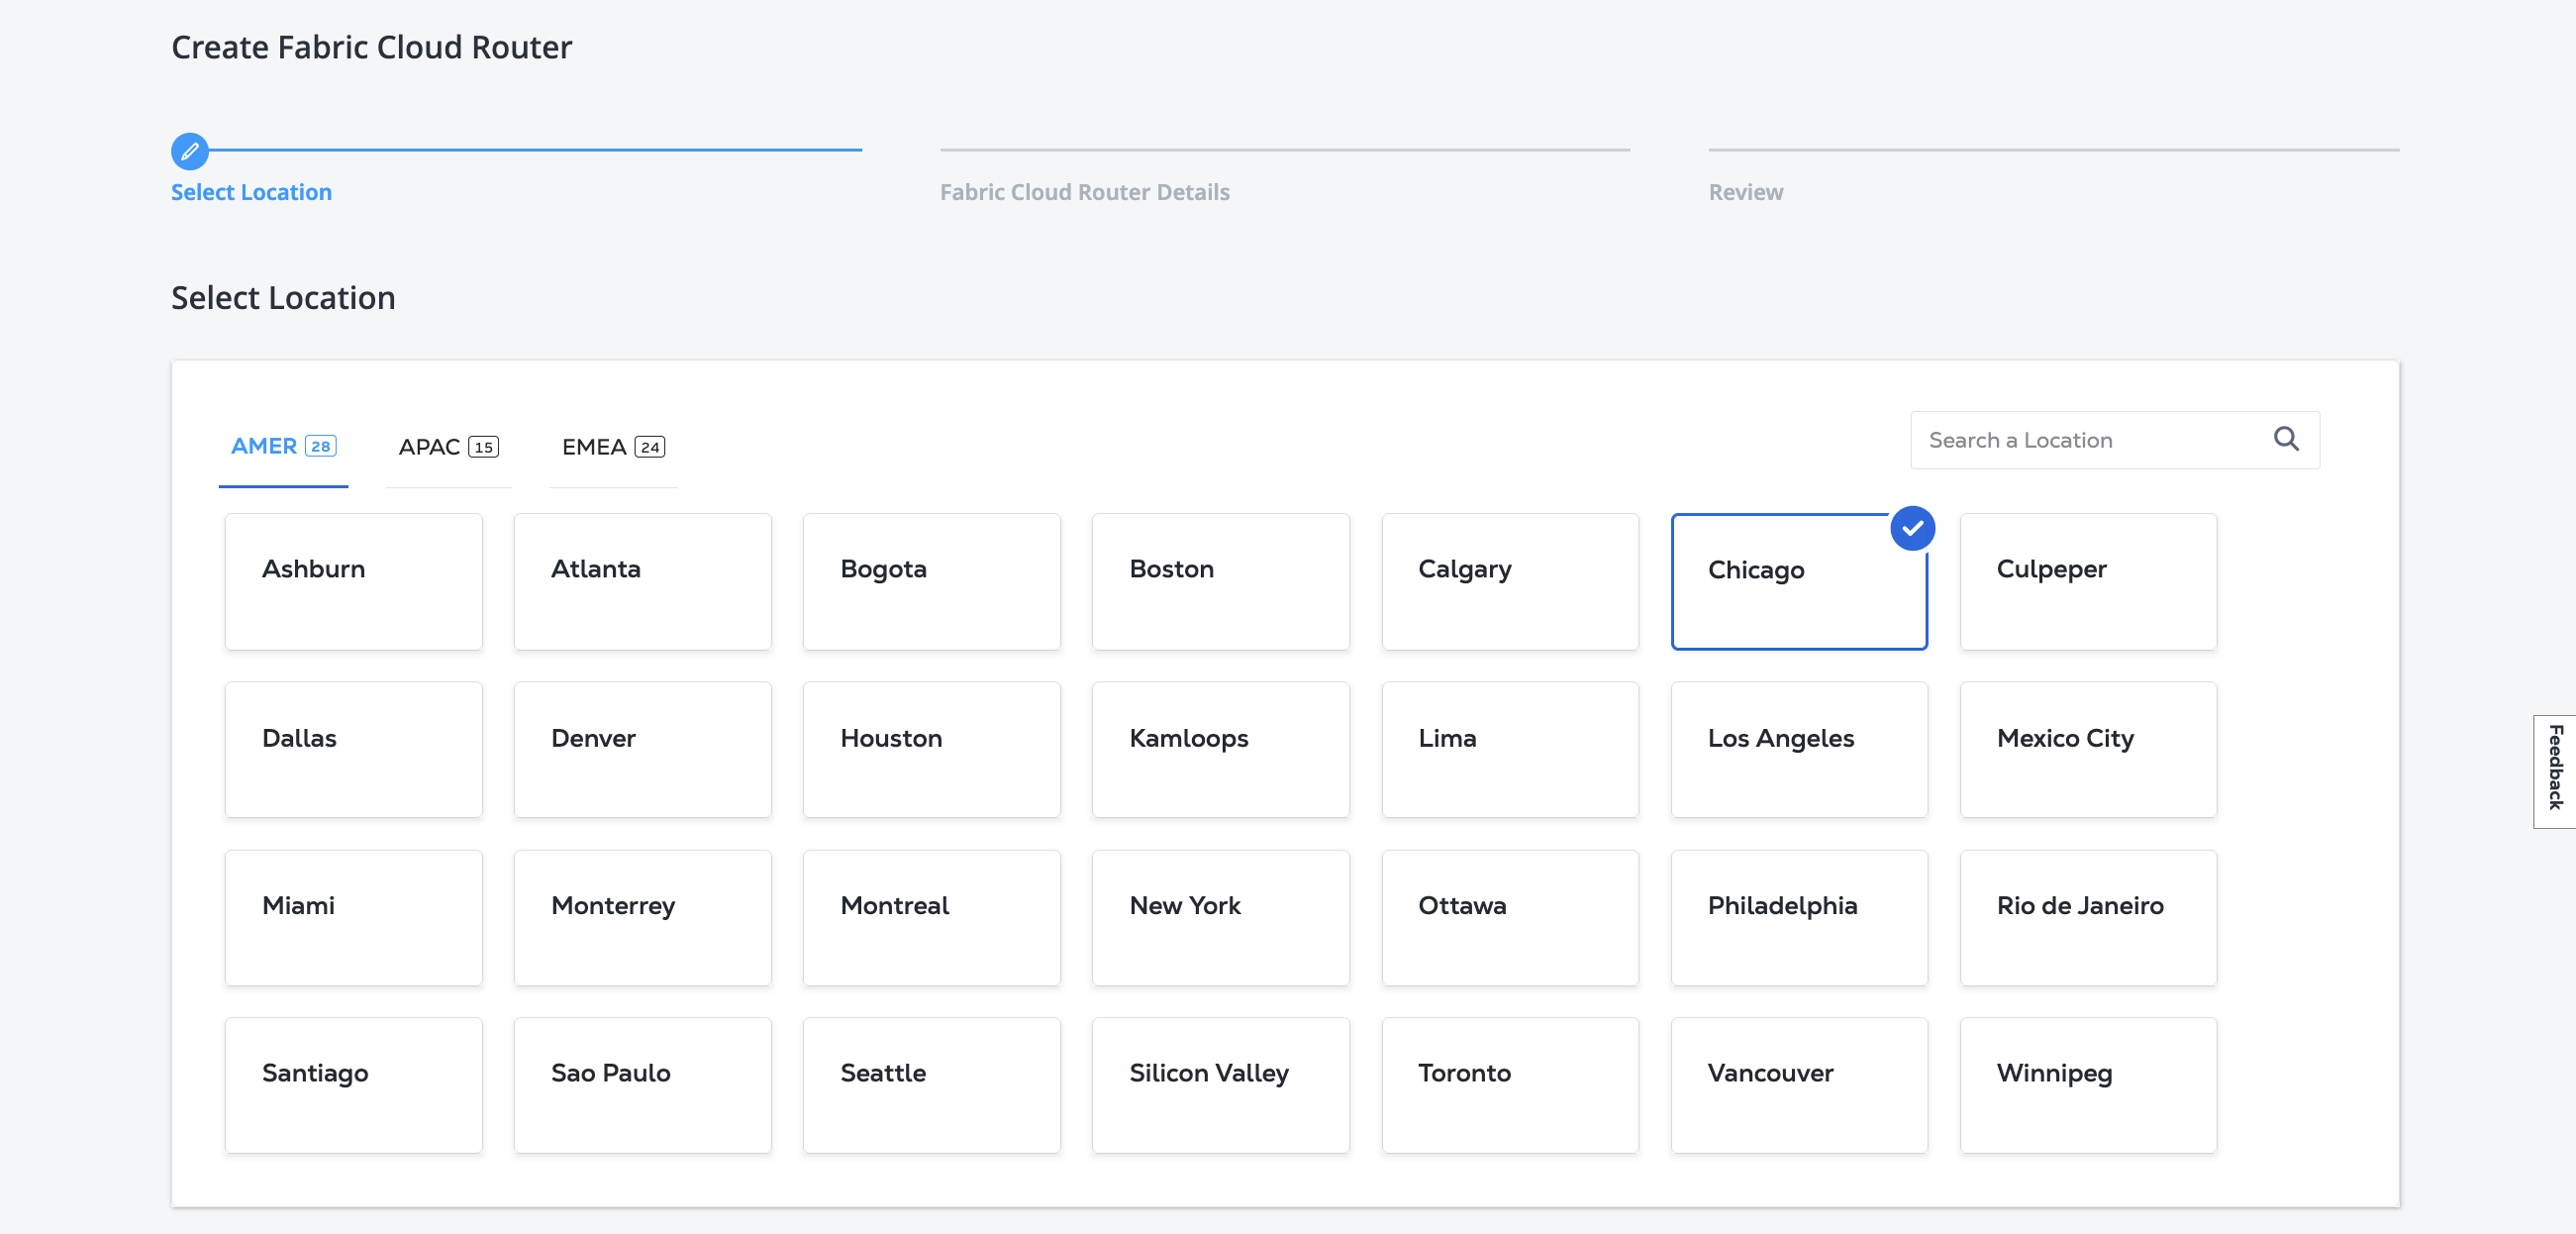
On the Select Location page, click a region and a metro location. For a list of the Autonomous System Numbers used for Cloud Routers in each of the available metros, see Locations and ASNs.
 note
noteYou can only connect a Cloud Router to other endpoints within the same metro location.
-
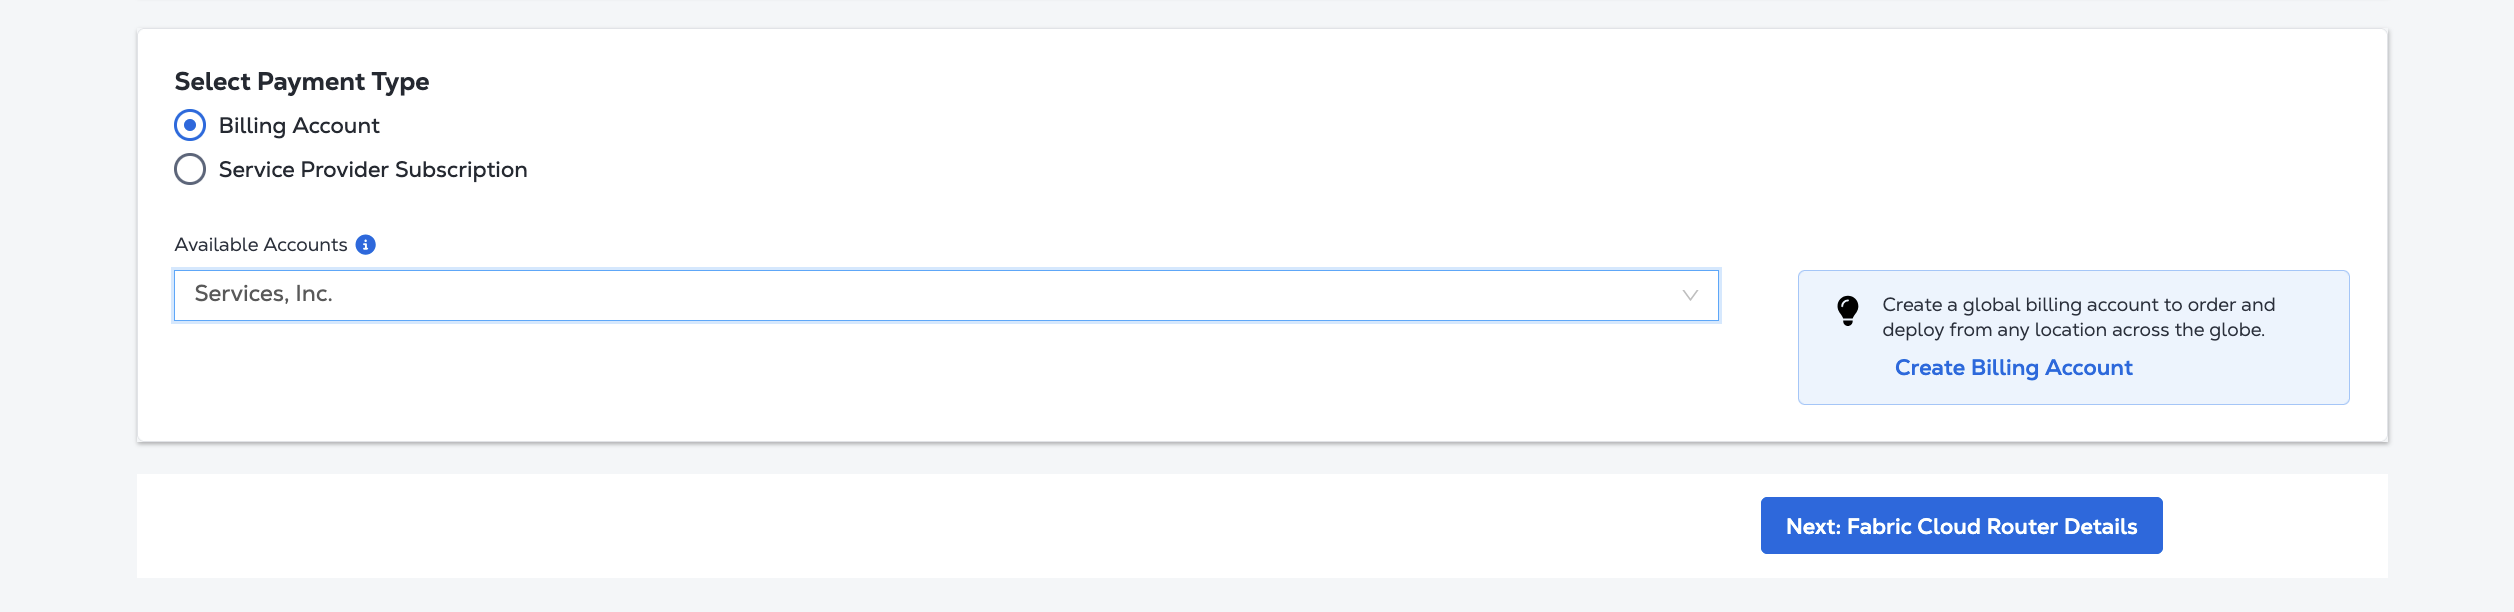
Choose a Billing Account from the drop-down list.
 note
noteYou can order a new Fabric Cloud Router and set up a billing account through the AWS Marketplace. For instructions, see Order a Cloud Router or VC in the AWS Marketplace.
-
Click Next: Fabric Cloud Router Details.
-
On the Fabric Cloud Router Details page:
-
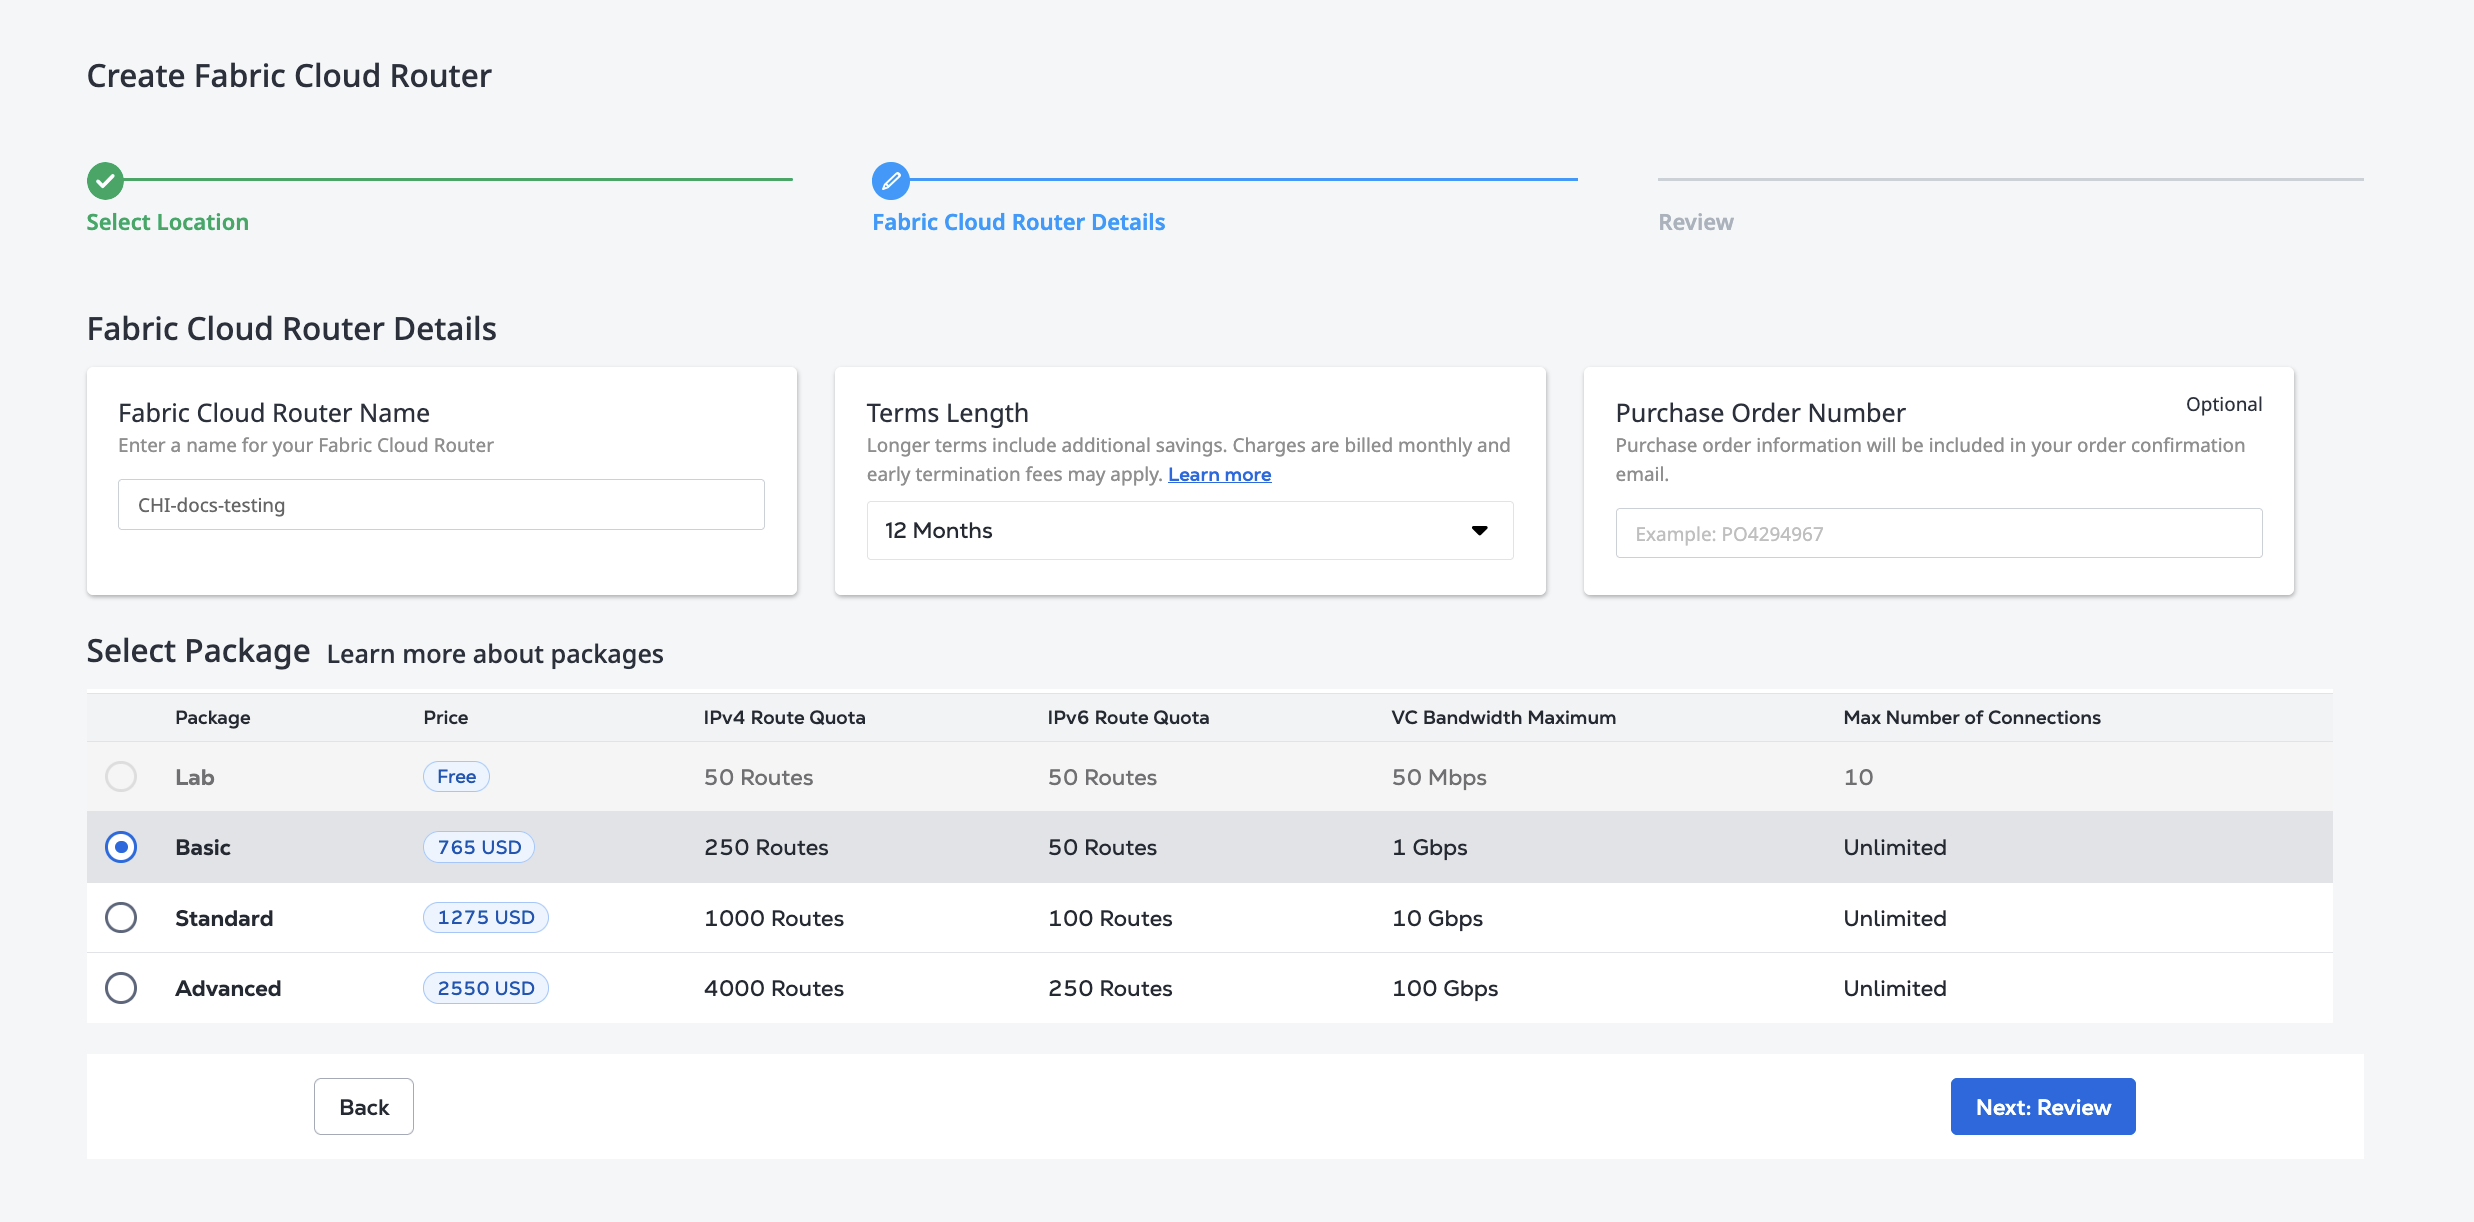
Enter a new cloud router name. The name must contain 3–24 characters.
-
Select a term length.
-
(Optional) Enter a Purchase Order Number.
-
Select a package with the number of IPv4 and IPv6 routes, the virtual connection bandwidth, and the number of virtual connections that you need for the new Cloud Router.
note100 Gbps virtual connections are supported as long as the metro and the infrastructure on the other side of the connections support 100 Gbps on their side. For more information, see Virtual Connection Availability.
-
-
Click Next: Review.
-
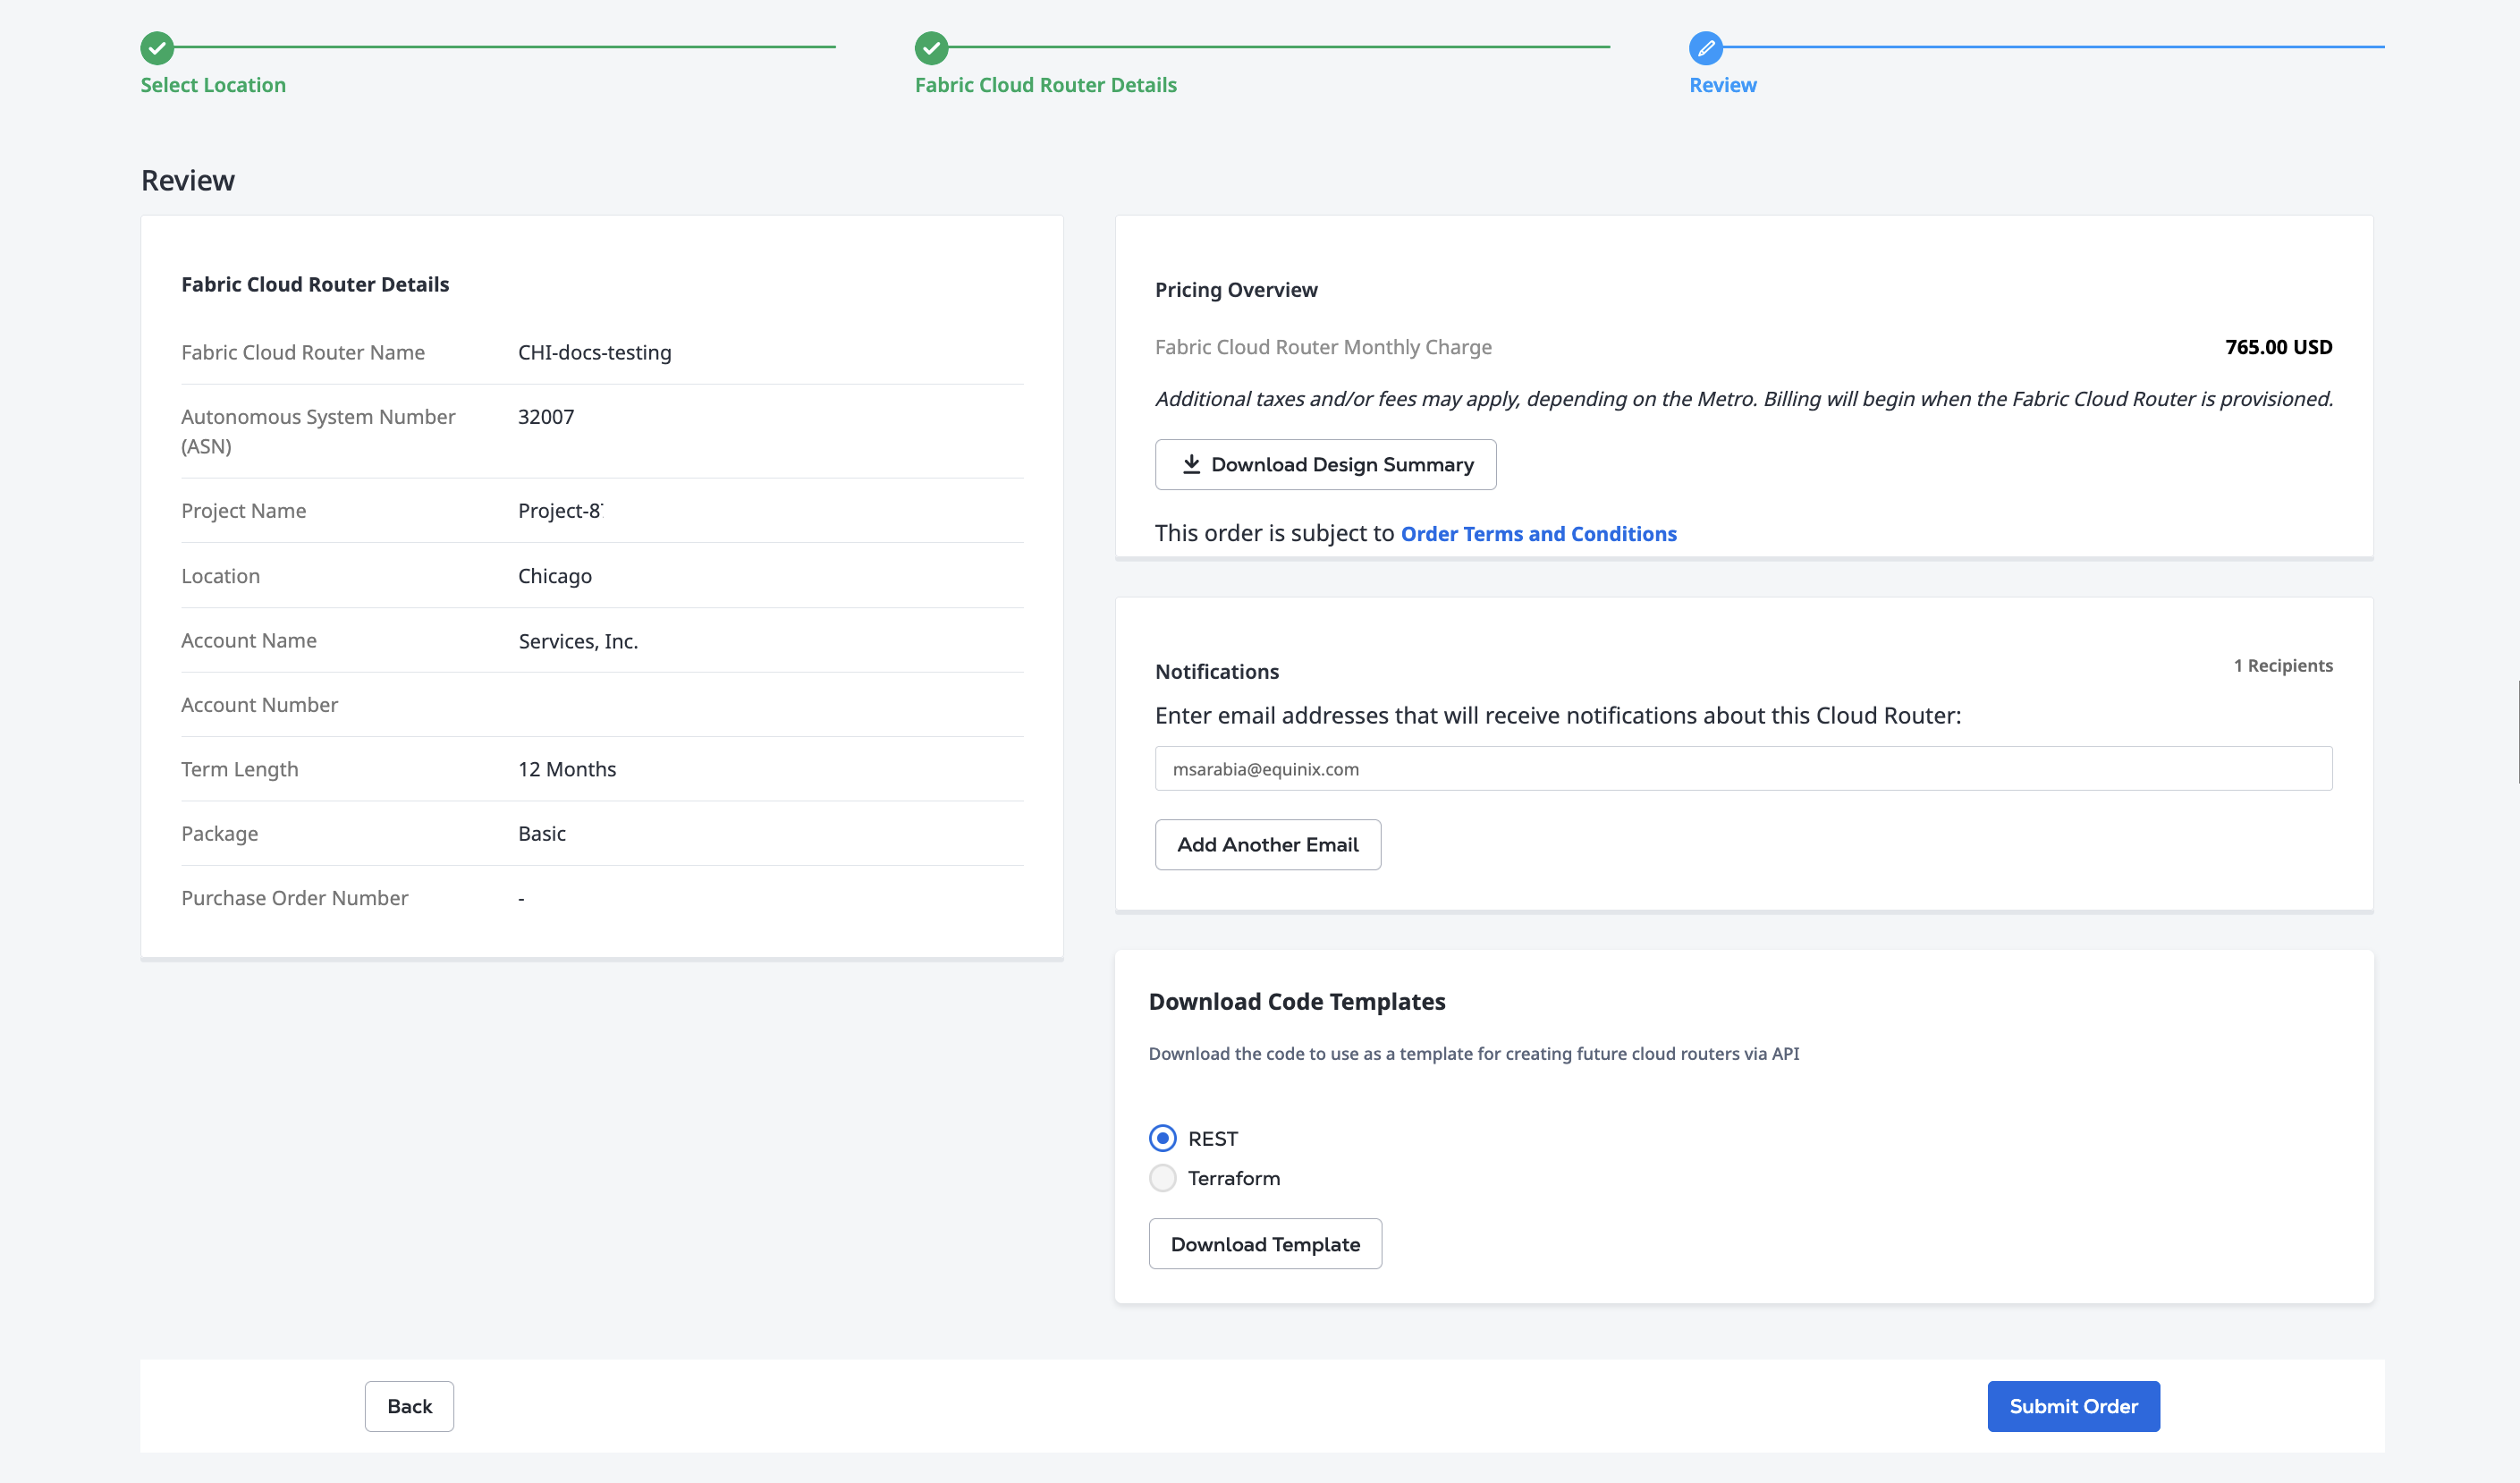
Review your order in the Fabric Cloud Router Details section. The Pricing Overview section lists your Fabric Cloud Router Monthly Charge.
Optionally:
-
To download a PDF summary of the order, click Download Design Summary in the Pricing Overview section.
-
In the Notifications section, click Add Another Email to enter any additional email addresses for notifications about this order or cloud router.
-
The Download Code Templates section offers a REST API or Terraform template for your order. To download, select an option, and click Download Template.
-
-
When you are ready, click Submit Order.
In the Suggested Actions section of your new Cloud Router order confirmation, click View this Fabric Cloud Router to display the inventory list. For more information, see Fabric Cloud Router Inventory.
To create a Fabric Cloud Router in the API, send a POST request to the /fabric/v4/routers endpoint.
In the body of the request, specify:
- The
typeisXF_ROUTER. - Your router name.
- The project the router belongs in.
- The Equinix Metro code for the router's location.
- Set the package code to
LAB,BASIC,STANDARD, orADVANCED. - Specify the
termLengthin number of months:1,12,24,36. The default value1is for on-demand usage. Lab packages are only available on-demand. - Enter your billing account number in
accountNumber. - Use the
notificationsobject for contact emails about this router.
Sample curl request:
curl -X POST 'https://api.equinix.com/fabric/v4/routers' \
-H 'content-type: application/json' \
-H 'authorization: Bearer <token>' \
-d '{
  "type": "XF_ROUTER",
  "name": "<cloud_router_name>",
  "project": {
    "projectId": "<project_uuid>"
  },
  "location": {
    "metroCode": "<metro_code>"
  },
  "package": {
    "code": "<package_code>"
  },
  "order": {
    "termLength": "<term_in_months>"
  },
  "account": {
    "accountNumber": <billing_acct_number>
  },
  "notifications": [
    {
      "type": "ALL",
      "emails": [
        "<contact_email>"
      ]
    }
  ]
}'
Create a Fabric Cloud Router using the equinix_fabric_cloud_router resource. Specify:
- The
typeisXF_ROUTER. - Your router name.
- The project the router belongs in.
- The Equinix Metro code for the router's location.
- Set the package code to
LAB,BASIC,STANDARD, orADVANCED. - Specify the
termLengthin number of months:1,12,24,36. The default value1is for on-demand usage. Lab packages are only available on-demand. - Enter your billing account number in
accountNumber. - Use the
notificationsobject for contact emails about this router.
resource "equinix_fabric_cloud_router" "new_cloud_router"{
  name = "<router_name>"
  type = "XF_ROUTER"
  project {
    project_id = "<project_id>"
  }
  location {
    metro_code = "<metro_code>"
  }
  notifications{
    type = "ALL"
    emails = ["<contact_email>","<contact_email>"]
  }
  order {
    term_length = "<term_length>"
  }
  package {
    code = "<package_code>"
  }
  account {
    account_number = "<billing_account_number>"
  }
}
Within a few minutes, you'll receive an email notification that your new Cloud Router is provisioned and ready for use.
Cloud Router Status
- Portal
- API
- Terraform
Once you have created your Fabric Cloud Router, check its status in your Fabric Cloud Router Inventory.
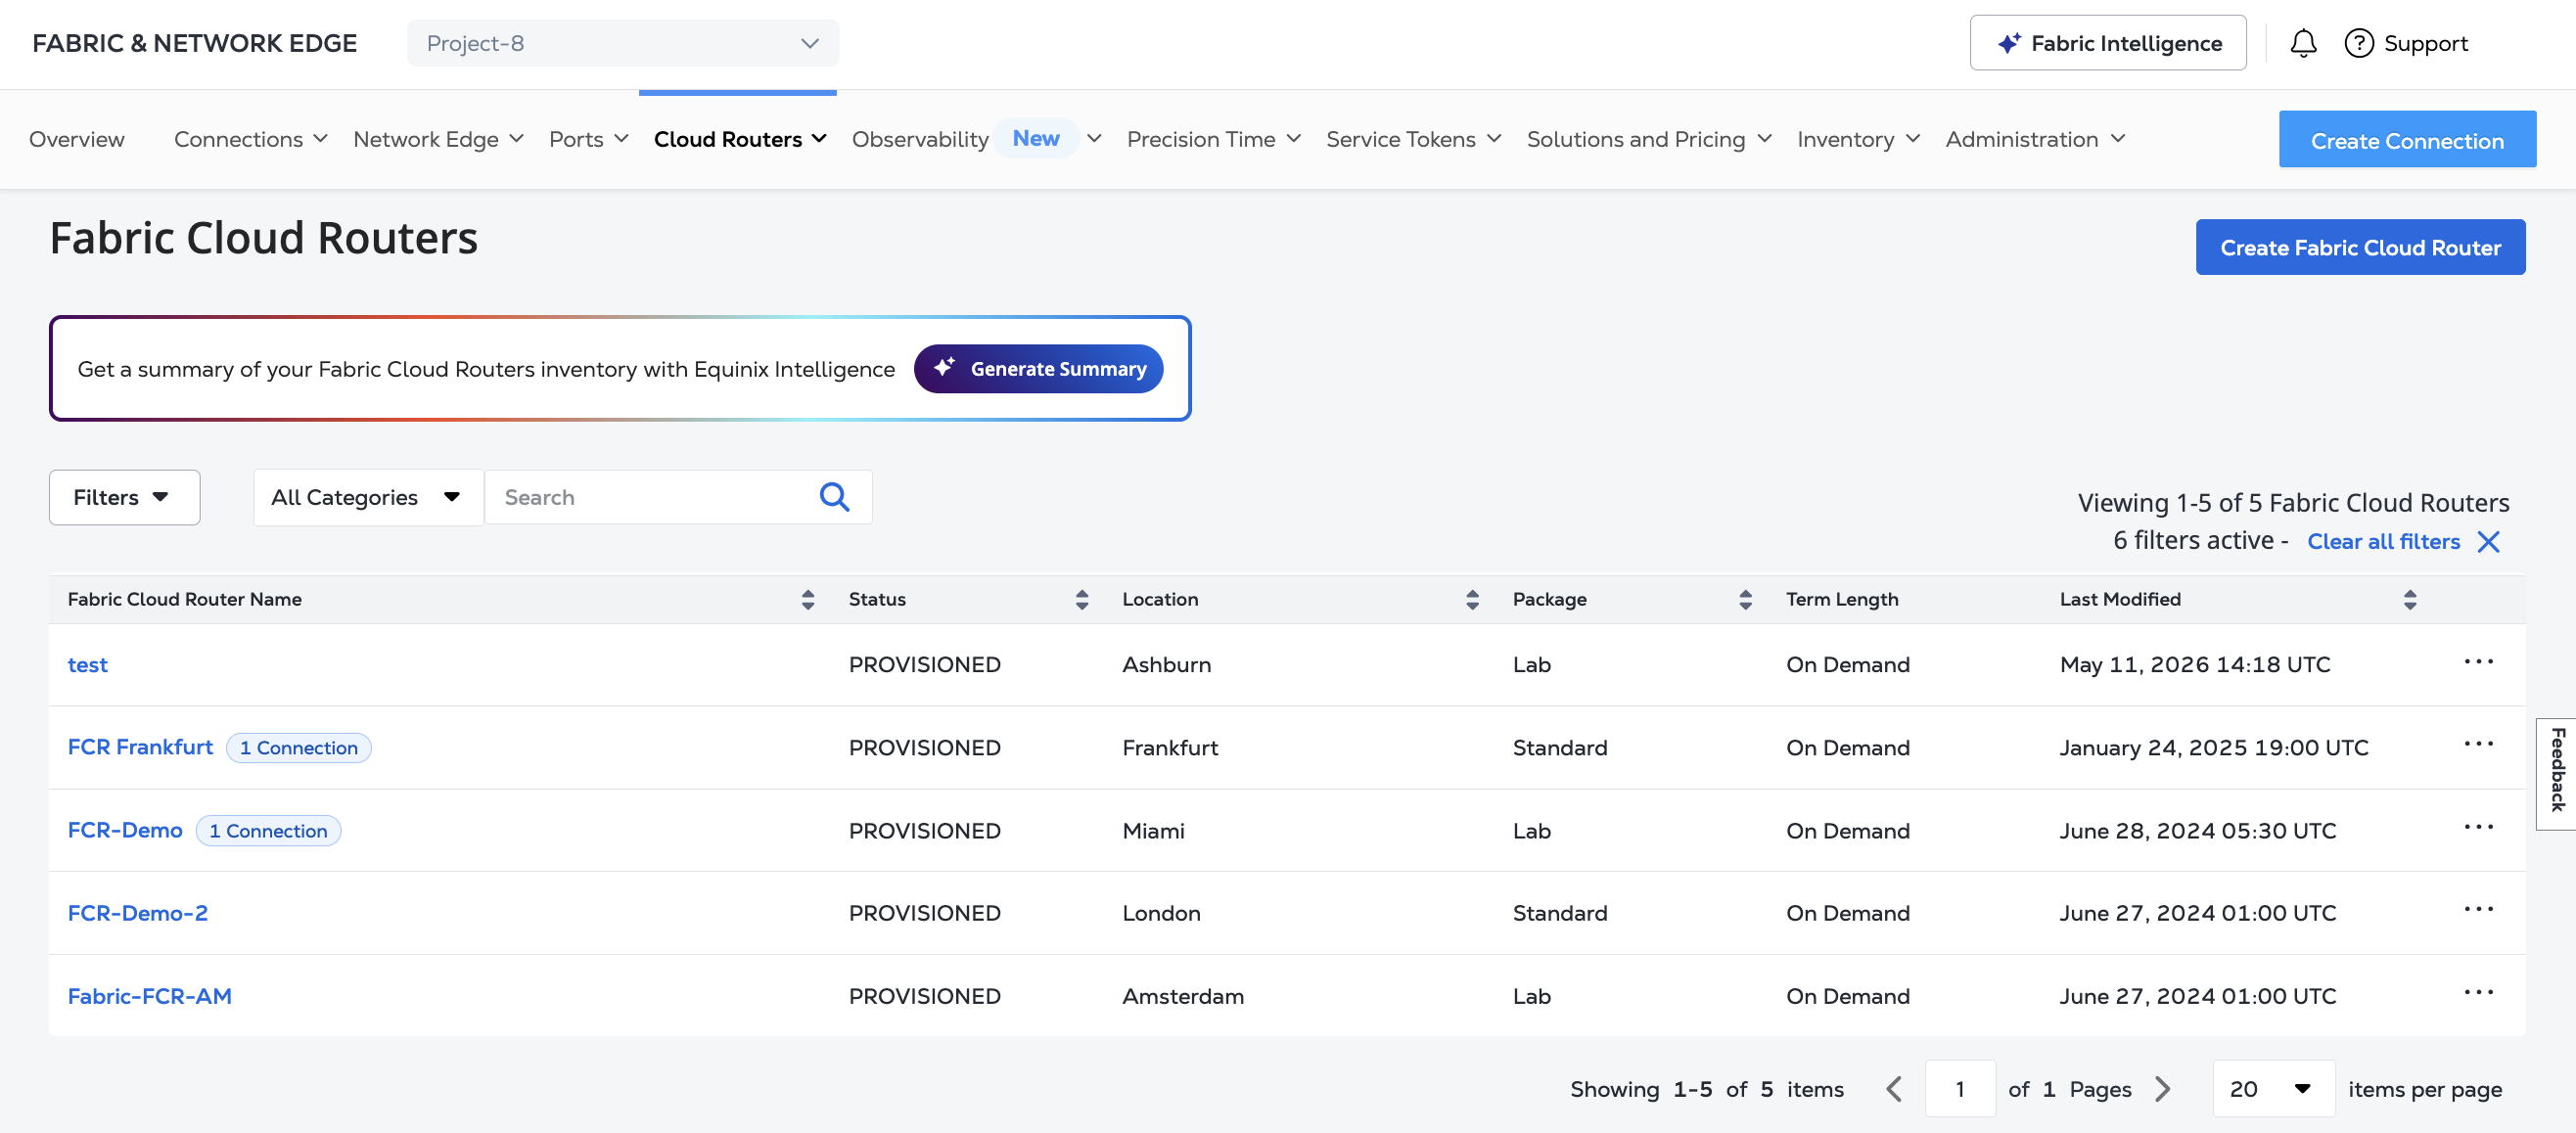
Once you have created your Fabric Cloud Router, check its status by sending a GET request to the fabric/v4/routers/{routerId} endpoint.
curl -X GET 'https://api.equinix.com/fabric/v4/routers/{routerId}' \
-H 'authorization: Bearer <token>'
Once you have created your Fabric Cloud Router, check its status using the equinix_fabric_cloud_router data source.
When your cloud router is PROVISIONED you can create connections to your ports, Network Edge virtual devices, or cloud service providers.