IBX Security Profiles
IBX Security Profiles allow you to physically access the data centers using a QR code and access PIN.
When your account is created in the Customer Portal, you'll receive an email asking you to complete your IBX Security Profile in the portal. Also, a message appears at the top of the portal dashboard the first time you sign in.
All users must create an IBX Security Profile to physically access an IBX.
For full policy information, refer to our Global IBX Policies. For questions, contact the Equinix Customer Support team.
Create a Password
-
You will receive two emails with instructions for creating your password. The first contains a 4-digit PIN and an assigned username. The second contains an activation link.
-
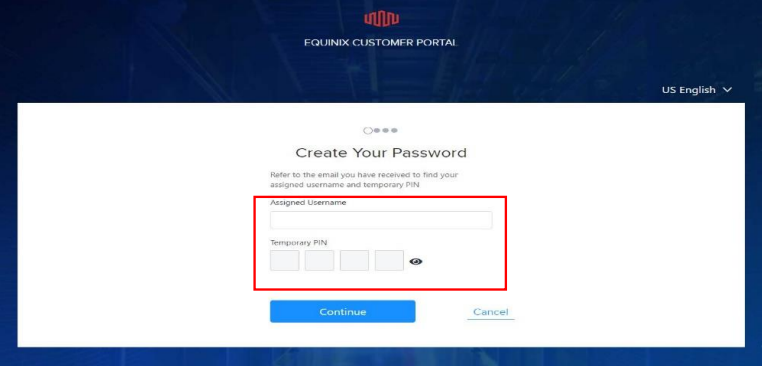
Click the activation link in the second email. A browser window opens, allowing you to enter your assigned username and 4-digit PIN, then click Continue.
-
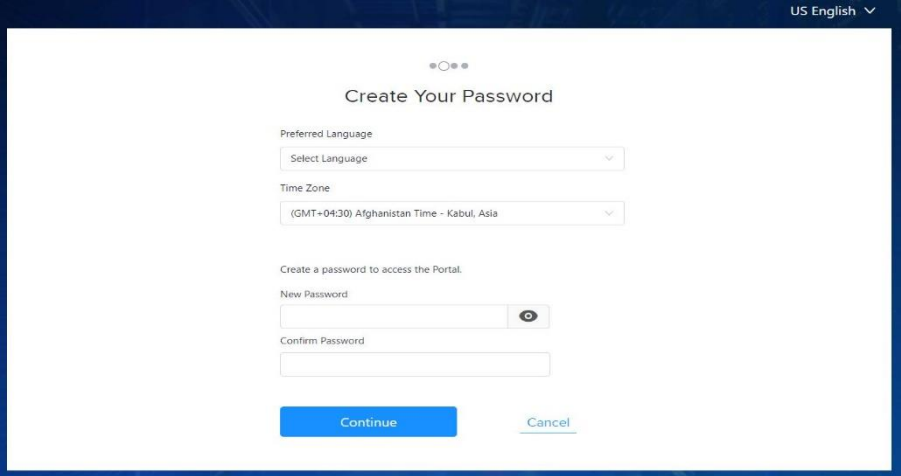
On the Create Your Password screen, enter the required information and click Continue.
-
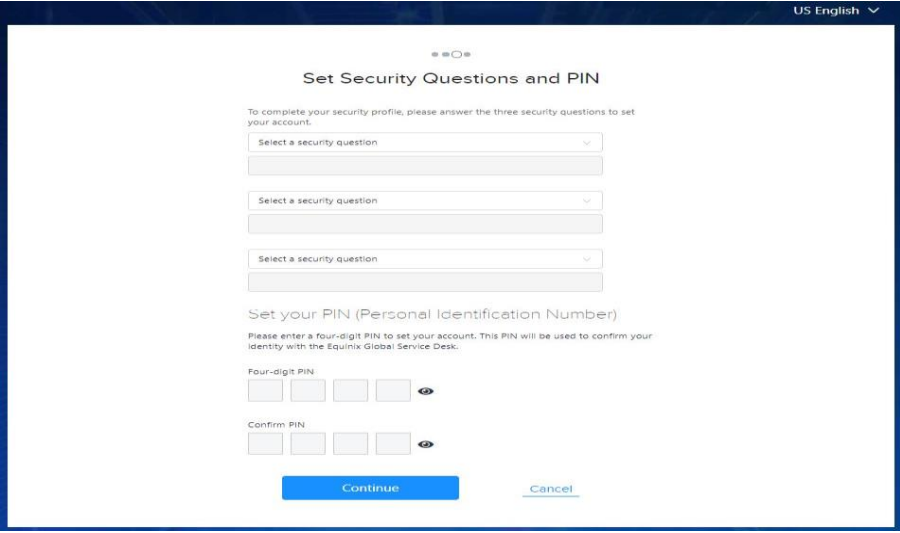
On the Set Security Questions and PIN screen, select and complete the three security questions, then set a new PIN. Click Continue.
-
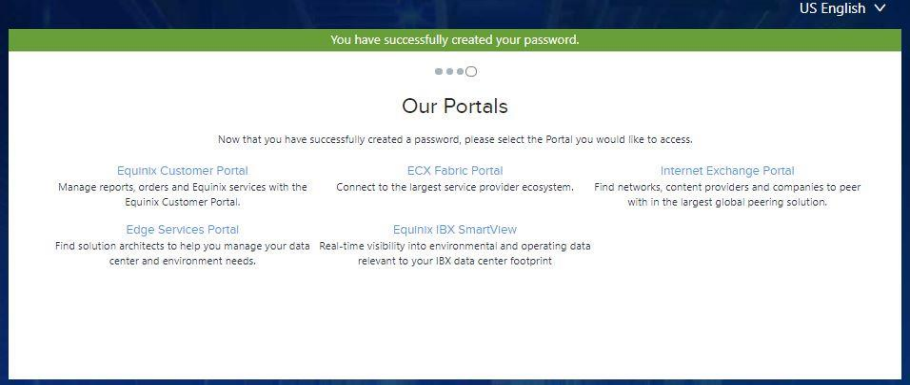
If you have successfully completed the process, the Our Portals screen is displayed, informing you that you have created your password and asking which portal(s) you would like to access.
Create a Security Profile
To create a security profile:
-
Sign into the Customer Portal.
-
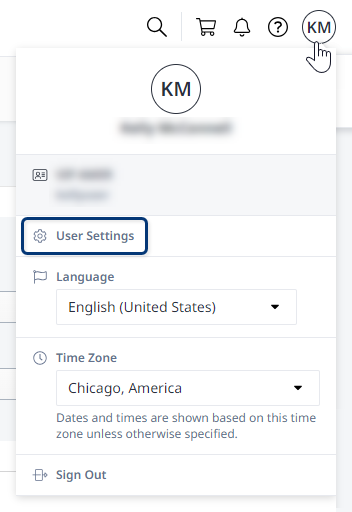
Click your user name and select User Settings.
-
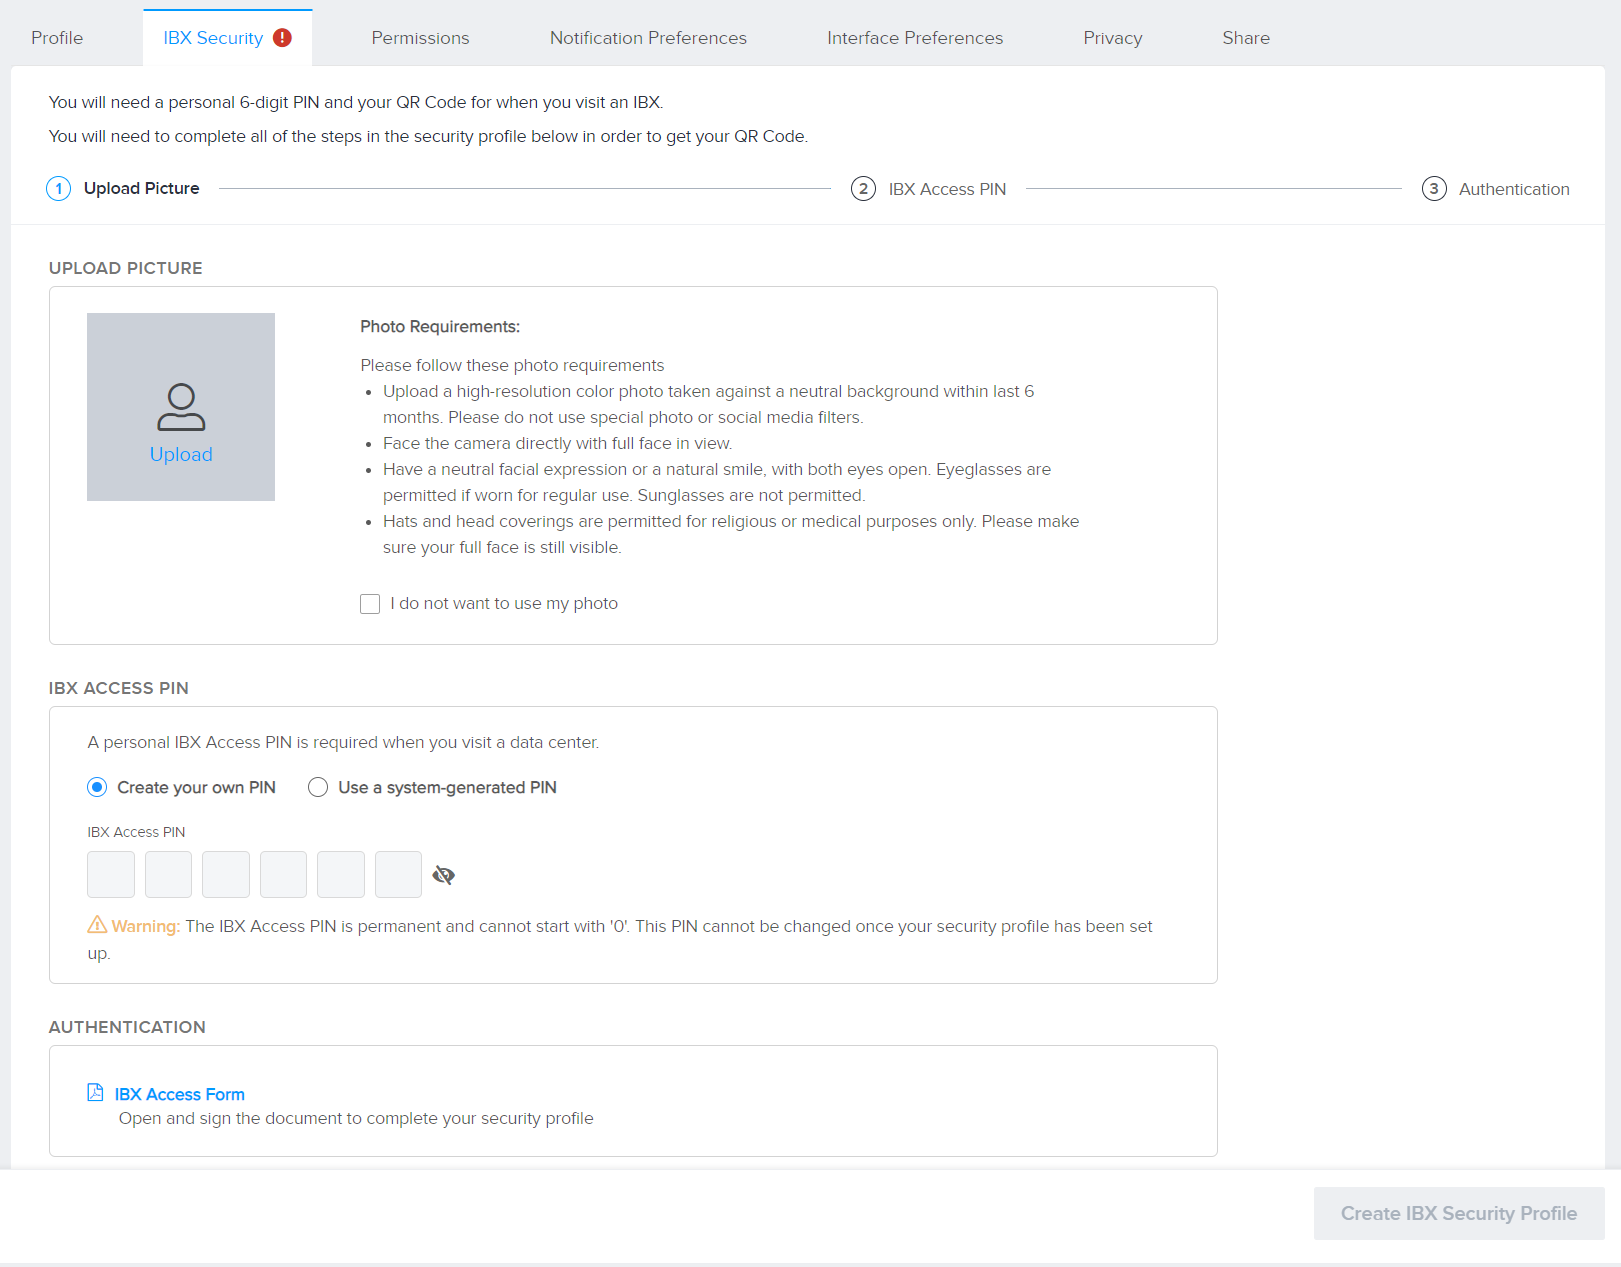
Select IBX Security.
-
Click Upload to add your headshot photo
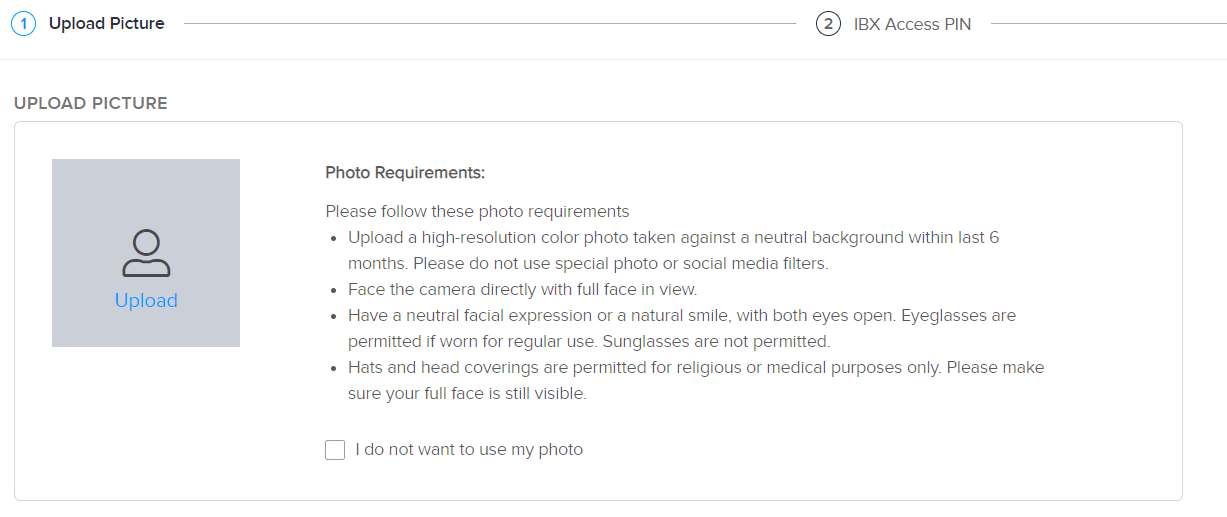
- Must be a high-resolution, color photo taken within the last 6 months.
- Background must be uniform, plain, free of shadows, and white or off-white.
- Must show a clear image of your face.
- Must not be digitally modified or have a social media filter.
- Must be high-resolution, and must not be blurry, grainy, or pixelated.
- Photo size must be: 2 x 2 inches (51 x 51 mm).
- Your head in the photo must measure between 1 inch and 1 3/8 inches (between 25 mm and 35 mm) from the bottom of the chin to the top of the head.
- Face the camera directly, with your full face in view.
- Display a neutral facial expression or a natural smile in the photo, with both eyes open.
- Do not wear a hat or head covering that obscures your hair or hairline, unless worn daily for a religious purpose. If you do wear a head covering, your full face should be visible, and your hat or head covering cannot obscure your hairline or cast shadows on your face.
- Eyeglasses worn daily can be worn in the photo.
- Selfies are allowed if they meet all listed requirements.
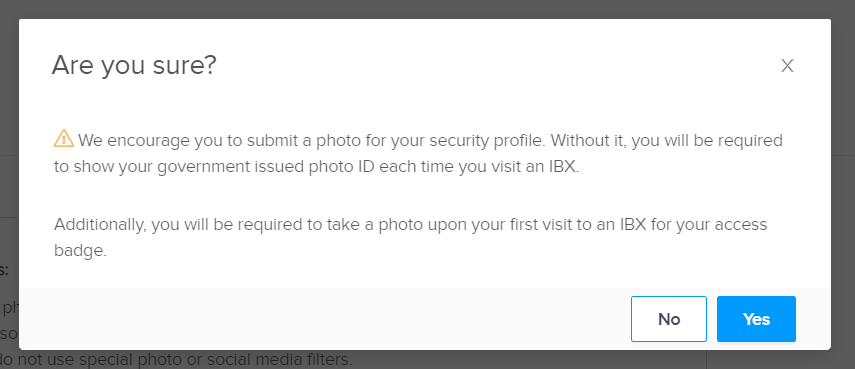
Or select I do not want to use my photo. If you don't add a photo to your profile, you must show a government-issued photo ID every time you visit an IBX. You may be required to have a photo taken at the IBX.
For more information, see Entering and Exiting an IBX.
-
Create a unique PIN to access your data centers.

- A PIN must be 6 digits and cannot start with 0.
- Once the security profile is configured, the PIN cannot be changed.
- To automatically generate a unique PIN, select Use a system-generated PIN. Or select Create your own PIN and enter a 6-digit number that does not start with 0. If the PIN you entered is valid and available, a green checkmark displays.
-
Click Generate IBX Access Form to continue.
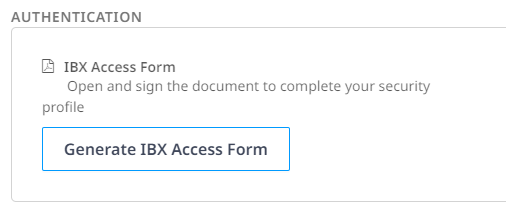
The button label changes once the form has been generated. Click Sign IBX Access Form.

An electronic document opens.
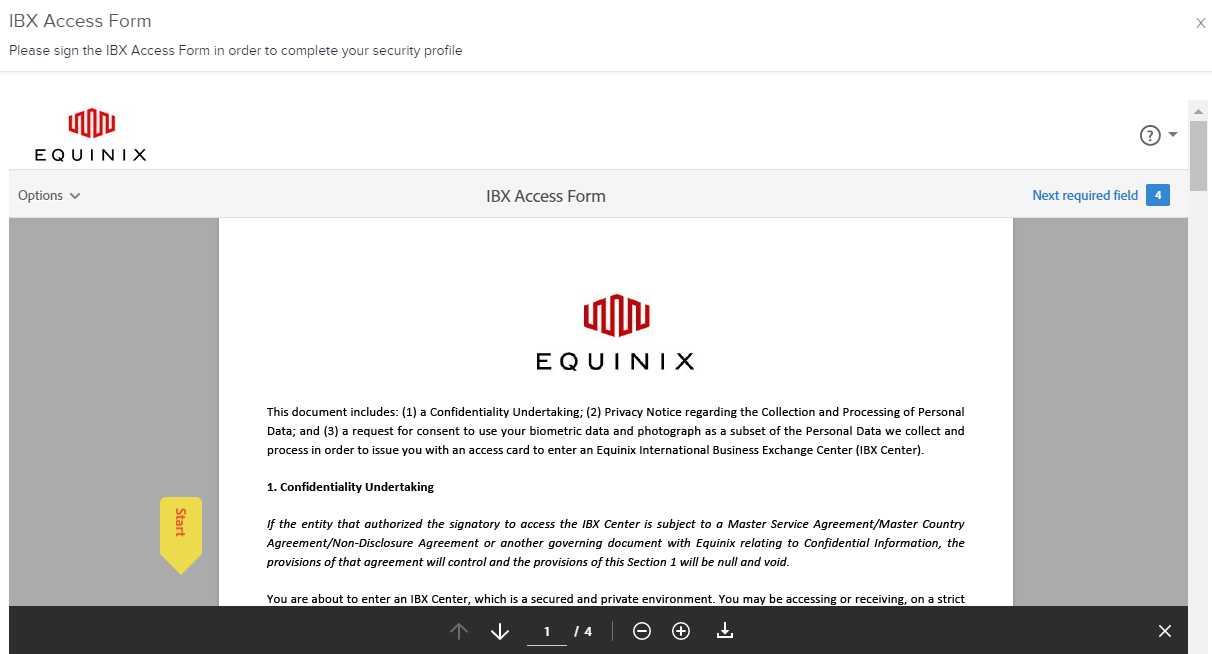
-
Read the document carefully, then select the agreement boxes.
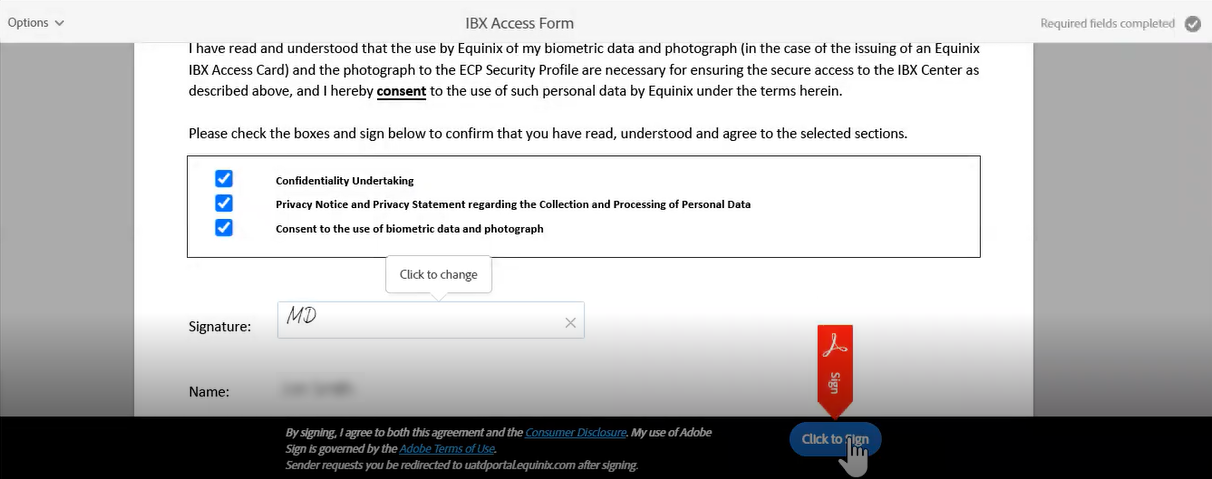
-
Sign the document, apply the changes, and select Click to Sign. A window appears with a success message.

-
Close this window to return to the previous page. A green checkmark appears beside the form to confirm that the system accepted your signed agreement.
-
Click Create IBX Security Profile.

-
Your IBX Access PIN is shown, your security profile is created, and a unique QR code is generated for you. Click Continue.
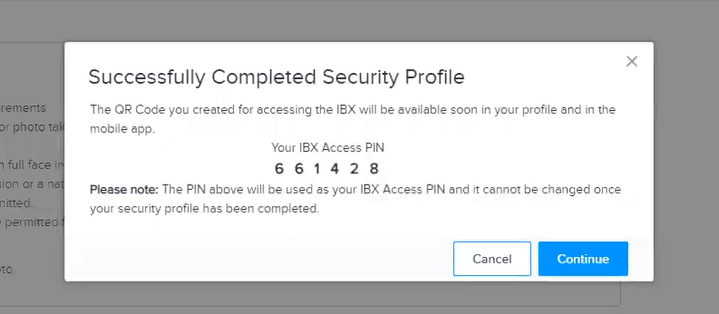
Now you can use your PIN and QR code to enter an IBX.
Find Your PIN and QR Code in the Customer Portal
For added security, Equinix uses QR codes to restrict physical access to IBXs. A QR code is a machine-readable code, similar to a bar code. Before entry to the IBX, each person is required to present a unique QR code (generated in the Equinix Customer Portal) to be scanned by Security staff.
You can store your QR code:
- in your email
- on a printed copy
- in your Apple Wallet or Google Wallet/Pay
- in the Equinix Customer Portal mobile app on your mobile device
To access your PIN and QR code in the portal:
-
Sign into the Customer Portal.
-
Click your user name and select User Settings.

-
Select IBX Security. Your QR code is shown.
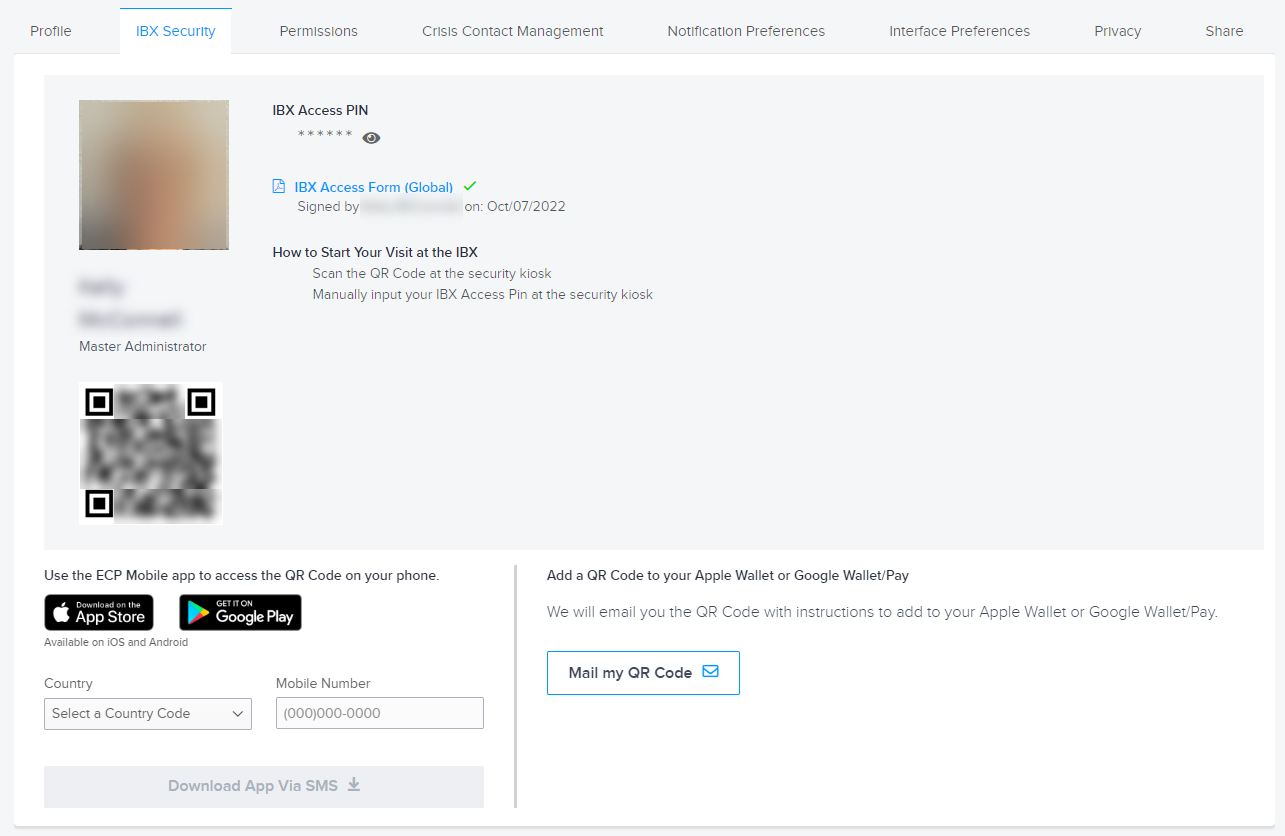
If you're checking into the IBX now, you can show this screen (on your mobile device) at the Security kiosk for scanning. Or you can print a copy to take to the IBX.
To store your QR code in your email account or add it to your Apple Wallet/Google Wallet/Google Pay, click Mail my QR Code. You'll receive an email with instructions.
To install the Equinix Customer Portal mobile app to access your QR code and PIN on your mobile device, click the button for the Apple App Store or Google Play store, or enter your country and mobile device number and click Download App Via SMS.
For IBX arrival and check-in procedures, see Checking In to an IBX.
Linking Your IBX Security Profiles
Users with multiple IBX Security Profiles can link them together. This simplifies your access to data centers by eliminating the need to manage multiple security profiles, QR codes, and access PINs.
- You can link multiple IBX Security Profiles for a single company so you can access your data centers with one QR code and IBX Access PIN.
- If working for multiple companies, you can use one QR code and IBX Access PIN per company to access the data centers for that company.
- A security profile can be linked to a maximum of 10 additional profiles.
- Only profiles with an identical first name, last name, and organization can be linked together.
- Accounts with pending link requests cannot be linked together.
- Linked profiles cannot be unlinked.
- All linked profiles share the same profile photo and access PIN as your preferred security profile.
Start a Link Request
To link multiple security profiles for the same company in the Customer Portal:
-
Sign into the Customer Portal.
-
Click your user name and select User Settings.

-
Select IBX Security.

-
Click Link Security Profile and enter the username of the other profile you want to link.
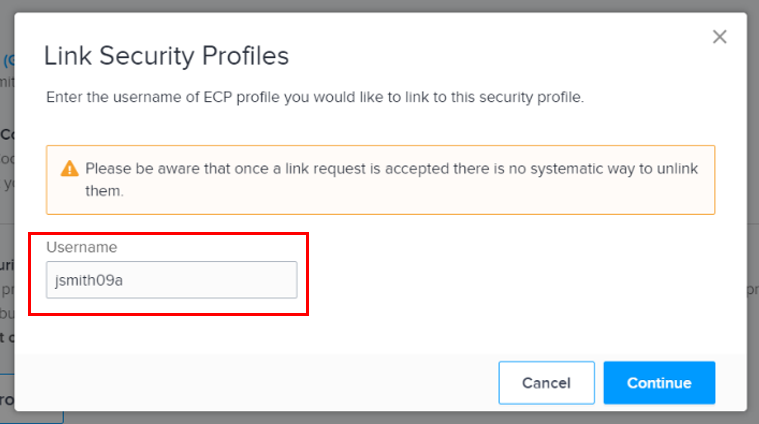
-
Click Continue. A link request success message appears.
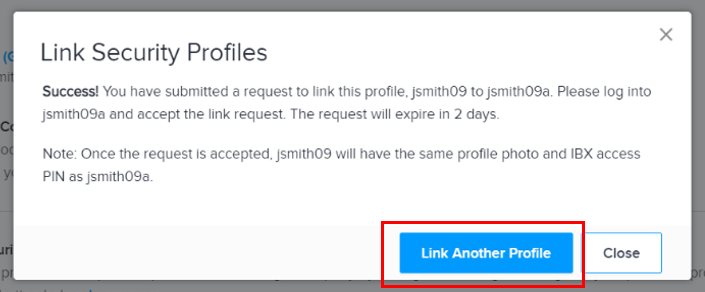 info
infoThe link request expires after 2 days if you do not confirm it (see next section below for instructions).
-
Click Link Another Profile to link additional security profiles, or click Close to return to the previous page. The number of pending Link Requests are displayed on the page.
Confirm a Link Request
To complete the process, you must accept the link request from your other security profile within 2 days.
-
Sign into the Customer Portal with the username of the profile you requested to link to your preferred profile. The Security Link Request message appears at the top of your dashboard.

-
Click View Request.
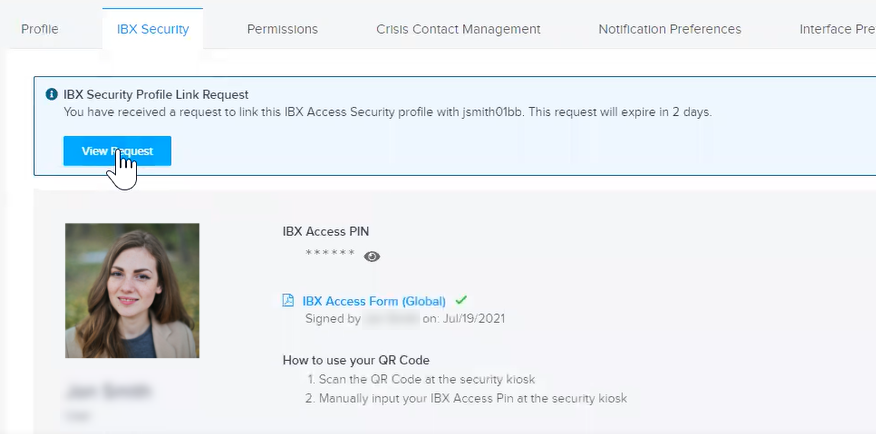
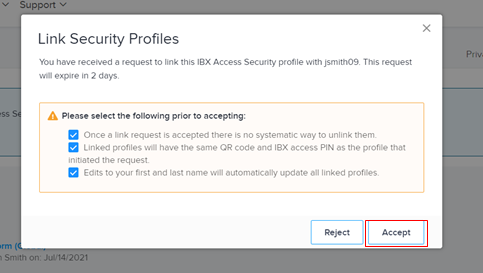
A window opens with the terms of the linking request.
-
Select each box, then click Accept to proceed.
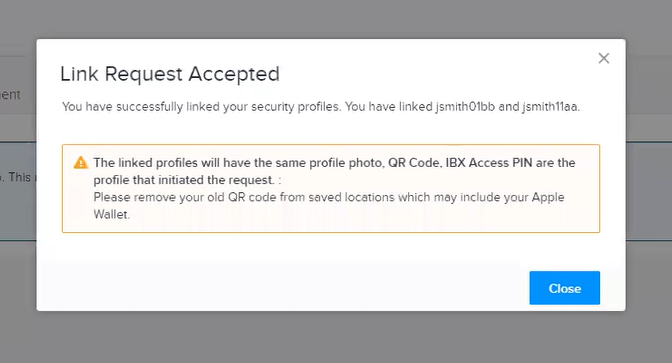
A message confirms that the security profiles have been successfully linked.
-
Click Close.
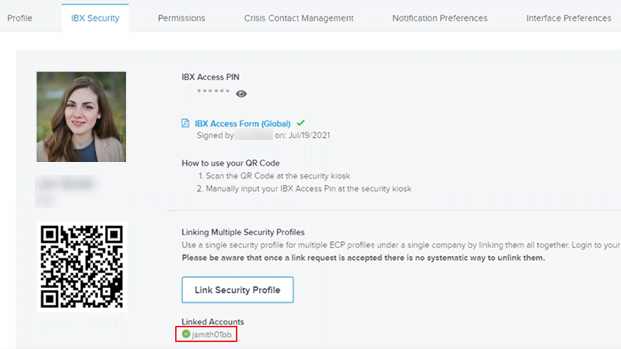
This security profile is now removed. The usernames of linked profiles are displayed under Linked Accounts. For example:
If you requested additional profiles to be linked, log out of the portal and repeat these steps to confirm each one.