Resellers and Reseller Administrators
Resellers market and sell a bundled solution that includes Equinix services. As a reseller, you use the Equinix Customer Portal to manage both your own account and the services you provide to your end customers (sub-accounts).
Resellers, taking advantage of Company Administrator and IBX Administrator roles, have additional special permissions and capabilities focused on managing sub-account assets, users, and billing.
Reseller Capabilities Overview
As a reseller administrator, you can perform a variety of critical functions for your end customers. Your primary role is to act as the administrator for the services they consume through the Equinix platform.
As a reseller, you serve as the primary administrator and intermediary between Equinix and your end customers, with three core areas of responsibility:
- Account and User Management – Create and manage sub-accounts for your end customers, add users, and set permissions.
- Billing and Order Management – Manage purchase orders, view invoices with charges grouped by sub-account, and receive order notifications with pricing details hidden from end customers.
- Asset and Service Management – Assign, share, and tag assets (such as cabinets and ports) to sub-accounts. Order and provision services for your end customers.
Services Available to Resellers
The following table summarizes the products, services, and features available to you as a reseller and where to find more information.
| Service/Feature | Reseller Capabilities | Documentation |
|---|---|---|
| Account Management | Create and manage sub-accounts for end customers. | Creating Reseller Sub-Accounts |
| User Management | Add users to sub-accounts and manage their permissions. | Adding Users to a Sub-Account, Managing End User Customer Permissions |
| Asset Management | Assign, unassign, and manage assets for sub-accounts, including Cabinets, Fabric Ports, Connect and Internet Access Ports, Smart Hands Support Plans, Internet Exchange Ports, Internet Exchange VLANs, and Network Edge assets. | Managing Assets for a Sub-Account |
| Asset Tagging | Tag assets, such as cabinets, to end customers for billing and management. | Asset Tagging |
| Billing & Invoicing | View invoices with charges grouped separately for your account and for sub-accounts. Filter invoices by end-customer. | Invoices |
| Purchase Order Management | Create blanket purchase orders and assign them to end customers. Search, filter, and download PO reports. | Purchase Order Management |
| Equinix Fabric | Enable sub-accounts for self-service, share Fabric ports, use the Context Switcher to manage projects, and issue service tokens. | Fabric Reseller Functionality |
| Internet Access | Order Internet Access with Network Edge virtual connections for sub-customers and enable self-service. | Solutions Providers (Resellers) |
| Internet Exchange | Manage dedicated Internet Exchange ports and assign VLANs for sub-customers. | Reseller Port Management |
| Managed Solutions | Create and manage sub-accounts, assign assets, create tickets, and manage billing for Managed Solutions products. | Managed Solutions |
| Cross-Connect and Interconnection | Order physical interconnection services (Cross-Connect, Fiber-Connect, Metro-Connect) for end customers. | Cross-Connect, Fiber-Connect, Metro-Connect |
| Network Edge | Order and manage Network Edge virtual devices and connections for sub-customers. | Network Edge Resellers |
| Equinix Precision Time | Order and provision Precision Time services for sub-accounts. | Precision Time for Resellers |
| Secure Cabinet Express | Order Secure Cabinet Express for end-customer projects using the Reseller Project option. | Ordering Secure Cabinet Express |
| Smart Hands | Order Smart Hands Support Plans through an offline quote process. Online ordering is not available for resellers. | Managing Assets for a Sub-Account |
Resellers cannot order Smart Hands Support Plans directly through the Customer Portal. To place an order, use the existing offline quote process through your Equinix account team.
Creating Reseller Sub-Accounts
-
Log in to the Customer Portal at portal.equinix.com.
-
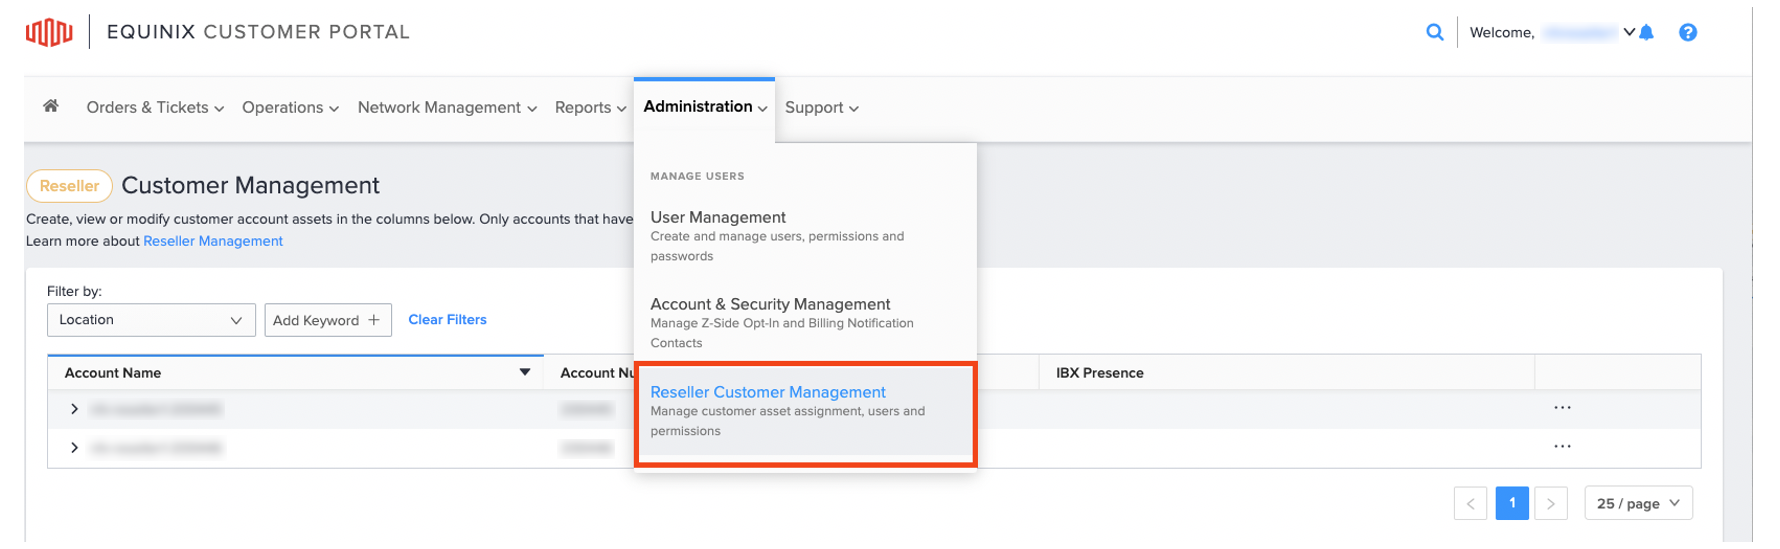
From the Administration menu, select Reseller Customer Management.
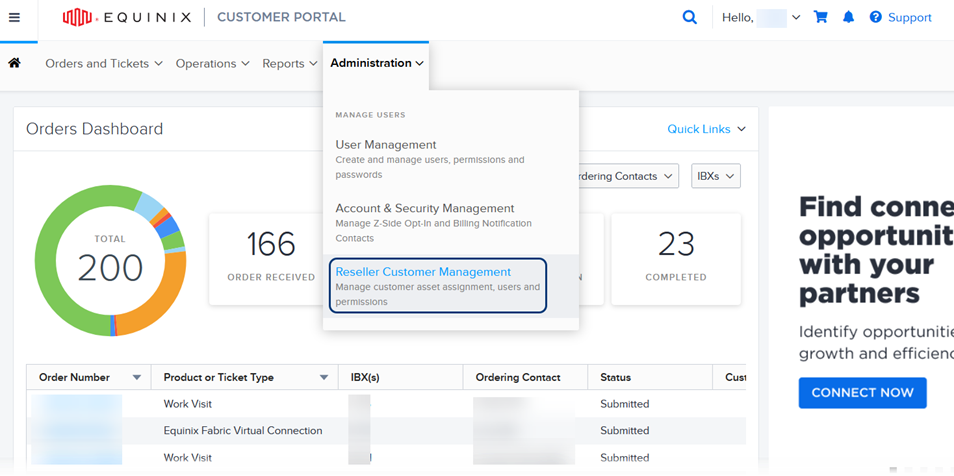
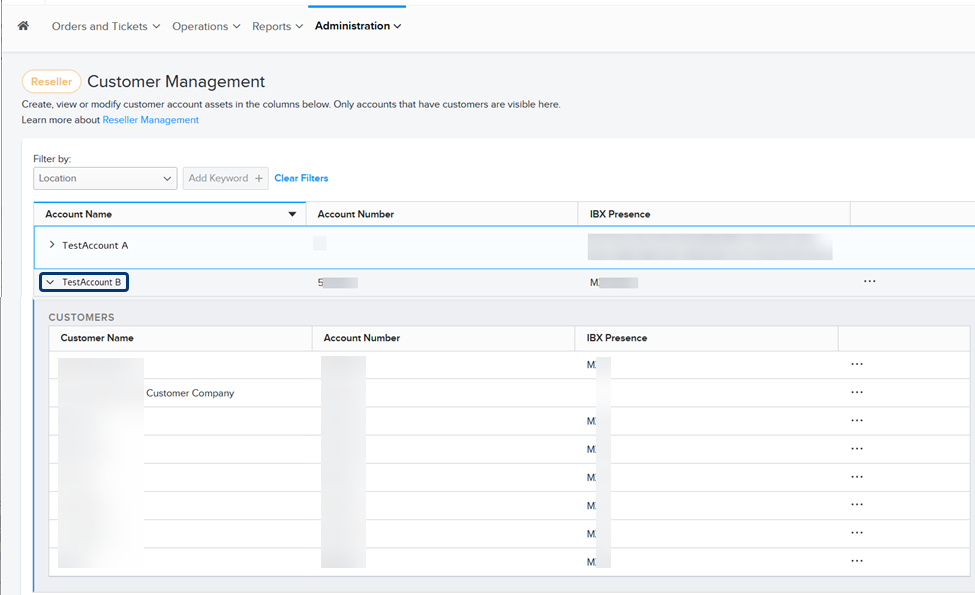
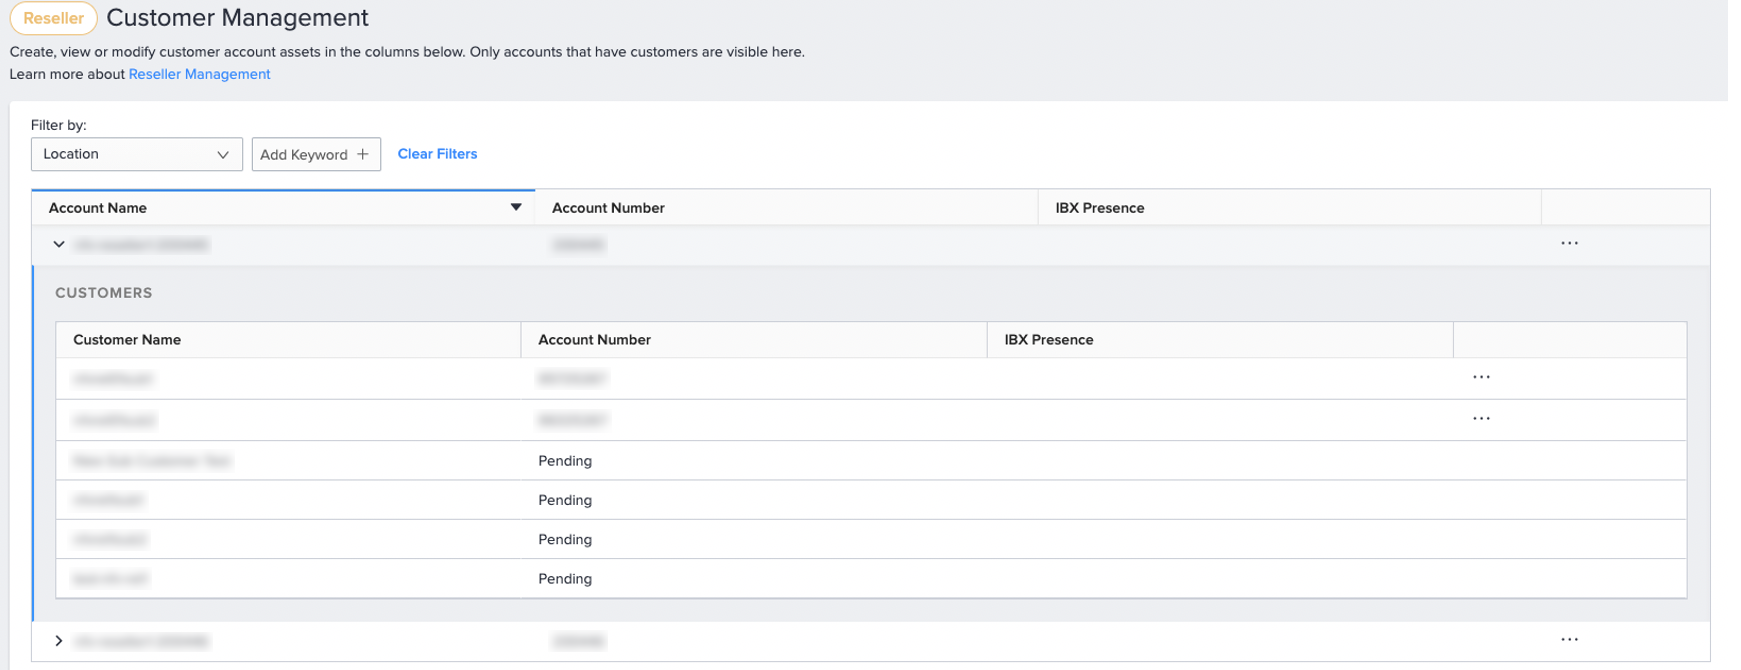
The Reseller Customer Management page shows your accounts.

-
To view a list of sub-accounts, click the arrow next to the account name.
-
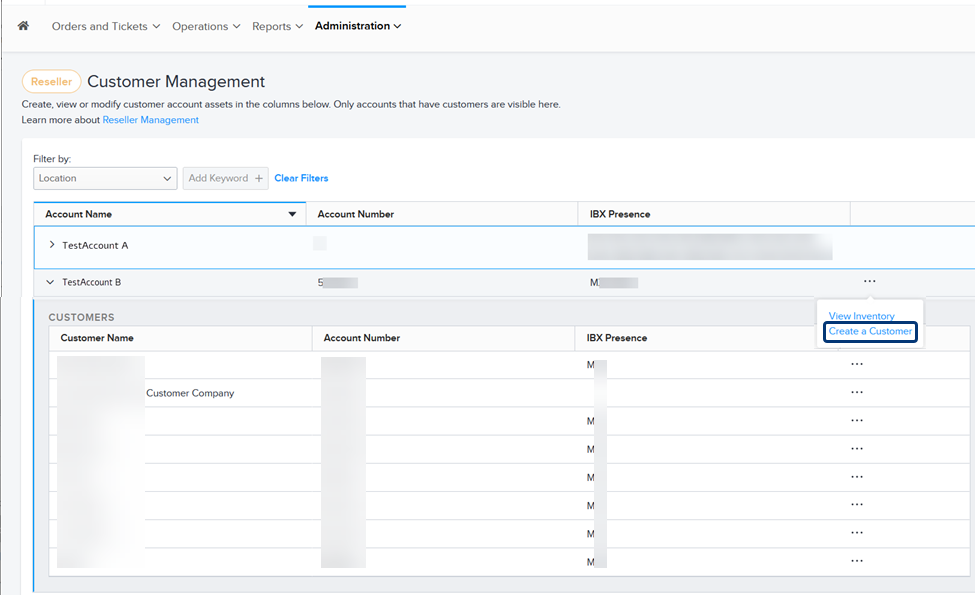
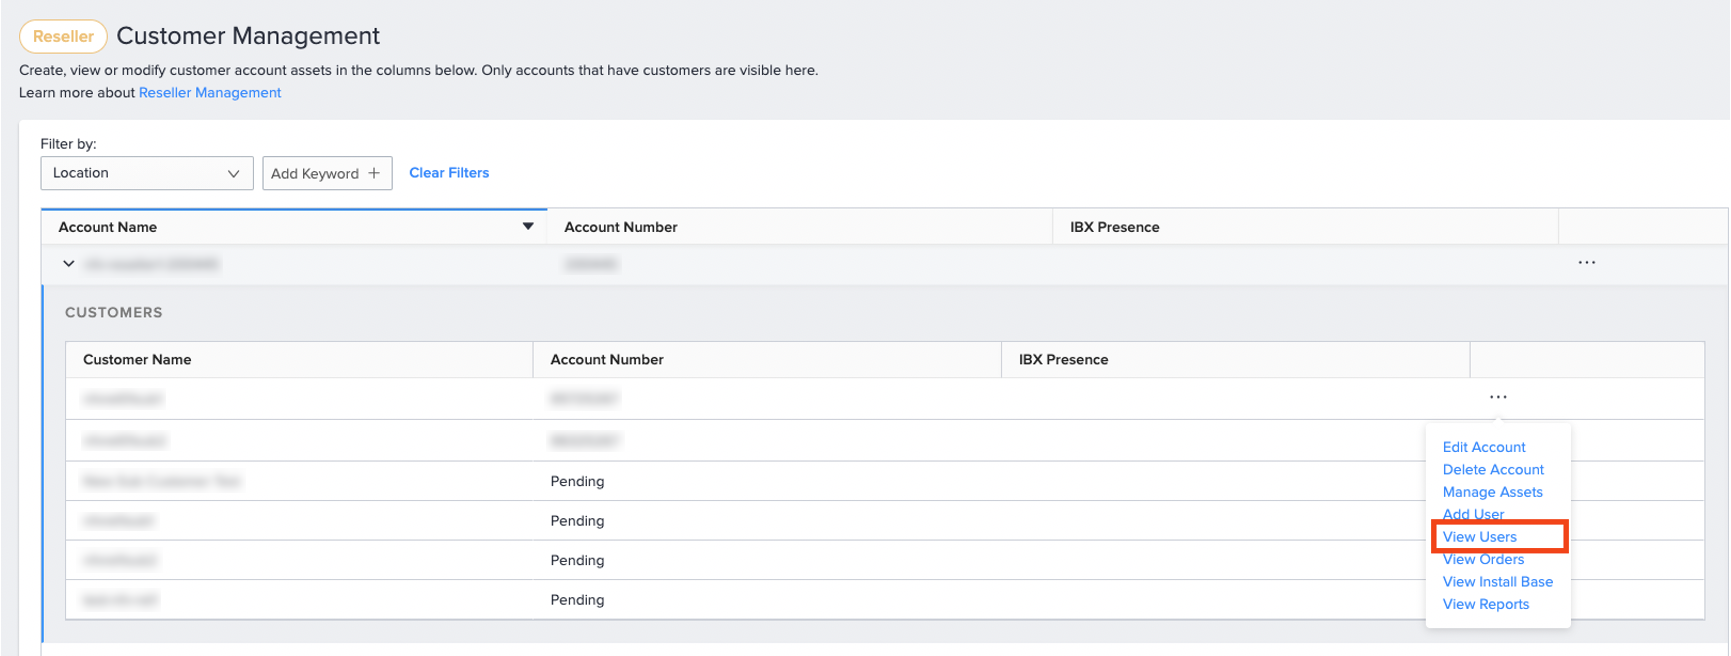
To create a new sub-account, click the options menu and select Create a Customer.
-
On the Create a New Customer Account screen, enter the name and address information for the new sub-account.
-
Select whether the sub-account is an End Customer - an entity that your company does business with, or a Sub Division - a subsidiary or affiliate of your company.
-
Specify a Reseller Notification Contact. You can use the search box to search by name or email address, or click User Directory to select from a list.
-
Click Review. The Review window displays the Customer Name, Address, and Reseller Notification contact details for review to ensure that it is correct. A data table is presented with similar accounts for selection:
- If there are existing records of the same Customer name and Address details in the Equinix Master Data Management database, this is presented and you have the option to select it.
- If there are similar records of the same Customer name and Address details in the Duns & Bradstreet suggestions, this is presented and you have the option to select it.
- If no selection is made, this entry will be entered manually and a new record will be entered in the Equinix Master Data Management database
-
Click Submit.
The new sub-account appears in the list, and is marked PENDING in the Account Number column. When the new account is available for use, the PENDING status is replaced with the new account number. Allow up to an hour for this processing. Then you can proceed to add users and assign assets to the account.
Adding Users to a Sub-Account
-
Log in to Customer Portal at portal.equinix.com.
-
From the Administration menu, select Reseller Customer Management.
The Reseller Customer Management page shows your accounts.
-
To view a list of sub-accounts, click the arrow next to the account name.
-
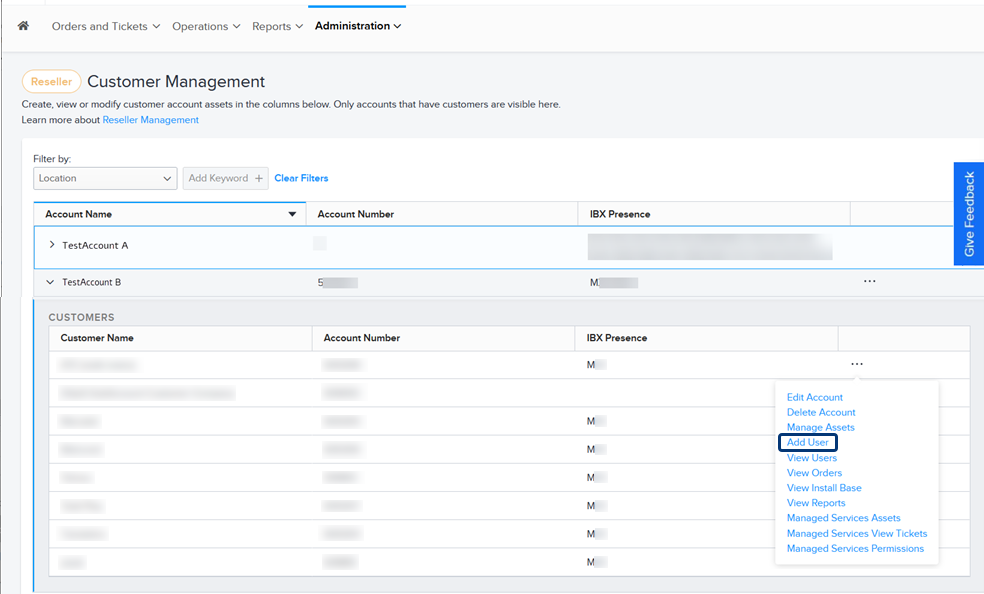
To add a new user to a sub-account, click the options menu and select Add User.
-
On the Add User(s) form, enter the contact information for the new user. To add multiple users, use one of these options:
- Click Batch Upload to upload a .CSV file that contains contact information for multiple users.
- Click Add More Users to enter contact information for each user manually.
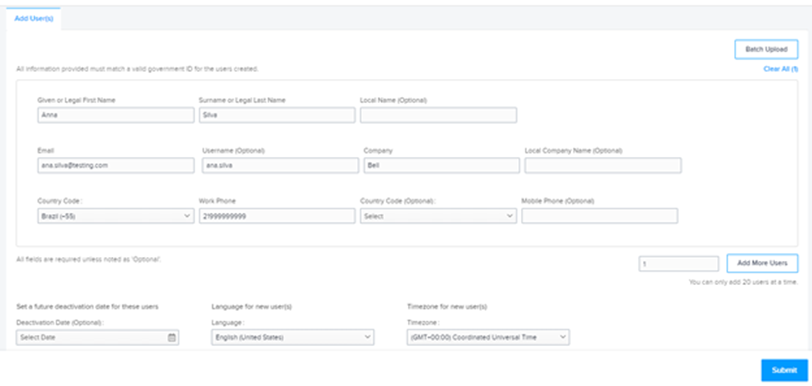
-
Choose the preferred Language and Timezone for the user.
-
Click Submit.
Each new user is added to the Reseller User Management page.
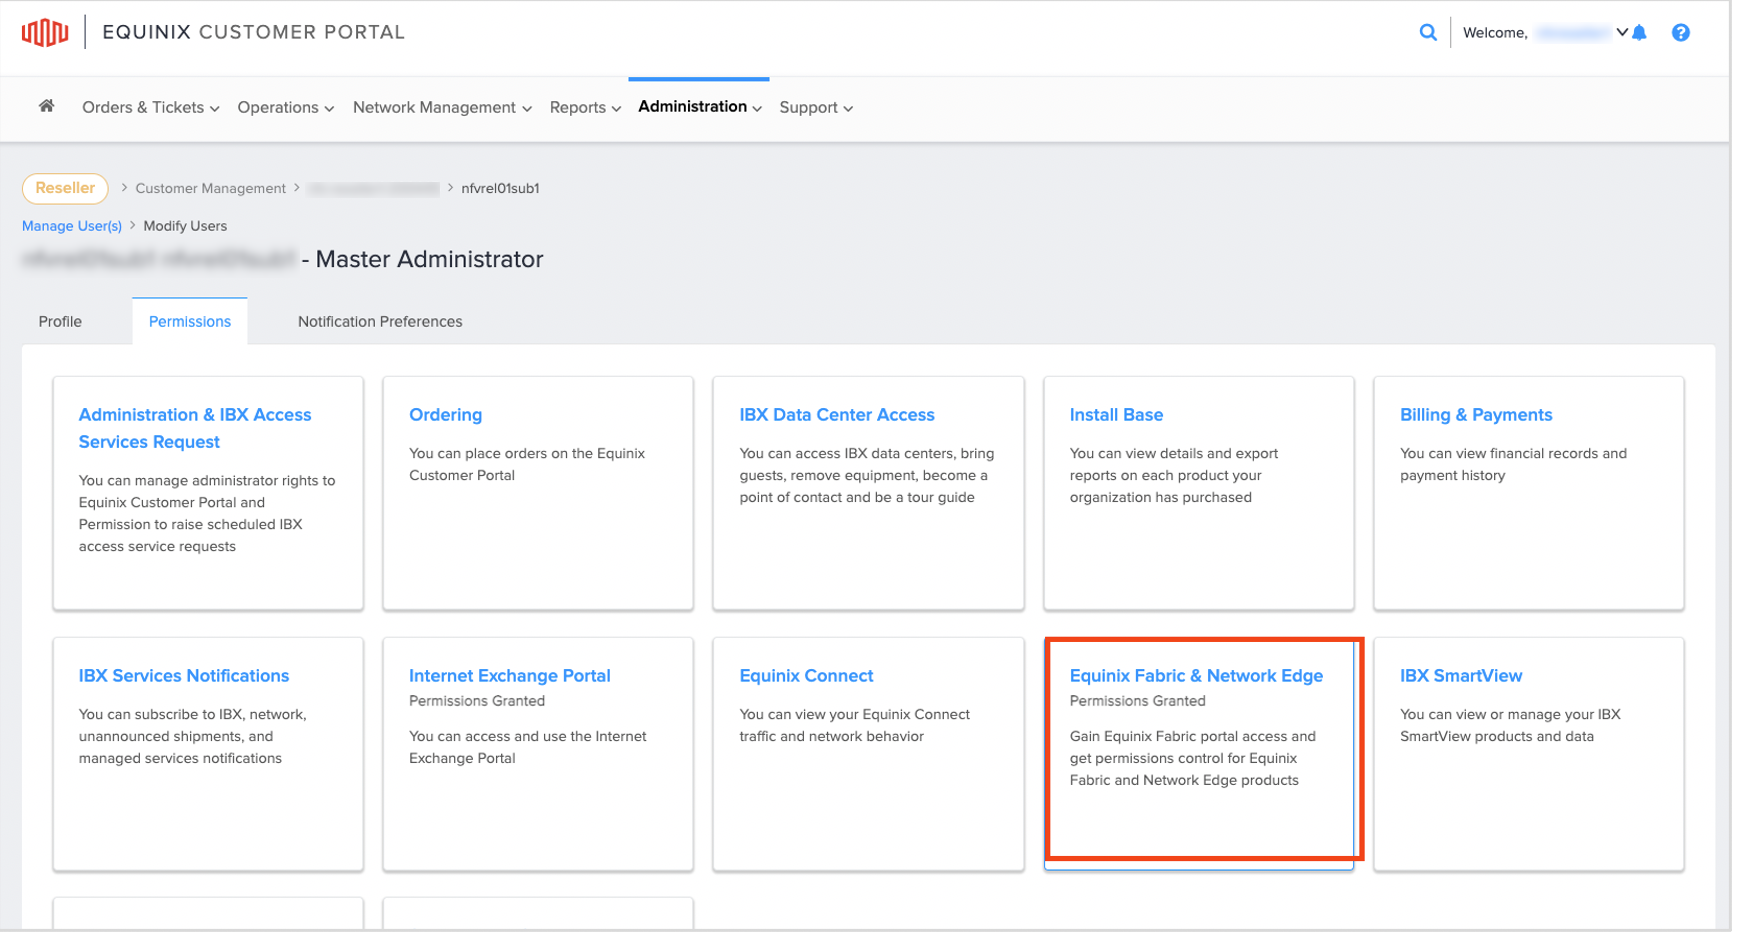
Managing End User Customer Permissions
-
From the Administration menu, select Reseller Customer Management.
-
On the Customer Management screen, locate and expand the reseller account to view the End User Customer accounts.
-
Locate the End User Customer account, click the options menu and select View Users.
-
Locate the user, click the options menu and select Manage Permissions.

-
Select permissions group.
-
Edit user permissions.
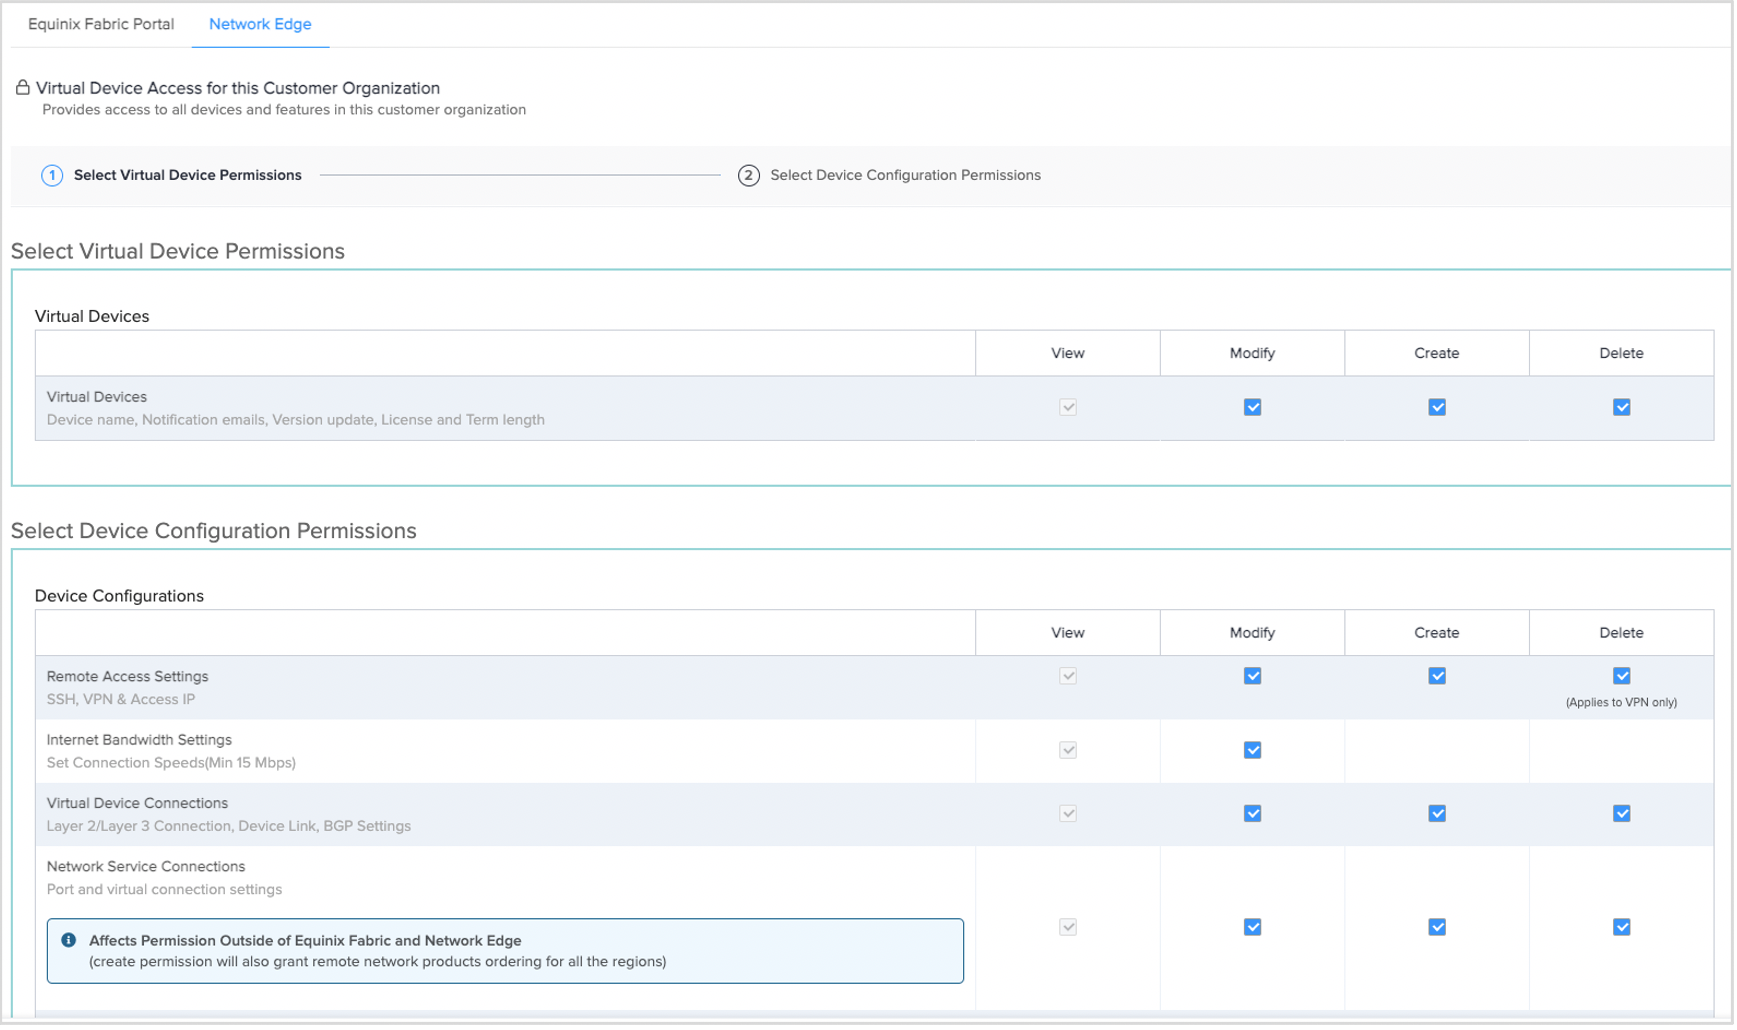
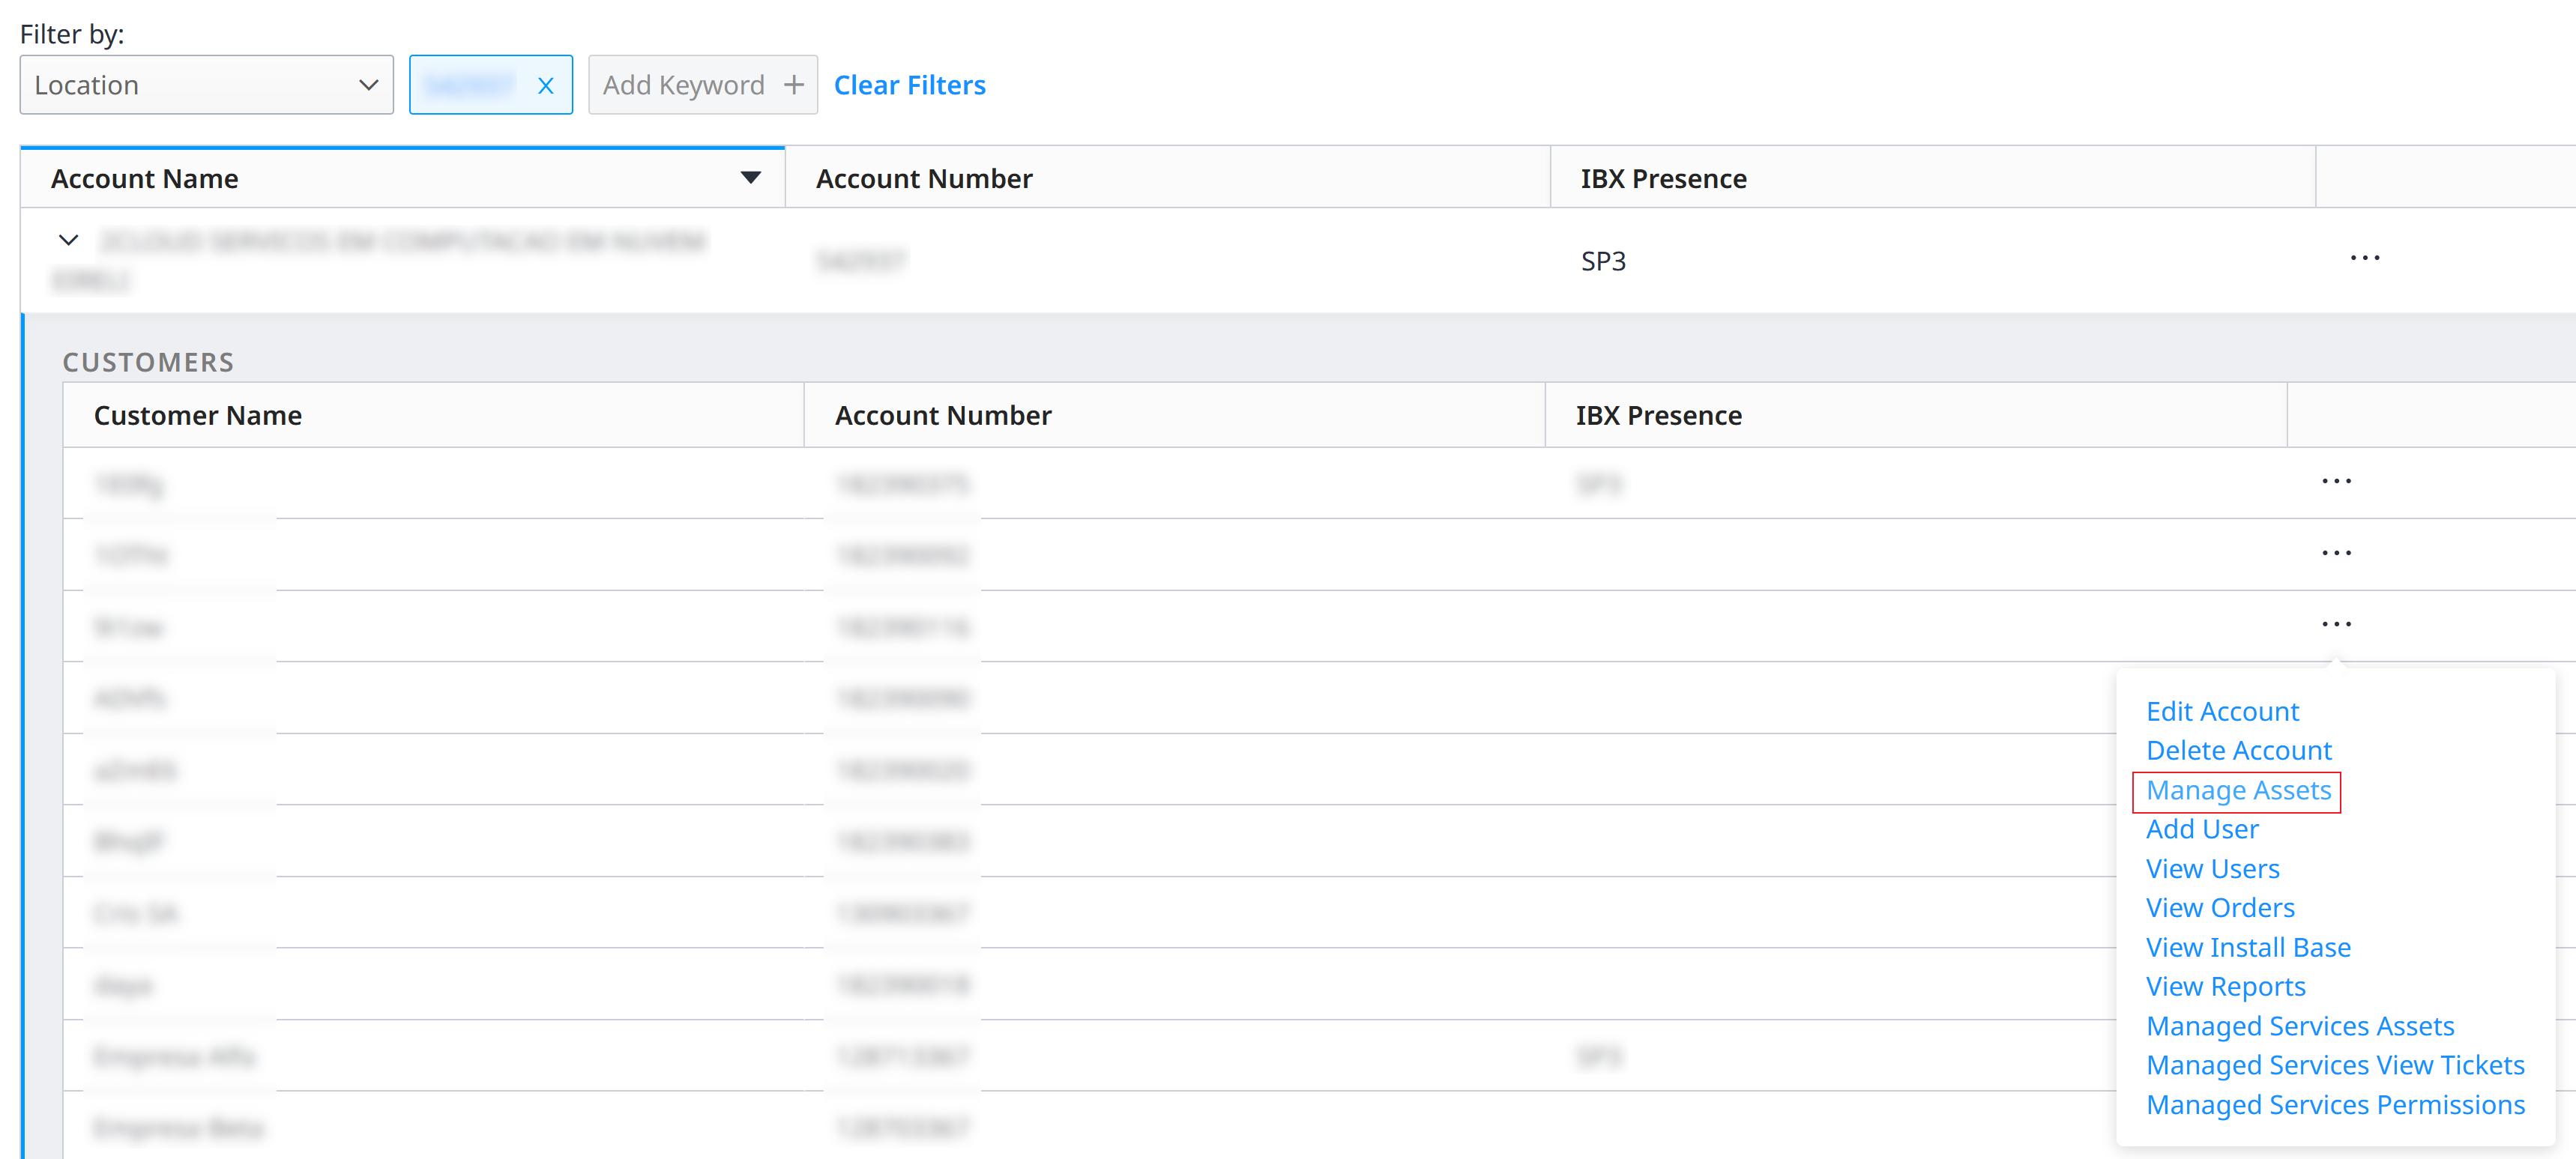
Managing Assets for a Sub-Account
-
Log in to the Customer Portal at portal.equinix.com.
-
From the Administration menu, select Reseller Customer Management.
The Reseller Customer Management page shows your accounts.
-
To view a list of sub-accounts, click the arrow next to the account name.
-
Locate the user, click the options menu and select Manage Assets.
-
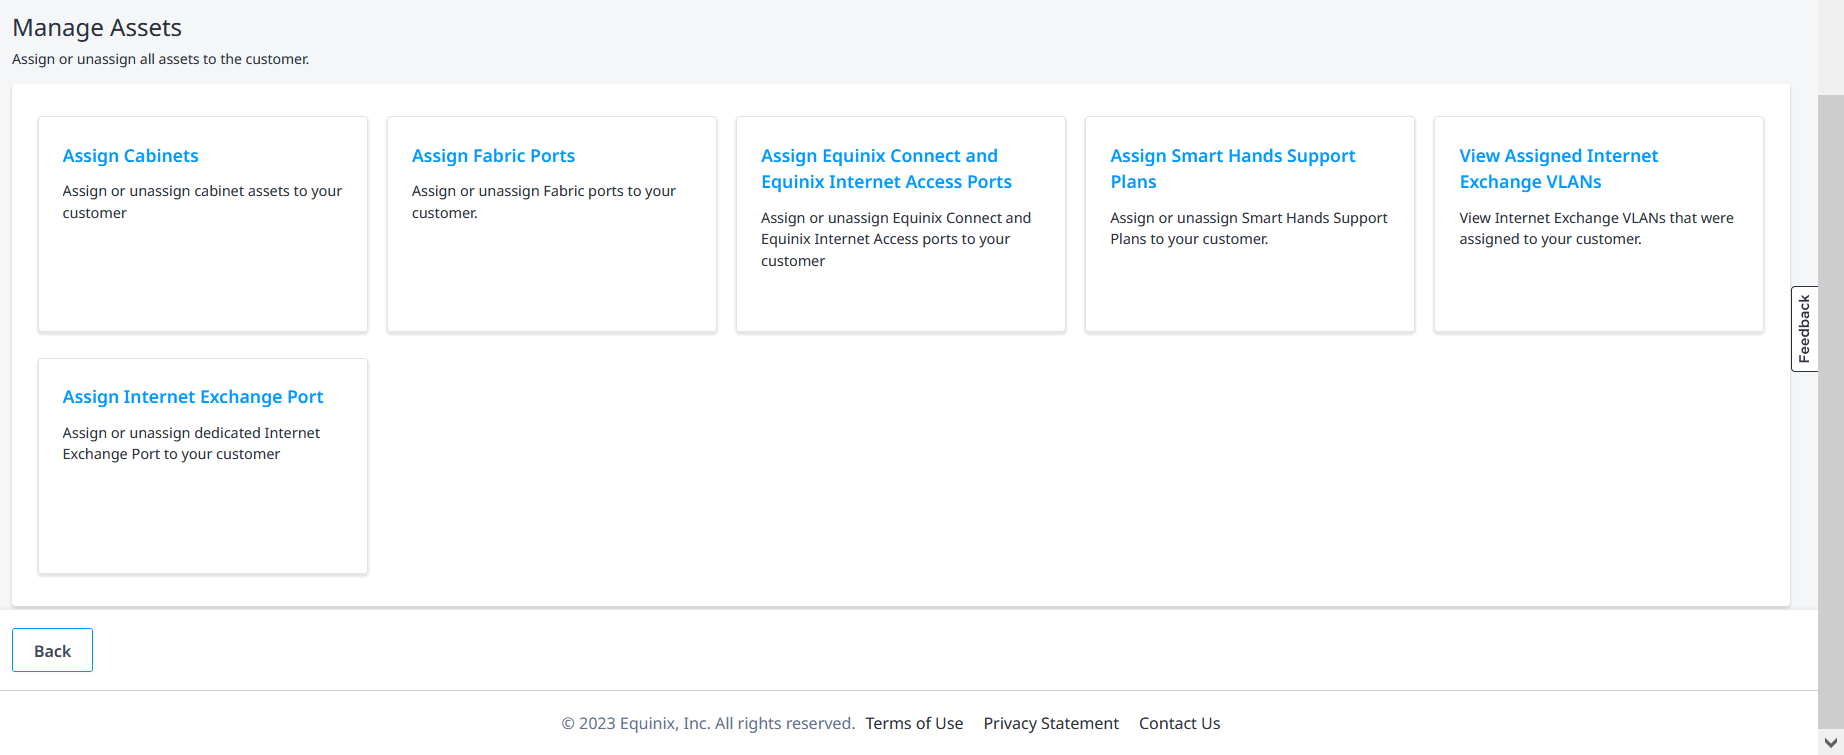
From the Manage Assets screen, resellers can assign, unassign, and manage a variety of assets for the sub-account, including plans for their end customers. These assets include:
- Cabinets - Physical colocation cabinets that can be tagged to specific end customers for billing separation
- Equinix Fabric Ports - Fabric ports that can be shared with sub-customers for self-service connection management
- Equinix Connect and Equinix Internet Access Ports - Dedicated network ports for connectivity services
- Smart Hands Support Plans - Managed support hour packages for on-site technical assistance
- Internet Exchange Ports - Dedicated peering ports for Internet Exchange services
- Internet Exchange VLANs - Virtual LAN configurations on Internet Exchange ports
- Network Edge Virtual Devices - Software-defined networking appliances and their associated connections
-
Click on the tile of the asset you want to assign.
-
Tick the checkbox for the asset and click Submit.
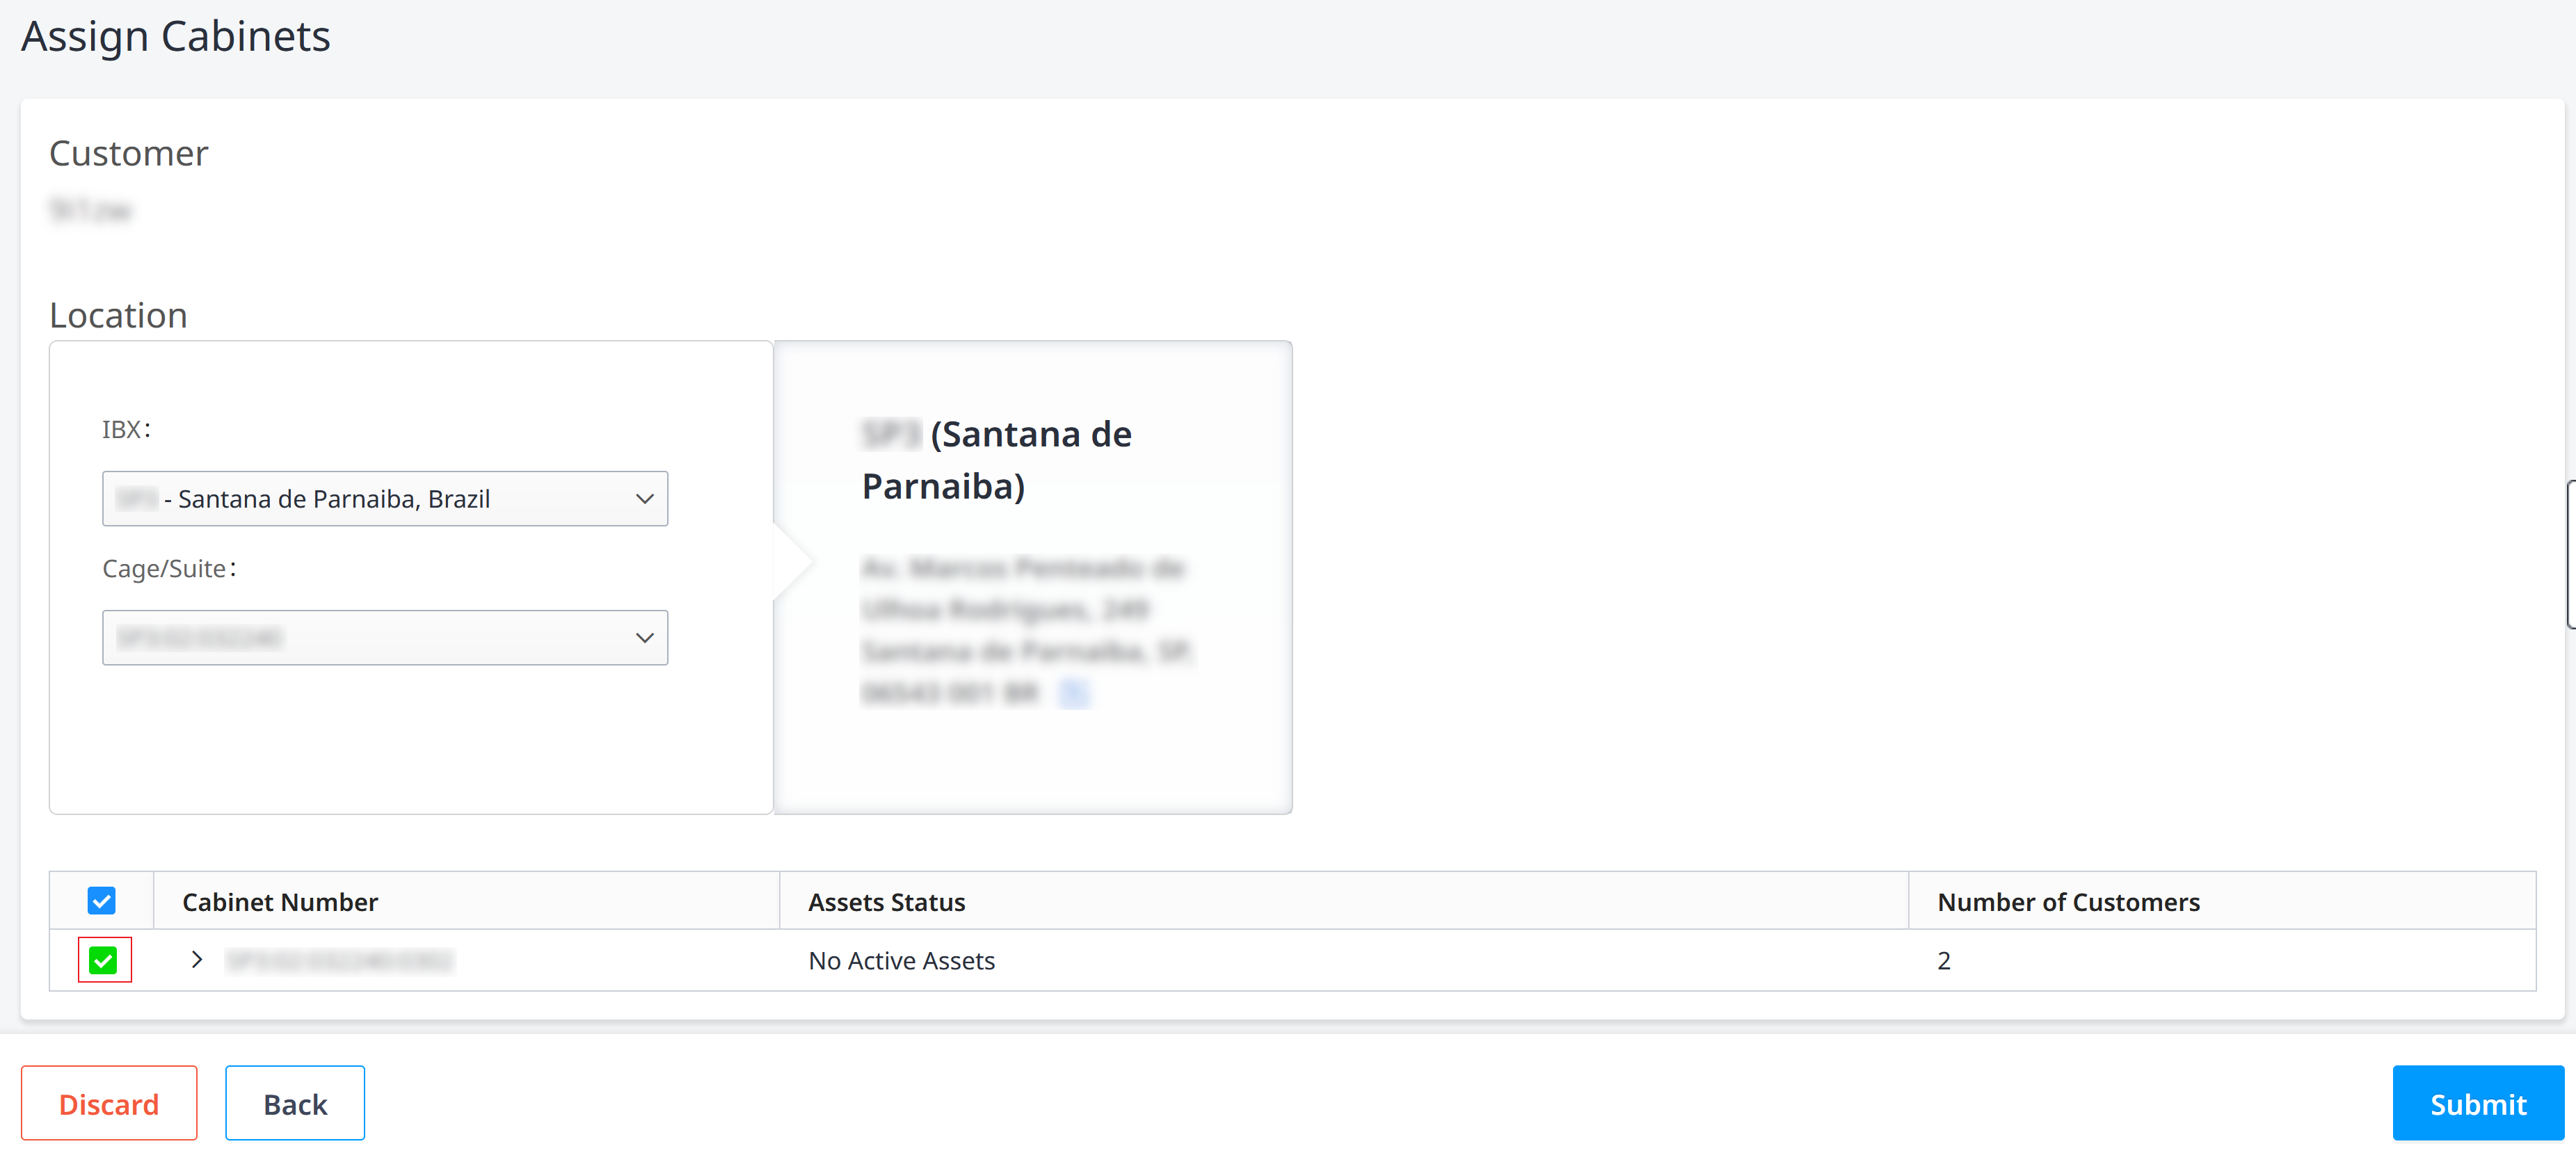
-
To un-assign an asset from a sub-account, untick the checkbox for the asset and click Submit.
View Support Plans and Set Notification Alerts
If you have the required permissions, resellers can:
- View existing Smart Hands Support Plans in the Customer Portal.
- Receive alerts when plan usage reaches 50%, 75%, and 100%.
How to Enable Notifications
- In the Customer Portal, go to Profile then click User Settings.
- Click the Notification Preferences tab.
- Select the alerts you want to receive.
View Smart Hands Support Plan Dashboard
- In the Customer Portal, go to Operations then click Smart Hands Support Plans.
- The Smart Hands Support Plan Summary tab provides a clear, segmented view that separates reseller plans from end customer plans.
End User Customer Order Notifications
When an End User Customer places an Order, the End User Customer Ordering Contact and the Reseller Notification Contact receive the Order Booking and Completion Notifications. This dual notification system ensures both parties are informed while maintaining appropriate pricing visibility.
-
End User Customer Notifications – Contain all the information such as the product, number of line items, and description, but don't include the billing price. This allows resellers to maintain control over their pricing strategies with end customers.
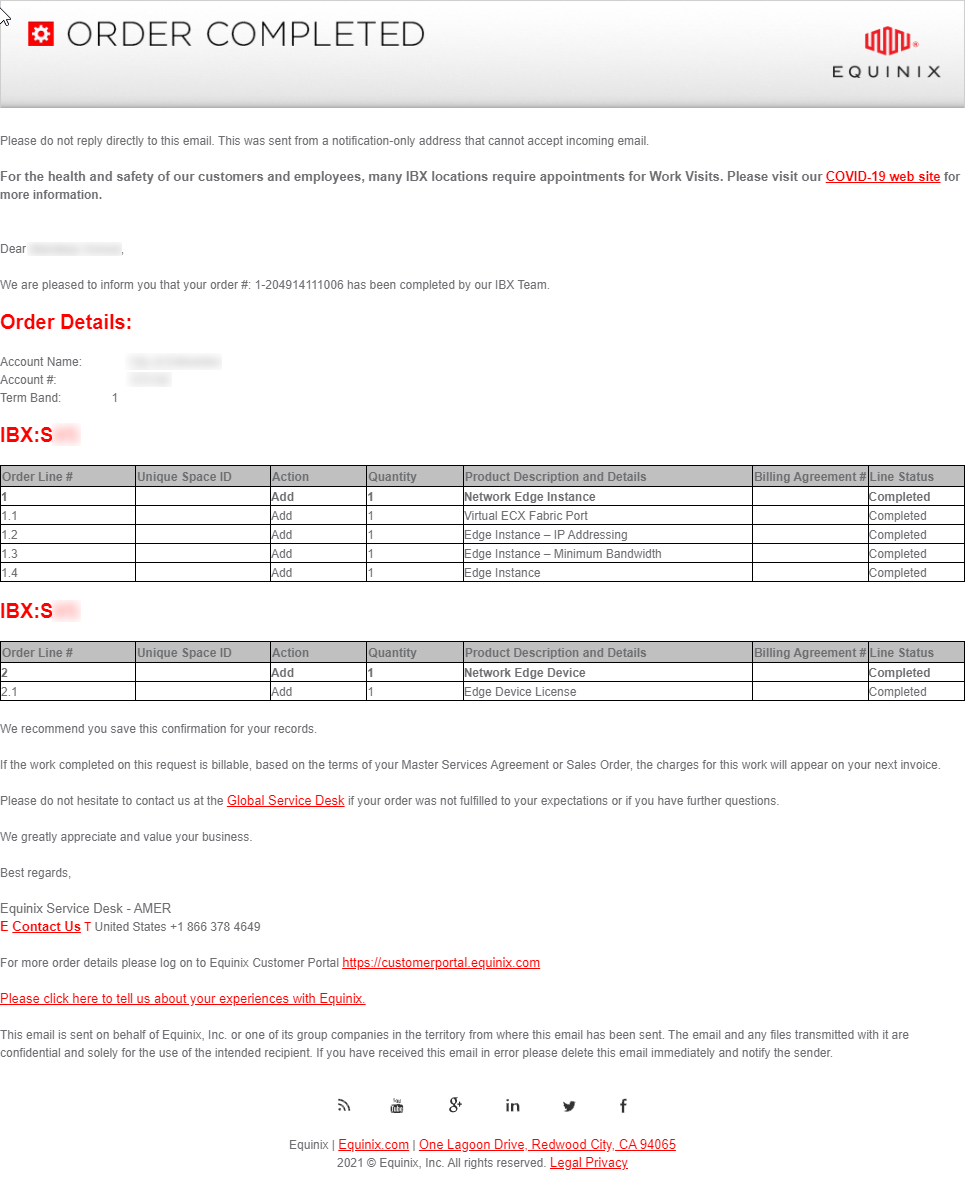
-
Reseller Notifications – Contain the same information as the End User Customer Notifications along with the billing price. This provides resellers with complete visibility into costs for proper margin management and billing reconciliation.
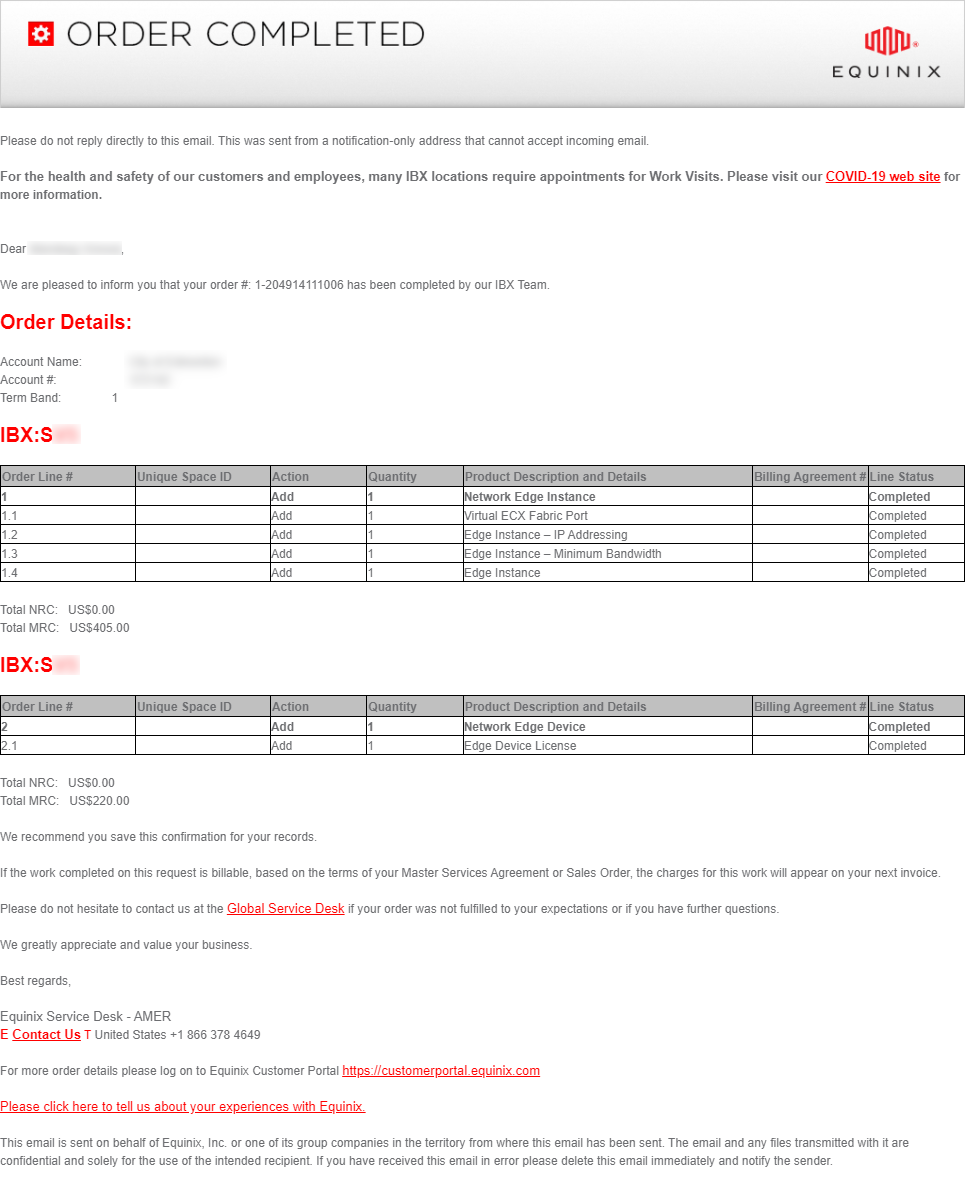
Notification defaults to the Ordering contact; however, other individuals can be added to receive the notification when requested by the customer.
Additional Resources
- Equinix Reseller Rules of Engagement: Learn more about deal registration, levels of Reseller engagement, quote preparation, and support requirements.