Smart Hands Order vs. Trouble Ticket
Trouble tickets are reserved for service interruptions or degradation of Equinix-provided services and have the highest priority at the IBX.
Use a Smart Hands request for customer-owned equipment tasks such as installation, maintenance, or troubleshooting.
Choosing the Right Request Type
Use this diagram to determine whether to create a Smart Hands request or a trouble ticket.
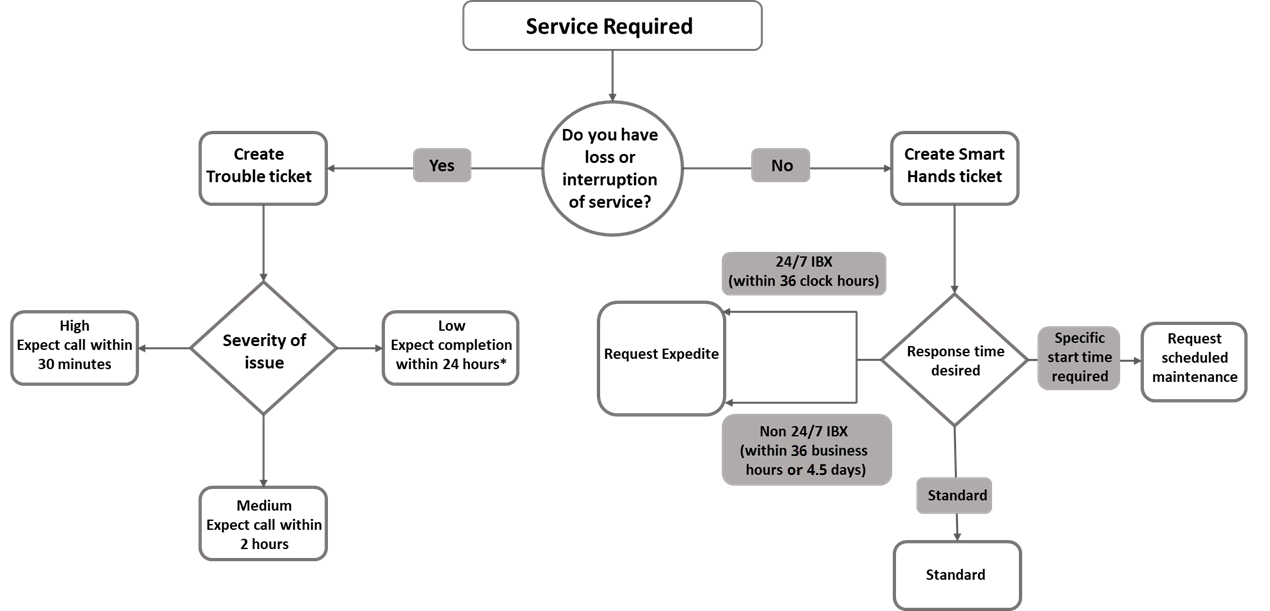
If the cause of a trouble ticket is determined to be on the customer side (i.e., not related to Equinix facilities/processes), Smart Hands hourly rates apply for the time spent, plus the cost of any parts used. Expedite fees are not charged in this instance.
Trouble tickets cannot be used to accelerate Smart Hands work. They are reserved for issues involving loss or degradation of Equinix-provided services.
For faster turnaround on Smart Hands tasks, select the Expedited scheduling option when submitting your request.
Submit a Smart Hands Order
To place a Smart Hands Order, follow the instructions on Submit a Smart Hands Order.
Opening a Trouble Ticket
Trouble tickets can be submitted by anyone with ordering privileges. Use trouble tickets or support cases for issues that require immediate response, based on a loss or interruption of service.
If the loss or interruption of service was caused by Equinix, the ticket will not incur any charges. However, if the issue was customer-caused, the ticket will incur Smart Hands charges.
-
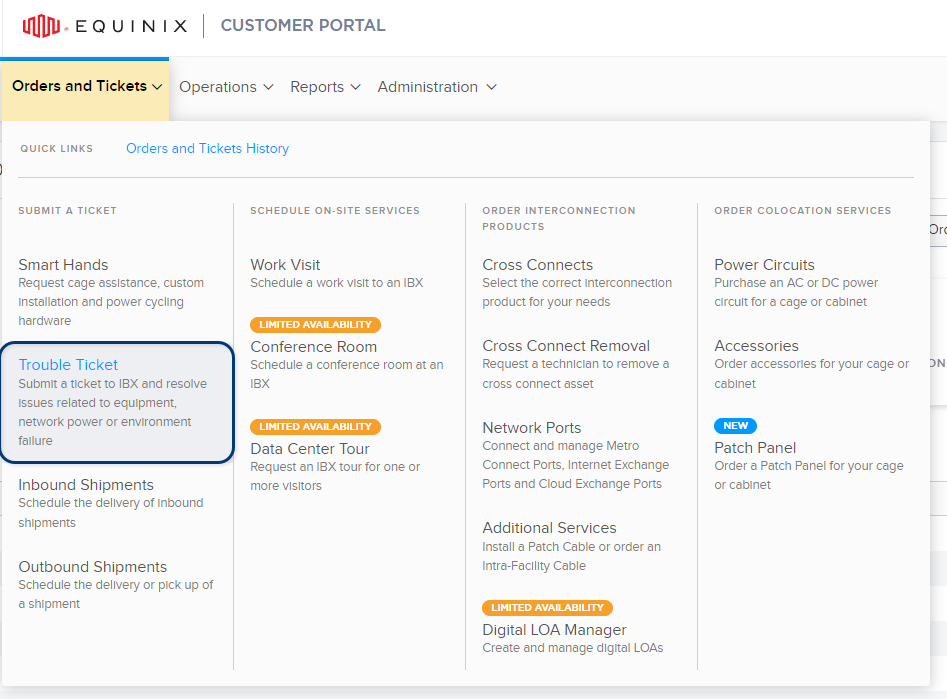
From the Orders and Tickets menu in the Customer Portal, select Trouble Ticket.
-
Select the location of the issue -- the IBX, the cage/suite, and optionally, the cabinet.
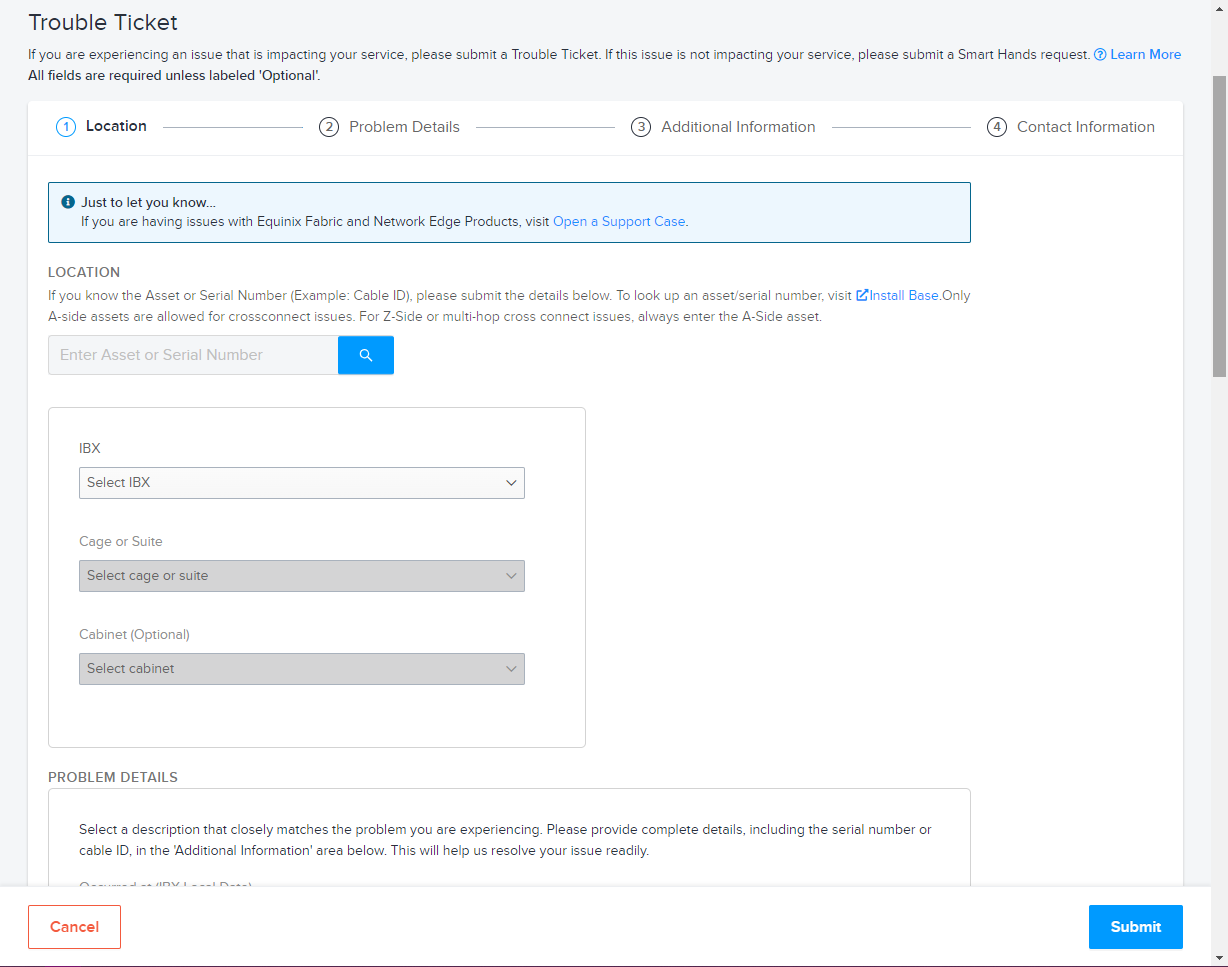
Once you select a location, the screen displays the location details (including the street address, hours of operation, and a link to a map of the surrounding area).
-
Under Problem Details:
-
Select the date the problem occurred. If you're in a different time zone than the IBX, use the IBX's local time zone when selecting the date.
-
Select a Problem Category and a Problem Description.
-
If you want the Equinix technician to call the specified Technical Contact when the work is in progress, select Call me from the cage.
-
Under Additional Details, enter all other information that might help the technician locate and resolve the issue. Examples:
- A detailed description of the issue.
- A chronological list of events that led to the issue.
- Any steps you've taken to investigate or resolve the issue.
-
-
Use File Attachment - Upload File(s) to add any relevant attachments to your request, such as screenshots and error/diagnostic logs.
- Add up to 5 files.
- The maximum size for each file is 2MB.
- The files can be any of the following formats: bmp, jpg, jpeg, gif, png, tif, tiff, txt, doc, docx, xls, xlsx, ppt, pps, ppsx, pdf, and vsd.
-
Add Customer Reference information.
Many companies have an internal ticketing system to track issues or track items ordered from Equinix. This field provides a place to enter your internal reference information, such as P.O. numbers, ticket numbers, or descriptive text.
You can find this information on the Orders and Tickets History screen, and any related invoices.
-
Under Contact Information, specify a Technical Contact and at least one Notification Contact:
Contact Types Description Technical Contact For troubleshooting or clarification of the ticket. If questions arise, Equinix contacts this person. Notification Contact Contact(s) who will receive email notices about the status (and pricing, if applicable) of the ticket. 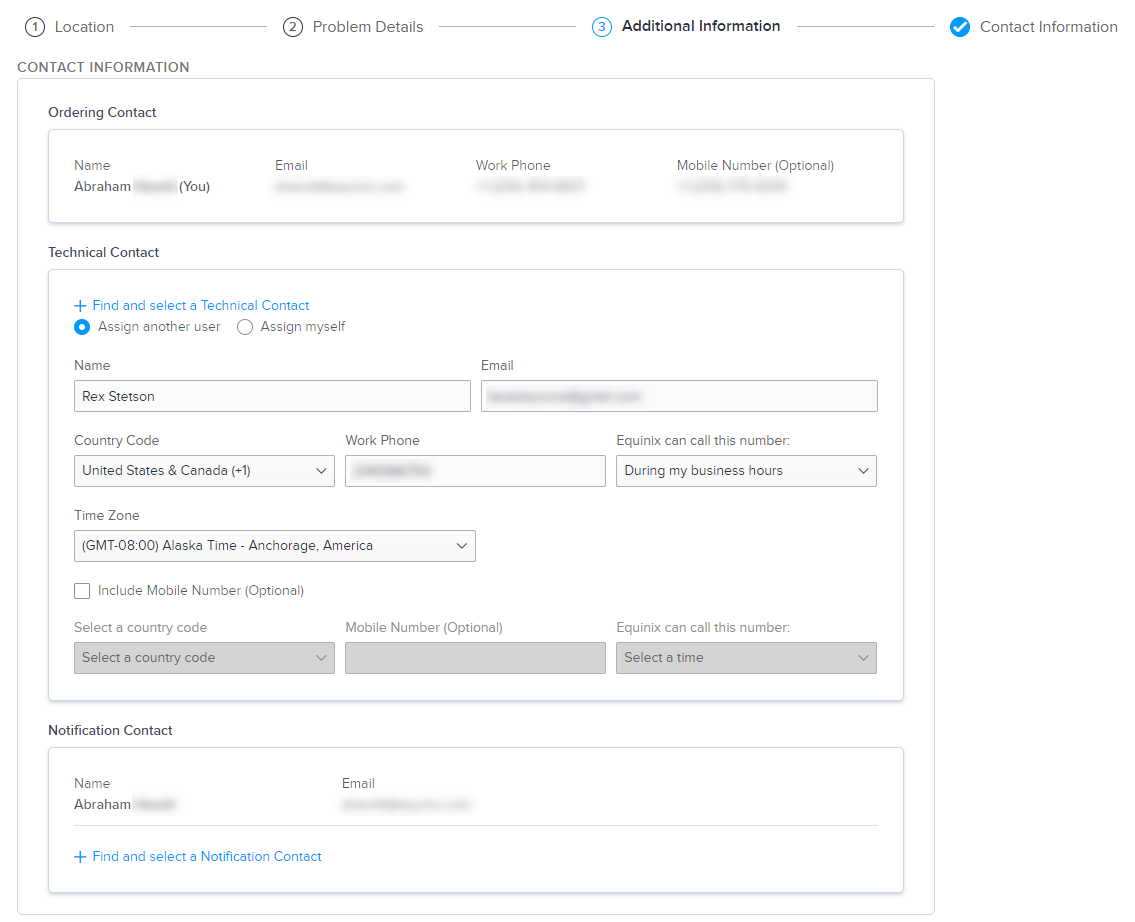
- The Technical Contact and the Notification Contact can be the same person.
- You can select multiple Notification Contacts, but only one Technical Contact.
- Technical contacts do not receive booking or completion notifications.
- To remove a Notification Contact from the ticket, click
X.
-
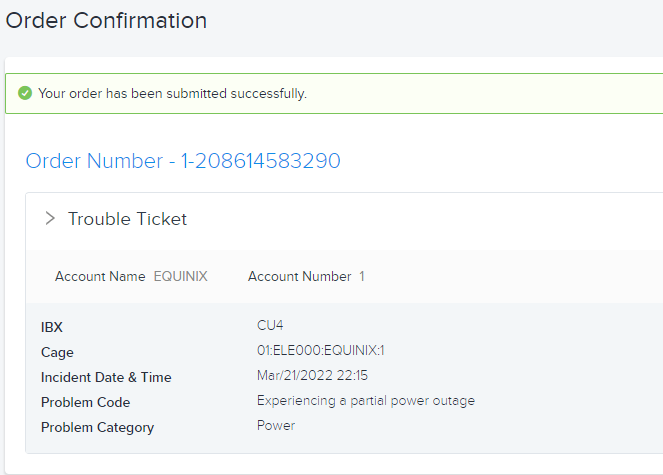
Once all required fields are completed, click Submit.
If your ticket was submitted successfully, a notification is shown.
To monitor the status of your request, see Orders and Tickets History.
To re-open a closed ticket, see Re-open a Completed Request.
Support Case Migration
As part of the experience updates rolling out to all customers over the course of 2026, Trouble Ticket functionality is being migrated to Support Cases. As part of this consolidation, once your account has been onboarded, instead of opening a Trouble Ticket, you must open a Support Case instead.
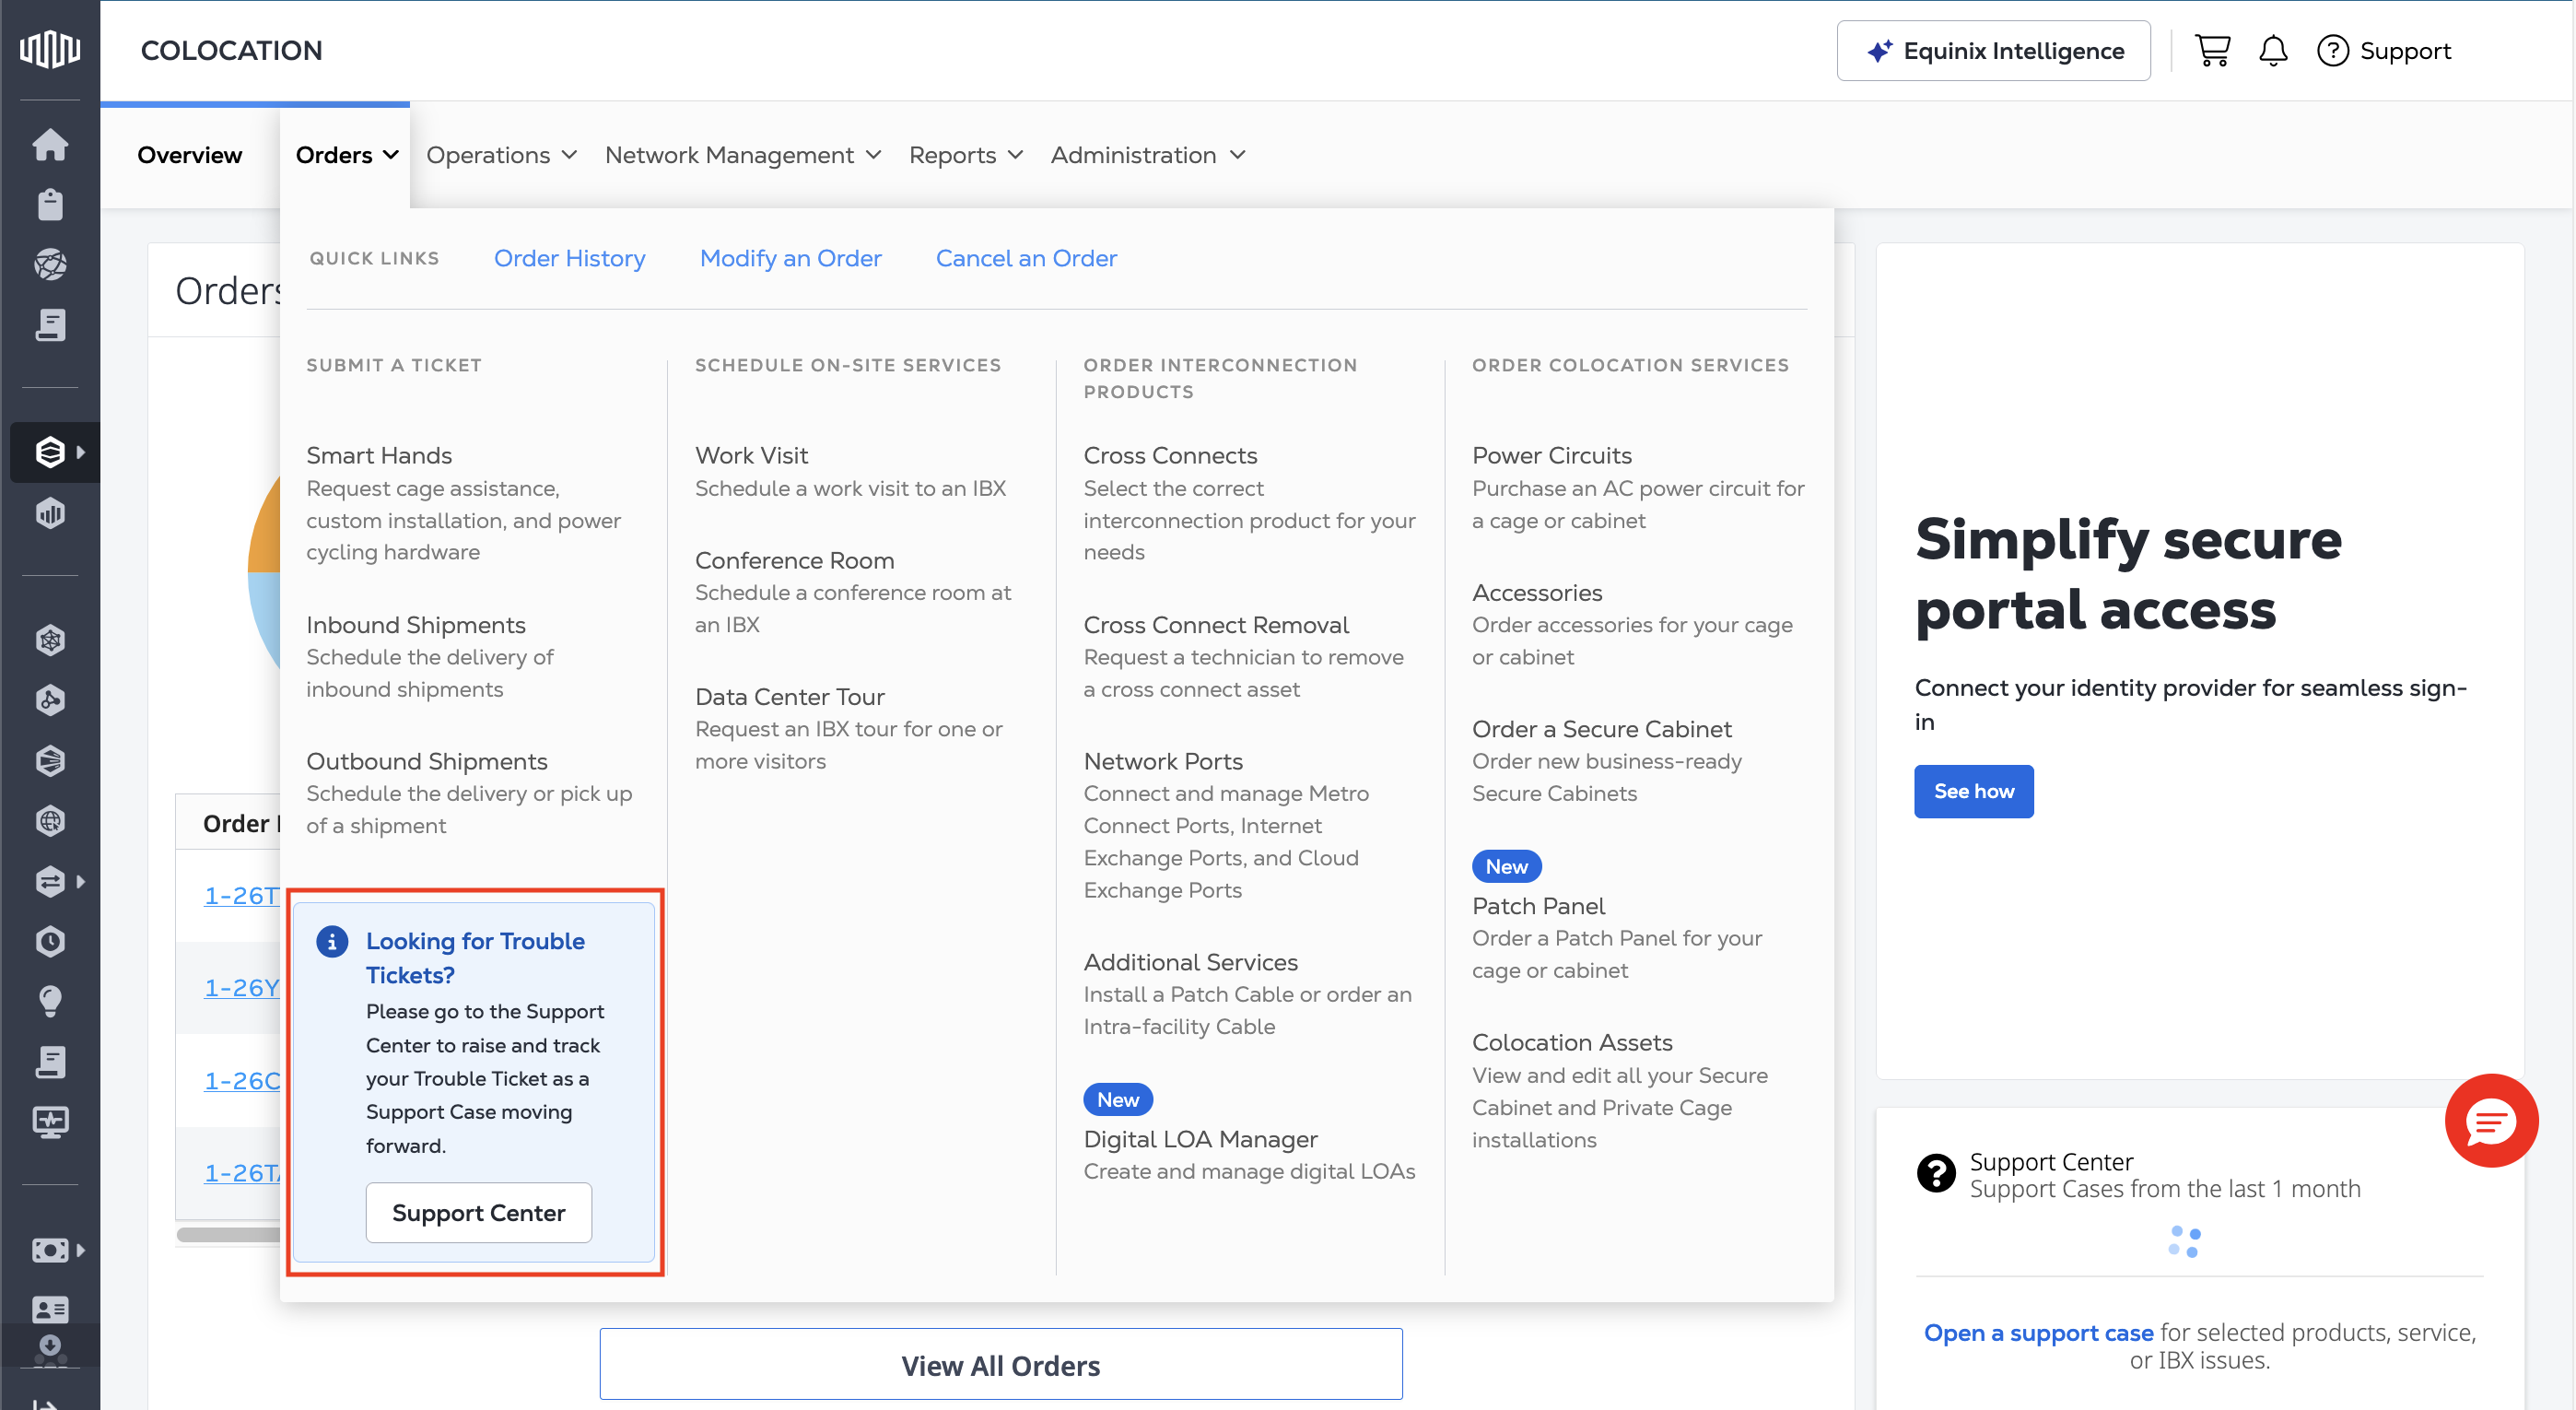
In the Customer Portal, in the Orders menu, there is a prompt where the Trouble Ticket option used to be, directing you to the Support Center.
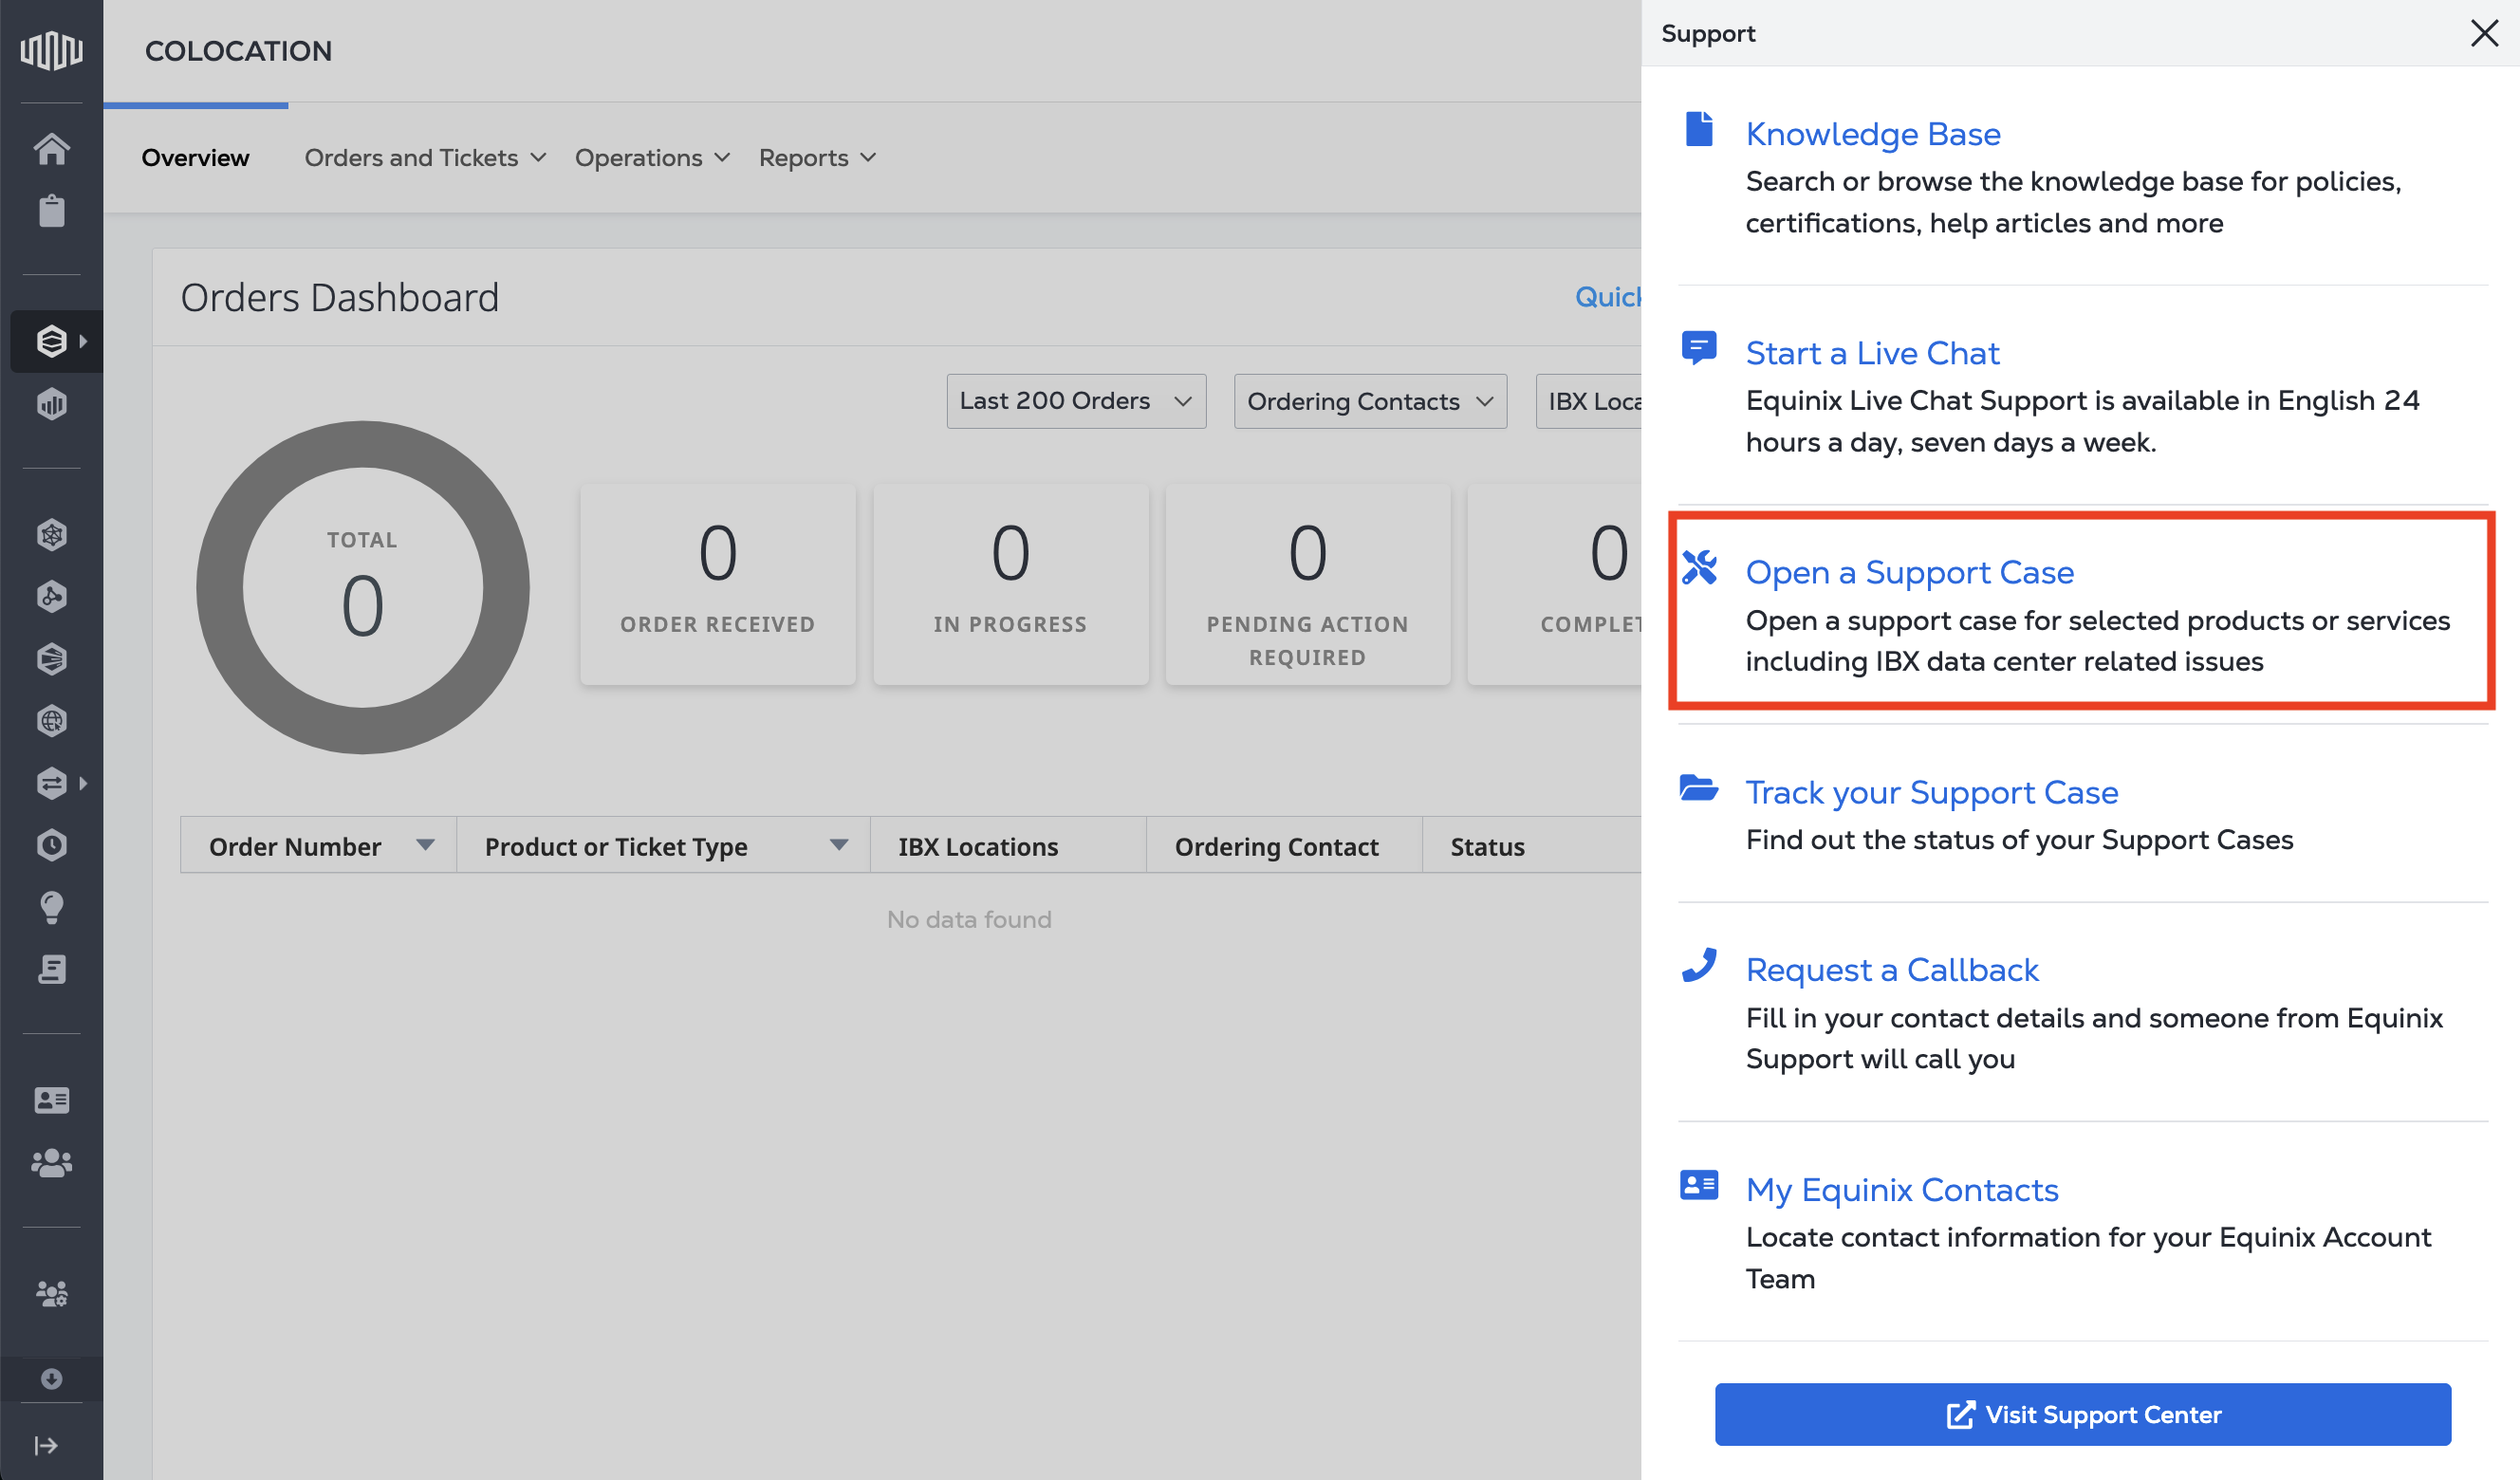
You can also open a Support Case by selecting Support from the main navigation, then select Open a Support Case.
For instructions, see Opening a Support Case. While the experience is being simplified, service-impacting incidents will continue to be treated with the same urgency, escalation paths, and service level commitments as before.