
This topic explains how to create and operate a Cisco cEdge SD-WAN virtual device using CLI template mode. Because of the specific nature of this process and the level of integration between Equinix and Cisco, we recommend this method because it's the easiest to use, and provisioning time is reduced.
This diagram describes the end-to-end workflow, and shows how to provision a virtual device to operate that virtual device with your CSP.
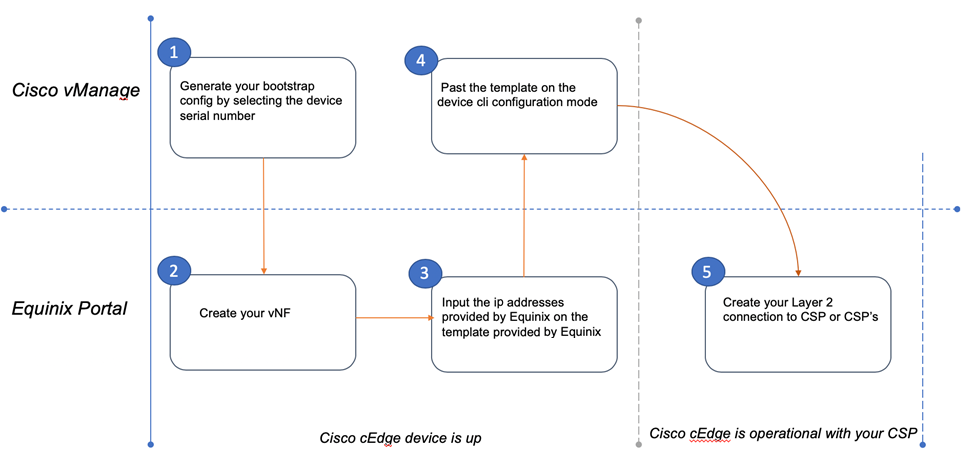
Complete this task by following these procedures in order:
User Expectations
Before starting this process, the user must have the following:
-
Cisco.com CCO login
-
The appropriate DNA licenses to provision and operate the cEdge device from Cisco.com
This task requires an intermediate level of proficiency to complete.
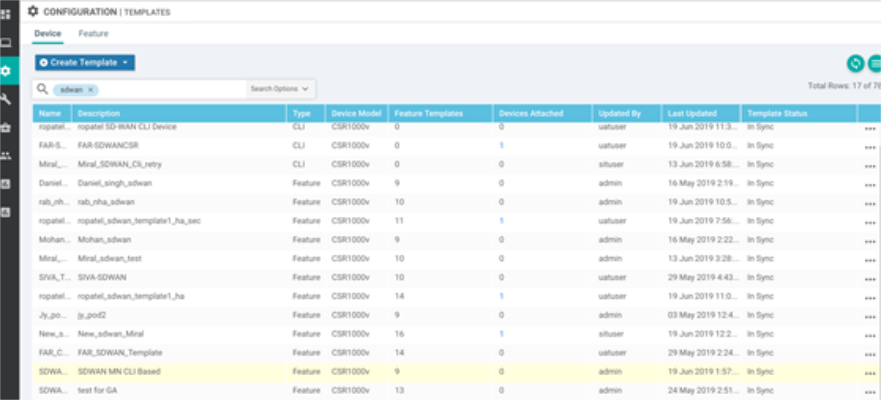
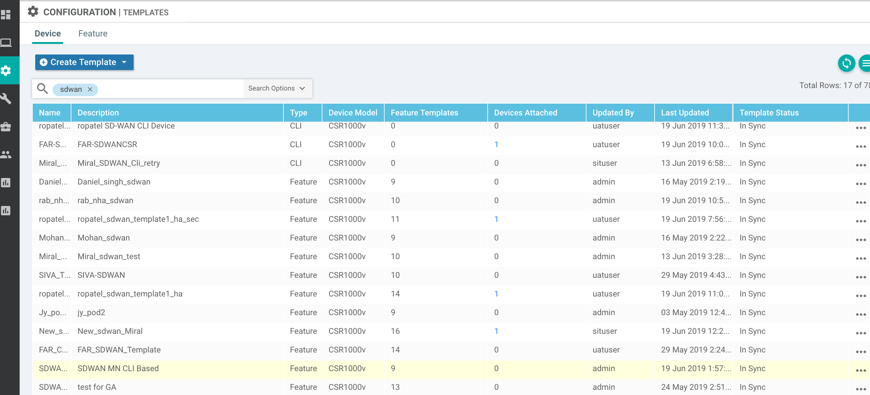
Provision a Cisco cEdge SD-WAN in CLI Template Mode
-
Create a bootstrap configuration on vManage
Note: For more information about this, see Create Configuration Templates for a vEdge Router on the Cisco documentation site.
-
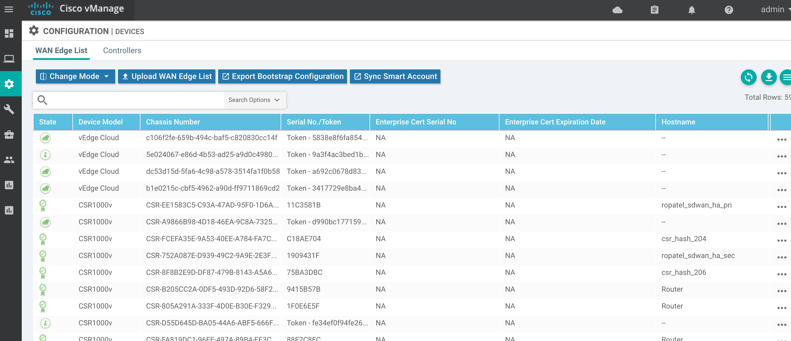
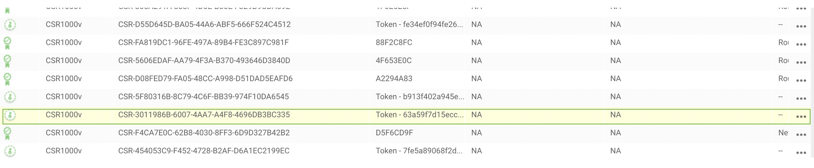
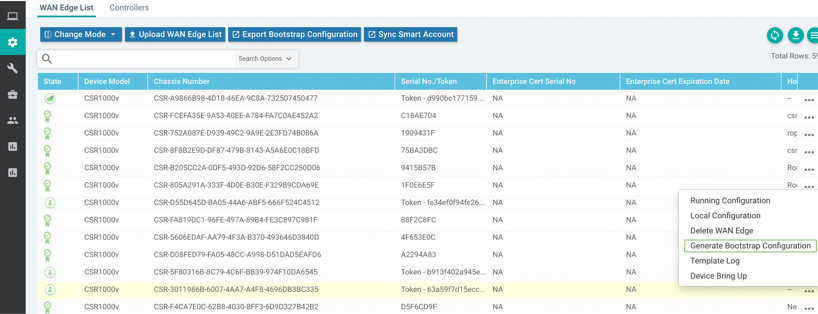
Log in to your vManage portal, then search for an available serial number that doesn't have any of the following:
-
Hostname
-
Site ID
-
Router ID
The list of all devices is shown.
-
-
In the select available devices page, right-click the three dots next to the device name to generate the bootstrap.
-
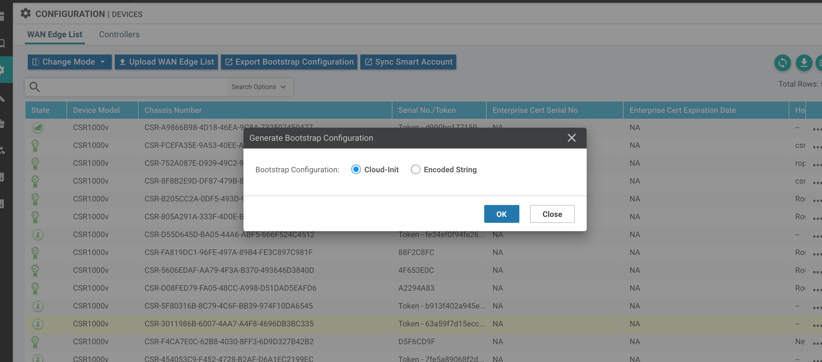
Next, select Generate Bootstrap Configuration.
-
Select Cloud Init.
The Bootstrap configuration that you'll need to bring up the device in the Equinix portal is highlighted in green.

-
Then, select Generate Bootstrap Configuration.

-
Download and save the configuration on your workstation The file should be in the .cfg format.
Downloading the configuration file completes the first part of this process.
Create your virtual device on the Equinix Cloud exchange portal
-
Login to the Equinix Cloud Exchange portal
-
Select High Availability (HA) or Non-HA mode
-
Select your Metro
-
Select your account
-
Fill in the details required to create the device
-
Under additional services – add the ACLs -- the networks that will require access to the device
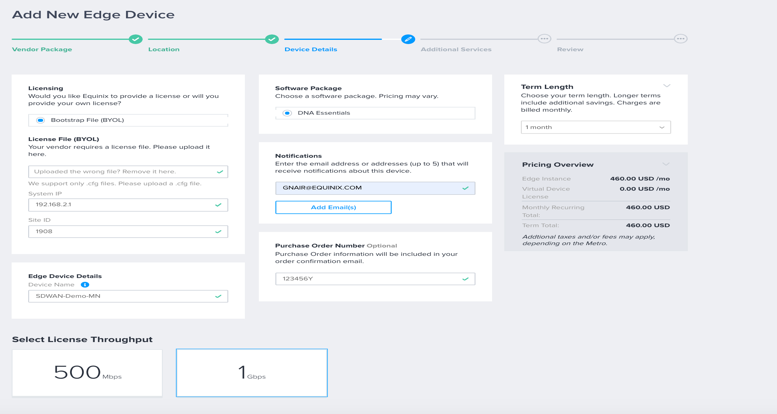
-
Enter your data in the required fields on the portal.
An example with the completed fields:

The device has been submitted for provisioning.
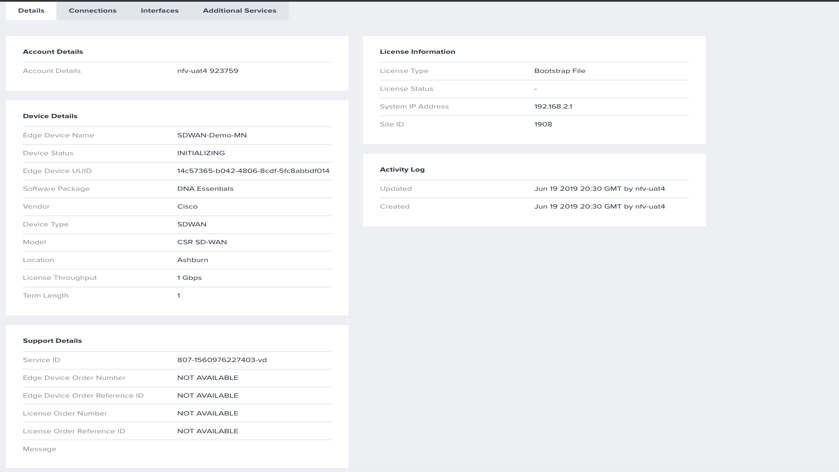
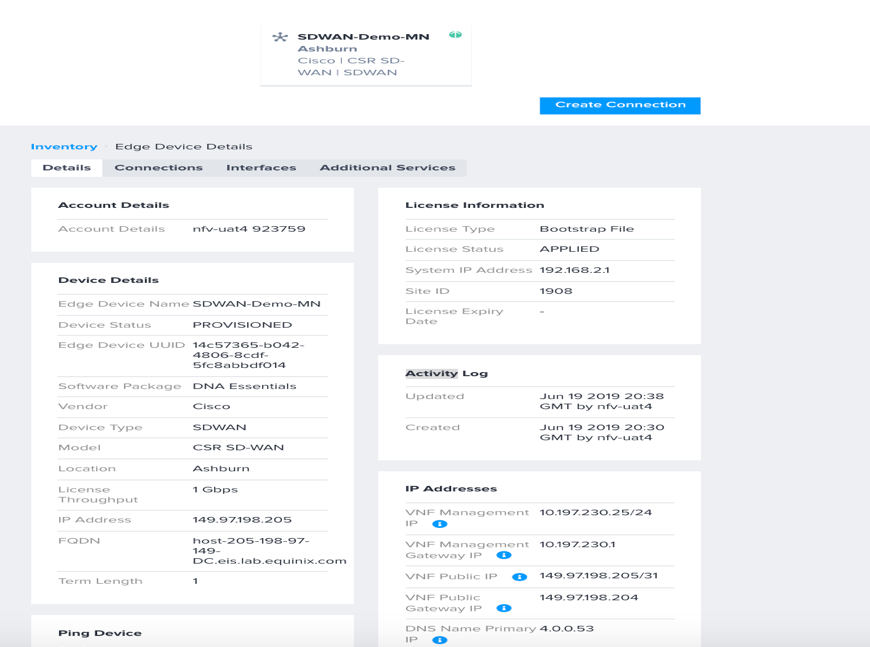
Once the device has been provisioned, the following tasks are complete:
-
The license has been applied
-
Equinix has assigned the following addresses
-
Primary and secondary DNS IP address
-
Public IP and public gateway UP address
-
Management IP and Management gateway IP address
-
Here's how that looks:
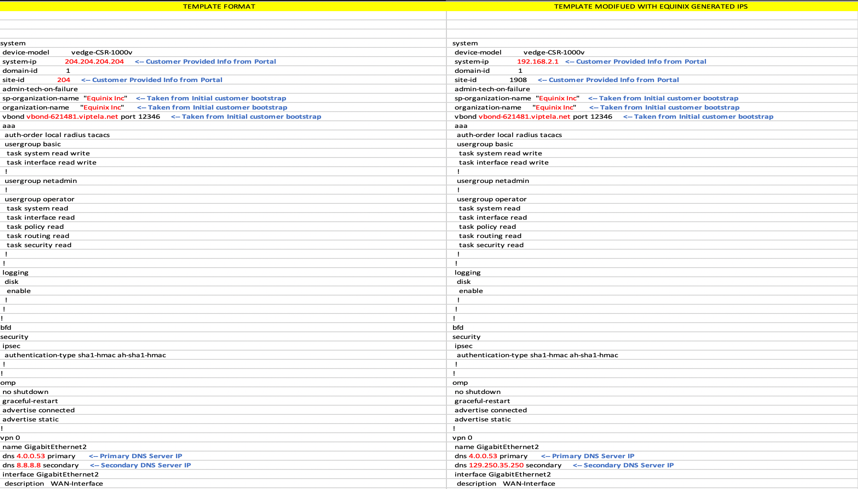
Copy and customize the following verbiage and replace the fields in red with the IP addresses provided by Equinix. Or, you can follow the process described in Download CLI Template.
--------------------------------------------------------------------------
system
device-modelvedge-CSR-1000
system-ip 204.204.204.204 <-- Customer Provided Info from Portal
domain-id 1
site-id 204 <-- Customer Provided Info from Portal
admin-tech-on-failure
sp-organization-name "Equinix Inc" <-- Taken from Initial customer bootstrap
organization-name "Equinix Inc" <-- Taken from Initial customer bootstrap
vbond vbond-621481.viptela.net port 12346 <-- Taken from Initial customer bootstrap
aaa
auth-order local radius tacacs
usergroup basic
task system read write
task interface read write
!
usergroup netadmin
!
user admin
group operator
password a6"J<^!$Gvg^Ja?3CpZer!~X=}!..W4P
usergroup operator
task system read
task interface read
task policy read
task routing read
task security read
!
!
logging
disk
enable
!
!
host-name cEdge_EQX_Branch
!
!
bfd
security
ipsec
authentication-type sha1-hmac ah-sha1-hmac
!
!
omp
no shutdown
graceful-restart
advertise connected
advertise static
!
vpn 0
name GigabitEthernet2
dns 4.0.0.53 primary <-- Primary DNS Server IP
dns 8.8.8.8 secondary <-- Secondary DNS Server IP
interface GigabitEthernet2
description WAN-Interface
ip address 149.97.199.204/31 <-- Public IP
tunnel-interface
encapsulation ipsec
color green
allow-service all
no allow-service bgp
no allow-service dhcp
allow-service dns
allow-service icmp
no allow-service sshd
no allow-service netconf
no allow-service ntp
no allow-service ospf
no allow-service stun
allow-service https
no allow-service snmp
!
speed 10000
no autonegotiate
no shutdown
!
ip route 0.0.0.0/0 149.97.199.205 <-- Public IP Gateway
!
omp
advertise bgp
!
!
vpn 512
name GigabitEthernet1
interface GigabitEthernet1
ip address 10.195.234.204/26 <-- Management IP
no shutdown
!
ip route 0.0.0.0/0 10.195.234.254 <-- Management Gateway
!
!
!
---------------------------
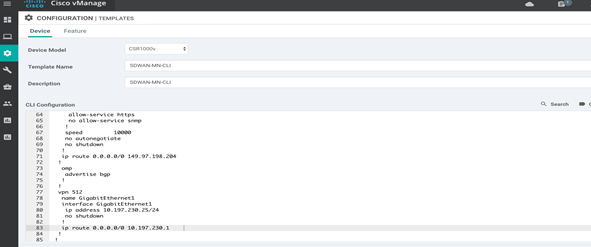
Download the CLI Template
In the first release of Cisco SD-WAN or cEdge, you had to input the Equinix provided IP addresses (Public IP, Gateway IP, DNS primary IP, and DNS secondary ip ) on a pre-defined Equinix config template. This manual work could cause mis-configurations on the templates resulting in the device being out of sync and other operational issues.
With the “Download CLI Template” feature, you can download the Equinix template with the IP addresses pre-configured.
The following shows where in the Equinix portal to click to activate the feature. The file is downloaded on your local host and you can open it in any editor (for example, notepad or TextEdit):
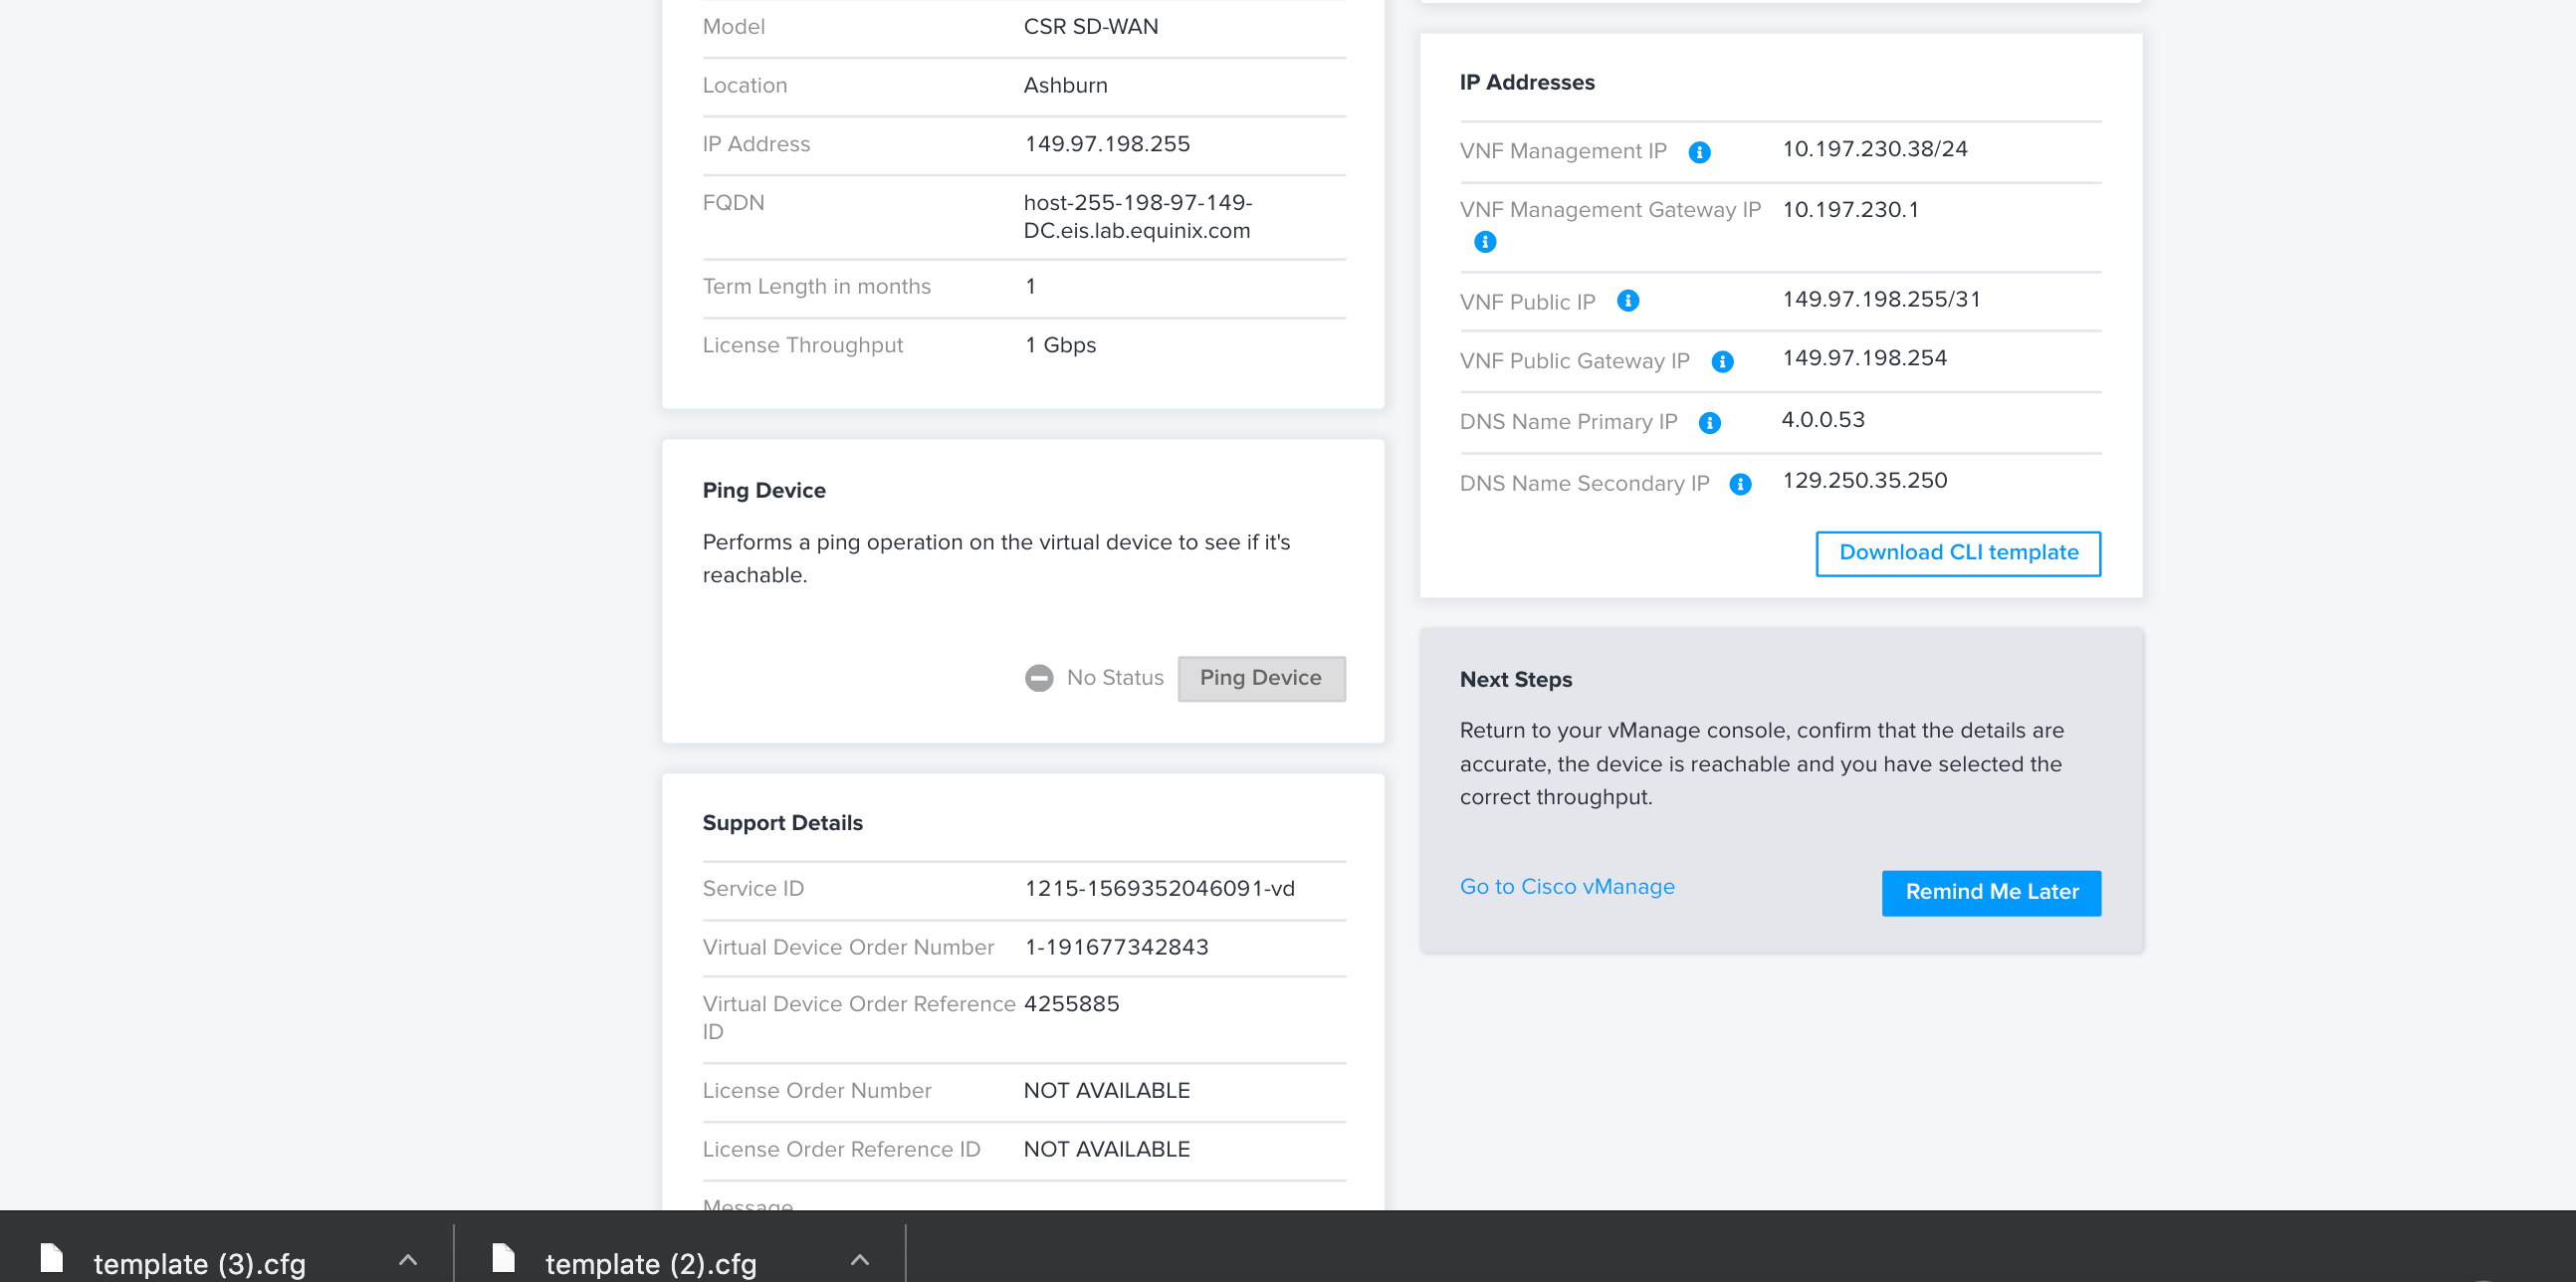
Following is the configuration with the IP addresses in the template
----------------------------------------------------------------------------------------
Configuration
system
device-model vedge-CSR-1000v
system-ip 176.176.176.176
domain-id 1
site-id 176176176
admin-tech-on-failure
sp-organization-name "Equinix Inc"
organization-name "Equinix Inc"
vbond vbond-621481.viptela.net port 12346
aaa
auth-order local radius tacacs
usergroup basic
task system read write
task interface read write
!
usergroup netadmin
!
usergroup operator
task system read
task interface read
task policy read
task routing read
task security read
!
!
logging
disk
enable
!
!
!
bfd
security
ipsec
authentication-type sha1-hmac ah-sha1-hmac
!
!
omp
no shutdown
graceful-restart
advertise connected
advertise static
!
vpn 0
name GigabitEthernet2
dns 4.0.0.53 primary
dns 129.250.35.250 secondary
interface GigabitEthernet2
description WAN-Interface
ip address 149.97.198.255/31
tunnel-interface
encapsulation ipsec
color green
allow-service all
no allow-service bgp
no allow-service dhcp
allow-service dns
allow-service icmp
no allow-service sshd
no allow-service netconf
no allow-service ntp
no allow-service ospf
no allow-service stun
allow-service https
no allow-service snmp
!
speed 10000
no autonegotiate
no shutdown
!
ip route 0.0.0.0/0 149.97.198.254
!
omp
advertise bgp
!
!
vpn 512
name GigabitEthernet1
interface GigabitEthernet1
ip address dhcp
no shutdown
----------------------------------------------------------------------
You can copy and paste this template in vManage portal during template creation.
At this point, the device is provisioned.
vManage verifies that the device is in-sync.
Apply the generated template to the device
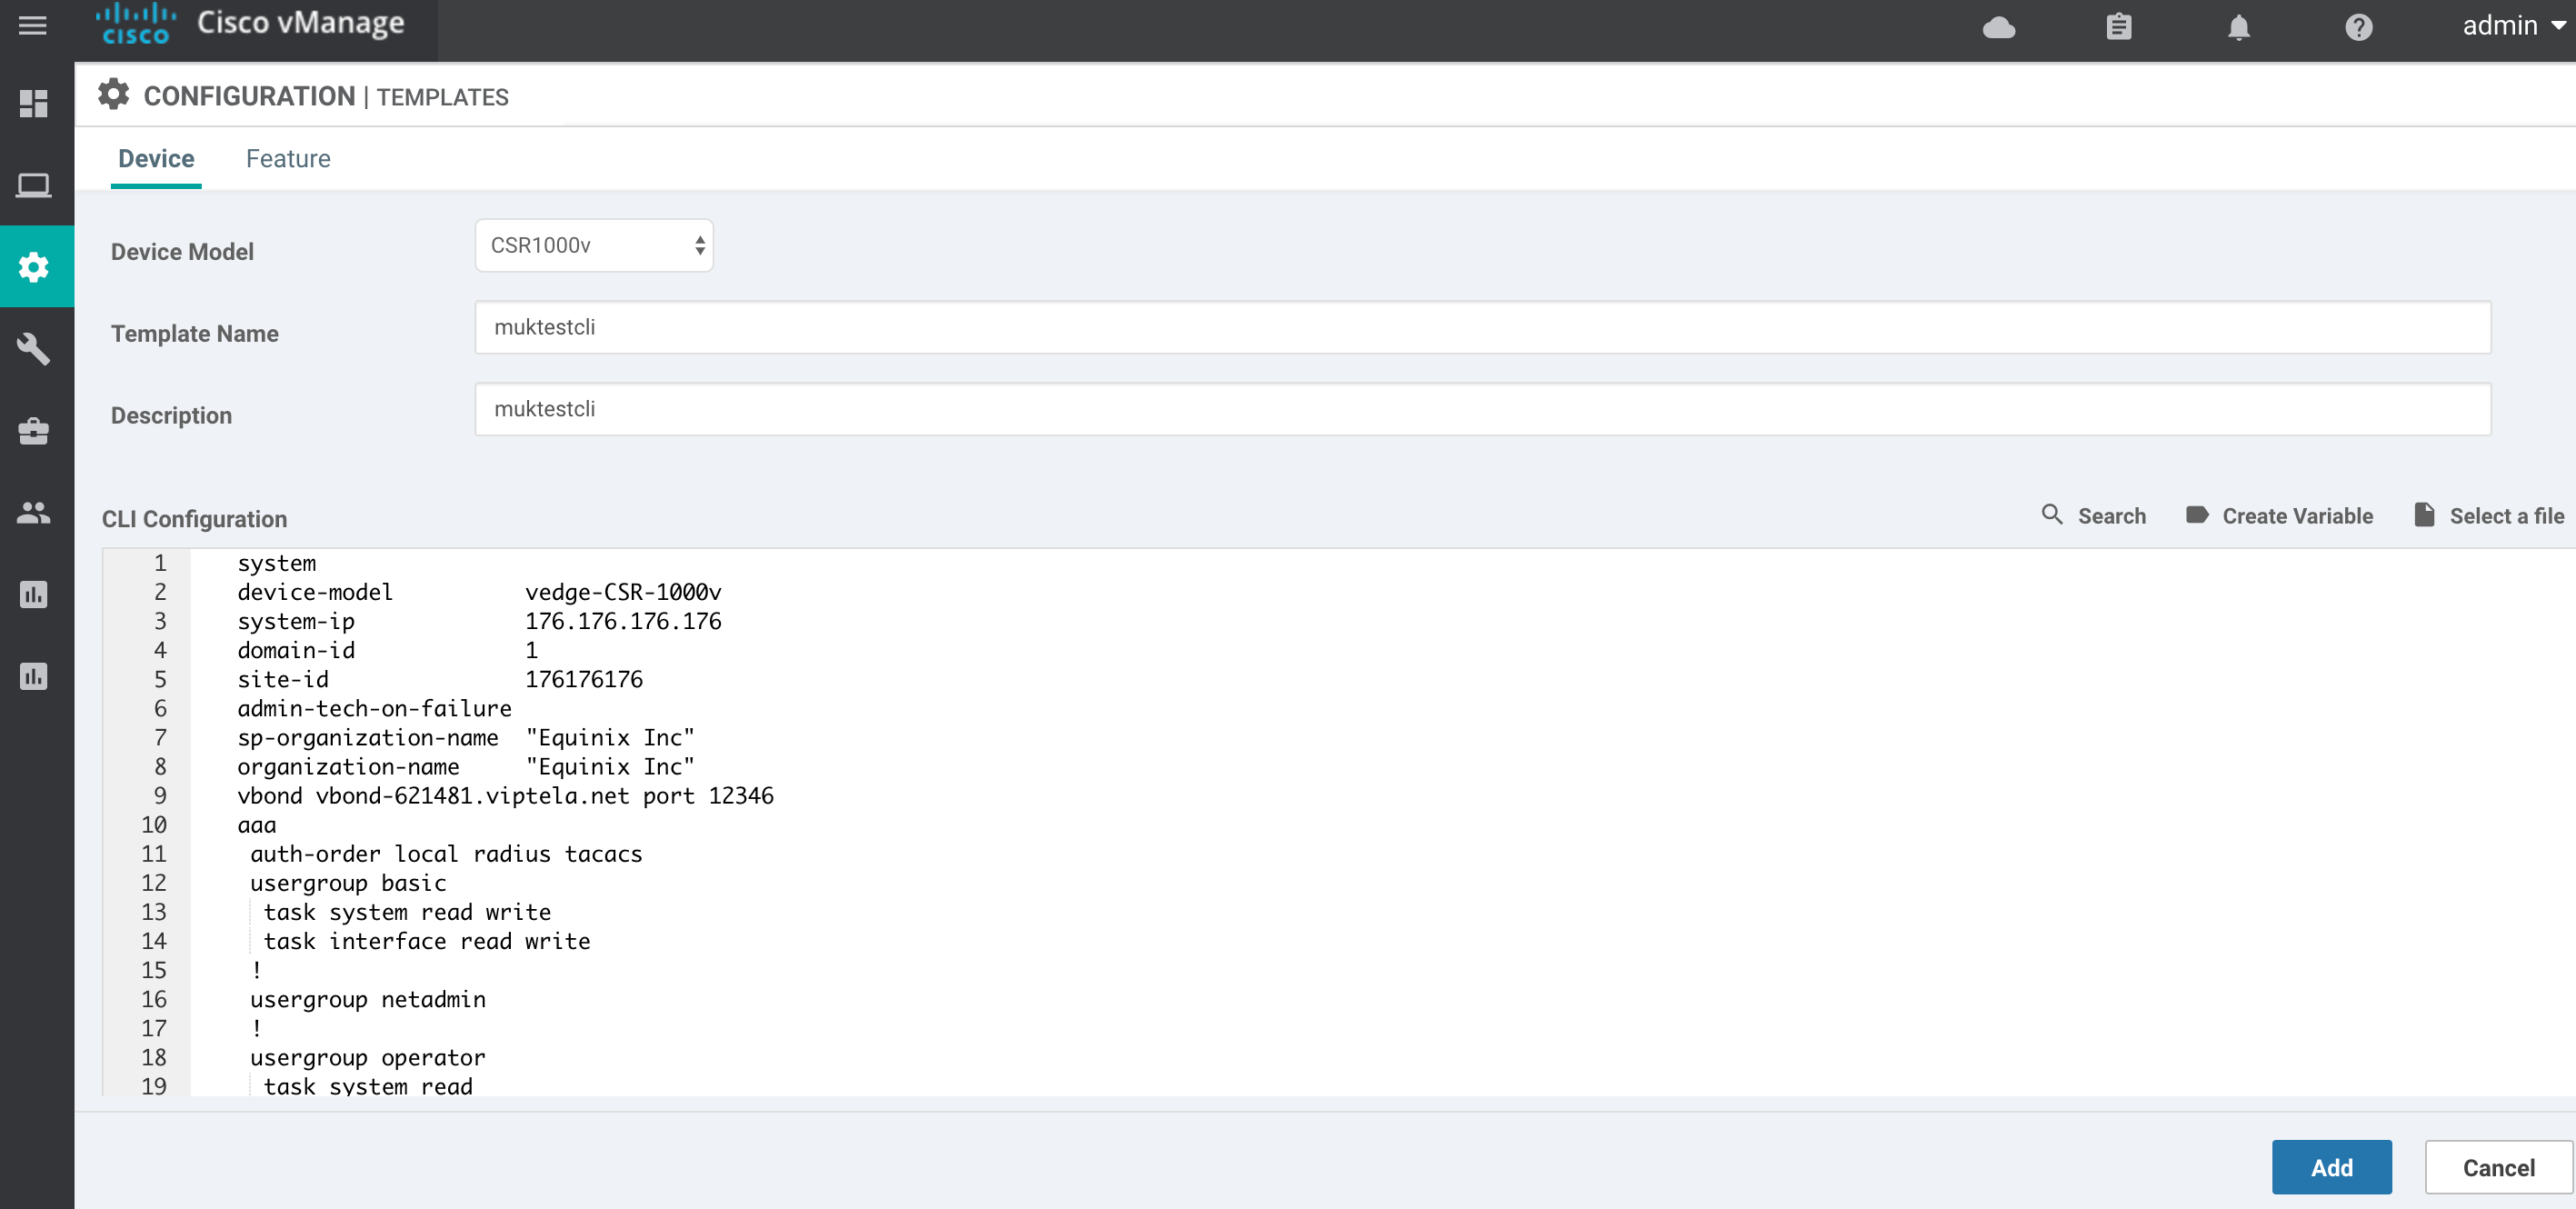
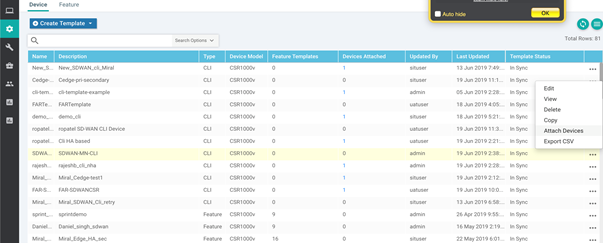
To create a device CLI template:
-
Select a configuration.
-
Go to Devices.
-
Choose Create Template.
-
Select Create CLI Template.
-
You can verify that the device is in-sync on vManage.

-
Paste the modified template on the CLI configuration.
-
Attach the template to the device.
-
Select your device from the left pane, then use the arrow to navigate the right pane.
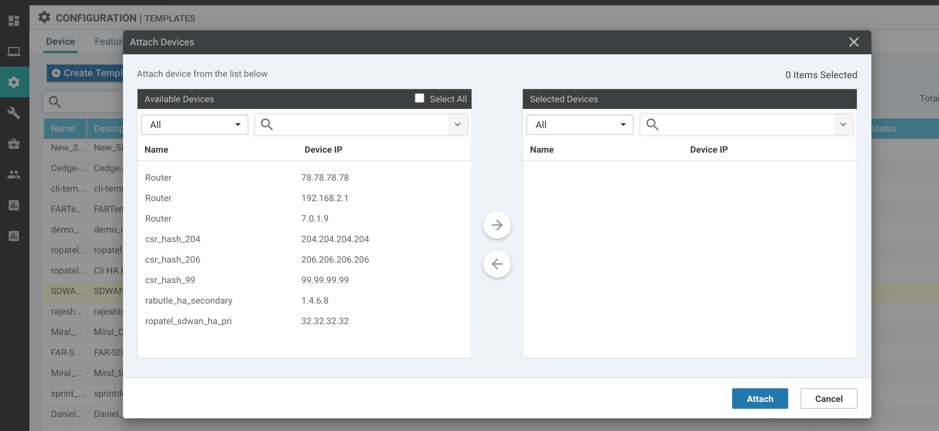
-
Choose a device from the list, use the arrow to add it, then click Attach to attach the device.
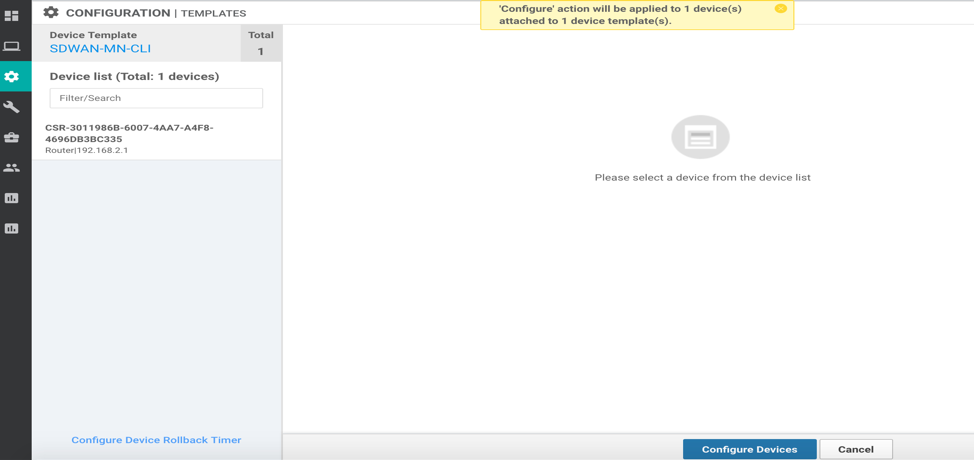
-
Click Configure Devices to continue.
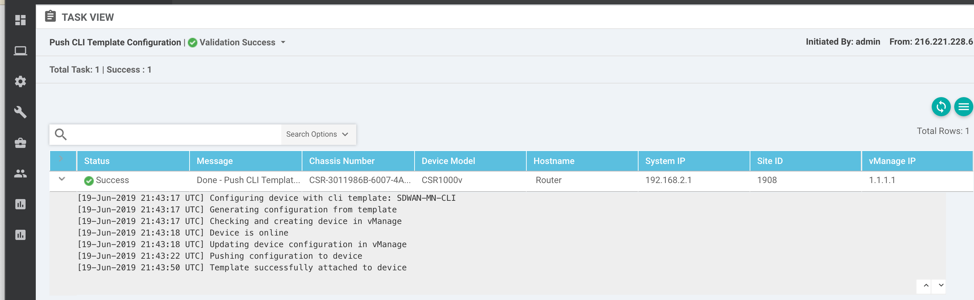
-
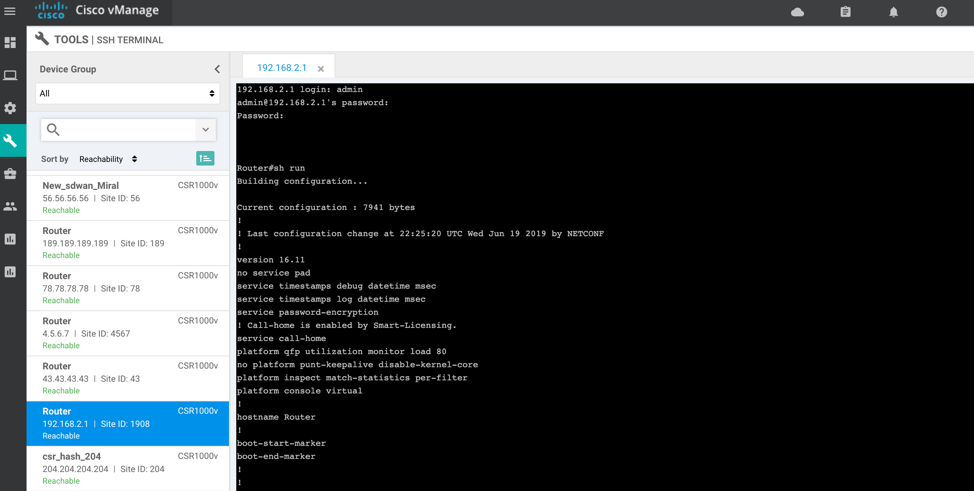
At this point, the configuration has been pushed into the device. Verify your configuration by reviewing the template and logging into the device through SSH.
The device is now configured.