
This topic demonstrates how to create a redundant pair of virtual devices in Network Edge.
To create primary and secondary devices:
- Sign in to the Equinix Customer Portal and navigate to Network Edge.
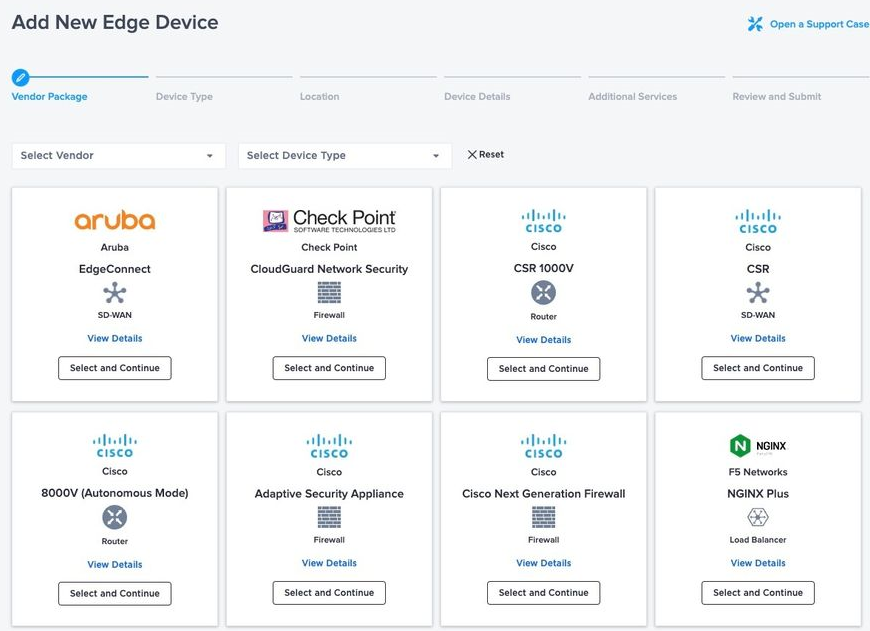
- On the Network Edge menu, select Create Virtual Device.
- Select a vendor package by clicking See Description on the vendor card.

- Click Select and Continue.
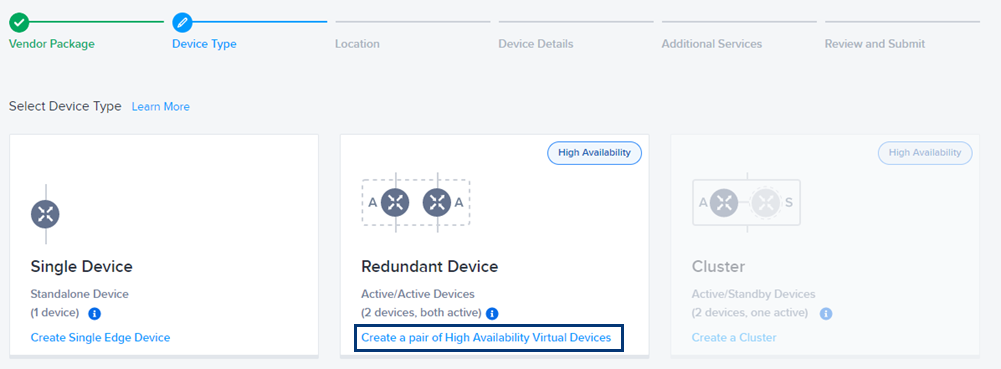
- Click Redundant Device.
- In the Select Redundancy section, make sure Create a redundant pair of devices that includes a new primary and secondary device is selected.

- Click Begin Creating Edge Devices.
- In the Select Metro section, click a location.
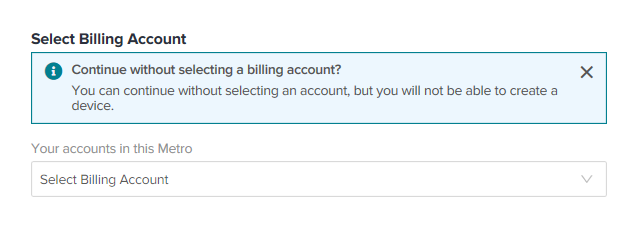
- In the Select Billing Account section, select a billing account in the Your accounts in this metro drop-down menu.

In order to create a device in a specific metro location, you need a billing account for the metro. You can continue without selecting an account, but you won’t be able to create your device. - If you require a separate location for the redundant device than the one selected in step 7, click Select a separate location for the redundant device and click a second metro.
- In the Select Billing Account section for the second metro, select a billing account in the Your accounts in this metro drop-down menu.
In order to create a device in a specific metro location, you need a billing account for the metro. You can continue without selecting an account, but you won’t be able to create your device. - Click Next: Device Details.
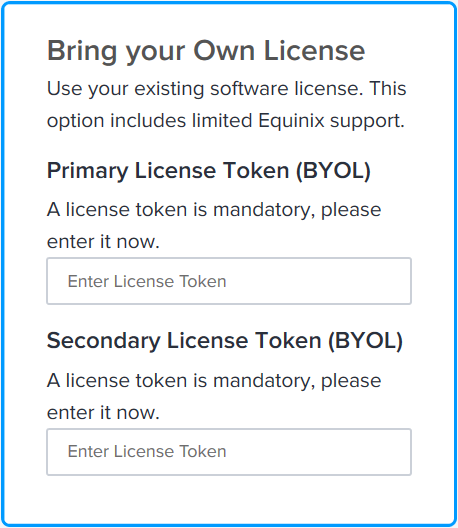
- In the Licensing section, click Subscription or Bring Your Own License.

Note: If you chose to Self-Configured, your only Licensing option will be Bring Your Own License.
- If you choose Bring Your Own License, enter the Primary License Token and the Secondary License Token.

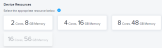
- Select the Device Resources .
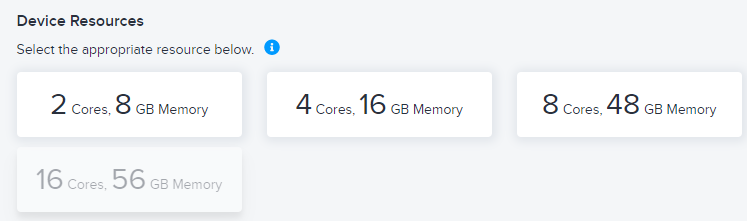
- Select a Software Package.
- Select a Software Version.

- In the Device Details box, enter:
- Device Name – Enter a name for the device.
- Primary Device Host Name – Enter a host name prefix for the primary device.
- Secondary Device Host Name – Enter a host name prefix for the secondary device.
- In the Interfaces drop-down menu, select the number of interfaces.
- In the Device Status Notifications box, enter email addresses of anyone who should receive email notifications regarding device status. Up to five addresses can be added.
- (Optional) In the Optional Details box, enter the Purchase Order Number and Order Reference/Identifier.
- In the Term Length drop-down menu, select a term length.
- Click Next: Additional Services to add any additional NE services.
- Click Next: Review and review your order.
- Click Create Virtual Device.
Warning: Your device will be assigned an external IP address for reachability. If you change the configuration, you could experience connectivity issues.
