Billing Account Management

The Account Management feature in Network Edge allows users to create, view, and edit billing accounts.

Billing Management Video

Creating a New Billing Account

To create a new billing account, you need to enter your billing information and accept the digital services agreement.

Important: The following billing account statuses can be used to place orders for Network Edge virtual devices, Equinix Fabric remote ports, and Fabric Cloud Routers.
Pending - A Billing Account is Pending as long as the Billing Account number is not generated.
Active - The account will become Active once the Billing account has been created and the Billing Account Number is generated.

  1. Sign in to Equinix Fabric.
  2. Click Administration and choose Account Management. Existing billing accounts will display.
  3. Click Create New Billing Account.

  4. Select Network Edge in the Product drop-down menu.
  5. Select the project to associate with this billing account.
  6. Select the Country and Currency where this billing account is going to be used.

  7. Choose whether the Billing Account will be used for resale.
    The Reseller/Sub-account model resellers enables some or all their end customers for self-service on Equinix Fabric. For more information, refer to Fabric Resellers.

  8. Click Creating Billing Account.
  9. Enter a Legal Company Name.
  10. In the Company Address section, enter the company address.
  11. In the Billing Information section, enter the following information:
    • Billing Address – A billing address is the designated location used by businesses and organizations to send invoices and receive payments. In the dropdown, you can:

      • Use an existing address from the dropdown (if you are an existing user and have created billing accounts in the past) or;

      • Enter a new billing address or;

      • Use the company address as the billing address.

      If you select Enter a new bill-to address, enter the address details.

    • Billing Contact – Enter the billing contact name and contact information.
    • Currency – Select the currency. The default currency will be based on the country selected.

    • Sold-To Address – Select the sold-to address. Choose from the following options:
      • Enter a new sold-to address

      • Use the company address as the sold-to address

      • Use the billing address as the sold-to address

      • Use an existing address from the dropdown (if you are an existing user and have created billing accounts in the past).

    • VAT Registration Number – Enter the VAT registration number if its applicable based on the country/region where the billing account is being created.
  12. In the Agreement section, you can choose:
    • Use an existing/previously accepted signed Digital Services Agreement – You will need to select the Billing Account from a dropdown list which displays all Billing Accounts for which the Digital Services Agreement has been accepted in the past.
    • Sign or accept a new Digital Services Agreement – You will need to choose from the following options:
      • Select My Organization does not require signed documents to accept Digital Services Agreement if your organization allows electronic acceptance of terms. This option requires you to view the terms and accept electronically. Review the Digital Service Agreement, select I have read and understand these terms, and click Accept.
      • Select My Organization requires signed documents to accept Terms and Conditions if a signed document is required. This option requires you to e-sign or wet sign the Digital Services Agreement or designate another individual to e-sign or wet sign. You will receive an email from Equinix that provides a link for completing the signatures.

Note: If the digital services agreement has been negotiated offline, you will not make a selection in the Terms & Conditions section. Instead, a note will display indicating that the Digital Services Agreement has already been accepted.

  1. Click Create Account.

When the new billing account is created, you'll be able to view it on the Account Management page. The account name will display, but the account number will be In Progress and the account status will be Pending or Active. It takes up to two hours for the account number to generate.
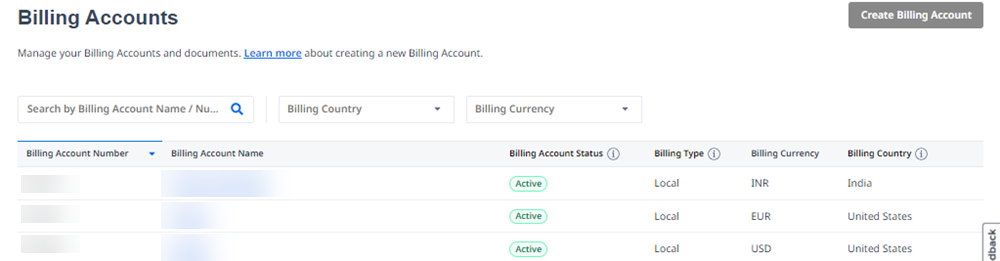
  • Direct Customers – The new billing account status will be Pending or Active and can be used to order virtual devices and Equinix Fabric remote ports.

  • Resellers – If you are placing orders for yourself, Pending or Active accounts can be used to place orders for virtual devices and Equinix Fabric remote ports. 
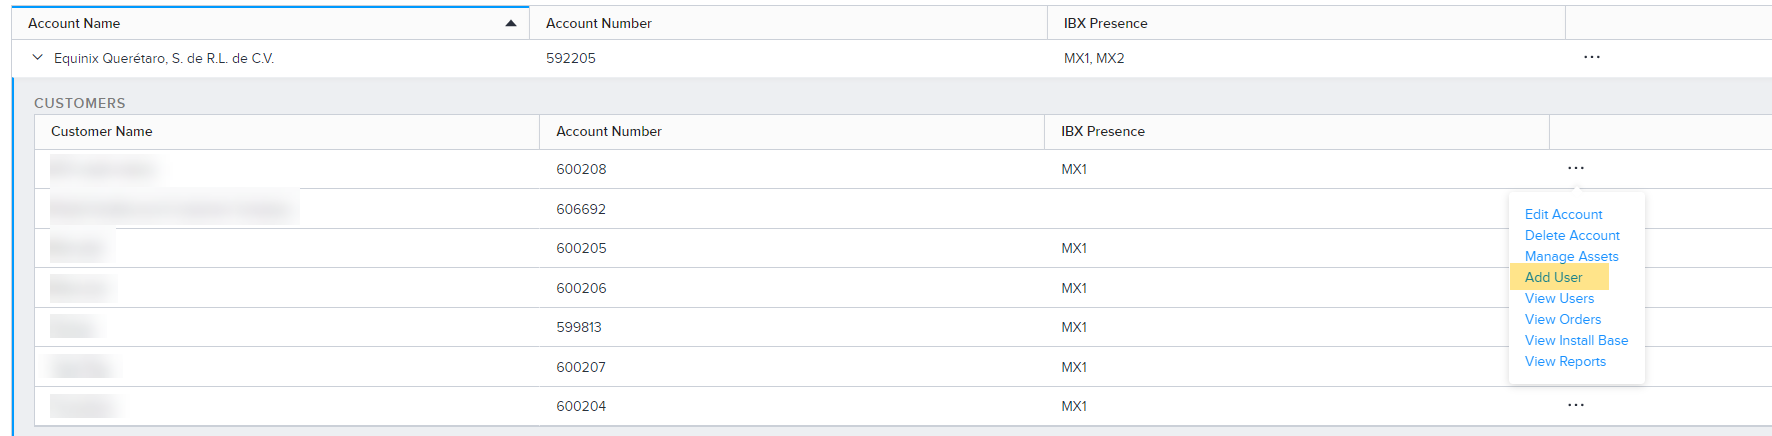
If you are placing orders for your customer:

    • Go to the Equinix Customer Portal.

    • Click Administration and select Reseller Customer Management to create the end-customer account. The end-customer account number will take up to an hour to generate.

    • Add the first user.

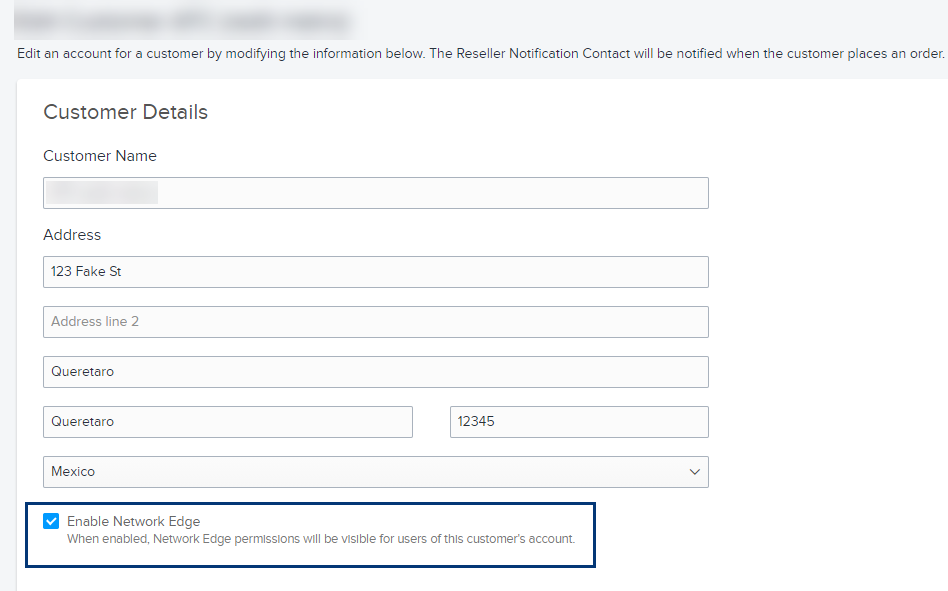
    • Be sure to select the Enable Network Edge checkbox.

    • Go back to the Equinix Fabric portal and place the first device order on behalf of the end-customer.

    For more information about Equinix Fabric resellers and impersonation, see Equinix Fabric Resellers and Reseller Impersonation.

Viewing Account Details

To view account details, select an account from the list on your account management page.

Account details are separated into two tabs:

  • My Organization – shows billing accounts belonging to your organization

  • My Customers – as a reseller, select this tab if you want to view account details of your customers

Account Details displays the following:

  • Account Details – Account Reference ID, Billing Account Name, and Account Status.
  • Company Information – Company Name, and Headquarters Country.
  • Billing Information – Bill to Address, Billing Country, Billing Contact and Sold-to-Address.
  • Account Specifications – PO required (yes or no), and Signature required (yes or no).
  • Activity Log – Created date and Last Updated date.

Click Terms and Conditions Documents to view all service agreements for the account.

Deleting a Billing Account

Billing accounts can't be deleted from the portal. If you need to delete a billing account, contact the Equinix sales team.