Add Redundancy to a Single Virtual Device
A secondary device can be added to an active Network Edge device to create a redundant pair. Adding resiliency to an existing device eliminates the need to start over with two new devices, saving time and adding flexibility.
To add a secondary device to an active Network Edge device in the portal:
-
Sign in to the Equinix Customer Portal and navigate to Network Edge.
-
From the Network Edge menu, select Virtual Device Inventory.
-
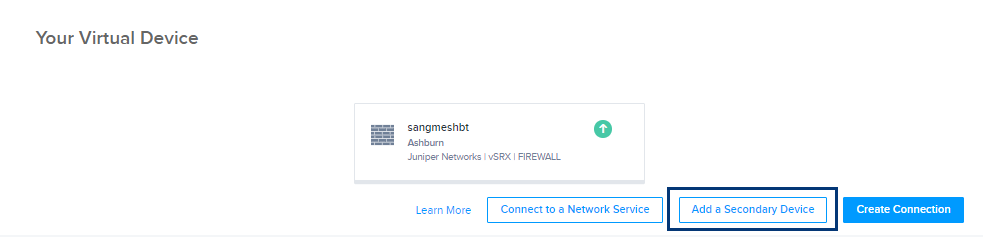
Click on the device you want to edit. The virtual device details will display.
-
Click Add a Secondary Device.
By default, With a Redundant Device, Add an additional, redundant device to an existing device, the primary device location, and the primary device will be selected.
-
Click Begin Creating Edge Devices.
-
Click View Primary Device Summary to view account details, device details, license information, notification details, and bandwidth information for the primary device.
-
Select a location for the secondary device.
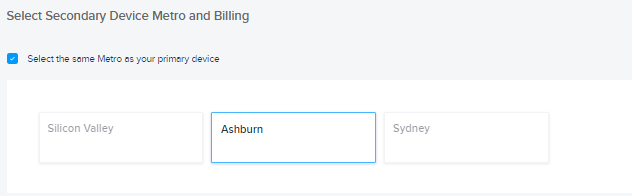
By default, Select the same Metro as your primary device will be selected and the metro will be highlighted.
-
Select a billing account.

Click Select the same billing account as your existing primary device, and that billing account will display in the drop-down menu.
-
Click Next: Device Details. Device Details default to the same selections as the primary device.
noteA redundant device with a newer software version (non-retired version) can be added to the primary device. However, having two devices in a redundant pair with different software versions might affect performance. We recommend that you update the software version for your primary device.
-
If you chose a different billing account than the one used for the primary device, select a term length in the Term Length section.
-
Click Next: Additional Services. Additional Services default to the same selections as the primary device.
-
Click Next: Review and review your order.
-
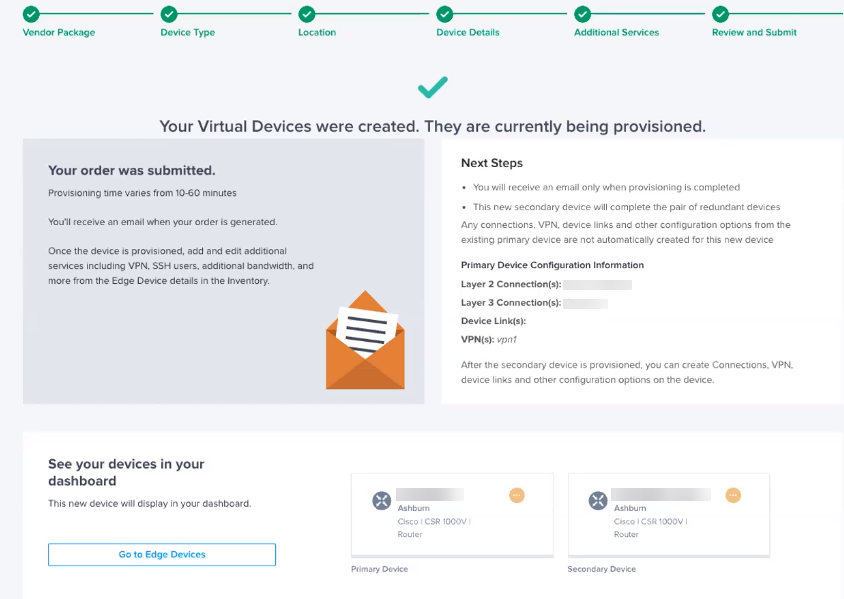
Click Create Virtual Device.
The order confirmation page will display with a preview of your submitted order and a list of next steps. A confirmation email will be sent to you with the order details. You will receive a second email once the connection is provisioned.
Add a Secondary Device Using API
A secondary device can be added using Network Edge APIs. For details, see Network Edge API – Add Secondary Device.